3D Bow Tie Quilt Block Tutorial

Image credits: Alanda Craft via Youtube
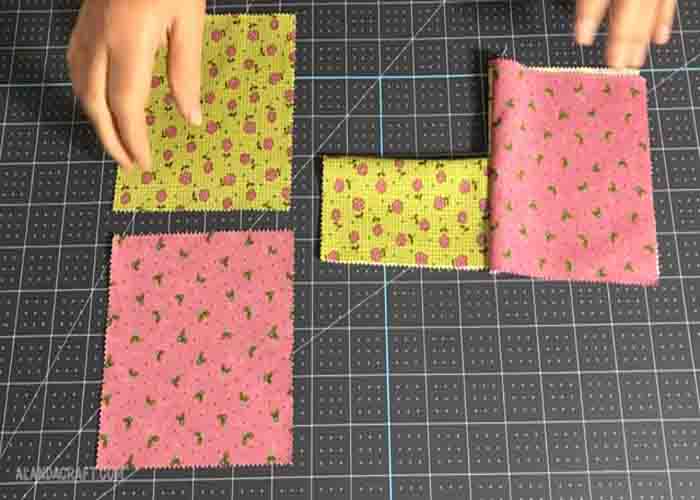
If you’re looking for your next quilt project, try this 3D bow tie quilt block from Alanda Craft. It’s a quick and easy take on this classic pattern, and I’m sure beginners will love this. It’s also a great project if you have leftover charm squares, as it only needs five 5” x 5” squares of fabric.
RELATED: Easy Bow Tie Quilt Block Tutorial
This quilt pattern is great for gifting, and I’m sure this will become one of your favorite projects! Gather your materials now and start quilting! Watch the video tutorial below to learn the step by step instructions.
Materials:
- (click here for the free pattern tutorial)
- 5 – 5″ x 5″ squares of fabric (2 squares for the background and 3 squares for the bow tie)
Directions:
Step 1
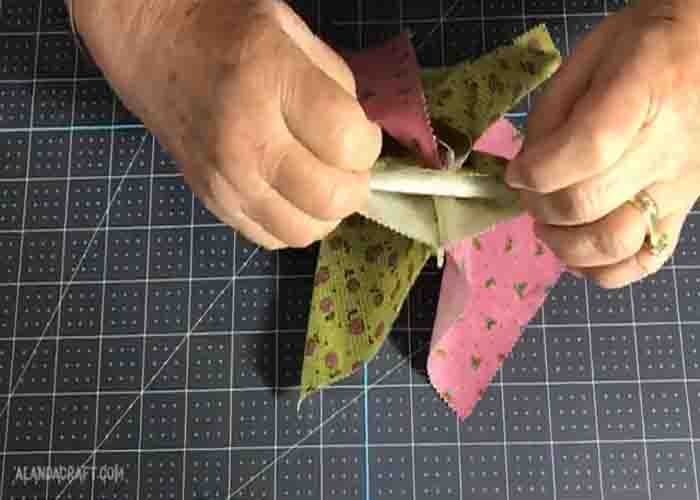
Fold one of your bow tie squares in half, then take another bow tie square and lay it along the raw edges of the folded piece, lining up along the top and down the side. Next, take one background square and lay it on the other side of the folded piece, lining everything up together. Sew all the way down the edge with a 1/4″ seam allowance. After sewing, open the unit up, then hold on to that folded piece and pull the other two pieces back. Now, take the last bow tie square and line it up to the folded square, right sides together. Do the same to the last background square, lining it up underneath, right sides together as well.
[social_warfare]
Step 2
Sew along the side edge with a 1/4″ seam allowance. Now, open it up, pushing the two larger squares back. After this, work with the folded piece, put your fingers in the middle, and pull it apart, lining up all the seams nicely. Next, pull the folded piece flat, making sure everything sits nicely. Pin all the lined-up edges in place, then sew. Once you get to the seam while sewing, lift the presser foot up, keeping the needle in the down position, then pull the folded piece to straighten it, then just continue sewing down to complete the block.
3D Bow Tie Quilt Block Tutorial


")


