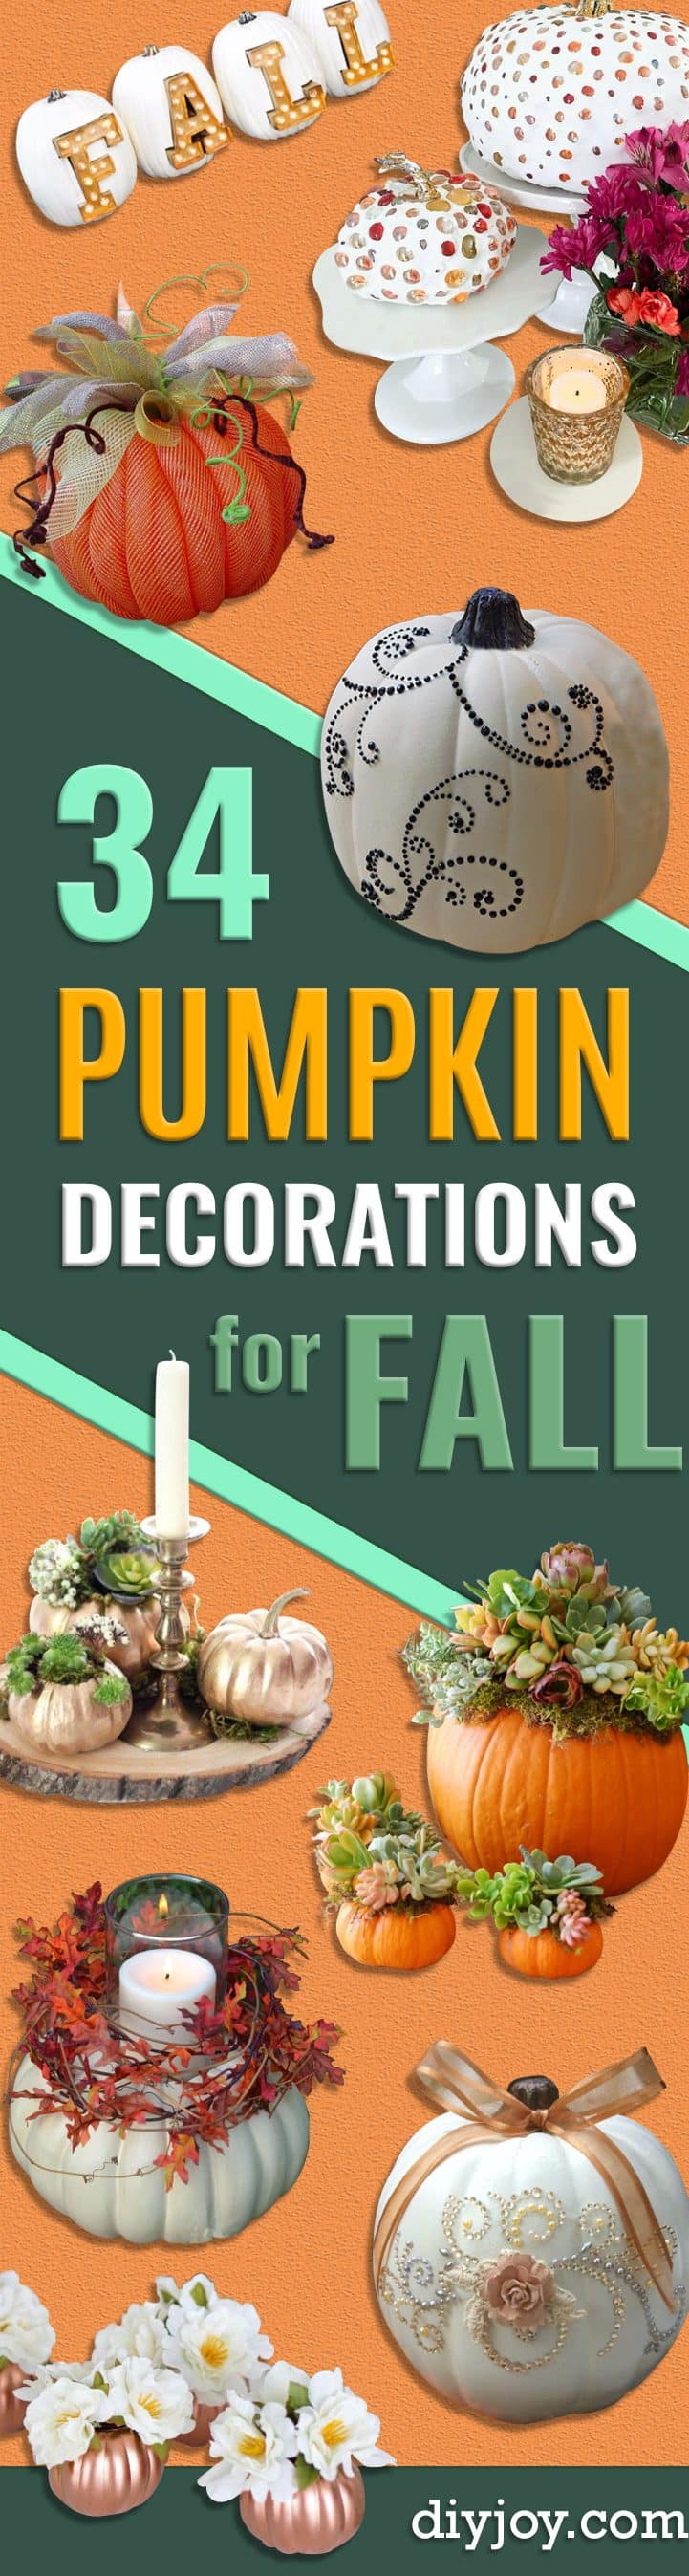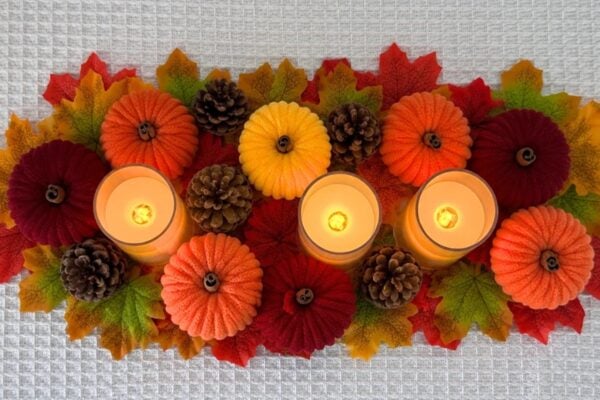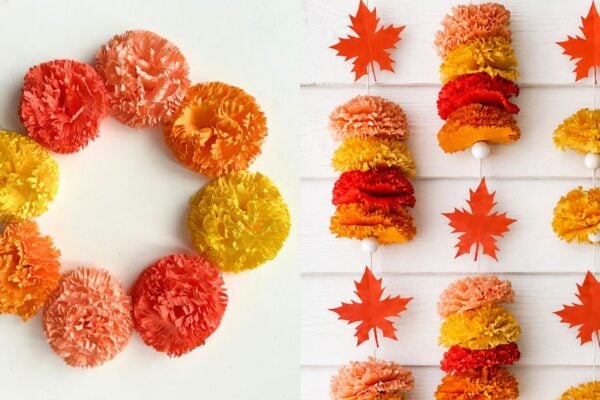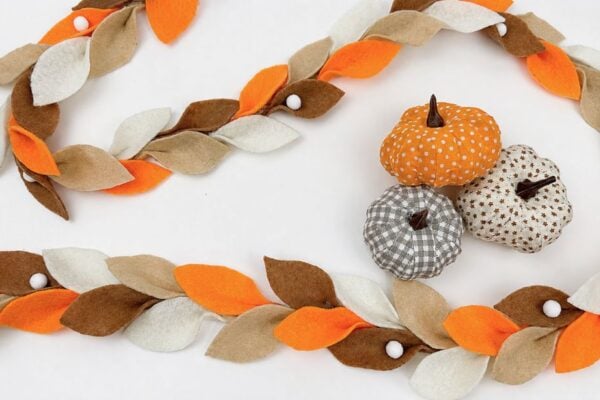
Pumpkin decorating ideas do not have to start with a knife. Everything on this list is a no carve project, which means your pumpkins are still good in three weeks and none of them smell. Paint is doing the heavy lifting here, and that is the part I actually know something about, because faux pumpkins take more coats than anyone tells you and cheap paint is exactly where that goes wrong. There is gold leaf, chalk paint, grout, glitter, lace, thumbtacks and flowers pushed straight into a drilled pumpkin, running from a ten minute craft store pumpkin to a real one that holds a bouquet. Perfect for a front porch, a Thanksgiving table, a mantel that needs one more thing, or a rainy Saturday with the kids.
Table of Contents
- 1. Pumpkin Succulent Harvest Decoration
- 2. Mini Pumpkin Vases With Fresh Flowers
- 3. Painted Pumpkins With Vinyl Leaves And Dots
- 4. Copper Pumpkin Fall Centerpiece
- 5. DIY Gold Leaf Dipped Pumpkin
- 6. Gold Leaf Painted Pumpkin Makeovers
- 7. DIY Gold Confetti Pumpkins
- 8. Sweater Style Farmhouse Pumpkins
- 9. DIY Faux Terracotta Pumpkins
- 10. Framed Fall Pumpkins
- 11. DIY Glitter Pumpkin Votive Holder
- 12. Chalk Paint Pumpkins
- 13. Pottery Barn Inspired Mercury Mirror Grout Pumpkins
- 14. Gold Glitter And Grout Pumpkins
- 15. Gold Thumbtack Polka Dot Pumpkins
- 16. Splatter Paint Mini Pumpkins
- 17. Gold Glitter Monogram Pumpkin
- 18. DIY Dry Brushed Chalk Painted Pumpkins
- 19. DIY Faux Milk Glass Pumpkins
- 20. DIY Confetti Pumpkin
- 21. Vintage Doorknob Pumpkins
- 22. DIY Marquee Light Letter Pumpkins
- 23. DIY Dropcloth Driftwood Petite White Pumpkins
- 24. Lace Pumpkin DIY
- 25. Pumpkin Door Hanger
- 26. Turquoise Rhinestone Pumpkins
- 27. Fall Flower Pumpkin Centerpiece
- 28. Faux Pumpkin Aged With Paint
- 29. Decoupage Pumpkins
- 30. Yarn Wrapped Pumpkins
Pumpkin Decorating Ideas for Fall Decor
1. Pumpkin Succulent Harvest Decoration
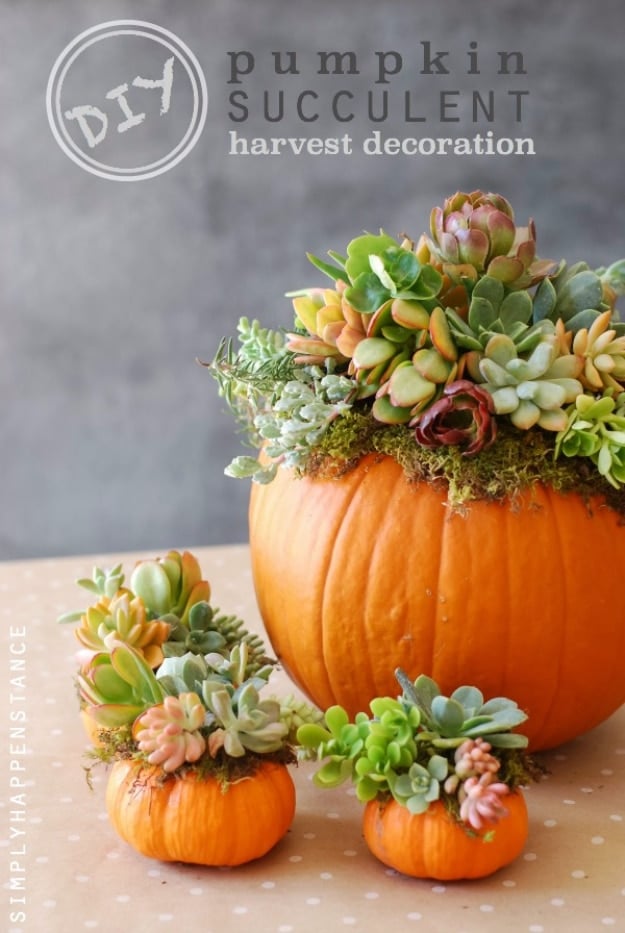
The best part of this one is that the pumpkin never gets cut. Moss is sprayed with adhesive in small sections and pressed onto the top of the pumpkin like a cap, then succulent cuttings are glued into the moss. Take your cuttings a day or two ahead and let the ends dry out first, which is what keeps them alive up there. When the pumpkin eventually gives up, the succulents come off and go straight into soil, so nothing is wasted.
Get the full tutorial at Simply Happenstance.
2. Mini Pumpkin Vases With Fresh Flowers
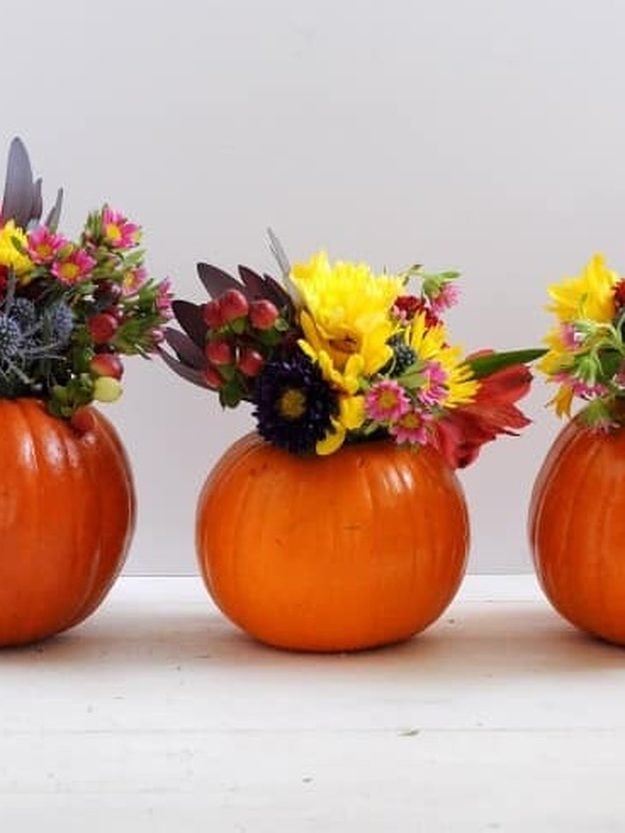
Real mini pumpkins hollowed out and holding a grocery store bouquet. You cut a circle around the stem the size of a votive holder, scoop the seeds out (save them for roasting, that part is free), press soaked floral foam into the little glass jar and slip the whole thing down inside the pumpkin. That jar is the entire trick, because the flower water never touches the pumpkin and you get a lot longer than the two weeks these last otherwise. Size up to a full pumpkin and the only thing that really changes is the jar, so trace the new one on the pumpkin before you cut, because a hole cut too big isn’t a hole you can uncut.
Get the full tutorial at DIY Candy.
3. Painted Pumpkins With Vinyl Leaves And Dots
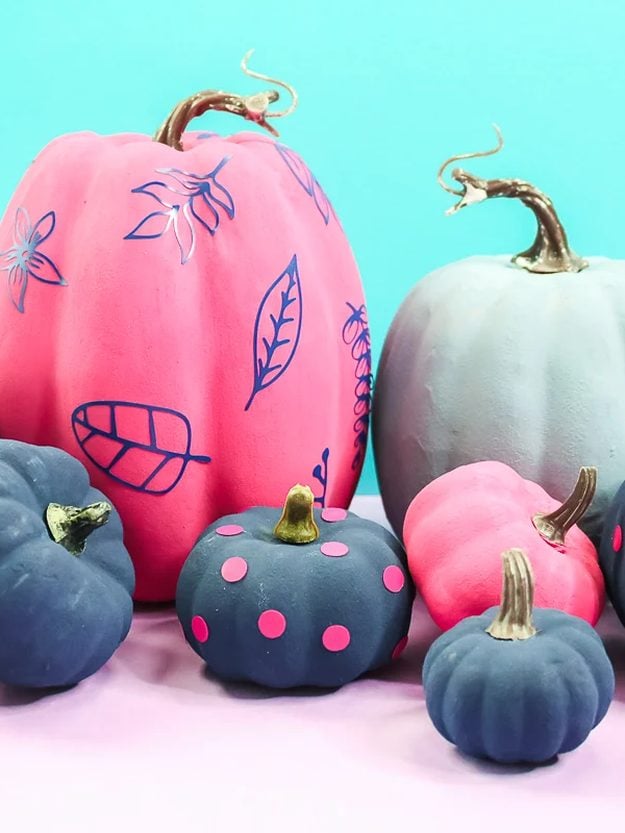
Paint first, then let a cutting machine do the decorating. These craft store pumpkins take a base coat in pink, navy and gray, and the leaves and the polka dots are cut from adhesive vinyl and pressed straight on, which is why the edges stay that crisp. Random dots scattered over a small navy pumpkin take about a minute. Vinyl peels off a faux pumpkin cleanly at the end of the season too, so the same blanks come back out next year in a different color with a different pattern on them.
Get the full tutorial at The Country Chic Cottage.
4. Copper Pumpkin Fall Centerpiece
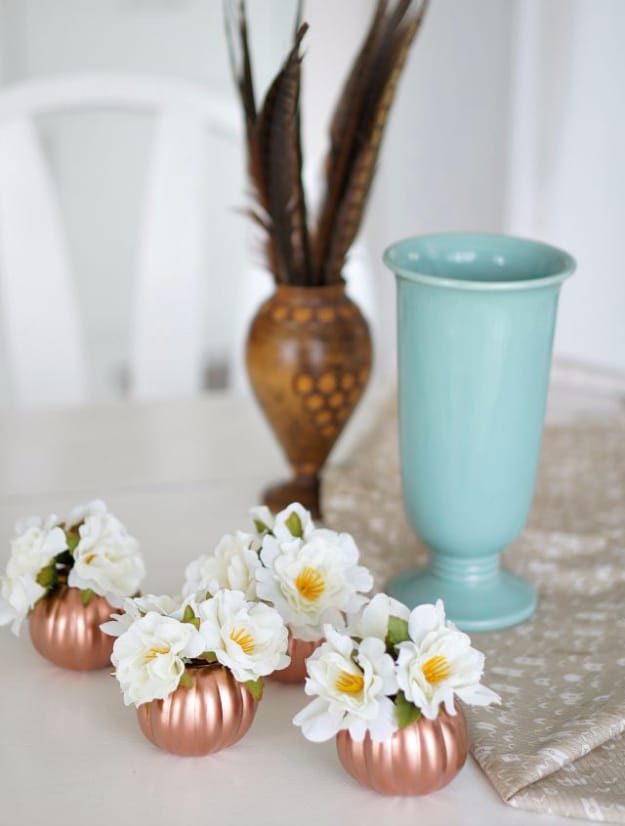
Dollar store plastic pumpkin pails, handles snapped off, given two light coats of copper spray paint. They dry almost instantly, so there is no real waiting between coats. Fill each one with rice or dried beans to weigh it down and hold stems upright, because the opening is too small for a floral frog. Three or four flower stems per pumpkin, trimmed so the heads sit just above the rim. Roughly two dollars for the group, and jack-o-lantern faces turn to the back.
Get the full tutorial at Up To Date Interiors.
5. DIY Gold Leaf Dipped Pumpkin
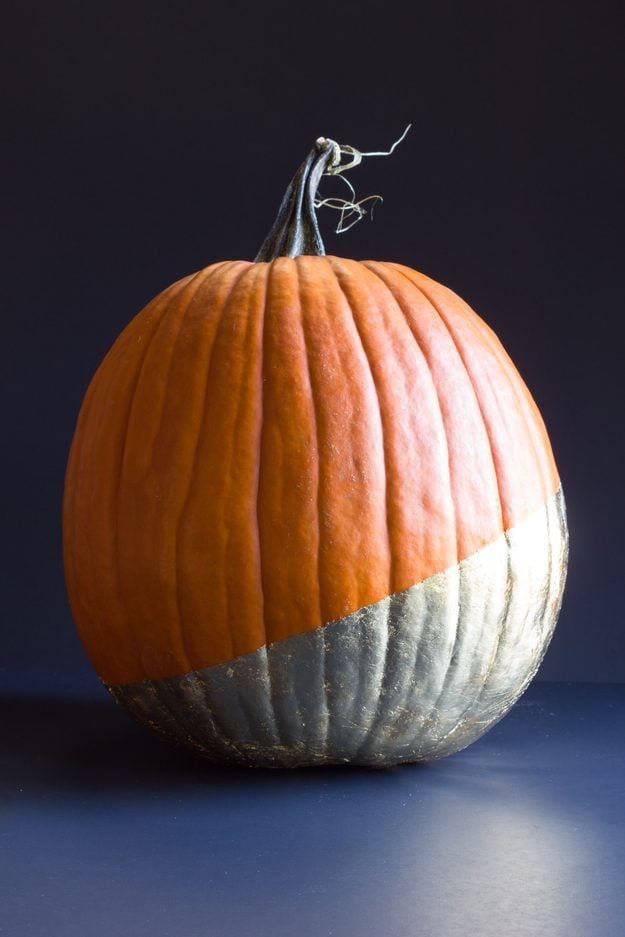
A real pumpkin, dipped on the diagonal in actual gold leaf. You tape the line off with painter’s tape (stand the pumpkin upside down on the tape roll to hold it still, one of those tips you feel silly for not thinking of), brush gilding adhesive below the tape and wait until it goes from white to clear and tacky before the leaf touches it. This is one of those projects where the adhesive is the project, so do not rush that tacky stage. A dry brush buffs the extra away and you can patch any thin spots after, which makes it far more forgiving than it looks.
Get the full tutorial at Erin Spain.
6. Gold Leaf Painted Pumpkin Makeovers
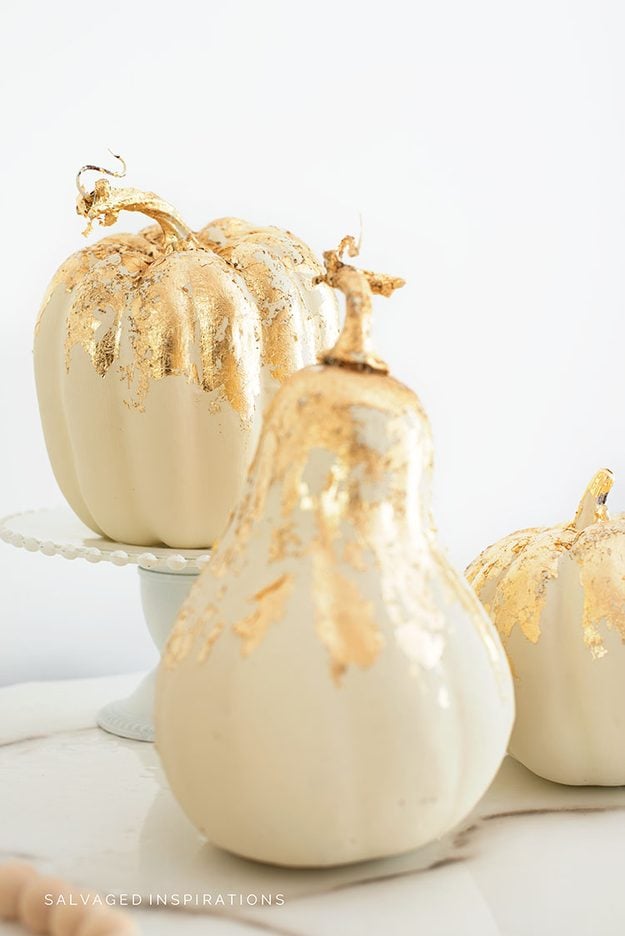
Cream chalk paint first, gold leaf second, dollar store pumpkins underneath. The clever bit is how the glue goes on: brushed solid where you want full coverage and stippled where you want the gold to break up, so the flaking looks deliberate instead of like a mistake you are trying to explain. That control is the whole difference between this and every gold leaf project that goes wrong. Practice the technique here before you take gold leaf anywhere near a piece of furniture.
Get the full tutorial at Salvaged Inspirations.
7. DIY Gold Confetti Pumpkins
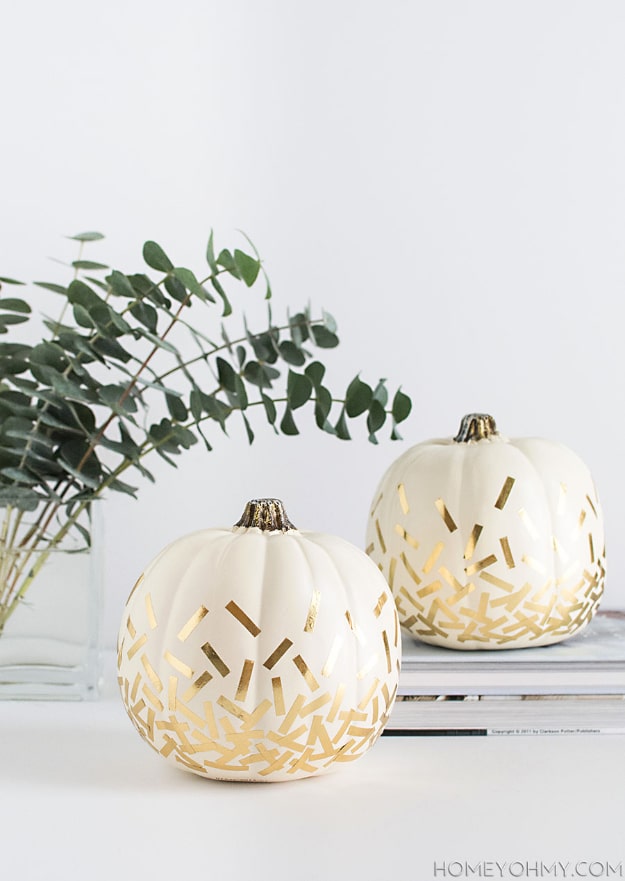
Washi tape, scissors and a white craft pumpkin. Cut the tape into one inch pieces, then cut each piece in half lengthwise so you end up with skinny confetti slivers rather than fat strips. Stick them on densely at the bottom and thin them out toward the top so it reads as confetti falling. Gold washi with a paper backing is easier to handle than the slippery kind. It takes a while to cut them all, but there is no drying time and nothing to clean up.
Get the full tutorial at Homey Oh My.
8. Sweater Style Farmhouse Pumpkins
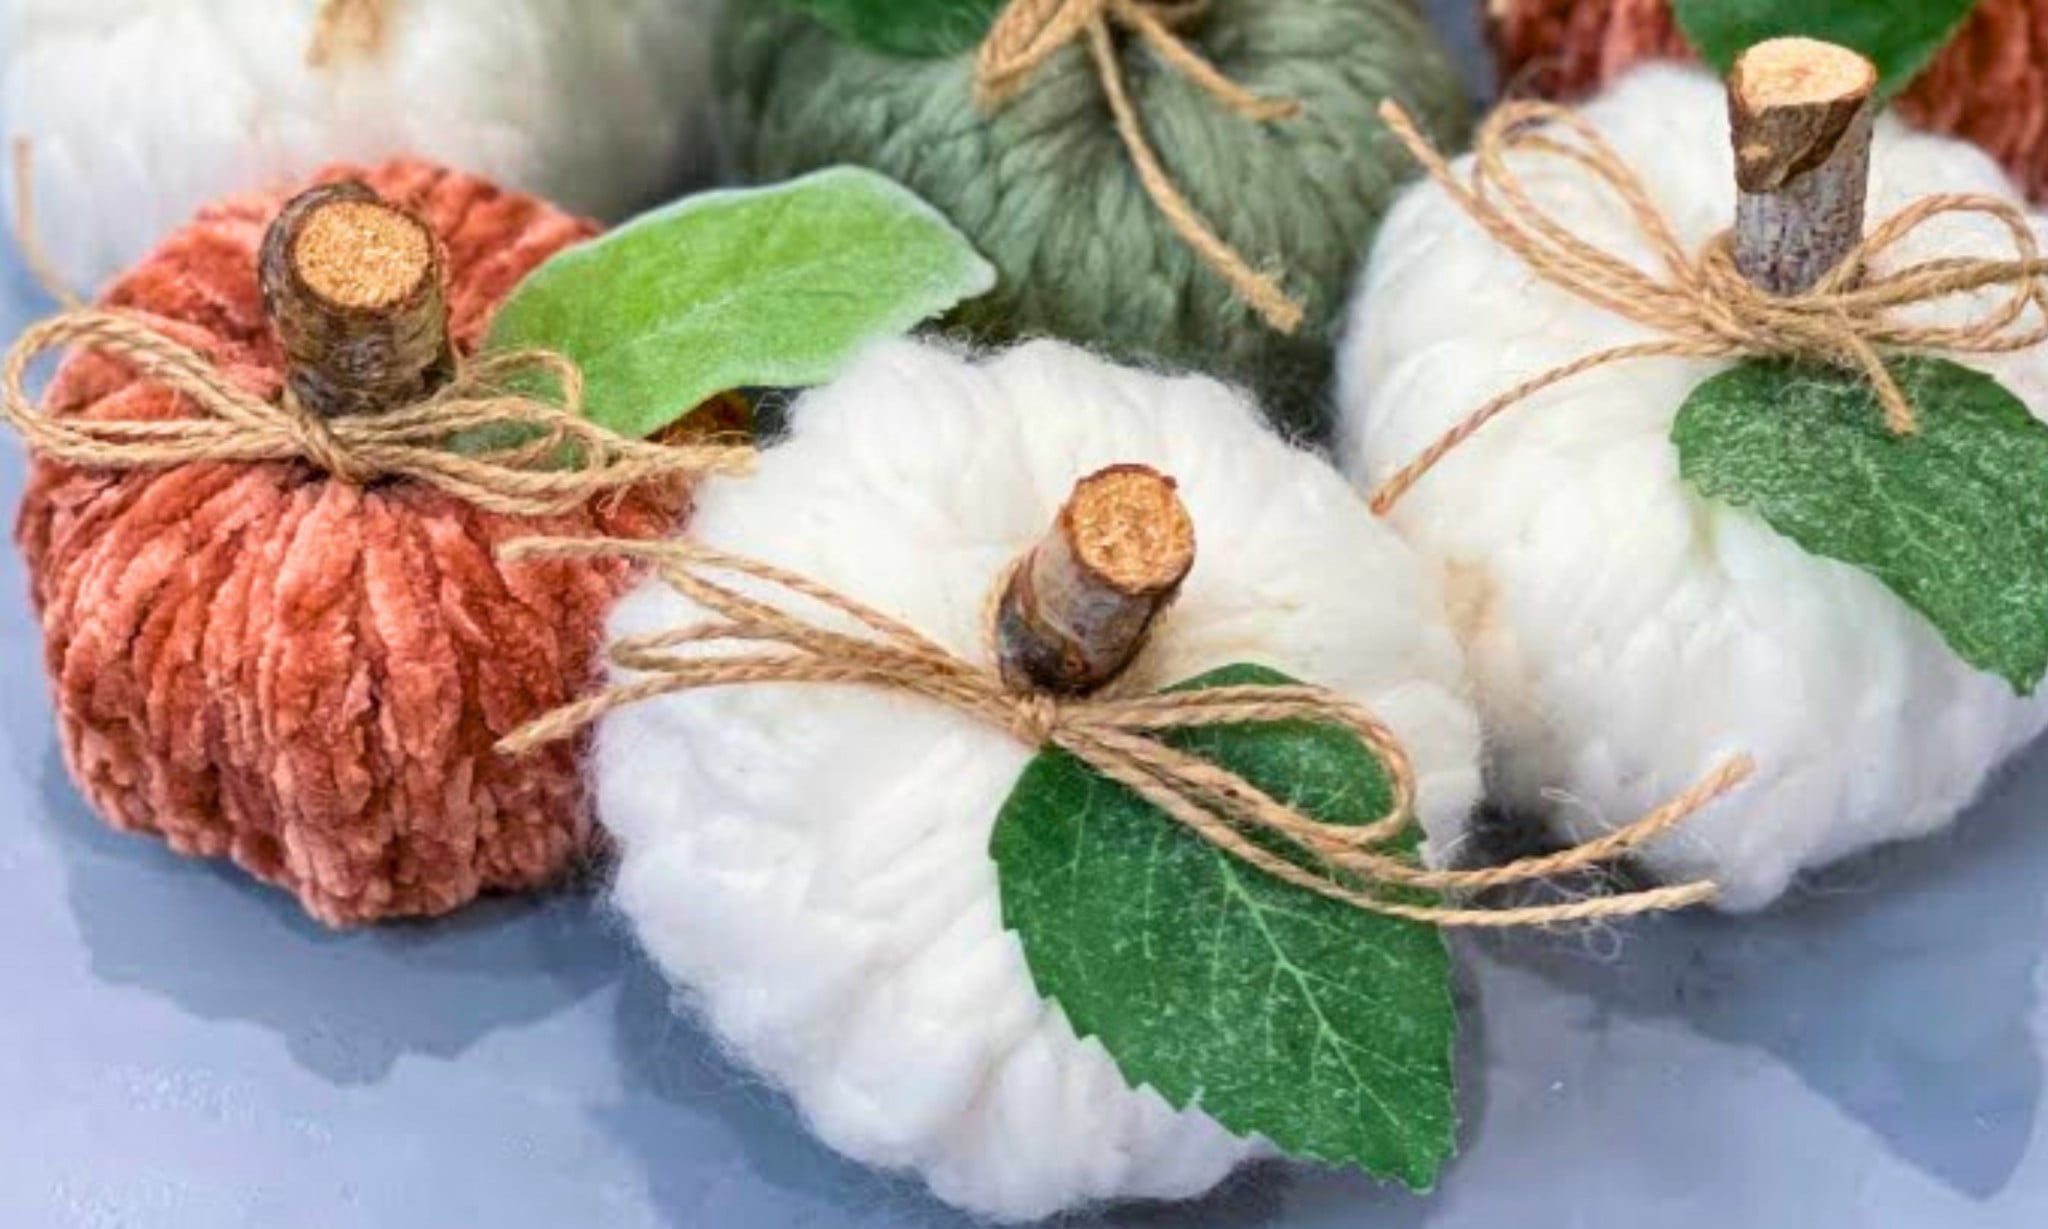
A pool noodle, cut into inch and a half lengths, is the secret core here. Chunky knit yarn gets pulled through the middle with a hair braiding tool, loop after loop, until the ring is completely filled and looks like a knitted pumpkin. Use every bit of the two and a half yard length and keep your tension even all the way around, because a loose patch shows. A twig stem and a jute bow finish it. One pool noodle makes 31 pumpkins, which is either a warning or an invitation.
Get the full tutorial at DIY Joy.
9. DIY Faux Terracotta Pumpkins
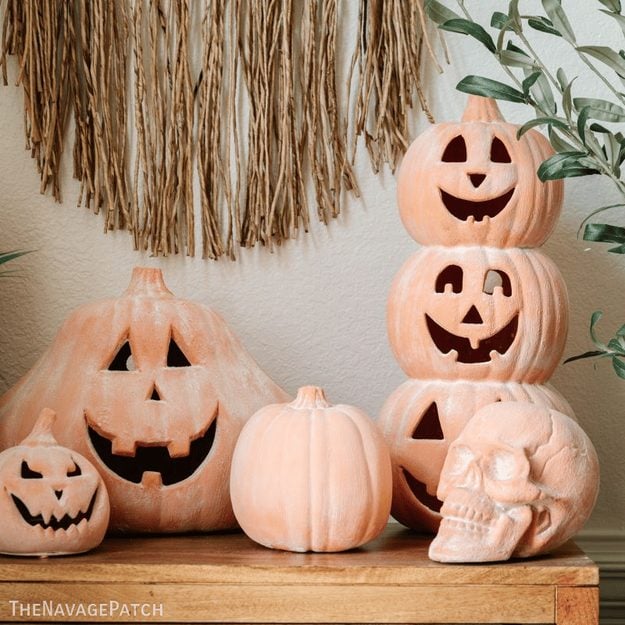
A plastic pumpkin that ends up looking like it came from the garden center instead of the seasonal aisle. You mix orange and yellow paint at about 1.5 to 1, stir in baking soda until it’s thick, brush it on in long up and down strokes, then dust flour over the still damp paint (yes, flour, out of your own cabinet). Seal it with spray fixatif rather than acrylic sealer, because acrylic wipes the flour right back off, and keep these indoors since they aren’t porch pumpkins. I have made my own chalk paint and it still never occurred to me to reach for the flour jar, which is exactly the kind of trick I love finding.
Get the full tutorial at The Navage Patch.
10. Framed Fall Pumpkins
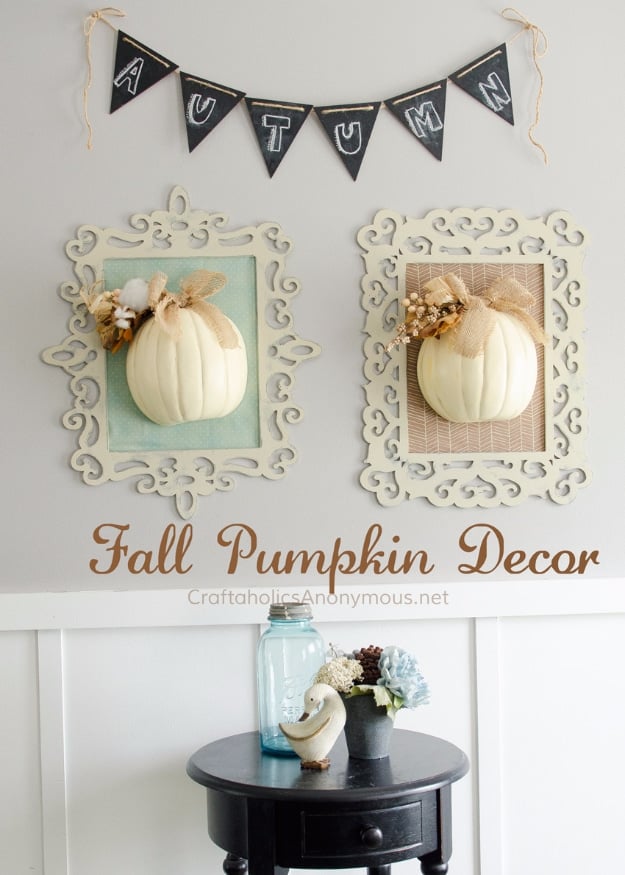
Half pumpkins, which are craft pumpkins cut down the middle with a hanger already built in, mounted on a fabric backed wood frame. Paint the frame gray, paint cream over it, then sand lightly so the gray comes back through at the edges. Fabric is hot glued to the back of the frame to fill the 11 by 14 opening. The optional step worth doing: brush black craft paint into the pumpkin grooves and wipe most of it off with a paper towel, which gives a flat white pumpkin some depth.
Get the full tutorial at Craftaholics Anonymous.
11. DIY Glitter Pumpkin Votive Holder
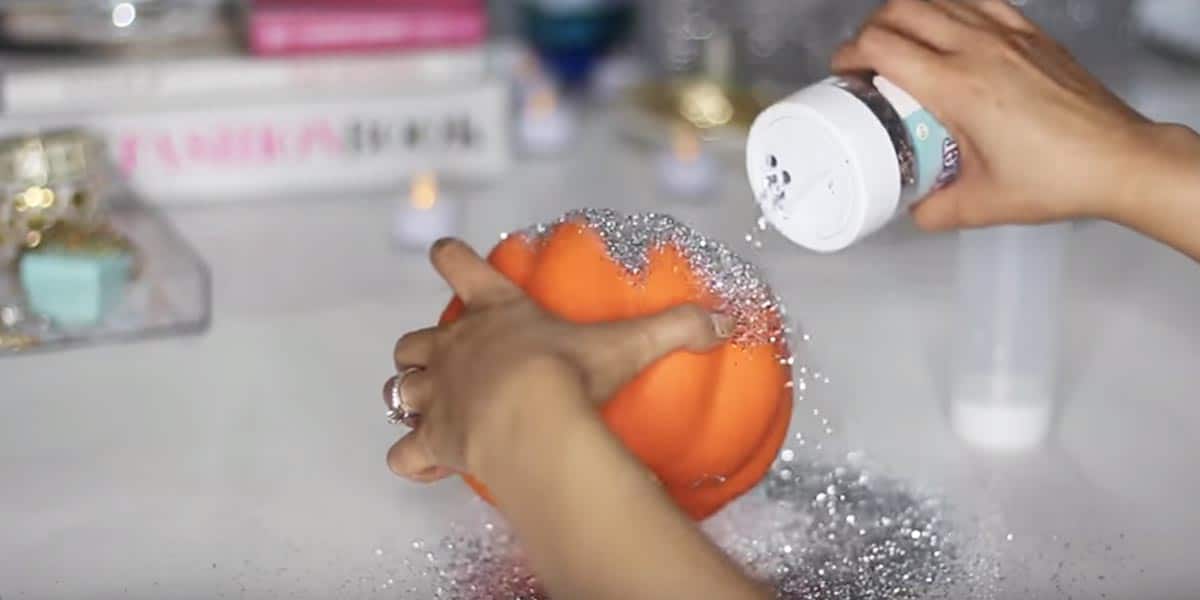
Mod Podge, glitter and either a drill bit or a craft knife, and a foam pumpkin out of the storage bin becomes a votive holder. Coat the outside in glue and glitter, then cut or drill an opening in the top sized to a tea light so the glow comes up through the hole. It is the cheapest glamour on this list and it scales: make a run of them in different sizes for a mantel, a wedding reception table or a porch step on a mild evening.
Get the full tutorial at DIY Joy.
12. Chalk Paint Pumpkins
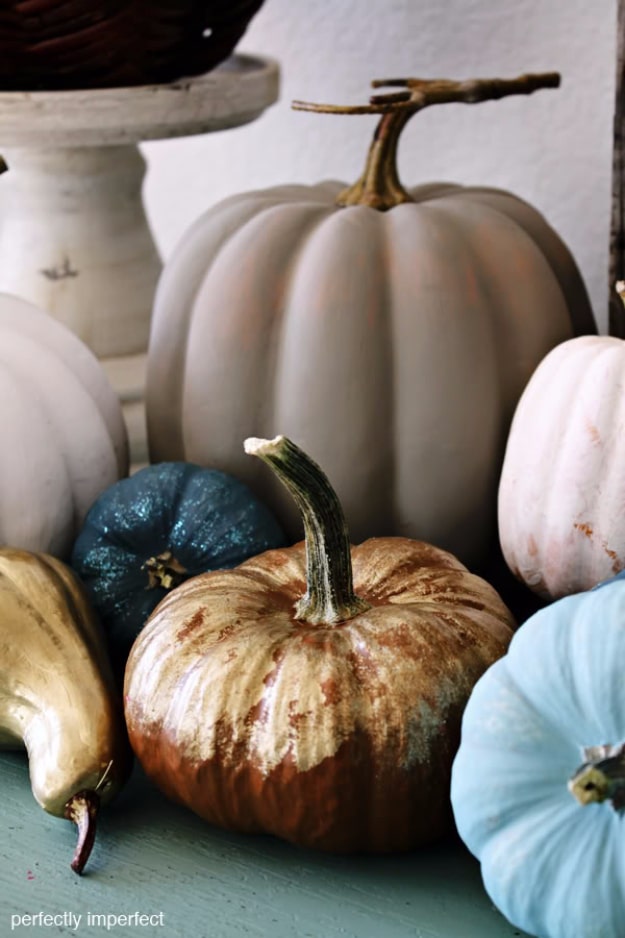
Chalk paint on both real pumpkins and funkins, with no priming and no sanding first, which is the entire appeal. Pure White and French Linen carry the neutral ones, Aubusson blue does the color. One coat is plenty on a real pumpkin, because there is no sense in spending an afternoon on something that will not last past November. The clever one in the group is a metallic blue base dry brushed with duck egg on top, which comes out looking like mercury glass.
Get the full tutorial at Perfectly Imperfect.
13. Pottery Barn Inspired Mercury Mirror Grout Pumpkins
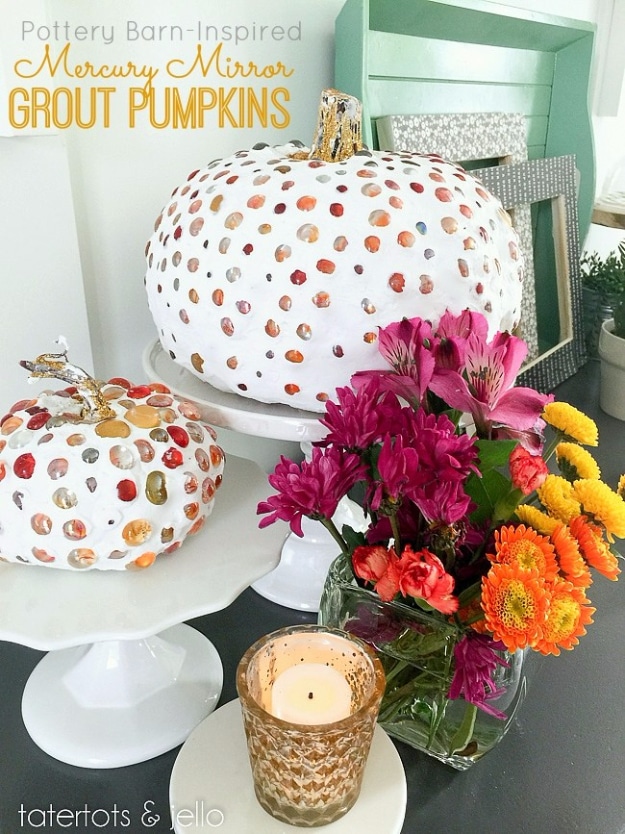
Pre-mixed grout, straight out of the tub with your bare hand, spread thick over a craft pumpkin. Let it set about 15 minutes, press flat glass marbles into it, push them all the way down and leave it overnight. The next day a second layer of grout goes over the marbles, sits an hour, then a damp sponge wipes their faces clean, rinsing the sponge after every single swipe. Buff them with a cloth the following day. The imperfections are what make it look handmade rather than bought.
Get the full tutorial at Tatertots and Jello.
14. Gold Glitter And Grout Pumpkins
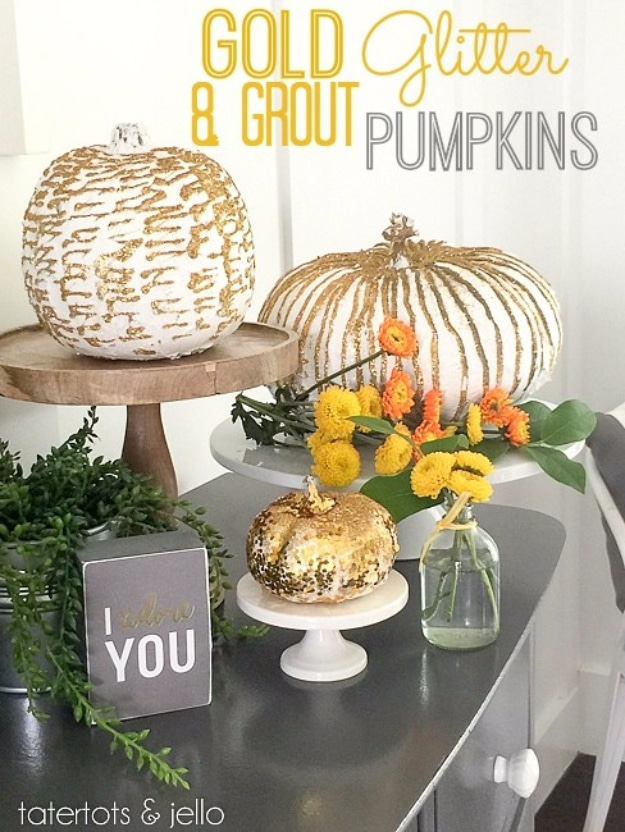
Same grout, different finish. Foam pumpkins get covered in pre-mixed grout smoothed as flat as you can get it, thinned with a little water in your hand where it drags, then left overnight. Dimensional paint or glue draws lines over the dry surface, vertical on one and horizontal on another, and glitter goes on before the glue sets. Cut a hole in the bottom and drill a few in the sides and a votive inside turns the whole thing into a lantern after dark.
Get the full tutorial at Tatertots and Jello.
15. Gold Thumbtack Polka Dot Pumpkins
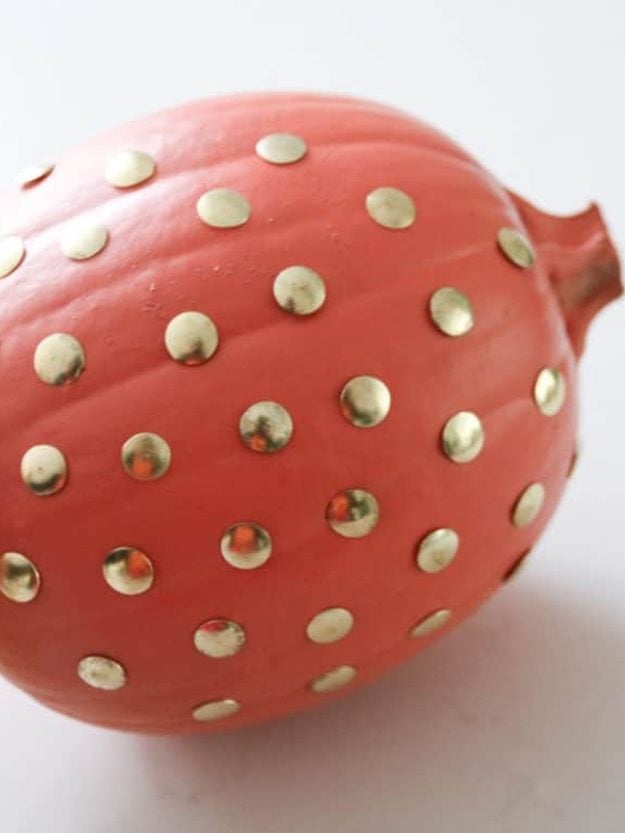
Brass thumbtacks pushed into a pumpkin in a loose polka dot pattern, which is about as no carve as decorating gets. Spray paint the pumpkin first and let it dry all the way (coral against gold tacks is unexpected and it works), then press tacks in wherever the spacing looks right to you. Push each one all the way flush or they sit proud and catch on everything, and that is genuinely the only way to get this wrong. It works on a real pumpkin or a faux one, and the faux one comes back out of the box next fall.
Get the full tutorial at Oh So Lovely Blog.
16. Splatter Paint Mini Pumpkins
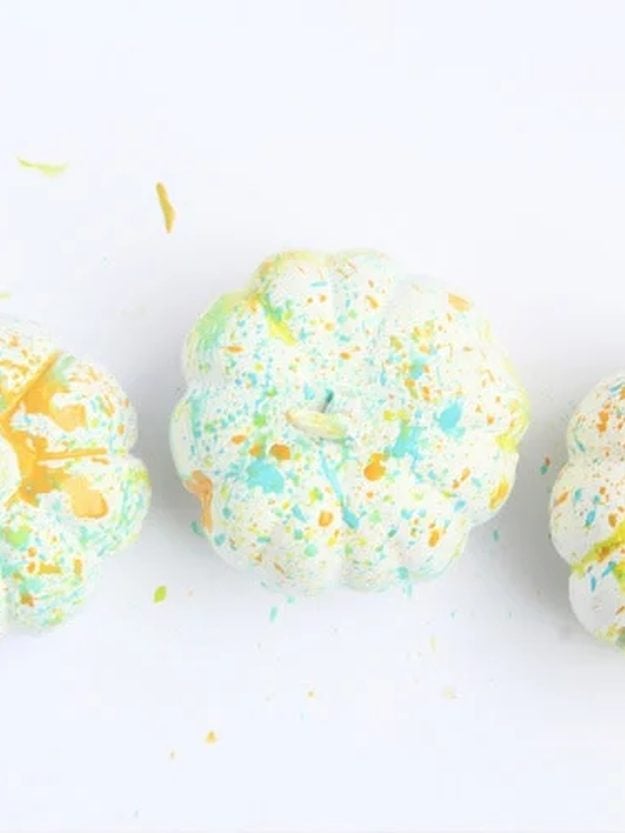
Thin a few acrylic colors with a drop or two of water, then flick them at a white pumpkin with a brush and your thumb until it is covered in confetti. There is no technique to get wrong here, which is exactly why it works with children. Lay newspaper down first and wear something you do not care about, because the splatter travels further than you think. Set a few of the mini ones inside a glass hurricane and it turns into a centerpiece nobody expects.
Get the full tutorial at One Little Project.
17. Gold Glitter Monogram Pumpkin
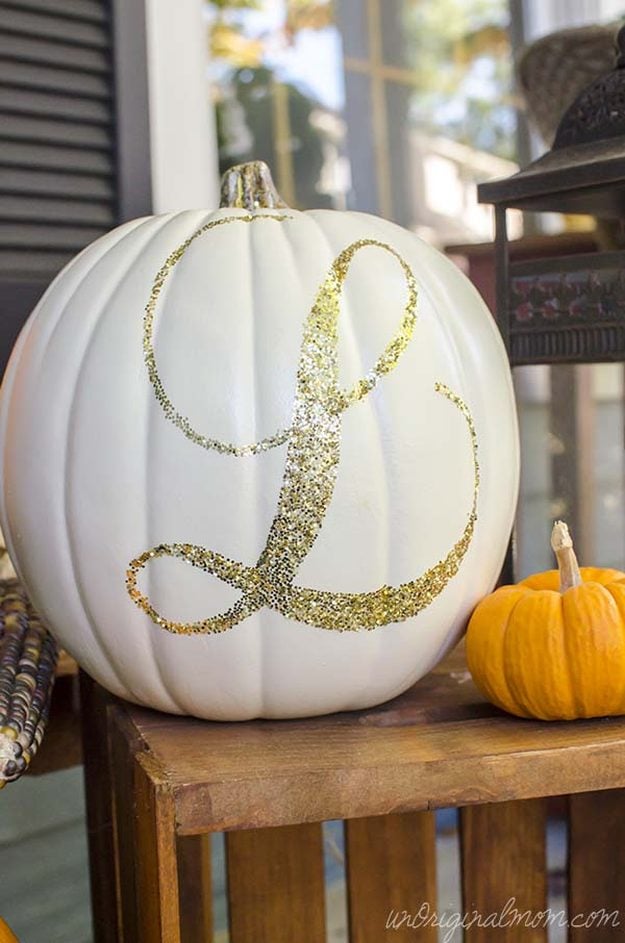
One big gold glitter initial on a white craft pumpkin, and the whole thing takes about 20 minutes. You cut the letter out of a sheet of double sided adhesive, press it down into the grooves of the pumpkin as you smooth it across, peel the top layer off and pour glitter straight onto the sticky letter. A cutting machine makes quick work of it, but a printed letter and an X-Acto knife do the same job. Do the glitter part over a bin unless you want gold in your floorboards until Christmas.
Get the full tutorial at Unoriginal Mom.
18. DIY Dry Brushed Chalk Painted Pumpkins
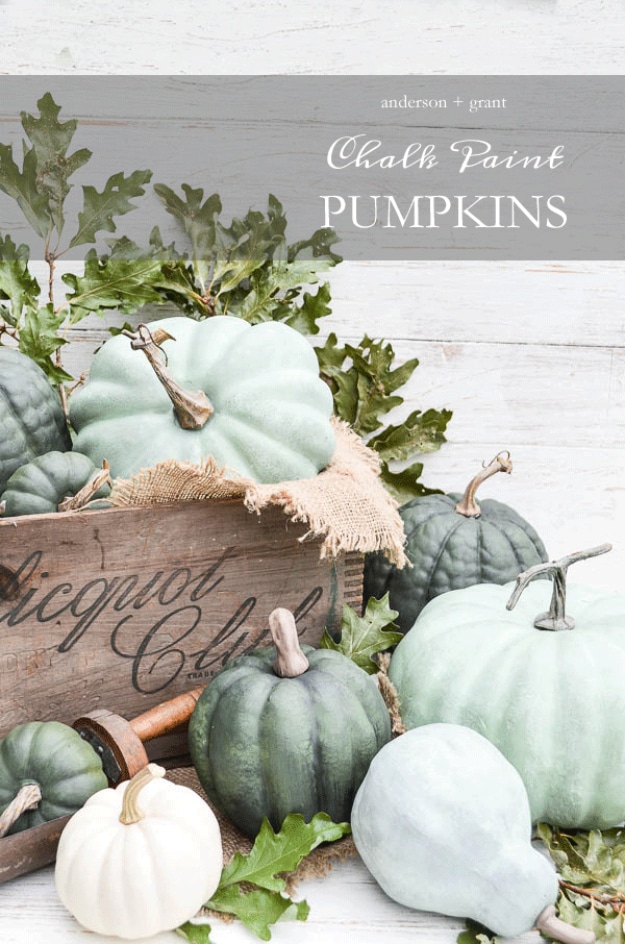
Craft store pumpkins repainted in muted greens so they pass for heirloom varieties. Two steps make the difference. Twist the stems out before you paint, because getting paint off a stem is worse than the painting itself, and glue them back in at the end. Then base coat with a color blocker, since orange and red bleed through pale paint otherwise. You can mix your own chalk paint at 2 tablespoons of Plaster of Paris to 1 tablespoon of water stirred into a cup of paint.
Get the full tutorial at Anderson + Grant.
19. DIY Faux Milk Glass Pumpkins
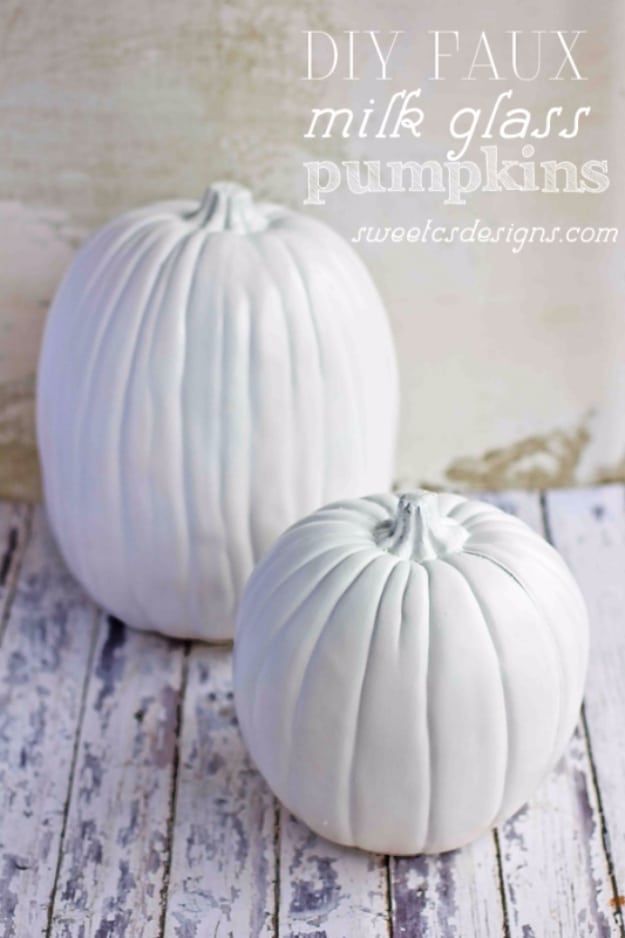
The most honest project on the list, because there is really only one step. Take foam or plastic pumpkins, off white with brown stems is fine, and spray them with a good paint and primer in a glossy finish. Even passes, top down, then flip and repeat once dry. Thin coats or you get drips, and give them a few hours depending on humidity. The gloss is what sells it as milk glass, and because nothing about them says October they can stay out into winter.
Get the full tutorial at Sweet Cs Designs.
20. DIY Confetti Pumpkin
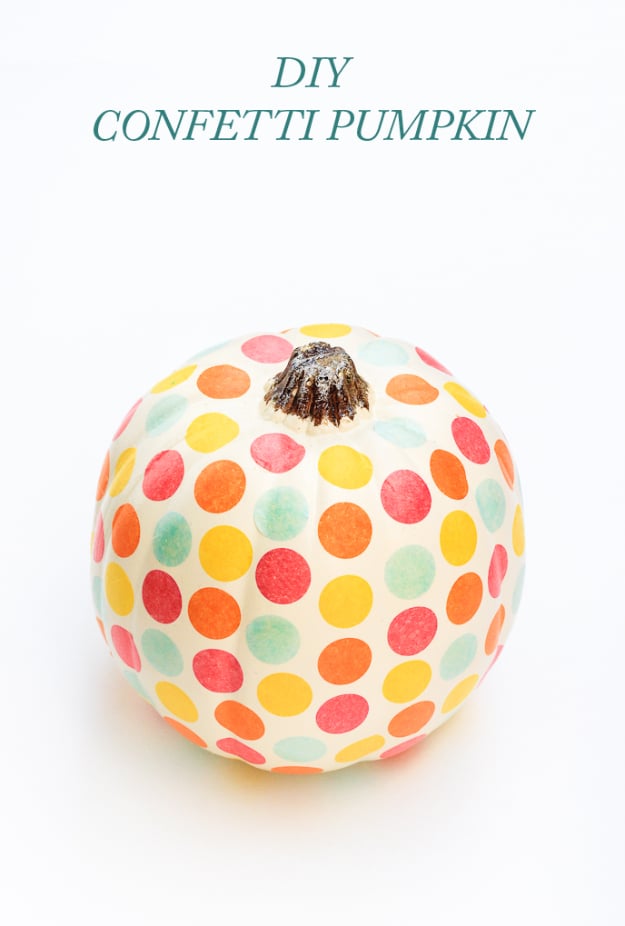
A white craft pumpkin, paper confetti and Mod Podge, done in about 30 minutes for roughly fourteen dollars. Work in four inch sections: thin layer of Mod Podge, lay the confetti down, thin layer over the top, move on. Trying to coat the whole pumpkin at once means the glue skins over before you get there. Buy the confetti or punch your own out of tissue paper. It is the brightest thing on this list, which is exactly the point if you are tired of brown and tan.
Get the full tutorial at The Crafted Life.
21. Vintage Doorknob Pumpkins
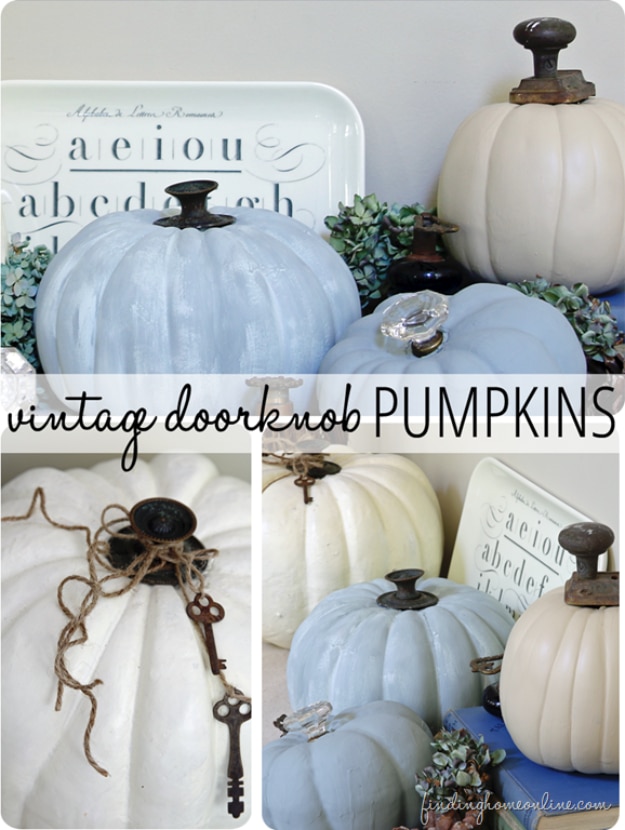
Buy the cheapest and ugliest fake pumpkin you can find, because the stem is the problem with fake pumpkins and here the stem comes off. Some cheap ones pop straight out and leave a small hole; the rest need a craft knife. Paint the pumpkin whatever you like, beige craft paint or a layered blue chalk paint, then set an old doorknob into the opening. Use a wide based knob or one with a collar so it covers the hole. Rough, chipped hardware looks better than clean.
Get the full tutorial at Finding Home Farms.
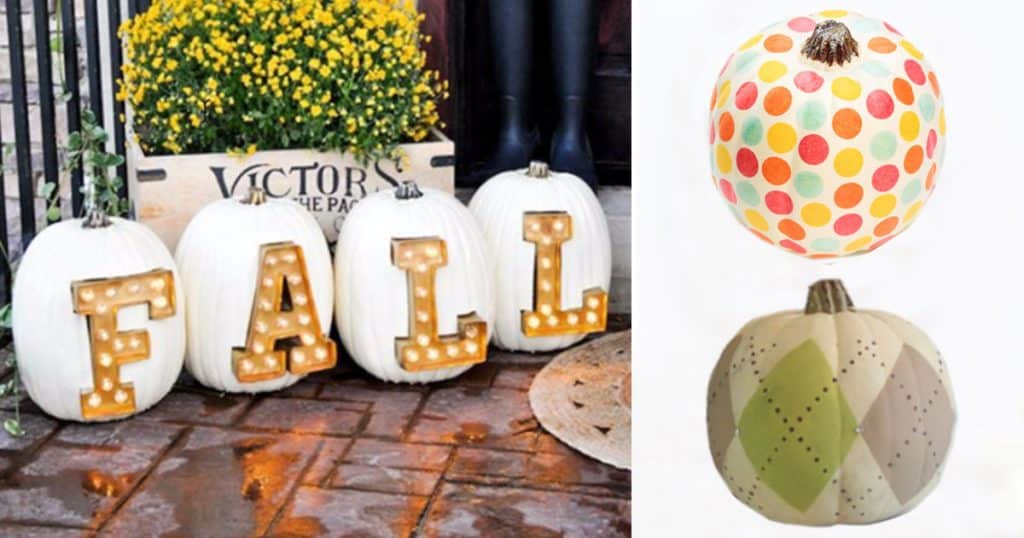
22. DIY Marquee Light Letter Pumpkins
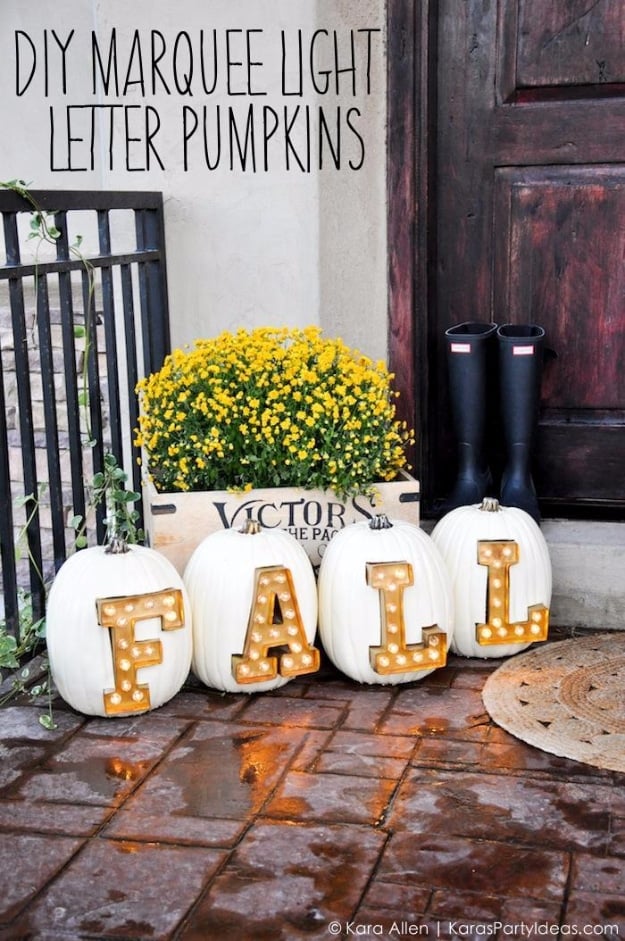
Marquee light letters set into white craft pumpkins, one letter per pumpkin, lined up to spell a word on the porch. Trace the letter outline onto the pumpkin using the insert that comes with the marquee letter, then cut with a craft knife. The instruction that saves you: cut the shape slightly larger than the pattern, or the letter will not seat. Push the letter about halfway in so the pumpkin holds it, and the lights are battery operated, so no extension cord.
Get the full tutorial at Kara's Party Ideas.
23. DIY Dropcloth Driftwood Petite White Pumpkins
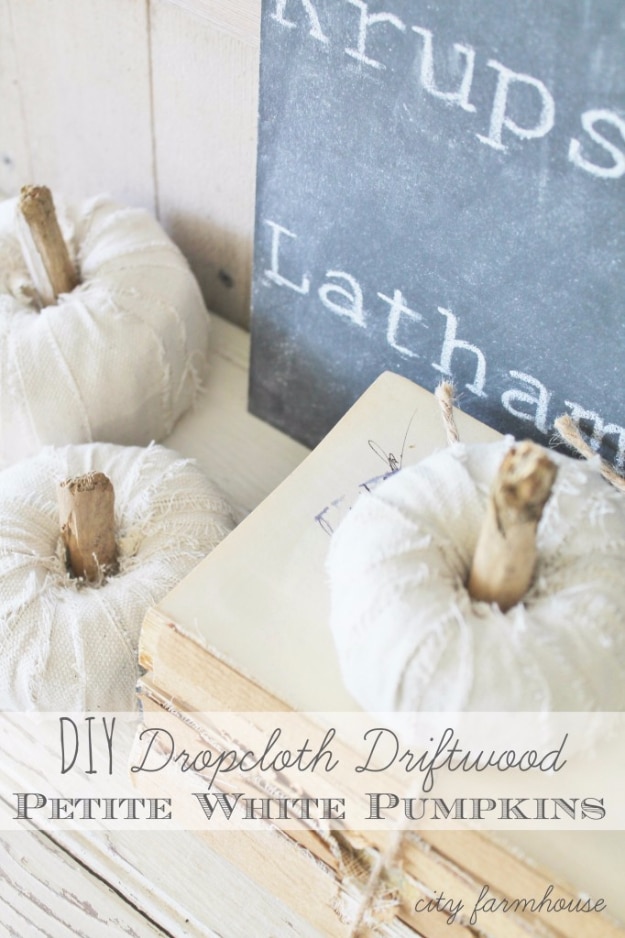
Half a roll of soft toilet paper is the body. Cut the roll in half with a knife, pull the cardboard tube out and strip some off the outside, taking off different amounts if you want a range of sizes. Wrap inch wide strips of canvas drop cloth around and through the center and pull them tight, tucking or gluing the ends, then hot glue on a piece of driftwood or a twig for a stem. They come out to less than thirty cents each.
Get the full tutorial at City Farmhouse.
24. Lace Pumpkin DIY
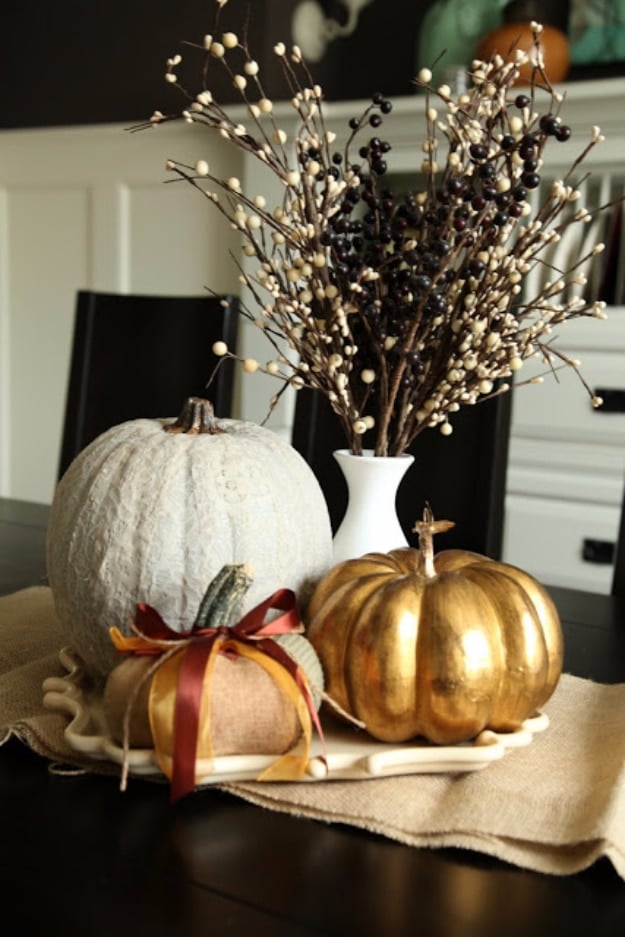
Lace fabric cut into strips, laid over a funkin painted with two coats of gray acrylic, and Mod Podge applied heavily over the top and through the lace. Let it dry a full 24 hours, which is longer than you want to wait and shorter than you want to find out about afterward. Grey under white lace is what gives it the shadow and depth; over a white pumpkin the pattern vanishes. The original was a $3.99 craft store pumpkin.
Get the full tutorial at Vintage Pretty Pearl.
25. Pumpkin Door Hanger
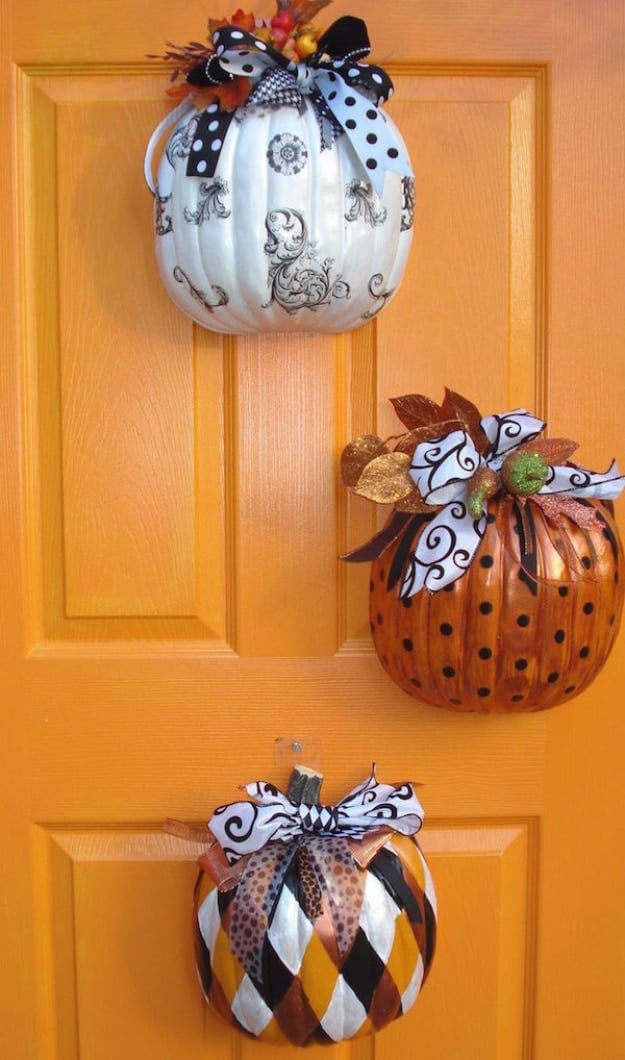
Faux pumpkins cut in half and hung flat on a door, three of them staggered down the panels instead of one wreath. Decorated every which way: black scroll work on white, black dots on orange, and a harlequin diamond pattern in copper, black and white, each one finished with a big wired ribbon bow and a few glittered leaves at the stem. A door with three panels is practically asking for this, and half a pumpkin takes up no depth at all.
Get the full tutorial at Smart School House.
26. Turquoise Rhinestone Pumpkins
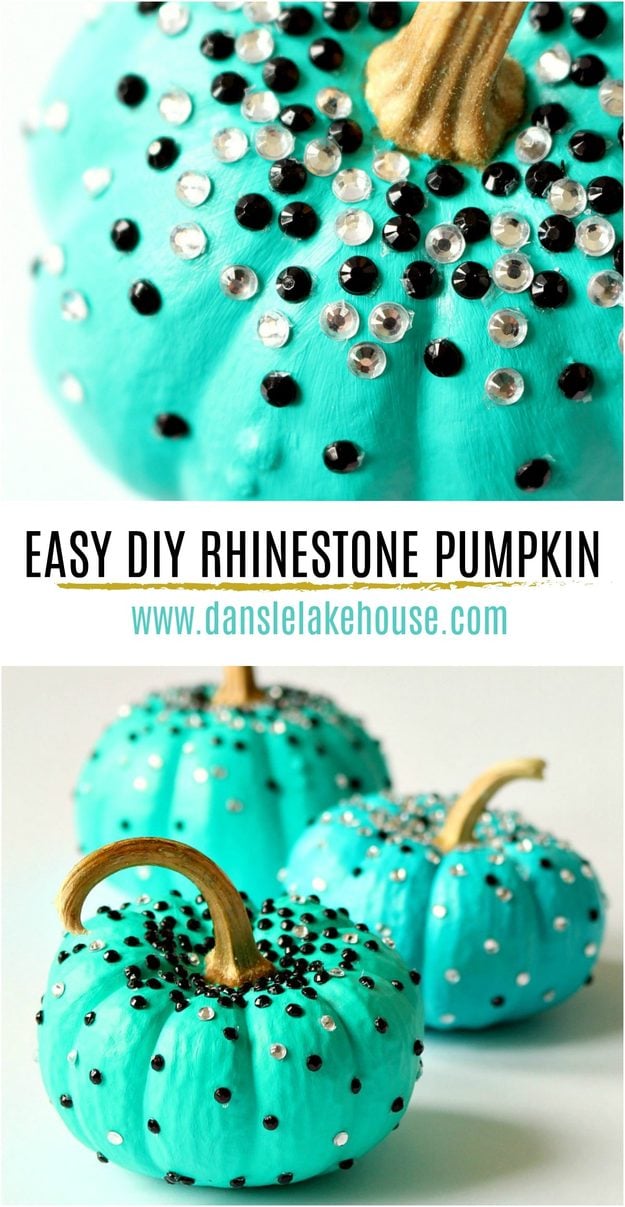
Paint a mini pumpkin turquoise, then bedazzle it, which is not a sentence I expected to write about fall decor. Stick on rhinestones do all the work here, so there is no carving, no glue gun and no drying time past the paint. I know almost every aisle at Michaels because I have tried almost everything in them, so take this from me: buy the gems that come in strips as well as the loose ones, because a strip gives you an even line without any measuring.
Get the full tutorial at Dans le Lakehouse.
27. Fall Flower Pumpkin Centerpiece
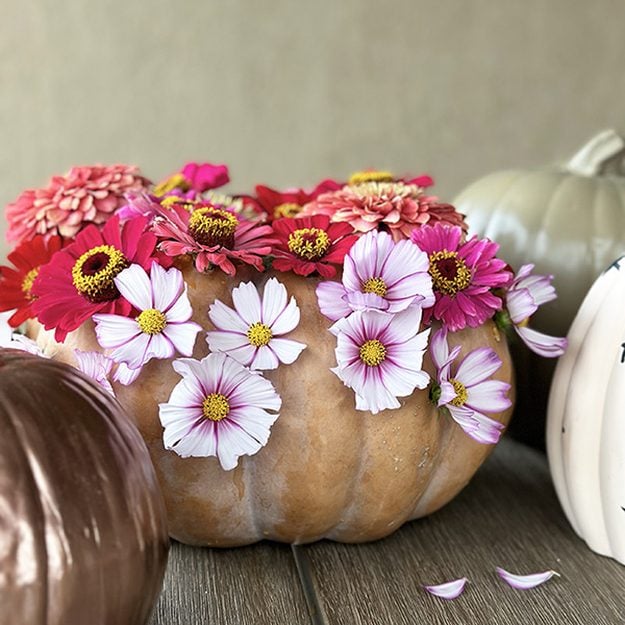
A real pumpkin turned into a flower holder, no vase and no water hiding anywhere. You drill holes straight through the pumpkin wall, matching the bit to your stems (zinnias get thick right under the bloom, so size up for those), then push the cut flowers in one at a time, keeping them in water until the last possible second. Give backyard blooms a little shake first so the ladybugs stay outside where they belong. Flower arranging isn’t a skill I can claim, but I can tell you the cosmos give you about two days and the zinnias hold on much longer, so photograph it the day you make it, which is my advice on everything you make.
Get the full tutorial at Delineate Your Dwelling.
28. Faux Pumpkin Aged With Paint
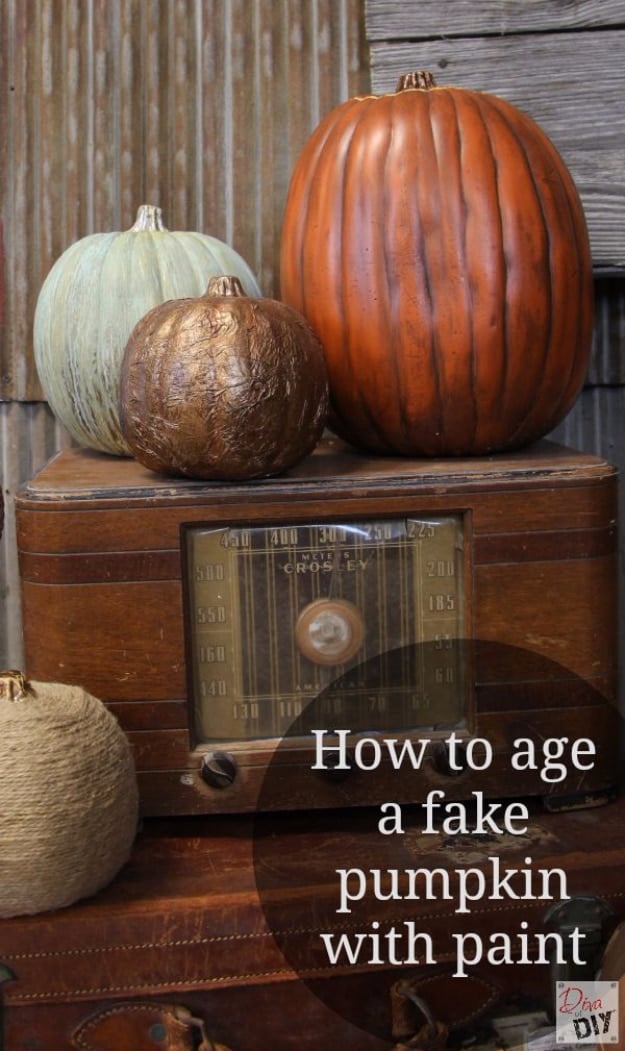
The answer to the one real complaint about faux pumpkins, which is that they look faux. An aging glaze of 1 part burnt umber acrylic to 2 parts water, with an optional dab of black, brushed over a third of the pumpkin at a time and then dabbed back off with cheesecloth or a soft rag. Work in thirds, because the wash sets faster than you can chase it. Keep going until the depth looks right to you, and it works on white pumpkins too.
Get the full tutorial at Diva of DIY.
29. Decoupage Pumpkins
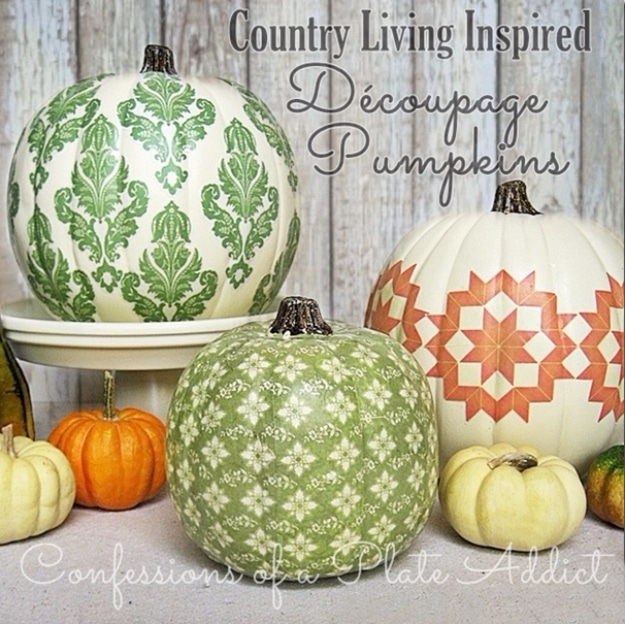
Not fabric, which is the thing people get wrong looking at these. The pattern is scanned and printed onto paper, then cut out and decoupaged onto cream faux pumpkins, so you get the look of upholstered pumpkins without wrestling fabric around a curve. Buy enough of the fabric for one full repeat of the design, scan it, and print as many copies as you need. Damask on one, a small floral on another, a quilt star on the third. The cream pumpkins go on unpainted.
Get the full tutorial at Confessions of a Plate Addict.
30. Yarn Wrapped Pumpkins
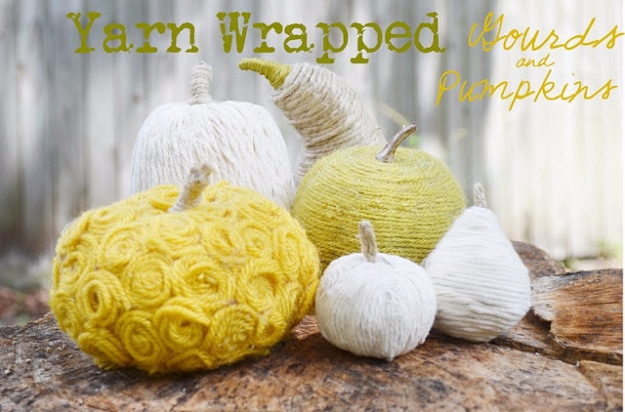
Dollar store and discount fake pumpkins and gourds wrapped in yarn, with different gauges in ivory, green and mustard so no two match. Glue at the base of the stem and wind, applying glue as you go. Hot glue holds best because it sets fast, but craft glue is the safer choice with children, just do not press hard or you get hard glue spots under the yarn. The white one is four strands twisted together first, which looks like cable knit without any knitting.
Get the full tutorial at Two Shades of Pink.