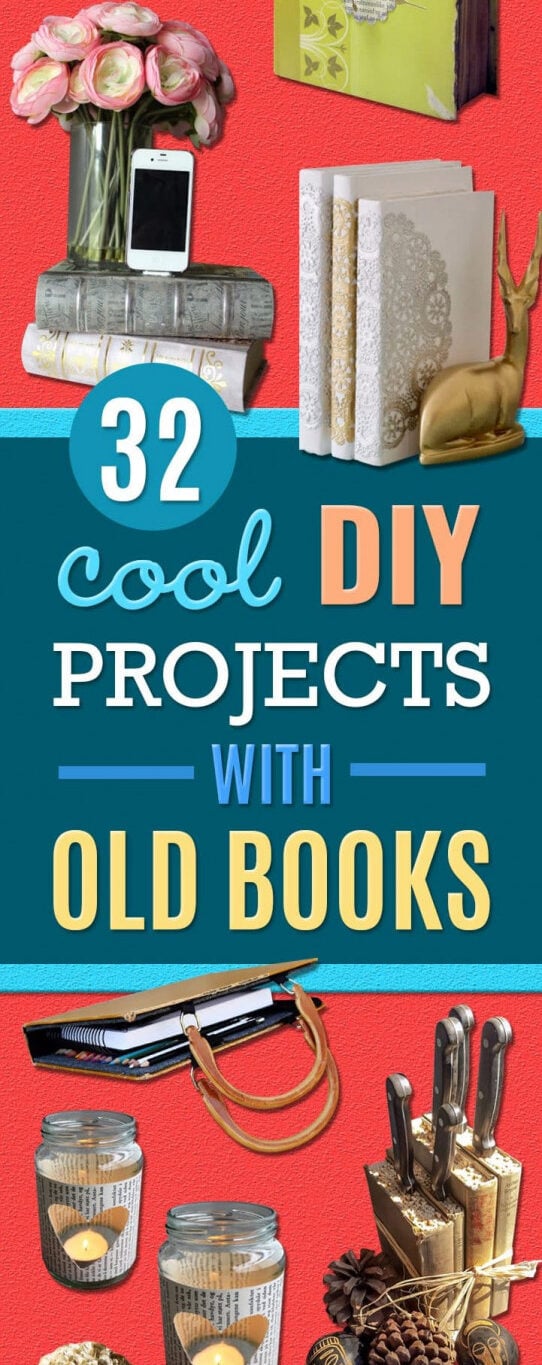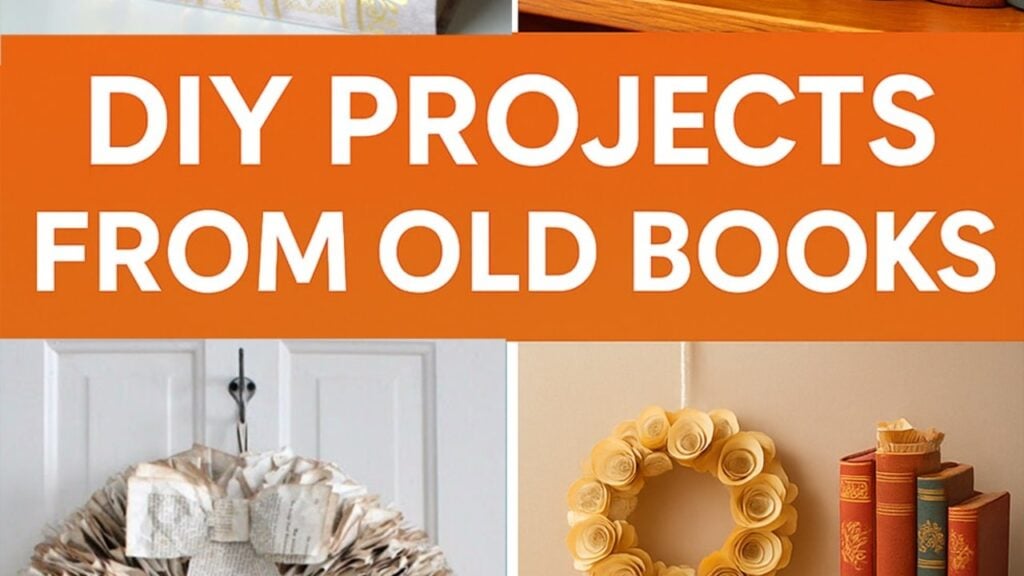
Paper crafts are my favorite thing in the world to make, so a thrift store shelf of water damaged hardcovers looks like a supply run to me rather than a sad pile. That is really all these DIY projects made with old books need: a book nobody will miss, a craft knife and some patience. Two things happen on this page. The hardcover gets cut and built into a knife block, a purse, a phone charging station, a clock, a planter or a secret box, which is the structural half. And the pages get torn out and rolled, punched, folded or cut into roses, pumpkins, gift bags, paper stars and garlands, which is the pretty half. Check the copyright page before you cut anything, because a first edition is worth more intact. Everything else is fair game.
Table of Contents
- 1. Book Page Rose Wreath
- 2. Turn Old Books into a Knife Block
- 3. DIY Book Balls
- 4. Book Page Gift Bags
- 5. Heart Garland From Old Books
- 6. DIY Book Page Paper Flower
- 7. DIY Deer Book Art
- 8. Book Photo Frame
- 9. DIY Book Purse
- 10. Dollar Store Book Topiary DIY
- 11. Place Card Holders Made Out Of Old Books
- 12. DIY Book Flower Vase
- 13. Old Book Clock
- 14. DIY Book Vase Planter
- 15. DIY Cell Phone Charging Book
- 16. Old Book Lantern
- 17. Repurposed Book Flower
- 18. Book Page Pumpkin
- 19. Make New Books Look Old
- 20. DIY Snowflake Covered Books
- 21. DIY Old Book Accordion Organizer
- 22. Turn an Old Book into a Book Box
- 23. Boxes Covered With Old Books
- 24. DIY Paper Star Ornament
1. Book Page Rose Wreath
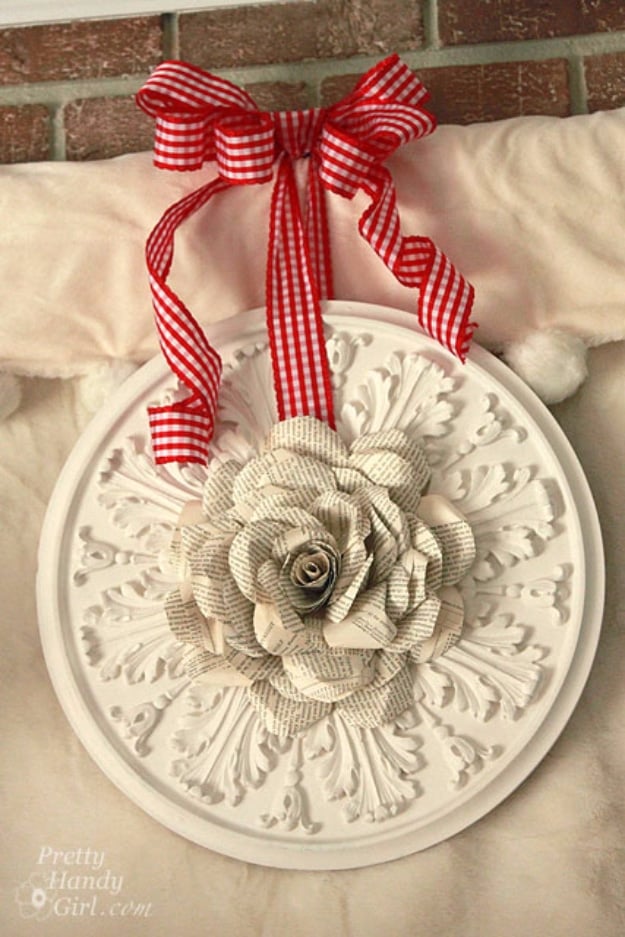
A ceiling medallion from the hardware store, a dozen torn book pages and a hot glue gun. Cut petal shapes in a range of sizes, curl the top edges back, fold each one in half lengthwise with the curled edges facing out, then roll several of the smallest into tubes for the center. Thread the hanging ribbon through the medallion before you build anything, because the rose covers the hole. Glue a piece of cardboard over that hole, then work outward from the center petal by petal. A reader tip worth stealing: soak the pages in weak tea first for a deeper aged color.
Get the full tutorial at Pretty Handy Girl.
2. Turn Old Books into a Knife Block
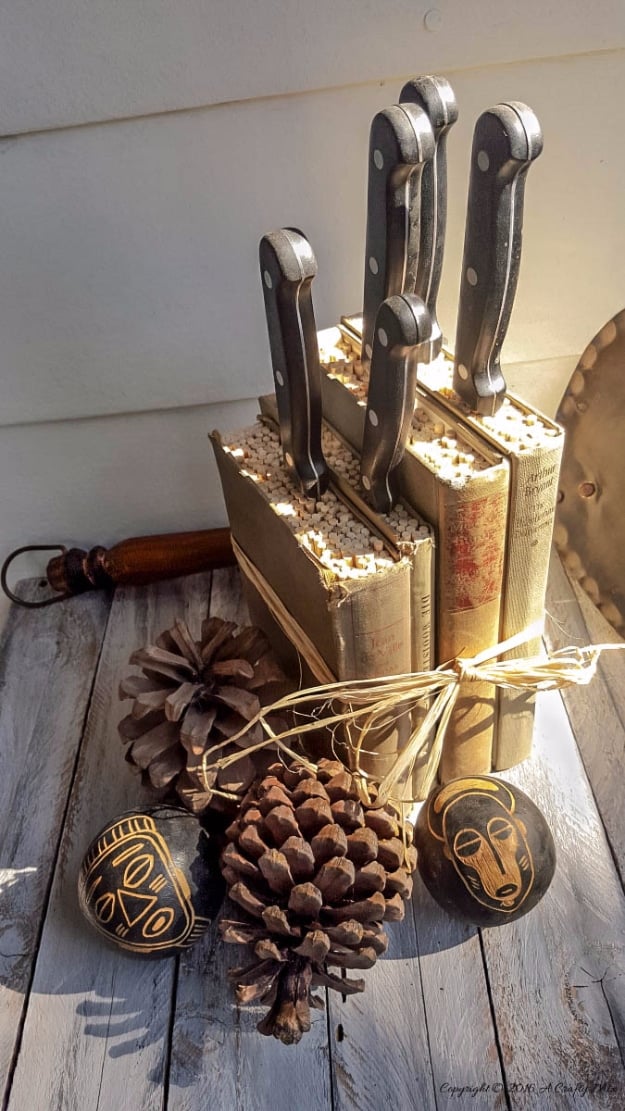
Books standing on end with bamboo skewers packed between the covers, and the knives slide down between the skewers. Michelle tried simply gluing the books together first and her knives tore straight through the pages, so the covers get stripped and plywood pieces cut to the shape of the page block take over as the structure. Three coats of outdoor Mod Podge seal the plywood against moisture, and the outside of the books get coated too so the whole thing wipes clean. She saved the removed pages for another project, which on this page is an easy thing to do.
Get the full tutorial at A Crafty Mix.
3. DIY Book Balls

Scalloped circles punched from book pages, each one pressed around the end of an unsharpened pencil so it scrunches into a little cup with one flat spot, then glued flat spot down onto a styrofoam or ping pong ball. Keep going until the ball disappears under paper. They look like paper hydrangeas from a step back. Heidi’s list of uses is better than the project description: ribbon through the top makes them Christmas ornaments, a bowlful makes a centerpiece, and balanced on the foot of an upturned wine glass they become something far grander than they cost.
Get the full tutorial at Muslin and Merlot.
4. Book Page Gift Bags
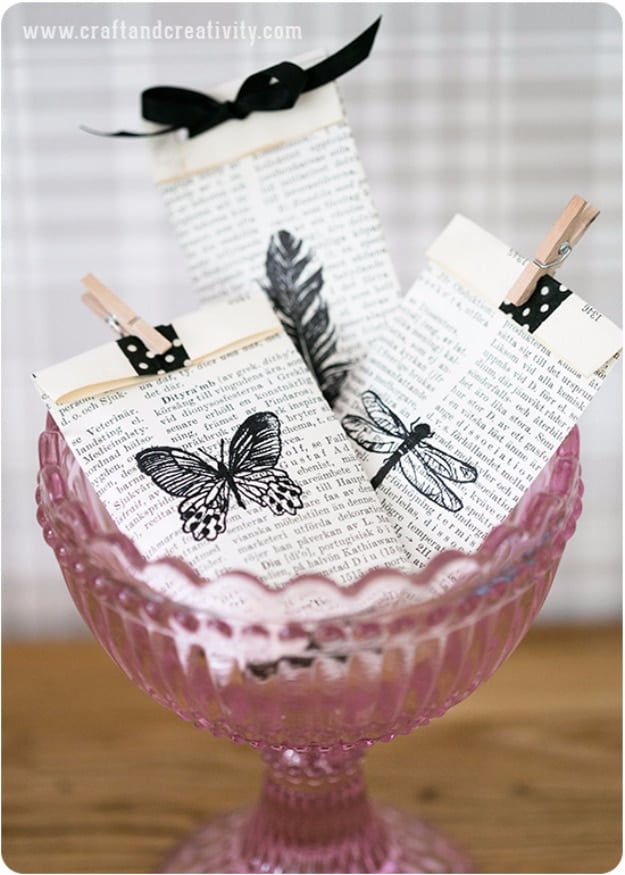
Gift bags folded from the pages of a flea market dictionary, using the same folding method as a party bag, so there is no pattern to print and no sewing unless you want it. Helena’s order of work is the one to follow: stamp the pages first, fold second, because stamping a folded bag is a fight. Close them with a miniature 25mm clothes pin, or punch two holes at the top and thread a satin ribbon through. If your pages feel too flimsy, a coat of Mod Podge stiffens them. Size follows whatever your book’s pages happen to be.
Get the full tutorial at Craft & Creativity.
5. Heart Garland From Old Books
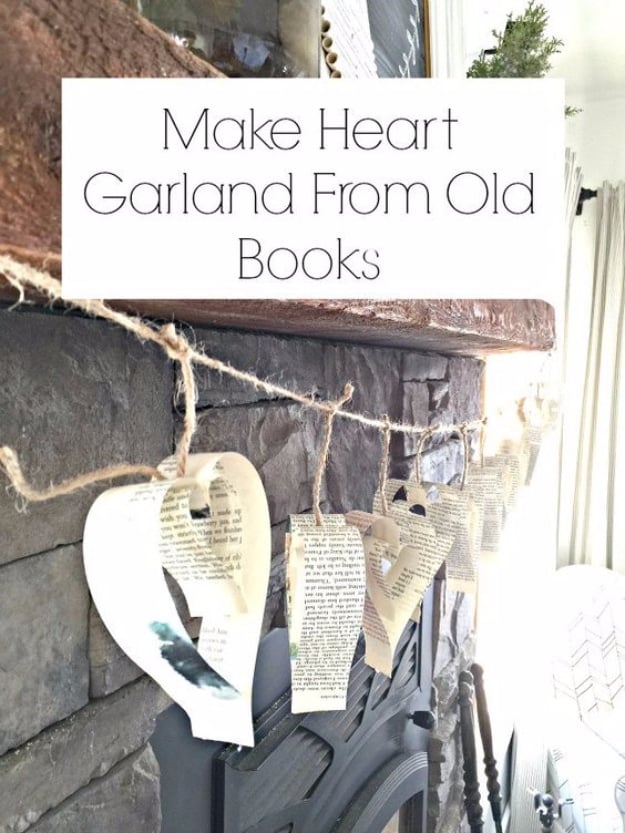
A dime a piece for a shelf of old Reader’s Digest volumes is how this one starts. Tear out a handful of pages and cut them into consistent strips with a paper cutter, some full page length and some half, and use a plastic ruler laid on the paper as your width guide if you are unsure. Two strips glued together at the ends form each heart. Hot glue rather than craft glue, purely for speed: the difference is an hour versus a whole day. Strung on sisal twine it reads as soft neutral decor rather than as Valentine’s decorations.
Get the full tutorial at Twelve On Main.
6. DIY Book Page Paper Flower
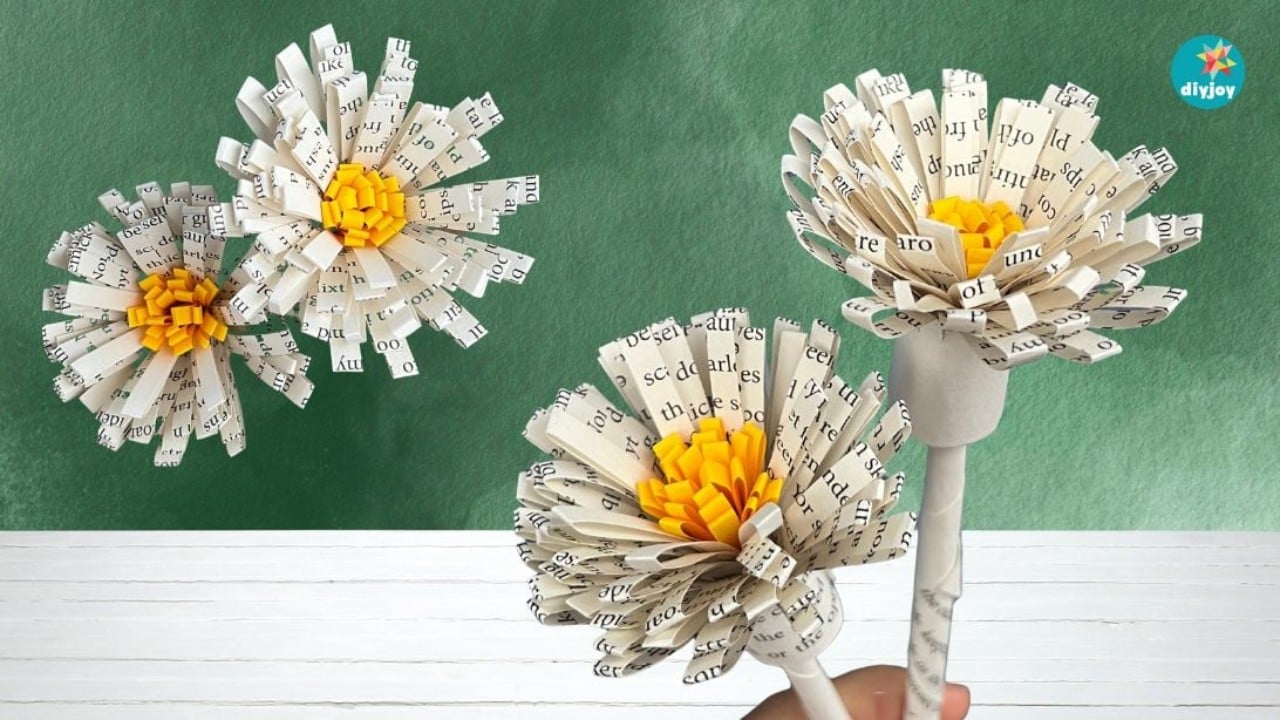
The single best use for a book too damaged to read. A page gets cut in half crosswise, shaped into petals, wrapped around a skewer stem with double sided tape and layered up, and because the paper is already printed and yellowed the flower looks aged without any work at all. Book pages, scissors, a skewer, tape and hot glue is the whole list. Make one for a vase or a dozen for a wreath, and they never wilt or need water. This is the one I would hand a nervous beginner, because a crooked petal just reads as a real flower.
Get the full tutorial at DIY Joy.
7. DIY Deer Book Art
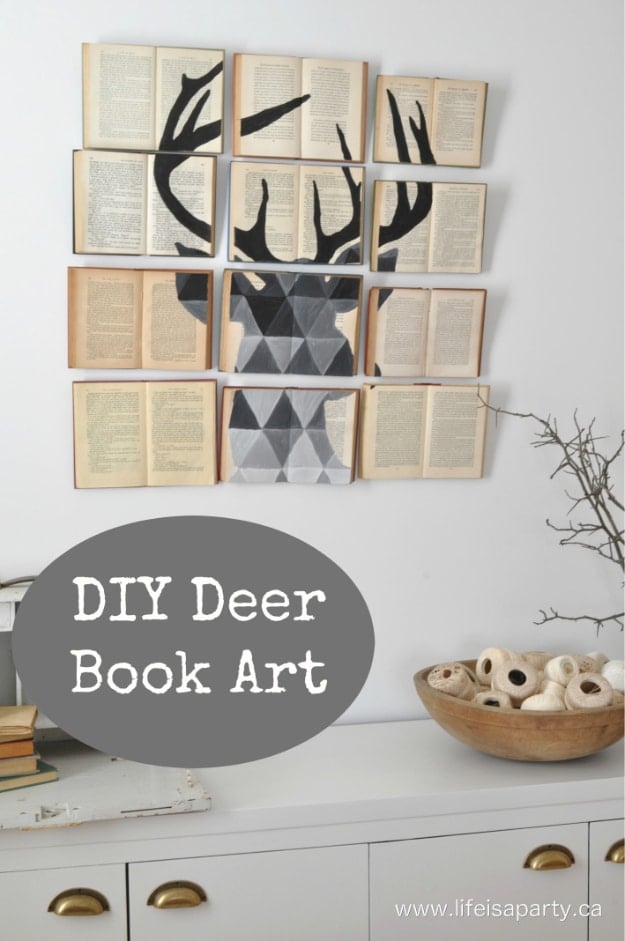
Twelve old books become one large piece of wall art, opened flat and hung in a grid with an image painted across all of them. Getting the books to stay open is the part that took trial and error: gluing the pages was too slow, so she pushed thumb tacks through and glued one page over the top to hide them, and broke paint sticks in half and hot glued those to the back so the books hold their shape hanging. A small nail hammered into the back, left protruding, takes the hanging string. The deer transfers with carbon paper.
Get the full tutorial at Life is a Party.
8. Book Photo Frame
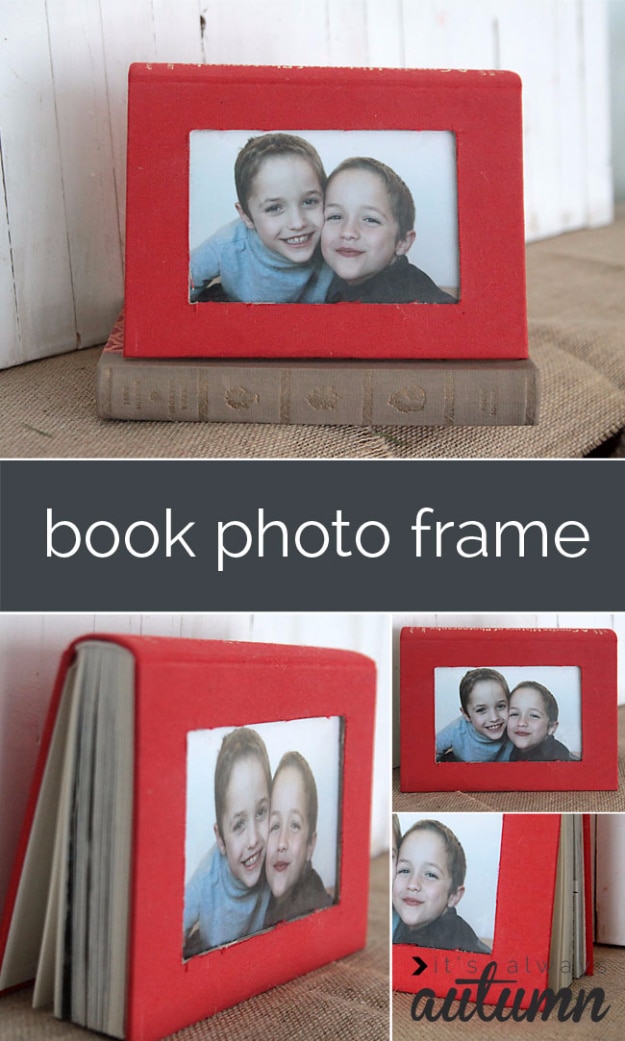
Fifteen minutes, and it damages neither the book nor the photo. A rectangle is cut through the front cover and the top pages so a photo slides in behind and shows through the opening, and because the photo is removable you can swap it whenever you like and still read the book afterward. Use a genuinely sharp Exacto blade, a fresh one if yours has gone dull, and a metal edge ruler. Pick a book whose cover is a solid color rather than covered in words and pictures, which means taking the dust jacket off in the shop to check.
Get the full tutorial at It's Always Autumn.
9. DIY Book Purse
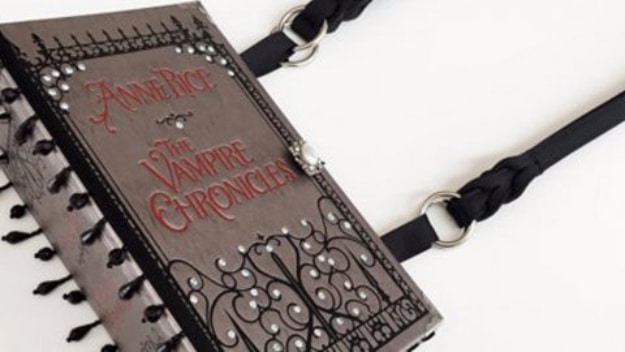
A hardcover with the pages removed and a strap added, and it fools people every time. This is our own post, built around a step by step that shows how the covers become the body of the bag. The appeal is that nobody else in the room has one, which the etsy price of sixty eight dollars for a ready made version rather confirms. Pick a cover you would be happy to carry, since the title is the entire design. There are endless options for handles and embellishments once you understand how the covers hinge.
Get the full tutorial at DIY Joy.
10. Dollar Store Book Topiary DIY
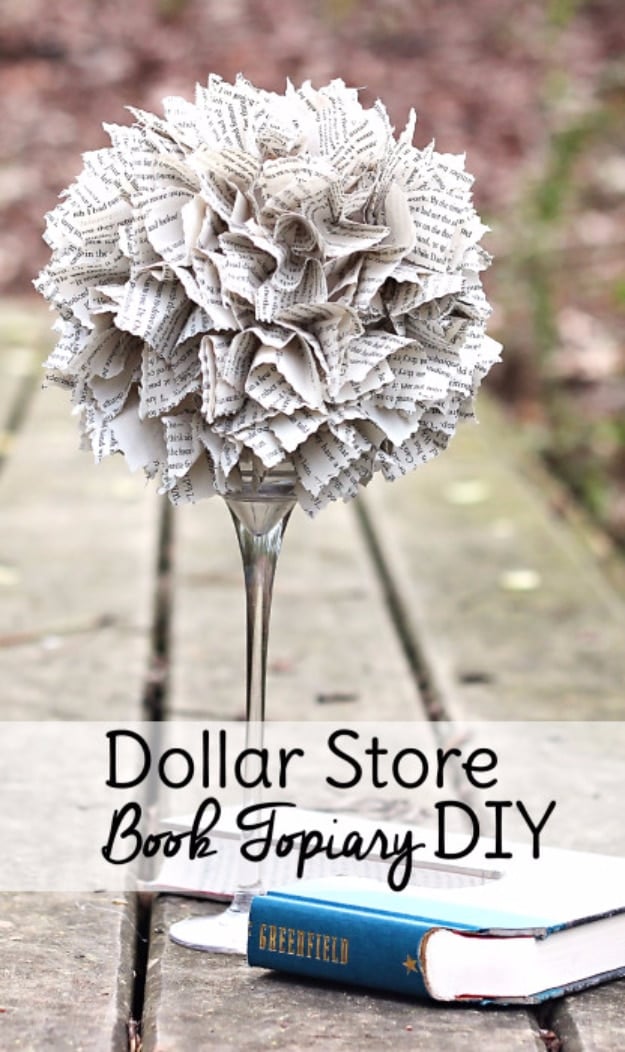
A dollar store candleholder, a four inch styrofoam ball and about fifty pages ripped from a book. Trim the margins off with a paper trimmer, cut the pages with pinking shears or decorative scissors for the ruffled edge, then build them onto the ball until it is covered. Ink the edges on a stamp pad first if you want a rustic finish. Two hours, which is why her step one is to start something on Netflix. And the practical note: if you have pets or small children, epoxy the ball to the candleholder rather than trusting hot glue.
Get the full tutorial at Sweet T Makes Three.
11. Place Card Holders Made Out Of Old Books
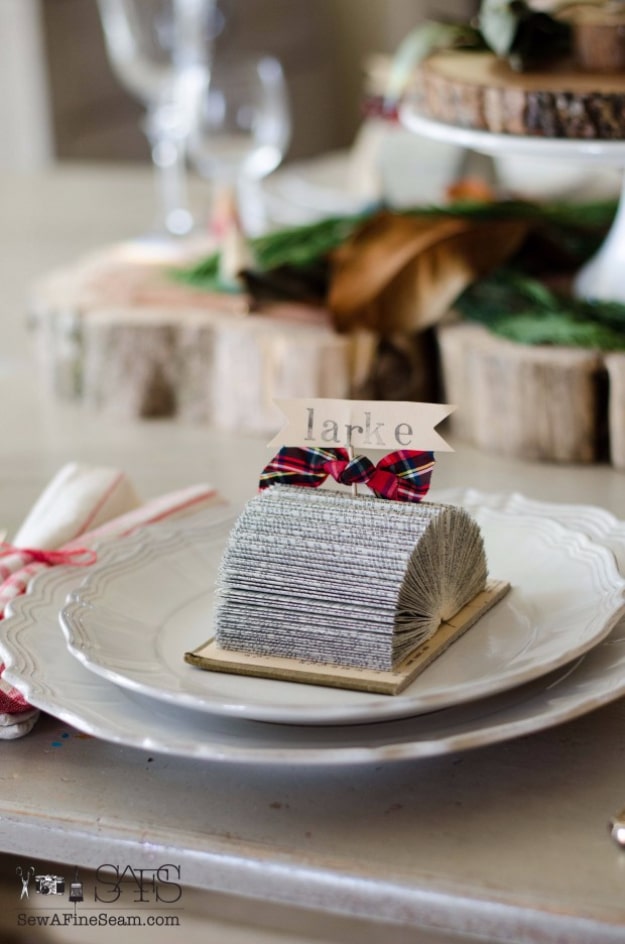
Small blocks cut from an old book, fanned open, with a toothpick pushed in to hold the card. The order is the opposite of what you expect: fold every page in to the spine first, tucking each edge into the center fold, and only then cut the block apart down the spine with a utility knife. Trim the folded block to size with a band saw if you have one. Hot glue sets the shape, a toothpick or a short piece of dowel takes the place card, and ribbon or washi tape dresses the block. Choose a book whose pages do not crumble when folded.
Get the full tutorial at Sew a Fine Seam.
12. DIY Book Flower Vase
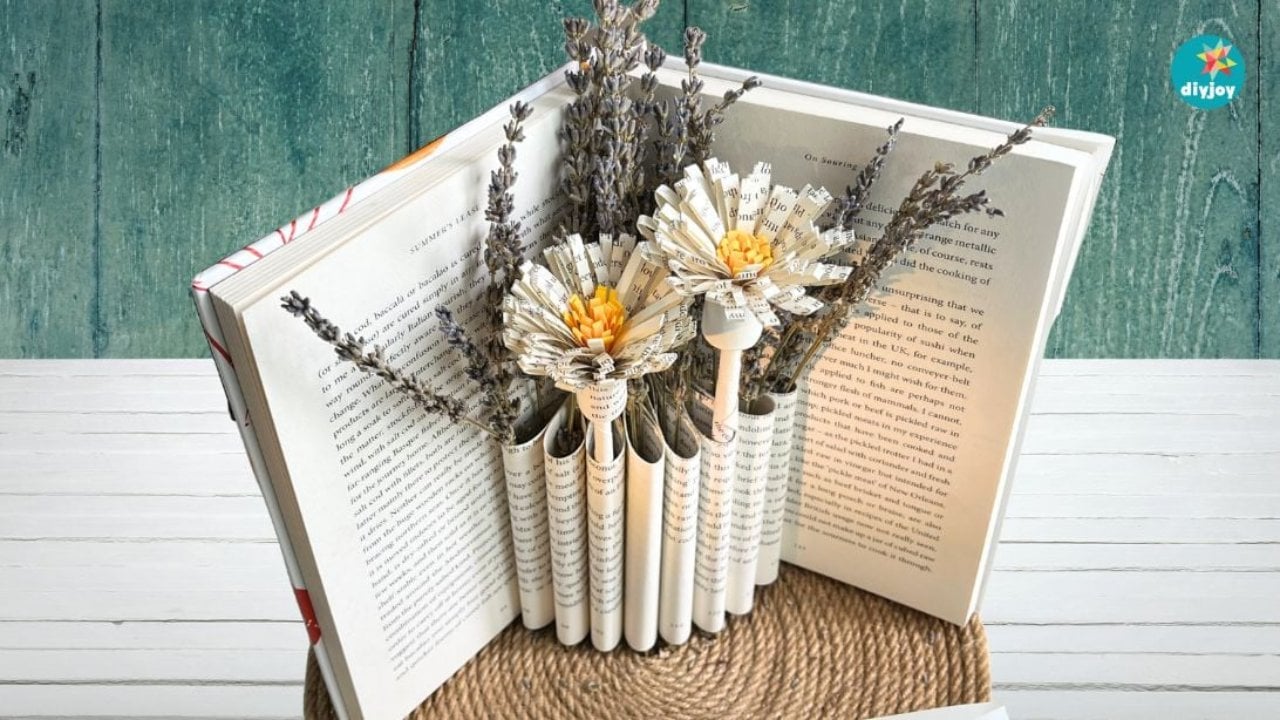
A vase folded out of the book itself rather than one tucked inside a book, so the whole object is paper. It needs an old book, double sided tape, a blade cutter, a ruler and a pencil, and no special tools beyond that. It sits on a shelf with a stem or two in it and looks like something from a boutique, for whatever you paid for the book. Pair it with the book page paper flowers further up this list and the entire arrangement, vase and blooms both, comes out of the same donated hardcover.
Get the full tutorial at DIY Joy.
13. Old Book Clock
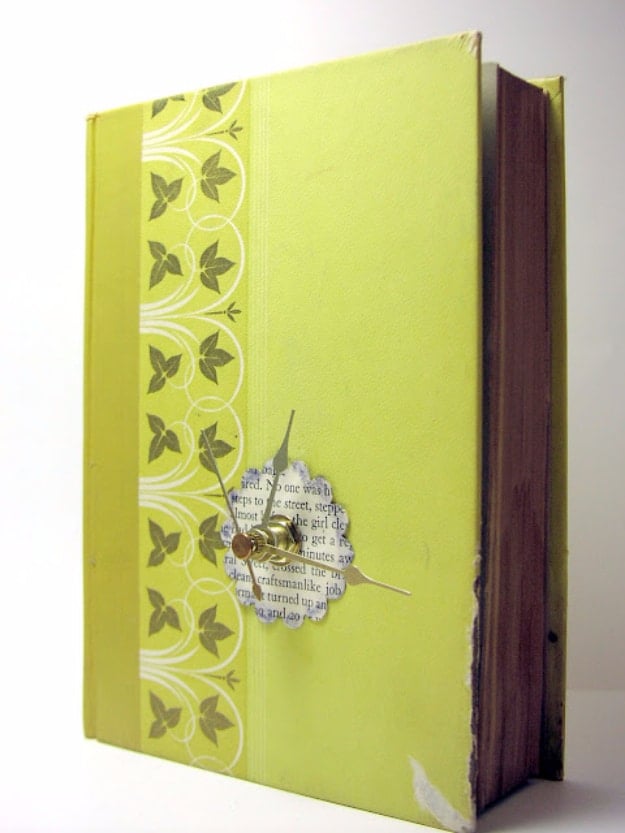
A clock mechanism fitted into an old book, hung on a wall or stood on a shelf. Candice sold hers for a few years and learned the trade offs the hard way. The hidden mechanism version looks the most elegant but is the most work. A hollowed version needs every page glued into a solid block, or drilling straight through a slim hardcover will warp it, and it needs something holding the cover shut, for which small velcro rounds work well. Children’s books that are wrecked inside but fine outside make the best ones. Her favorite was The Giving Tree, with the falling apple as the twelve.
Get the full tutorial at the ReFab Diaries.
14. DIY Book Vase Planter
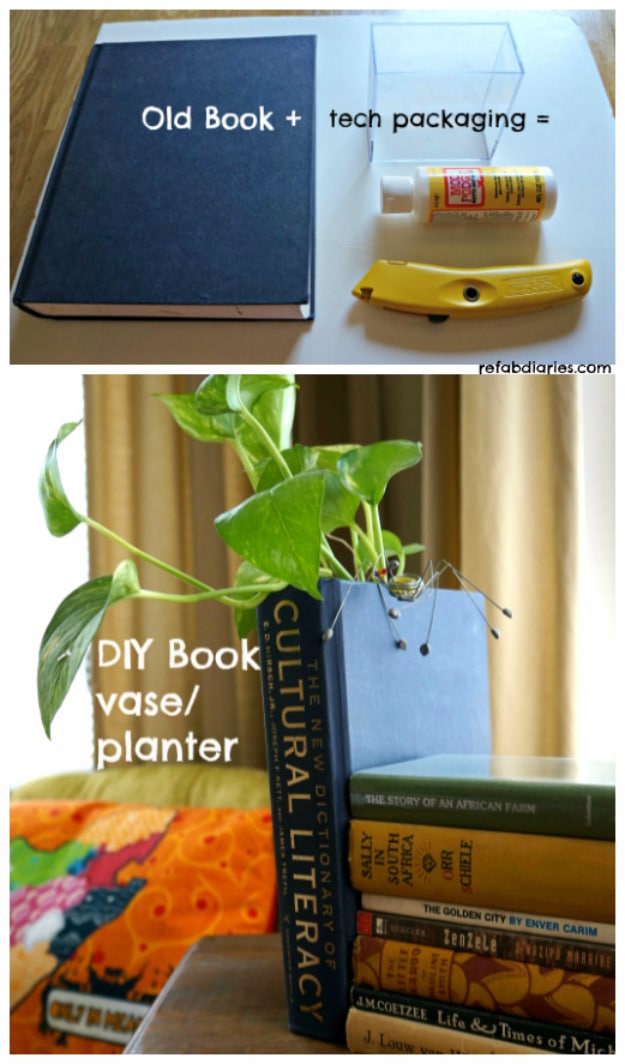
A rigid plastic package, the kind electronics come in, cut down and dropped inside a hollowed hardback to hold water or soil. Because the packaging will almost never fit the book exactly, Candice’s workaround is the useful part: cut only about halfway down and leave the lower pages intact as a shelf for the smaller container to sit on. Mod Podge seals and stiffens the cut pages. This one won Woman’s Day’s first DIY challenge in its original form. If you hate the book’s title, cover it, which is a project of its own further down this list.
Get the full tutorial at the ReFab Diaries.
15. DIY Cell Phone Charging Book
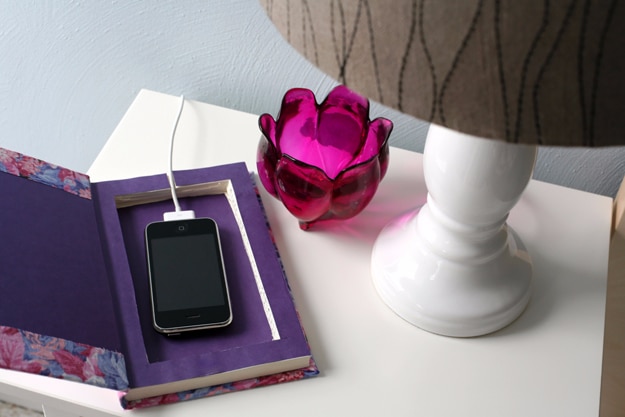
Three steps and one detail that makes it work. Hollow the book to fit your phone, using Mod Podge as you go to seal and stiffen the pages into a solid compartment. Then cut a small notch in the side of the page block for the cable, and cut it slightly narrower than the cable itself, because a snug notch grips the cord and stops it sliding out or dropping behind the nightstand every time you open the book. Feed the cable through, set the phone in and close the cover. The side effect is the real selling point: the phone is out of sight, so it stops lighting up the room at 2am.
Get the full tutorial at CaughtOnAWhim.com.
16. Old Book Lantern
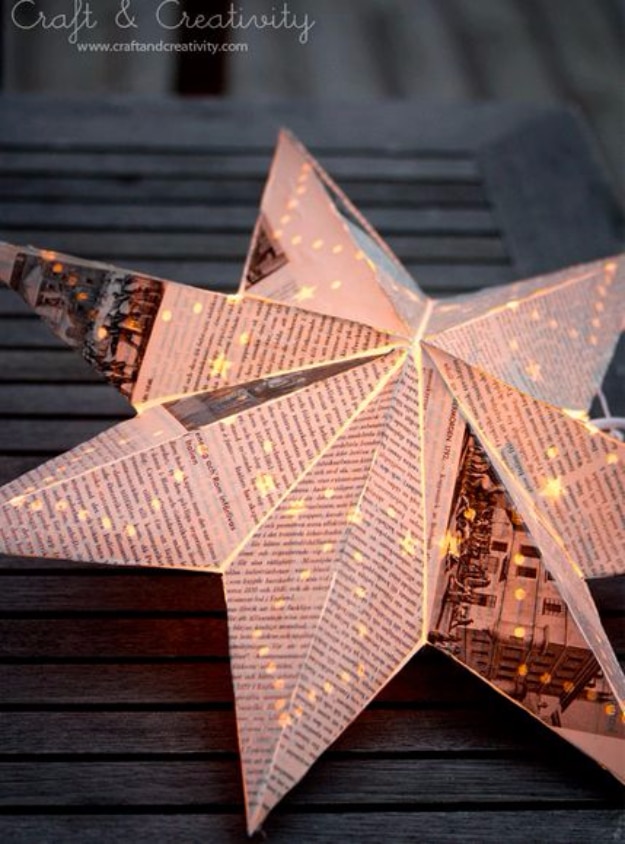
A ready made paper Advent star covered point by point in pages from an old encyclopedia and sealed with decoupage lacquer, which lights from inside and glows through the print. Helena’s method is worth the click: cut one triangular template that fits a single point, use it to cut every piece of paper, then brush lacquer on, lay the paper down and smooth it with your fingers, one point at a time, turning the star over to do the other side. Trim uneven edges with scissors afterward. She used gloss and says she would choose matte if she did it again.
Get the full tutorial at Craft & Creativity.
17. Repurposed Book Flower
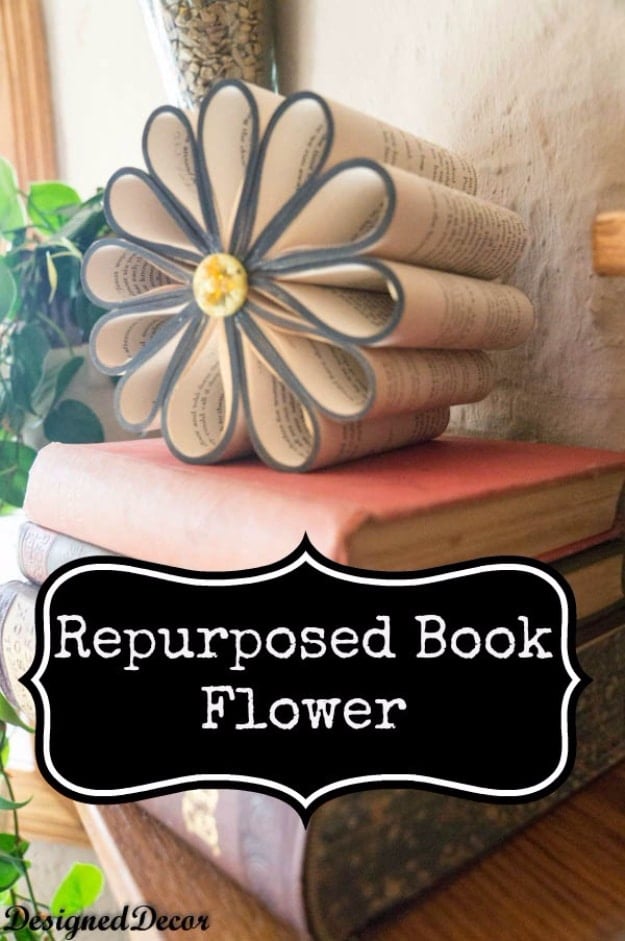
A whole book, cut in half across the middle, becomes one large paper flower with the two halves glued together to double the petals. Mark a straight line down the center of the outside pages, cut four or five pages at a time by hand with scissors, then use a hacksaw for the binding, which is the only power tool decision here. Spray paint the page edges before you start, black for a rustic contrast against yellowed paper, or stain them. Debbie counted her pages and divided them evenly so the petals came out the same size, and says you can just eyeball it.
Get the full tutorial at Designed Decor.
18. Book Page Pumpkin
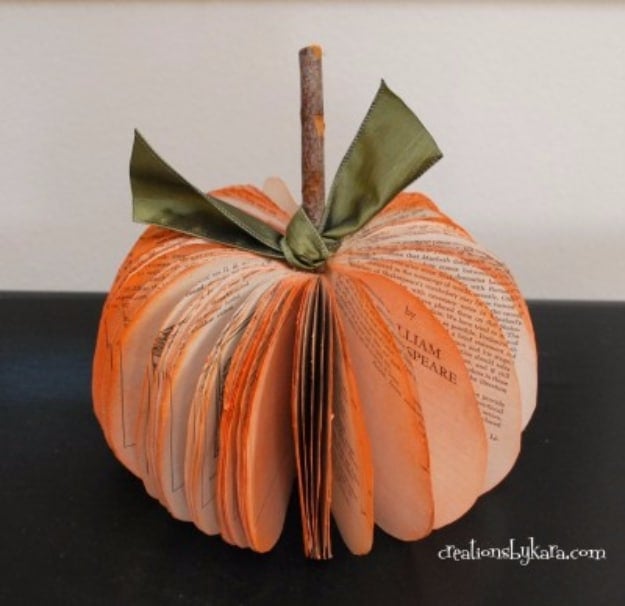
A paperback, not a hardcover, and the binding stays on. Draw half a pumpkin on folded paper so it comes out symmetrical, take the cover off the book and lay the pattern with the fold against the binding edge, then cut through five or six pages at a time with scissors. After the first pass, pull the excess pages over toward the binding and they tear right off. Kara’s hard won tip is to cut slightly inside your pencil line each time, or the pumpkin grows with every pass. Glue the back page around to the front, add a stick stem and a scrap of ribbon.
Get the full tutorial at Creations by Kara.
19. Make New Books Look Old
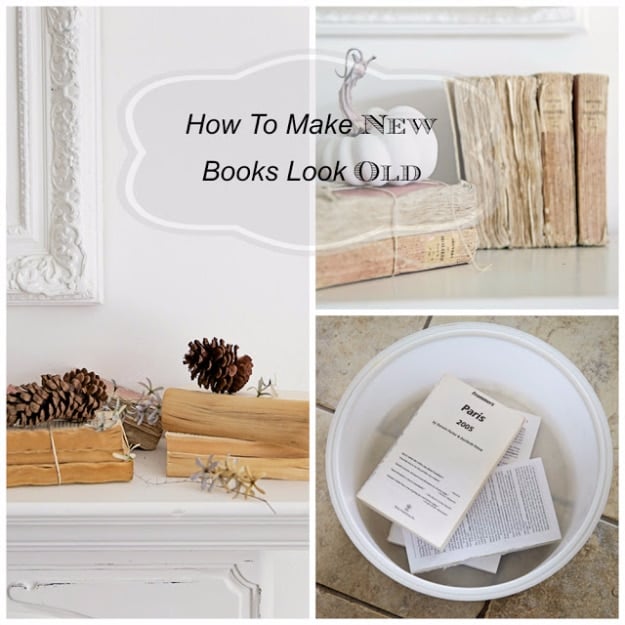
The reverse of everything else on this page, and useful precisely because genuinely old books are getting expensive. Start with paperbacks nobody would miss, outdated travel guides are ideal, from a thrift store or a yard sale. Janet makes the practical case for using new paper made to look old rather than hunting the real thing: aged paper has issues that recreated aging does not. The finished stack does the same job in a vignette, giving height to objects and adding texture when you turn them so the ruffled page edges face out.
Get the full tutorial at Shabbyfufu.
20. DIY Snowflake Covered Books
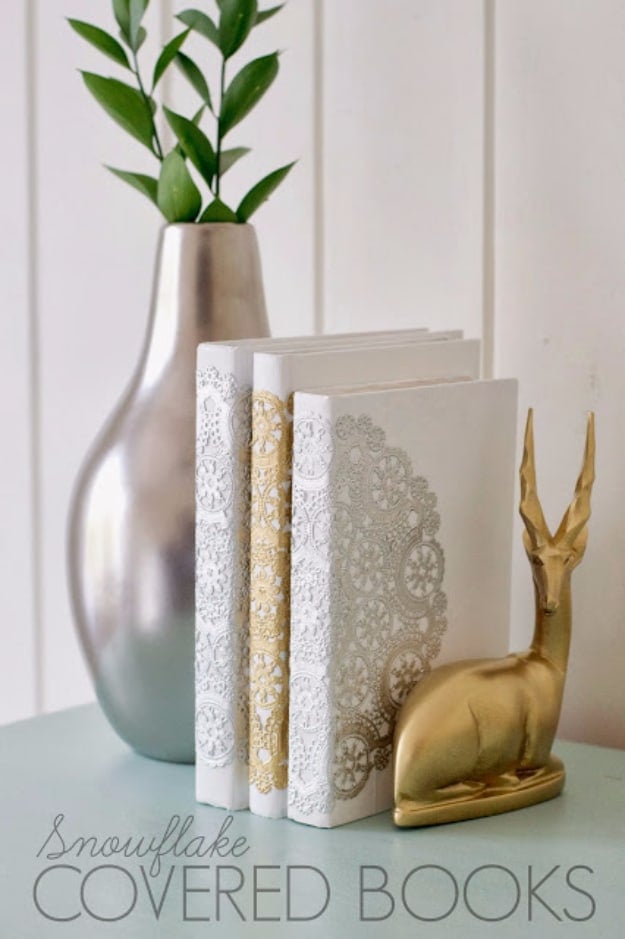
Books painted white and decoupaged with foil baking doilies, which is a two dollar way to get a stack of matching white winter decor. Prime first, then paint, and Virginia used leftover semi gloss house paint on hers rather than buying anything. Mod Podge holds the doilies on; she used matte because it was what she had and recommends gloss for a more finished look. The doilies are the whole trick, since a foil baking doily reads as a snowflake from across a room. They also make a good handmade gift with a message written inside the cover.
Get the full tutorial at LiveLoveDIY.
21. DIY Old Book Accordion Organizer
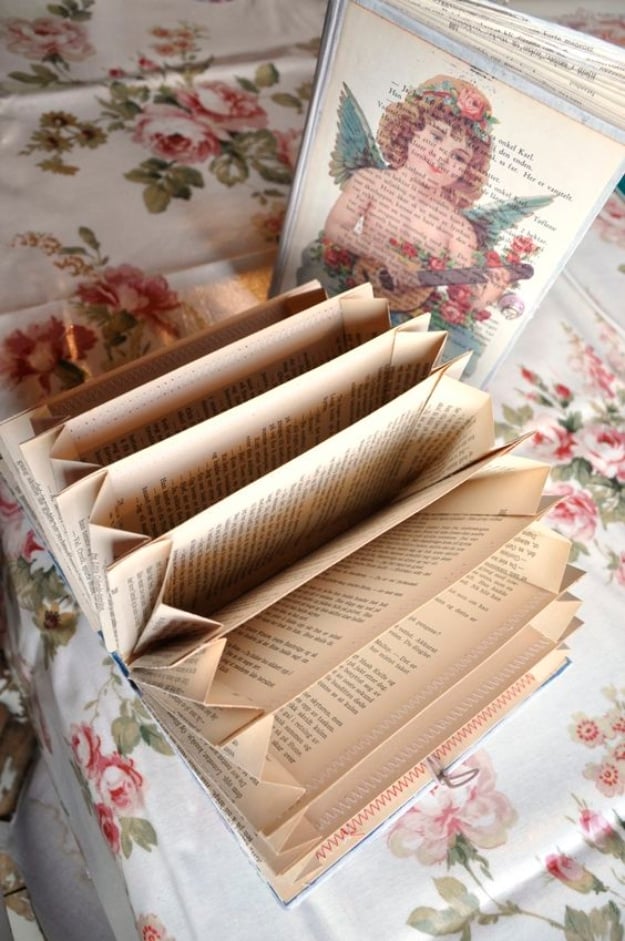
An accordion file made from the book itself, which is the cleverest thing on this page. Divide the book into eleven sections with post it notes, each covering two adjacent pages, and that gives you ten pockets. Cut out every page between the dividers, sew or glue the divider pages together, then trim twelve of the cut pages to matching width and accordion fold each into eight equal sections. Glue them three at a time into long strips and work from the back of the book forward. Close the book between gluing each pocket so nothing twists. Gesso the cover and decorate.
Get the full tutorial at Wings of Whimsy.
22. Turn an Old Book into a Book Box
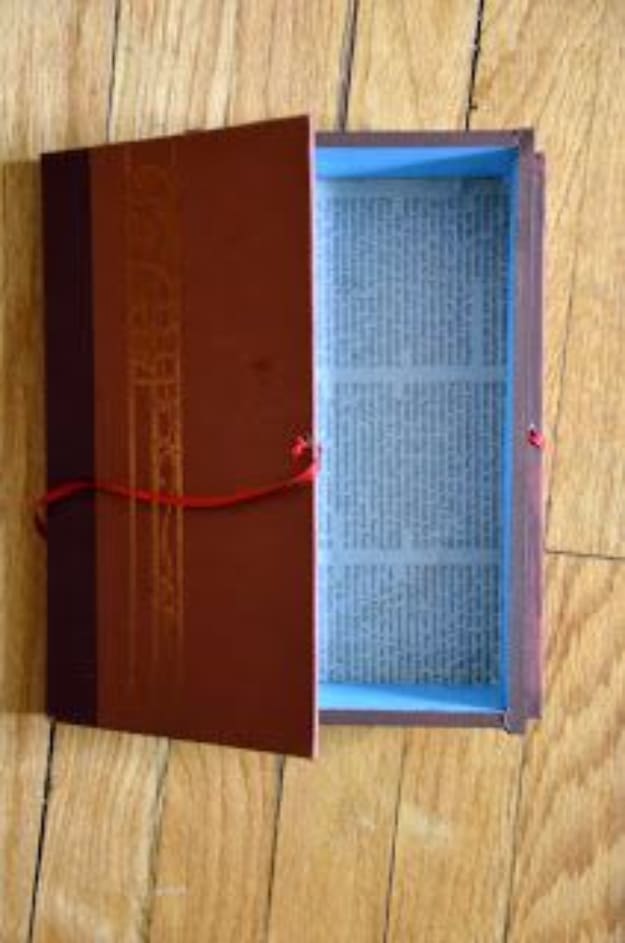
A secret storage box with a real wooden frame inside it, which is the difference between this and a simple hollowed book. You need a book at least two and a half inches thick, and thrift stores are full of them. Cut the inside out with a craft knife, measure an eighth of an inch in from each corner to mark where the box goes, then cut side, top and bottom pieces of thin wood to those measurements and hot glue them in one at a time. Korrine’s honest warning: sawing wood is harder than it looks, and she cut her pieces twice. Fill any gaps with hot glue.
Get the full tutorial at Hello There Handmade.
23. Boxes Covered With Old Books
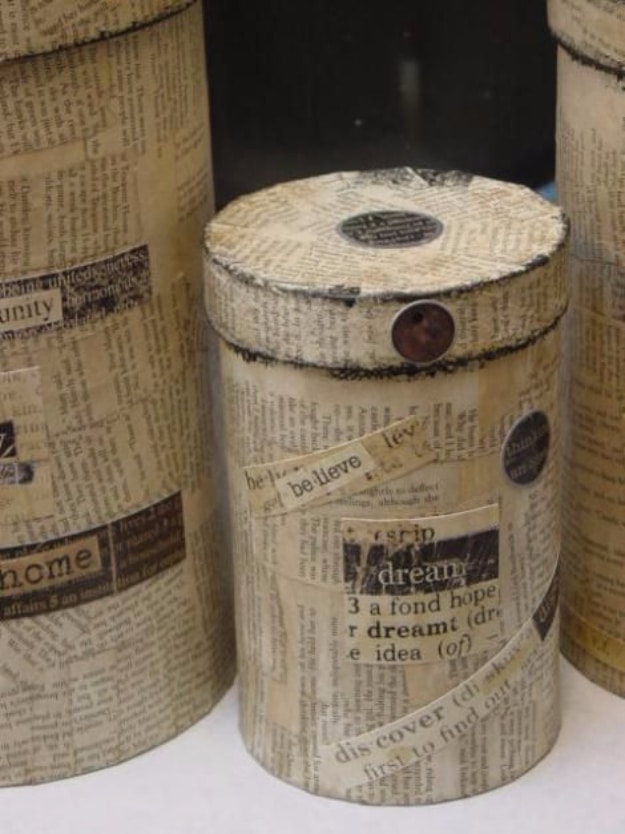
Liquid laundry starch, not glue, and it will cover almost anything including furniture. Tear the pages into small pieces first, smaller still for curved lids, and keep a stash torn and ready so you can start the moment you feel like it. Shake the bottle, pour an inch into a shallow pan, dip each piece until it is fully covered, squeeze off the excess and lay it on with a slight overlap. The blue color dries clear. Leave a paper’s thickness of room at the rim of anything with a lid or it will no longer fit. Curled edges after drying take a drop more starch and a rub.
Get the full tutorial at AJ's Trash2Treasure.
24. DIY Paper Star Ornament
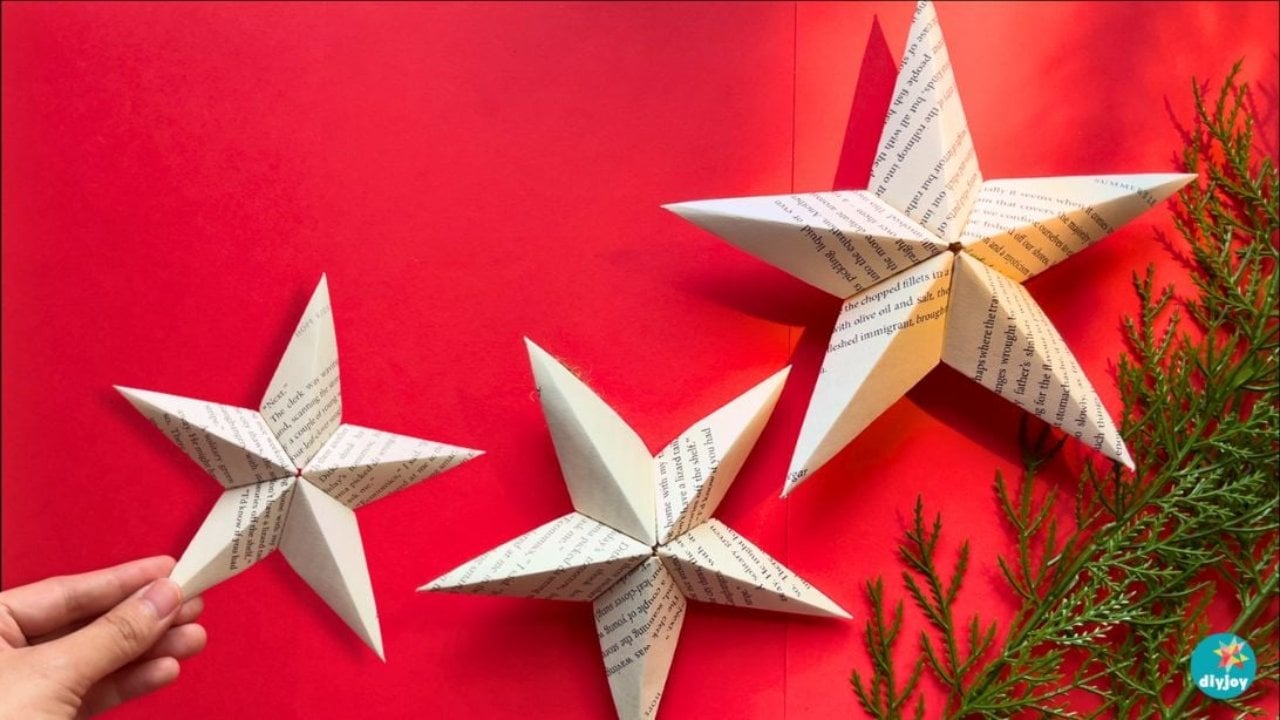
Book pages folded and joined into a three dimensional star, which is the project that turns one tired old book into a whole box of ornaments. Book pages, scissors and glue is the entire supply list. Printed paper gives them a warmth that plain white card never manages, and because the folds repeat you get noticeably better by about the fourth one. Hang them on the tree, string them into a garland or tie one onto a wrapped gift. Paper crafts are what I love making most, and this is the shape I come back to every year.
Get the full tutorial at DIY Joy.