There is a particular kind of satisfaction in taking a hammer to a chipped plate on purpose. These broken tile projects turn the pile of offcuts in the garage and the dish that came out of the dishwasher in pieces into pots, trays, coasters, a watering can and wall art that looks like it cost something. Broken china counts too, and honestly it is the better material, because the roses and willow patterns on old plates give you detail you simply cannot buy in a tile shop. Most of these want the same four things: nippers, a strong adhesive, a bag of sanded grout and a sponge. Wear the safety glasses. Every project below links back to the maker who made it.
DIY Ideas Made With Broken Tile
1. PVC Pipe Planter
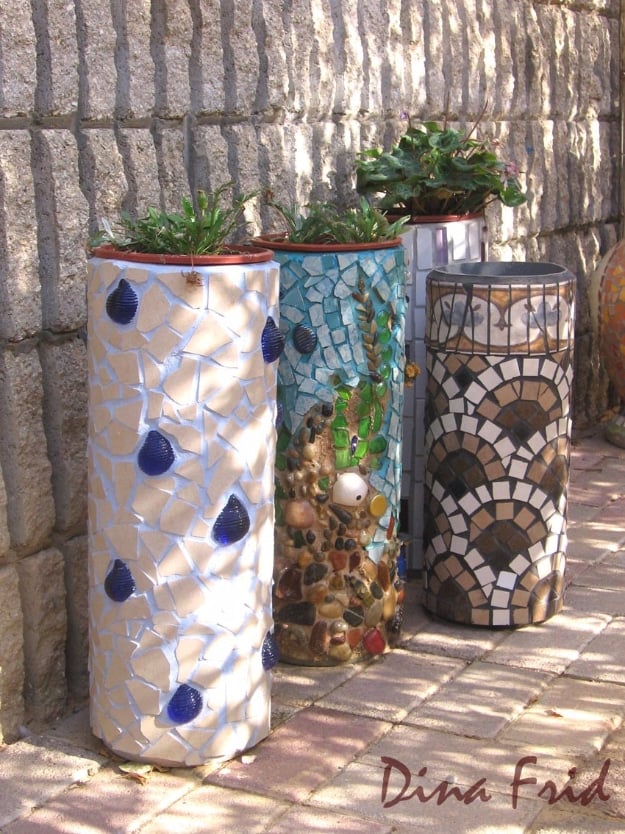
A length of PVC drainpipe is the cheapest tall planter base in existence, and once it is covered in mosaic nobody can tell what is underneath. Offcuts from a plumbing or guttering job are exactly what you want. The materials list is short: mosaic squares in glass, ceramic or plastic, plus broken tiles, pebbles and shells for texture, tile adhesive and grout. Height is the point, because a column lifts the planting to eye level where a pot on the ground disappears. Cut the pipe to several different lengths, or a row of identical columns reads as far too tidy.
Get the full tutorial at Színes Ötletek.
2. Broken China Mosaic Pots
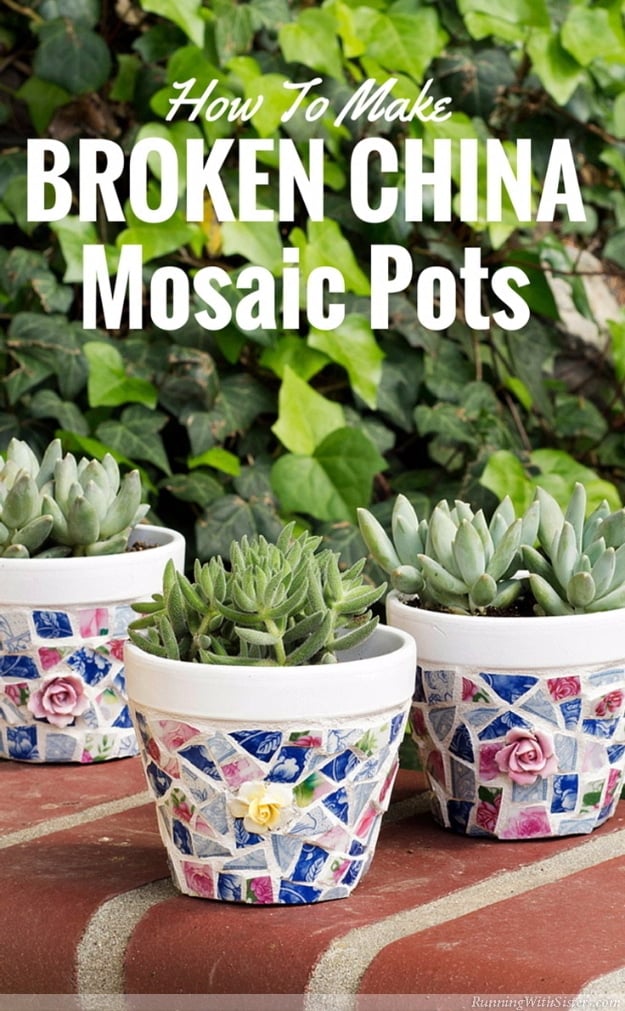
Start with plain 4 inch terra cotta pots and spray them white, so the grout lines and the china read cleanly instead of fighting an orange background. Bag up five to seven flea market plates and break them with nippers into roughly half inch pieces, about ninety to a hundred per pot. Leave an eighth of an inch between pieces for the grout. Mix sanded white grout to the consistency of peanut butter and work fast, because it stays usable for only about fifteen minutes. Buff the haze off with a damp sponge and seal after a day.
Get the full tutorial at Kenarry.
3. Watering Can
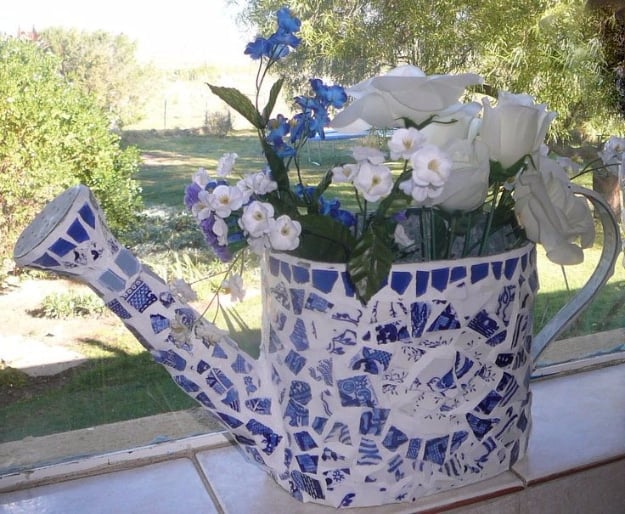
Galvanized tinware takes mosaic beautifully, and hot glue is genuinely enough to hold china onto it. Break the plates on a wooden board under a thick cloth, two or three strikes, wearing eye protection, then sort the pieces by color and pattern before anything gets stuck down, or the finished can just looks like a smashed plate. Work the border and edge pieces first, place your feature fragments next and fill around them. White grout goes on with a wooden ice cream stick, gets sponged after a few hours and buffed with a dry cloth.
Get the full tutorial at Practical Pages.
4. Outdoor Chandelier
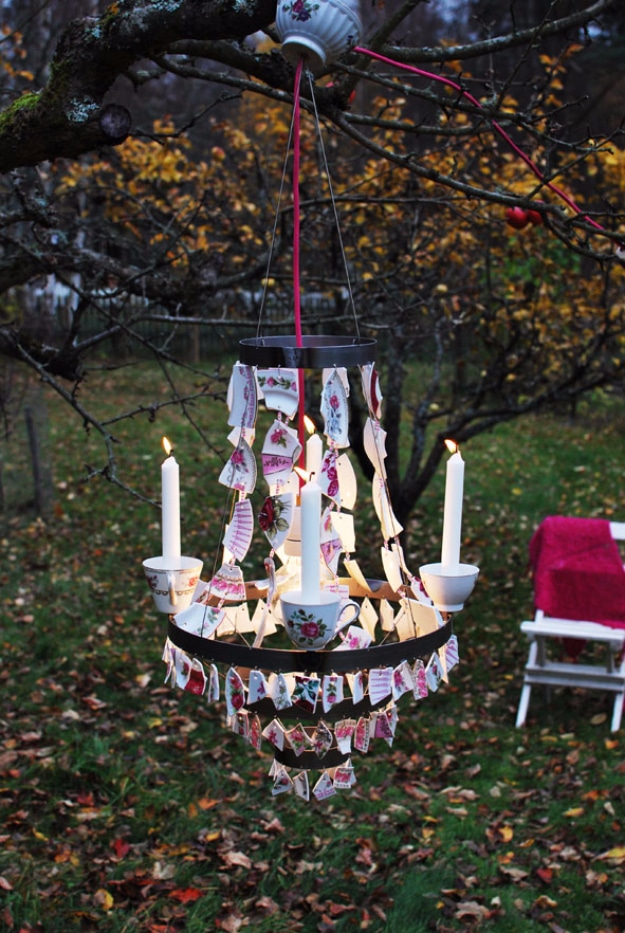
A chandelier hung from a tree branch is the sort of thing that makes an ordinary garden look staged, and a mosaic one takes candles rather than bulbs, so there is nothing to wire. The frame is a metal chandelier body with the china built up across the arms and the lower tier and real candles seated in the cups. The maker rust-proofed the rings on this one and left a second one bare to weather, and says she still cannot pick between them. Bring it out for an evening rather than leaving it outside all winter.
Get the full tutorial at Familjen i Uttran.
5. Tile Tree Mosaic
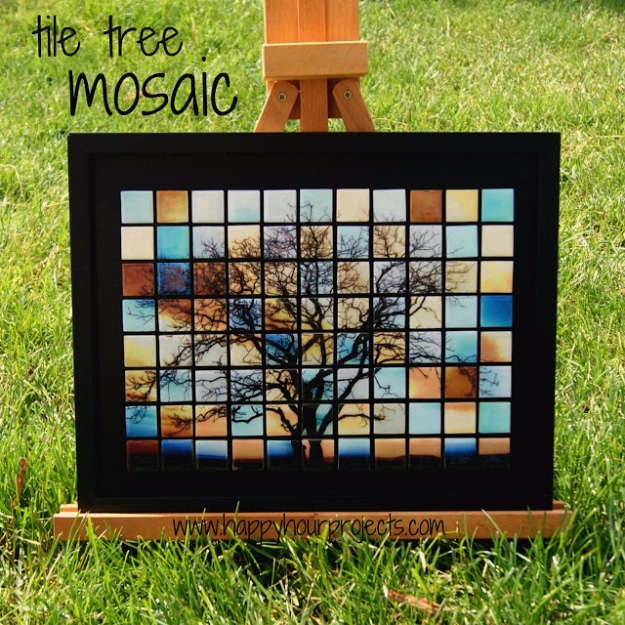
This one is a different technique entirely: instead of broken pieces, a photograph of a tree is printed across four color variations, cut into one inch squares and mounted onto eighty eight one inch glass tiles. Matte Mod Podge holds the paper on, then Dimensional Magic goes over the top for the gloss and depth. Let that settle before using it and never shake the bottle, or you get bubbles you then have to chase out with a toothpick. Keeping the cut squares in order is the genuinely hard part. Around four hours plus drying.
Get the full tutorial at Happy Hour Projects.
6. Tile Mosaic Coaster
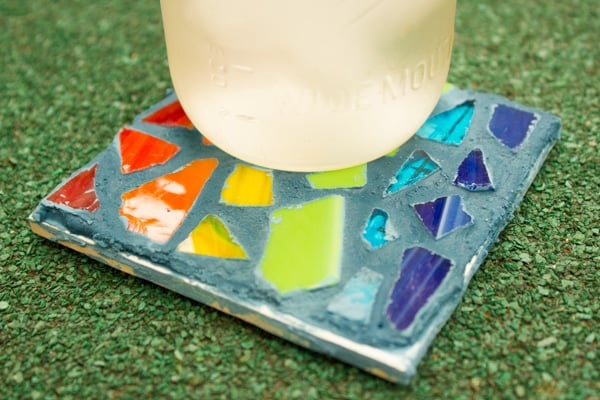
A single leftover tile from a bathroom job is the whole base, and this is the most forgiving mosaic on the list. Wash and dry the tile, then glue your pieces down with ordinary school glue, which is plenty for something this size. Broken glass, pottery, bottle caps, stones and even coins all work. Spread grout with a popsicle stick or a gloved hand, wipe the pieces clean with a damp cloth after ten to twenty minutes, buff with a dry cloth an hour later and let it cure a full day before a glass goes on it.
Get the full tutorial at Crafting a Green World.
7. Custom Mosaic Letter
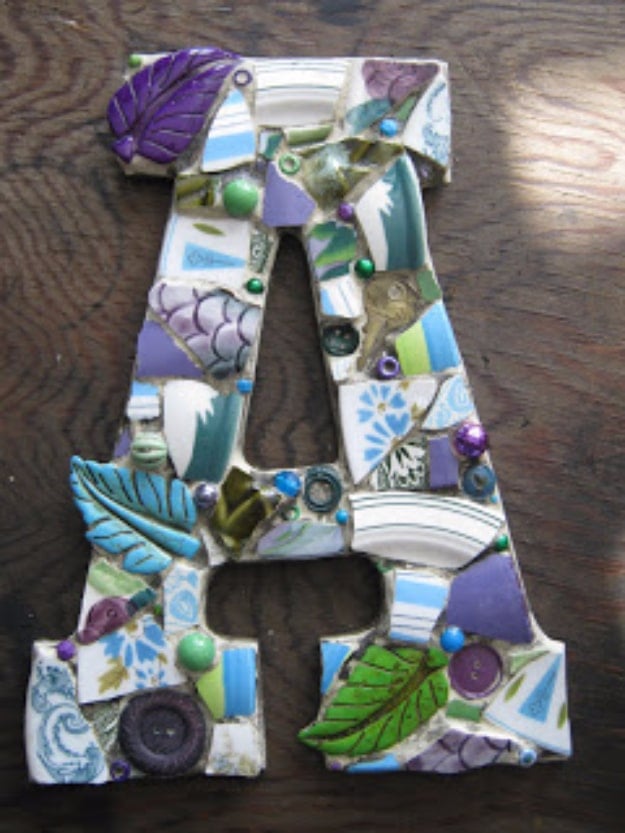
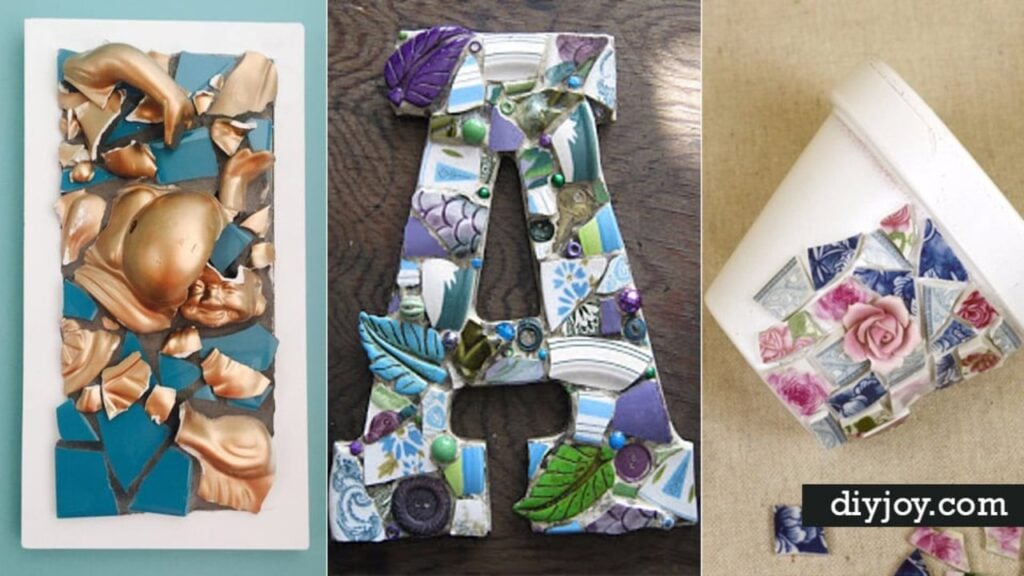
The base is a letter cut from plywood, which is the part most people do not think of and the reason a shop-bought craft letter never looks this good: cut your own and you can make it any size and any font you like. Everything goes on it, broken dishes, buttons, brooches, beads, figurines and carved howlite leaves, so the palette comes from what you have rather than from a tile aisle. Choose a color theme before you start and stick to it, because it is the discipline that stops a mixed-materials piece from looking like clutter.
Get the full tutorial at Kelly Aaron Mosaics.
8. Mosaic Tray

Paint a plain wooden tray white first, then sketch the design onto it in pencil before anything is broken, so you know what shapes you are hunting for. Break patterned ceramic tiles into small pieces and place them one at a time against the sketch rather than scattering and hoping. Plaster or mortar goes on afterwards to fill the gaps and lock everything to the tray. Once it is dry, a damp sponge takes off the dust and polishes the surface. Patience in the arranging is what makes the difference here.
Get the full tutorial at Nazarca.
9. Easy DIY Mosaic Table Using Broken Dishes
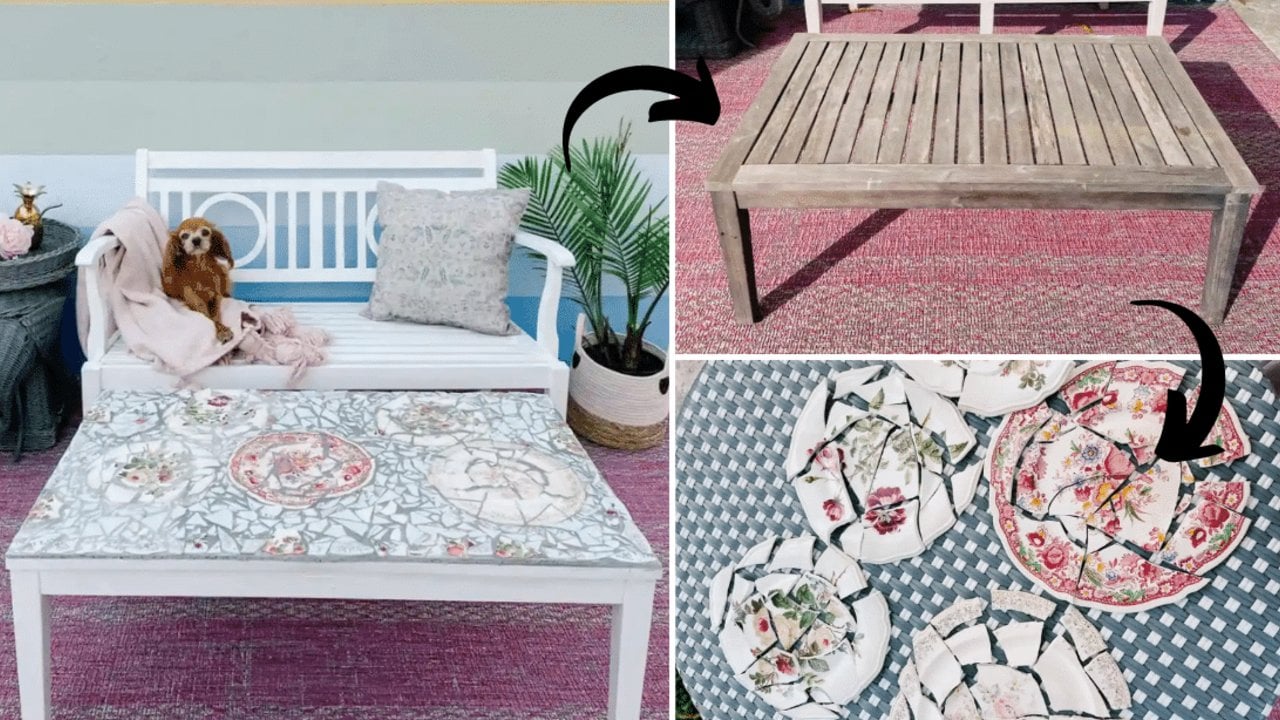
This is the full furniture version: clean the table base with TSP, paint it with white chalk paint, seal it, then cut a quarter inch concrete backer board to fit the top and screw it down. Thrifted dishes get broken with a hammer and cut with tile nippers, sorted by size and laid out in a pattern before any adhesive appears. Tile adhesive goes on with a square notch trowel, the pieces transfer across, then sanded grout is worked in with a rubber float and sponged clean. Seal the tile and grout at the end.
Get the full tutorial at DIY JOY.