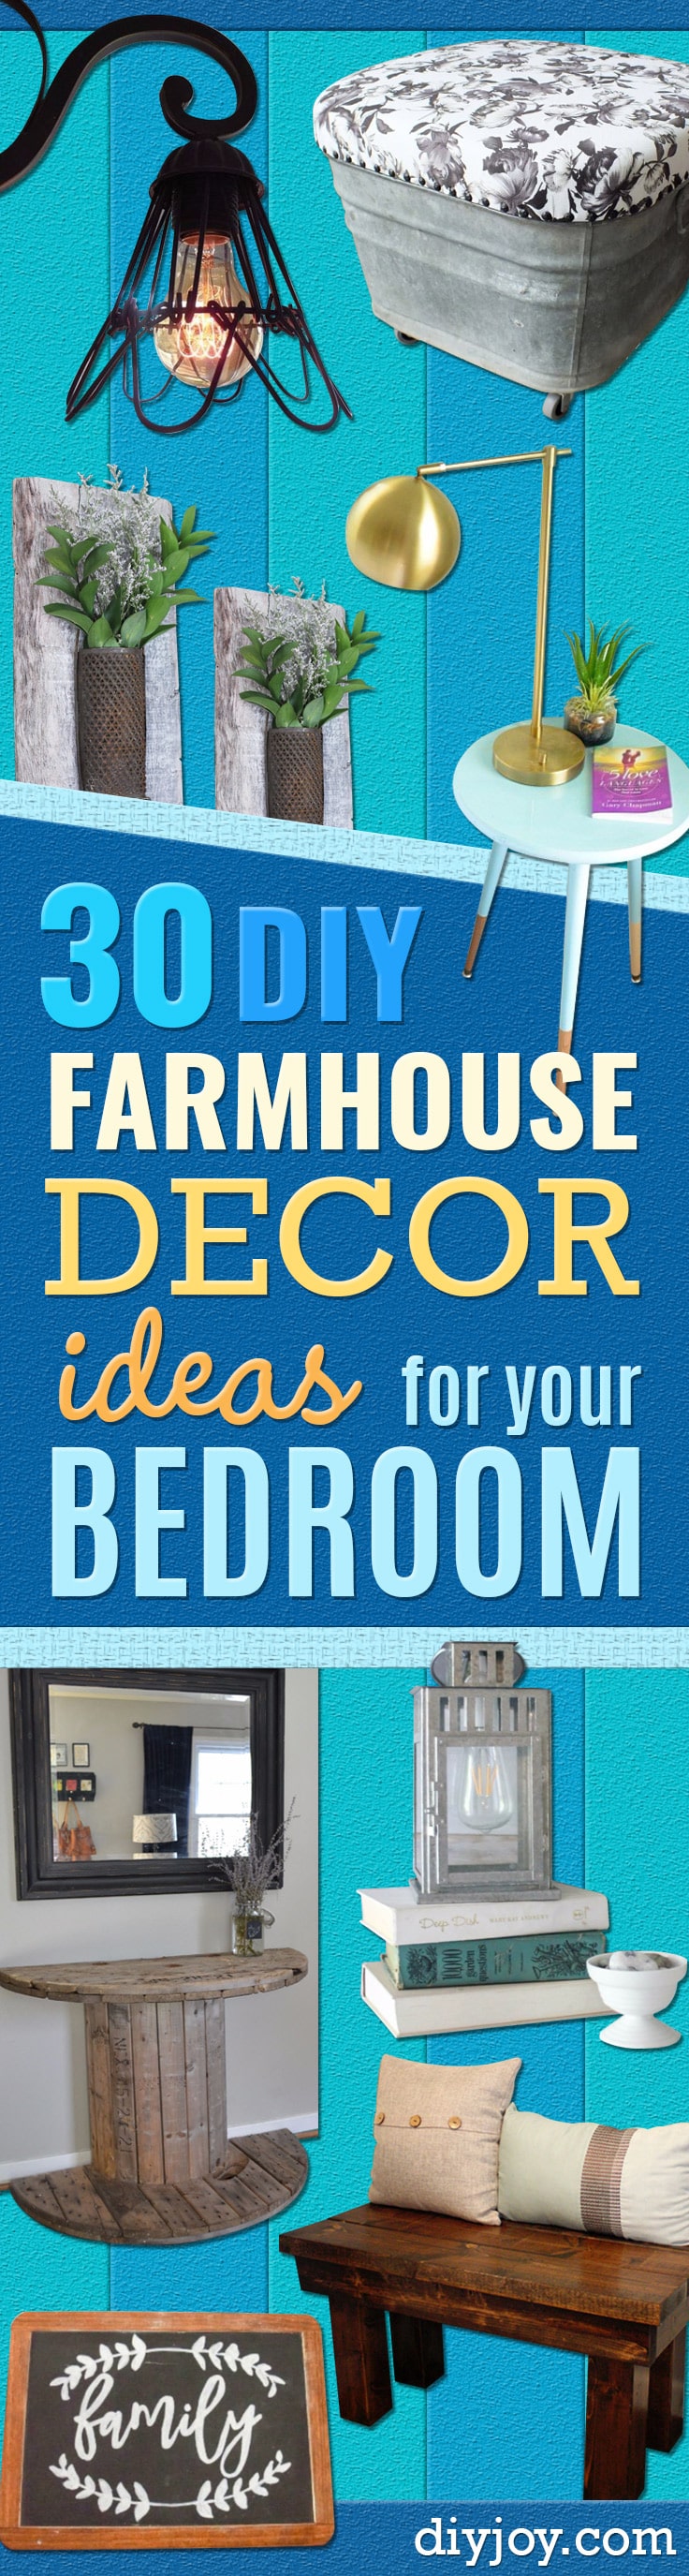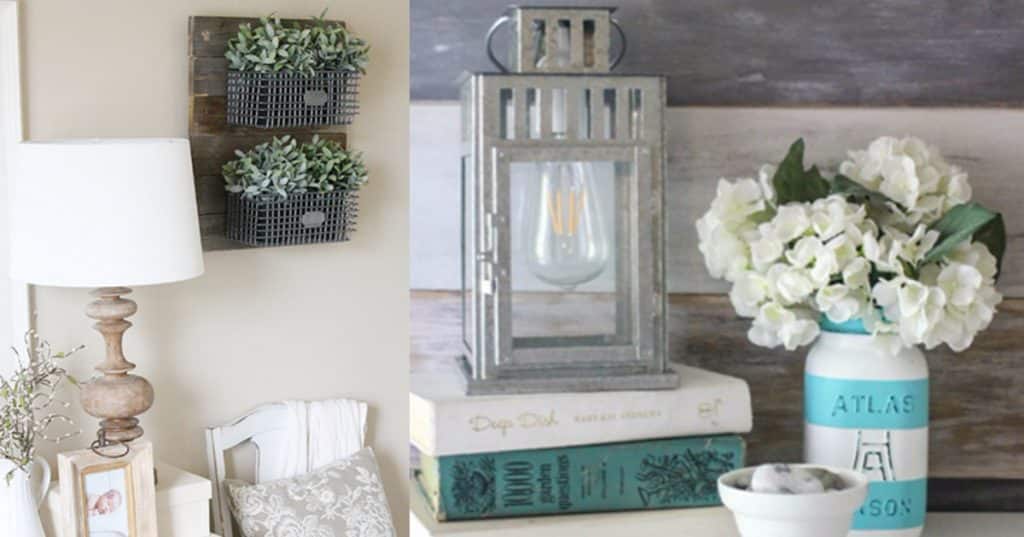
Farmhouse bedrooms get expensive fast, which is funny when you look at what they are actually made of: chicken wire, old window sashes, galvanized wire baskets and tin cans. That is the whole palette. These 18 DIY farmhouse decor ideas for your bedroom work the same trick, and most of them cost less than a throw pillow does at the store. A 6 foot wood curtain rod comes in under $15. Thrift store candlesticks go for a dollar apiece and come out looking like they were salvaged from a chapel. There are hanging wire baskets, a stenciled pillow cover, a lantern wired into a lamp, and a nightstand built from two wooden crates. Start with whichever one needs the fewest tools, because the first finished piece is what makes you keep going.
1. Easy DIY Rustic Nightstand Tutorial
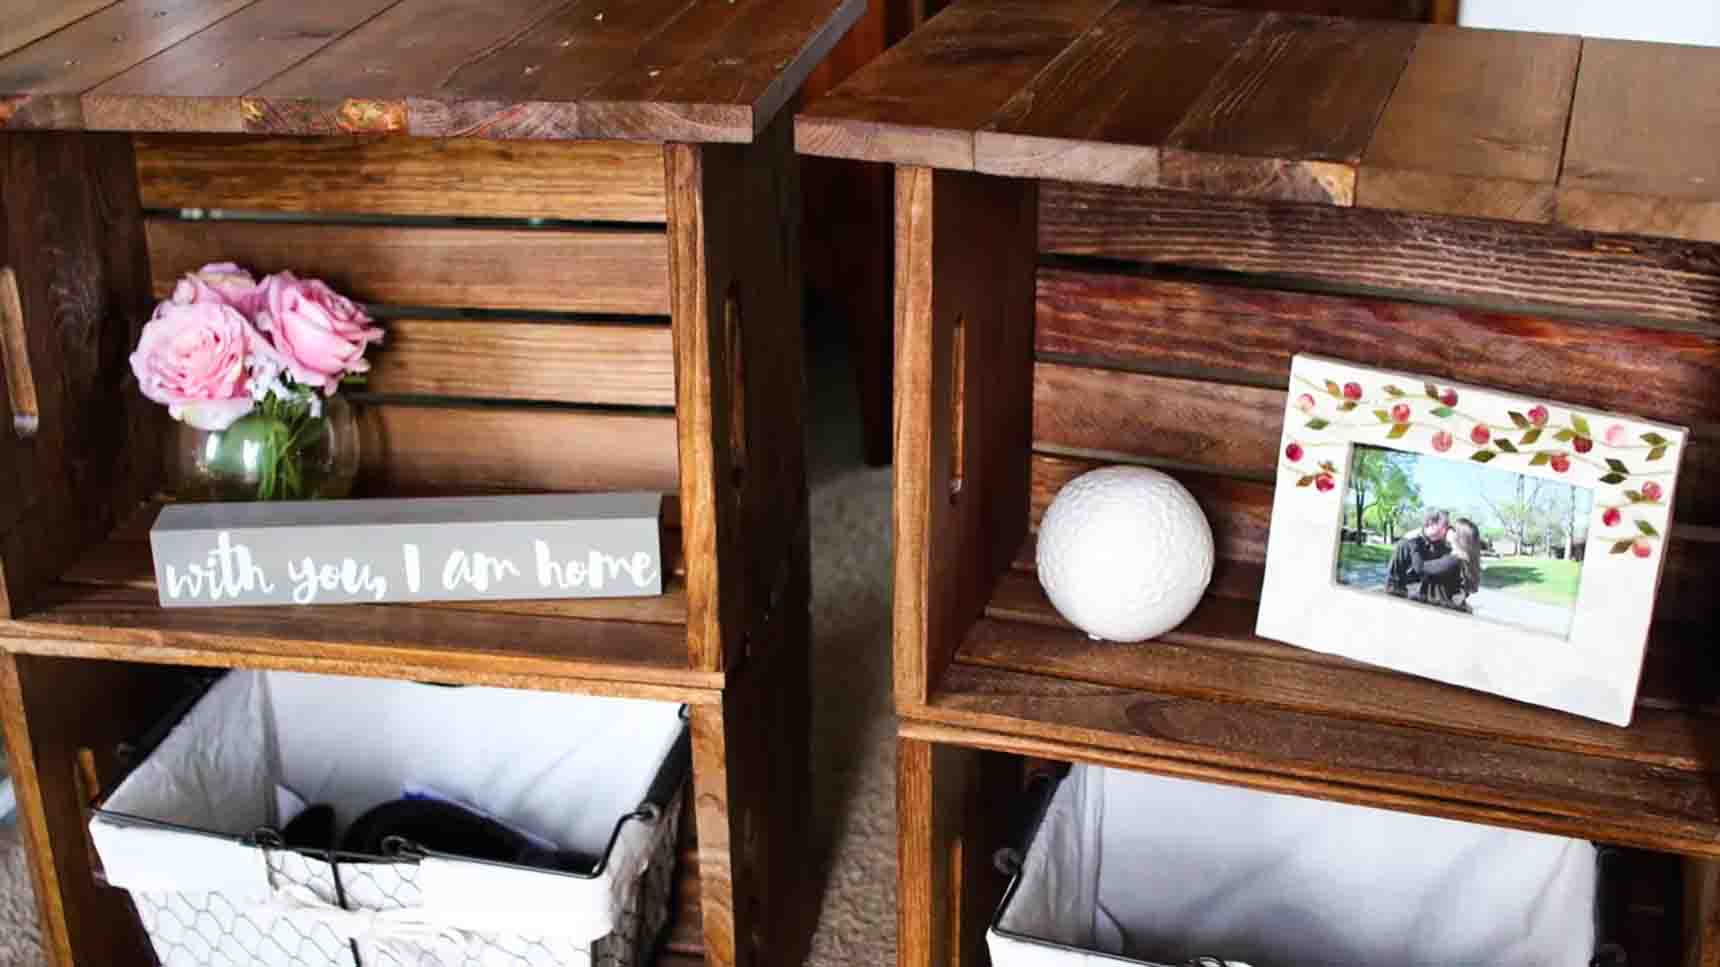
Two wooden crates, stacked and glued, and the whole nightstand is basically done. One side of a crate gets roughed up so the liquid nails has something to grab, and a bracket with two screws holds the backs together while everything cures. The top is 1×4 boards cut into 13 inch pieces, glued down, weighted with something heavy and left to dry flat. Stain the crates first, one coat each, then stain the top to match so the seam between the two parts disappears. It costs almost nothing and reads as a real piece of furniture next to a bed.
Get the full tutorial at DIY JOY.
2. DIY Modern Farmhouse Dipped Nightstands
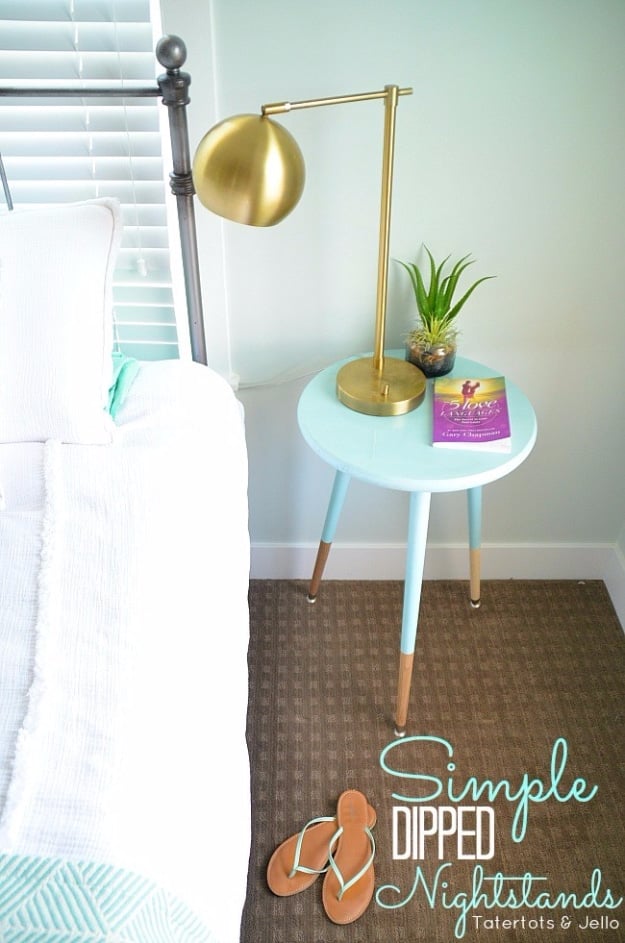
Round wood tabletops and modern angled legs, both off the shelf at Lowes, and the dipped look is nothing but tape. Measure 10 inches up each leg, mark it, tape the line and wrap the bottom in saran wrap so no paint creeps past. Three coats of spray paint, then a glossy polyurethane over the legs and the tops for that lacquered finish. The brackets matter more than you would think. Angled brackets throw the legs outward, and the closer together you set them on the tabletop, the more mid century it looks. Both nightstands came in under $60.
Get the full tutorial at Tatertots and Jello.
3. DIY Farmhouse Curtain Rods
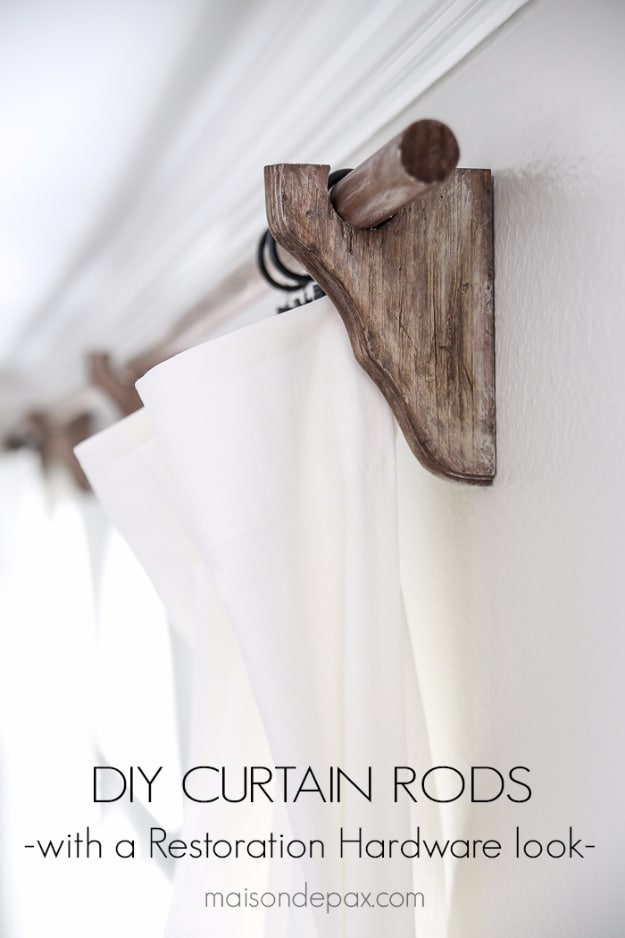
Real wood curtain rods for under $15 on a 6 foot window, and under $20 at 8 feet. A 1 1/4 inch dowel is the rod. The brackets are plain wood brackets with a semicircle cut out using a hole saw, then beaten up on purpose with a hammer or a screwdriver. Here is the part worth copying: cheap wood has no grain, so you make some. Run a stainless steel wire brush hard up and down the bracket while the Special Walnut stain is still slightly wet, dry brush warm gray over it, then rub in dark wax. That last step is where the grain actually appears.
Get the full tutorial at Maison de Pax.
4. Farmhouse Stenciled Pillow

A plain pillow cover with one big stenciled number on it, and it is maybe an hour of work. Two 22 by 22 squares of fabric, a stencil taped down dead center so it cannot shift, and black matte fabric paint dabbed on with a stencil brush. Load the brush, then tap most of the paint back off before it touches the fabric, because a heavy brush bleeds under the edges and ruins the crisp line. Once it is dry, pin the squares right sides together, sew around leaving a gap, turn it out and hand stitch the opening closed over a 20 inch insert.
Get the full tutorial at My Life From Home.
5. DIY Chicken Wire Picture Frame
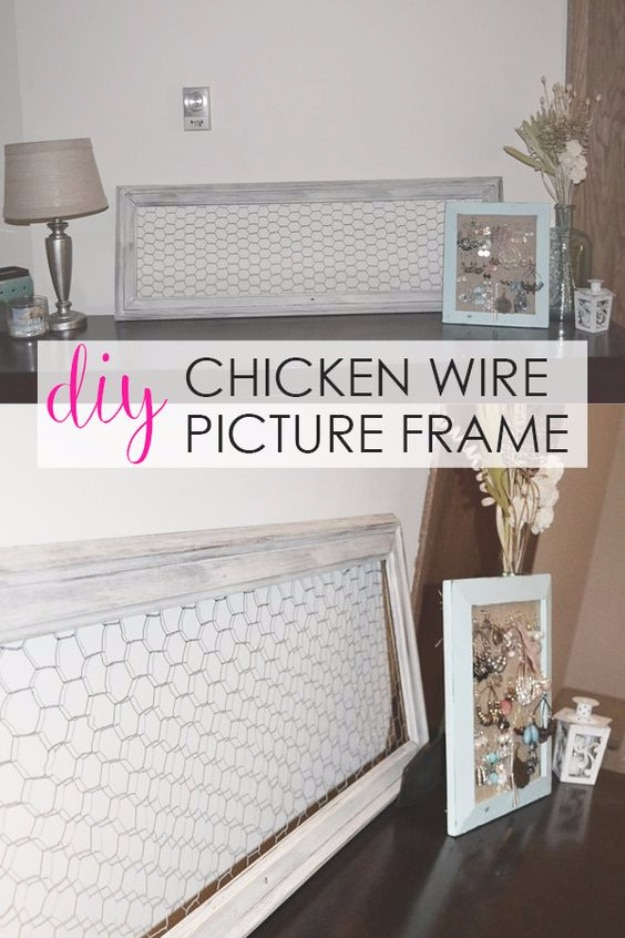
Two thrifted wood windows with the glass taken out and chicken wire stapled across the back of each one. Scuff the frame lightly rather than stripping it, because chalk paint only needs something to grab. Two coats of a soft gray go on in long light strokes without fully covering, then sand the edges back and rub dark antique wax into the corners where wear would land anyway. Spray the chicken wire before it goes near the frame rather than after. One person holds the wire while the other staples, and dense old window wood will fight even an air powered gun. About five hours including drying time.
Get the full tutorial at North Country Nest.
6. Distressed Mini Wooden Ladder
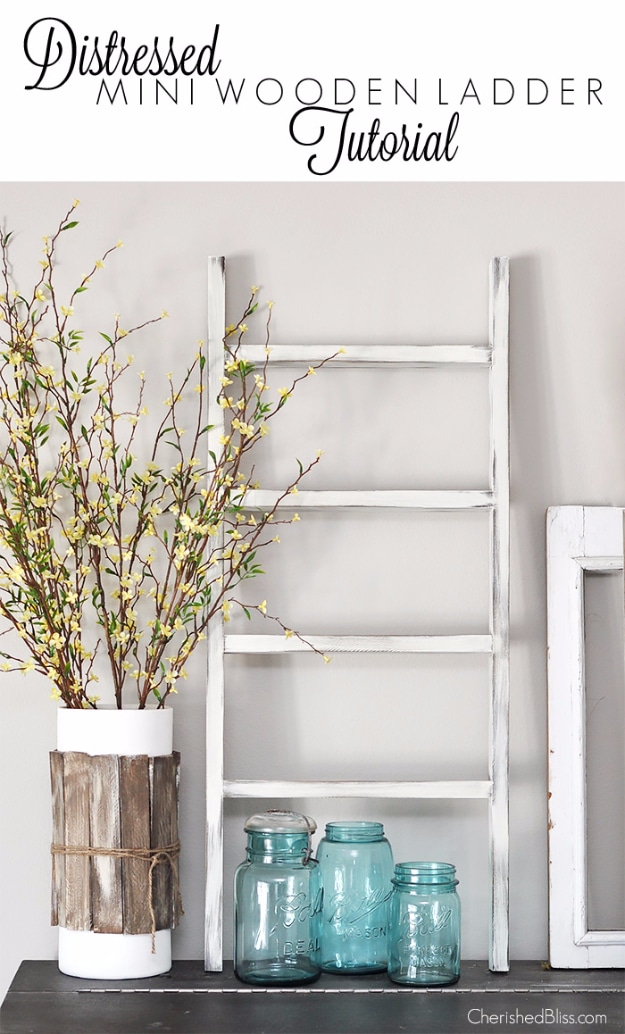
A little ladder, about 32 inches tall, that leans on a dresser or a mantel and holds a folded quilt or a few dried stems. The cut list is two 1x2s at 32 inches for the sides and four at 12 inches for the rungs, from cheap 1×2 stock. Pick through the pile for straight ones, because the budget boards are famously twisted. Two nails plus wood glue at every joint, never one, or the rung pivots before the glue sets. Finish it with Dark Walnut stain, then dry brush Old White over the top so it stays streaky, and knock it back with a sanding block.
Get the full tutorial at The Crafty Blog Stalker.
7. DIY Lantern Lamp
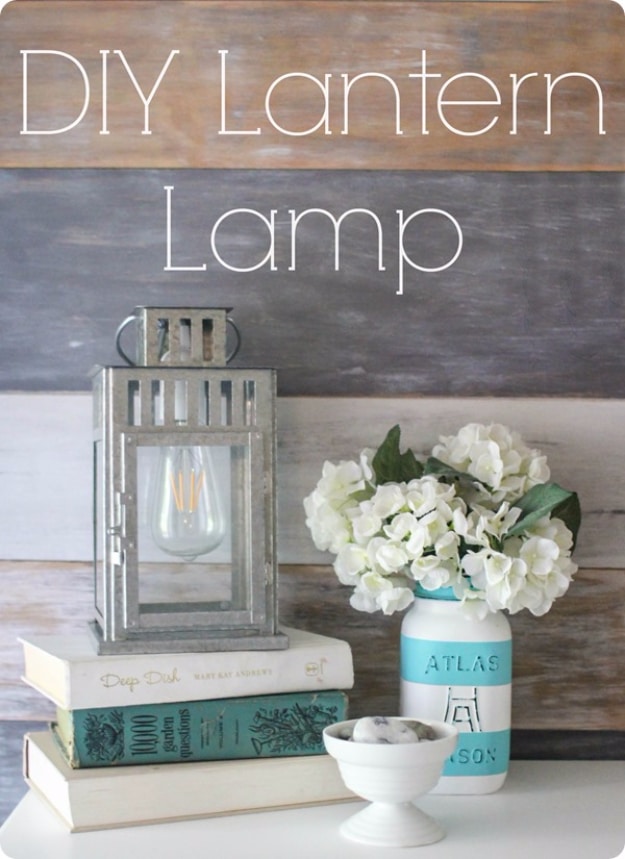
Take the candle out of an old lantern and put a light socket in its place. Thread a lamp cord with a switch already on it down through the hole in the lantern top, which every candle lantern has because the smoke had to go somewhere. Snip the socket wires, strip the ends, feed the cord through, twist the wires back together and cover every bit of exposed wire in electrical tape. Skip the duct tape for holding the socket up, it gave out in a week. A small clear Command decorating hook glued to the lantern top holds the cord properly. Use an LED Edison bulb.
Get the full tutorial at Lovely Etc.
8. DIY Wood Round Ring Holder
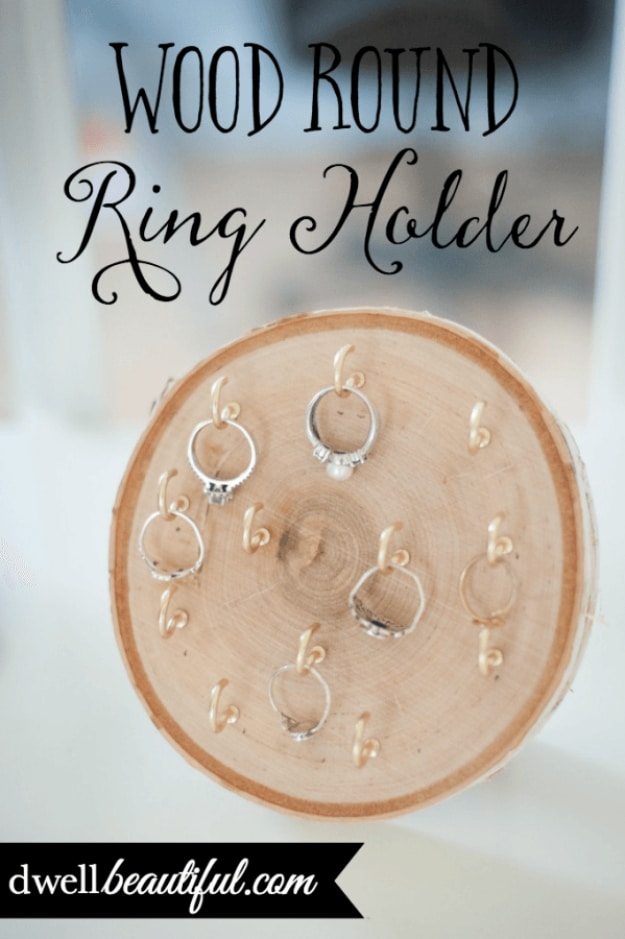
A sliced wood round with gold cup hooks screwed into the face, standing on a dresser where the rings end up anyway. Craft stores sell the rounds precut for a few dollars, or cut your own from a branch. Mark the hook positions with a pencil and eyeball the spacing rather than measuring, because perfectly even hooks lose the rustic look this is going for. Drill each mark with a 3/32 bit, gently, and stop after a few seconds so you do not come out the other side. The hooks screw in by hand until the neck meets the wood. Half an hour, start to finish.
Get the full tutorial at Dwell Beautiful.
9. DIY Rustic Modern Nightstand With Free Plans
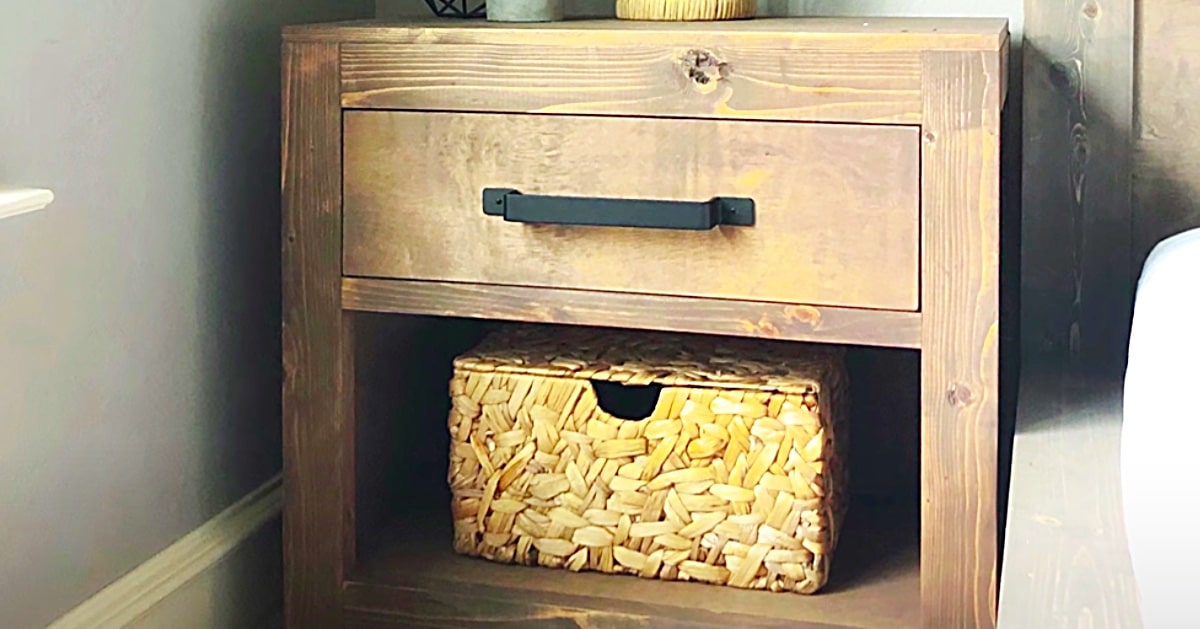
Built entirely from 2x4s, which is why it feels like a piece of the house rather than a bedside table. Free plans come with the tutorial, so there is no measuring to work out from scratch. The drawer across the top is deliberately oversized, big enough to sweep everything off the surface into when someone turns up unannounced. The tools are plain: a drill, a saw, a level, screws and a sander, plus stain if you want it. Finish it with stain and hardware and the chunky 2×4 frame reads as modern farmhouse rather than rough.
Get the full tutorial at DIY JOY.
10. DIY Aged Layered Painted Candlesticks
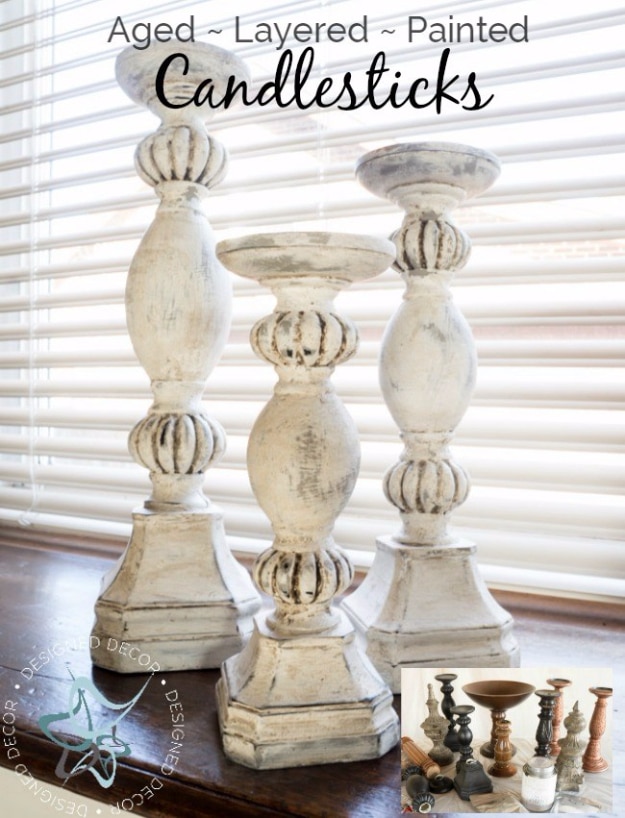
Thrift store candlesticks, every one bought for under $5 and some for a dollar, layered up until they look like chapel salvage. The sequence is what matters. Clean them with a 50/50 water and vinegar mix and a brush to get the dust out of the crevices, then a base coat of gray one step paint. Next comes cracked gesso mixed to the consistency of pancake batter and laid on generously, which is what builds the texture that reads as decades of paint. Last, a white milk paint over the top. Mix milk paint with warm water and a cheap immersion blender or you will be picking grit out of it.
Get the full tutorial at Designed Decor.
11. DIY Lettered Chalkboard Sign
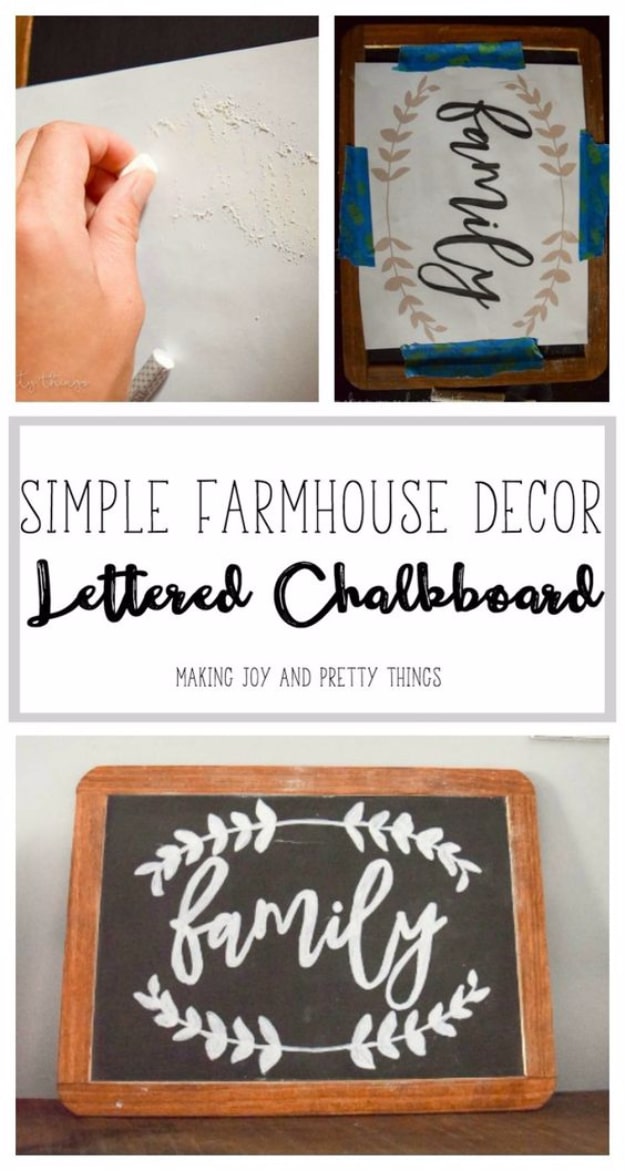
A $5 unfinished chalkboard frame from the craft store, stained American Walnut on the outside, with a word lettered on in white paint pen. Design the wording on a computer first, print it on plain paper at the right size, then flip the sheet over and scribble white chalk across the back of the design. Tape it chalk side down on the board and trace the outline hard with a pen, and the chalk transfers a perfect guide. Fill it in with the paint pen, going over everything twice. One thing to copy from the mistake: tape off the chalkboard before you stain the frame.
Get the full tutorial at Making Joy and Pretty Things.
12. Hardware Cloth Vase
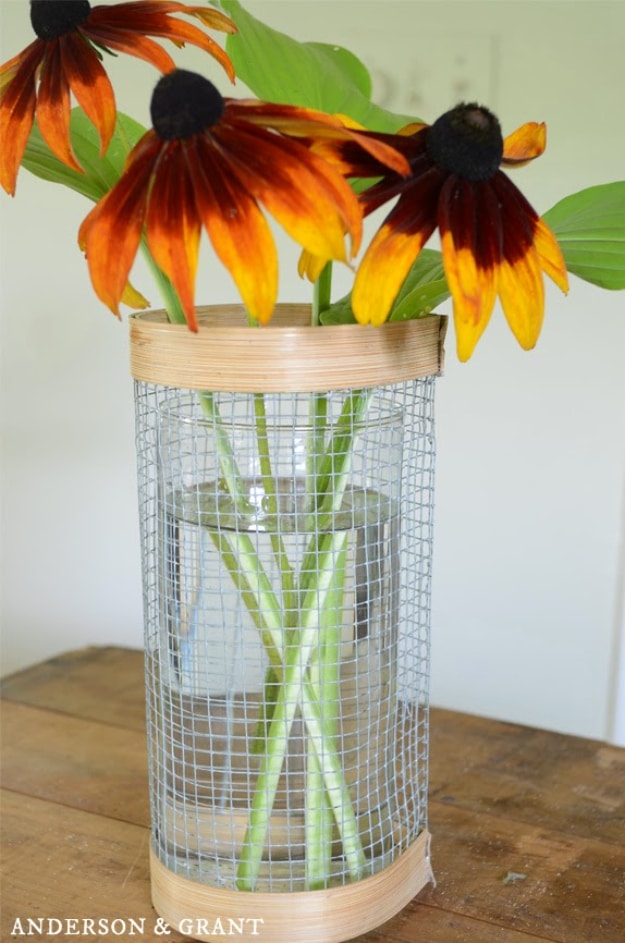
Hardware cloth is wire mesh sold by the roll in the landscaping aisle, and wrapped around a Dollar Tree glass vase it turns a one dollar vase into something industrial farmhouse. Cut a rectangle 12 inches wide by 8 inches tall with wire cutters, sized slightly larger than the vase in both directions, and cut one edge smooth while leaving the other edge with the wire ends sticking out. Flat basket reed banded around the top and bottom hides the raw edges. Soak the reed in water for about an hour first, otherwise it cracks the moment you try to bend it around the curve.
Get the full tutorial at anderson + grant.
13. Rustic Bedroom Wall Decor
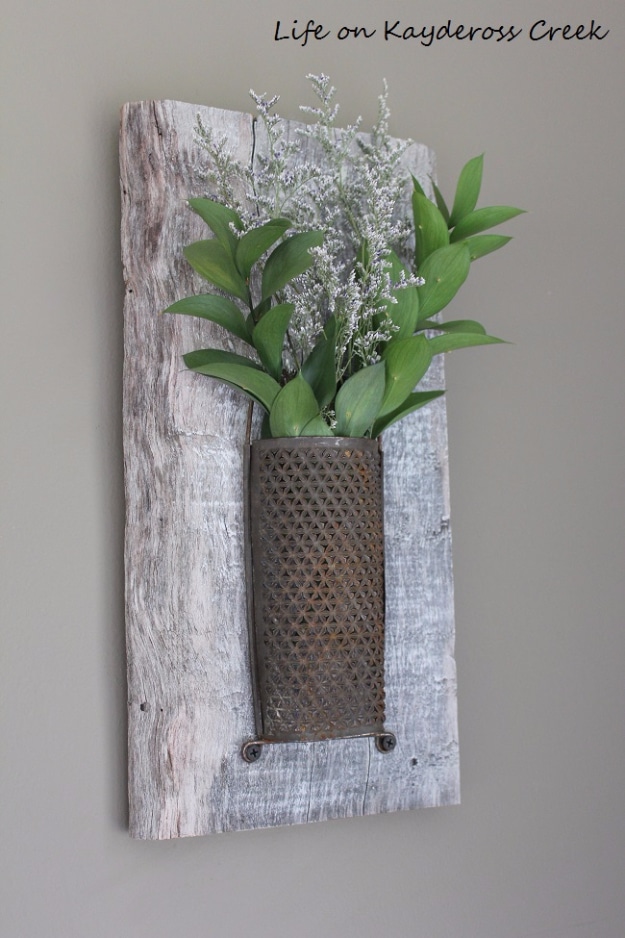
A rusty $8 flea market grater screwed to a chunk of weathered board, with dried flowers tucked down inside it. The grater already had curled feet at the bottom, which made it easy to screw flat to the wood, and black drywall screws were chosen so they vanish against the rust. The board matters as much as the grater: pick one with gray and white tones already in it, then dry brush creamy white chalk paint over the top if the piece sitting on it disappears. Slip a small glass bottle in behind the grater and it holds fresh flowers instead of dried.
Get the full tutorial at Life on Kaydeross Creek.
14. DIY Farmhouse Style Hanging Wire Baskets
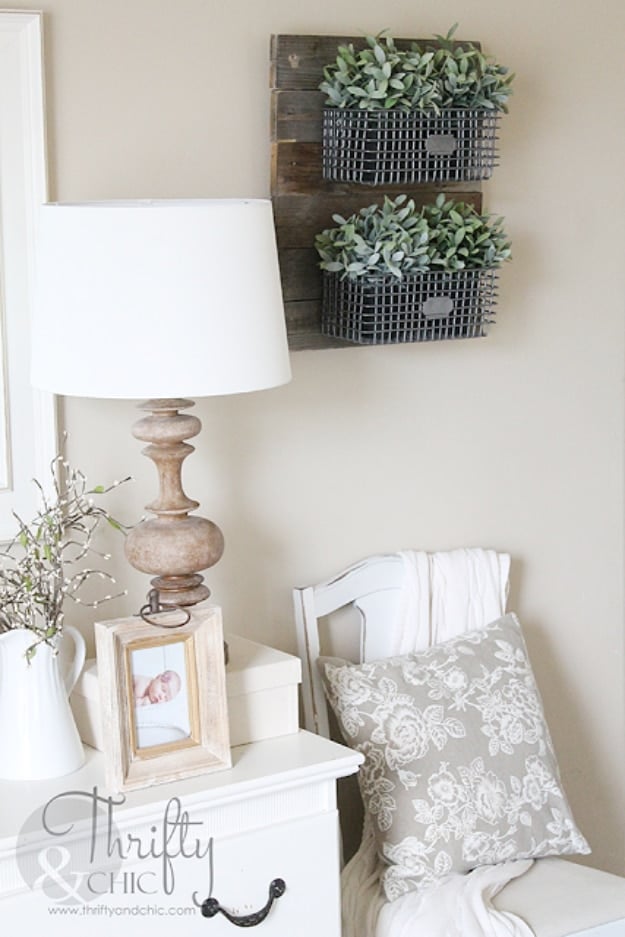
Three galvanized wire baskets mounted on a panel of old weathered boards, hung on a neglected bedroom wall with greenery dropped in. The baskets came from At Home at $6 apiece. The backing is scrap: slats pulled off the legs of a couple of old benches, held together with wood glue and 1 1/4 inch nails from a nail gun, with a D ring screwed to the back to hang it. Nothing was sanded, stained or cleaned up. Screws got pulled and the wood went on the wall as it came off the bench, and that imperfect surface is exactly what grounds a bright white room.
Get the full tutorial at Thrifty and Chic.
15. Vintage Ladder As Jewelry Holder

A chippy, paint spattered salvage ladder bought for $20, leaned against a bedroom wall and hung with necklaces. The reason it works is not storage, it is visibility: necklaces that live in a jewelry box get forgotten, and necklaces you can see actually get worn. Drape them over the rungs by length, longest at the bottom, and let the pearls sit against the aged wood where the contrast does the work. A wreath was tried at the base and taken straight back off because the scale was wrong, which is a useful thing to know before you add one.
Get the full tutorial at Create and Babble.
16. DIY French Chair With Graphics
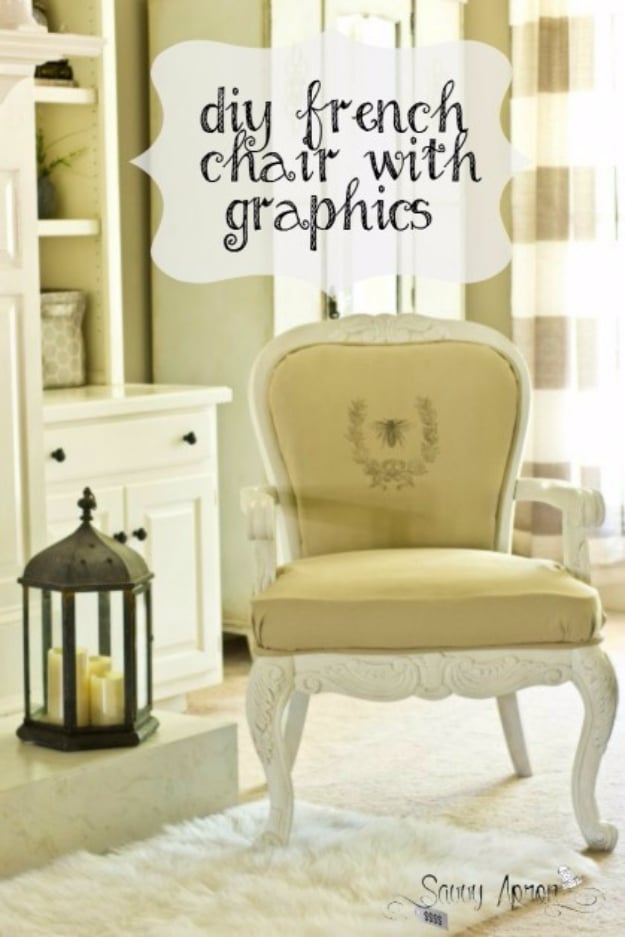
This started as a five dollar chair with a broken leg and became a lesson in what not to do. Painting the old upholstery with chalk paint took six coats, drank the expensive stuff and came out feeling like sandpaper. Plan B is the one to copy: two dollars of thrift store fabric, a free French graphic, and a wax paper transfer rather than Mod Podge, which failed on the test scrap. The step the instructions leave out is the one that matters. Dampen the fabric with a damp rag before the wax paper goes down, or the image barely takes. Frame painted white and sealed with clear wax only.
Get the full tutorial at Savvy Apron.
17. Farmhouse Style Shelves
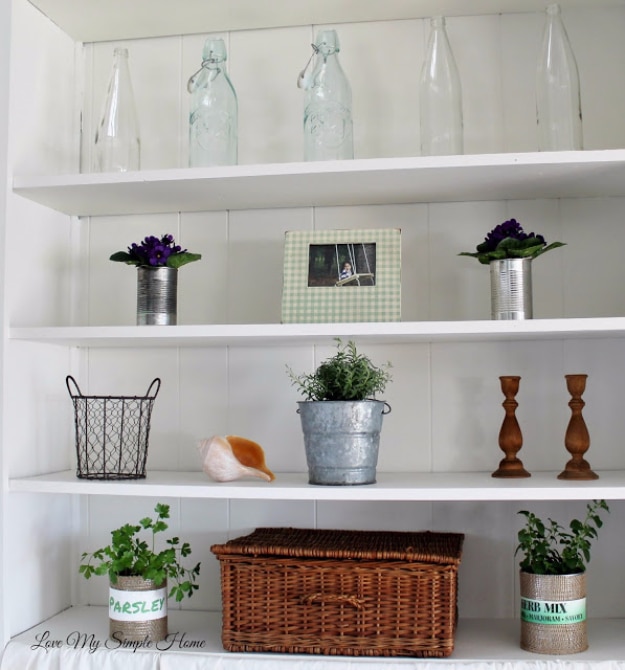
Built in shelves painted bright white, then styled three different ways to show what actually works. Clear glass bottles along the top shelf let the eye see straight through, which gives you interest without clutter, and three of the bottles here are soda bottles. Books or magazines stacked at both ends give a shelf balance. Live plants lined up with gaps between them keep things airy, and baskets plus a white curtain on a tension rod hide everything you would rather not look at. Tin cans and buckets add the farmhouse part, and wood candlesticks warm up all that white paint.
Get the full tutorial at Love My Simple Home.
18. Striped Grain Sack Chair Makeover
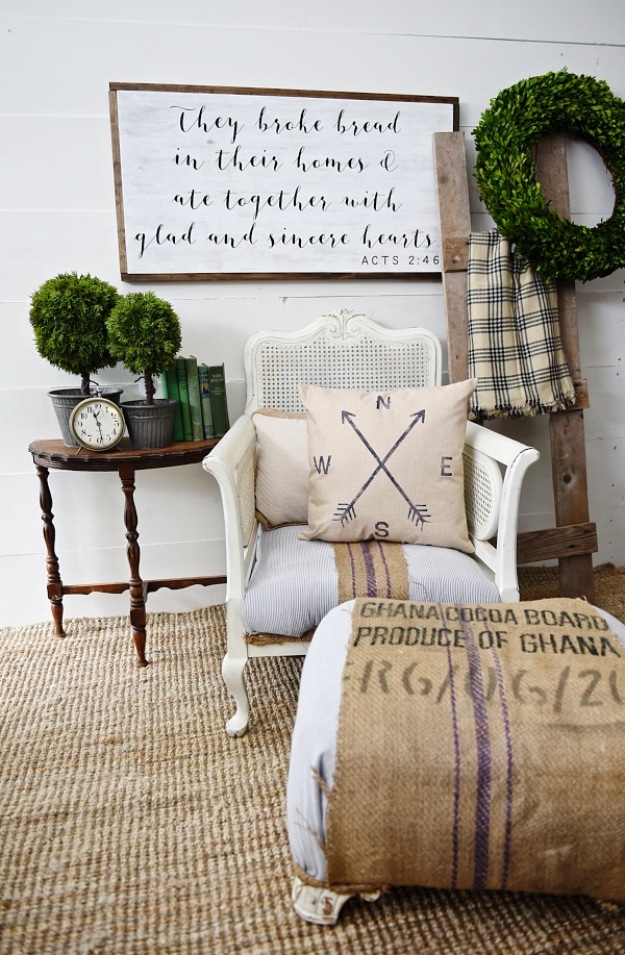
A cane back chair and its ottoman recovered in about an hour with a staple gun and whatever was already lying around. The blue stripe is not grain sack at all, it is a striped curtain, one panel for the chair and one for the ottoman. The grain sack came afterwards, cut into a few pieces and stapled on more or less at random once the stripe was in place. Nothing got painted, because the white frame did not need it. The unfinished look is the whole point here, so the trick is stopping before it gets neat. A thousand staples, by her own count.
Get the full tutorial at Liz Marie Blog.