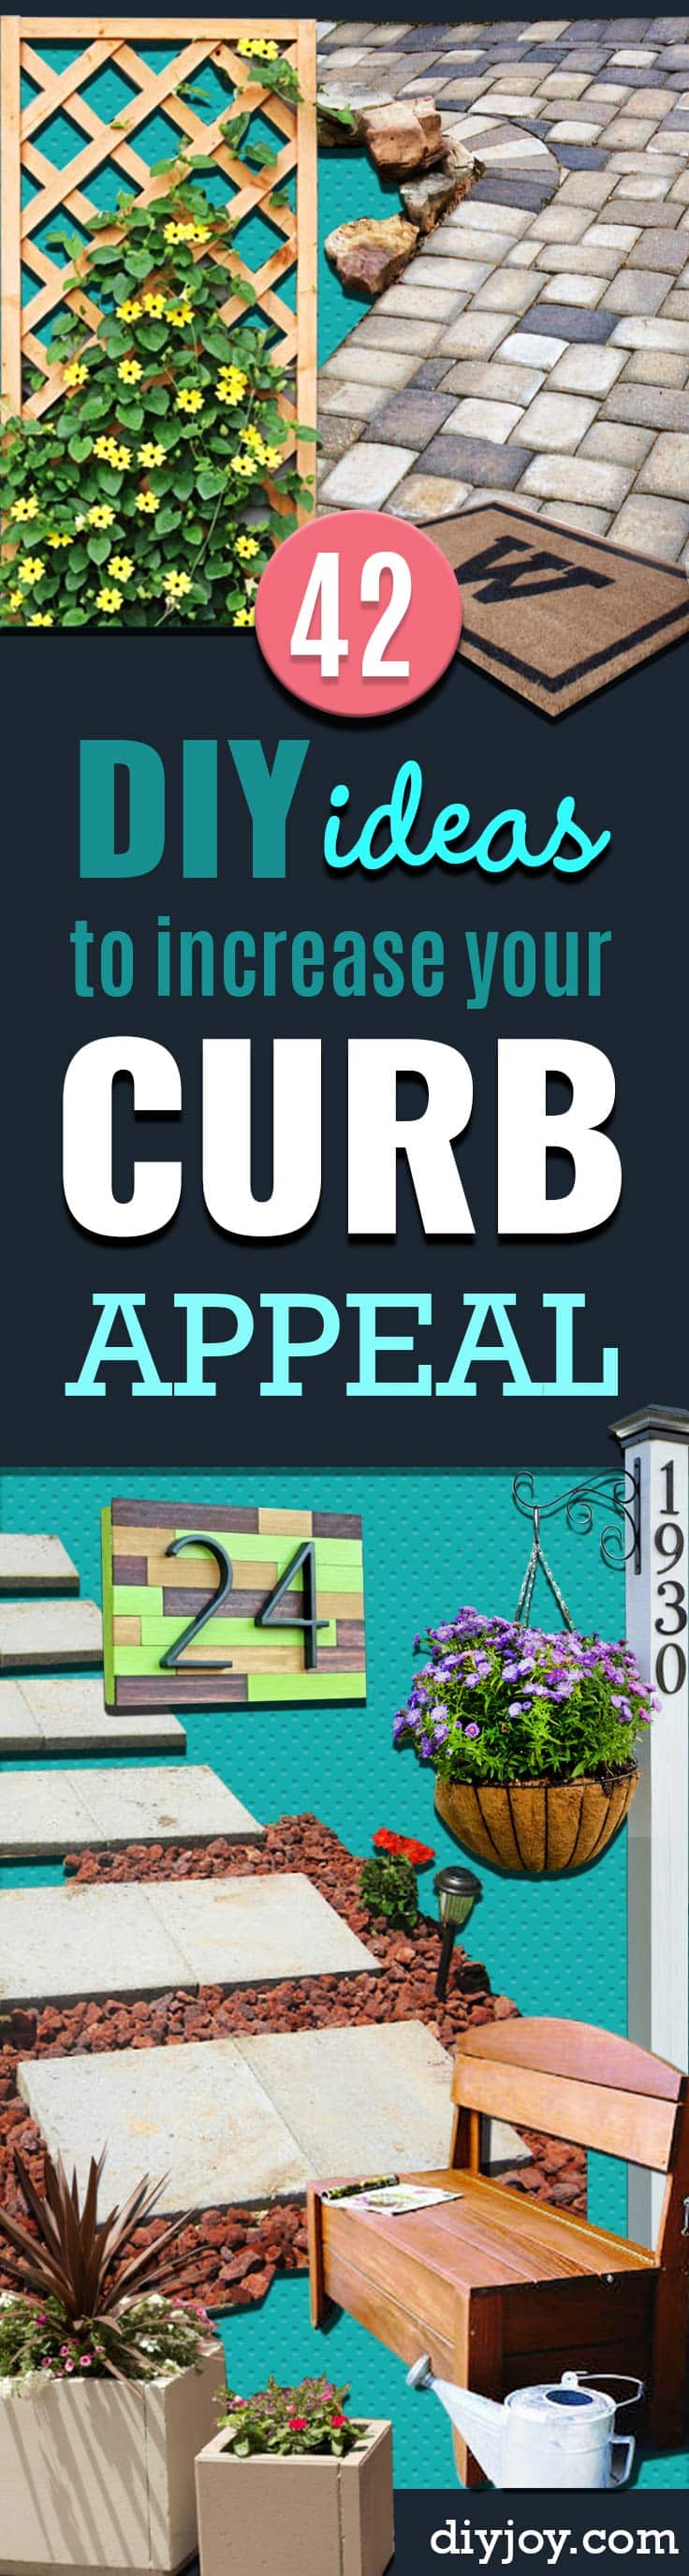
Your house gets about four seconds of a stranger’s attention from the street, and almost all of it lands on three things: the door, the numbers and whatever is growing near them. That is the good news, because all three are cheap to fix. Below are 27 DIY curb appeal ideas that range from a one dollar can of spray paint on a tired porch light to a weekend of laying pavers, and the small ones pull more weight than you would think. A window box, a stained concrete stoop, a mailbox that is not leaning. You will also find the quiet wins nobody photographs: a bench that swallows the garden hose, wine bottles buried along a bed, a slat screen that gives the front windows privacy. Start with whatever you can see from the sidewalk and work backward.
1. Mailbox Makeover Tutorial
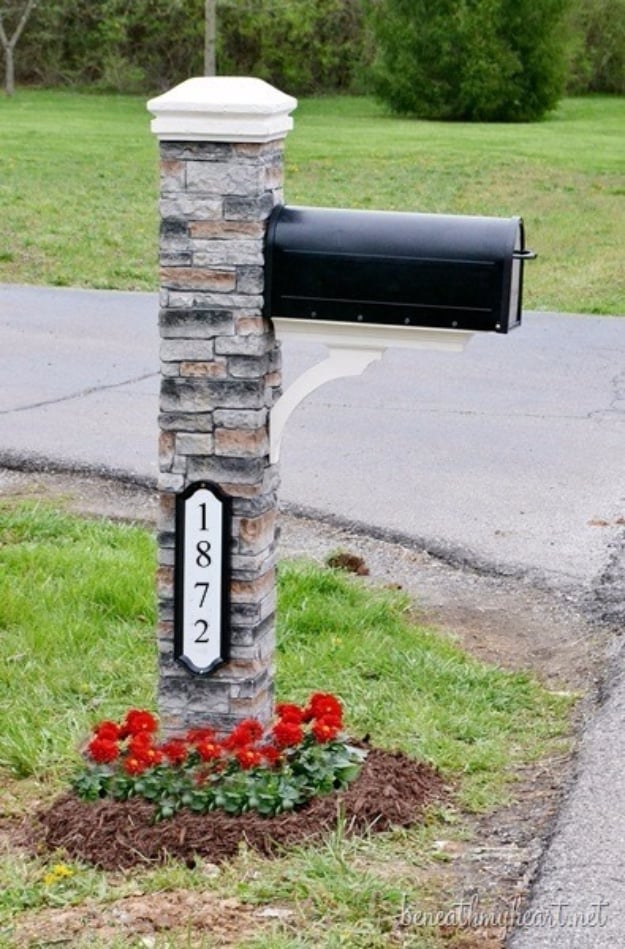
A leaning mailbox undoes every other thing you do out front, so start here. This one is a gray cast stone post kit from Lowe’s, around a hundred and eighty dollars, dropped over a 4×4 that is set eighteen inches deep in fast-setting concrete. Check level twice before that concrete goes off, because you get about an hour and then you get a monument to your mistake. Epoxy holds the cap stone, the mailbox screws to a drilled holder, and a reflective number plate goes on the face. Mulch and a ring of red flowers finish it for pocket change.
Get the full tutorial at Beneath My Heart.
2. DIY Address Post
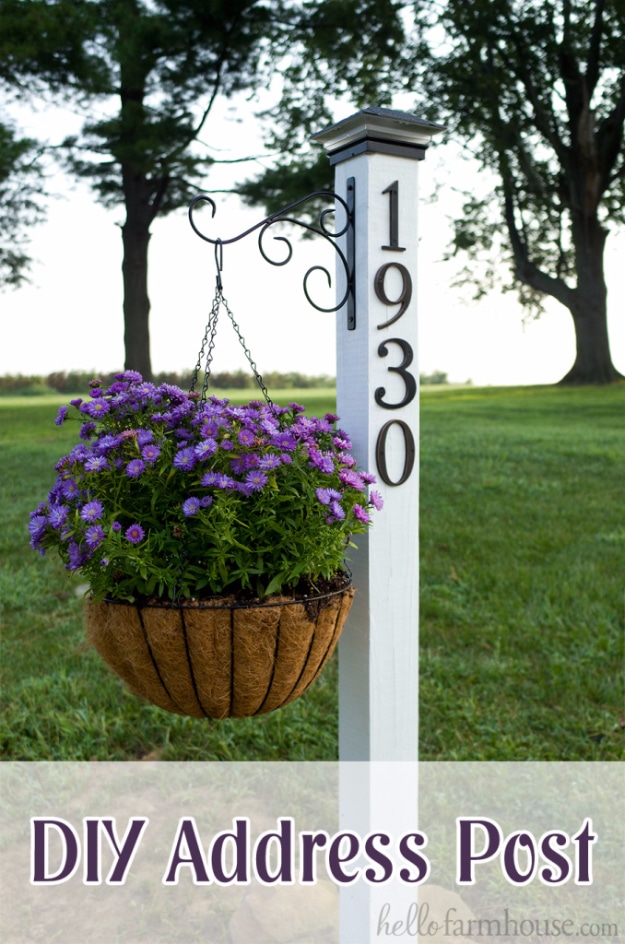
Six feet of 4×4, a foot and a half of it in concrete, and suddenly people find your driveway on the first pass. The numbers run vertically up the post rather than across it, which is what makes this read as designed instead of utilitarian. A solar cap sits on top so it lights itself, and a plant bracket roughly seven inches tall by ten inches wide screws to one side to carry a fourteen inch hanging basket with a coco liner. Worth knowing: the creator tried stain first and switched to white, because dark numbers on dark wood disappear from the road.
Get the full tutorial at Hello Farmhouse.
3. DIY Window Box
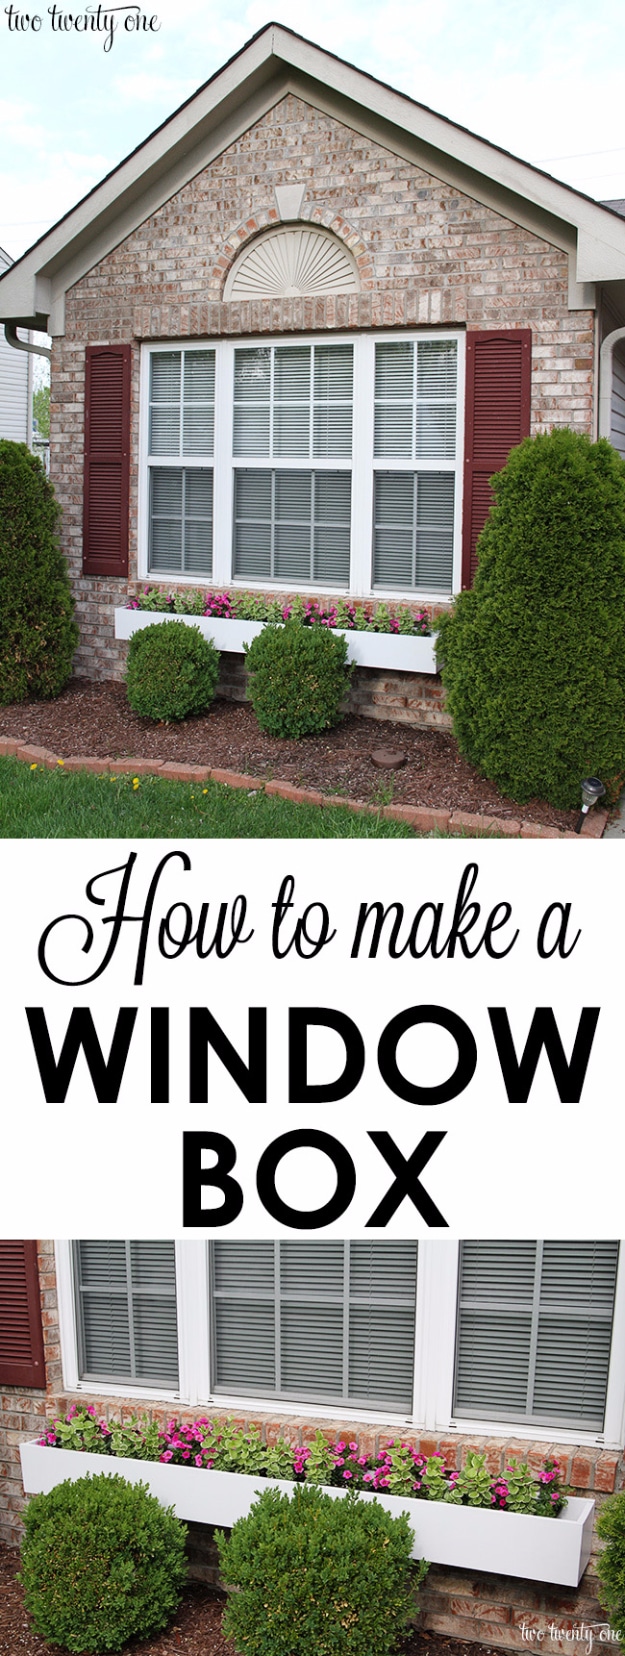
Three long boards and two square ends, and a brick house stops looking like a rental. The cut list is eighty inches by seven and a quarter for the long pieces and seven and a quarter square for the ends, all three quarter stock, nailed every eight to ten inches. Caulk the inside corners before you paint, drill eight drainage holes in the bottom, then two coats of primer and two of exterior satin. The clever part is the mounting: L brackets go into the brick and the box bolts to them, so the whole thing lifts off in November and goes back in April.
Get the full tutorial at Two Twenty One.
4. Charming Flower Outdoor Planter Box
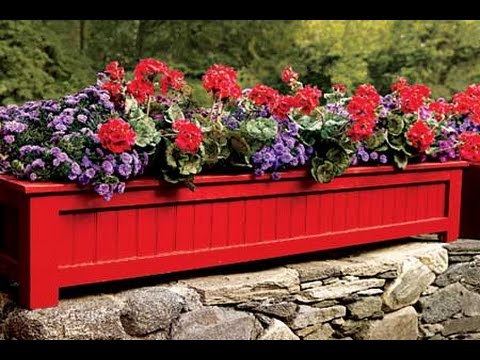
A long painted trough packed shoulder to shoulder with red geraniums and purple petunias, sitting on a dry stone wall. The color is doing the heavy lifting: a saturated red box against gray stone reads from the road in a way a natural cedar box never will. If you build one this long, remember that a full planter is mostly water by weight, so give it a solid ledge or real brackets rather than trusting the wall. Plant it densely from the start, because a planter with soil showing between the plants looks unfinished for the whole first month.
Get the full tutorial at DIY Joy.
5. Mid Century Modern House Numbers
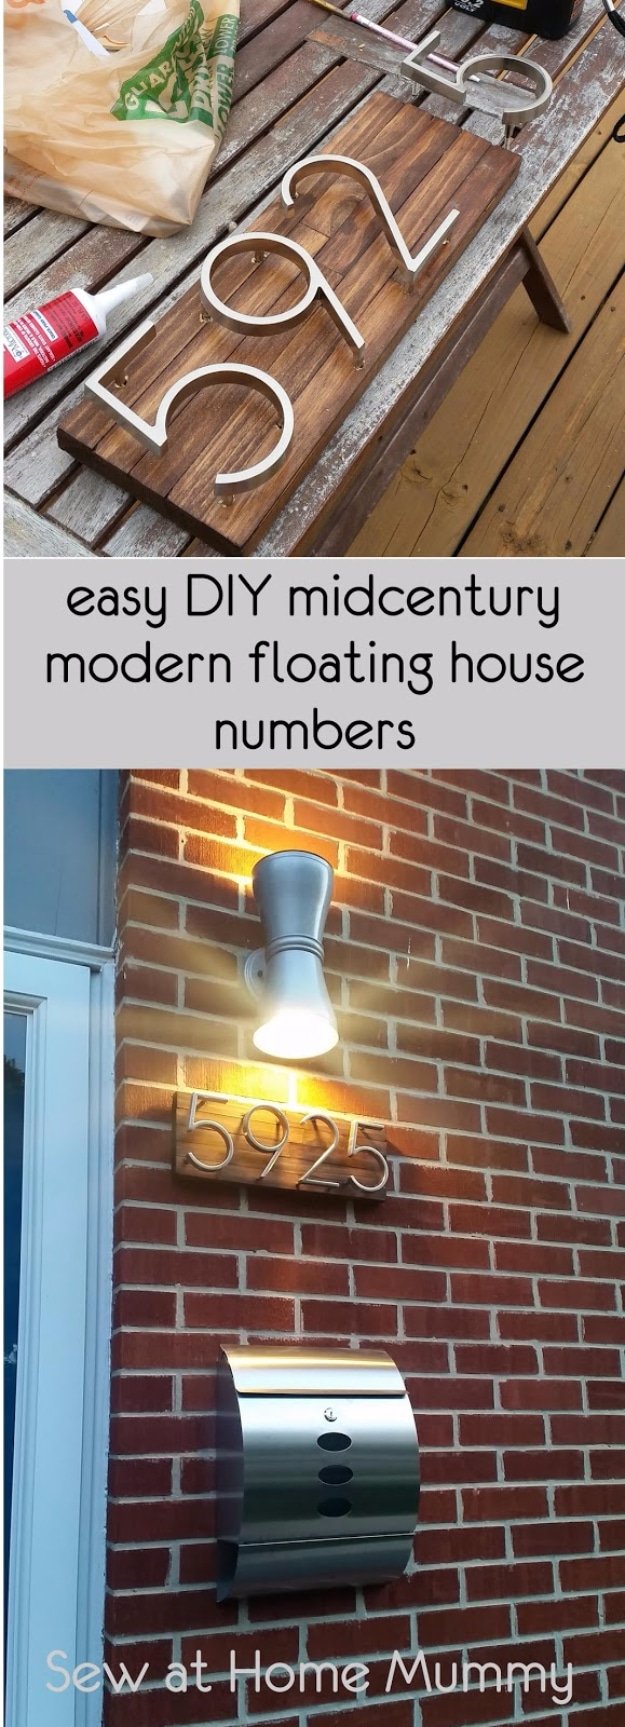
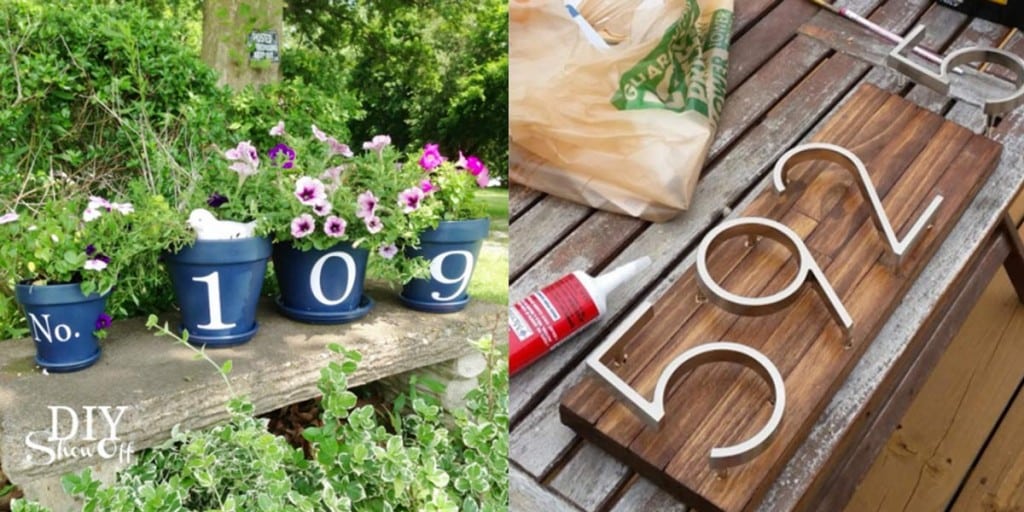
Ten paint sticks, a scrap of 2×6 cut to about twenty four inches, and floating numbers that cost roughly six dollars a digit. Stain the sticks before you cut them, one light coat on the faces and edges only, then stagger the seams as you lay them across the board so it reads as planking rather than a stripe. Cut them face down to keep the ends from splintering. Seal every side of the backer board, not just the front, or the first wet winter will cup it. Keyhole hangers with washers behind them give the piece a shadow line off the wall.
Get the full tutorial at Sew at Home Mummy.
6. DIY Bird Bath
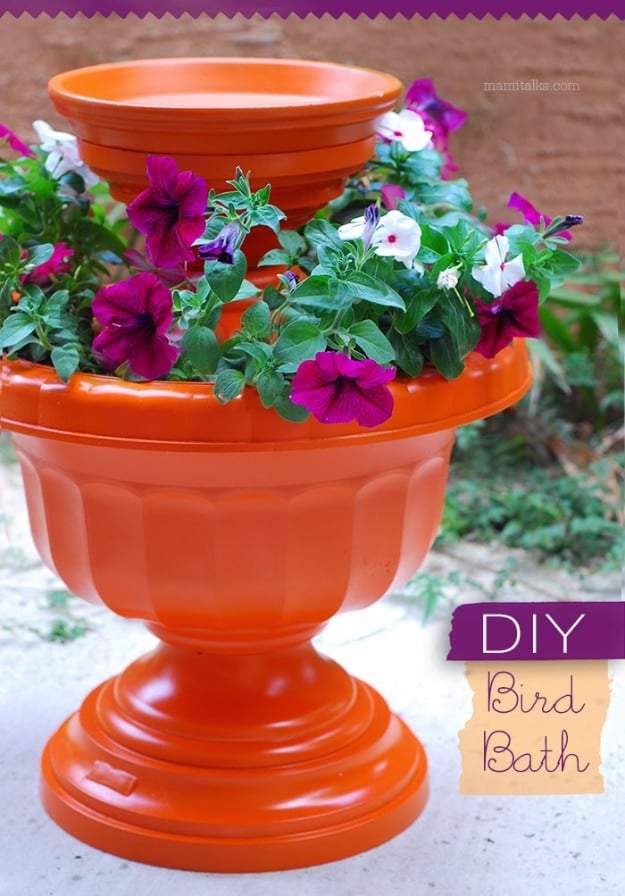
Three planter parts, stacked, and nothing else. A seventeen inch urn on the ground, a twelve inch poly urn turned upside down on top of it, and a ten inch terra cotta saucer on top of that. Drill four or five drainage holes in the big one first, fill around the rim with potting mix and plant it, then set the saucer and add water. One thing the creator went back and added after publishing, which is worth repeating: use craft paint rather than spray paint on the saucer itself, so the birds are not drinking out of a freshly sprayed dish.
Get the full tutorial at Mami Talks.
7. DIY Pallet Swing
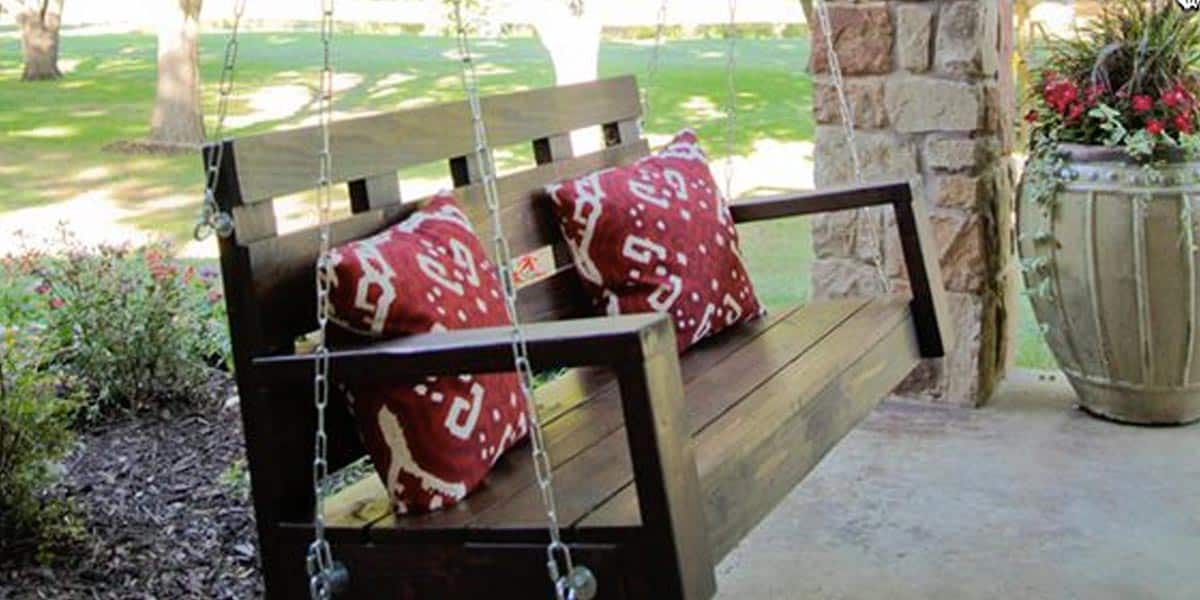
A porch swing changes how a front of a house feels more than any amount of paint, because it says somebody sits out here. This one is slatted wood hung on chain, dressed with two red and white pillows, with a stone column behind it. If you are building from pallets, the thing to check before anything else is the ceiling: a swing needs to hang from a joist or a properly rated eye bolt into structure, never into porch decking boards. Leave about seventeen inches from seat to floor and a couple of feet of clearance behind for the swing back.
Get the full tutorial at DIY Joy.
8. Paint Striped Porch Steps
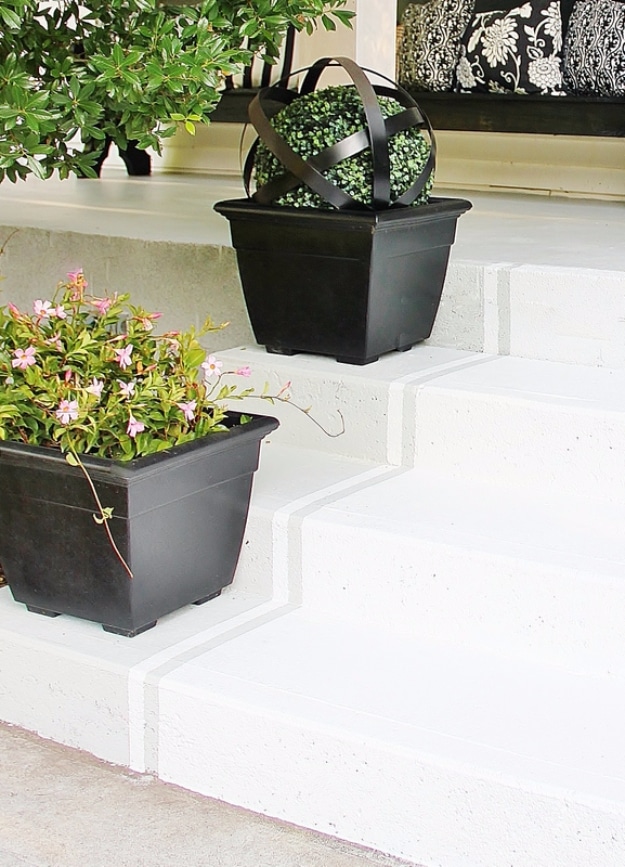
Painted concrete steps are the highest-return afternoon in this whole list, because bare gray concrete reads as unfinished no matter how good the door behind it looks. The photograph shows crisp white risers and treads with two black square planters staged on them, and the black against the white is what gives the stairs an edge you can actually see from the curb. If you try this, use a porch and floor enamel rather than wall paint, scrub and rinse the concrete first, and mask your stripe lines only after the base coat has fully cured, not while it is still tacky.
Get the full tutorial at Thistlewood Farms.
9. House Number Flower Pots
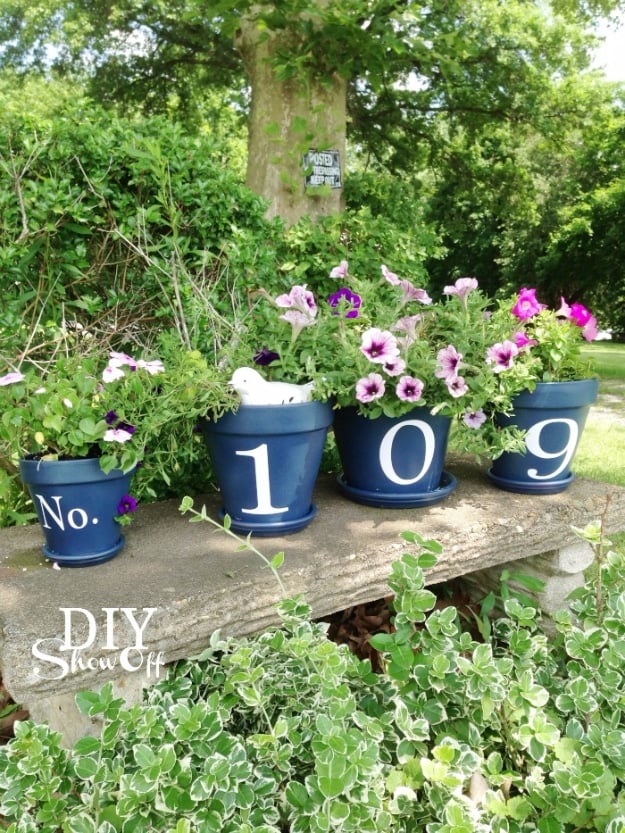
Four pots lined up on a bench, one digit on each, and the address is legible from the road all summer. Terracotta is the base, spray painted and then sealed with a satin lacquer so the finish survives watering, with reflective adhesive vinyl numerals stuck on the front. The reflective vinyl is the part worth copying, because it does the same job at night that a plain painted number cannot. Group the pots tightly and plant them all with the same flower in the same color, or the numbers stop reading as a set and start reading as four random pots.
Get the full tutorial at DIY Show Off.
10. Install Paver Path
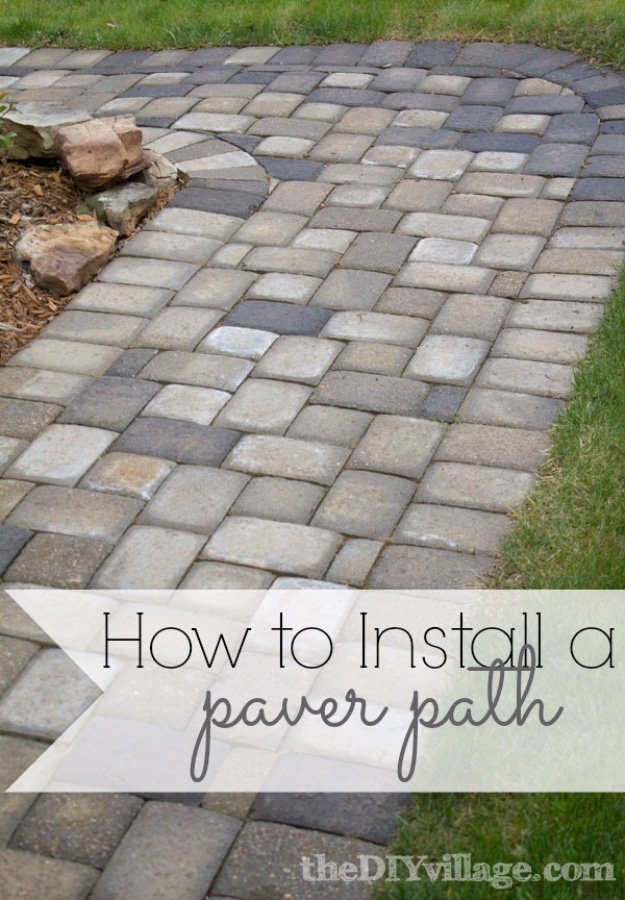
The part nobody photographs is the part that decides whether this path is still flat in five years, and it is all underneath. Four inches of compacted crusher run gravel, an inch and a half of manufactured sand, then three inch pavers on top. The sand layer has to be genuinely level, and the trick used here is two lengths of half inch PVC laid four feet apart as rails, with a scrap board dragged back along them to screed the sand flat. Three tons of gravel went into this one path, tamped by hand. A dead blow hammer seats every paver.
Get the full tutorial at The DIY Village.
11. DIY Concrete Garden Globes
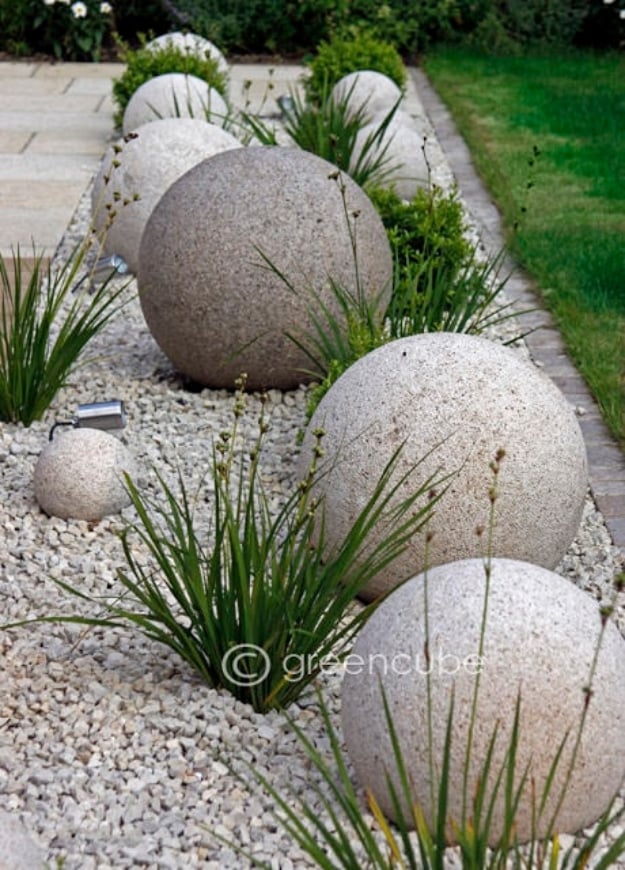
Thrift store glass lamp globes are the mold, which is why these cost under fifteen dollars for three. The mix that worked best was one part Portland cement to one part peat moss, wet to a thick cake batter, poured in and left somewhere cool for two or three days. Then the fun and slightly alarming part: put the globe inside a plastic bag and crack the glass off with the side of a hammer, wearing goggles and gloves, because it does shatter. File the seams down, then rough the whole surface with a wire brush if you want that weathered stone texture rather than a smooth ball.
Get the full tutorial at The Garden Glove.
12. Build A Front Portico
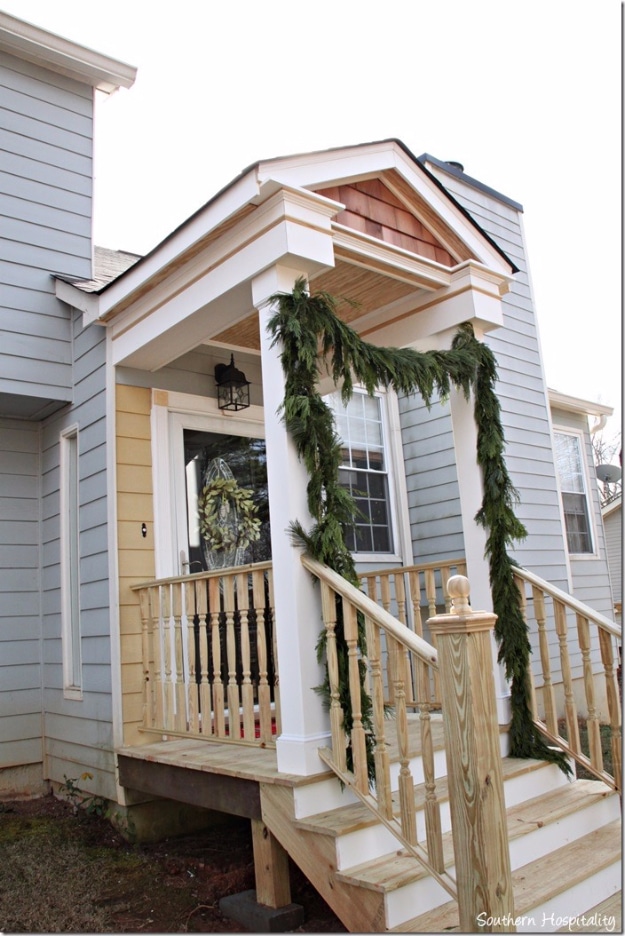
Be honest with yourself about this one. A portico ties into the existing roof, carries load and has to meet code on stair rise, and the version in this photograph was built by a contractor for twenty four hundred dollars including labor, a new garage header and a new door. What you get for it is real: two vinyl-wrapped 4×4 posts, cedar shingle detail in the gable, a beadboard ceiling and shingles matched to the existing roof. The stairs went from three to four to satisfy code once the platform was leveled. Budget for a permit and a builder rather than a Saturday.
Get the full tutorial at Southern Hospitality.
13. Front Porch Light Makeover
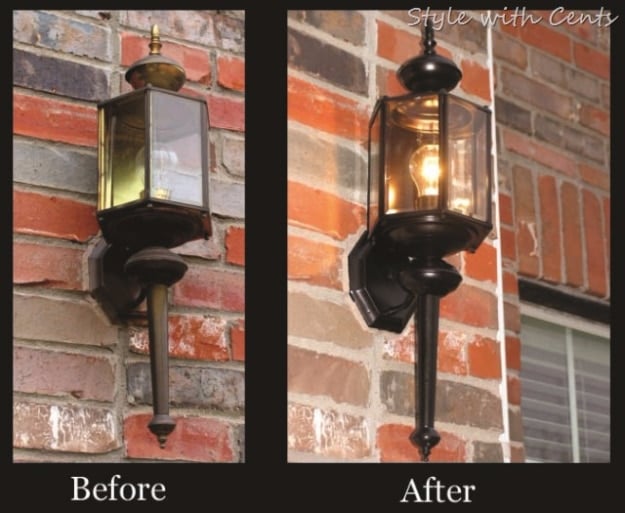
One dollar. That is the whole budget, assuming the can of oil rubbed bronze is already sitting in your garage, which it usually is. Both fixtures here were written off, one hail-damaged and one simply ignored for years, and both came back with a clean and a coat. Do the boring part properly: dig the dead bugs and cobwebs out of the glass, and scrape off the white paint drips a previous painter left down the arm, because spray paint over a drip just gives you a bronze drip. Then a light even pass, and stop before you are tempted to go heavy.
Get the full tutorial at Style with Cents.
14. Front Door Miracle
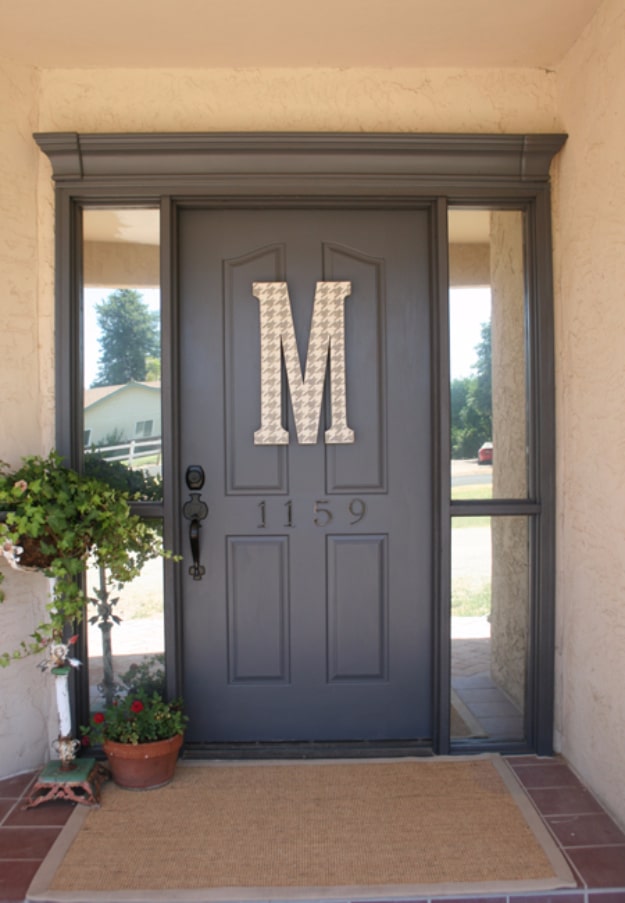
A quart of deep gray satin exterior paint, a spray-bombed door handle and thirteen dollars of foam crown molding off a clearance shelf, and the entry looks like it was designed rather than defaulted. The molding above the door is the move most people miss: a plain slab door with a header over it stops looking like a hole in the wall. Four inch house numbers went on the door itself, and a big craft store letter hung on adhesive velcro so it comes off for a wreath in December. The paint here is Benjamin Moore Iron Mountain in satin.
Get the full tutorial at Me and Jilly.
15. House Number Plaque DIY
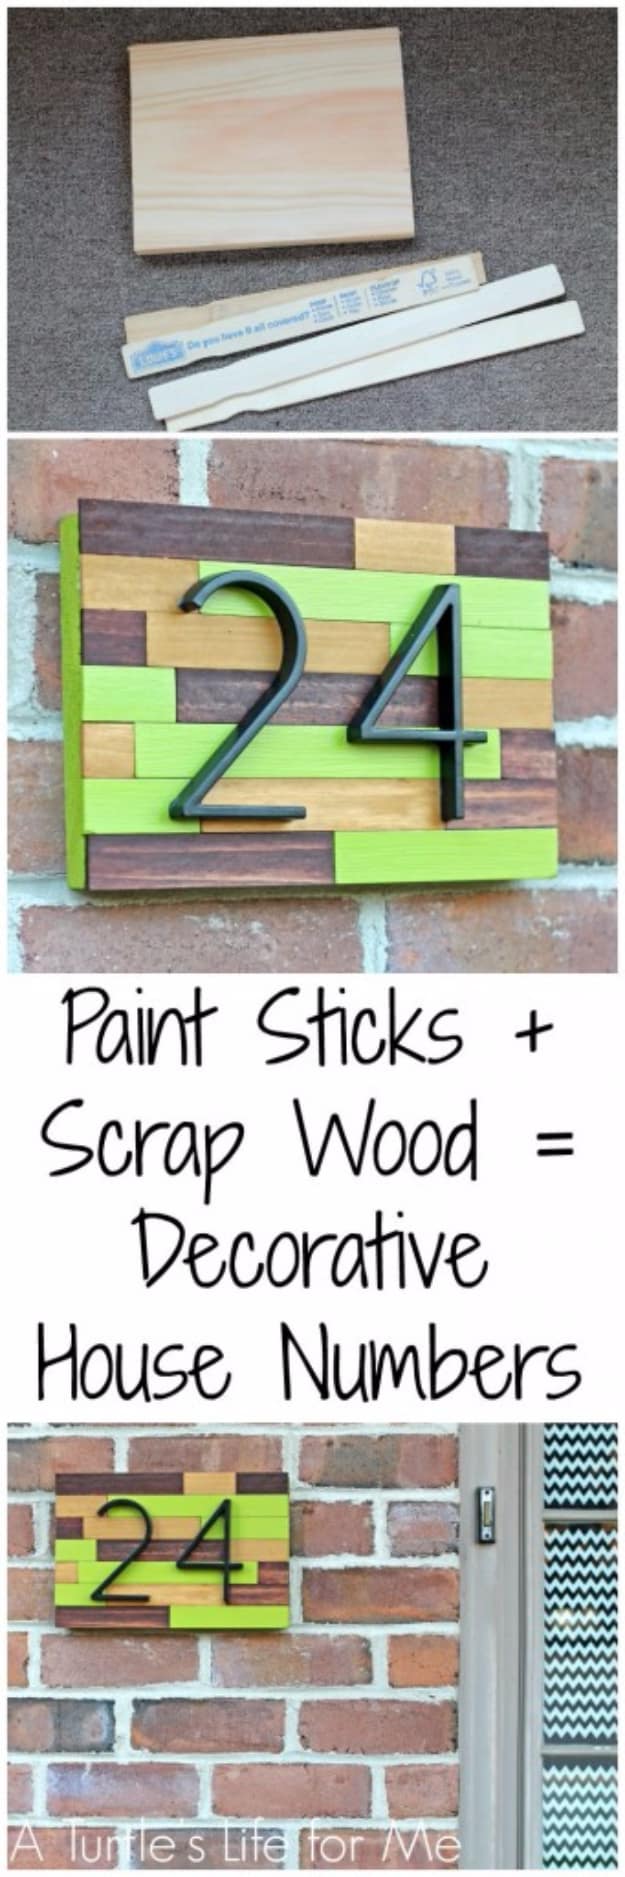
Paint sticks again, but cut to random lengths and finished three different ways, some painted and some in two different stains, so the panel reads as reclaimed rather than uniform. They get glued to a scrap board and weighted overnight while the wood glue sets, then the numbers mount through the face. The creator flatly refuses to give measurements, and she is right: size it to how many digits your address has, or you end up with a plaque that is mostly empty board. Masonry anchors hold it to brick. Mark the back of each stick before you glue.
Get the full tutorial at A Turtle's Life for Me.
16. DIY Monogrammed Welcome Mat Tutorial
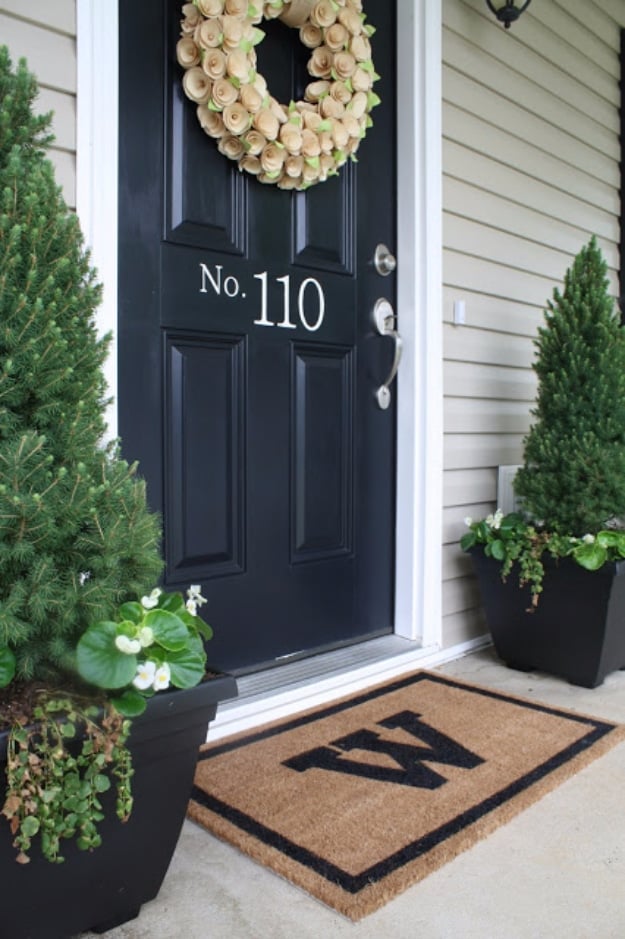
A plain coir mat, a bordered rectangle and a single painted initial, and the doorstep goes from builder issue to considered. The design here is drawn on first with a black paint pen rather than taped, using a strip of poster board as the straight edge for the borders and a poster board stencil for the letter, then filled in with outdoor paint. That drawn line is what keeps the edges crisp on a surface far too coarse for masking tape to seal against. Buy the rug slightly oversized if you can, because a standard mat looks mean against a wide stoop.
Get the full tutorial at Live A Little Wilder.
17. Front Porch Decorative Ladder
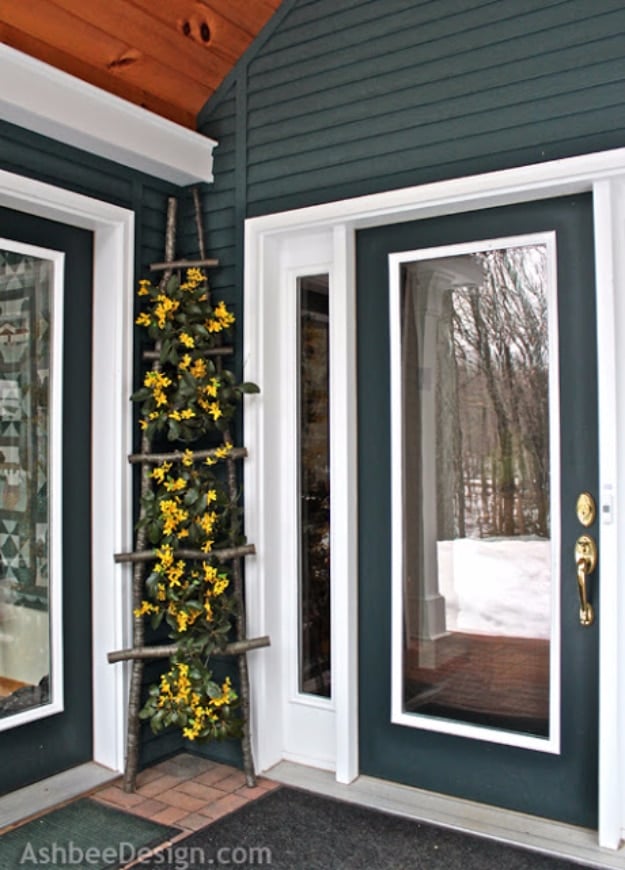
A rustic ladder leaned into the corner beside the front door, built from black birch saplings, and it gets redressed every single month. The March version in this photograph carries silk forsythia mixed with real mountain laurel branches, arranged in small metal pails hung at an angle from twine. That angled hanging is the detail worth stealing, because a pail hung straight looks like storage and a pail tipped forward looks like a display. A ladder is also the rare entry decoration that survives wind, since it leans against the house rather than standing free.
Get the full tutorial at Ashbee Design.
18. Black Eyed Susan Vines
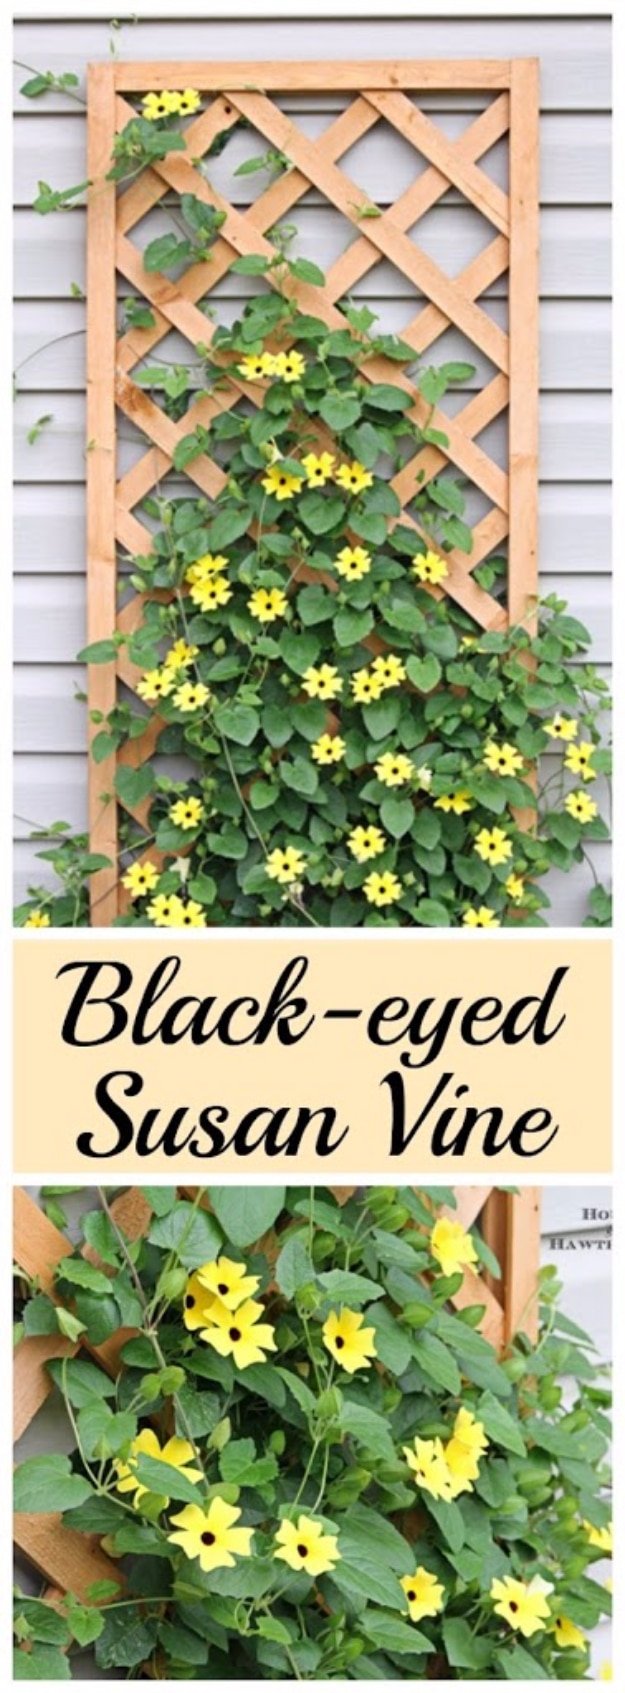
Fast, cheerful and completely unbothered, which is what you want climbing a trellis on the front of a house. It wants full sun with a little afternoon shade and regular water, and if you grow it in a hanging basket you cannot let that basket dry out, not even once. Give it a trellis or a stake straight away, because the vine takes off. In zones 10 to 12 it is perennial; everywhere colder it runs as an annual. Start seed indoors six to eight weeks before last frost, or sow outside once soil clears 60 degrees. Seedlings show in ten to fourteen days.
Get the full tutorial at House of Hawthornes.
19. DIY Welcome Column
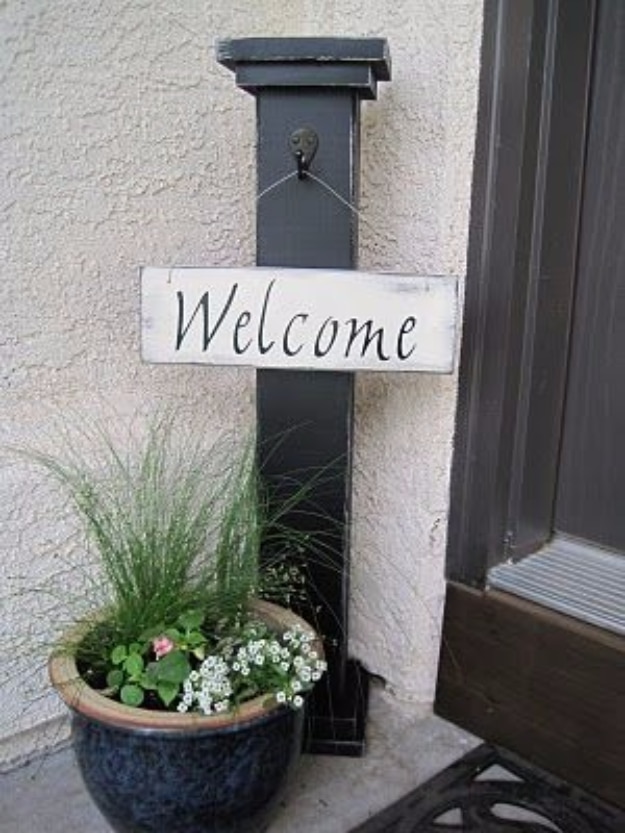
A short black post that stands in a planter and holds a hanging sign, made from a 4×4 cut to twenty four inches with 1×6 squares capping each end, 5.5 inch over 4.5 inch, screwed from underneath. The sign is an eleven inch length of 1×4 with vinyl lettering, hung from an oil rubbed bronze hook on beading wire. Prime, then hit the edges with heirloom white before several coats of flat black, so that when you sand the corners back with a sponge the white ghosts through instead of bare wood. An ink pad aged the sign edges.
Get the full tutorial at 9 o'clock Dance of Joy.
20. Concrete Floor Stain For Your Porch
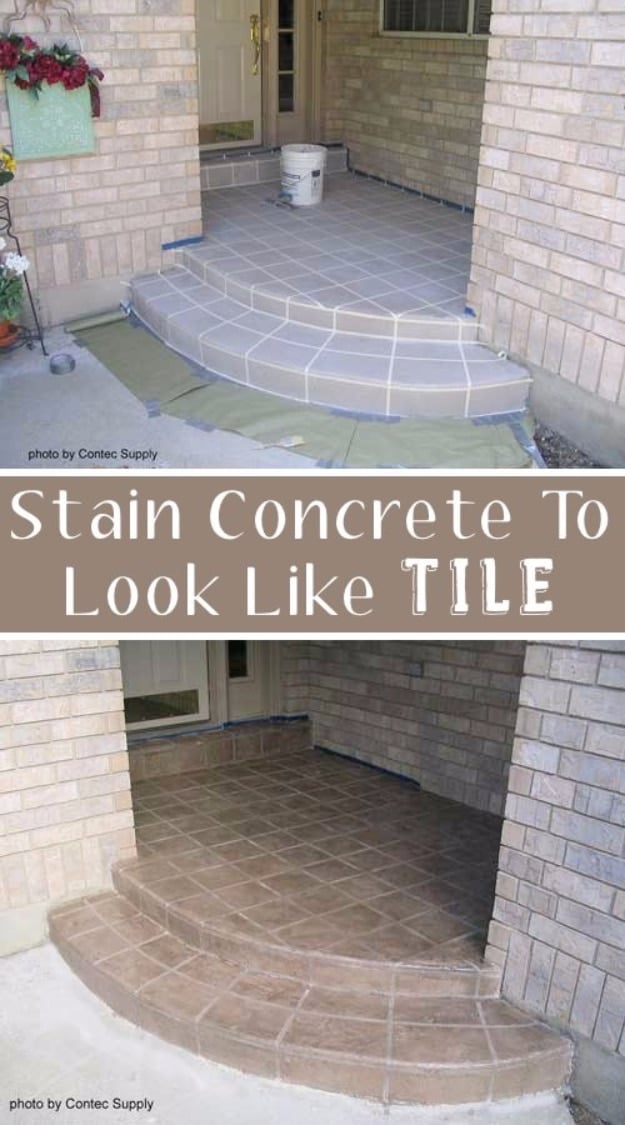
Stain is not paint, and that difference is the whole reason a stained porch floor still looks good in five years. An acid stain soaks into the concrete and gives you a mottled, variable finish; a water-based stain is pigment in an acrylic polymer and lays down far more evenly. Either way the prep is identical and unskippable: fill the cracks, then clean and degrease until the surface will actually absorb. Brush the tight edges, roll or spray the open field, then seal it, with an anti-slip additive if the porch sees rain. Reseal every one to three years and keep rock salt off it.
Get the full tutorial at Front Porch Ideas and More.
21. Install A Slate Tile Entry
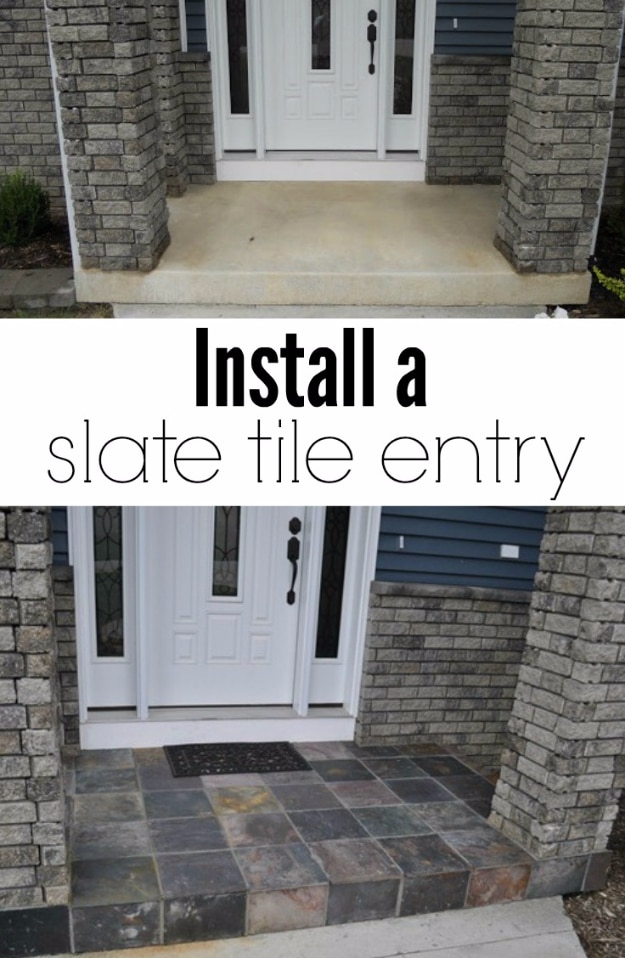
Natural slate over a concrete stoop, and the uneven surface is the point, because slate hides the small imperfections that would show on a smooth porcelain tile. Pressure wash first, then dry lay the whole thing with five eighths inch spacers before any thinset comes out, so you can see where the cuts land. Work from the center outward, set every full tile first and leave the cuts for last. Then wait: twenty four hours for the thinset, and another twenty four after grouting. A grout bag rather than a float is what keeps grout out of a textured surface.
Get the full tutorial at Decor and the Dog.
22. DIY Concrete Planters
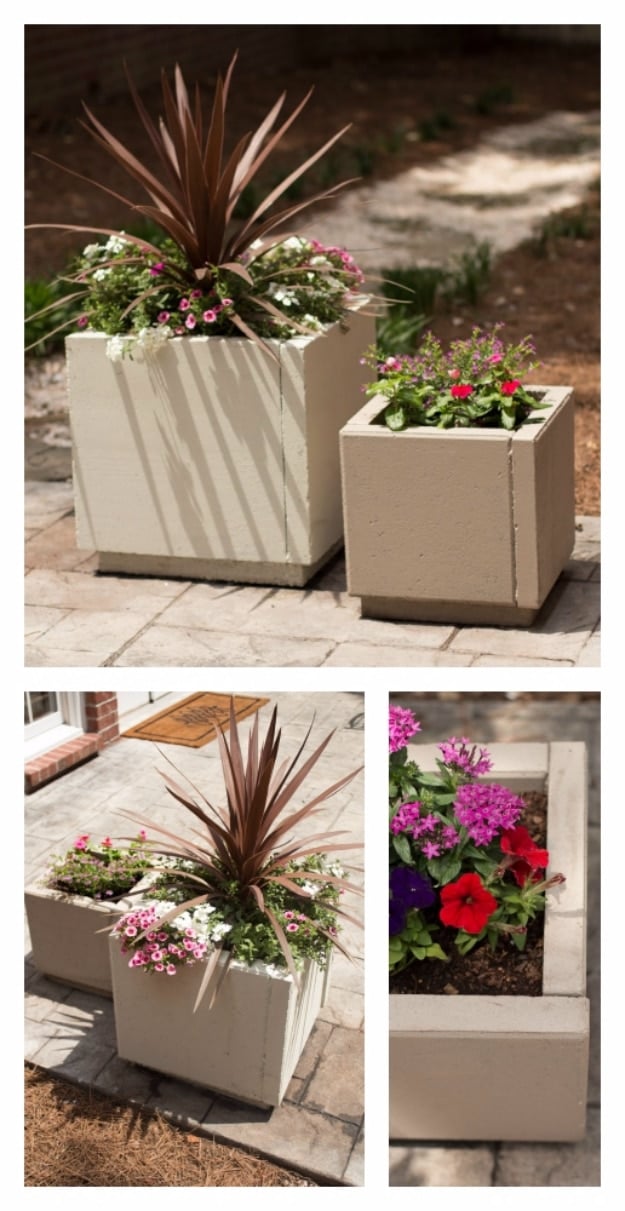
These are not cast at all, which is the surprise. Each planter is five patio pavers, sixteen inches square for the large size or twelve for the small, glued edge to edge with the fifth paver used as the base. Gorilla Glue and clamps beat construction adhesive on its own here; the creator came home to one side collapsed after skipping the clamps. Run thin lines of glue, because it expands to about three times its volume, and use only small dots under the base so water can still drain out. Build them where they will stand. They are heavy.
Get the full tutorial at Life in Velvet.
23. DIY Slat Screen
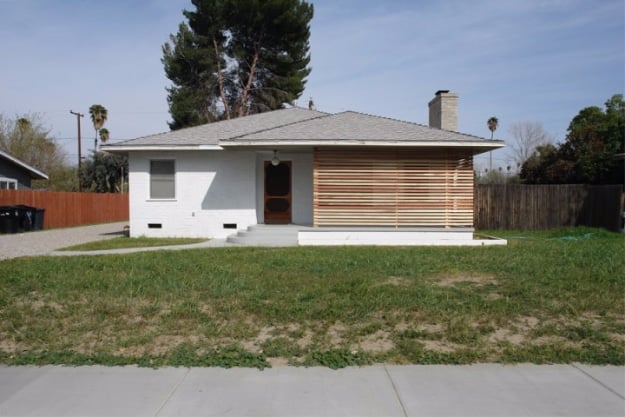
Sixteen feet of horizontal wood slats across the front of a stucco ranch, and the elevation changes character completely. A low, flat house is usually missing a strong horizontal line, and a run of slats supplies one while giving the front windows privacy without a single curtain. If you build something like this, pick a species that lives outdoors happily, redwood or cedar, and accept early that your spacing will not divide evenly around posts that are already in the ground. Sliding a support off center beats splicing boards to save the math.
Get the full tutorial at The Brick House.
24. DIY Wine Bottle Edging
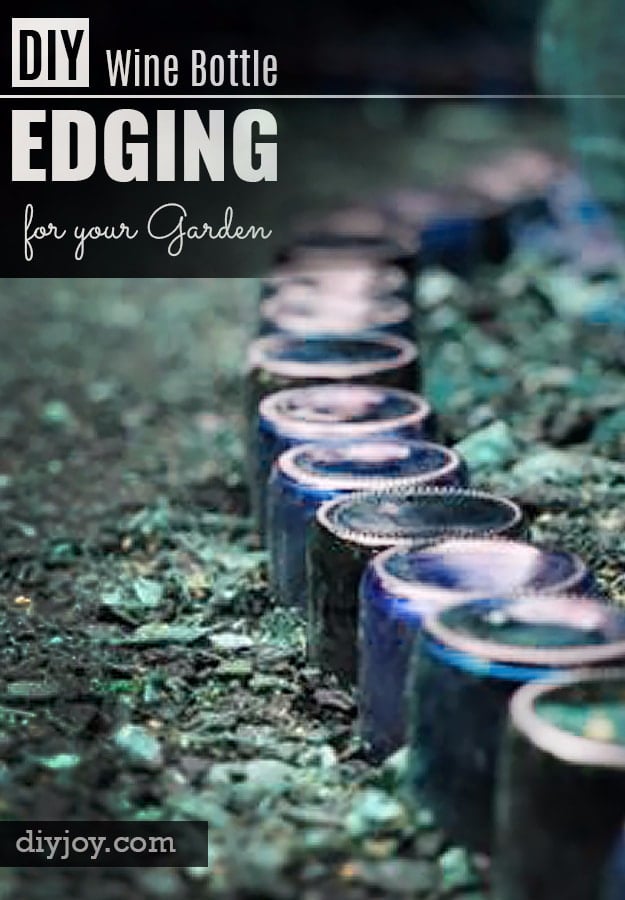
Empty bottles, upside down, shoulder to shoulder along a bed, and the bases catch light all day like glass cobbles. Dig a trench to roughly half the height of a bottle, which is deeper than instinct says and is exactly why most attempts look wobbly. Set them in touching each other, pack soil firmly around every one, tamp the sides down and then water the whole run, because water settles the soil into the gaps that packing misses. Sort your bottles by color first if you want a deliberate pattern rather than whatever the recycling bin produced.
Get the full tutorial at DIY Joy.
25. Bench Hose Storage
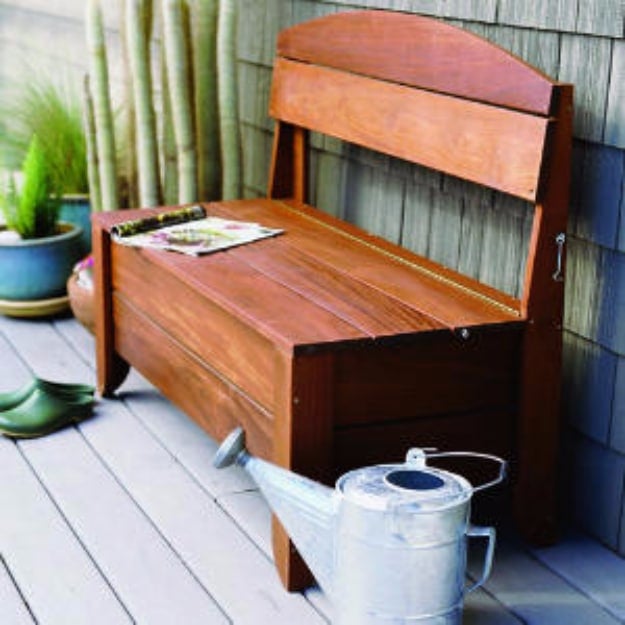
A hinged bench that swallows the garden hose, built from seven eight-foot 1×6 boards in something rot-resistant, ipé, cedar, redwood or teak. The legs are cut at 16 and 32 inches with 45 degree miters, and the seat runs on a 48 inch continuous hinge with a hook and eye to keep it shut. The detail that makes it work as hose storage rather than a damp box is the bottom: four feet of quarter inch galvanized wire mesh instead of boards, so a wet hose drains and dries. Under two hundred dollars and about two days of work.
Get the full tutorial at Sunset.
26. Brick Edging For Your Flower Beds
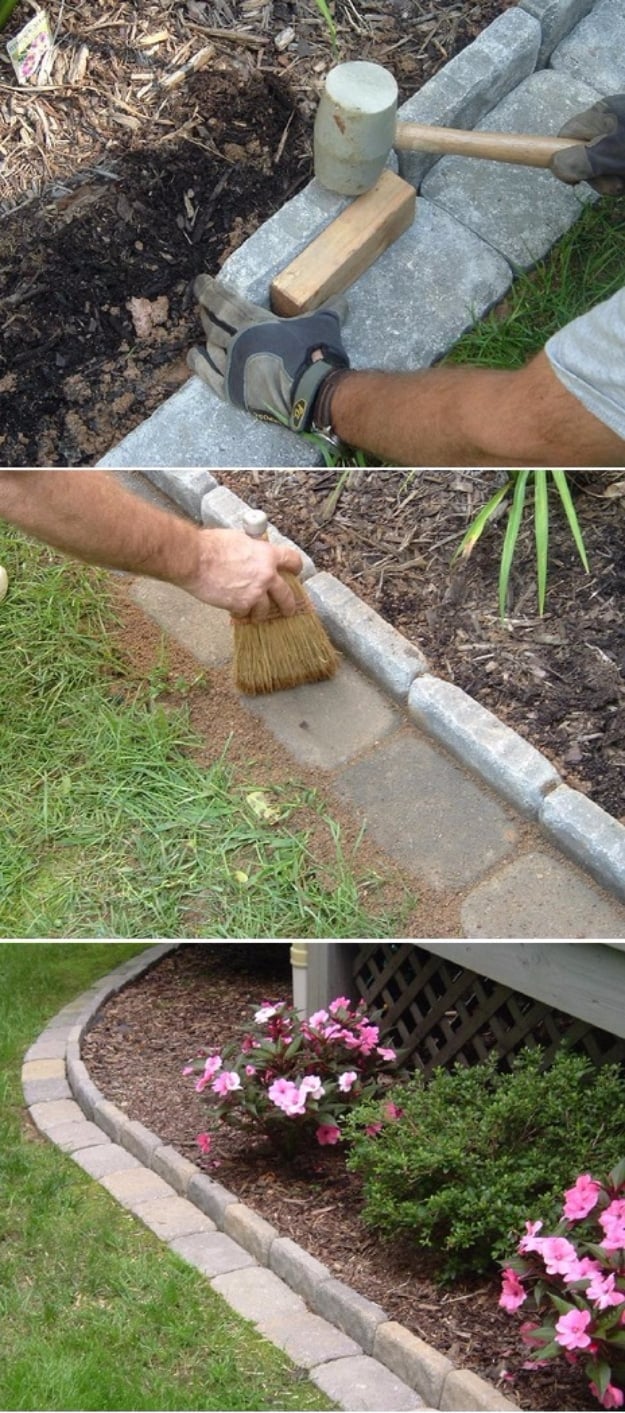
Concrete pavers at six by nine inches, set on sand along the edge of a bed, tapped down with a rubber mallet until every one sits level with its neighbor. Use a no-bounce mallet rather than a standard one, because a bouncing head throws pavers out of line faster than you can reset them. A lawn edging tool cuts the clean line first, then the trench gets its sand bed, then the pavers. Sweep the joints out with a stiff brush at the end. A two and a half inch scrap block works as a spacer if you want the gaps identical.
Get the full tutorial at Gardeen World.
27. Easy Carriage Style Garage Doors
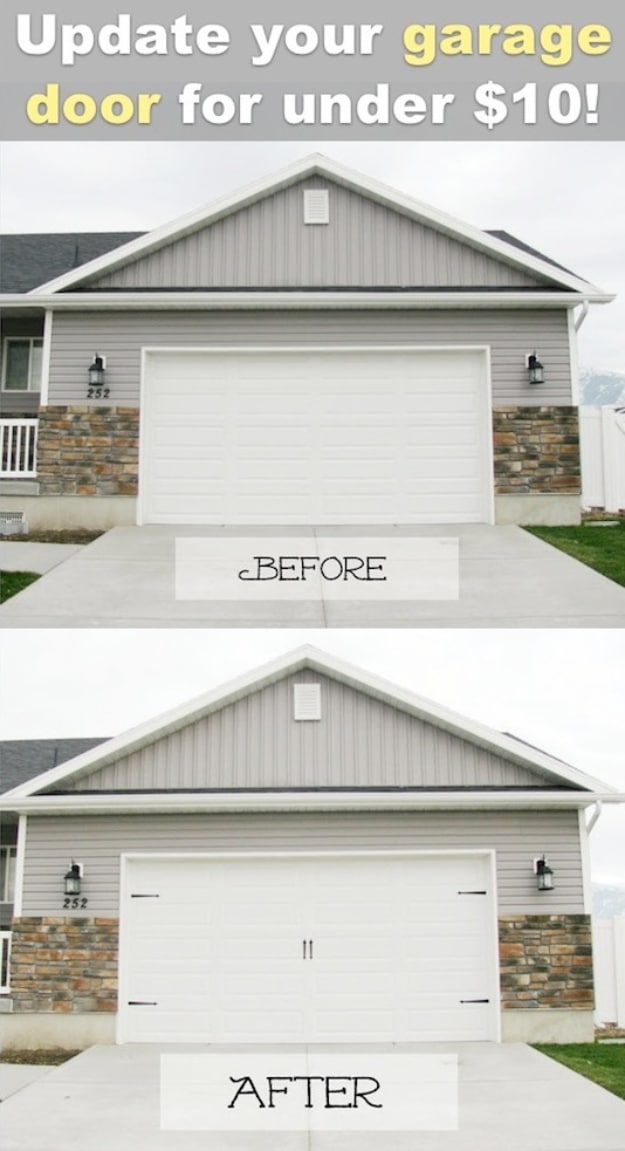
Two doors, one house, and the only difference is hardware. The before shot is a plain white panel door and the after has simple strap detail across it, which is enough to read as carriage style from the street. Because the panels on most steel garage doors are shallow, this works best when the hardware is dark against a light door and mounted to line up with the existing panel divisions rather than floating between them. Measure the panel lines first. Magnetic hardware exists and is the sensible route on a steel door, since screwing into an insulated panel is a bad idea.
Get the full tutorial at Garrden of Love.