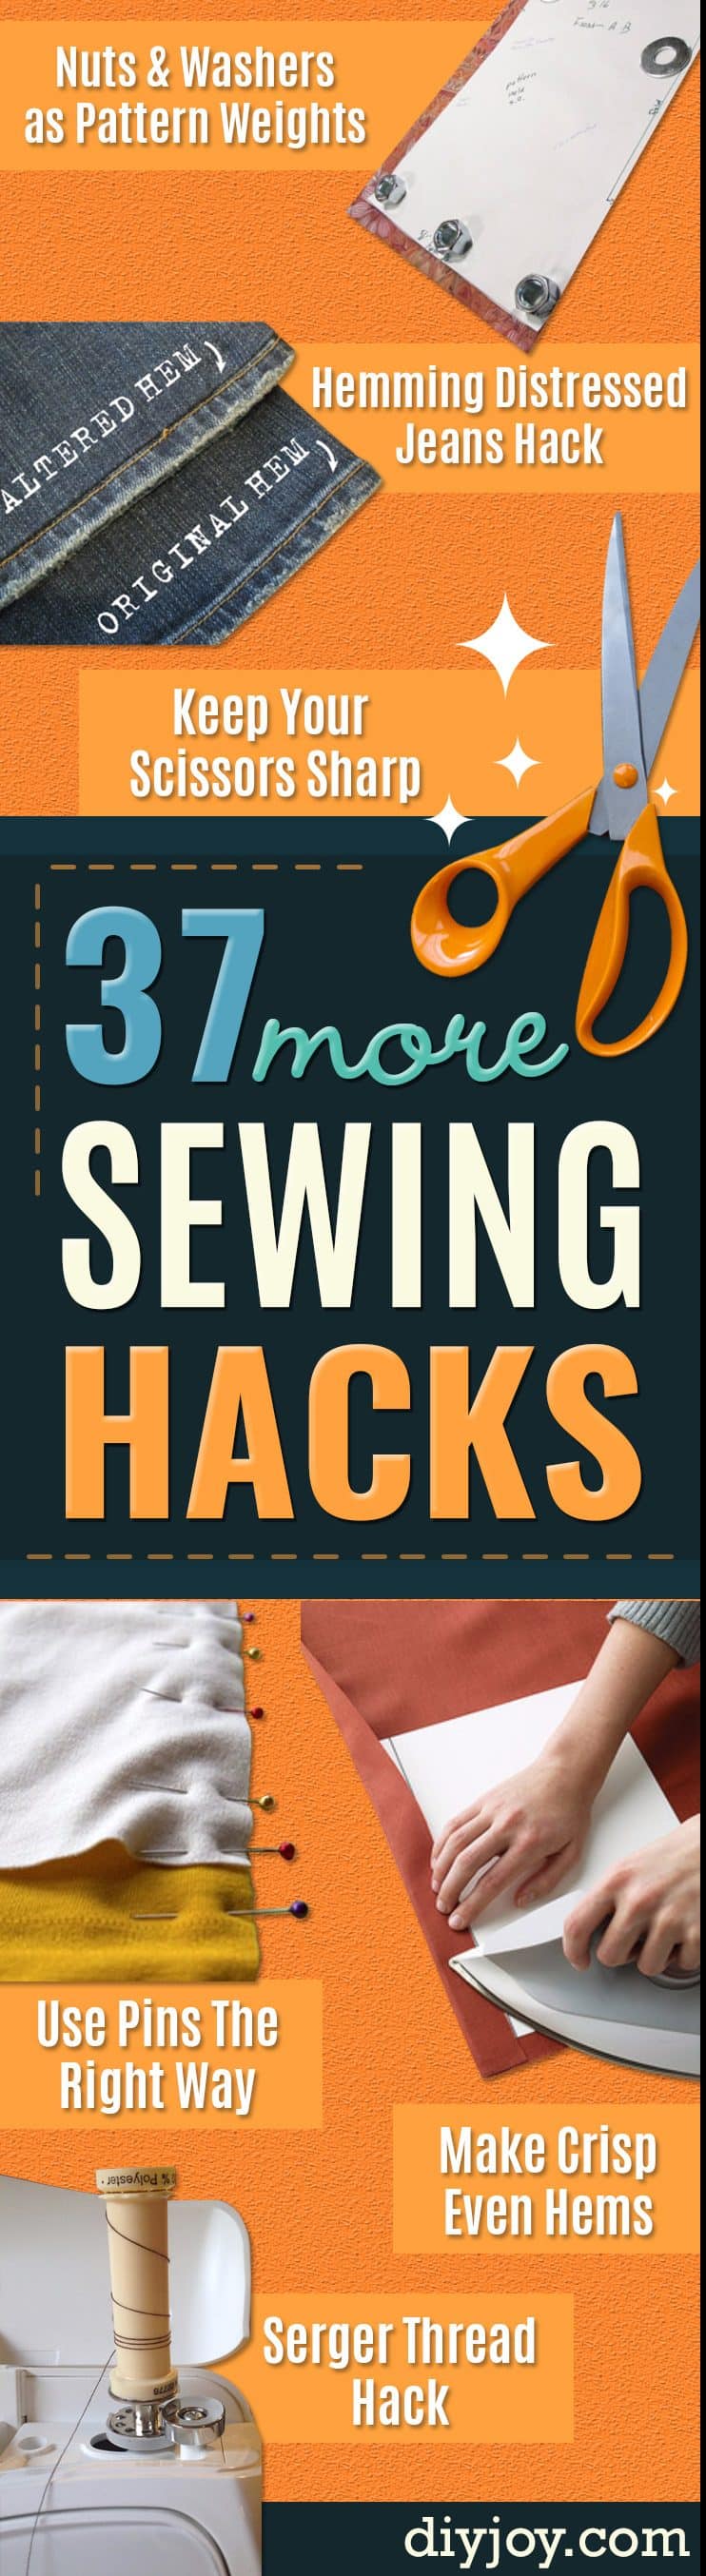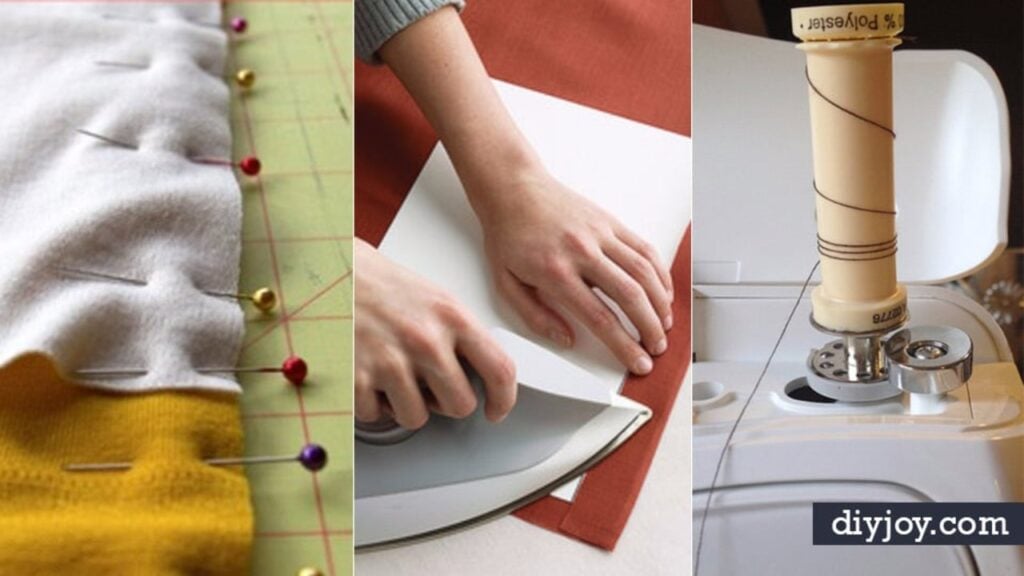
Nothing in sewing wastes an afternoon like the small stuff. A seam that wanders a sixteenth of an inch until the shoulders do not match, a bobbin nest on the back of the fabric, a zipper that ripples along its whole length, a pin you ran over and a needle you now have to replace. Every one of those has a fix, and most of the fixes are five minutes and a thing you already own. So that is what I went looking for here: 33 sewing hacks, tips and tricks that solve a specific problem rather than just sounding clever, from the cheapest pattern weights in the hardware aisle to the difference between pressing and ironing, which is not the same thing and changes how your seams look. Some are machine tricks, some are hand sewing, some are pure storage. Perfect for a beginner and for anybody who has been sewing for years and never learned to set a zipper flat!
Sewing Hacks
1. Winding and Threading Your Bobbin
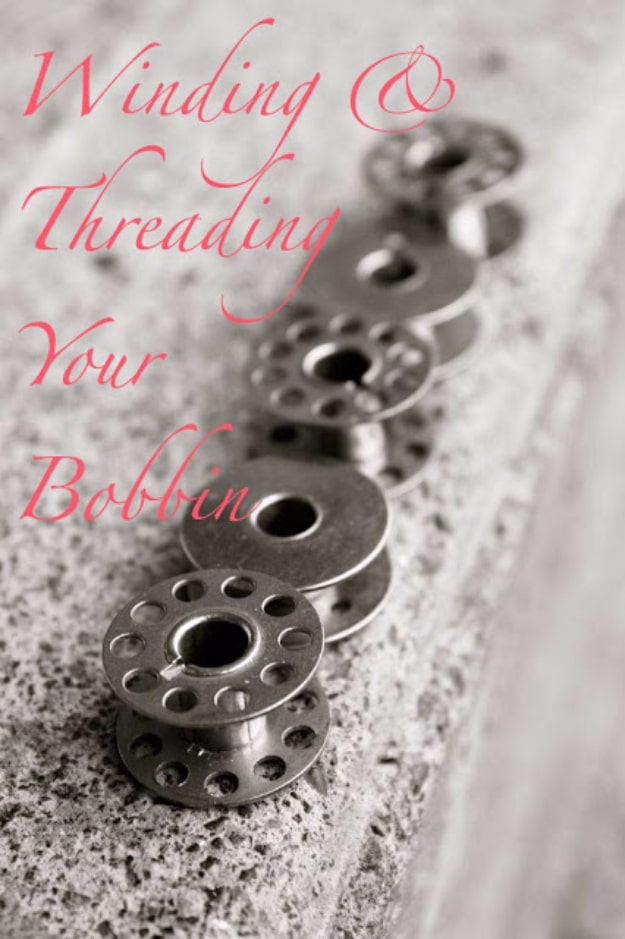
Start here if the bottom half of your machine is still a mystery. Thread from the inside of the bobbin out so an inch or two sticks through the hole, snap the bobbin onto the little metal shank at the top of the machine, push it across to the white thread stopper and hold the tail while you press the pedal. Then the part everybody fumbles: pull the thread through the notch, under the finger inside the case, drop the needle once with the handwheel, and it brings the bobbin thread up to meet it.
Get the full tutorial at Ruffles and Stuff.
2. Keep Supplies Organized
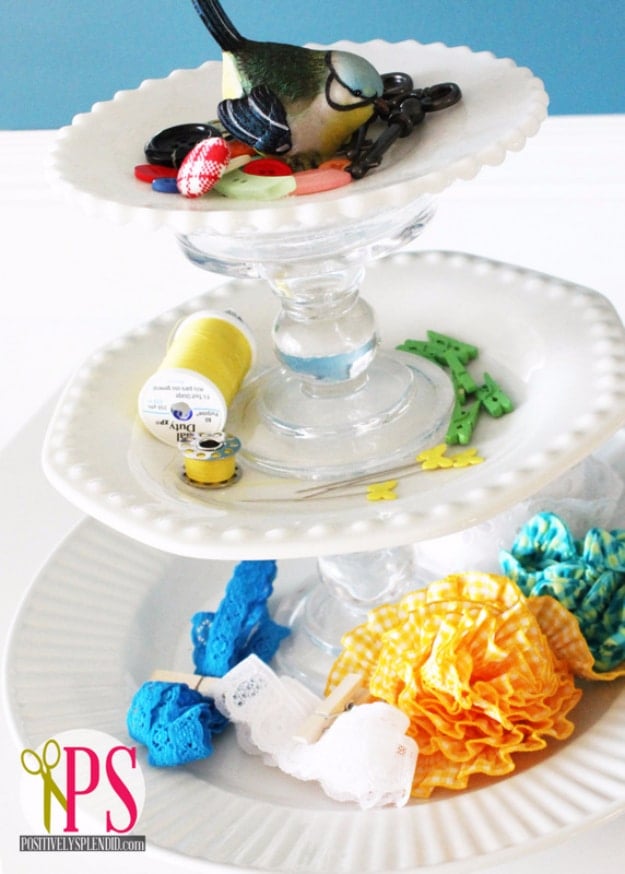
The fix is a tiered cake stand parked beside the machine, loaded with the things you get up for: thread, a thimble, buttons, snips, trim. It works because the sewing problem is not really storage, it is that you are holding fabric with both hands when you discover you need something. A stand puts it all inside arm’s reach and, unlike a drawer, it looks good enough to leave out. Fill the top tier with what you reach for every single time.
Get the full tutorial at Positively Splendid.
3. Easy T-Shirt Name Embroidery Hack
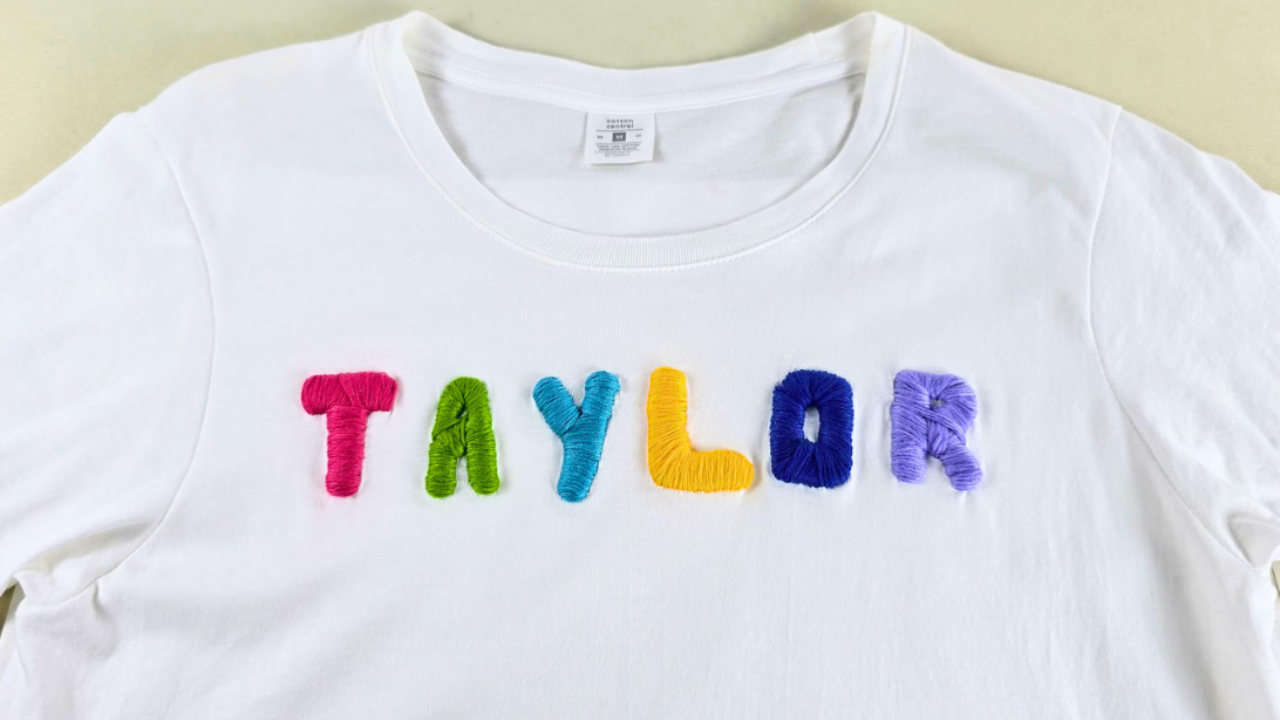
Here is a hack that makes people ask where you bought the shirt. Write the name on paper, cut the letters out, trace them onto the fabric, then outline each letter in hot glue and weave thread over the raised glue until it is covered. The glue does the shaping, so the letters sit up off the shirt like embossed embroidery instead of lying flat, and you need essentially no embroidery skill to do it. A plain shirt from the back of the closet becomes a birthday present or a set of matching group shirts.
Get the full tutorial at DIY Joy.
4. How to Make And Sew Piping
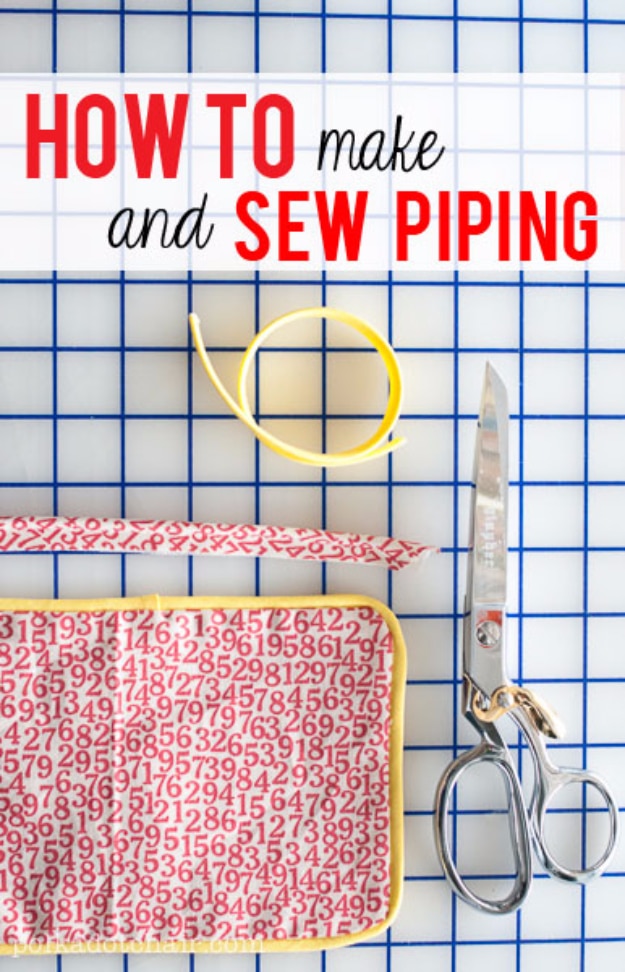
Piping is what makes a cushion or a bag look finished rather than merely sewn, and making your own means it can match anything in your stash. One correction worth having before you start: the tutorial recommends an actual piping foot, with a groove underneath that lets the cord slide through and holds it in place, over the zipper foot everybody suggests. She has tried the other ways and says the right foot is simply easier; her own zipper foot is a little too wide for the job. Zipper feet differ by manufacturer, so test yours on scraps first.
Get the full tutorial at The Polka Dot Chair.
5. How to Sew Bias Tape
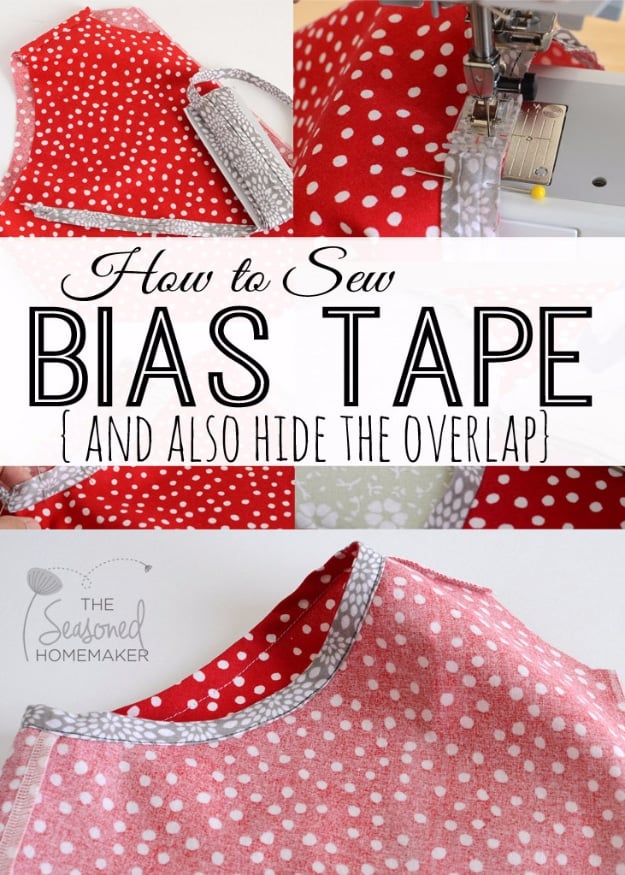
This one attaches bias tape around the armhole of a sleeveless top, which is the situation most people meet it in. Measure the opening, then add six to twelve inches so you never come up short. Press one fold open, fold the raw end into a triangle so the overlap finishes neatly, pin right sides together all the way round using far more pins than feels necessary, stitch, press the seam toward the tape, fold it inside, pin again and edge stitch. It looks right on both sides, which is the whole point.
Get the full tutorial at The Seasoned Homemaker.
6. Sew Sequins The Easy Way
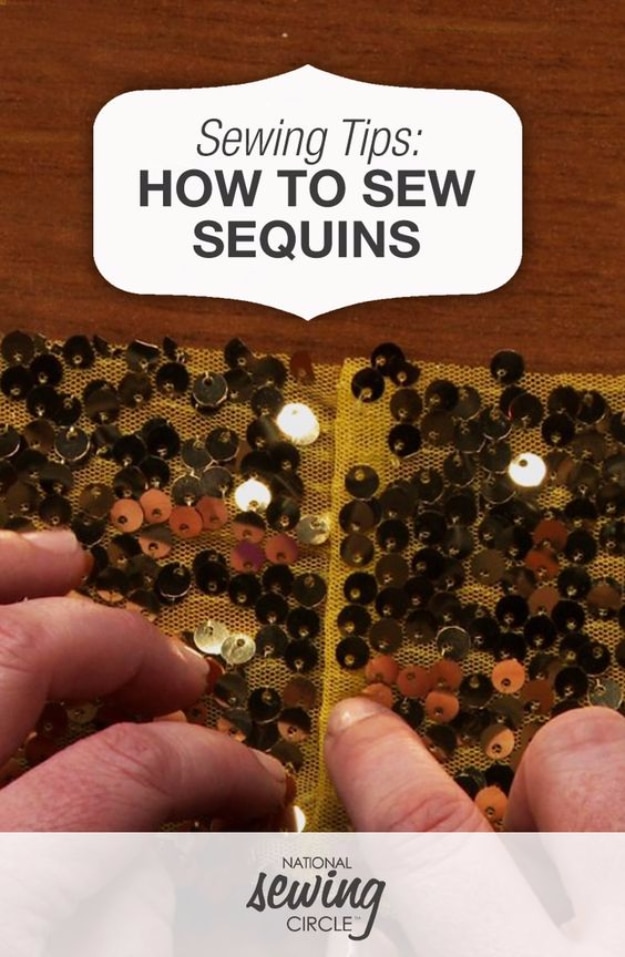
Sequins arrive three ways and each wants different handling: loose, usually cup shaped and anywhere from five to ten millimeters; pre-strung on a strand as trim, which saves enormous time if you just want a line of them; or already on the fabric, in which case the backing is deliberately lightweight mesh or tulle because a few thousand sequins get heavy. For anything you will wash, sew them on with a skinny sharp needle and matching or invisible thread so the stitches disappear into the fabric.
Get the full tutorial at National Sewing Circle, video by Beth Bradley.
7. 15 Basic Embroidery Stitches for Beginners
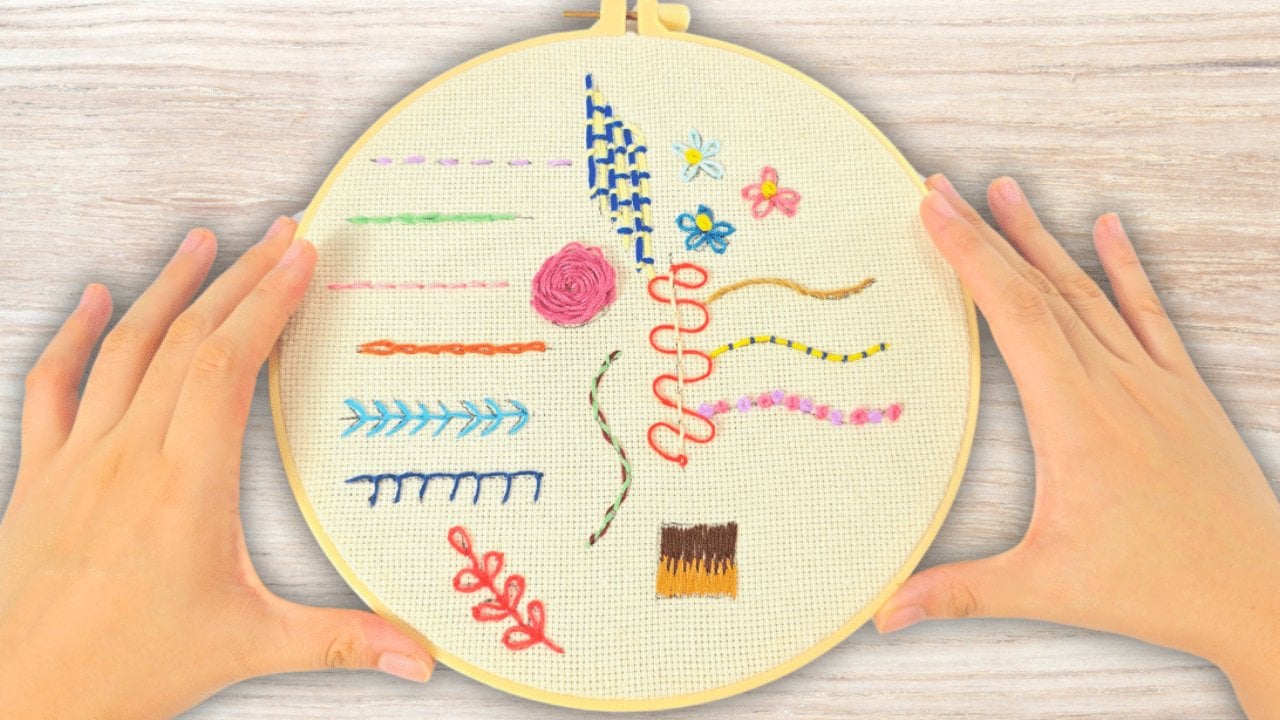
Fifteen stitches, learned in under an hour, and after that most embroidery patterns stop looking like a foreign language. The running stitch, the split stitch and the rest are each broken down step by step with a hoop, a needle, thread and scissors, which is the entire supply list. One practical tip from the tutorial: you can buy embroidery cloth with the guide already printed on it, or just draw the lines yourself, which is what we did. Knot on the back, keep your stitch lengths even, and the neatness comes with the third or fourth repeat.
Get the full tutorial at DIY Joy.
8. Unbelievably Easy Sewing Hack With A Rubber Band
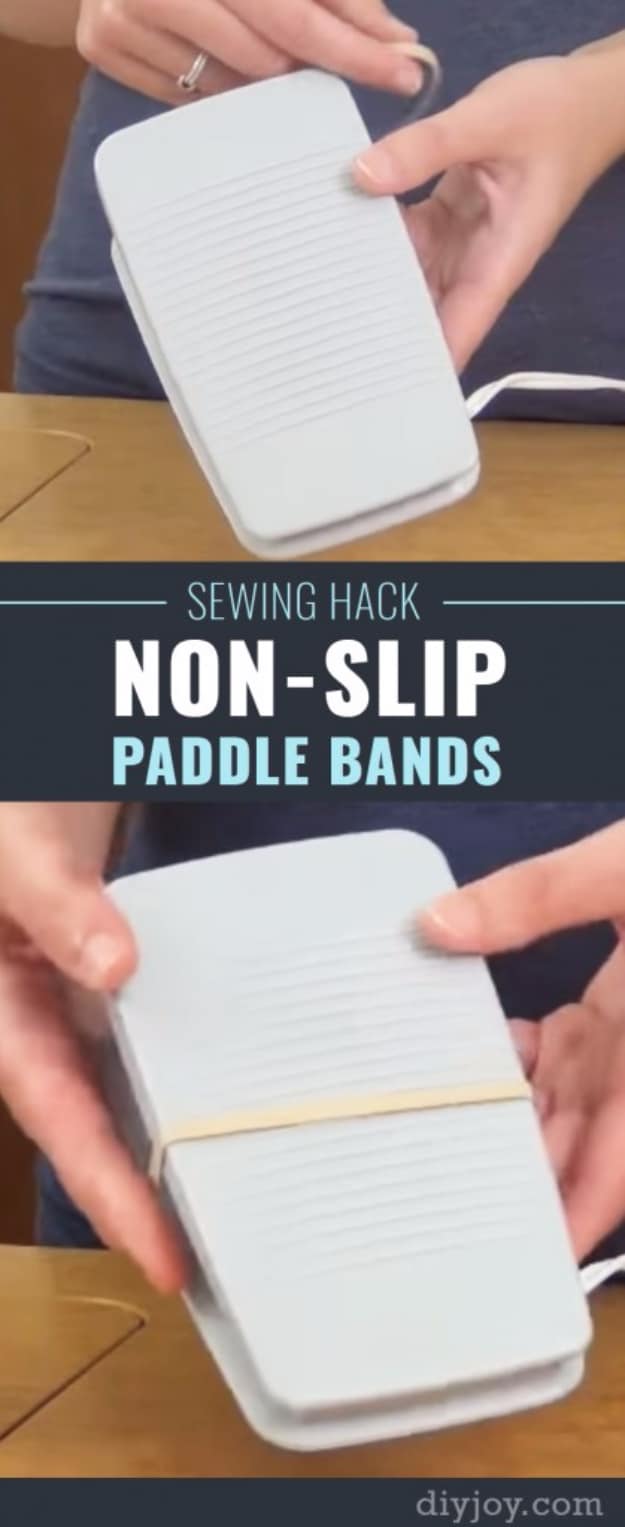
Our own entry in this list of sewing hacks is almost embarrassingly simple: wrap a rubber band around your foot pedal so it stops sliding away from you. If you have ever chased a pedal under the table and around every wire within four feet while trying to hold fabric steady, this is thirty seconds of your life that pays for itself immediately. On a larger pedal, use a couple of bands spaced an inch or two apart for better grip. There is a video on the post.
Get the full tutorial at DIY Joy.
9. How to Keep Your Scissors Sharp
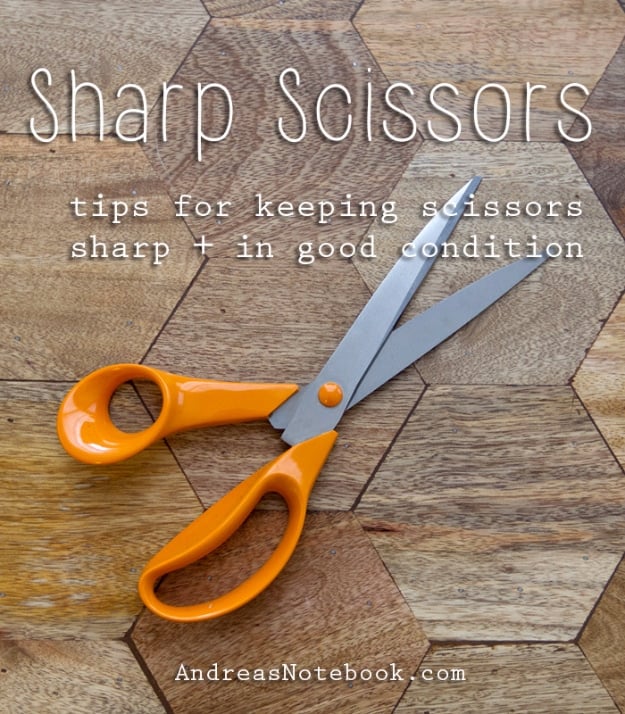
Fabric only, forever, is rule one and it is not negotiable, tissue patterns included. After that: wipe the blades gently with a clean dry cloth after each use to keep them lint free, never anything wet or they rust, and do not cut over pins. And one correction to something all over the internet, straight from this post: do not follow the Pinterest advice about cutting foil to sharpen them. Dull them properly and your options are new scissors, a professional sharpening or a real sharpening tool.
Get the full tutorial at Andrea's Notebook.
10. Cute Bow Embroidery on Jeans
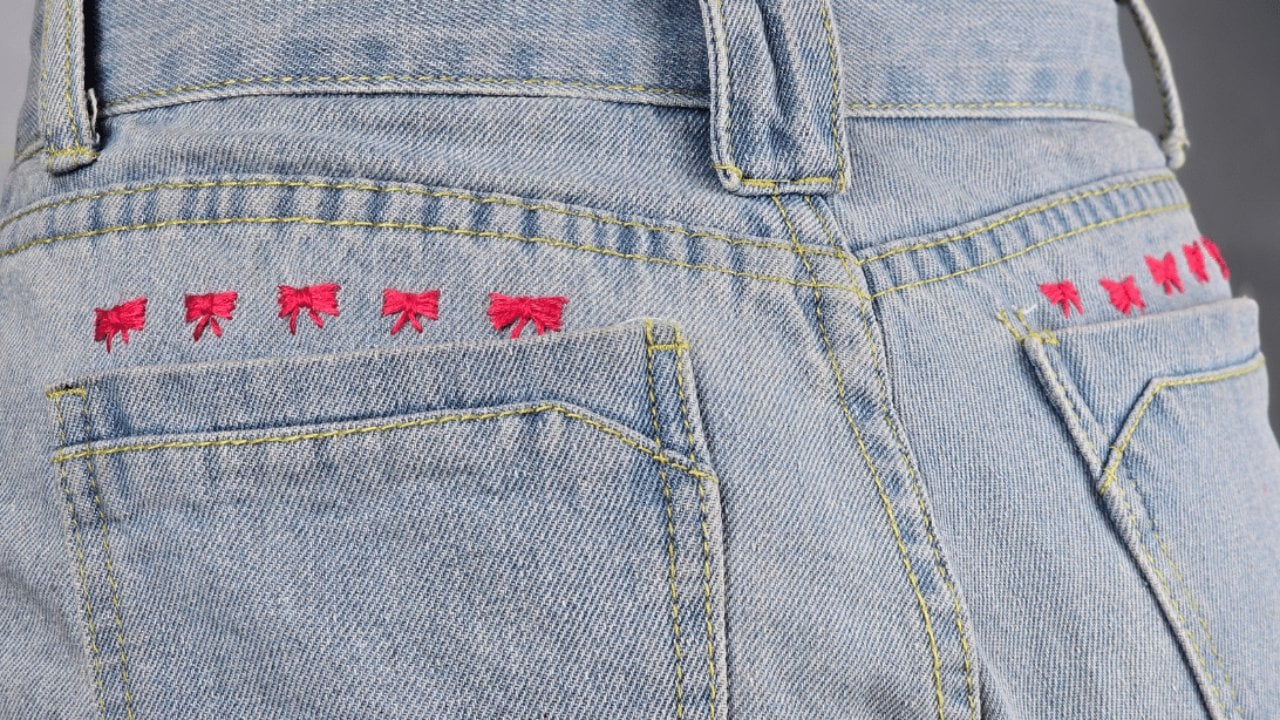
The whole supply list is a pair of jeans, a needle, thread and scissors, and it does not even have to be embroidery thread. Fill the body of the bow with straight stitches about half an inch long, set a quarter inch apart, then bring the needle up through the center, pass it under the threads to pinch the waist, and wrap the working thread around to finish the shape. Each bow takes under five minutes. It is the easiest way there is to cover a small tear or a stain on denim, which is usually how it starts.
Get the full tutorial at DIY Joy.
11. 7 Ways To Make A Ruffle
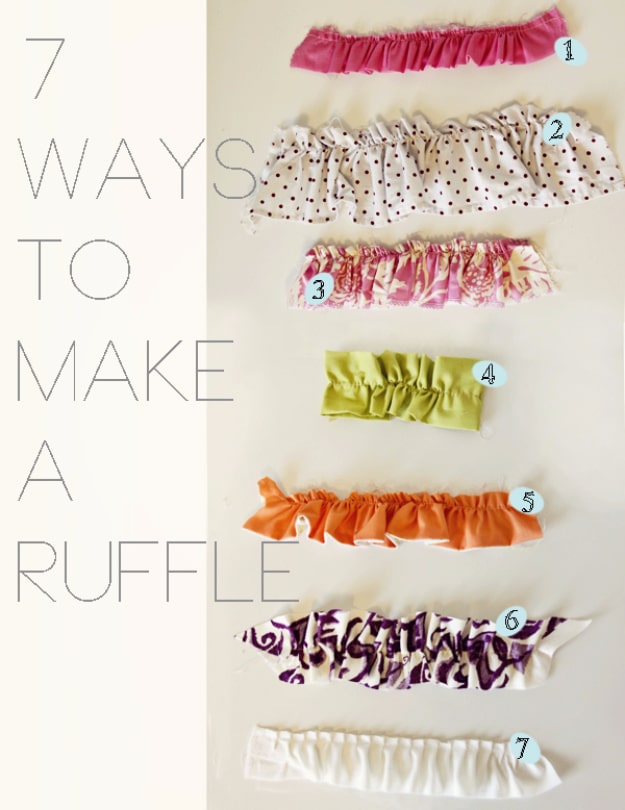
Ruffles turn up everywhere from cushion trim to little girls’ dresses, and having seven methods means always reaching for the right one. The list runs: a folded over strip gathered at the top, a hemmed ruffle folded a quarter inch twice and pressed before gathering, a serged ruffle, a tube ruffle made by folding a strip, sewing and turning it then gathering down the middle, a two tone ruffle from two colors seamed together, a bias cut ruffle that barely frays and a knit ruffle that needs no edge finish at all.
Get the full tutorial at See Kate Sew.
12. Sew Knits With A Sewing Machine
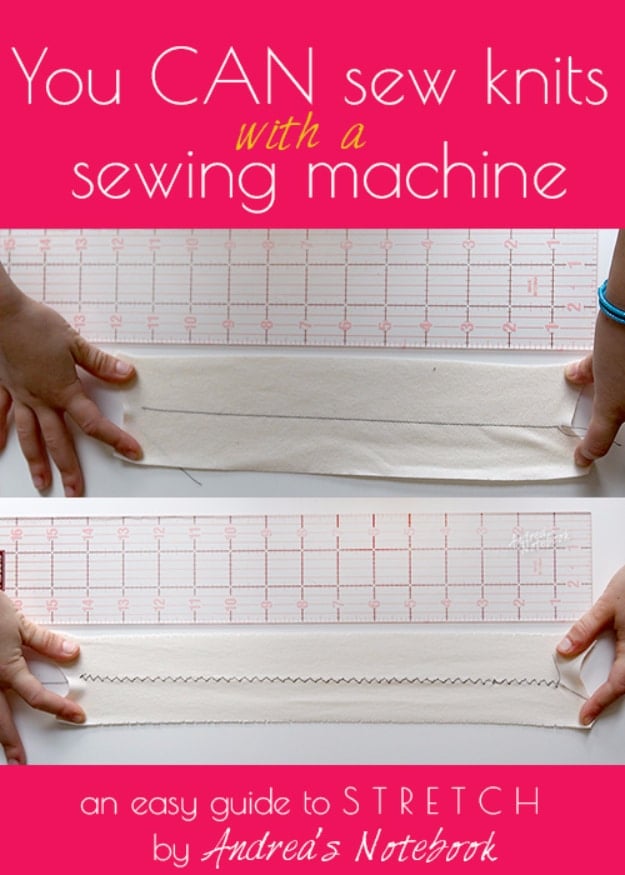
A serger is ideal for knits and absolutely not necessary, which is the useful half of this post. The test is straightforward: cut a few strips of your fabric, three by ten inches, and try each stitch. A straight stitch works, but you have to stretch the fabric as you sew and the seam ends up slightly puckered. A zigzag is on nearly every machine and is the reliable answer; narrow it so the seam lies flat. A knit stitch gives stretch with a straight look, and a faux serger stitch is excellent if you have one.
Get the full tutorial at Andrea's Notebook.
13. Use Pins The Right Way
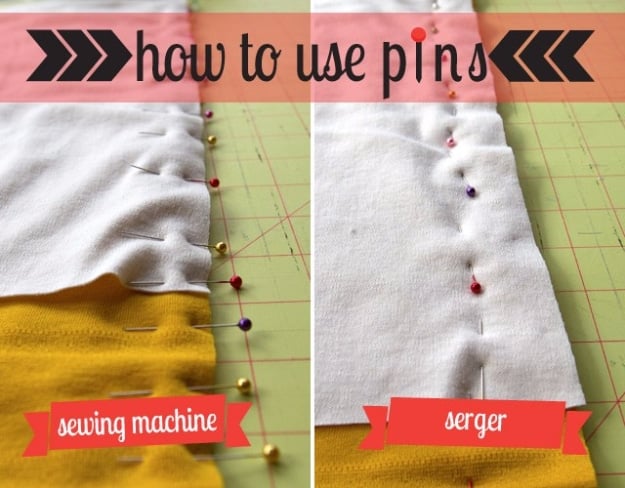
Two rules, and they are different depending on the machine. At the sewing machine, pin with the head off to the right hand side so the pins pull out easily as you sew, and slow down to take each one out before the needle reaches it, because a needle that hits a pin is a needle you are replacing. At the serger, pin an inch to an inch and a half inside the fabric edge with the heads facing down, which keeps them clear of the blade and stops them stabbing you.
Get the full tutorial at Go To Sew, now SEWTORIAL.
14. Make Your Own Pattern Weights
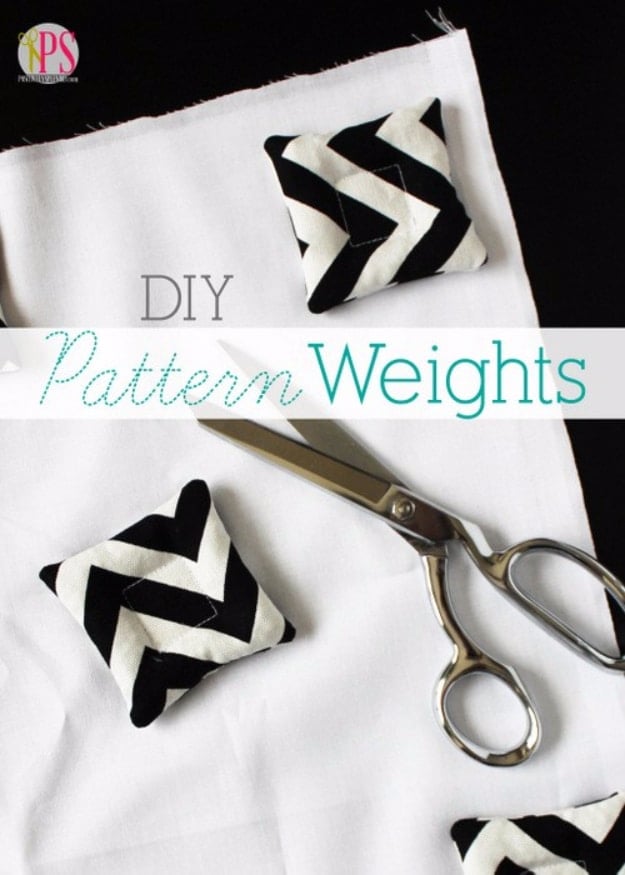
Pattern weights beat pins for cutting speed the first time you try them, and making your own turns a notions expense into a scrap project. Little fabric covered bean bag style weights hold the pattern pieces flat while the rotary cutter goes around them, with no pinning and unpinning marathon at either end. They also spare delicate fabrics the pinholes that pins leave behind. The black and white chevron set in the photo is small enough to sit on a tight curve.
Get the full tutorial at Positively Splendid.
15. Easy Sweater Embroidery Hack
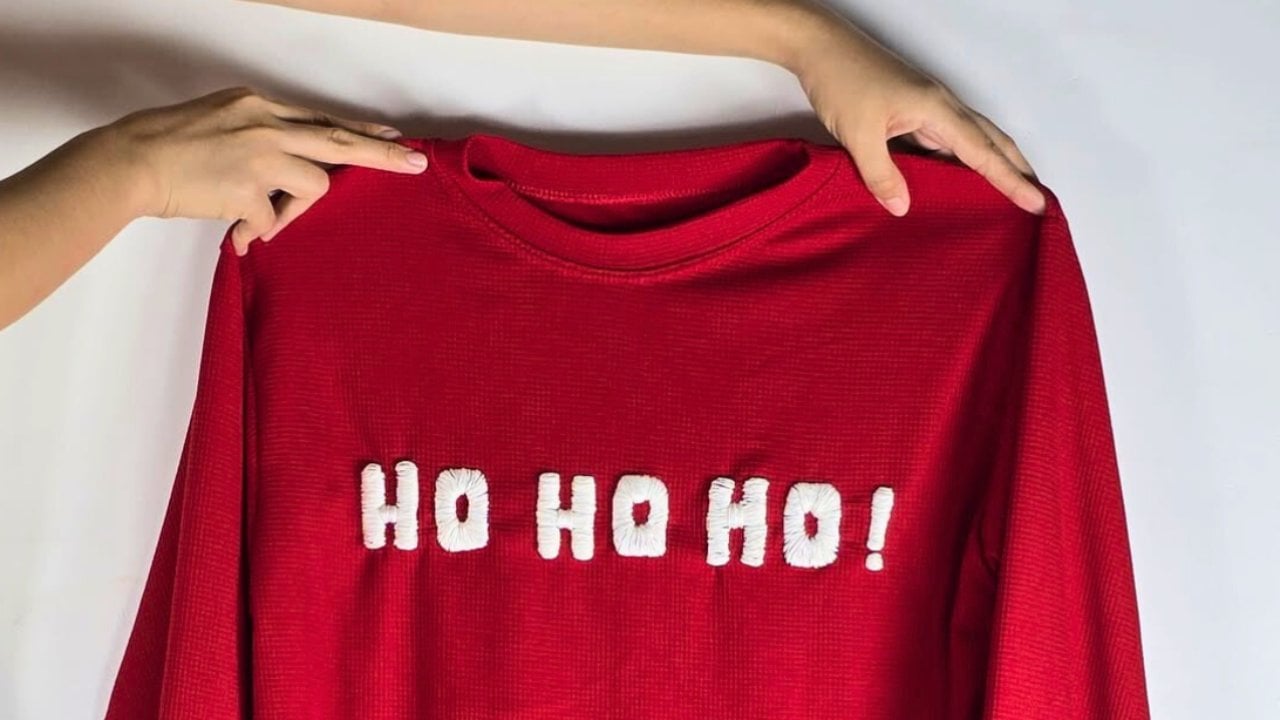
The same embossed lettering trick, this time on knitwear, and knits are where it really earns its place because stitching neat letters into a loose knit by hand is genuinely difficult. Hot glue lays the shape down first, the thread goes over the top, and the letters stand up off the surface so a big message reads from across a room. The stitches hold up in the wash, unlike a lot of delicate surface embroidery. One sweater you already own, a little white cord, and nobody else has one.
Get the full tutorial at DIY Joy.
16. Hemming Distressed Jeans
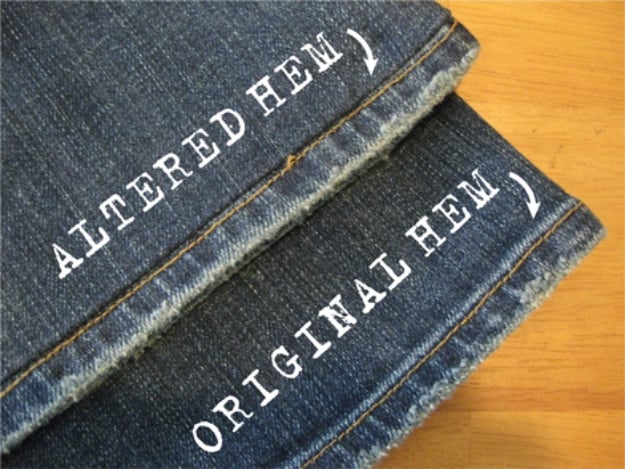
Shortening jeans normally means cutting off the perfectly worn original hem and replacing it with an obviously new one, and this keeps the factory edge instead. Mark the length you want, match the top of the original hem to that line and pin, then stitch along the top of the hem so the seam hides in the ditch. Trim the extra away, finish the raw edge with a zigzag or a serger, and from the outside the jeans look untouched, just shorter.
Get the full tutorial at Sew Simple Home.
17. How to Sew Zippers Without Waves
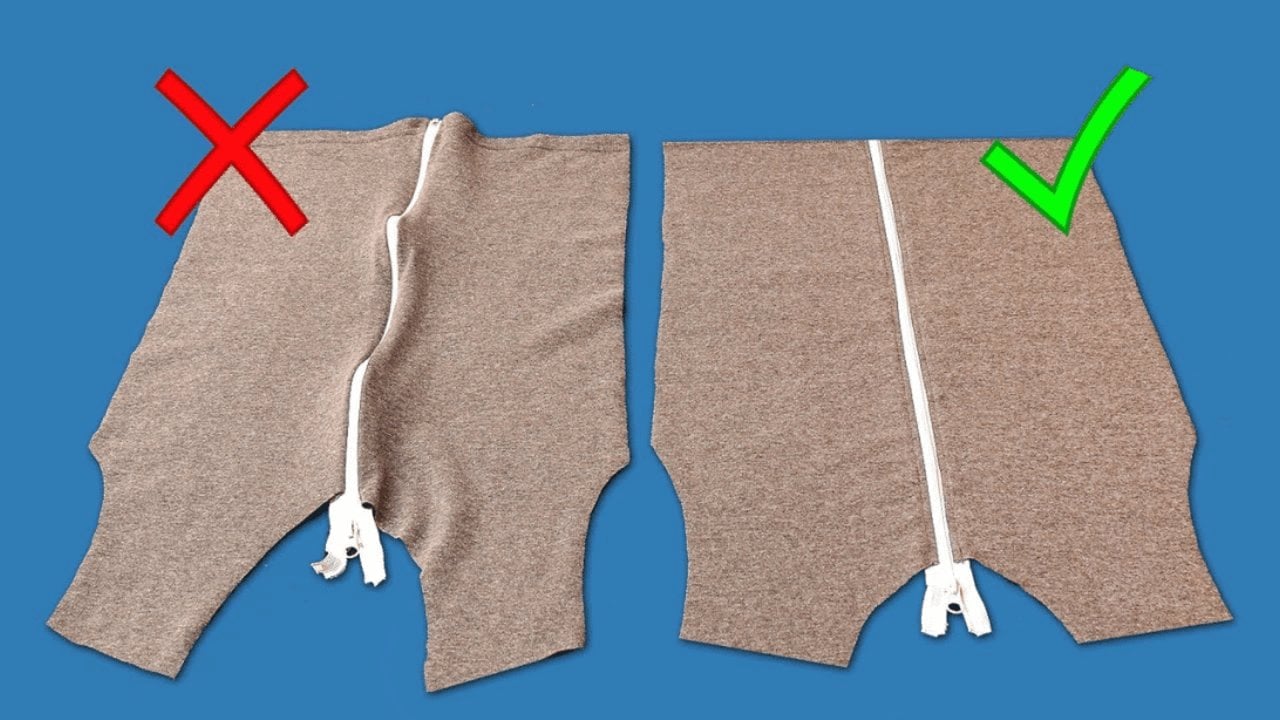
Wavy, rippling zippers are the problem almost every beginner hits and almost nobody knows is fixable. The fix is fusible interfacing: cut two strips the same size as each side of the zipper, iron them along the edges of the opening before the zipper goes anywhere near the machine, then lay the zipper face down with the edges matched and stitch between the zipper edge and the chain, backstitching at both ends. The interfacing stops the fabric stretching as you feed it, and the zipper comes out flat.
Get the full tutorial at DIY Joy.
18. Cut Out Your Size From A Pattern And Leave It Intact
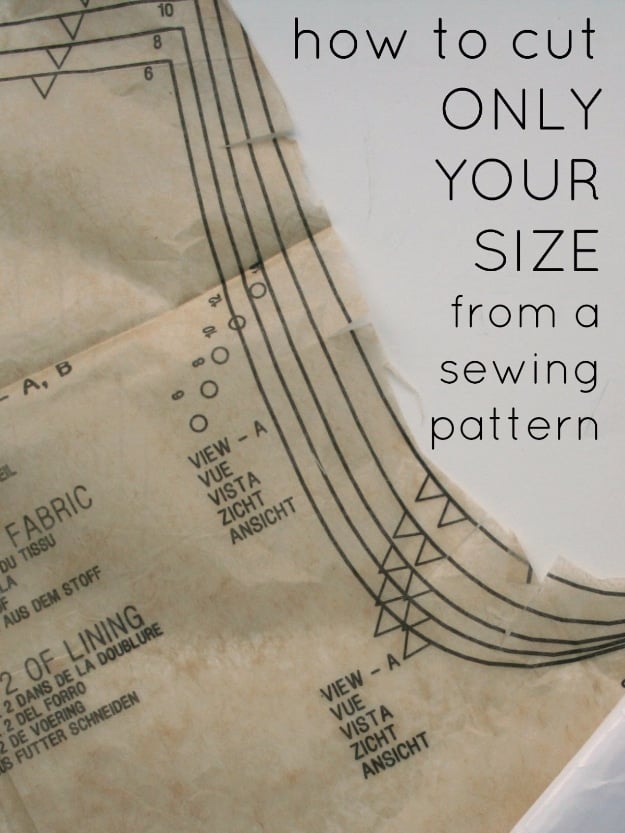
Multi size patterns force a cruel choice: cut your size and destroy the others, or trace everything like a medieval scribe. The third option is to leave the pieces whole and fold the tissue back along your size line, so the larger sizes fold away intact and are still there when a body changes or a child grows or a friend asks to borrow it. Curves like an armscye will not fold along a line, so snip into the curve in a few places and fold it in chunks. Weights hold folded tissue far better than pins.
Get the full tutorial at Create / Enjoy.
19. Sew Bias Tape The Proper Way
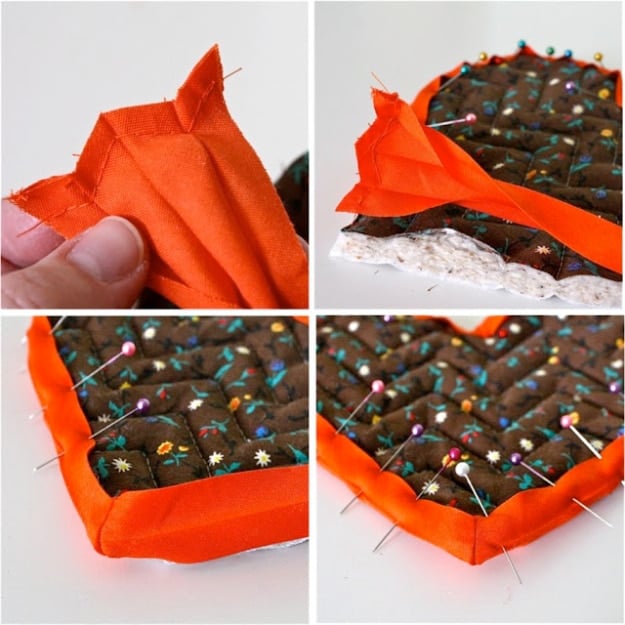
This is bias tape done the careful way, on a heart shaped hotpad cut from ready made IKEA potholders, which are about two dollars and want washing and drying first because they shrink. Use half inch double fold bias tape, unfold it, pin to the back of the potholder, overlap a crease at the top of the heart, and sew the two tape ends together at the bottom; a zigzag join there gives a nicer diagonal finish than a straight one. Then flip, fold to the front, pin and stitch down.
Get the full tutorial at MADE Everyday.
20. Sew A Perfect Curved Hem
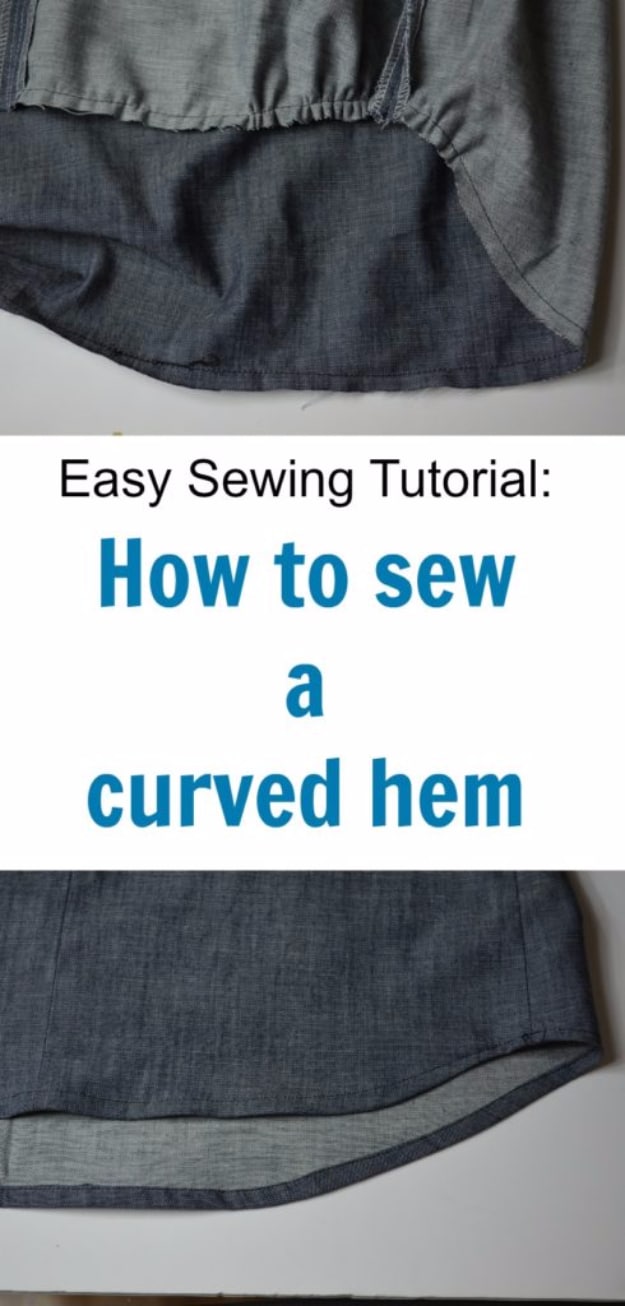
Curved hems pucker because a curved edge simply contains more fabric than the space it has to fold into, and the fix is easing. Baste the hemline at half the allowance your pattern gives, so a half inch hem gets basted a quarter inch from the edge. Gather the basting slightly, especially on the roundest parts. Hand press and fold the hem to the inside using that basting as your guide, press with the iron, then fold once more and edgestitch about an eighth of an inch from the fold.
Get the full tutorial at On the Cutting Floor.
21. Know Your Marking Tools
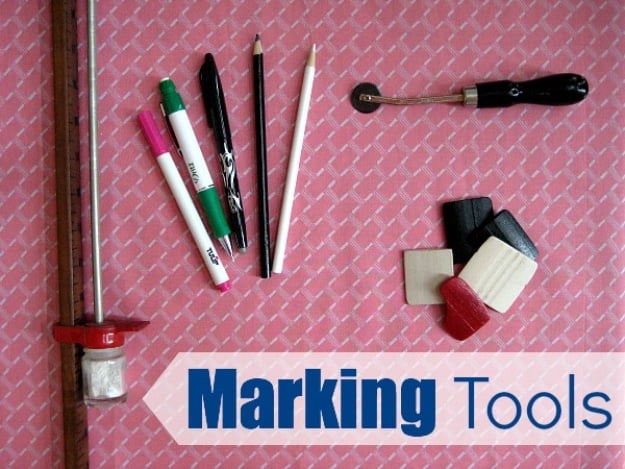
Every marking tool promises to disappear and they differ on when, how and whether they keep it. Disappearing ink markers often have two tips: the water soluble end stays put until you wash it, the disappearing end goes on its own and sometimes faster than you wanted. Two cautions worth knowing, both in the post: make sure disappearing ink has actually gone before washing, because detergent sets it permanently, and the chemicals degrade fabric over time, so keep them off an heirloom quilt. Test on a scrap of the same fabric first, always.
Get the full tutorial at The Sewing Loft.
22. Nuts And Washers As Pattern Weights
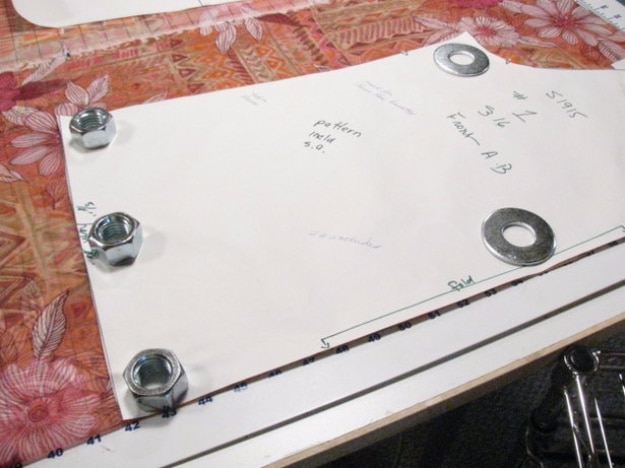
Straight from the fastener aisle, and one of the cheapest sewing hacks going: large steel washers make pattern weights that are flat, dense, cheap by the pound and small enough to hold down tissue edges and tight curves that a bigger weight bridges awkwardly. Gather a handful of fender washers an inch and a half to two inches across and stack four or five per weight so each has real heft, then cover the stack in a scrap circle of cotton if you want them pretty. Zero crafting required if you do not.
Get the full tutorial at So Sew Easy.
23. Tips For Sewing With Leather
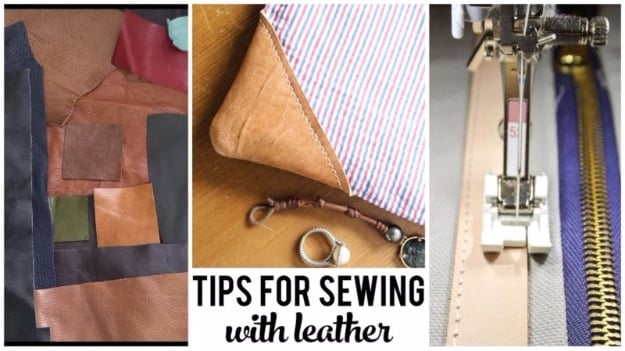
Leather sews on an ordinary home machine and looks far more expensive than quilting cotton ever manages, which is a good reason to pull the scraps out of the bin. Three things make the difference. Use a leather needle, which has a tip that punches through instead of dragging. Never pin, because every pin leaves a hole you cannot close, so hold the pieces with binding clips or a dab of glue. And swap to a Teflon foot if you have one, since a metal foot will not glide over the surface.
Get the full tutorial at The Polka Dot Chair.
24. Tension Trouble Tip
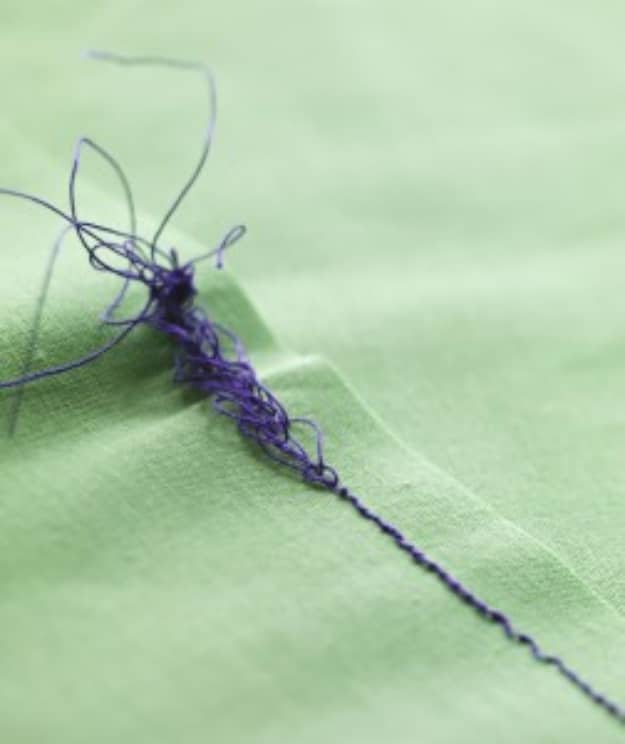
The loops and nests on the back of the fabric that send people to the repair shop are usually not a tension problem at all, they are a threading problem wearing a disguise. Rethread everything first, top and bobbin, with the presser foot UP so the thread can actually seat itself between the tension discs, then bring the foot down and test on a doubled scrap before you touch a single dial. Check the needle is seated properly too. If adjustment really is needed after that, move in small steps and sew a test seam between each one.
Get the full tutorial at So Sew Easy.
25. Sew Perfect Scalloped Edges
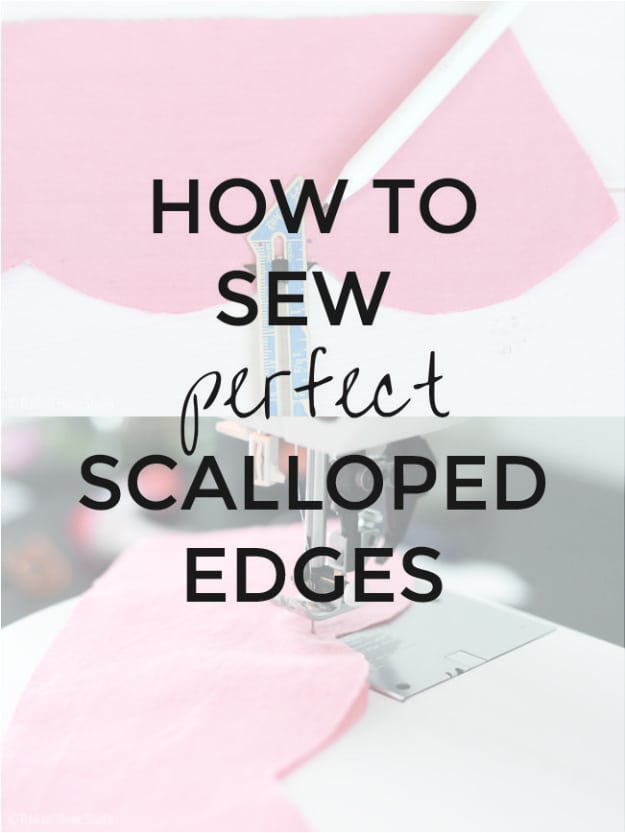
Scallops look like advanced magic and come down to marking, pivoting and patience. Mark a pivot point directly above each peak at your seam allowance, a quarter inch up if that is what you are using, then sew the curve with a short straight stitch, stop at the peak with the needle down, lift the foot and turn. Afterward, clip into each peak as close to the stitching as you dare, turn it right side out, and push the curves out with a blunt paintbrush end or a knitting needle before you press anything.
Get the full tutorial at Radiant Home Studio.
26. Tangle Free Hand Sewing
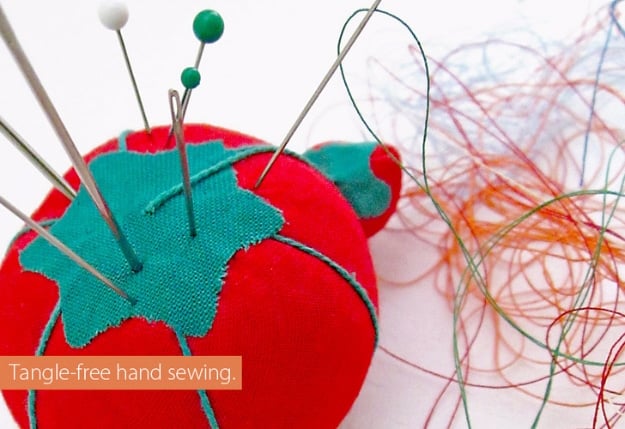
Hand sewing thread that twists and knots itself mid seam is not fate, and the fixes stack. Thread the needle with the end you actually cut from the spool, not the other one. Keep your lengths to eighteen or twenty inches rather than the heroic arm span. Pull the thread in the direction you are sewing, and do what hand quilters do and roll the needle between your fingers as you stitch, which unwinds the twist instead of building it. Beeswax or a thread conditioner coats the thread for a long hemming session.
Get the full tutorial at Sew4Home.
27. Basting 101
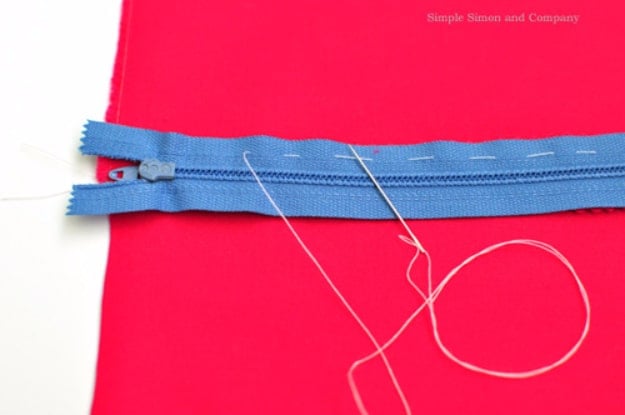
The photo shows the technique plainly: a blue zipper held to red fabric with a line of long, loose white running stitches before anything permanent happens. That is basting, and it is what stops a zipper or a tricky seam shifting under the presser foot while you sew it for real. It feels like doing the job twice, and it is, right up until the first time you unpick a zipper that wandered halfway down one side. Ten minutes on the walkthrough is worth it if you have been skipping the step.
Get the full tutorial at Simple Simon and Company.
28. Tips For Perfect Pressing
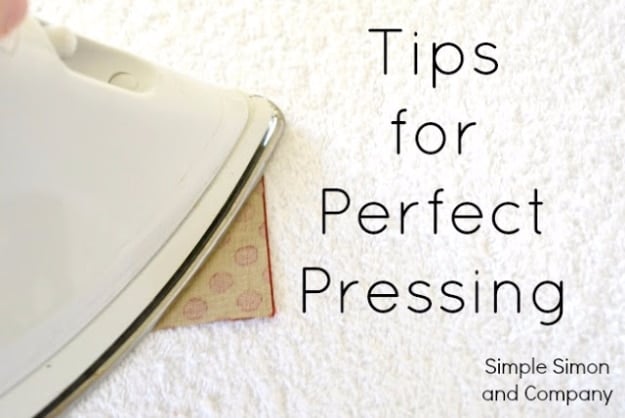
Pressing and ironing are not the same thing, and the difference changes how your work looks. Ironing slides the iron back and forth. Pressing is lift, lower, press, lift, lower, press, and it is the combination of heat, pressure and steam that molds the fabric. Press on the wrong side so you can see the seams. Press every seam flat before you press it open, which sets the stitches and kills puckers. Never press over pins or tape, and slide an envelope under a seam allowance so it does not print through to the front.
Get the full tutorial at Simple Simon and Company.
29. Sew With Elastic Thread
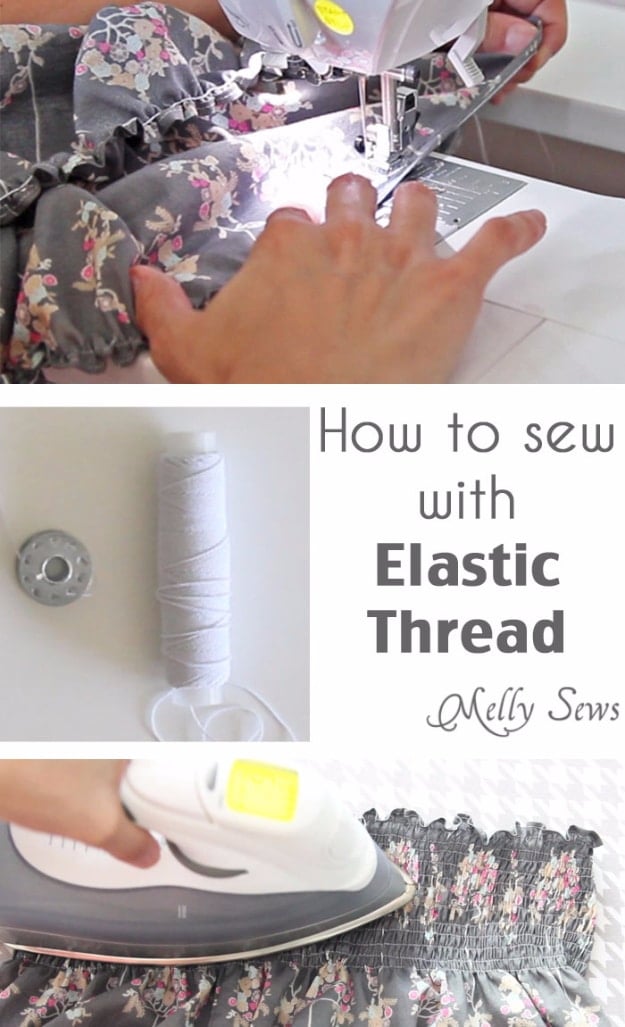
Shirring is elastic thread in the bobbin and ordinary thread on top, and each row of stitching gathers the fabric into a stretchy smocked panel. It is what every gathered sundress bodice is made of, and it works for waistbands, sleeve cuffs, neckbands and hem bands too. Two things worth knowing before you start: plenty of tutorials tell you to hand wind the bobbin and this one does not, and elastic thread comes on much shorter spools than sewing thread, so buy more than you think. Lightweight fabrics like cotton voile, lawn and rayon challis work best.
Get the full tutorial at Melly Sews.
30. Easy Seam Allowance Guide
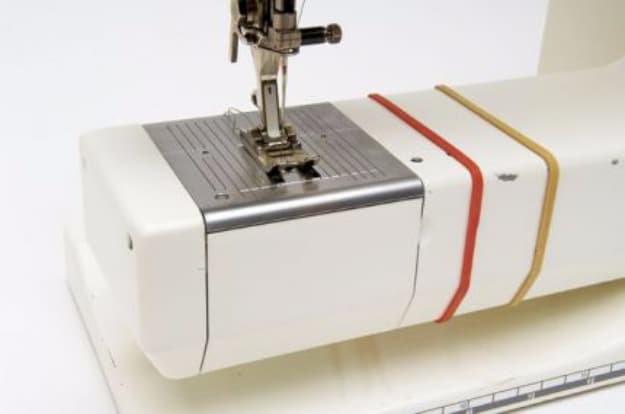
The whole tip is a rubber band. Stretch one around the base of your sewing machine at the seam allowance you want and it marks a wider than usual line that is easy to follow, stays put securely, and slides along when you need a different width. It came into the magazine as a reader tip from Rita Strobel of San Francisco, which is exactly the kind of thing that makes a tips column worth reading. Two bands in different colors let you switch between two allowances without moving anything.
Get the full tutorial at Threads magazine, tip from Rita Strobel.
31. Types Of Sewing Scissors Explained
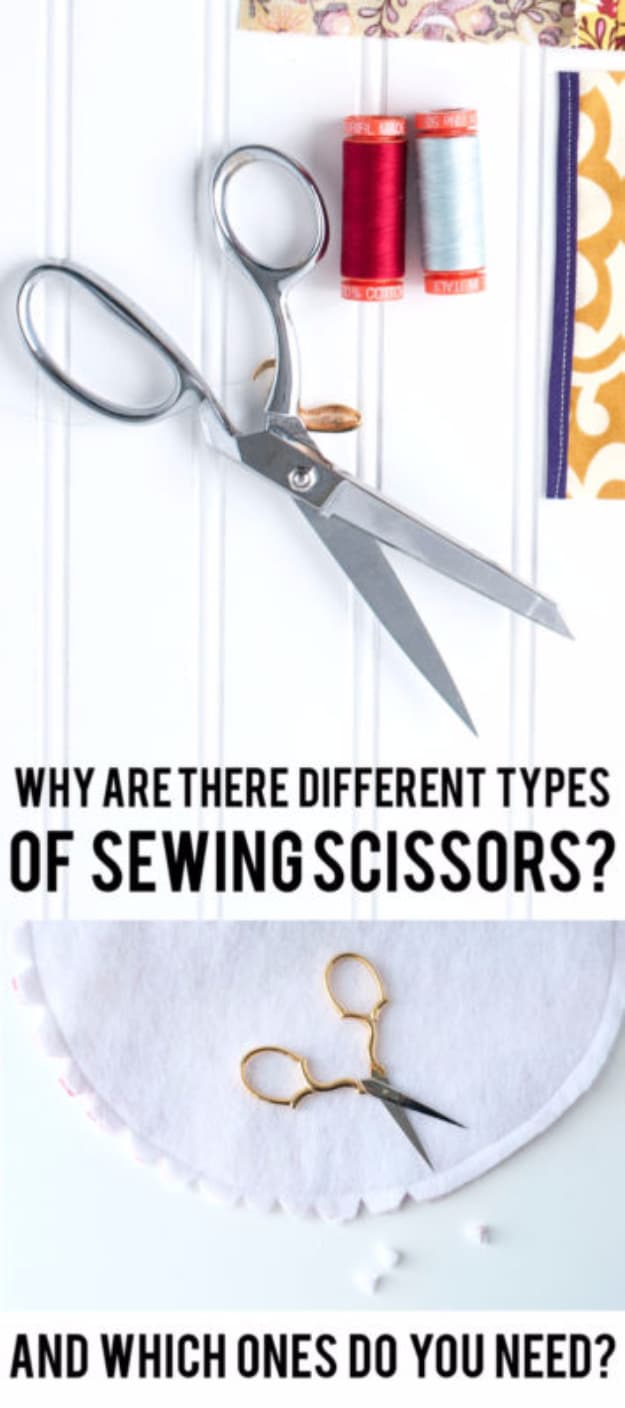
Big shears and tiny snips do completely different jobs and this sorts out which is which. Shears have blades over six inches long and two differently shaped handle loops, one for your fingers and one for your thumb; scissors have blades under six inches and two identical loops. The habit that matters: keep the bottom blade of your shears flat on the table as you cut, so they glide through the fabric instead of lifting it. The small pointed pair is for reaching in and snipping stray threads.
Get the full tutorial at Sew4Home.
32. Binding Trick
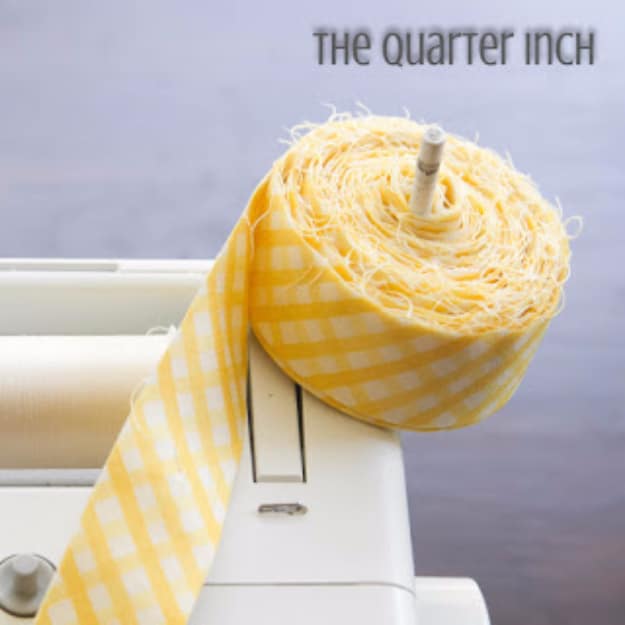
The unruly heap of quilt binding that fights you while you attach it has a one second fix, and it is sitting on your machine already. Most machines have two spool holders, one horizontal and one vertical. Put the rolled binding on the vertical holder and it sits neatly and unrolls as you feed it, instead of twisting itself into a knot on the table. The trick came from a quilter working on a Bernina 350, and any machine with a second pin will do the same job.
Get the full tutorial at The Quarter Inch.
33. Power Of Stay Tape
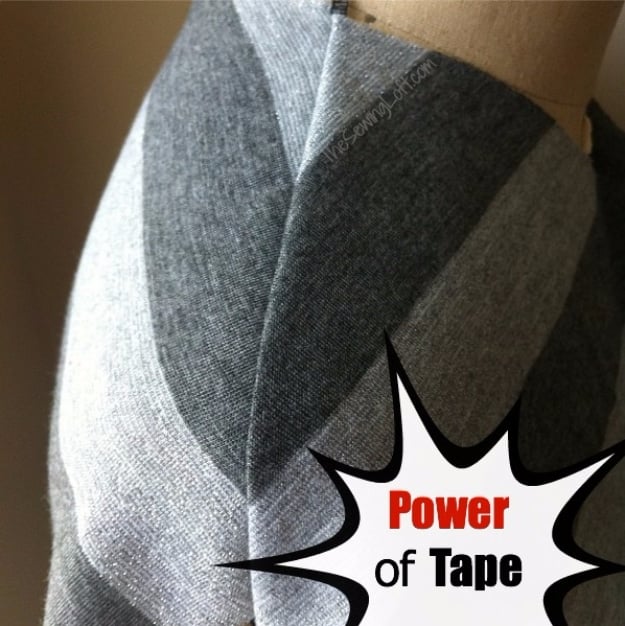
Stay tape is the quiet stabilizer ready to wear uses everywhere you cannot see it, and it is a genuine best friend when you sew knits. Cut it to size, then sew the seam as normal with the tape in it: it adds an even layer of stability and stops the seam stretching while you feed it through. The writer used it on the shoulder seams of a striped gray knit tee and says the stripes would never have matched without it, which is the honest test of whether something works.
Get the full tutorial at The Sewing Loft.