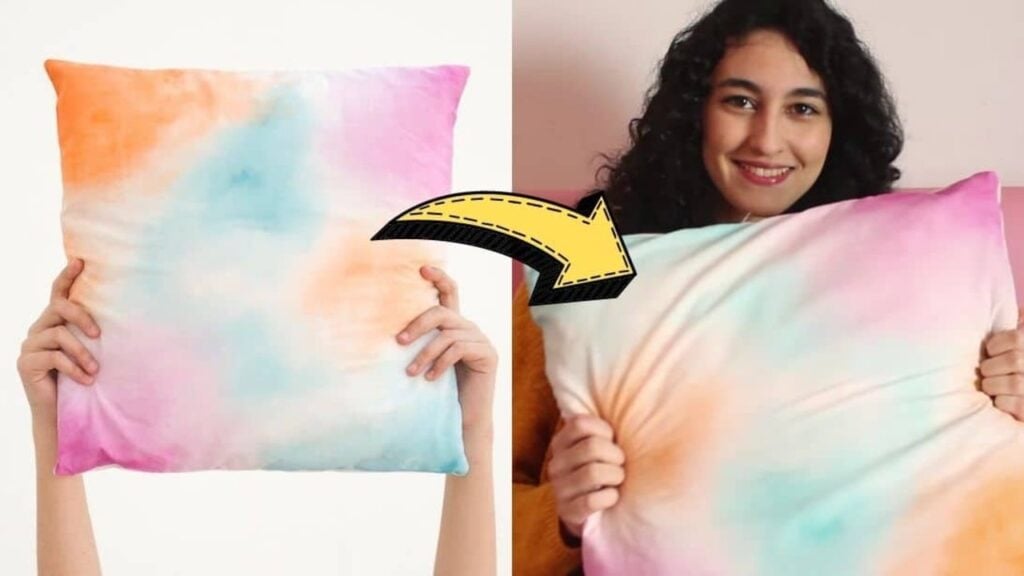
Here’s how you can add some fun to your plain white fabrics and turn them into a pretty pillowcase. This method is so simple and turned out to be really pretty and pleasing to the eyes. It also doesn’t require that much material, you can also use leftover paints with this. thanks to Curly Made on YouTube for this wonderful idea.
Materials:
- 1 piece of 45*45cm white fabric
- 1 piece of 35*45cm white fabric
- 1 piece of 25*45cm white fabric
- Acrylic or fabric paints
- Paintbrush
- Water
- Scissor
- Sewing machine
- Needle and matching thread
- Pins
Directions:
Step 1
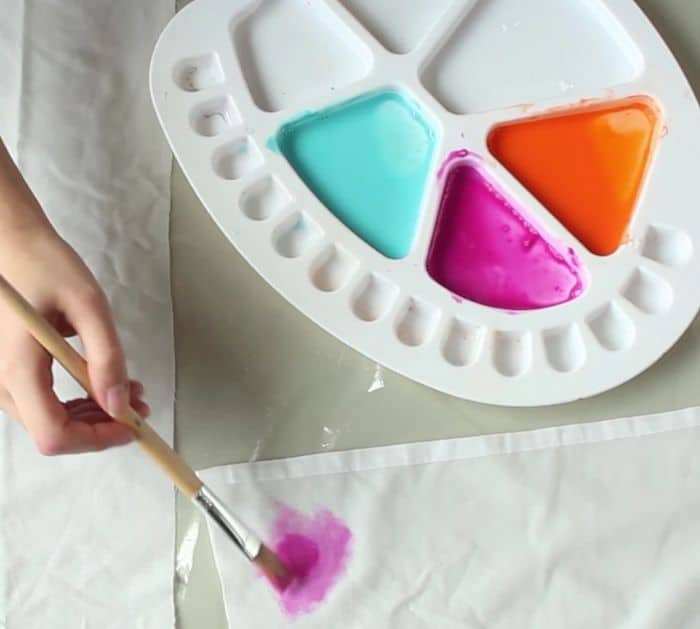
Start off by cutting your white fabric into 3 different sizes, one should be 45*45cm (17.7 inches), then the other two with a 45*34cm (17.7*13.3 inches) and 45*25cm (17.7*9.8 inches). These measurements may still be changed and modified depending on the size of your pillow. Set them all aside, then place a piece of plastic or anything that can cover your work surface from the paint. Get the large piece of white fabric and soak it in water, then wring it out. Place the wet fabric on top of your work surface covered with plastic, then smoothen it out, and remove any air bubbles or wrinkles. Start adding a little bit of water to each color of paint that you want to use, then mix them together until combined and uniform. You can use an extra or scrap white fabric to test the color, then adjust if needed. Just make sure to make the color a little darker than what you want the final result to be.
[social_warfare]
Step 2
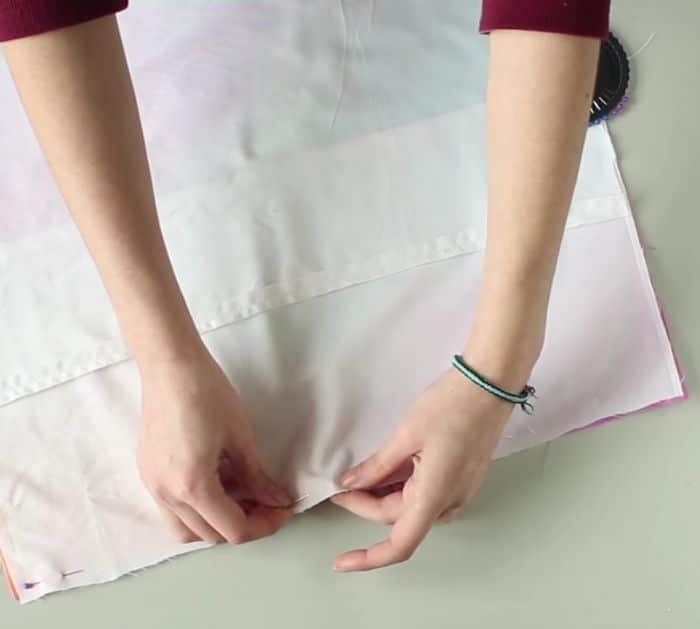
Once you’re happy with the color, then go ahead and start working on the soaked pillowcase. Start working on one of the corners by applying light circular brushstrokes, then use it to help blend and smudge the colors. This still depends on the look that you want to achieve, but if you don’t want your colors to blend together, then you can leave white space between them. Let the fabric dry overnight on the table, then after drying, start sewing the fabric together. Start by folding the seam on the longer side of both fabric pieces, then sew the seams in place. Lay the painted fabric with its right side facing up, then place the 45*25cm on top with its right side facing down, make sure that the folded seams are facing the down the center of the large fabric. Then, place the 45*35cm fabric in the lower area of the main fabric, its folded seams should overlap the smaller fabric at the top to create the pocket. Pin them in place and sew all around the square, leaving the overlapping fabrics unsewn, then turn them right side out, and tuck the corners nicely.
*All image credit belongs to Curly Made via YouTube. Follow and subscribe to her channel for more!
Super Easy DIY Watercolor Pillowcase Tutorial


