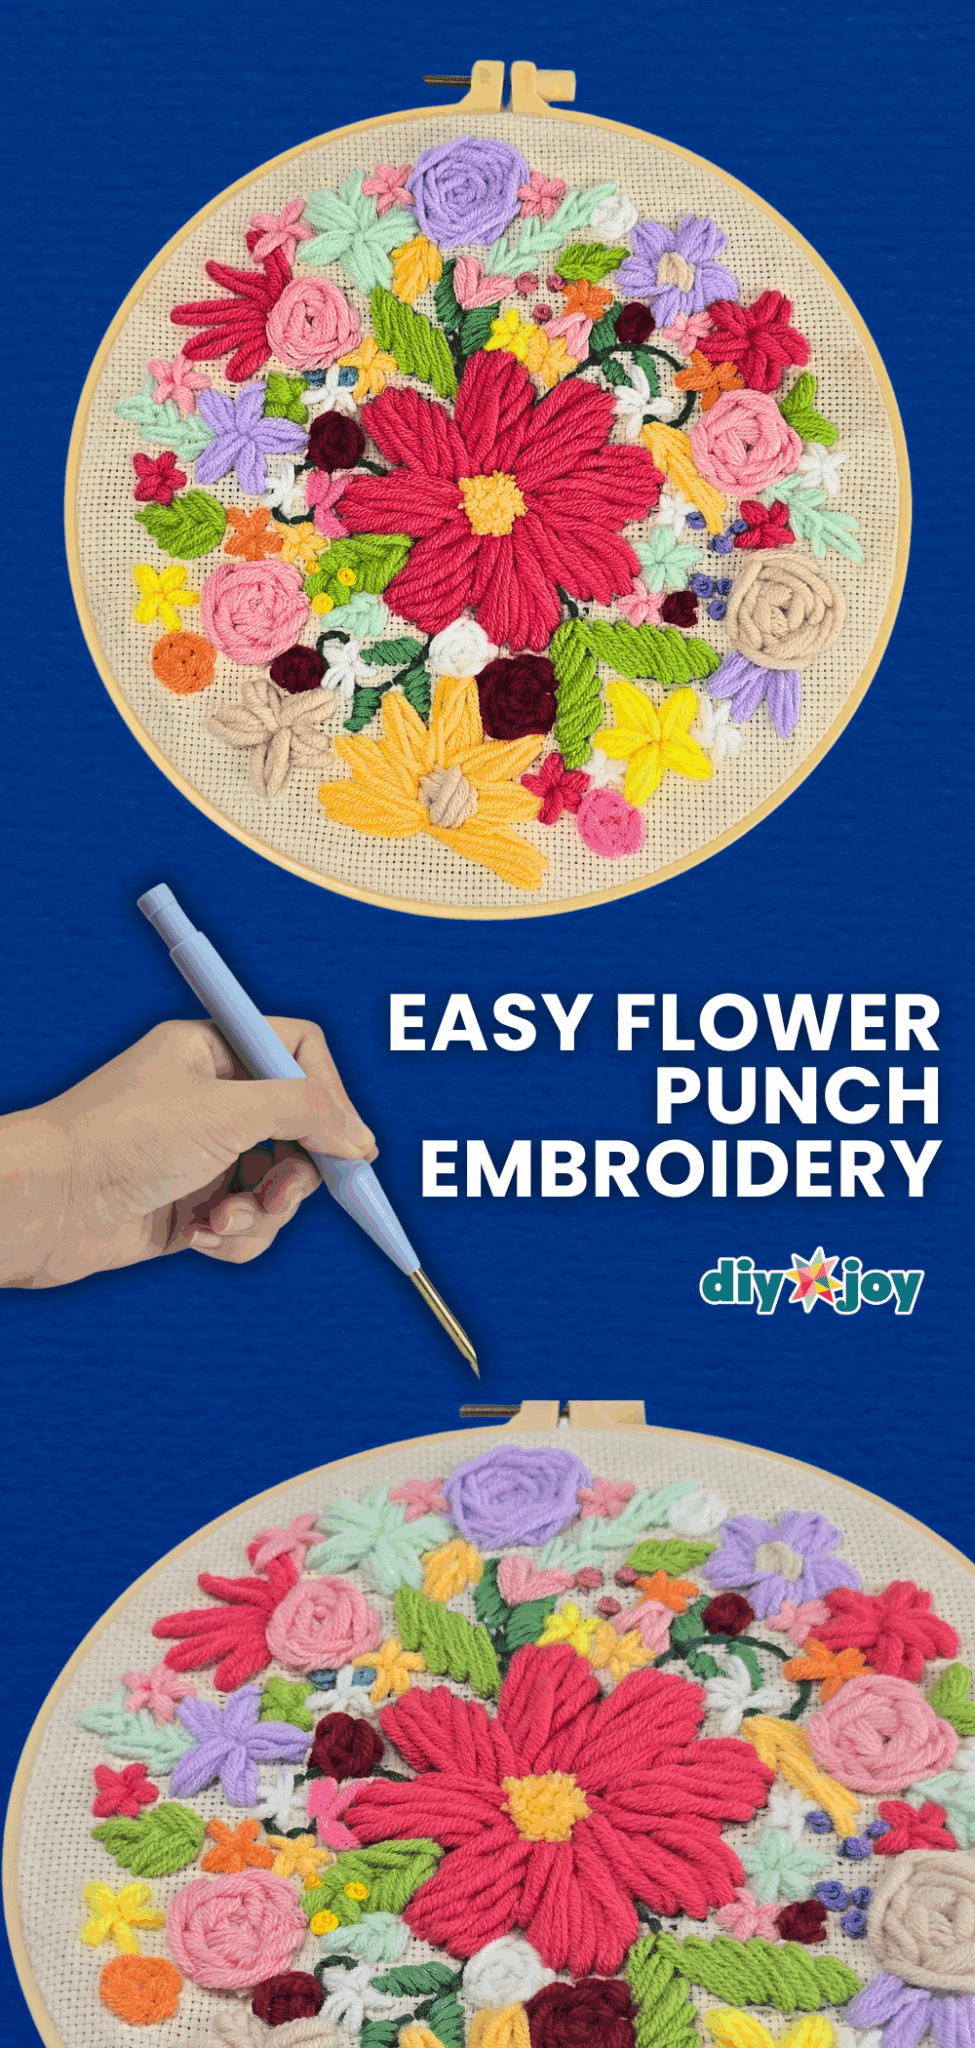
Ever since I got into embroidery and fully adapted it into a hobby, I have always wanted to try a version that uses a punch needle. It was very intriguing and easy enough to do, and I just know that trying it out would be inevitable. After watching a few inspirations online and picking out the design that I feel most drawn to and confident enough to pull off, I decided to gather my punch needle kit and start working on my first punch embroidery project!
RELATED: Learn 15 Basic Embroidery Stitches
Punch needle embroidery is a very beautiful art that usually uses yarn instead of thread, like other embroidery projects, which adds more texture and life to the design. I’ve approached this project with zero knowledge about punch needles and how to use them properly, apart from what I’ve learned online, I’m pretty sure I would mess the first few tries, but I’m as confident that I can pull it off eventually.
This particular design is perfect for beginners or those who are just looking for easy punch needle projects. The design and shape are pretty easy to follow, and you can have more freedom to play with colors and possibly use up all the yarn that you may have available, even leftovers from previous projects.
You Might Also Like This: 4 Basic Flower Embroidery Stitches
So if you’re wondering how to punch needle embroider or how to start a punch needle embroidery project, then you’ve come to the right place! Go ahead and read through the guide below and watch the video tutorial at the end of this article to see how I did this floral masterpiece.
What You’ll Need for Punch Needle Embroidery
- Yarn
- Scissors
- Punch Needle
- Embroidery Hoops
- Embroidery Thread and Needle
- Monks Cloth
- Pattern
How to Make Punch Needle Embroidery
Learn how to punch embroider as a beginner with this guide.
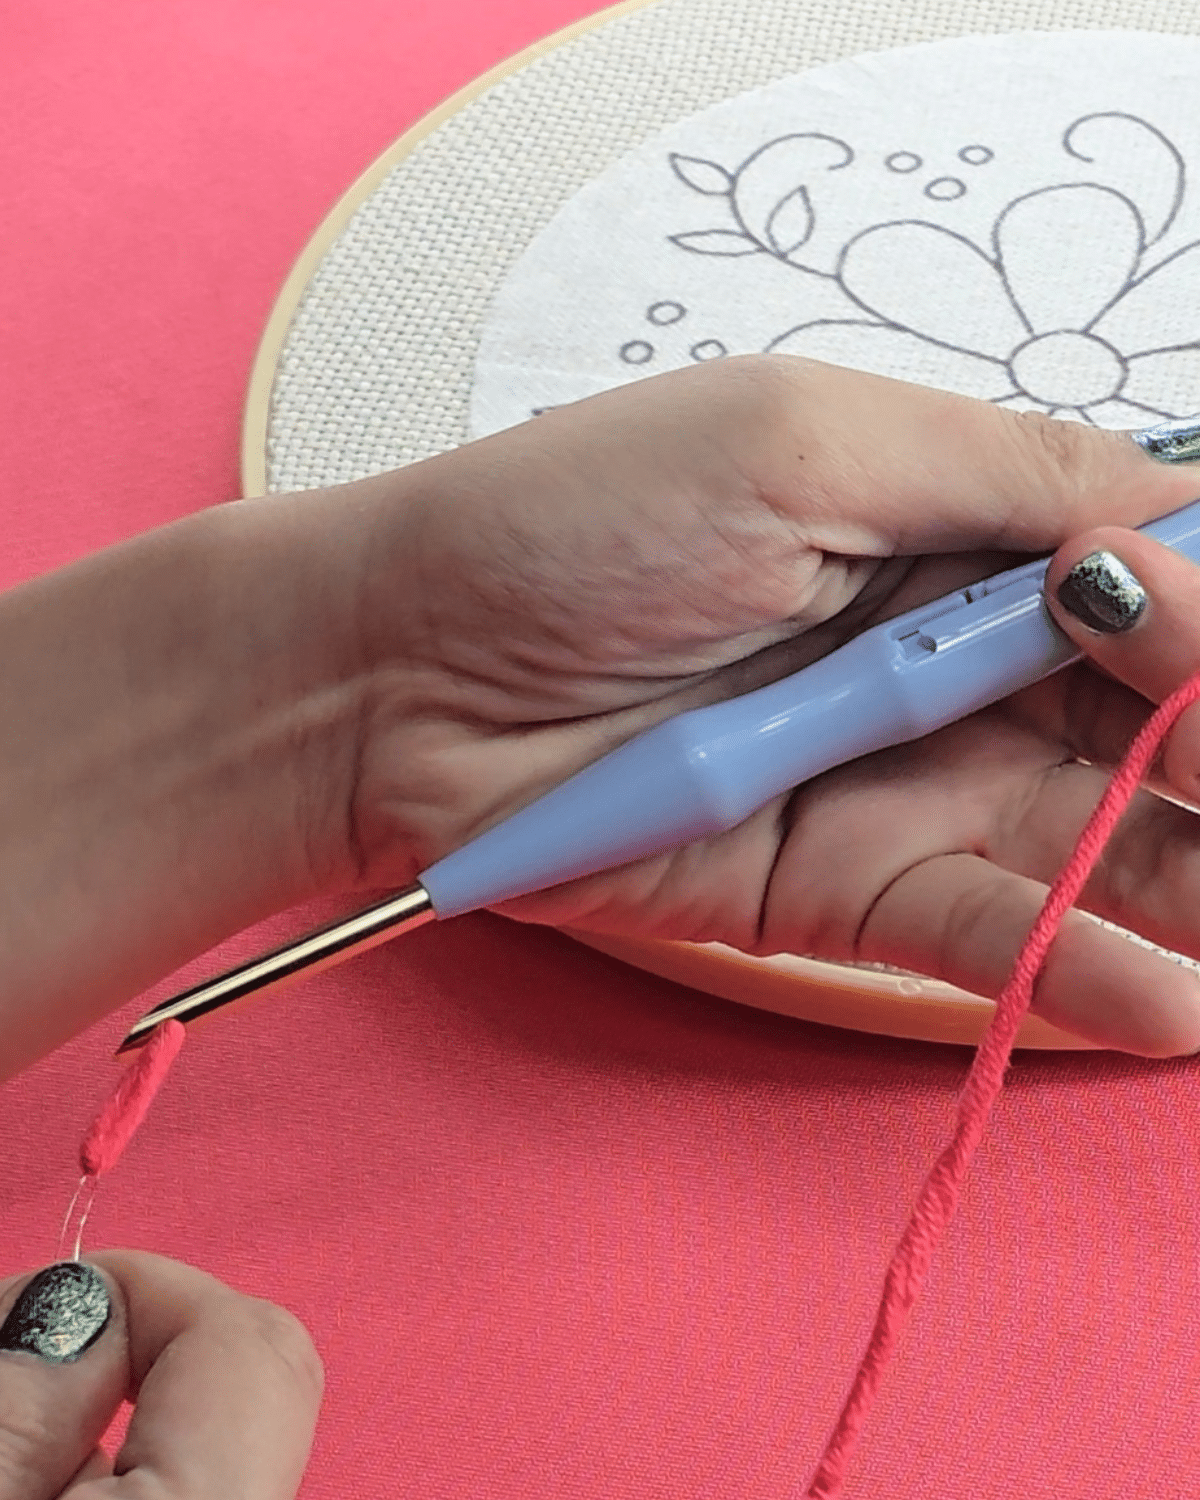
Threading Your Punch Needle

Grab your threader, which is a thin looped piece of wire, then make sure that the looped tip is facing up and the base is facing you. Insert the threader from the outside of your needle’s hole, then curve and insert it through the needle all the way up.
Once the looped part of the threader is exposed at the top of your punch needle tool, insert the yarn through the wire loop, and pull your threader all the way down, pulling your yarn with it.Starting on Your Largest Shape
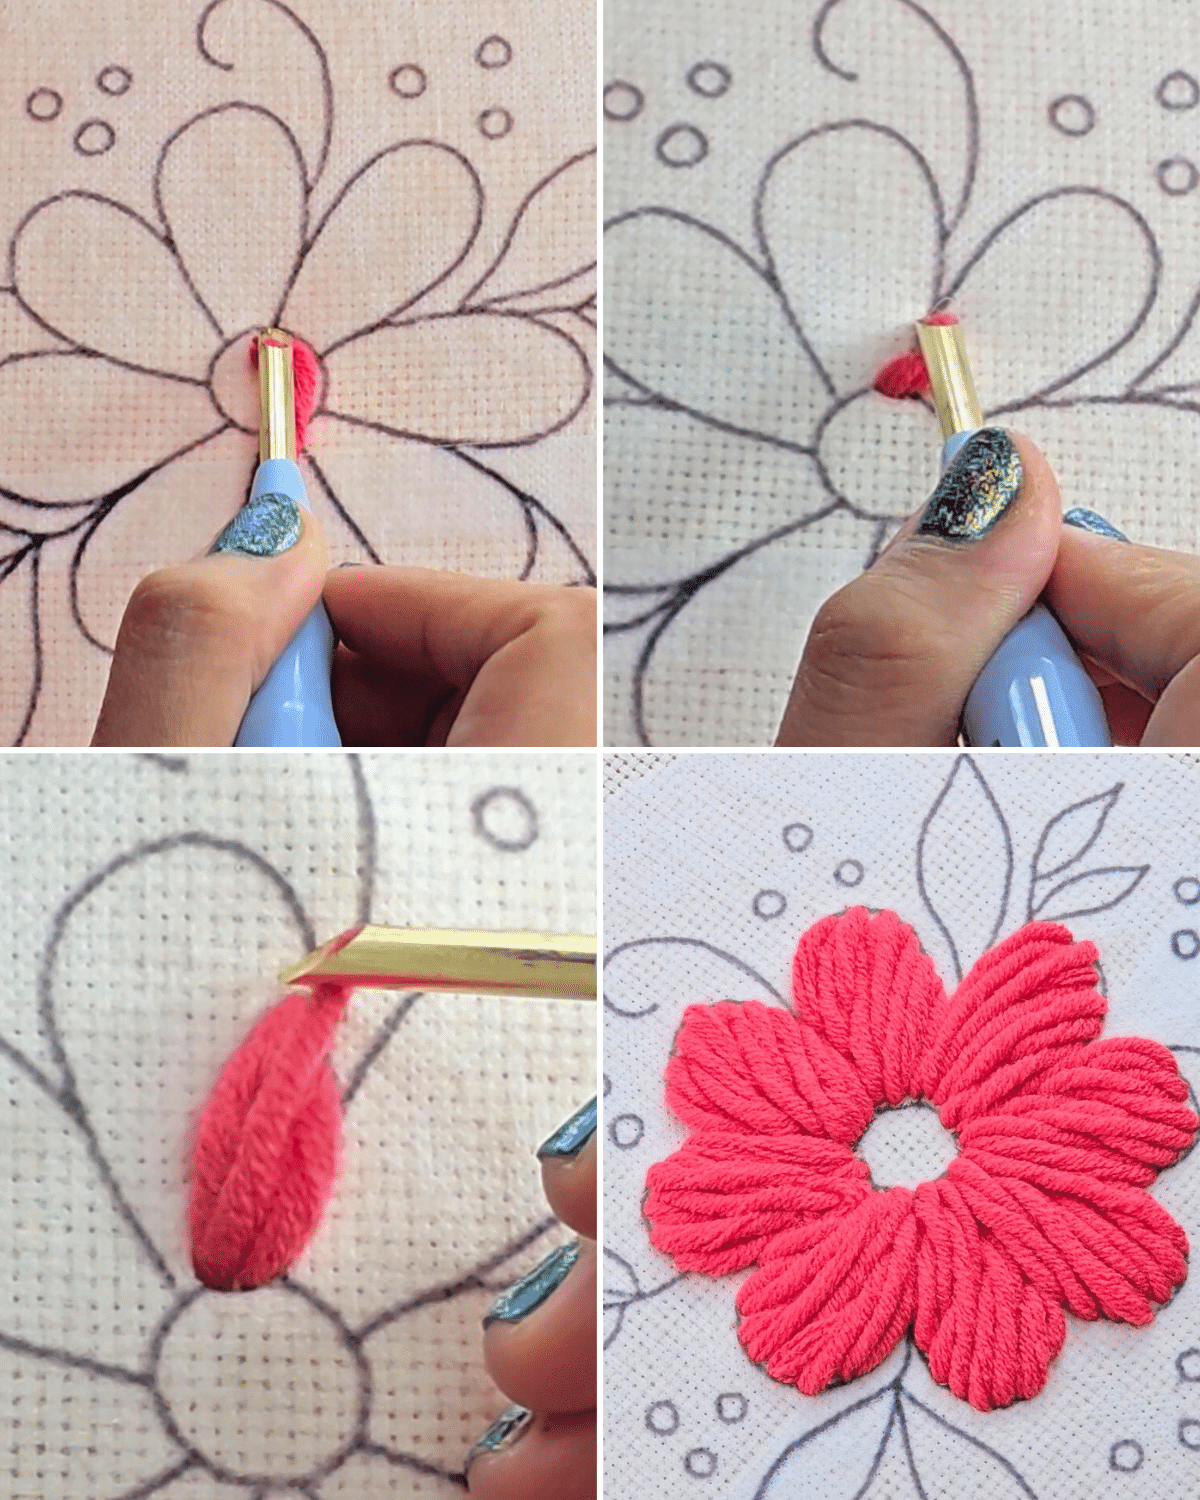
At your first punch, make sure to pull the thread all the way from the back of your fabric before you proceed, punching continuously. It’s often easier to start working with your largest shapes first, as they are easier to fill and they will also be the center of attention.
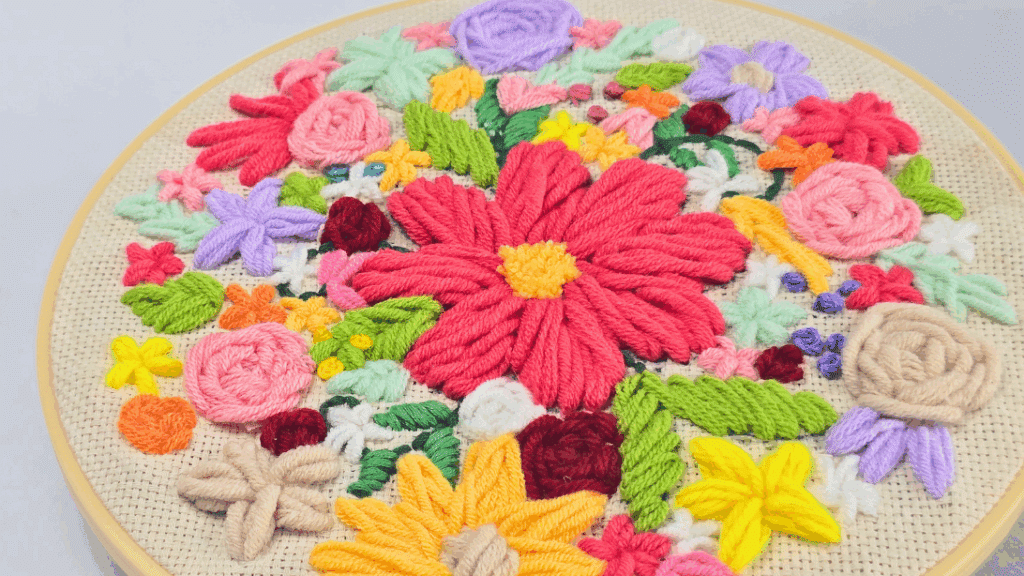
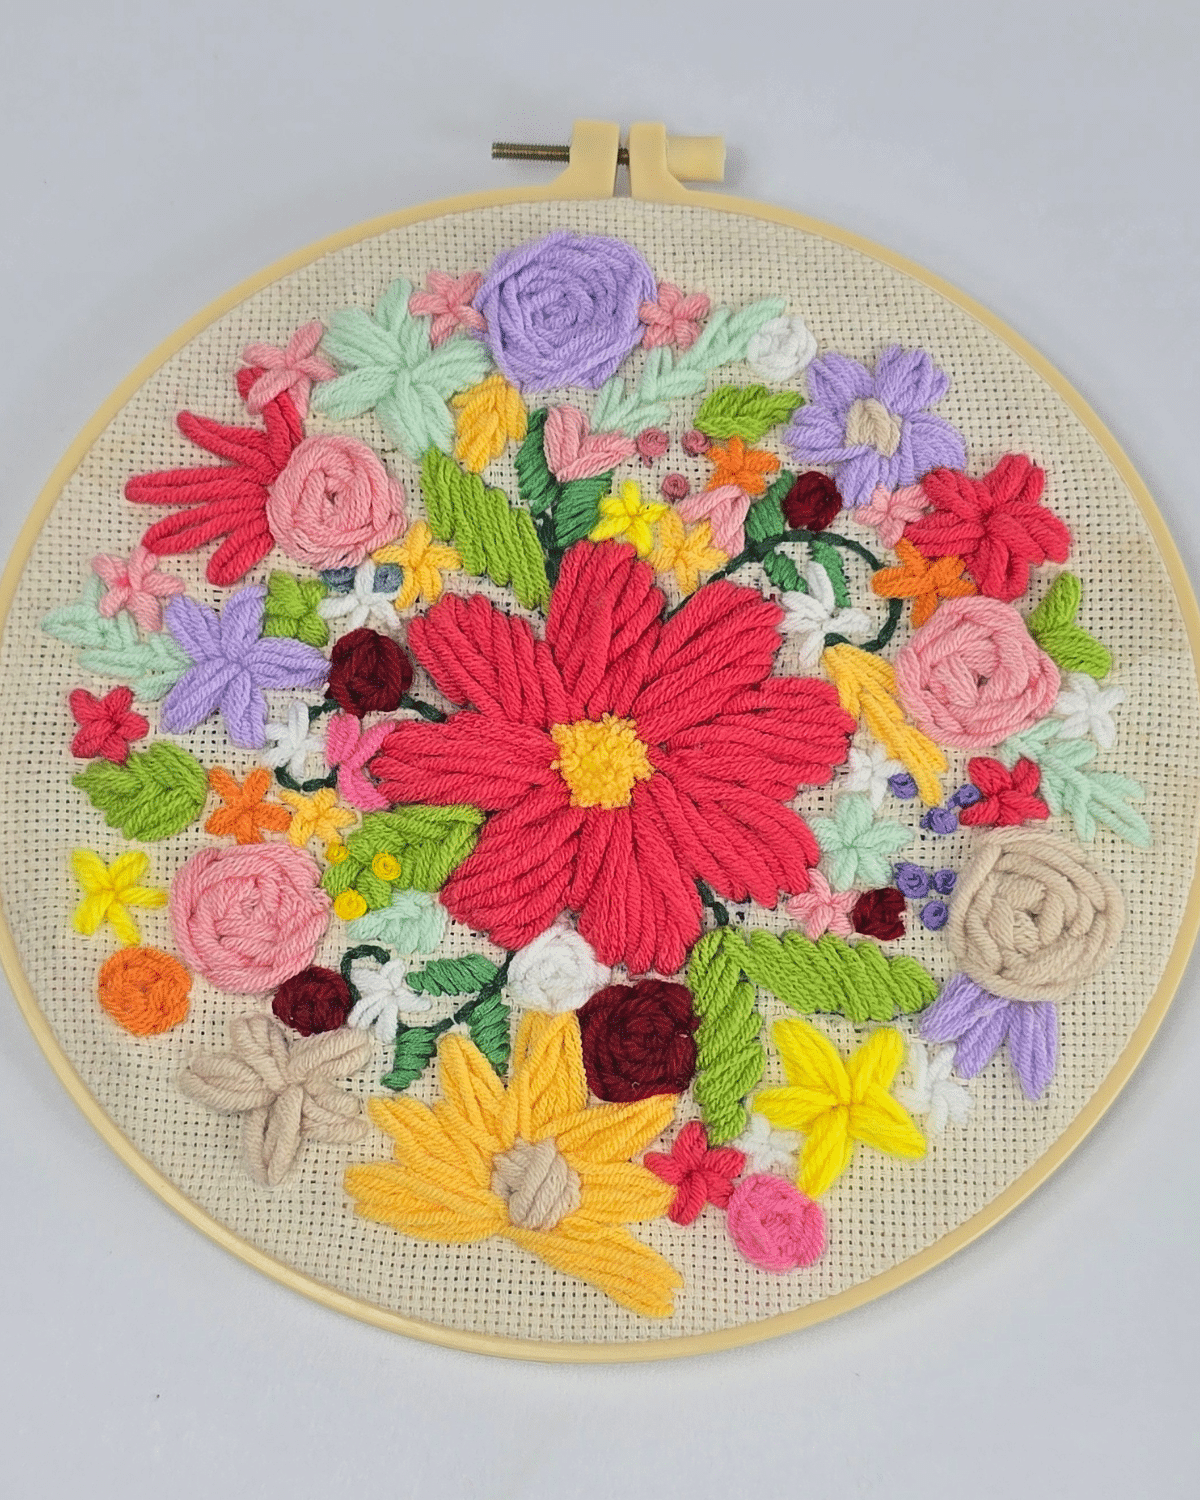
For this project, the center of the pattern is a large, simple flower, and all I did was punch from the base, and then punch up the tip of the petals. Keep doing this motion until you’ve filled the entire petal. You may also want to work in sections and cut the thread from the back, before you start working on the next petal.Adding Flair and Texture to the Center
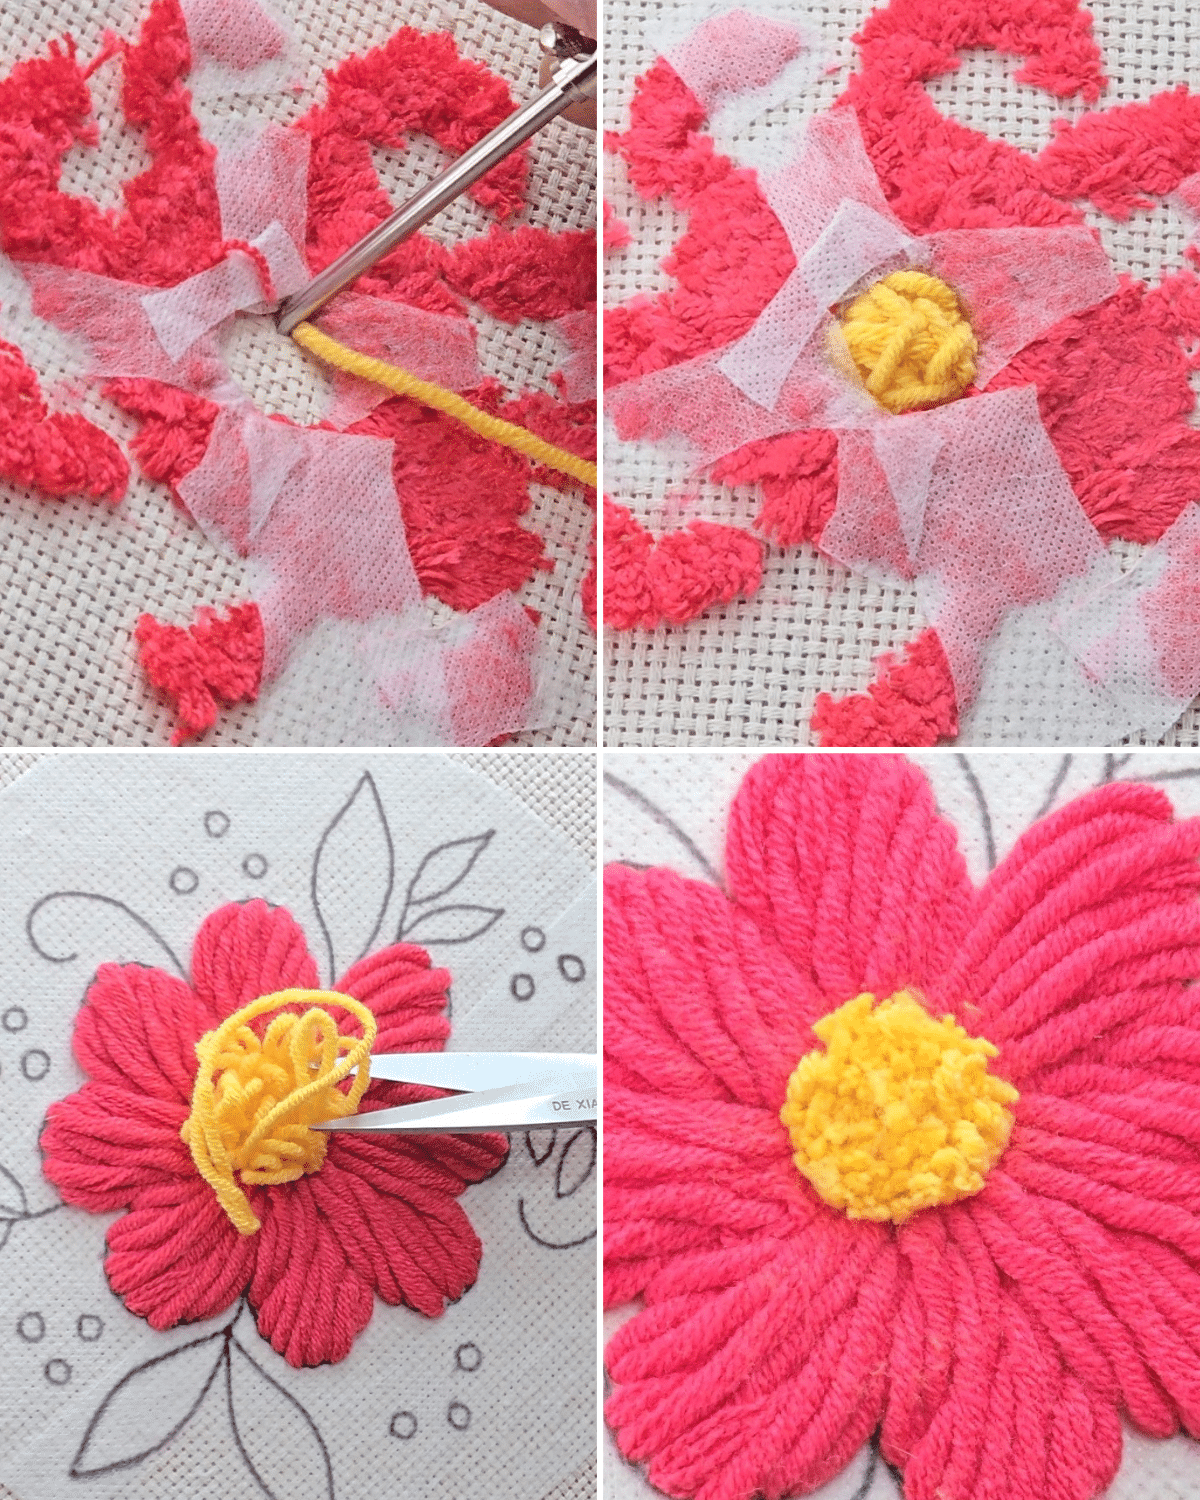
For the center, I decided to add some texture to imitate the look of a flower’s stamen. All I did was flip the fabric over, then punch from the back, which is now the front, as it should be facing you. Once done, a couple of loops should have formed at the front of your embroidery.
Flip it over again so it’s right side up, then start trimming off the loop until it resembles the photo above. You may want to secure your punches at the back of the stamen by adding a piece of fusible paper and ironing it down to secure.Working on Larger Leaves
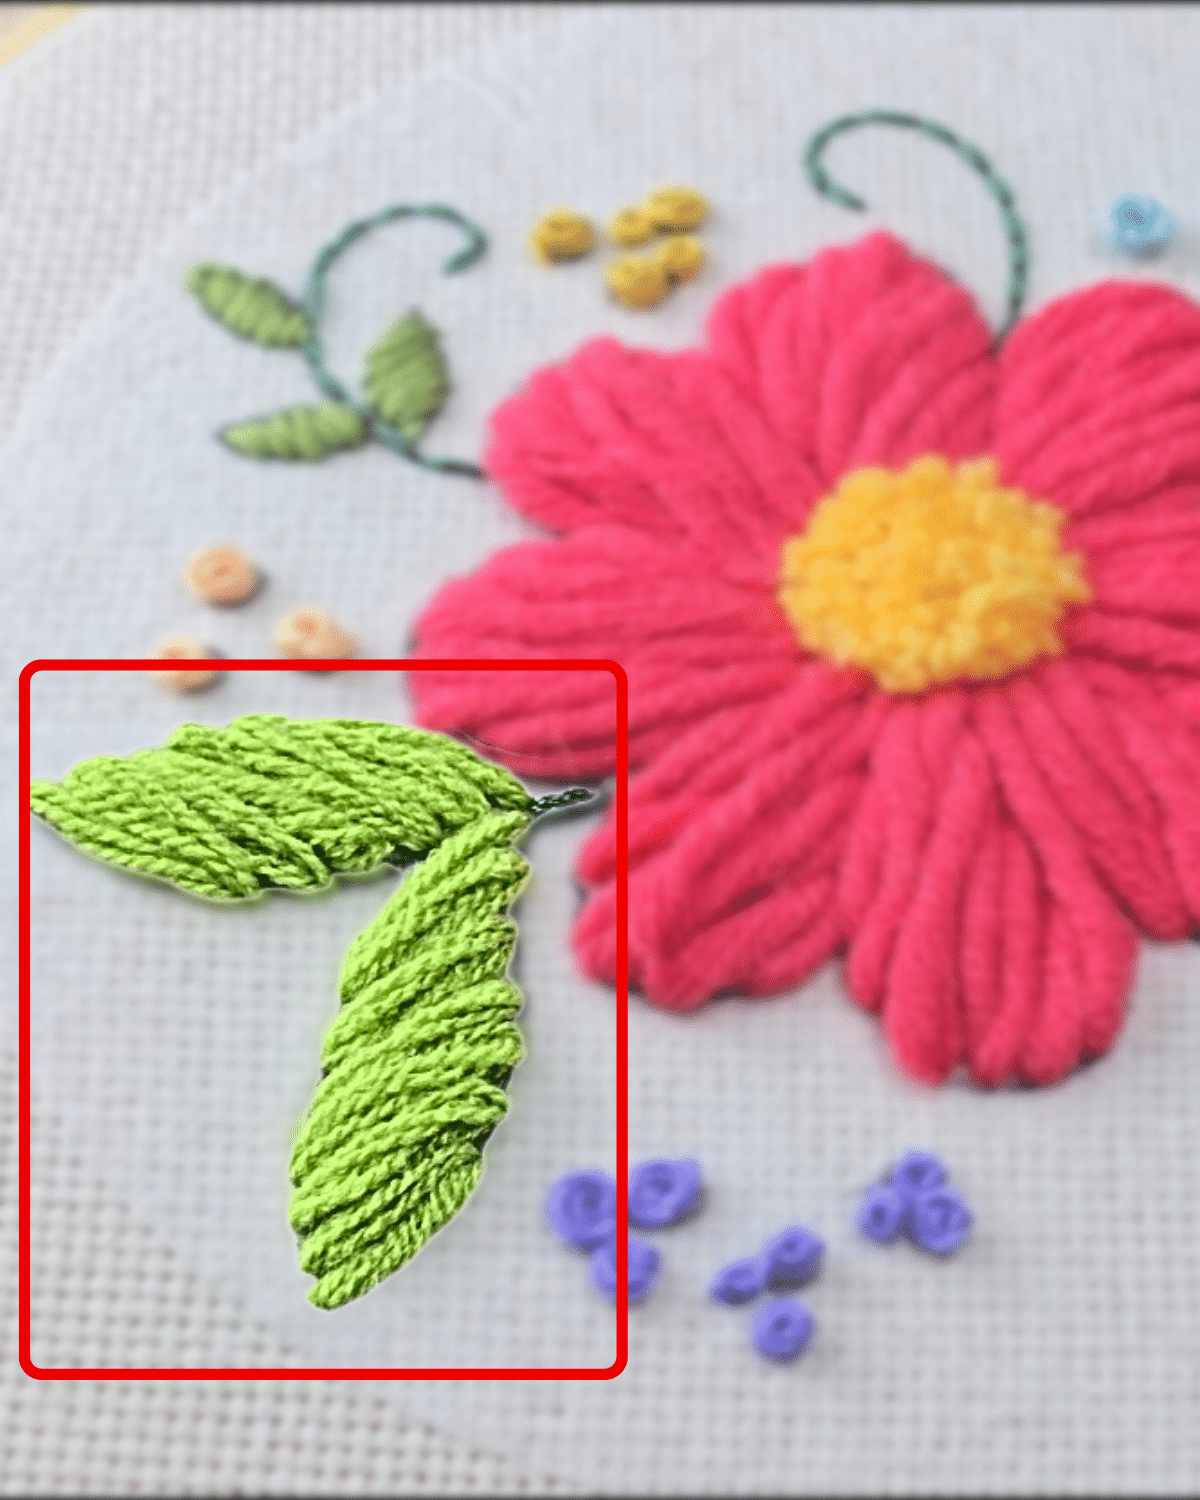
Like I said above, you go with the larger areas first, and in this case, the next larger shape is the main leaves around the flower. I punched from the base and worked my way diagonally until I reached the tip of the leaf.
One more important detail is that because it’s smaller than the flower at the center and therefore consumes less space, I decided to divide my yarn into 2 parts so the strands are thinner.Embroidering the Smaller Leaves
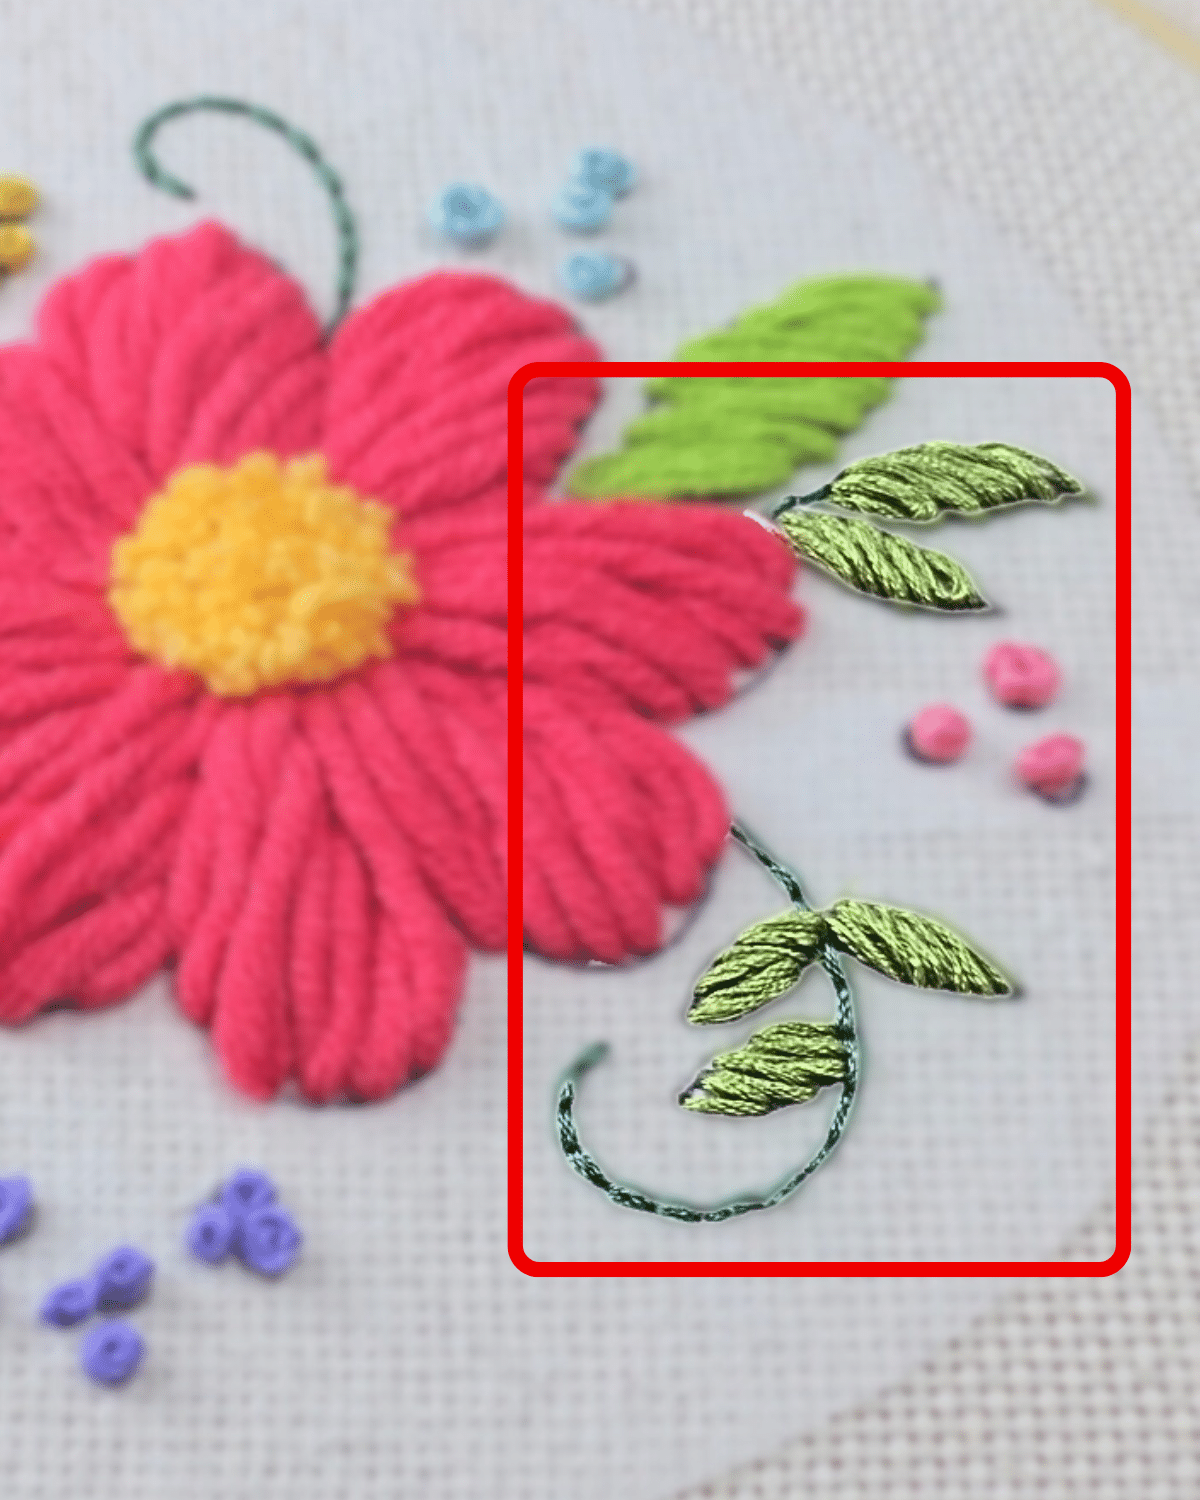
For this one, since the leaves are now way smaller for my thick yarn, I decided to switch to a classic embroidery technique, which is basically just sewing.
I used embroidery thread and needle and started working on the leaves using satin stitch, which has a pretty similar technique to the punch embroidery I did with the larger leaves above.
I also embroidered the thin stems using backstitch, and I think it added more definition and detail to my work.Finishing the Embroidery
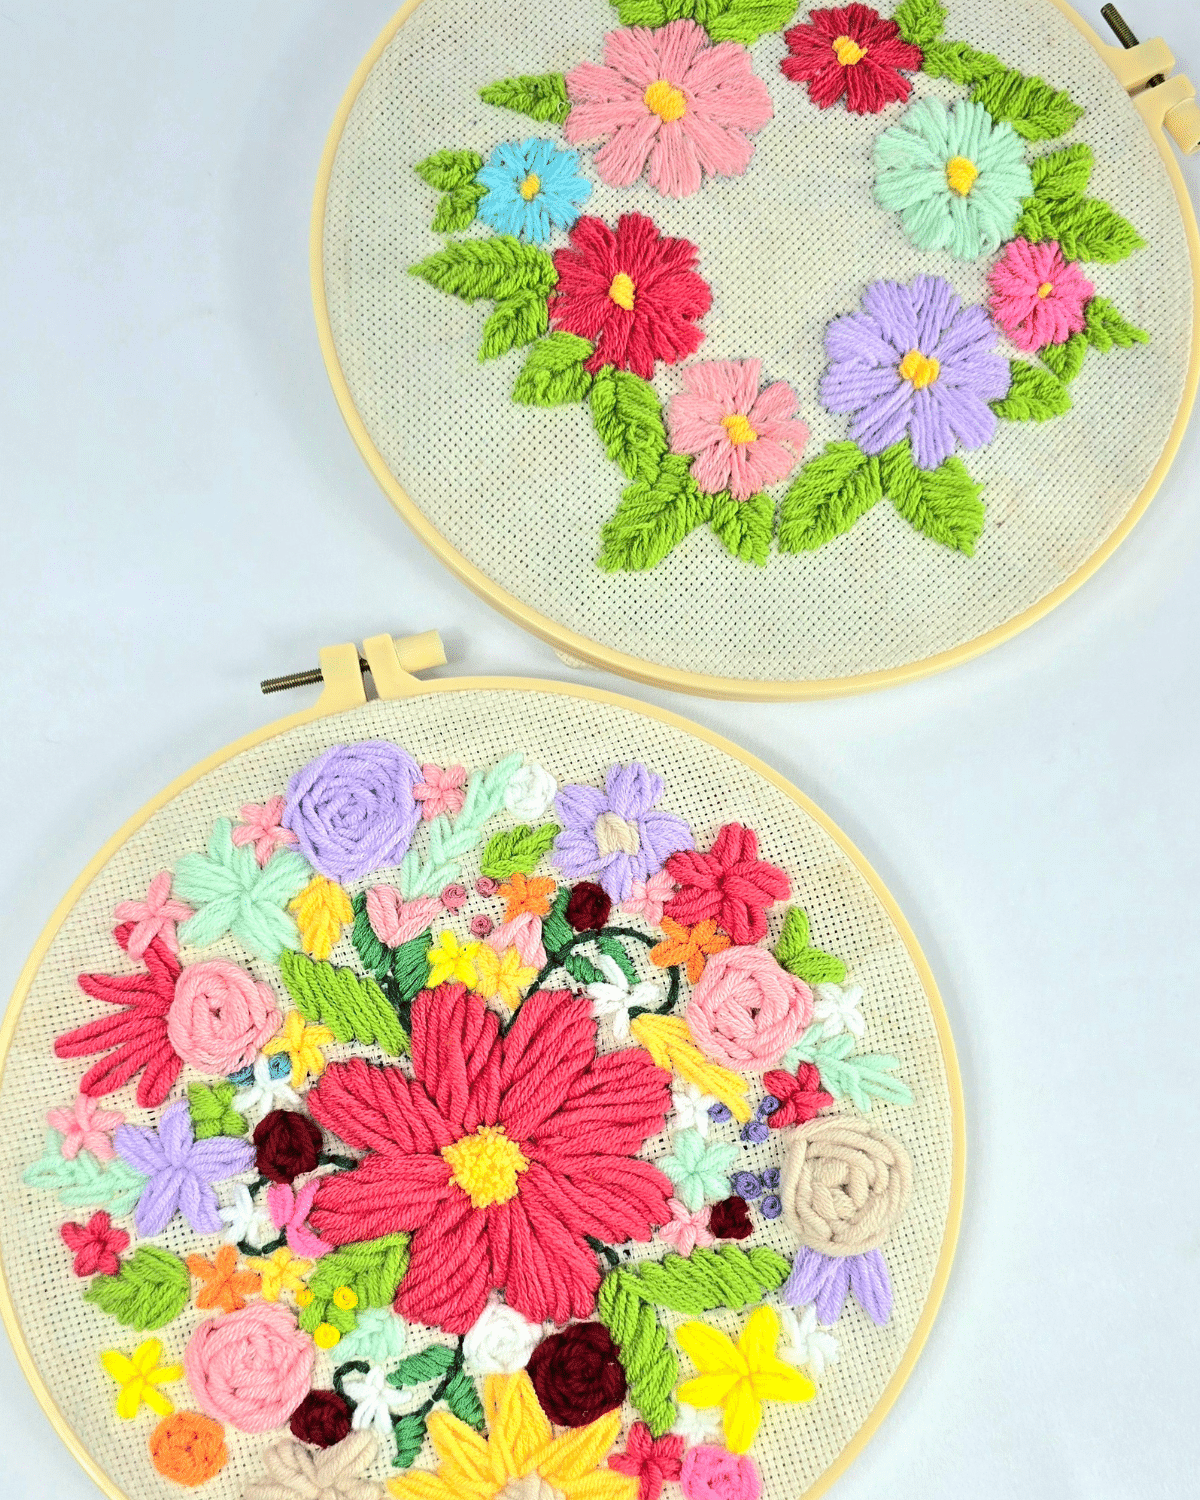
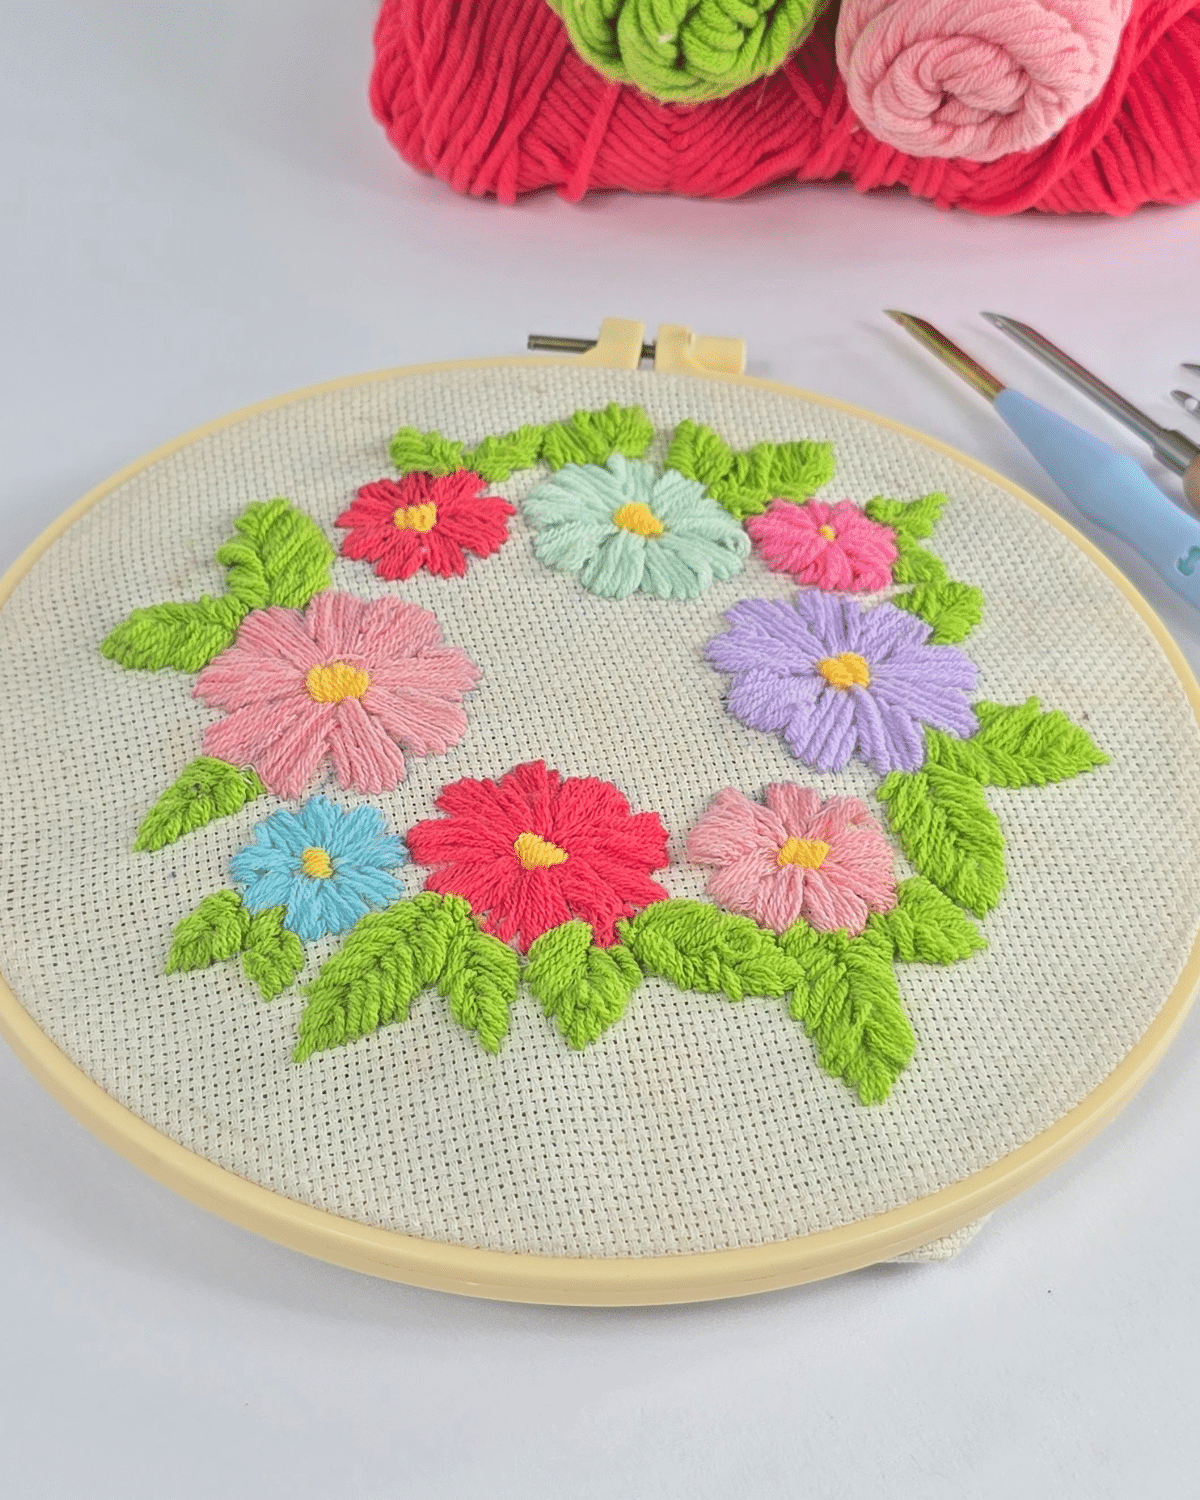
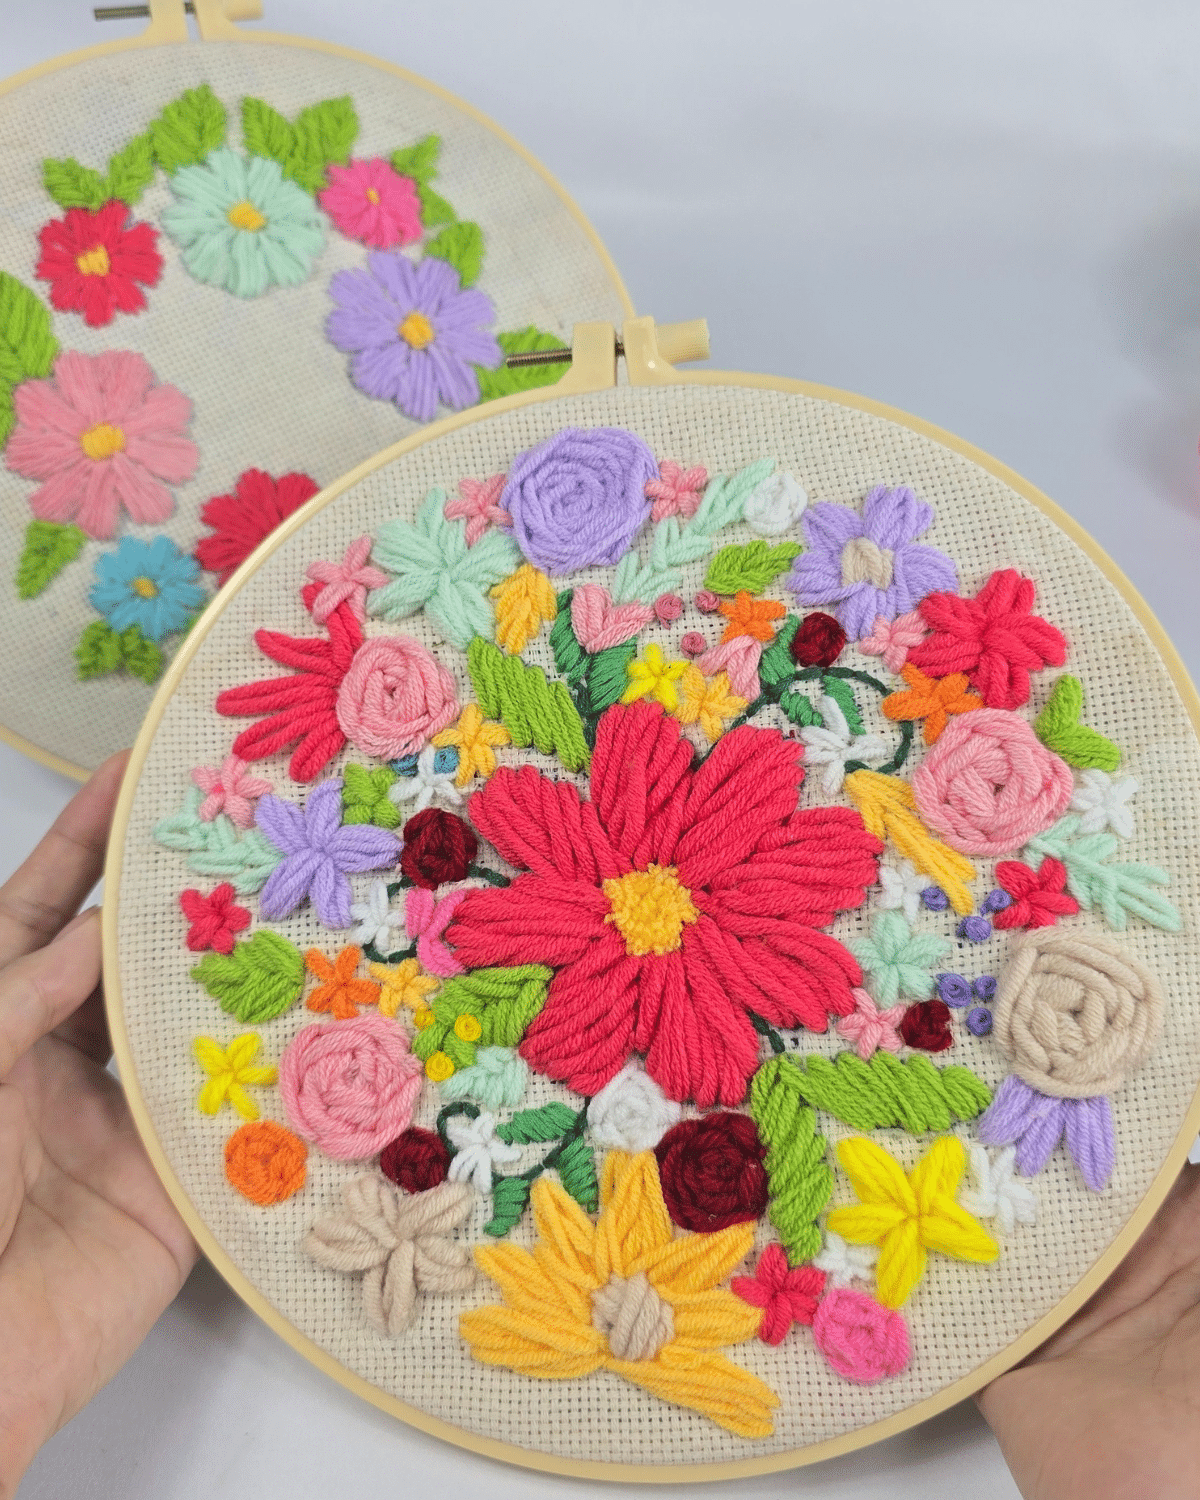
Once the leaves are done, I then proceeded to make some French knots on the small circles on my pattern. By this time, I have already outlined and filled every shape in my pattern, which means I can now go ahead and let my creativity take over. I punched embroidered all around the empty spaces however I want and added different flowers that vary in size and color.
 Once the leaves are done, I then proceeded to make some French knots on the small circles on my pattern. By this time, I have already outlined and filled every shape in my pattern, which means I can now go ahead and let my creativity take over. I punched embroidered all around the empty spaces however I want and added different flowers that vary in size and color.
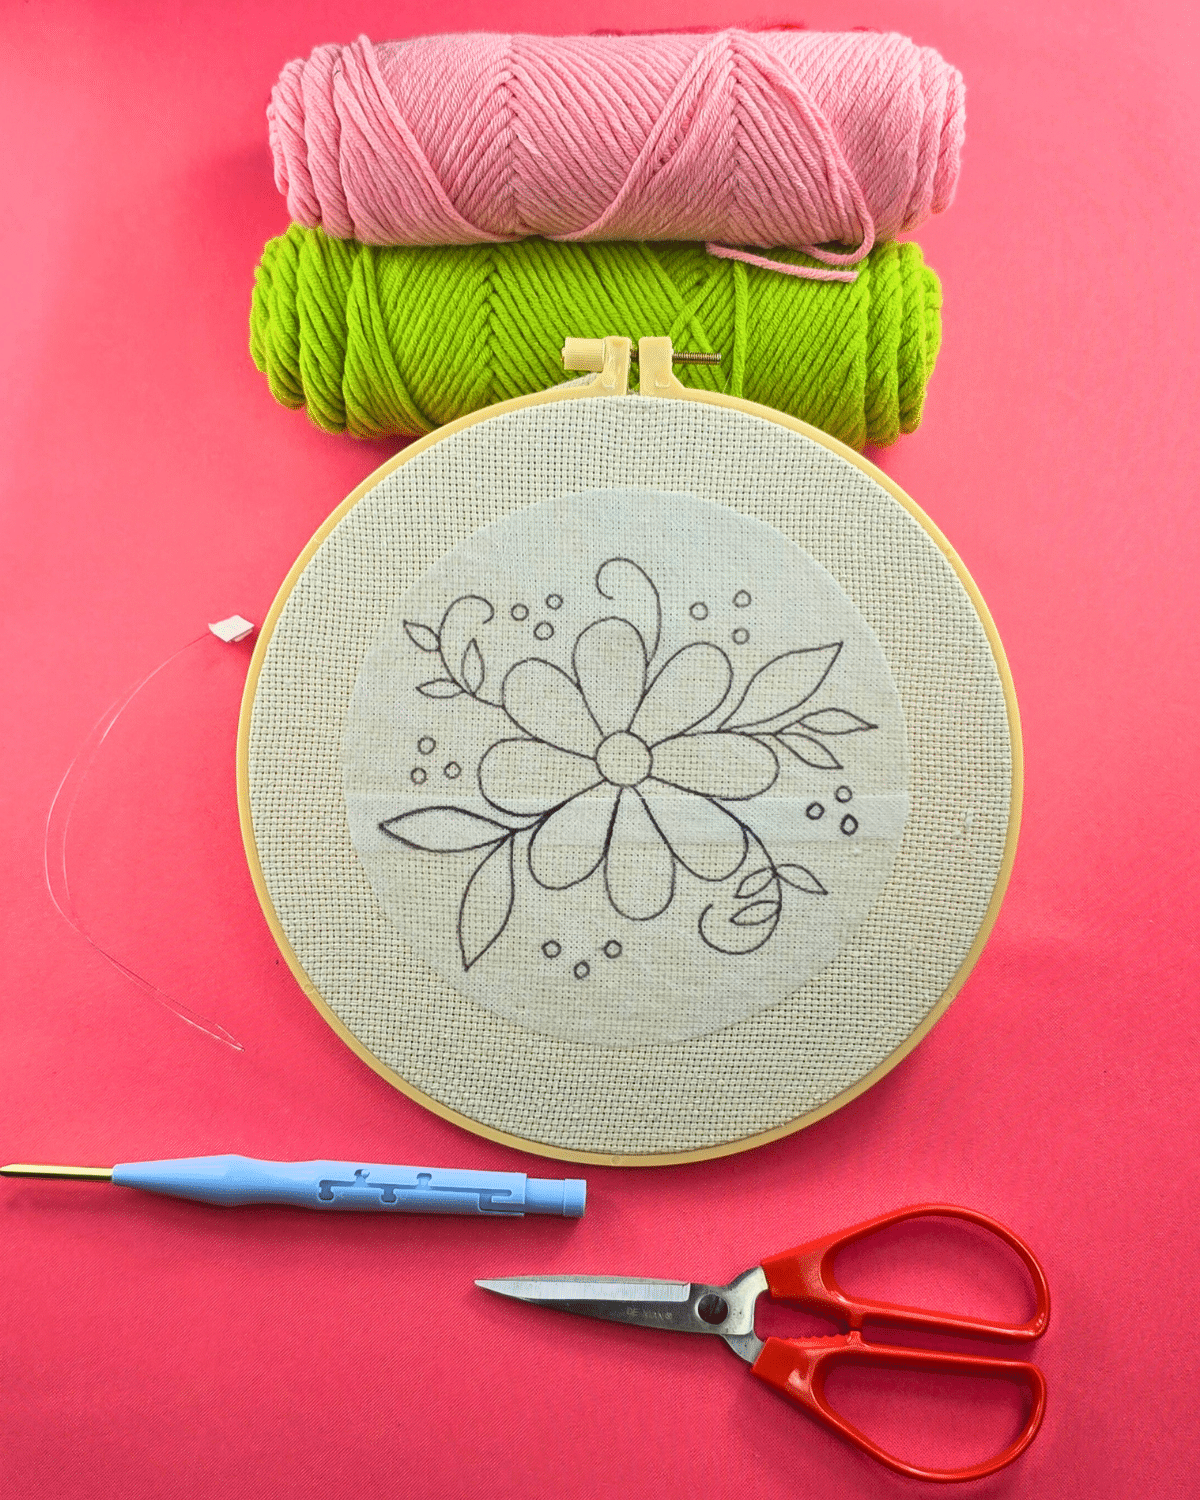
Materials
- Pattern
- Embroidery Hoops
- Embroidery Thread and Needle
- Punch Needle and Threader
- Scissors
- Monks Cloth
- Yarn
![]()
Beginner’s Tip
When punch embroidering, keep in mind that it’s mostly an up-and-down or back-and-forth motion. Don’t overcomplicate the steps and just focus on getting your hands used to punching the needle down, and it will come naturally to you.
If you want to go freestyle or not follow a pattern, then start at a certain point, then punch about 3 to 5 times while imagining an inverted triangle, and that would be your first petal. Continue making more keeping in mind to work in a circular direction until you meet your first petal. For the center, simply punch back and forth however you feel comfortable until you’ve filled the space.
Related Embroidery Crafts
Yarn Crafts
Sewing Ideas
Clothes & Fashion
Sewing Projects
*If you love this craft, then visit our official website, follow our Facebook page, and subscribe to our YouTube channel for more!
Punch Needle Embroidery for Beginners