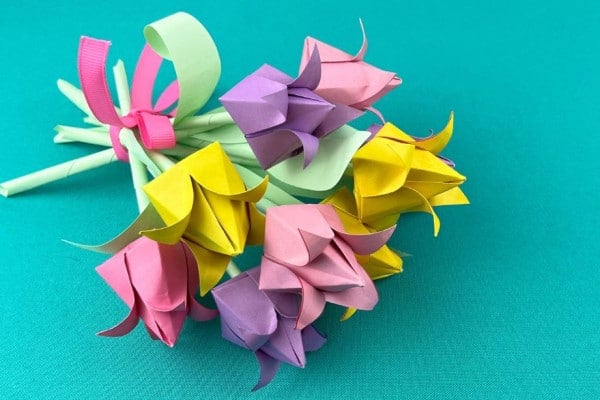
Learn how to make paper flowers with this quick and easy tutorial. Whether you’re a beginner or just looking for an easy paper craft to do on a weekend, this step-by-step DIY paper flower guide is for you.
RELATED: Toilet Paper Flowers Tutorial
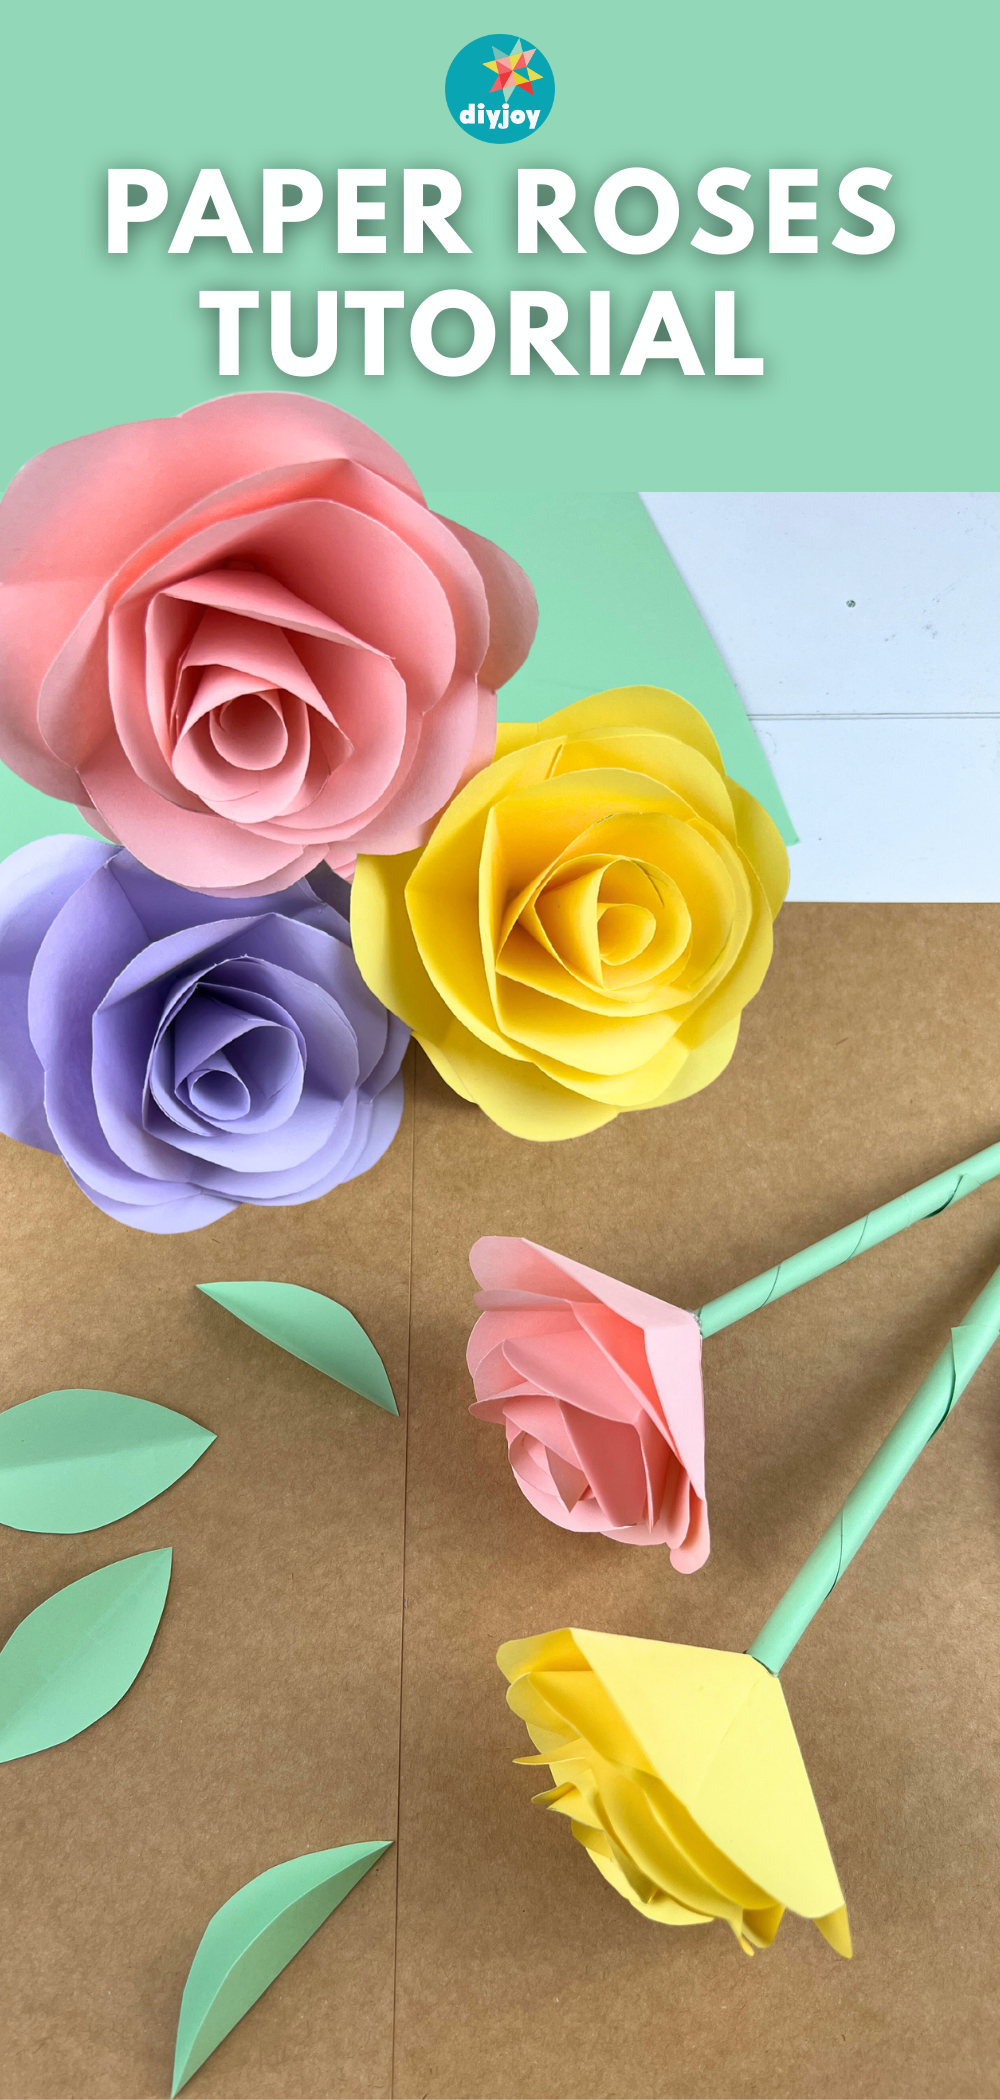
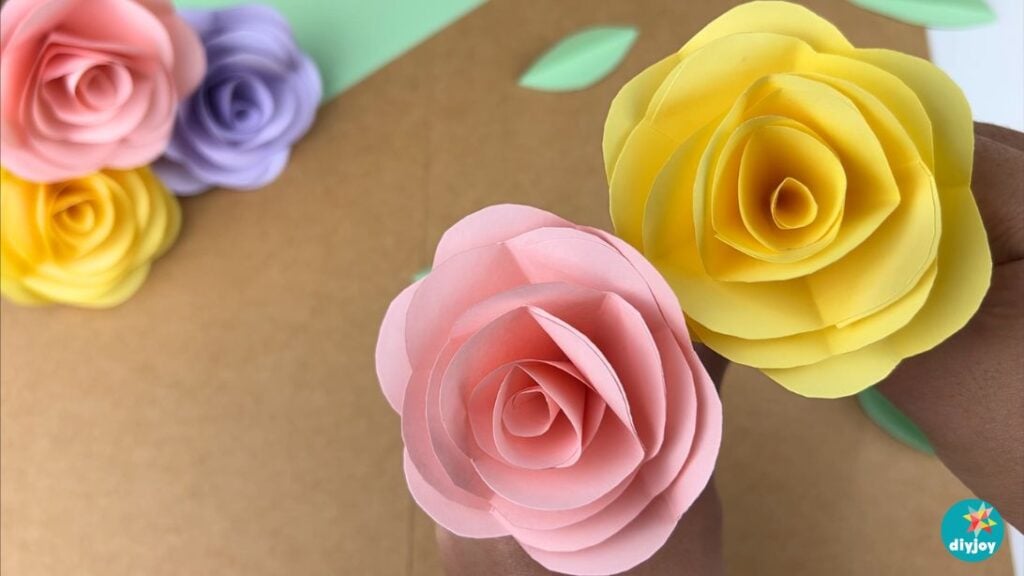
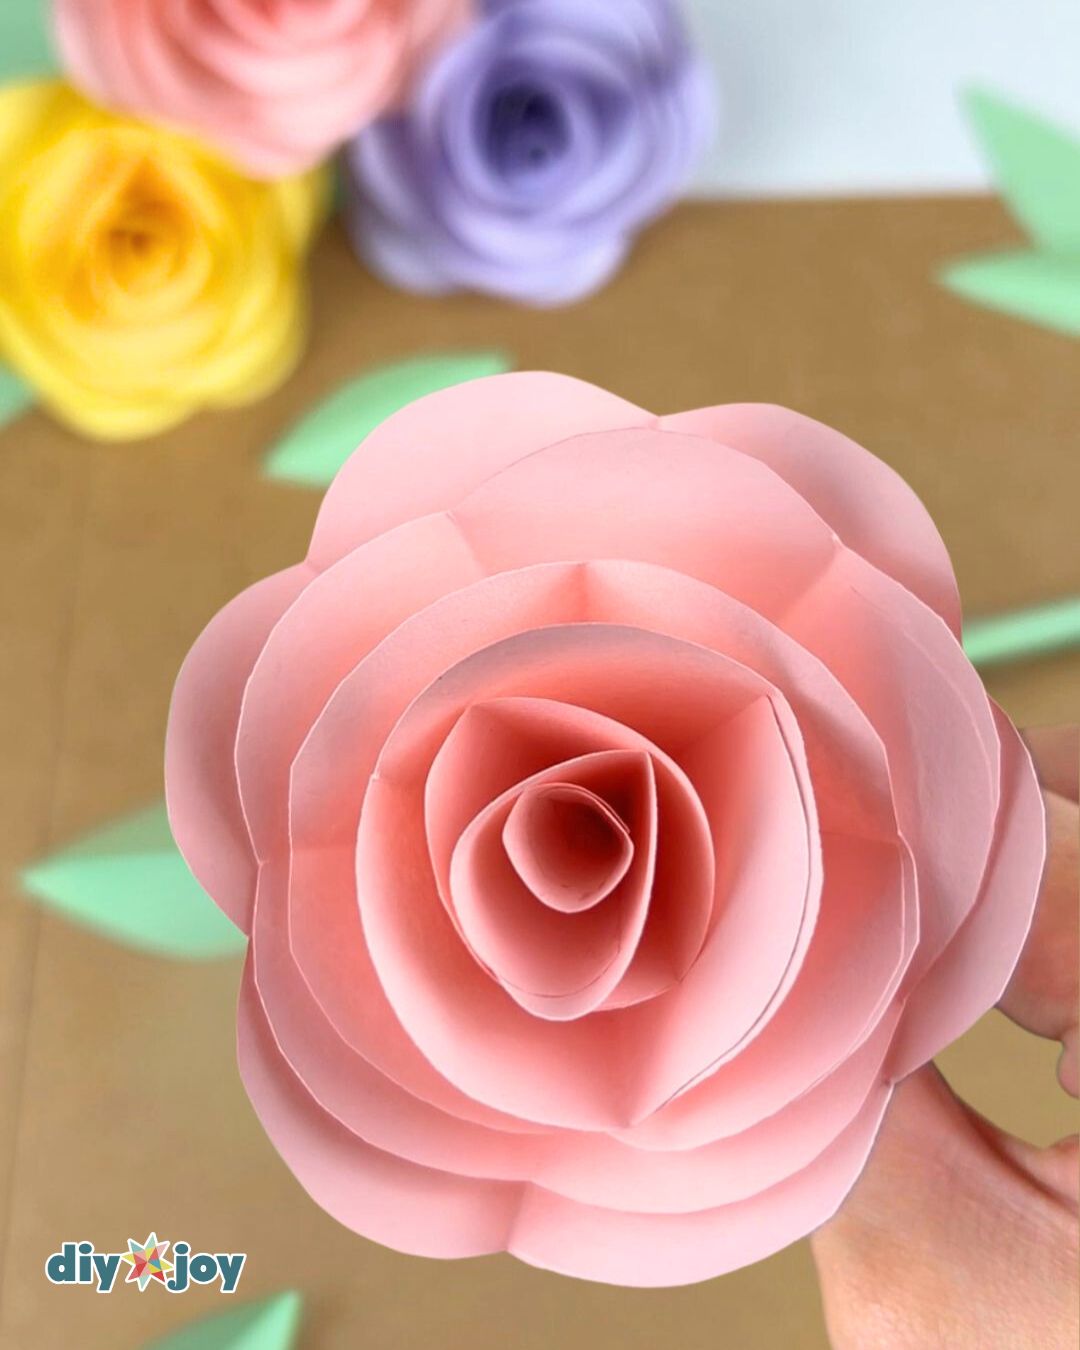
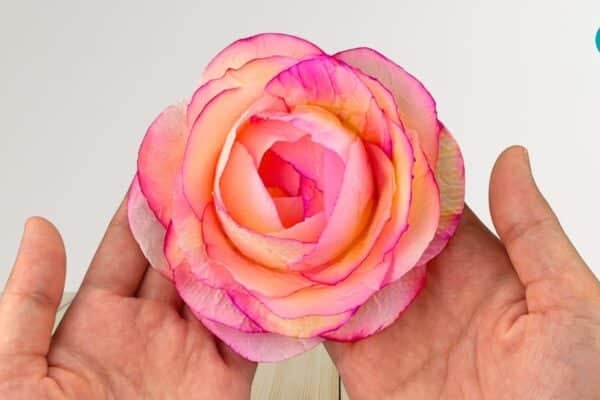
Roses are probably the most well-known and beloved flowers. In every flower shop I visit, there are always roses. If you’re one of those people who loves roses, then this tutorial is for you. I will show you how to make paper roses step by step. This is currently my favorite paper flower because it looks absolutely beautiful and is also very easy to make. Whether you’re a beginner or a pro, you will enjoy this project. You can even do it with the kids. Save this paper craft for spring. Keep reading or watch the video tutorial below for the steps.
Watch the TikTok video
How to Make a Paper Rose
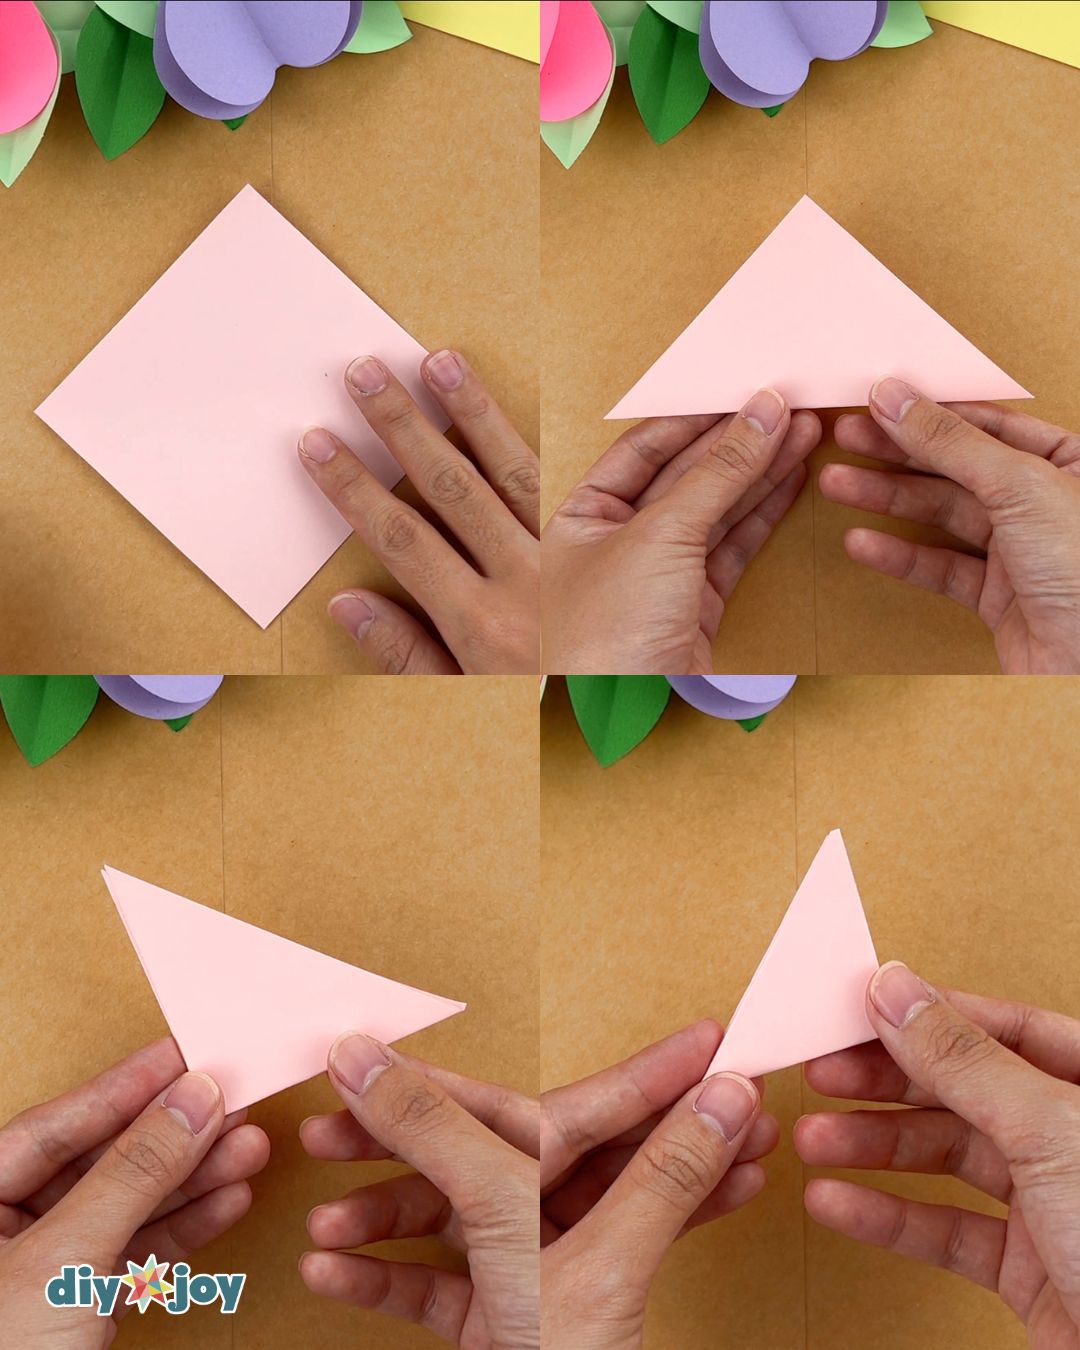
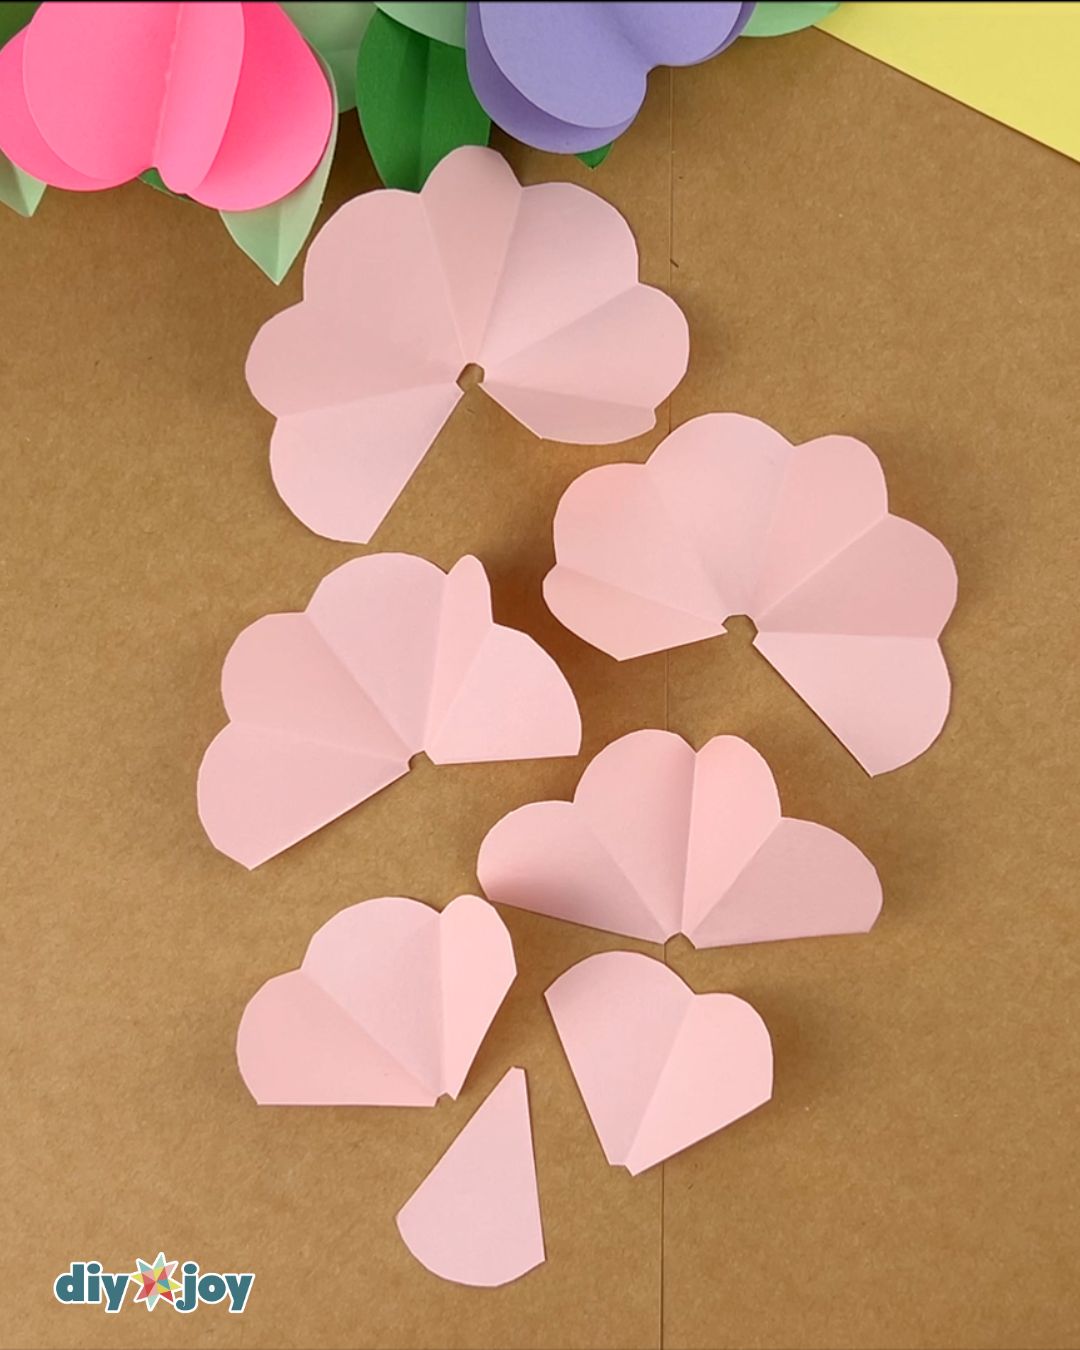
Take one square and fold it in half to form a triangle. Fold in half two more times to create a smaller triangle.

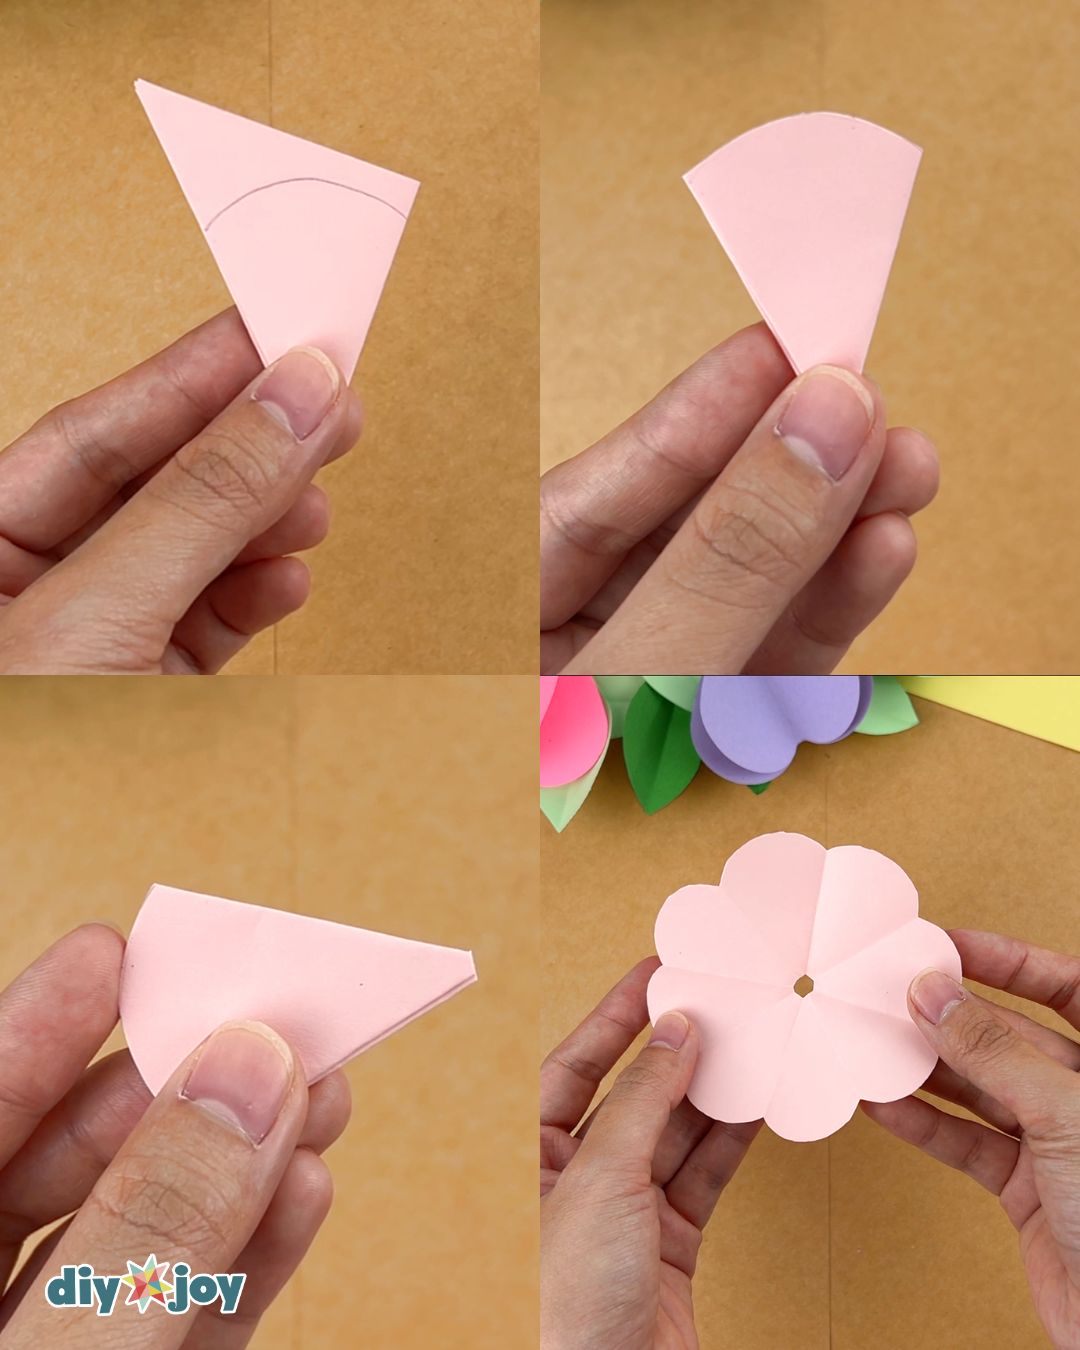
Draw a curve on the triangle and cut it out, then trim a small portion from the tip.
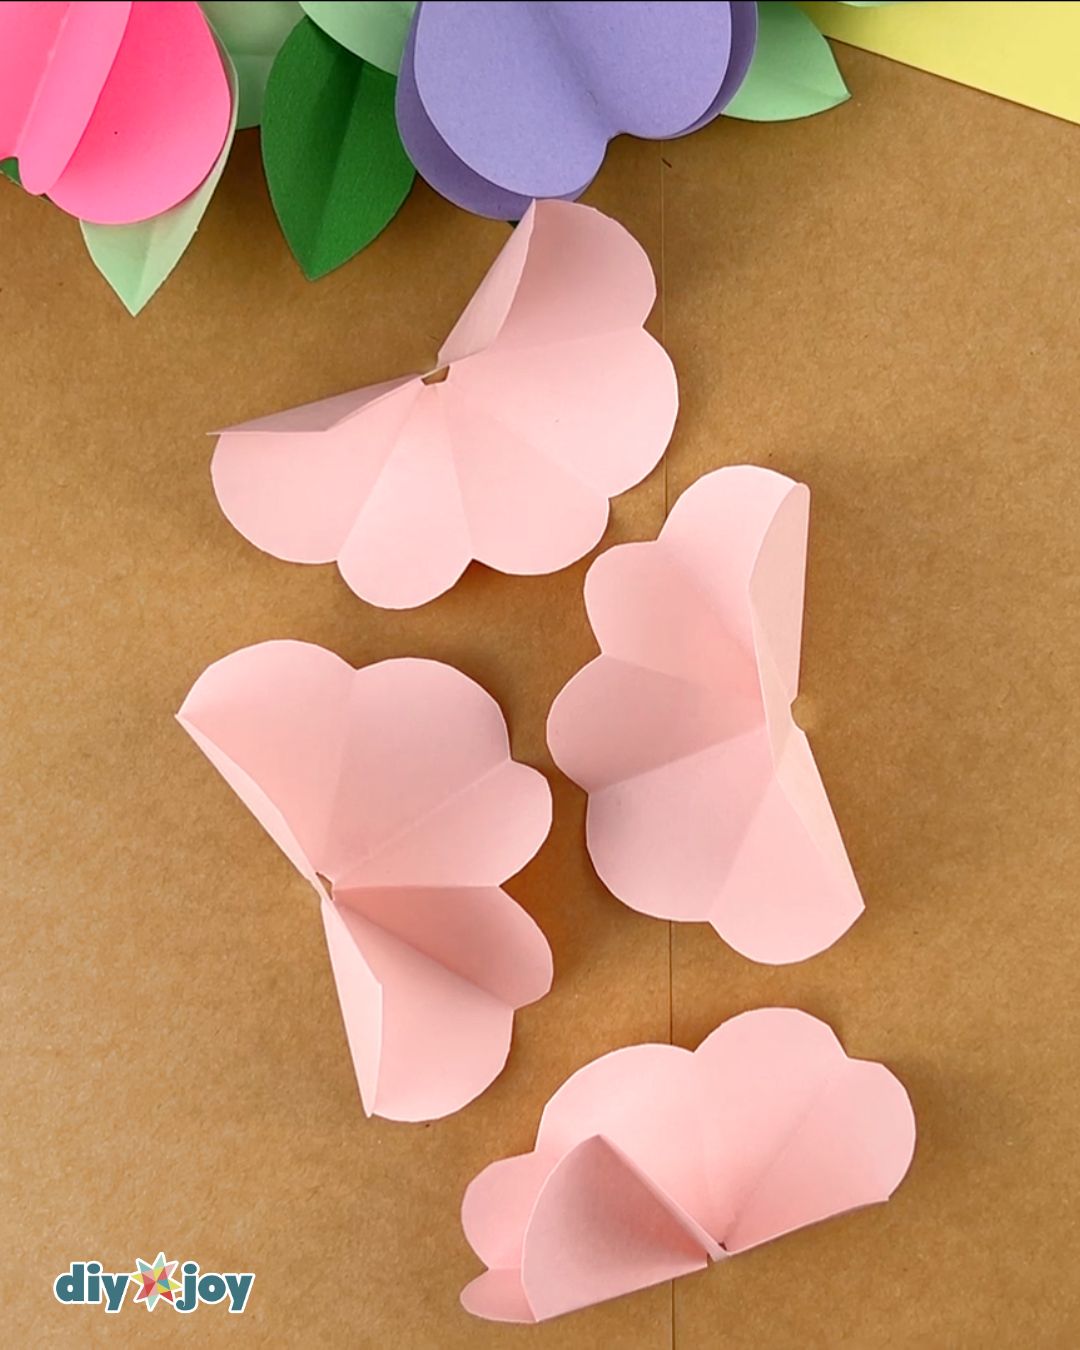
Repeat step 4 to make four pieces.
First flower – cut one petal
Second flower – cut two petals
Third flower – cut three petals
Fourth flower – cut four petals
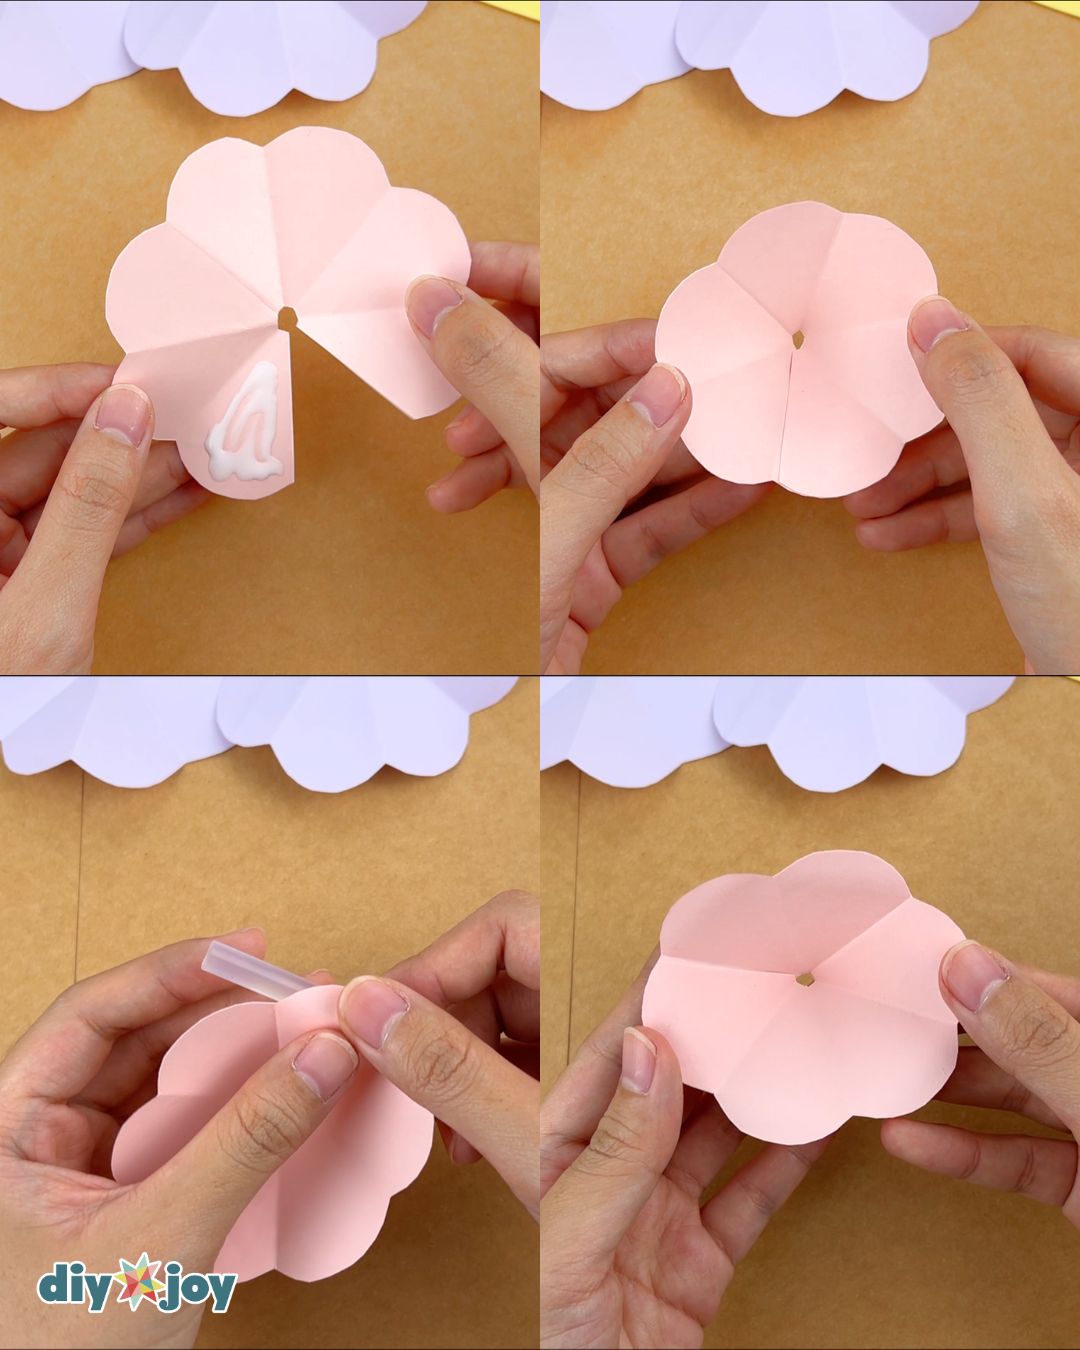
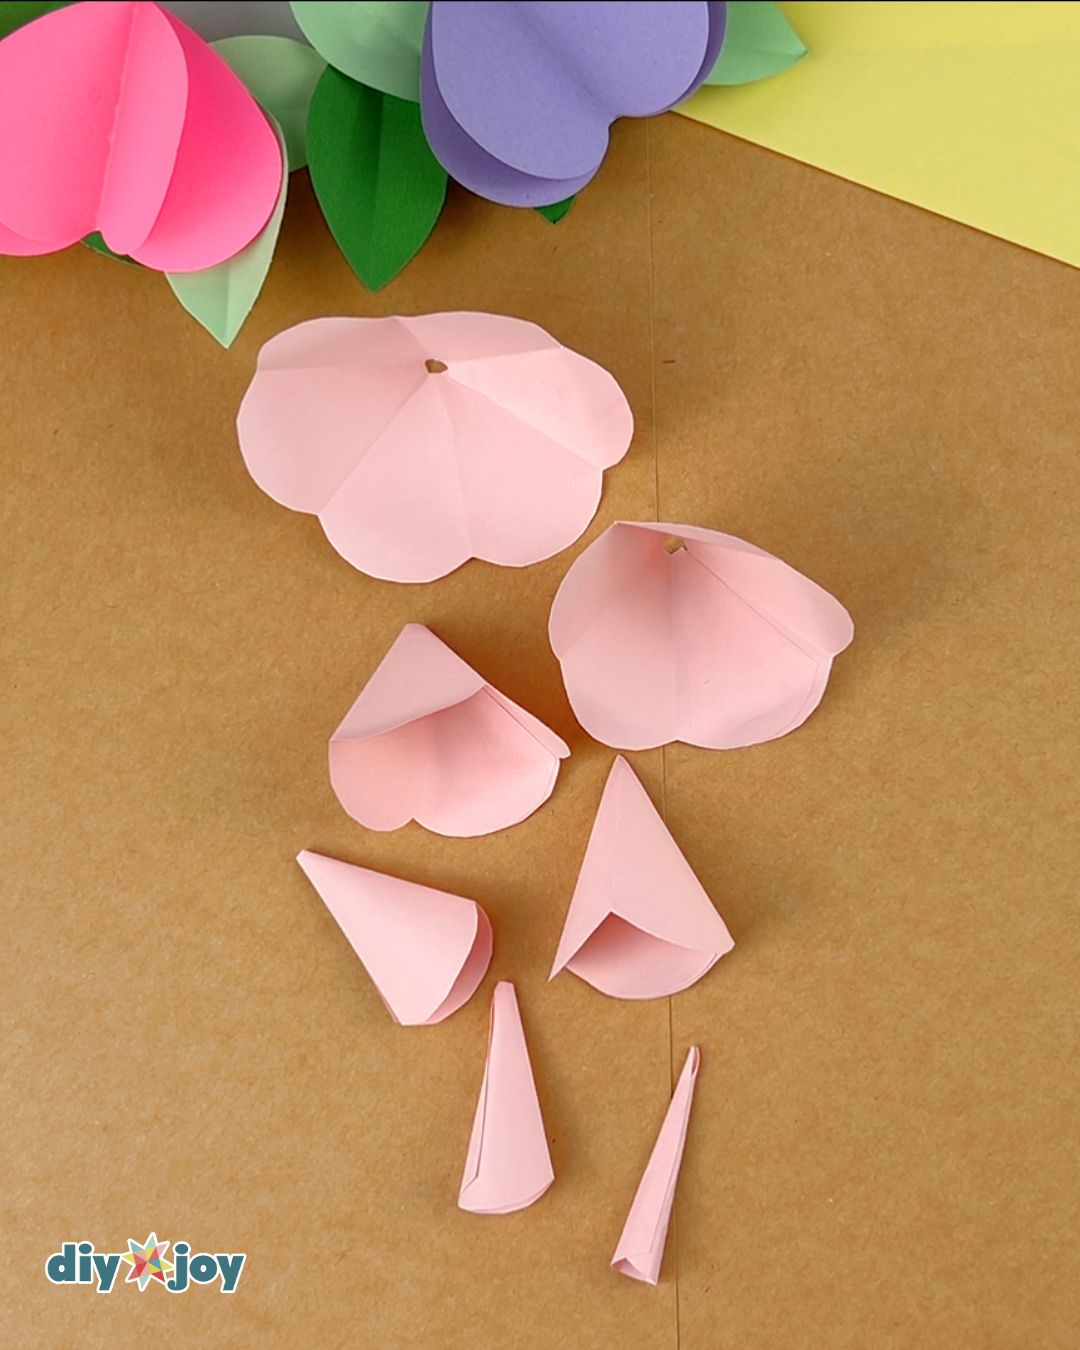
Set aside the other four-petal flower, then arrange the pieces from seven petals down to one petal.Take the seven-petal flower and apply glue to one petal. Press the ends together to form a six-petal flower. Using a pen, carefully curl the tips of the petals.
Repeat with the remaining pieces. For the two-petal and one-petal pieces, simply glue the ends together.
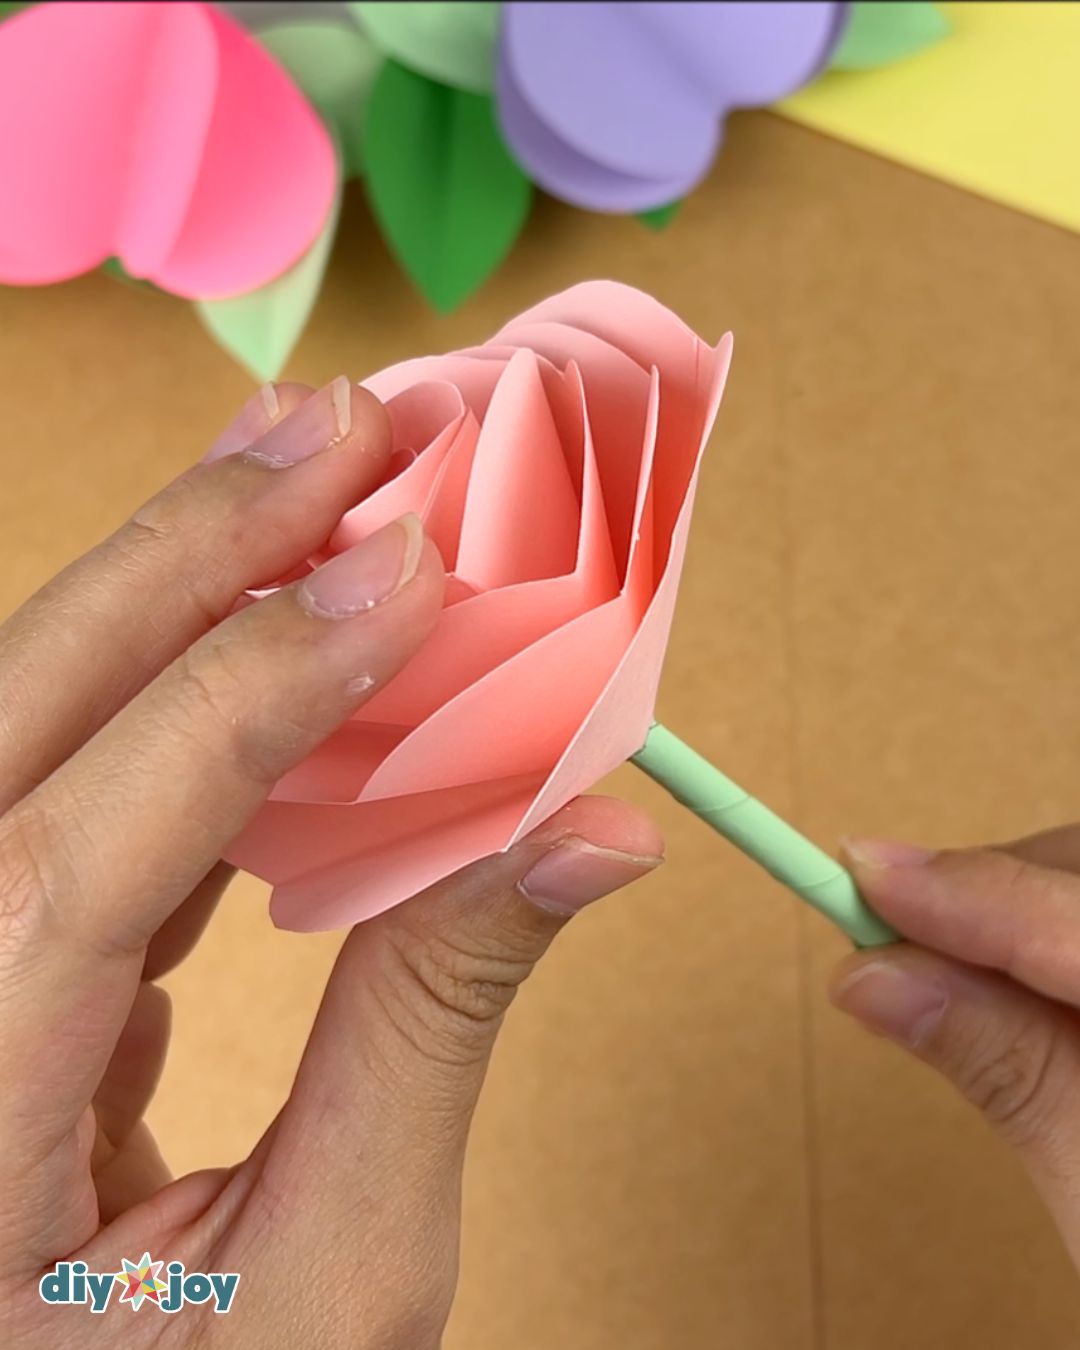
Using hot glue, assemble the flower by attaching the pieces together.
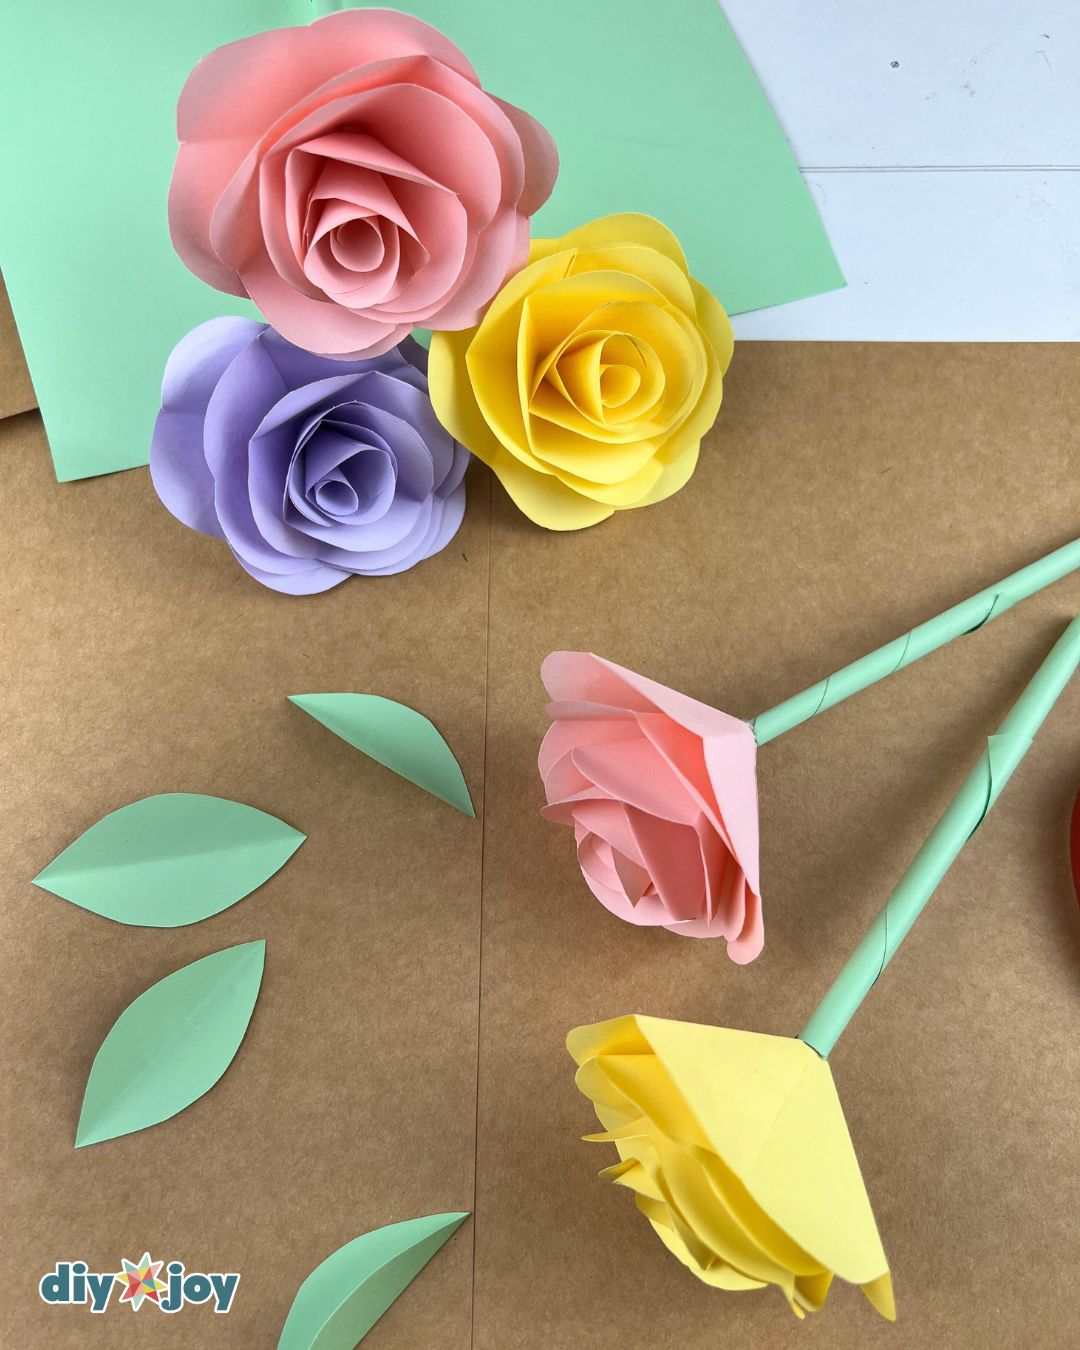
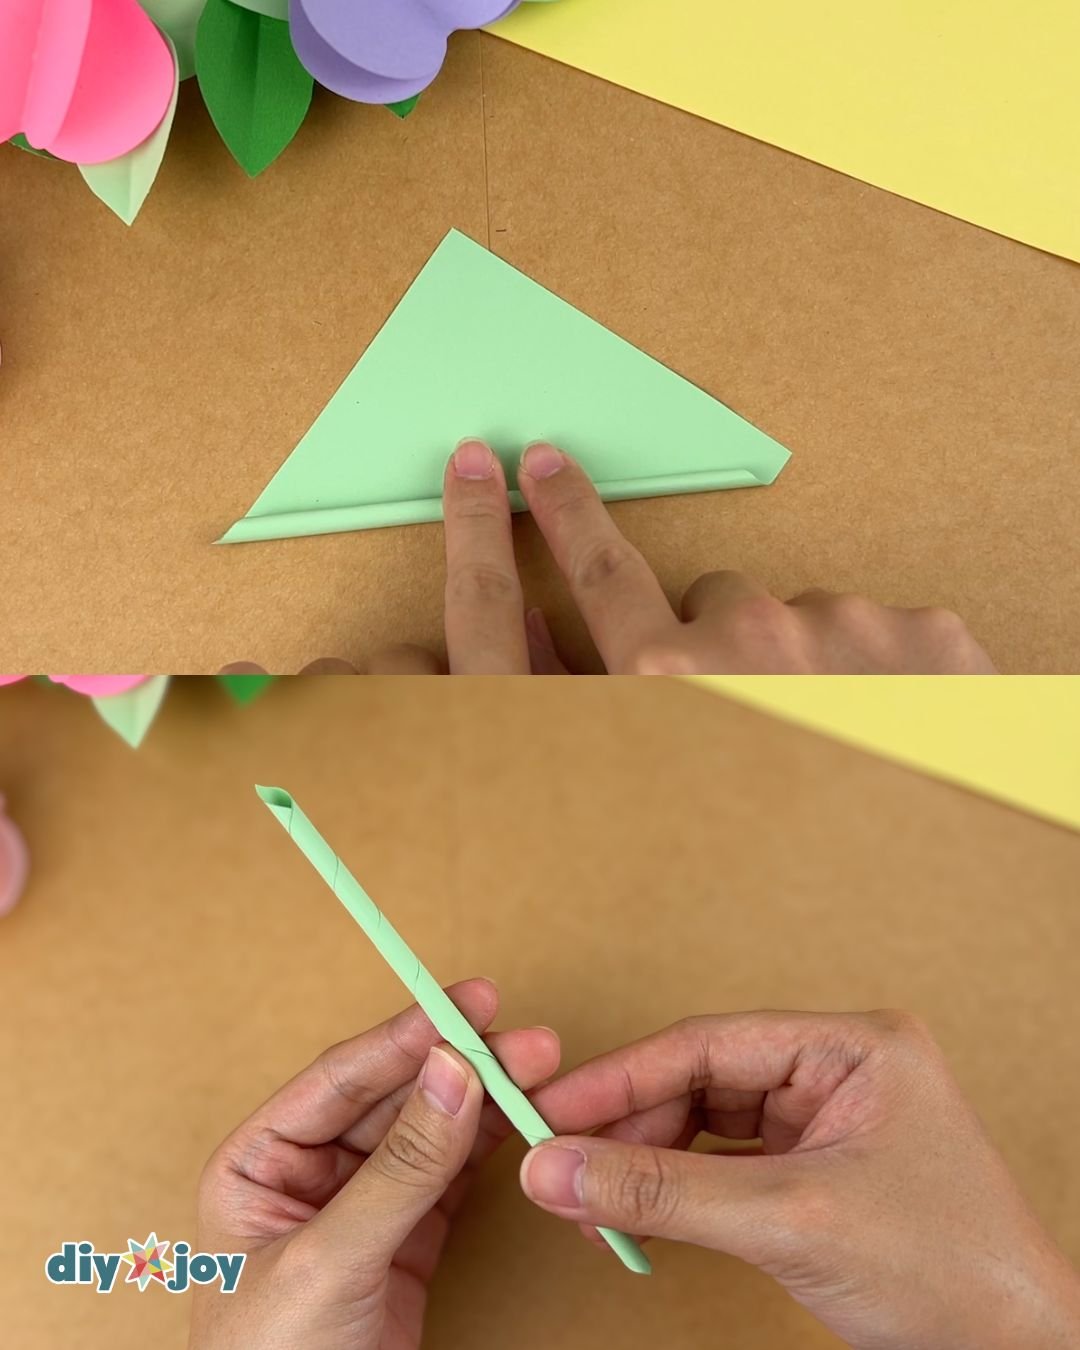
Take the green paper and roll it diagonally. Glue the end, and you’ll have the stem.
Using hot glue, attach the flower to the stem.
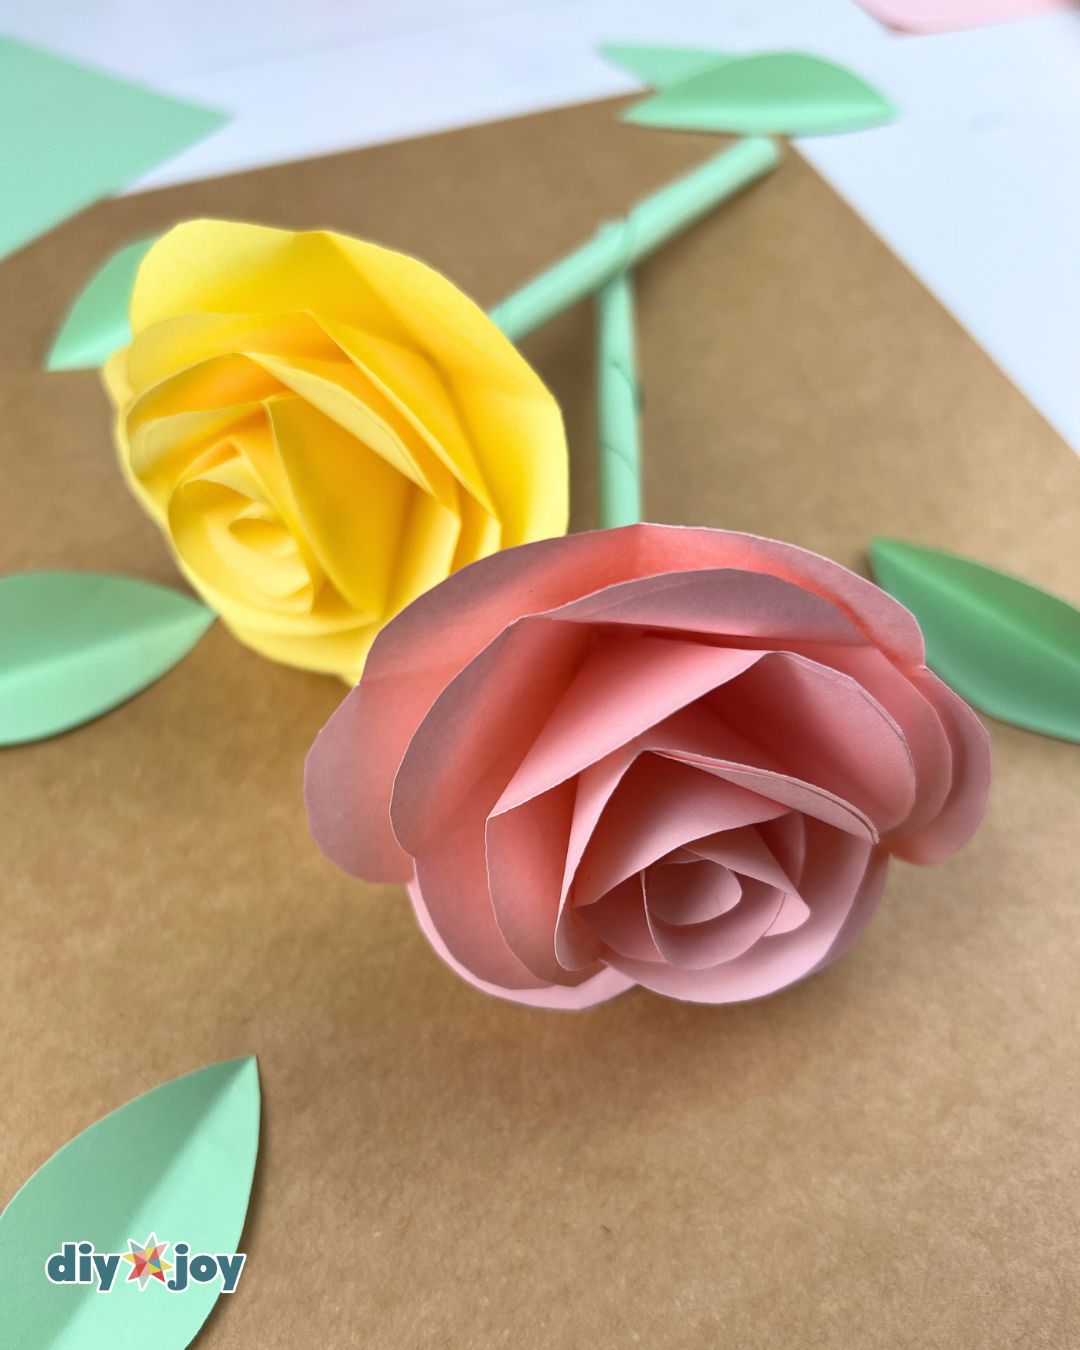
Done

Tools
- scissors
- glue gun
Materials
- 4 pieces 3-in by 3-in cardstock or colored paper (7.5 cm x 7.5 cm)
- one piece 3-in by 3-in cardstock or colored paper (7.5 cm x 7.5 cm)
- glue stick
- glue
- pencil
![]()
Crafting Tip
Use sharp scissors to get clean cuts.
Creative Ideas and Variations
- Sizes. You can absolutely make these roses in different sizes. If you’re planning to create a paper flower bouquet, I suggest varying the sizes a little for a more natural look. This also makes a perfect DIY gift idea for your loved ones.
- Colors. Make the flowers in different colors for variety. I made mine in pastel shades, but feel free to use vibrant colors.
- Leaves. To complete the look of the flowers, add leaves! Simply cut a leaf shape from your colored paper, fold it in half lengthwise, curl one end slightly, and glue it to the stem.
- Scent. If you want to add fragrance to your flowers, use scented paper. It is easily accesible and comes in different colors too.
- Decorate. Aside from making a bouquet or placing them in a vase, you can use the flowers without stems as gift toppers or wall decorations for your home, parties, or events.

More Paper Flower Tutorials
Paper Crafts
Paper Flowers
Paper Flowers