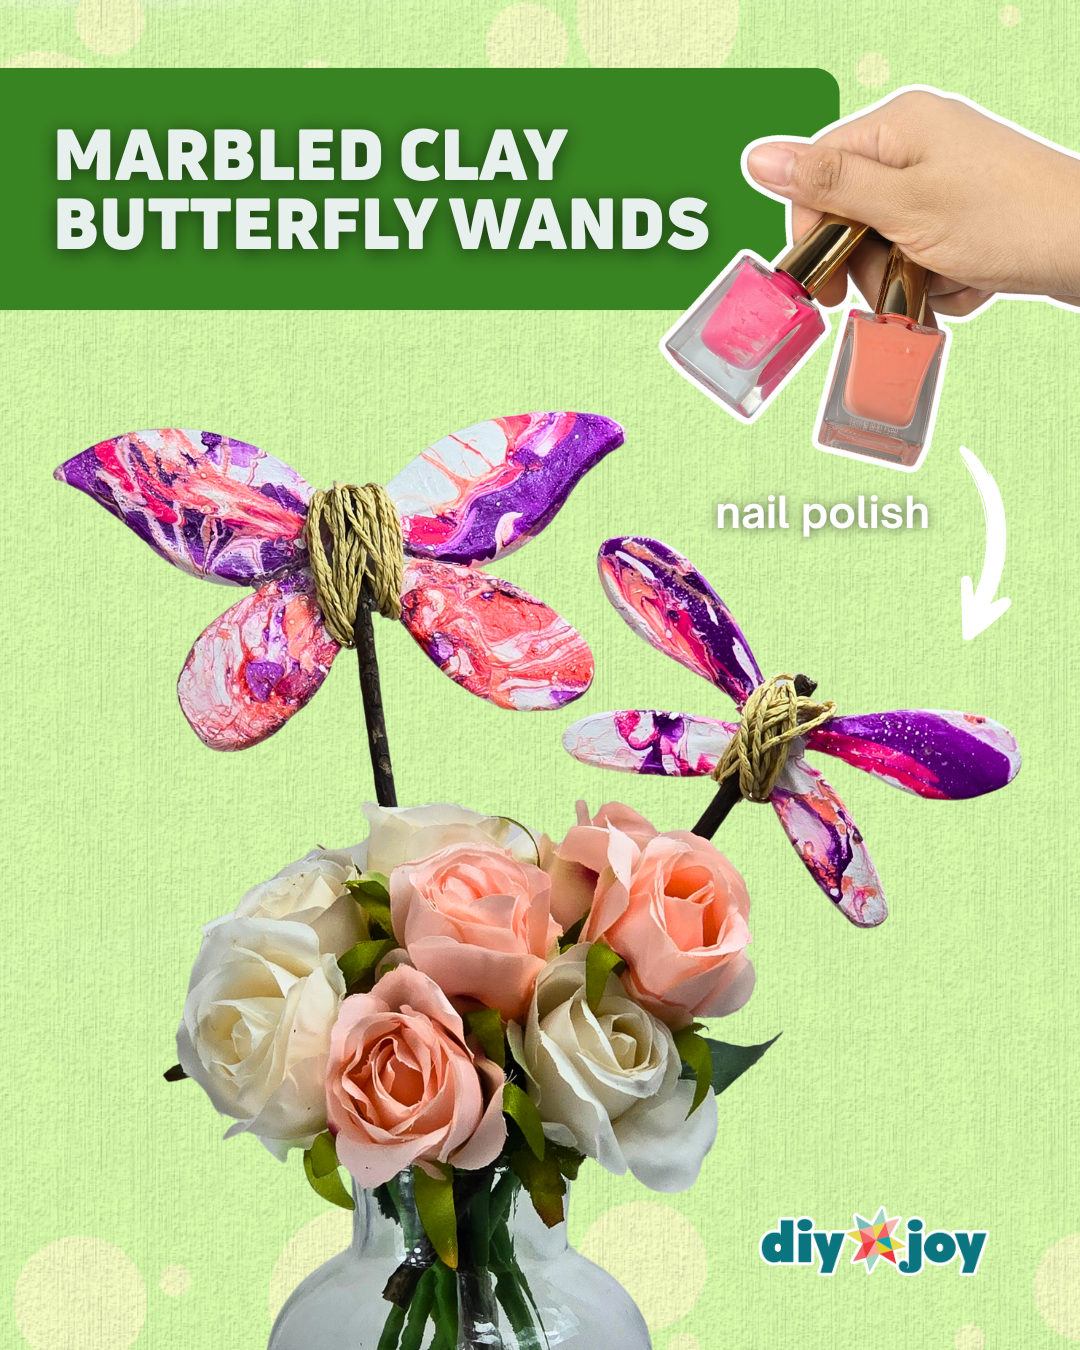
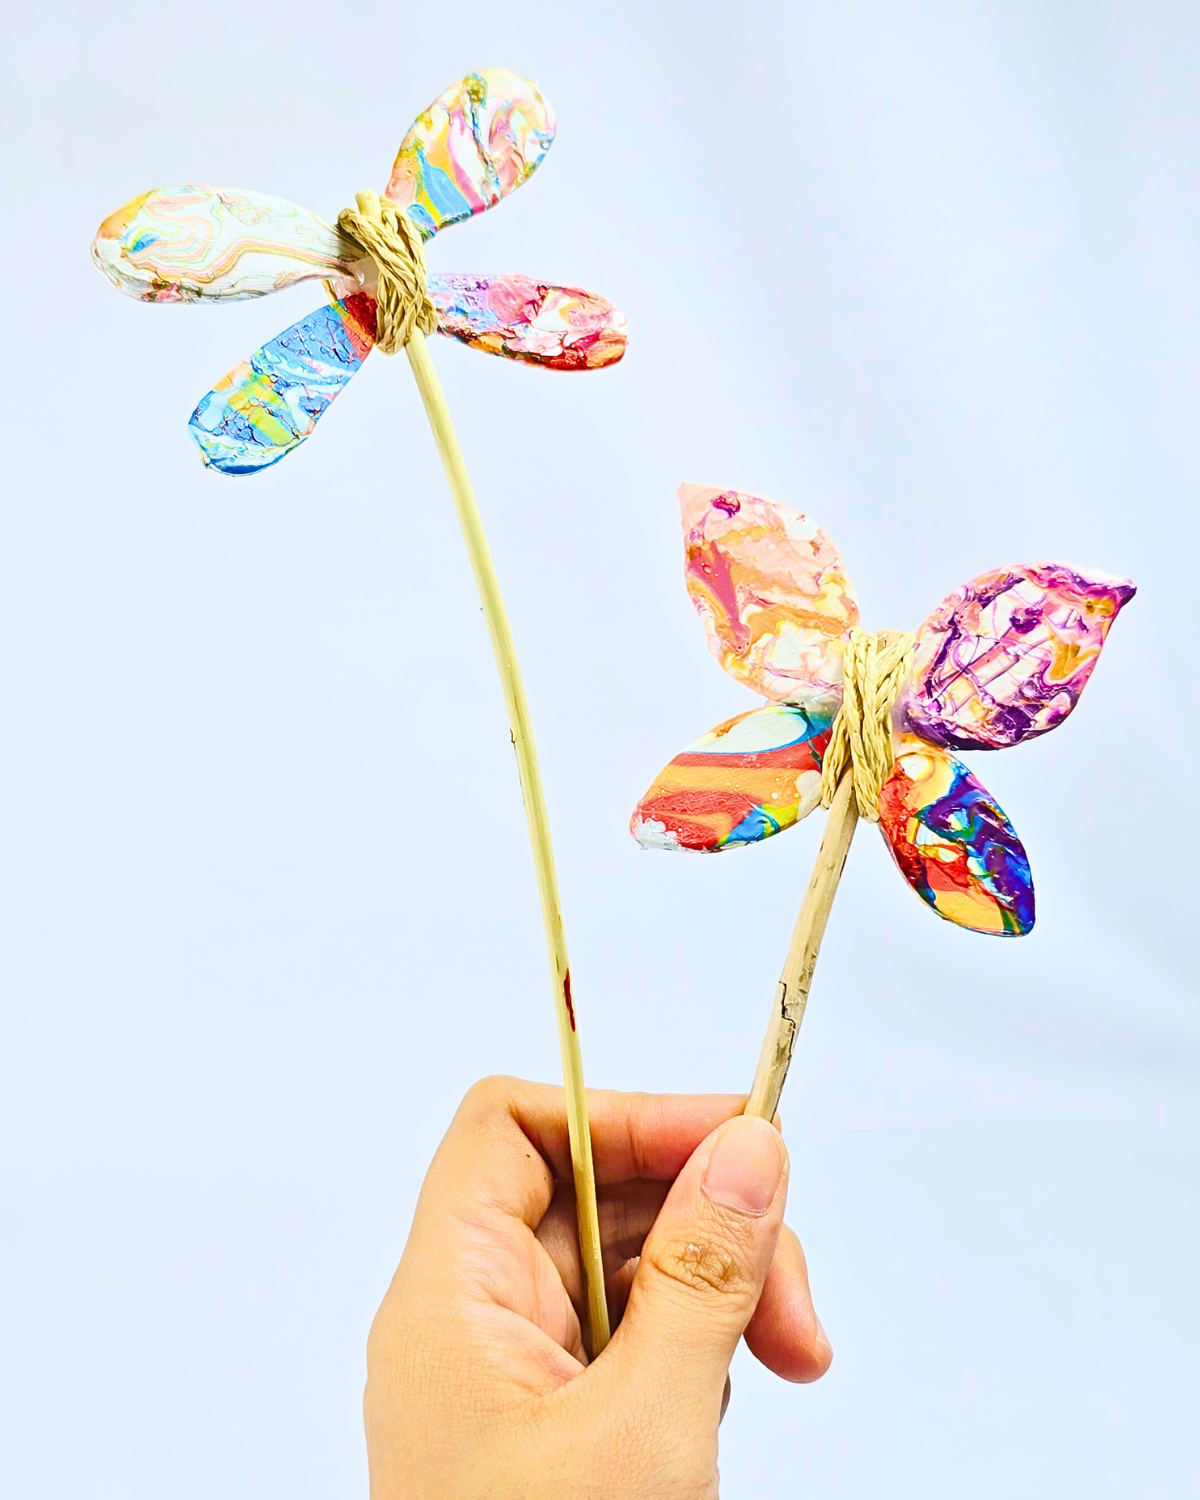
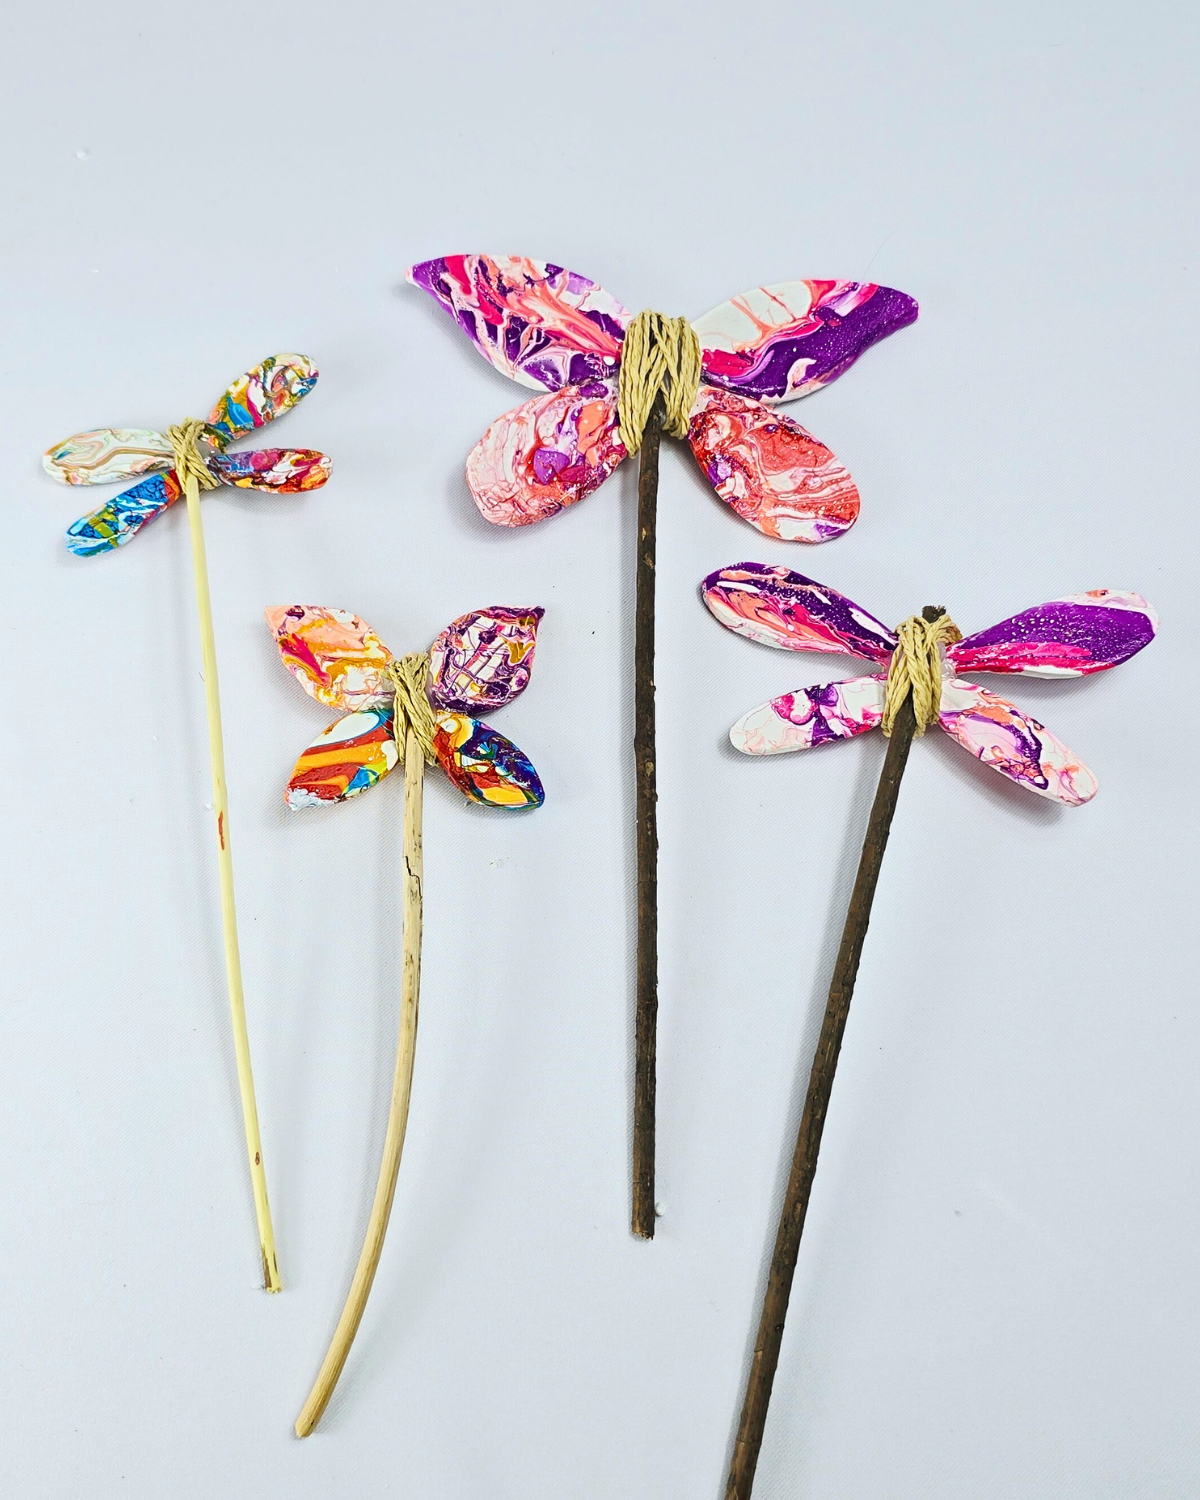
I had a bunch of leftover nail polish that I didn’t want to throw out and some extra air-dry clay from a different craft, so I figured—why not try something new and creative? That’s how these butterfly and dragonfly wands came to life.
I wasn’t aiming for perfection, just looking for something creative to do with what I already had. But once I dipped those little wings into the polish and saw the beautiful marbling effect, I knew I had to make more. It was way more satisfying than I expected—and honestly kind of addictive.
These DIY wands aren’t just for fun—they’re surprisingly useful too. I love sticking them into potted plants to add a pop of color, especially in the kitchen or on a balcony. They make plain planters look more playful and alive.
You can also tuck them into garden beds, indoor vases, or even use them as cute photo props or handmade gifts. They’re lightweight, low-maintenance, and a great way to decorate without spending a lot or cluttering up your space.
This project actually reminded me of something I made a while back—Air-Dry Clay Plant Markers. Just like these wands, they’re colorful, simple, and such a fun way to personalize your space. If you’re looking for a craft that’s more practical for labeling your plants or herbs, that one’s definitely worth trying too. Be sure to check it out if you haven’t yet!
It’s a simple craft that doesn’t need fancy tools or too much time, and it gives you something beautiful and personal in return. If you’ve got a few materials on hand—and a little patience—this project is absolutely worth trying.
RELATED: Air-Dry Clay Jewelry Tray | Air-Dry Clay Ring Holder
What You’ll Need for Marbled Clay Butterfly Wand
How to Make a Marbled Clay Butterfly Wand
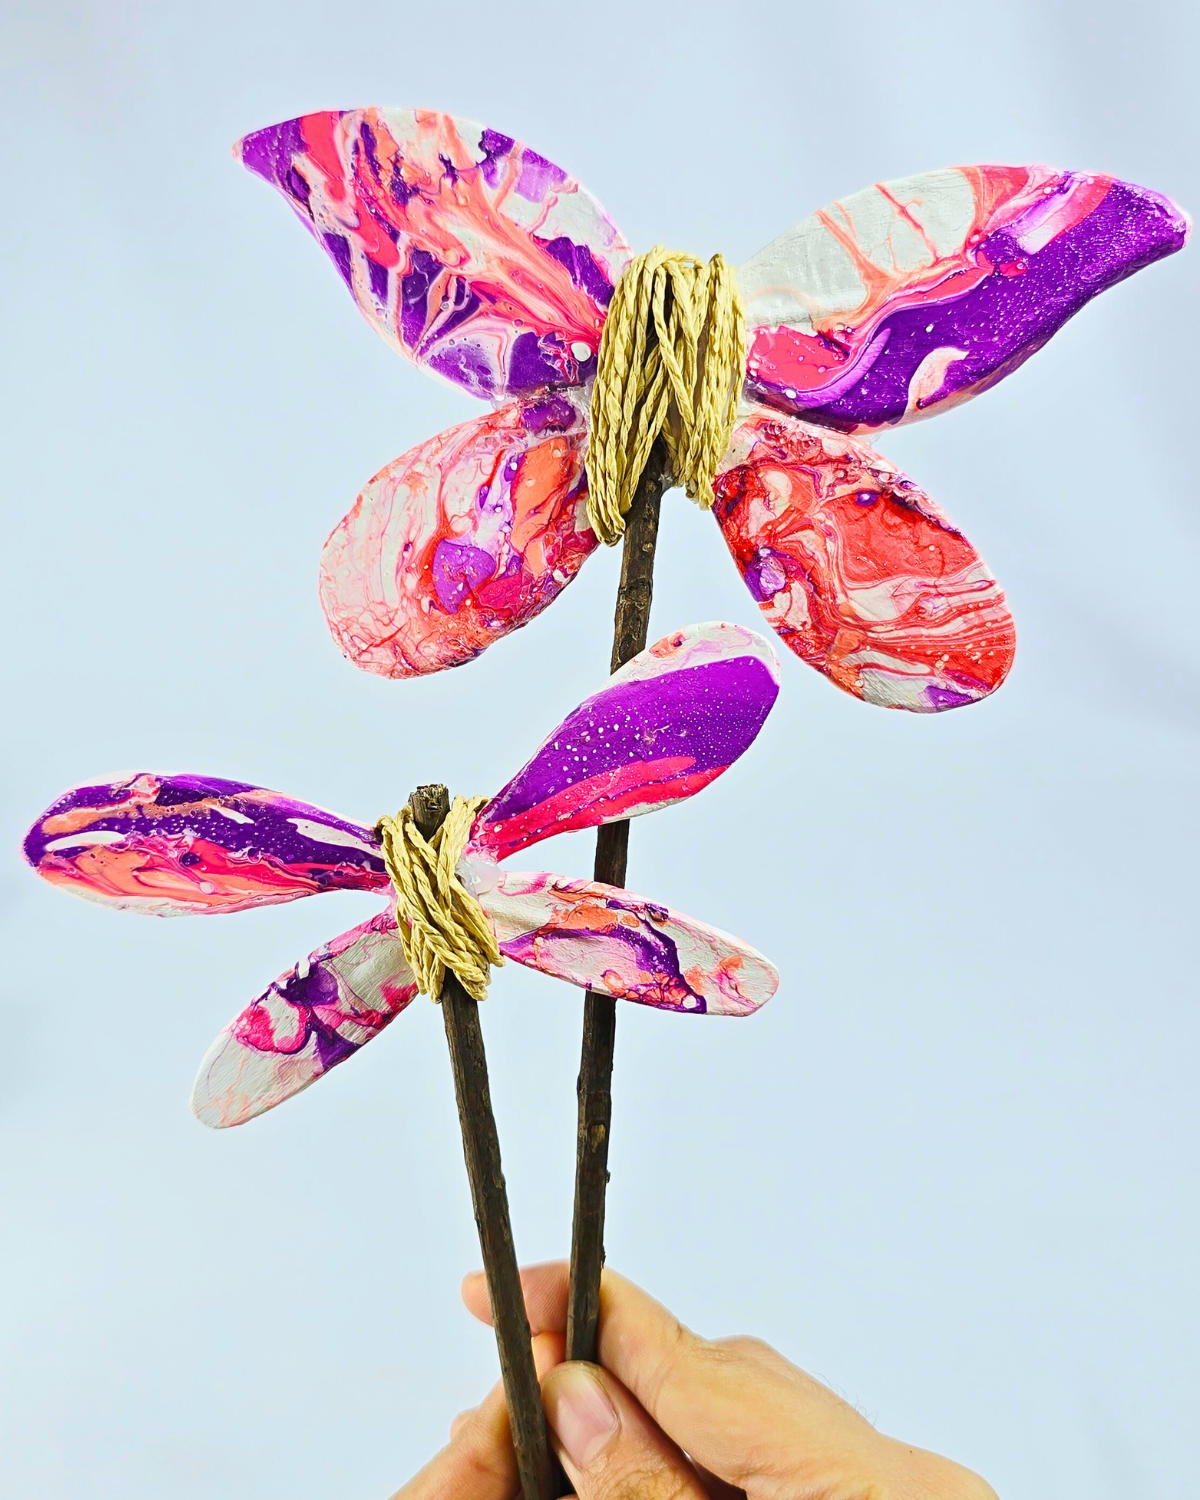
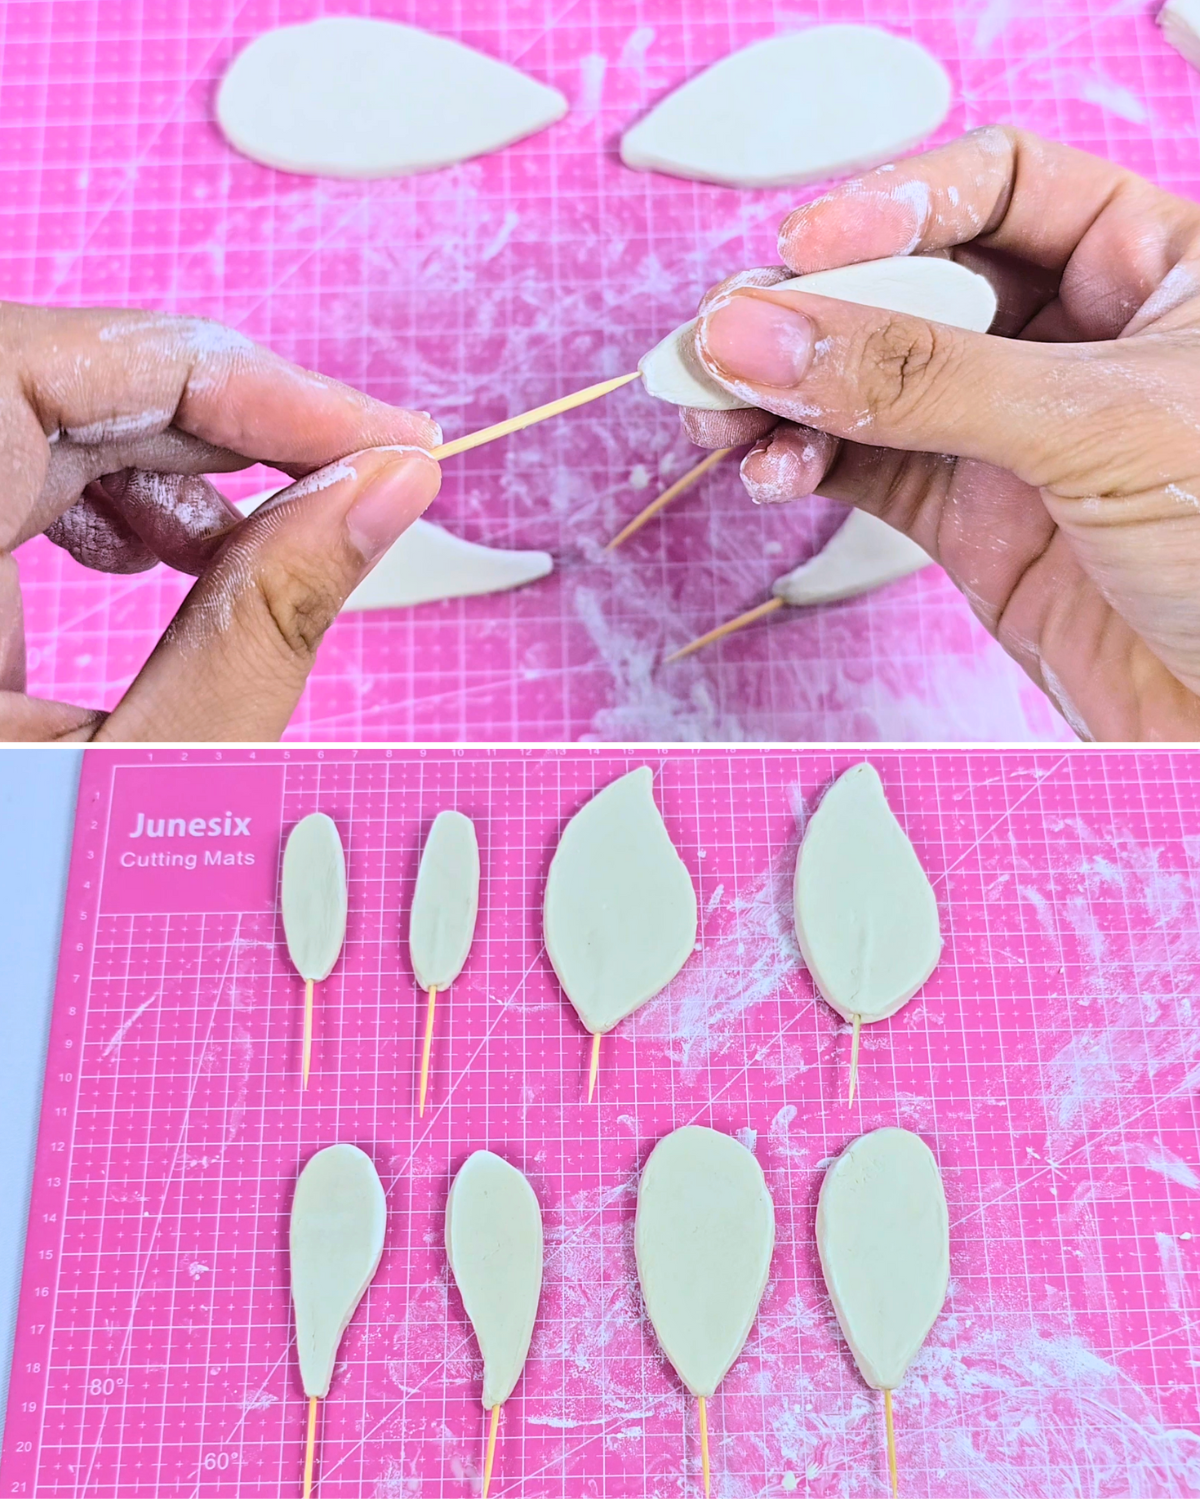
Step 1: Shaping the wings

Roll and flatten a small chunk of clay until the desired thickness, then cut out the shape of the dragonfly and butterfly’s wings as shown in the photo. You can also make them into a different shape.Step 2: Inserting the toothpick
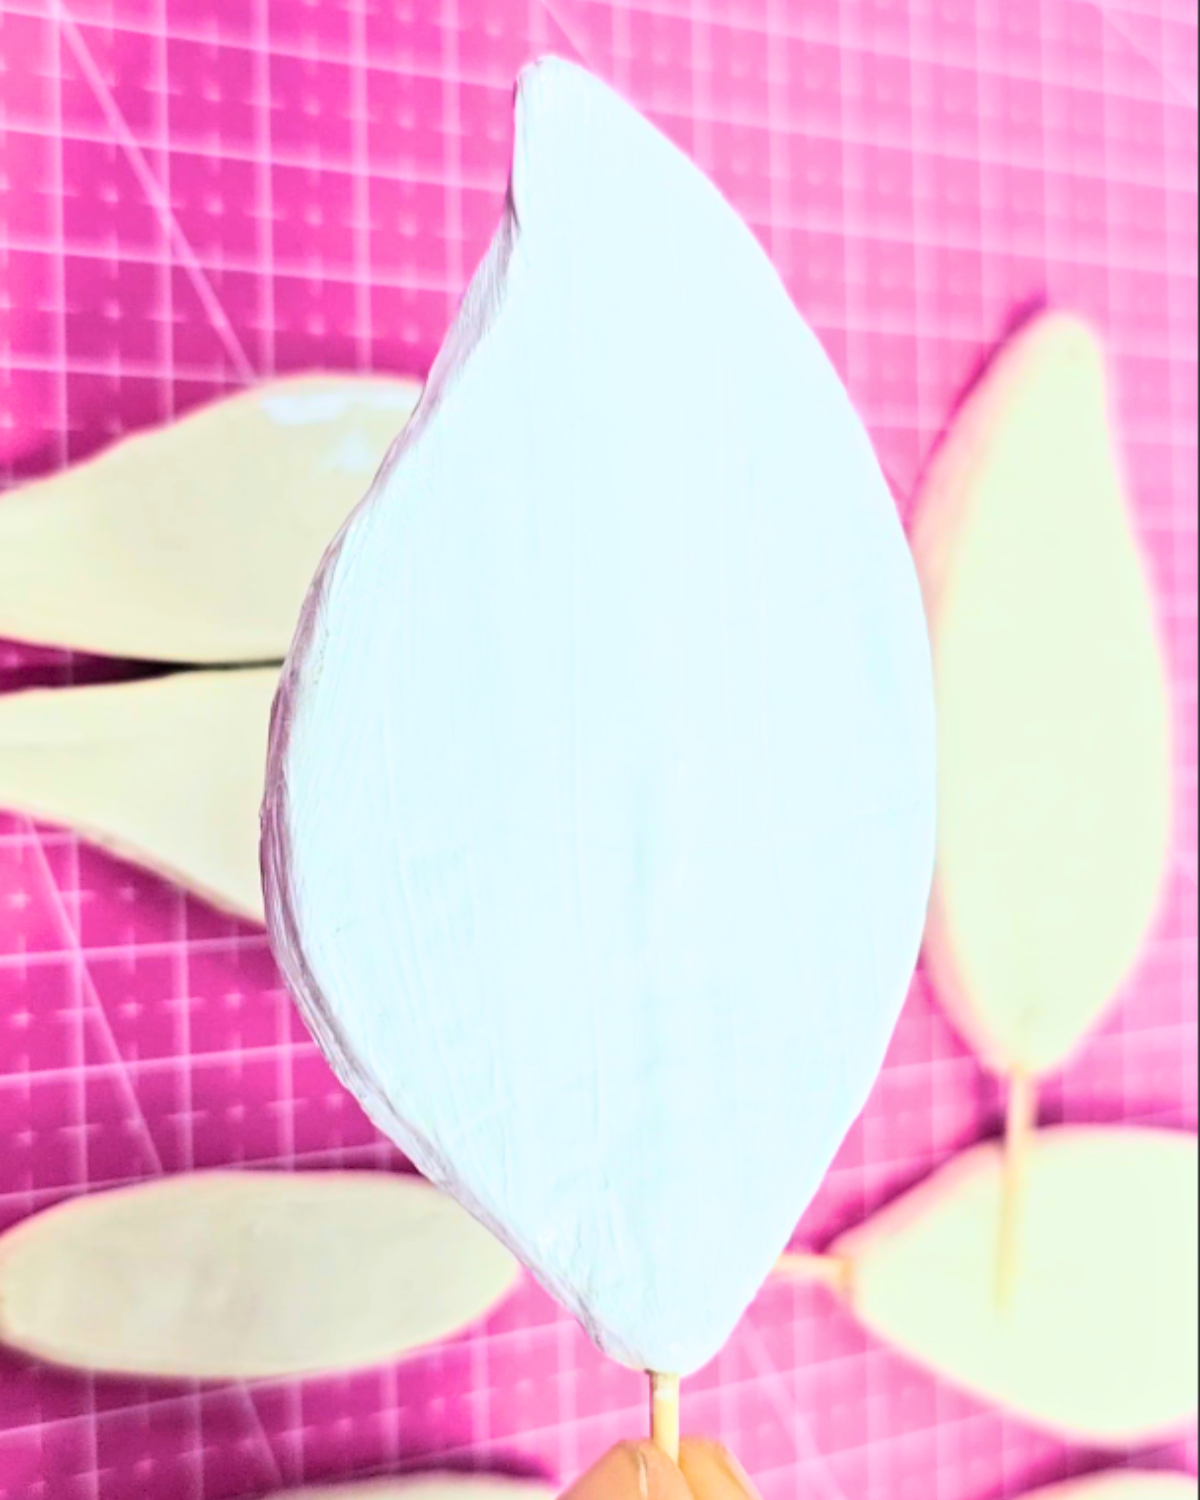
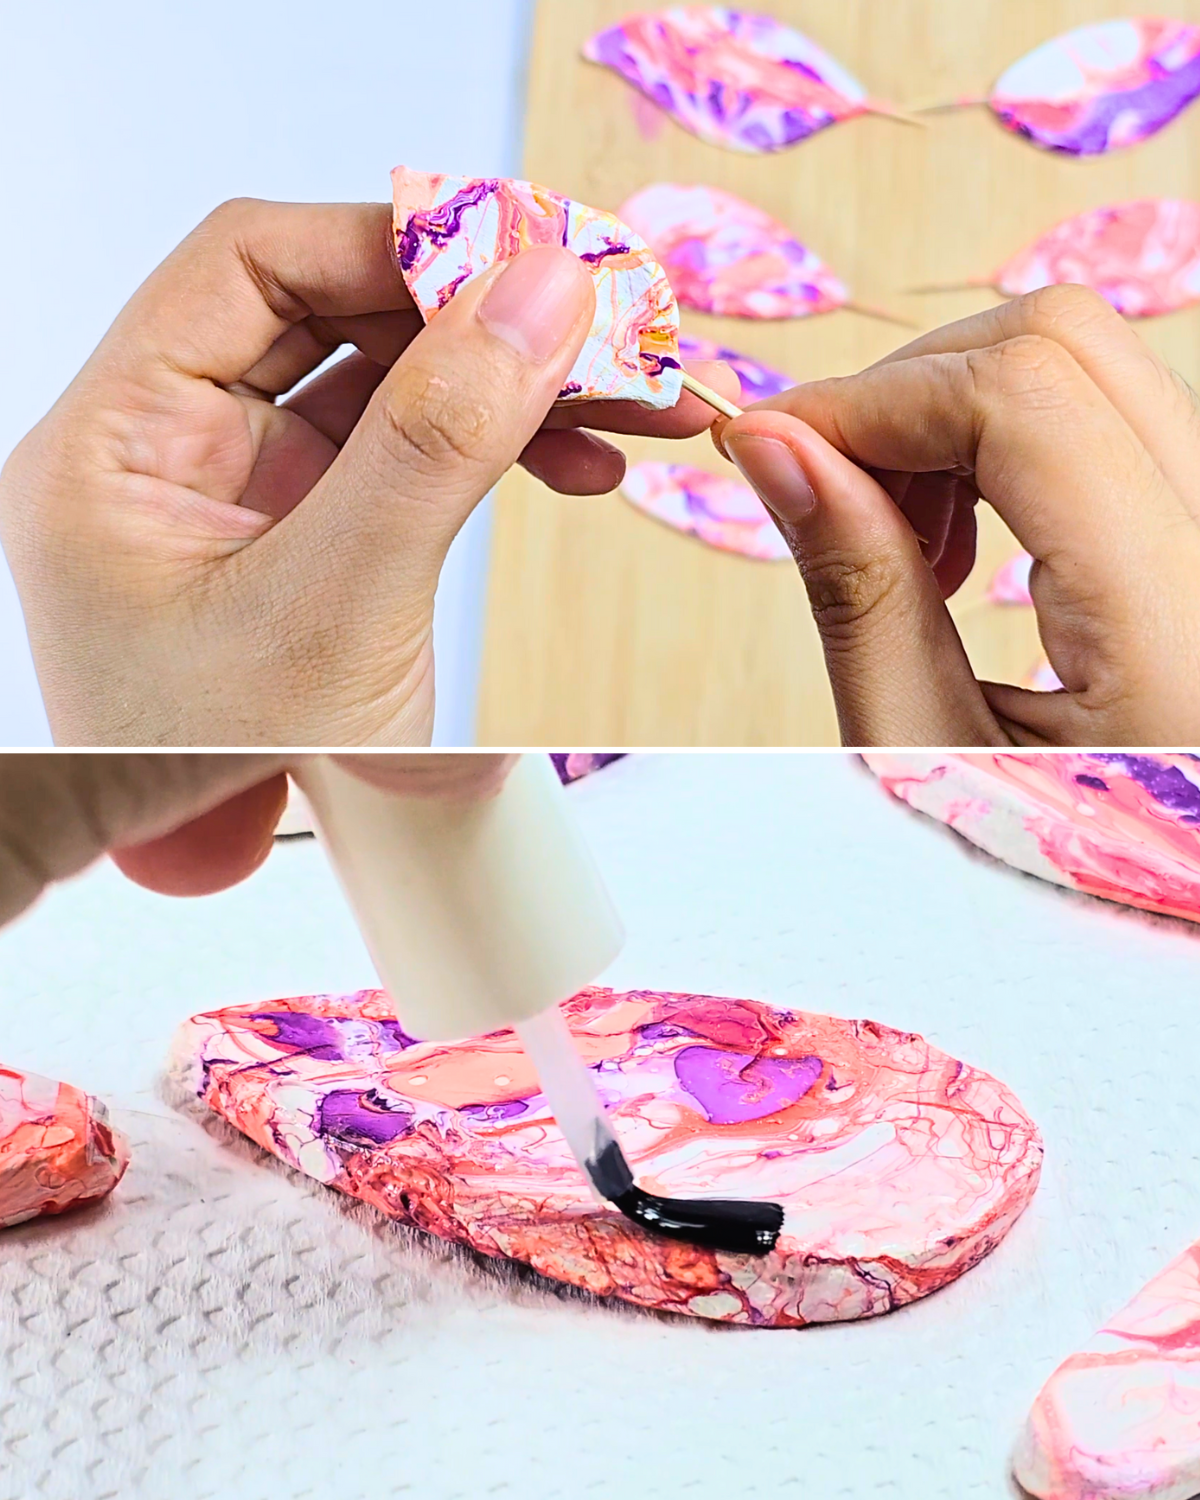
Insert a toothpick into one end of the wing pieces, preferably on the pointed end. The small hole it leaves will be hidden once you begin assembling the pieces together. This toothpick will serve as the handle when you start dipping the clay wings.Step 3: Applying the primer
You can coat it with white acrylic paint or primer, but using primer first will give the clay a better surface texture, helping the nail polish adhere more effectively.Step 4: Dipping the clay wings
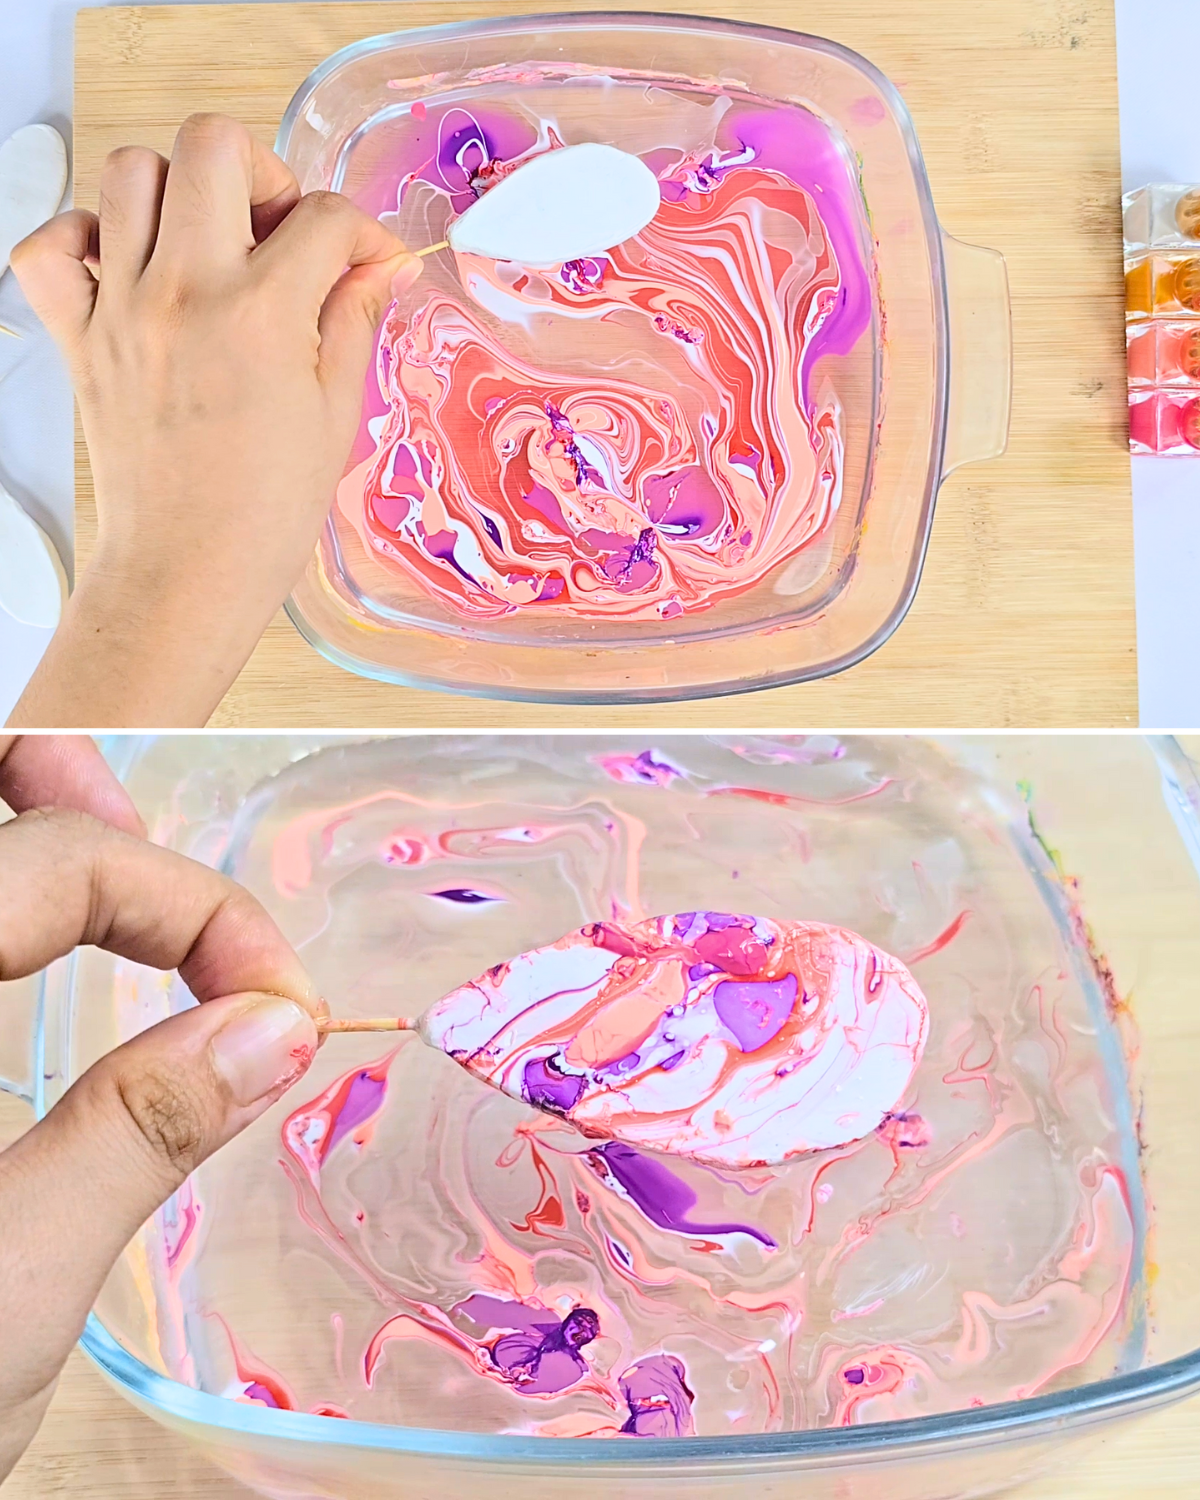
Pour and mix any nail polish colors you like and make sure to give it a little swirl. Then, holding the clay wings by the toothpick, dip them into the polish mixture. Feel free to add and mix more colors as you go.Step 5: Apply clear nail polish
Let the nail polish dry completely, then carefully remove the toothpick. Finish with a clear top coat for added shine and to seal the design.Step 6: Assemble the wings
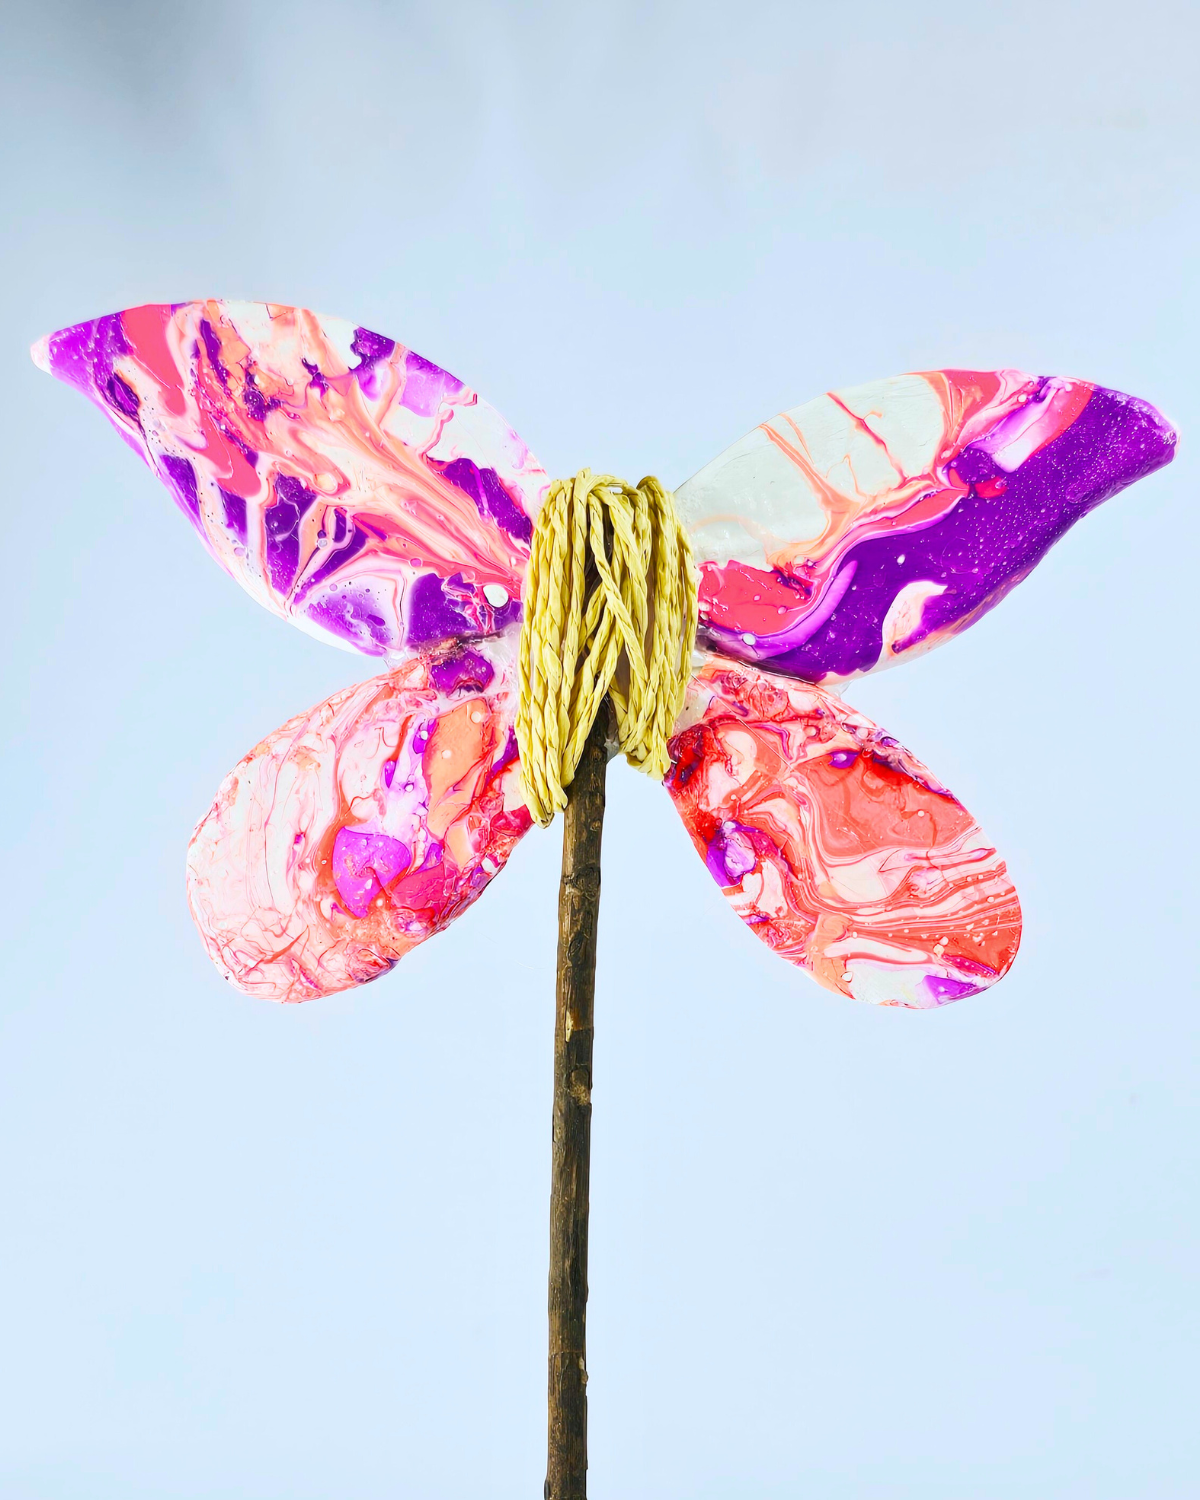
Now, assemble the wings and apply a generous amount of hot glue in the center. Place a stick directly on top of the glue, then add more to secure it in place. Once the glue has dried, wrap and tie a piece of twine around the wings and stick for added hold and a nice finishing touch.


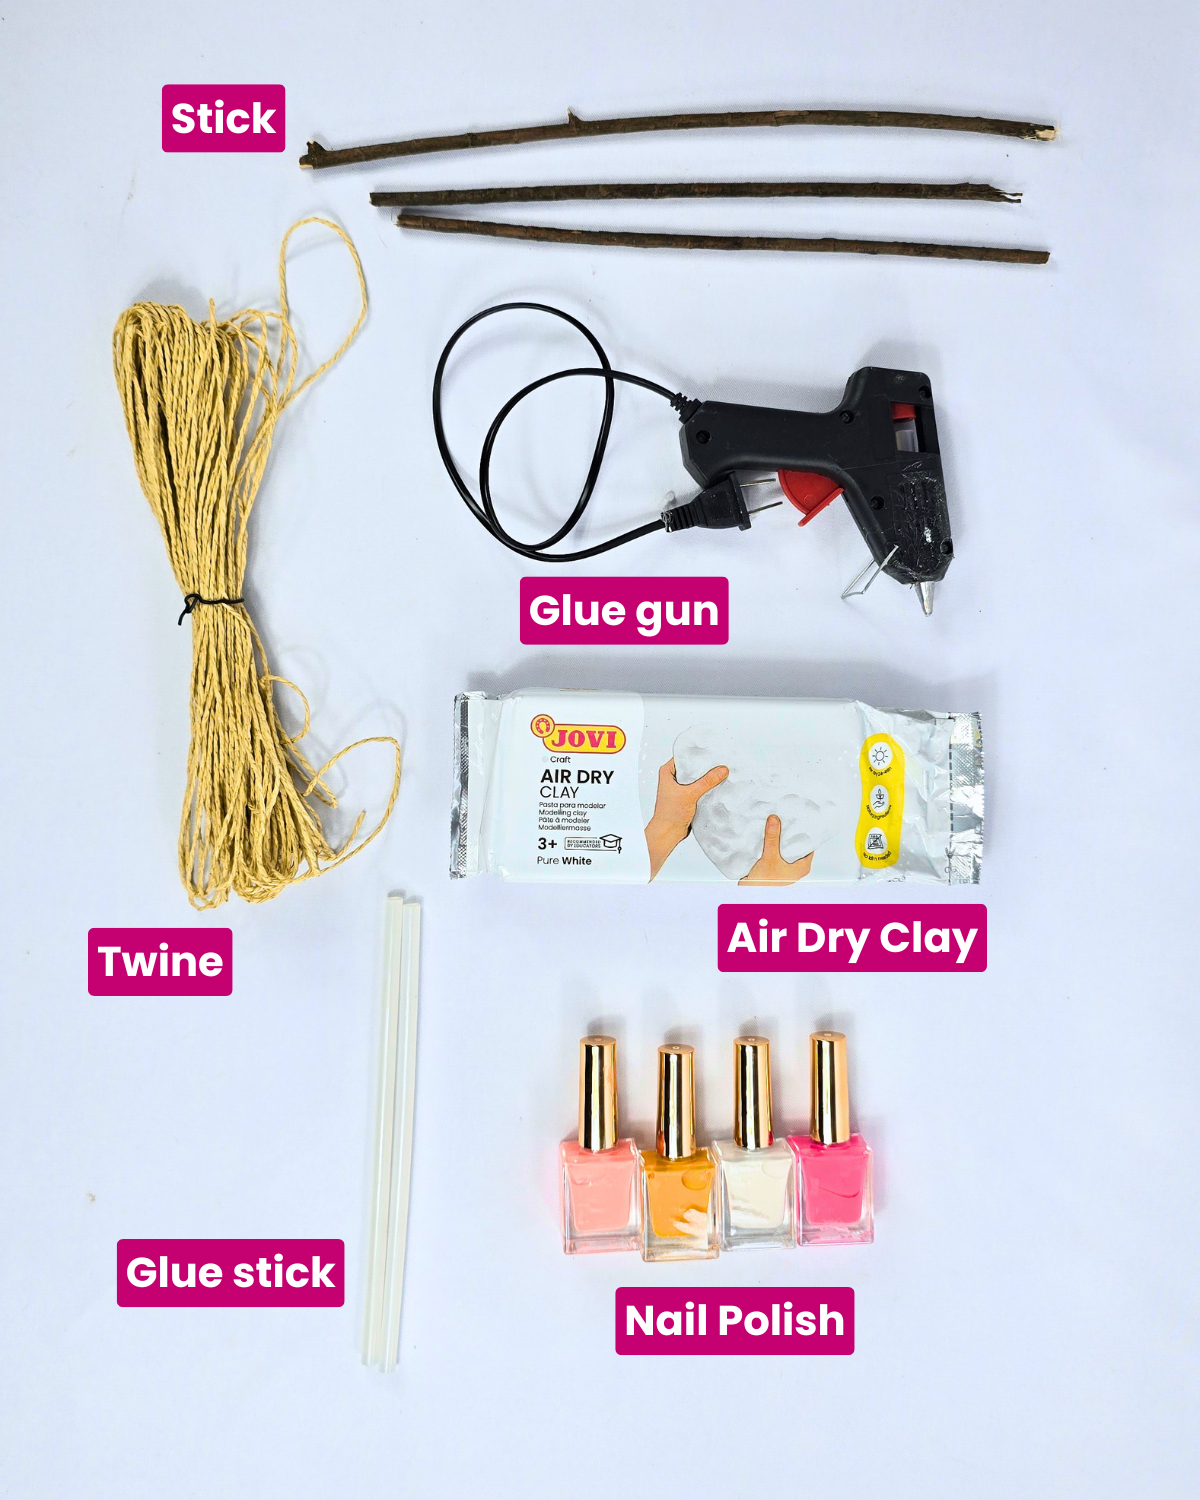
Materials
- Air Dry Clay
- Hot glue gun
- Glue stick
- Scissors
- Nail polish
- Twine
![]()
Pro Tip
Use a Strong and Flexible Twine
Choose a soft but sturdy twine or jute cord so you can tie it snugly without putting too much pressure on the dried clay. Wrap it firmly but gently around the wings and the stick—make sure not to overtighten, as it may cause the clay to snap.
Add a Dab of Hot Glue Under the Twine
Don’t rely on the twine alone to hold everything together. Add a generous dab of hot glue between the stick and wings, then press down gently. Let it cool before tying, and it’ll act like a cushion and anchor to hold everything securely in place.
What’s Viral Recently:

Crafts

Paper Flowers

Crafts

Paper Flowers
*If you love this craft, then visit our official website, follow our Facebook page, and subscribe to our YouTube channel for more!
Marbled Clay Butterfly Wand