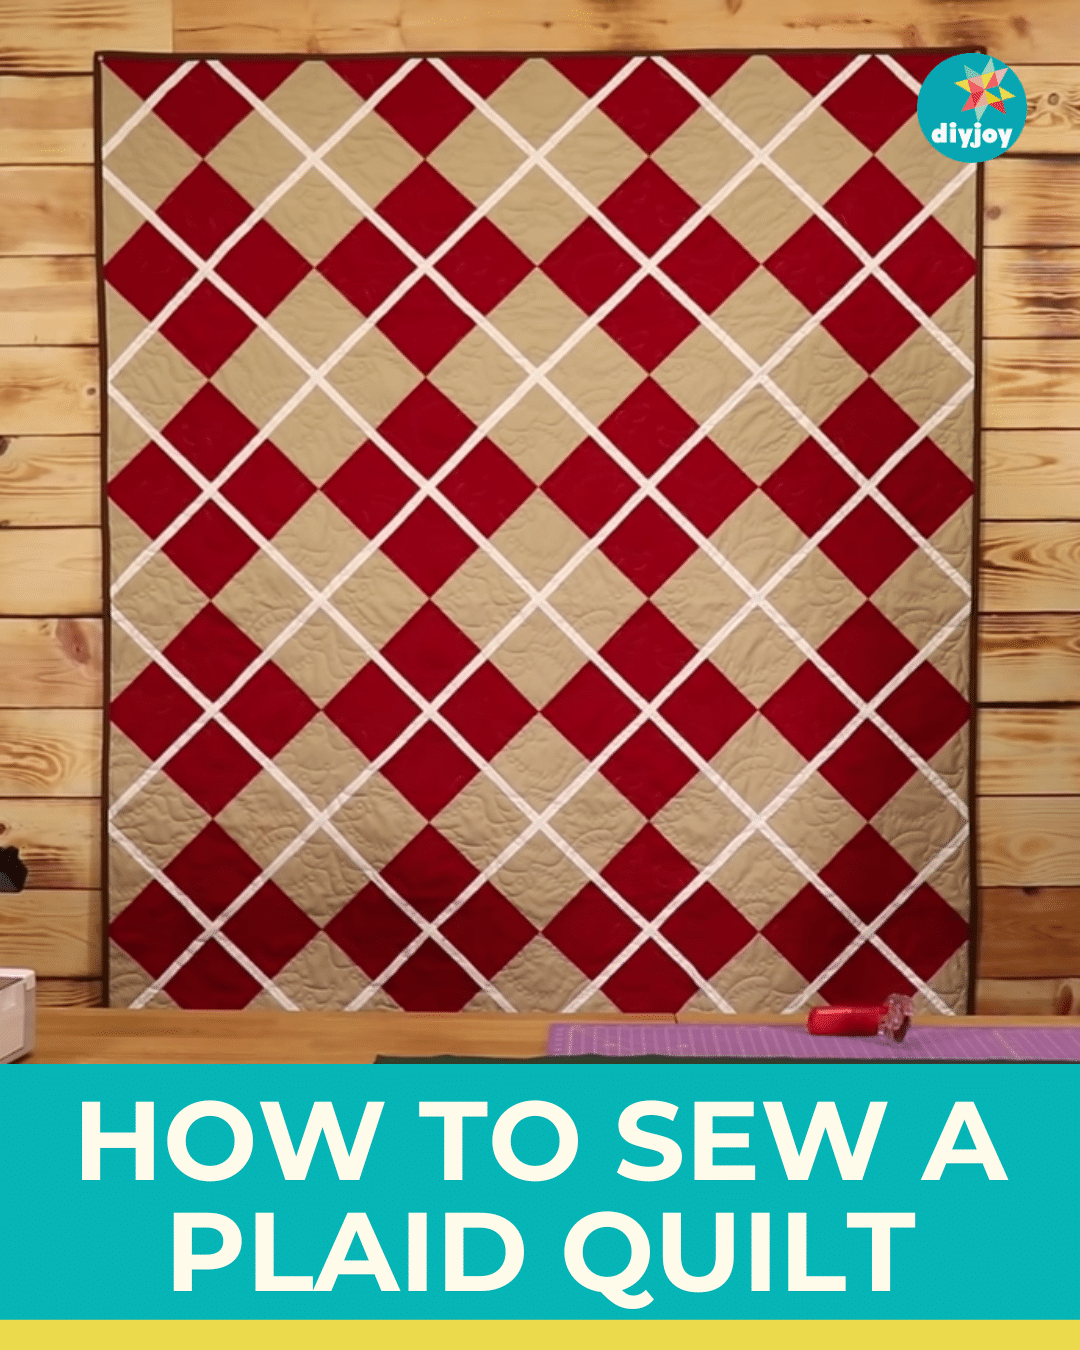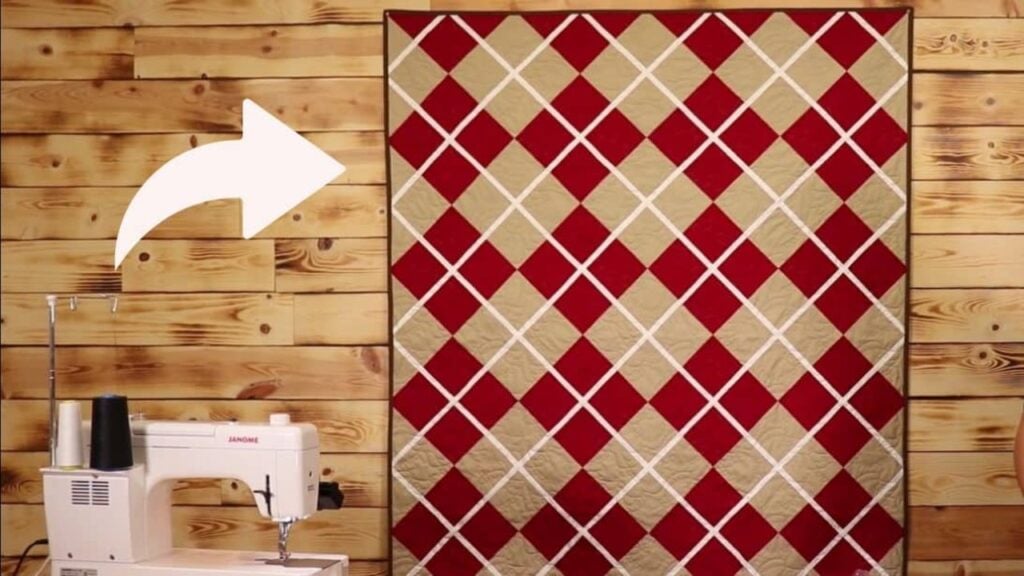
Do you love plaid patterns? If you do, this plaid quilt is for you! I am pretty sure you have a clothing item in your closet with this beautiful pattern. It is a timeless design that is loved by many. Several brands still make clothes and bags using this pattern, so why not make your own at home? Be creative as you want, when you make this pattern. Try different colors or even use a scrappy four-patch.
RELATED: Iconic 1970s Flower Power Applique Quilt
It is a simple and beginner-friendly project. The steps are easy to follow, just make sure to match the seam lines. You should definitely try this beautiful quilt pattern if you are a fan of plaids. Learn how to sew a plaid quilt with this tutorial by Sew Yeah on YouTube. Happy Sewing!
For more easy quilt patterns, check these out: 35 Easy Quilts To Make This Weekend
Easy Plaid Quilt Pattern Materials
Fabric A
1 1/2 yards – cut into 10 pieces of 5″ x WOF strips (A)
Fabric B
- 1 1/2 yards – cut into 10 pieces of 5″ x WOF strips (B)
Fabric C
- 1 yard
- 1 piece of 10″ x WOF strip, sub-cut into 42 pieces of 1″ x 10″ strips (C)
- 7 pieces of 1″ x WOF strips (D)
- 7 pieces of 2 1/2″ x WOF strips for binding
How to Make a Plaid Quilt
Step 1:
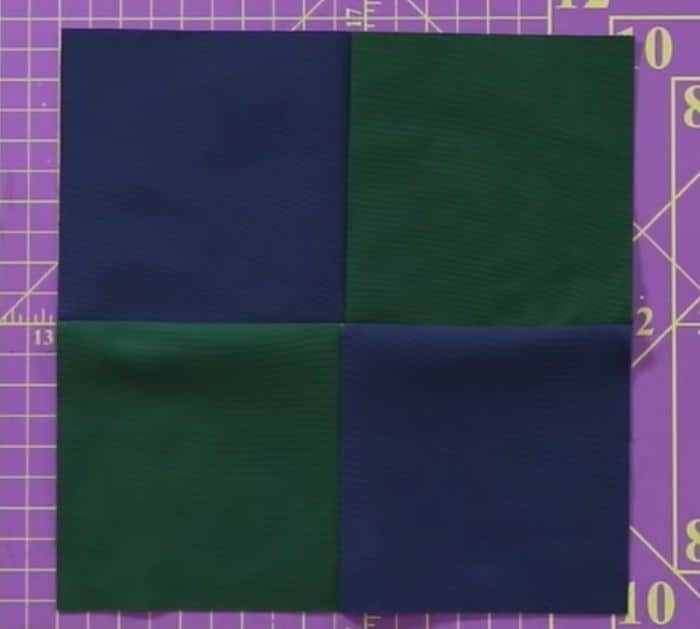
Sew each A strip to a B strip with 1/4″ seam allowance. You will make 10 pieces of 9 1/2″ x WOF strips. Sub cut each into 8 pieces of 5″ x 9 1/2″ rectangles.
Step 2:
Sew all the D strips together end to end just like a binding. Set it aside.
Step 3:
Place a 5″ x 9 1/2″ rectangle (AB) and a 5″ x 9 1/2″ rectangle (BA) right sides together, matching the seams. Sew with a 1/4″ seam allowance. Do this with all of the rectangles to make 40 pieces of 9 1/2″ squares.
Step 4:
Cut 3 of your squares diagonally corner to corner on fabric A and 4 of your squares diagonally corner to corner on fabric B. These will be your ABA and BAB triangles. They will be your top and sides. Cut another of your squares into quarters for your corners.
Step 5:
Take one of your squares and sew a 1″ x 10″ strips to 3 sides. Place the square on point with fabric A on the top and bottom. Sew 1″ x 10″ strip on the top right edge, trim overhang. Next, add additional strips to top left and bottom left.
Step 6:
Take a BAB triangle and sew it to the bottom left edge and an ABA triangle to the top right edge. Take a BA mini triangle and sew to the top left edge. This will be row 1 and will be place on the top corner of your quilt.

Step 7:
For rows 3 and 4, use a BAB triangle, 3 squares and an ABA triangle. Be sure to add 1″ x 10″ strip in between each one.
Repeat with the other rows just make sure sure that the colors are alternating.
For full instructions, watch the video below.
How to Sew a Plaid Quilt