Have you heard of bias tape before? If you are new to sewing, you probably don’t have any idea about it. Bias tape is strips of fabric cut at a 45-degree angle also known as the bias, which is why it has a little stretch. It has plenty of uses. You can use it for binding edges, finishing raw edges, piping, and even for decoration. Most sewing stores sell them but you can also make them at home. It is commonly used by quilters.
RELATED: 5 Ways To Make Bias Tape
Most people know the conventional way of making bias tape. It is made by cutting strips on the diagonal and then joining the strips one by one. You can definitely do that, but there is an easier and faster way to do it. I am sure you will never go back to the old method that you know once you try this trick. Some professional quilters may not even know about this sewing hack. Let littletoh on YouTube show you how to make continuous bias tape with this tutorial.
For more sewing tips, check these out: 4 Tips On How To Lessen Sewing Mistakes, 37 Life-Changing Sewing Hacks, 5 Sewing Tips You Haven’t Heard Before
Continuous Bias Tape Materials
- 15 x 16 inch square
- ruler
- scissors
How to Make a Bias Tape
Step 1:
Start by cutting the fabric on a diagonal also known as the bias.
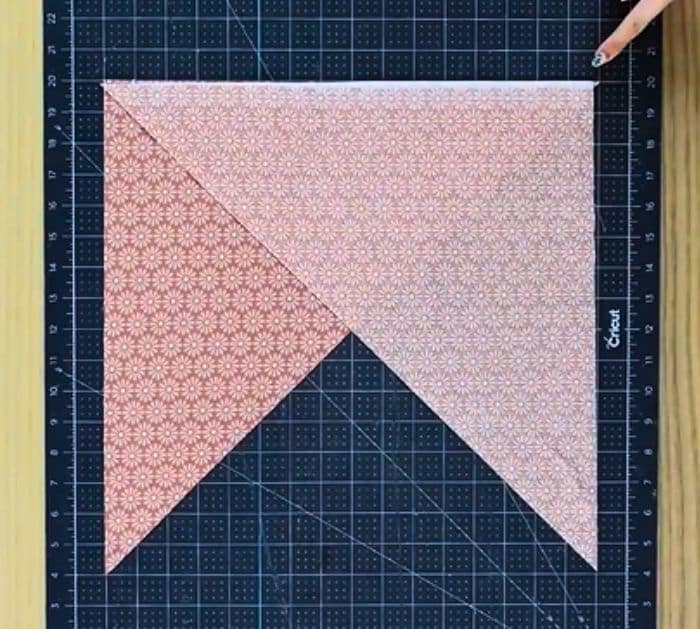
Step 2:
Place the bottom triangle on top, right sides together just like in the photo below. Sew on the top edge, then press the seams open.
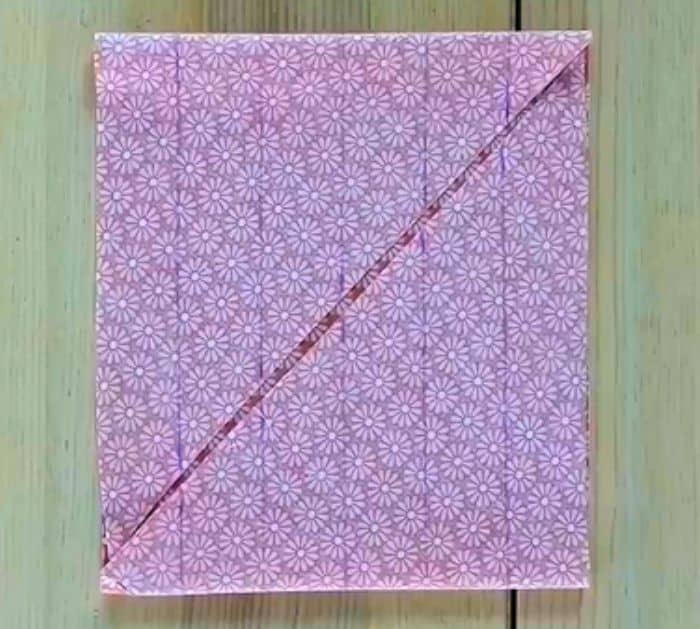
Step 3:
Draw lines parallel to the bias edge using your ruler. The lines should be 1 1/2″ apart, but you can make the bias tape as wide or narrow as you want. Cut off the extra fabric.
Step 4:
Fold the edges together so that they meet in the diagonal. You can see how the lines match up but offset them until they meet the next line. Pin them in place and sew them together. Press the seam open. You can see how all of the offset lines are still continuous with the two ends that hang over.
Step 5:
Cut using the line as the guide.
How to Make Continuous Bias Tape