Nobody teaches you the small stuff. Patterns cover the seams and the machine manual covers the stitches, and then you spend a decade working out on your own that hairspray stiffens a thread end, that a pin at the end of a buttonhole stops a seam ripper going straight through it, and that gathering with crochet thread never snaps halfway down a curtain. These sewing hacks are that missing decade, collected from people who sew for a living and are generous enough to give the shortcuts away. Some are two second tricks. Some will change how you finish a garment for good. Every one of them points back at the maker who worked it out, so you can read the full method in their words when you want the detail.
1. Needle Threading Secret
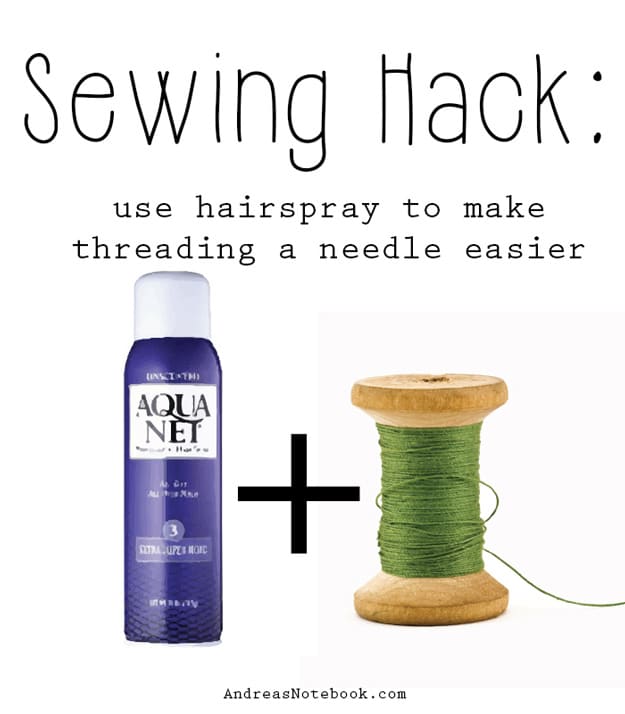
Hairspray on the end of the thread, and that is the entire tip. The spray stiffens the last quarter inch so the fibers stop splaying as they approach the eye, which is the actual reason threading fails. Keep a travel size can in the sewing drawer. It works best on the cheap stiff hold stuff rather than a flexible hold formula, and a light mist on a fingertip that you then pinch the thread end through is tidier than spraying the thread directly and coating your machine.
Get the full tutorial at Andrea's Notebook.
2. Unbelievably Easy Sewing Hack With A Rubber Band
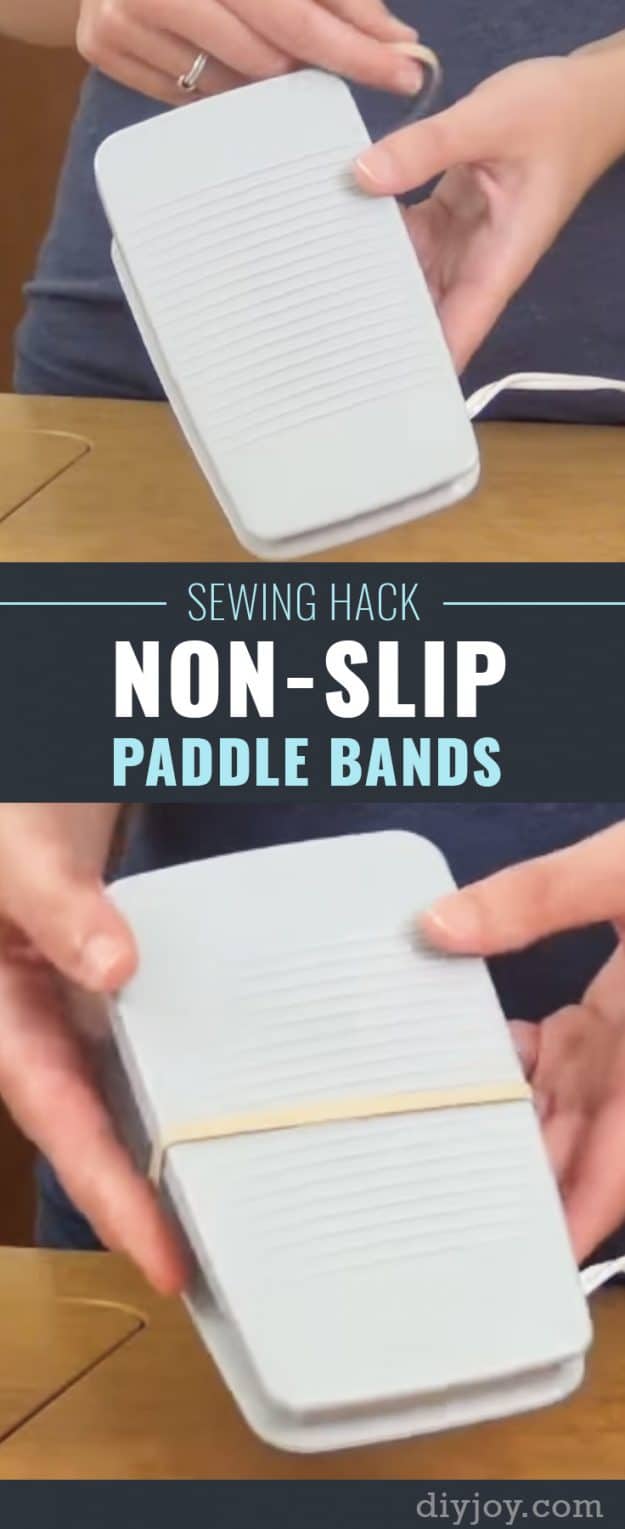
A rubber band stretched around the foot pedal so it stops travelling across the floor mid seam. It is the cheapest fix on this page and the one you will use every single time you sit down, especially on a hard floor where a pedal can wander a foot and a half in one long seam and leave you sewing at an angle with your leg stretched out.
Get the full tutorial at DIY JOY.
3. Gather The Easy Way
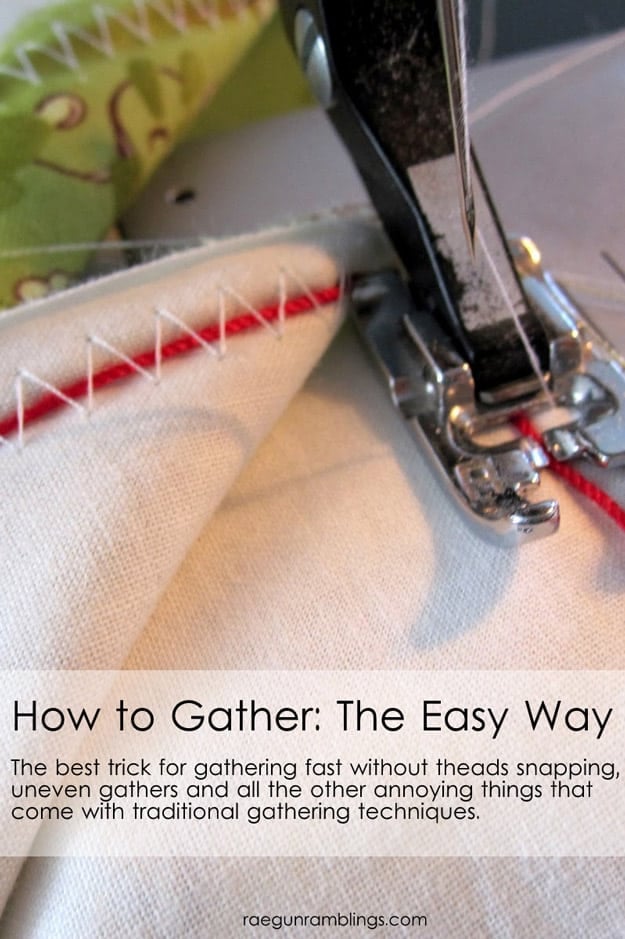
Lay crochet thread along the gather line, zigzag over the top of it without piercing it, backstitch both ends, then pull the crochet thread and the fabric gathers. Because crochet thread is thick it does not snap, which is the failure that ruins ordinary basted gathers halfway along a curtain or a full skirt. The maker’s settings are a zigzag at 4 length and 5 width, wide enough that you do not have to be precise about staying clear of the thread underneath.
Get the full tutorial at Rae Gun Ramblings.
4. Cutting Tables With Measuring Tape
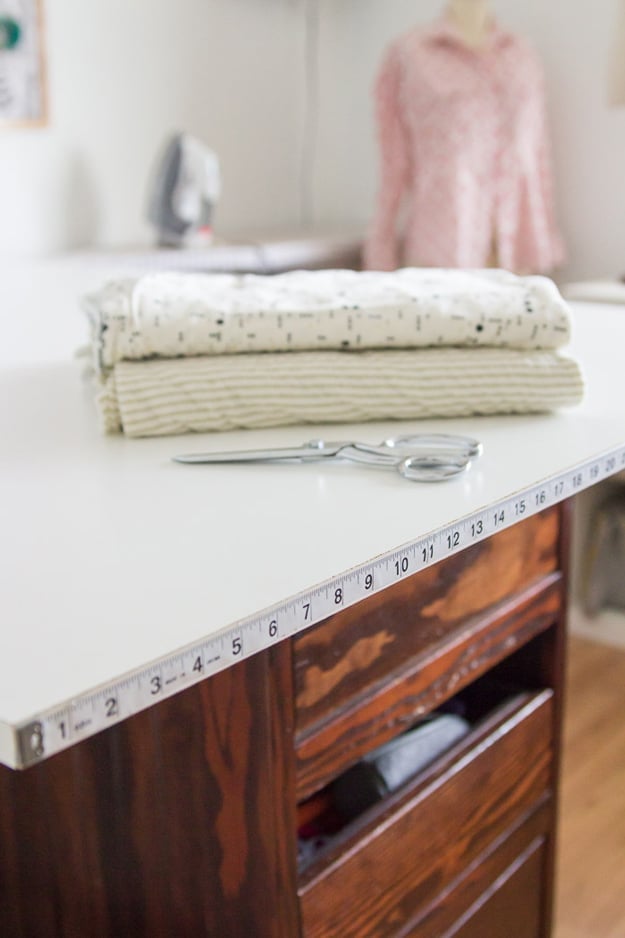
Hot glue a measuring tape along the front edge of the cutting table and you never hunt for a tape again. It sounds too simple to matter and it is the one from this list you will actually use daily, because most measuring at a cutting table is a rough check rather than a precise one and having the numbers already there saves the whole reach, find, unroll, measure, put down cycle. The maker says she uses hers constantly.
Get the full tutorial at Melly Sews.
5. Sewing Tip Keeps Buttons From Falling Off
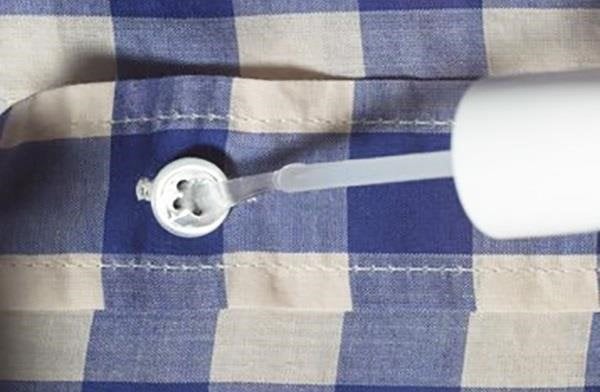
A coat of clear nail polish over the threads on the back of a button stops them unravelling and buys a shirt months of extra life. Do it on new shirts before you ever wear them, since factory sewn buttons are the ones that go first. Reapply when a button starts feeling loose again rather than waiting for it to come off in the wash. Clear rather than colored, obviously, and let it dry fully before the shirt goes near an iron.
Get the full tutorial at MacGyverisms on WonderHowTo.
Here are all the sewing hacks below in one YouTube video, watch and learn.
Then, check out the links to the tutorials in this article for all the specifics.
6. How to Fix Your Drawstring and Never Lose it Again
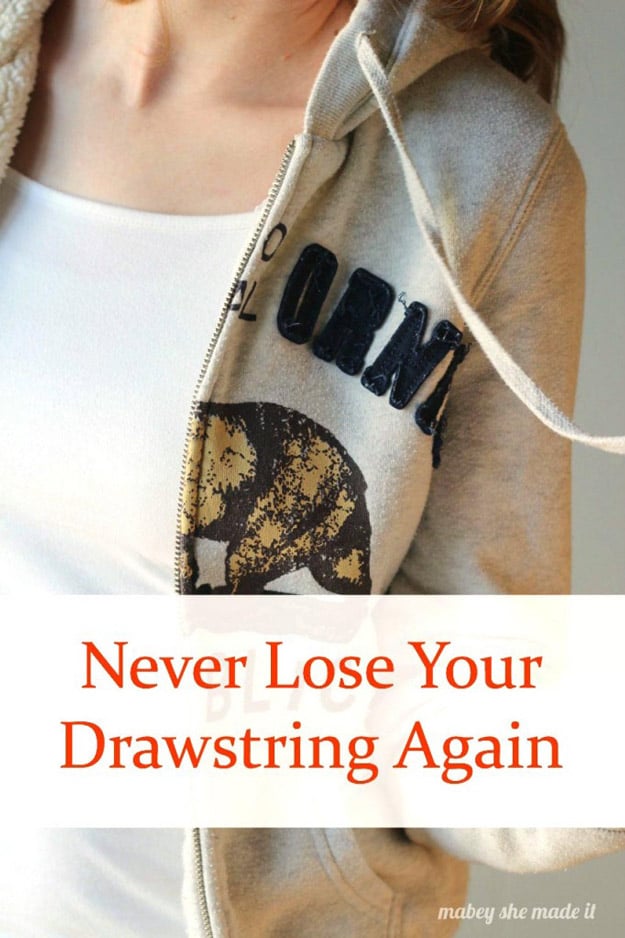
Find the center of the hood or waistband, where there is usually already a lining seam to line up on, then sew straight across the casing by machine or tack the drawstring by hand at that one point. The string still cinches normally, it just cannot travel anymore, so one hard tug at a sleeve or a wash cycle will never again leave you fishing a cord out of a tunnel with a safety pin. Two minutes on a new hoodie saves that forever.
Get the full tutorial at Mabey She Made It.
7. Serger Sewing Tip Tuck Your Tail In
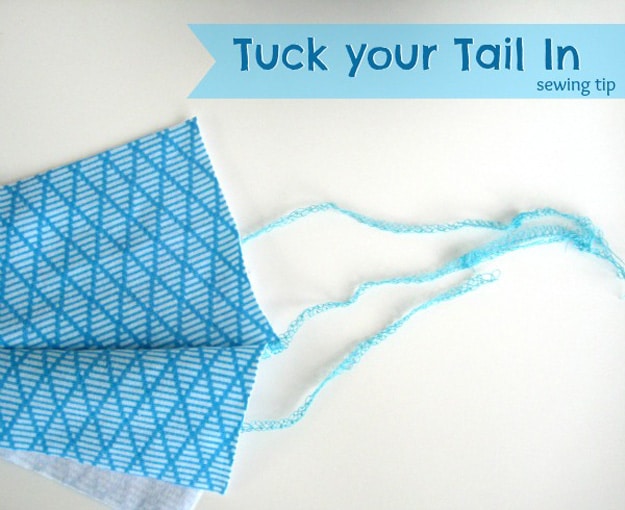
Thread the long serger tails through a hand sewing needle with a big eye, slip the needle back through the stitching of the seam itself, pull the threads along with it and trim close. The tails are then buried inside the seam instead of knotted, glued or snipped off to unravel later. The maker calls a trimmed tail the tell tale sign of a home sewn garment, which is a fair description of why this one is worth the extra thirty seconds per seam.
Get the full tutorial at The Sewing Loft.
8. Helpful Tip on How to Store and Organize Your Buttons
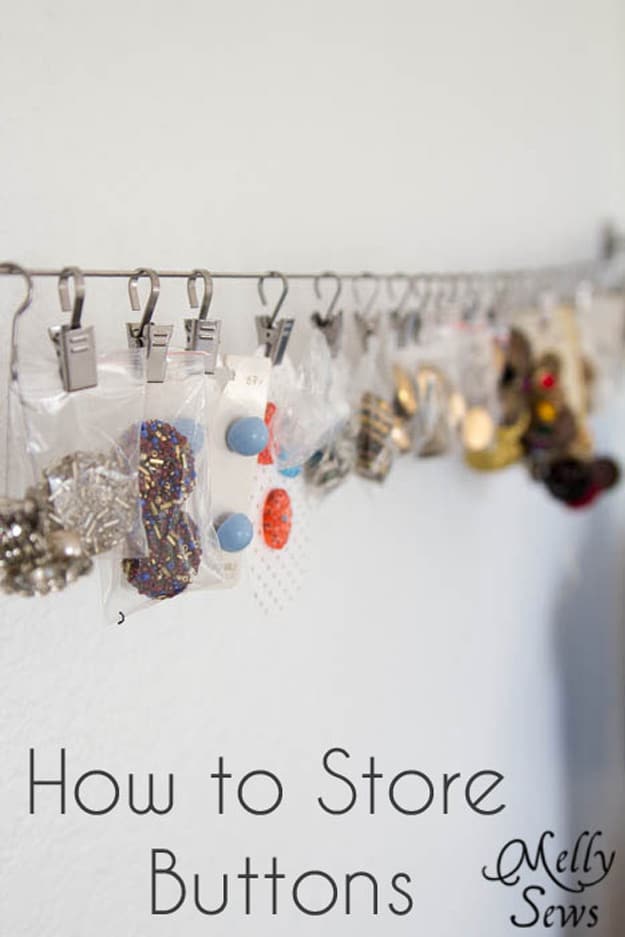
An IKEA curtain wire run along the wall with the hooks and clips it comes with, so carded buttons hang from the clips and loose buttons on thread loops hang from the hooks. Everything is visible at once, which is the real problem with a button jar, and the maker’s own point is that they are pretty to look through and the tools become artwork. It also takes almost no depth, so it works on a wall that is too shallow for any shelf.
Get the full tutorial at Melly Sews.
9. How to sharpen scissors and other sewing tools
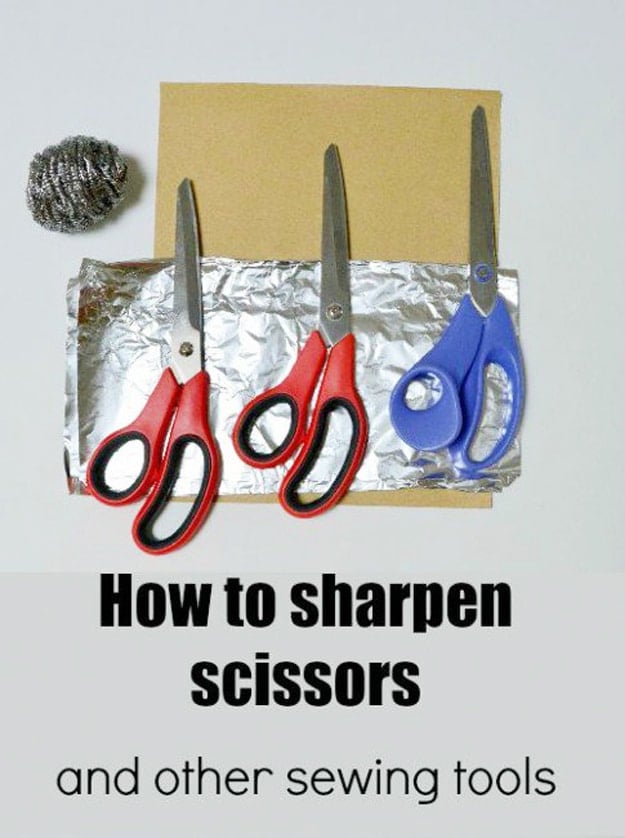
Three methods, all free, all using something already in the kitchen. Fold aluminium foil into about six layers and cut through it repeatedly, making sure the whole length of the blade contacts the foil on each cut. Fold sandpaper with the rough sides facing out and cut through that. Or cut through a steel wool pot scourer. The maker found all three equally effective and says the steel wool is decidedly messy by comparison. The foil trick also works on a rotary cutter blade.
Get the full tutorial at So Sew Easy.
10. Sewing Tip Pin The Button Hole
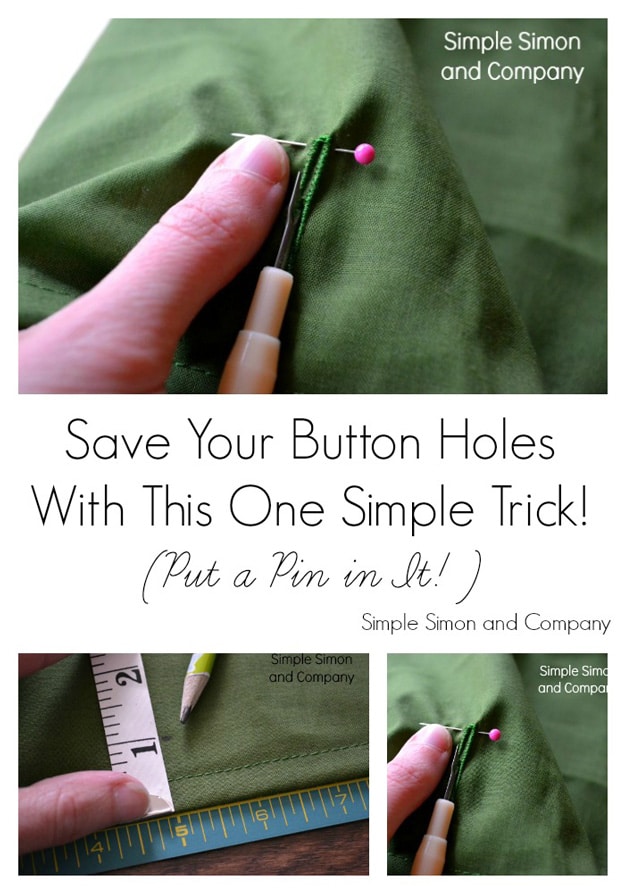
Slide a pin crossways at the far end of a stitched buttonhole before you take a seam ripper to it. The pin is a physical stop, so when the ripper inevitably runs on it hits the pin rather than tearing straight through the bar tack and out into the garment. The maker admits this happened to her repeatedly before she worked it out, which is the most relatable line on this whole page. Thirty seconds of prevention against unpicking and restitching a buttonhole.
Get the full tutorial at Simple Simon and Company.
11. How to Cut Fabric Perfectly
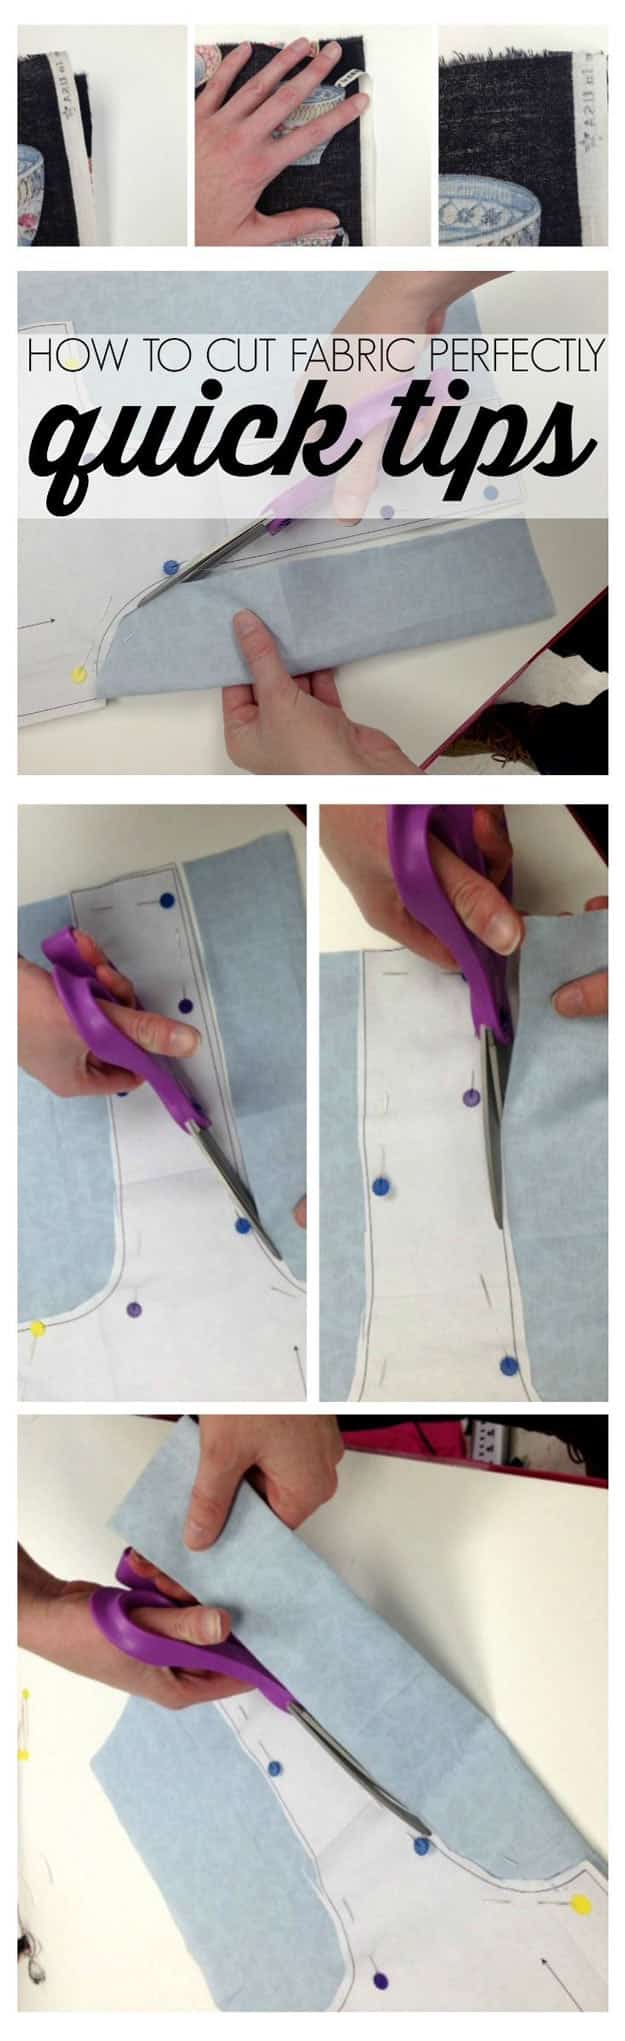
Five things, and none of them are about scissor technique. Wash and press the fabric before it goes anywhere near a blade. Use a genuinely sharp blade that snips threads rather than sawing at them. Match the selvages exactly when you fold. Follow the pattern layout arrows so they sit parallel to the fabric edge. Then lay everything out and look it over before the first cut. If you doubt cutting around pins, use a rotary cutter and fabric weights instead.
Get the full tutorial at AllFreeSewing.
Love DIY Crafts? Follow me on Pinterest for more cool ideas!
12. TrueGrips Non-slip pads for rulers
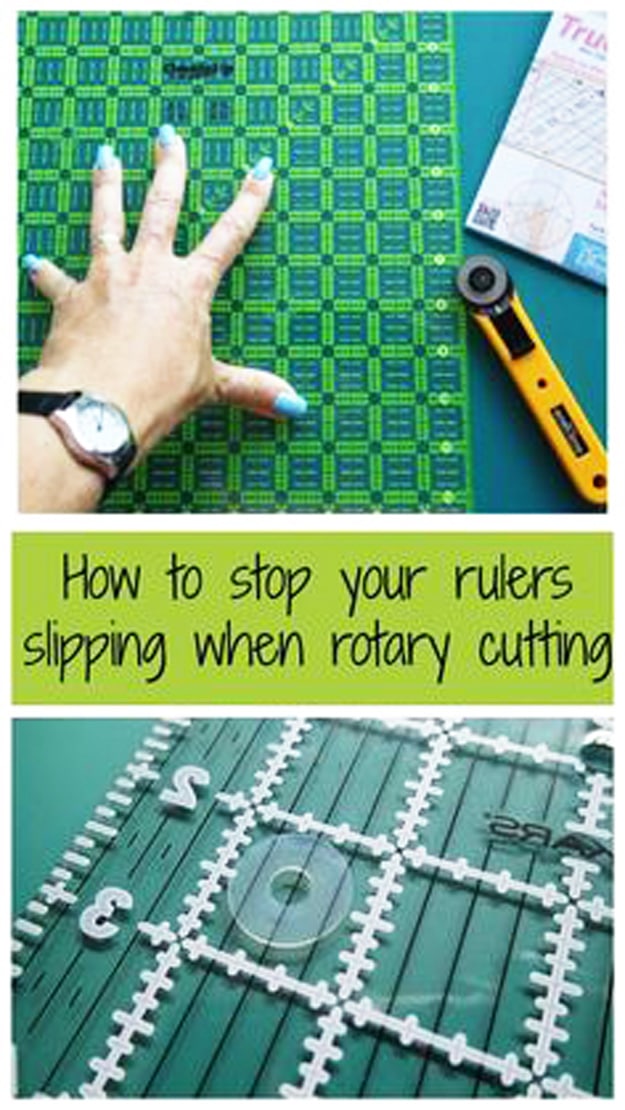
Small clear adhesive discs stuck to the underside of a quilting ruler in two or three widely spaced spots. Press down and the ruler grips the fabric and the mat instead of sliding away from the rotary cutter mid cut. A pack holds fifteen large and fifteen small so you can match the disc to the ruler. The maker has used them for a decade, put them on every ruler she owns and says she has never gone back to bare acrylic, even on a ruler sold as non slip.
Get the full tutorial at So Sew Easy.
13. How to Understand The Walking Foot
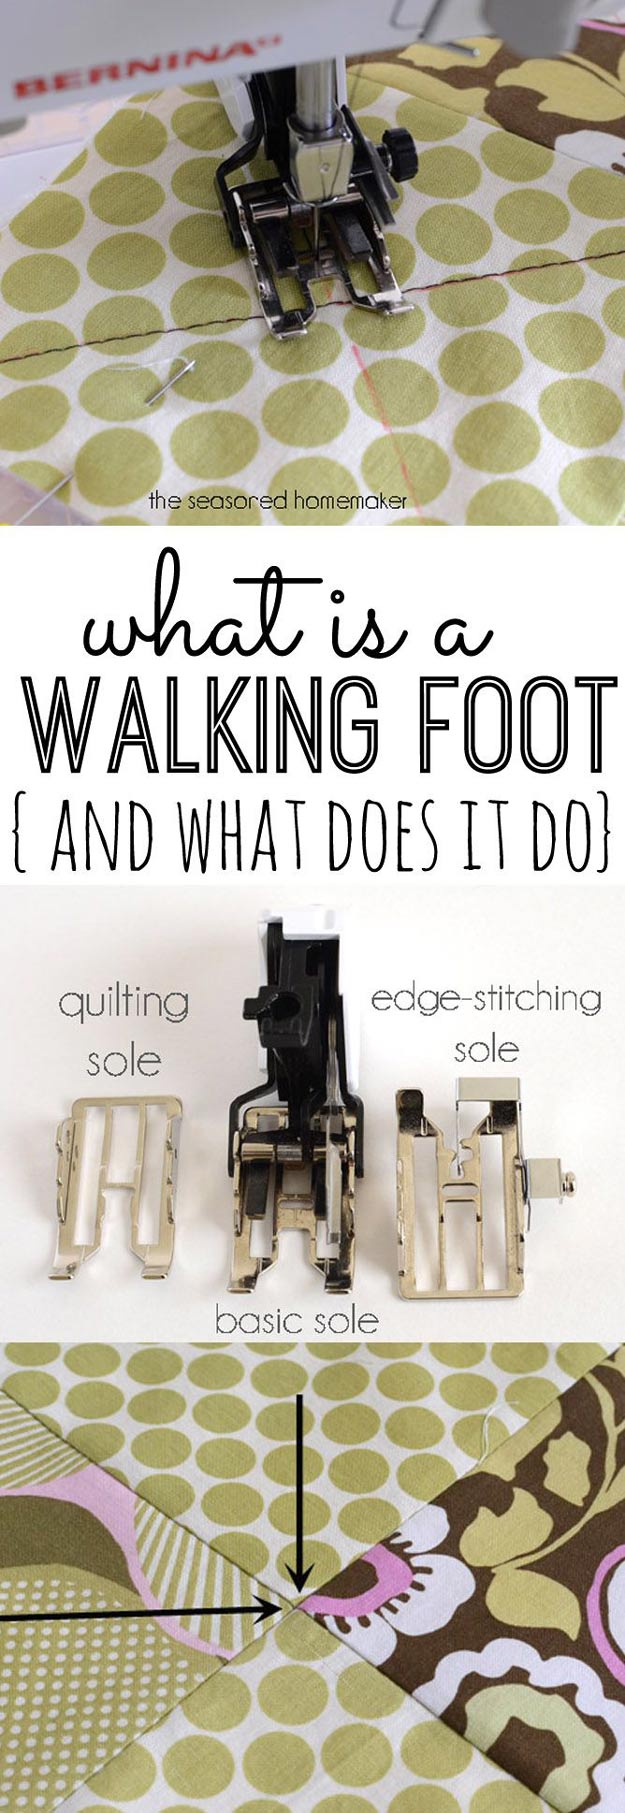
A walking foot adds a second set of feed dogs on top of the fabric and links them to the needle bar, so both layers advance together instead of the bottom one being pulled along and the top one creeping behind. That is why it is the answer for knits, minky, silk, matching plaids and stripes, and any quilt sandwich. The arm connection is fiddly and the maker advises attaching right to left. Expect to pay from around fifty dollars up to well over a hundred and fifty.
Get the full tutorial at The Seasoned Homemaker.
14. The Secret to Hemming Curved Edges
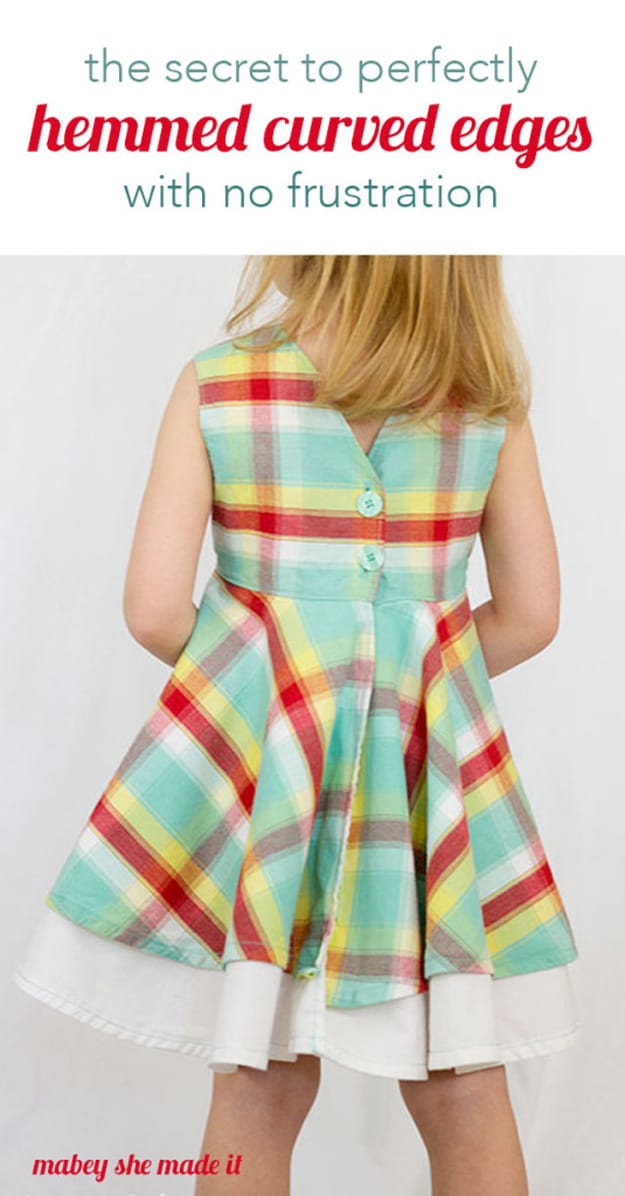
The reason a circle skirt hem bunches is that there is more fabric at the raw edge than at the line you are stitching. Bias tape solves it because bias stretches around a curve. A facing solves it better: cut the pattern an inch shorter, cut facing pieces from the hemline down to about two inches, finish one edge, join at the side seams, stitch right sides together all round the hem, then flip it inside and press. The facing matches the curve exactly, so nothing puckers.
Get the full tutorial at Mabey She Made It.
15. How to Use Elastic Thread
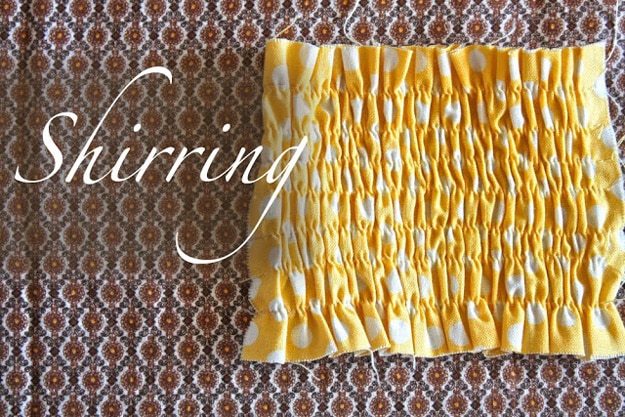
Wind the bobbin with elastic thread by hand, using a little tension but not much, and thread it through the bobbin guides exactly as usual with ordinary thread on top. Mark your lines first, roughly half an inch apart, and the closer they sit the more gathered the result. Regular stitch length and regular tension. Backstitch at each end. The first row barely gathers and it builds as you go. At the end, mist lightly with water and press without sliding the iron, which tightens the elastic further.
Get the full tutorial at Ruffles and Stuff.
16. Add Any Trim to a Seam Without Pins
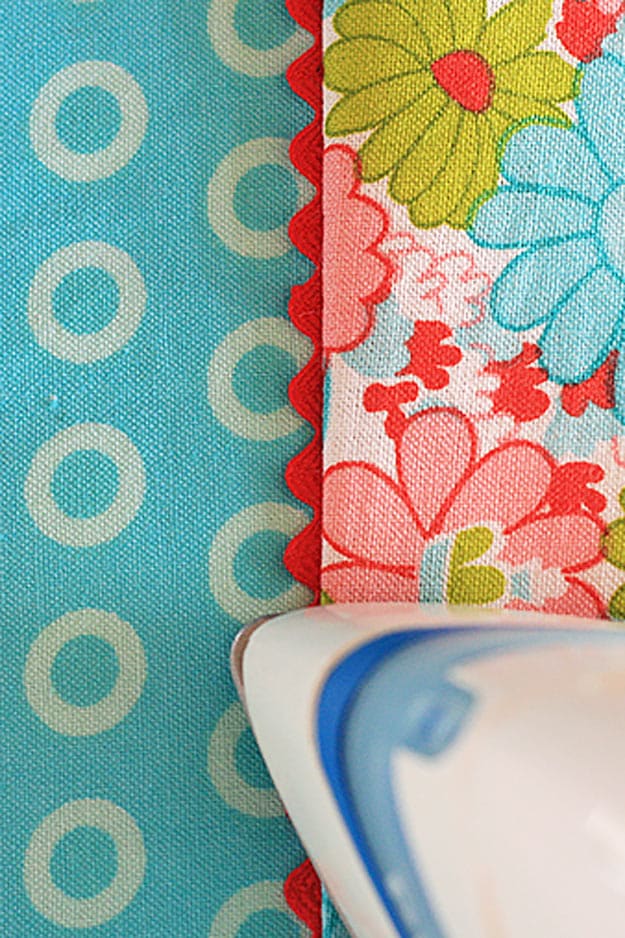
Mark the seam allowance line with chalk or an erasable pen, baste the trim down along that line with a long stitch, lay the second fabric on top, flip the whole thing over and stitch the real seam on top of or just left of the basting. The basting is doing the job the pins would do, which saves the time it takes to pin a long length of trim and holds it far more securely than pins do around a curve. Pull out any basting still showing.
Get the full tutorial at Sewtorial.
17. Finish Seams Without a Serger
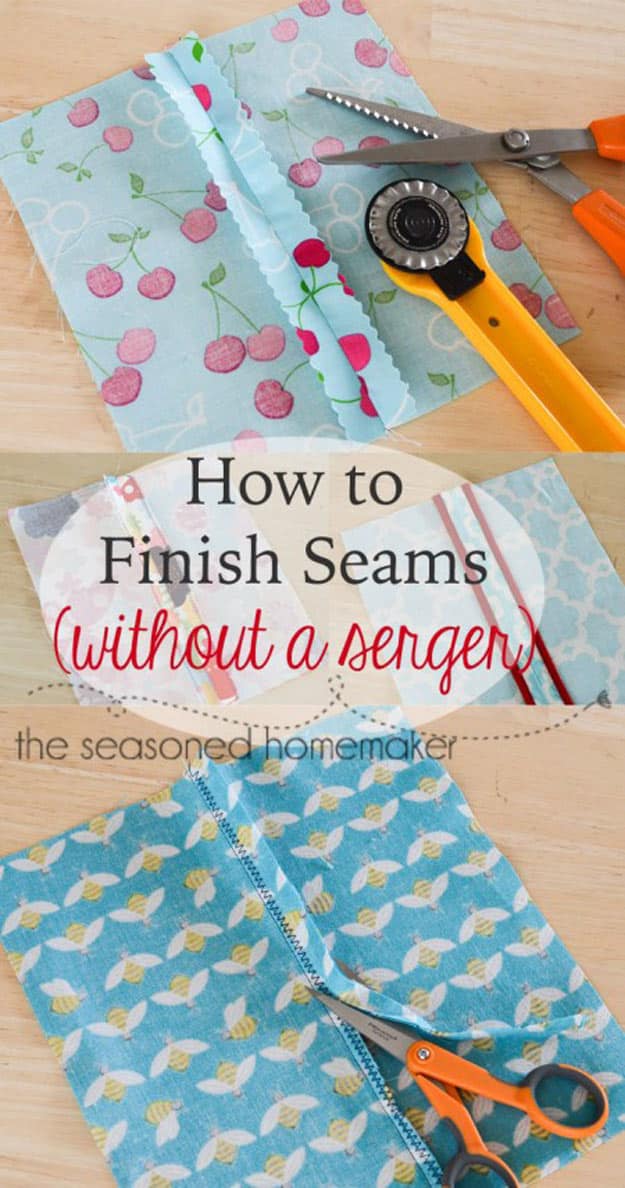
Six ways to stop a seam fraying without buying another machine. Pinking shears on tightly woven fabric that will not be washed often. A zigzag next to the seam allowance then trim, which comes closest to a serged edge. Turn and stitch, folding the raw edges under an eighth of an inch, for machines with no zigzag at all. The machine overcast stitch. Hong Kong bound seams in bias tape for unlined jackets. And French seams for straight seams in sheer or lightweight fabric.
Get the full tutorial at The Seasoned Homemaker.
18. How To Sew Bias Tape The Proper Way
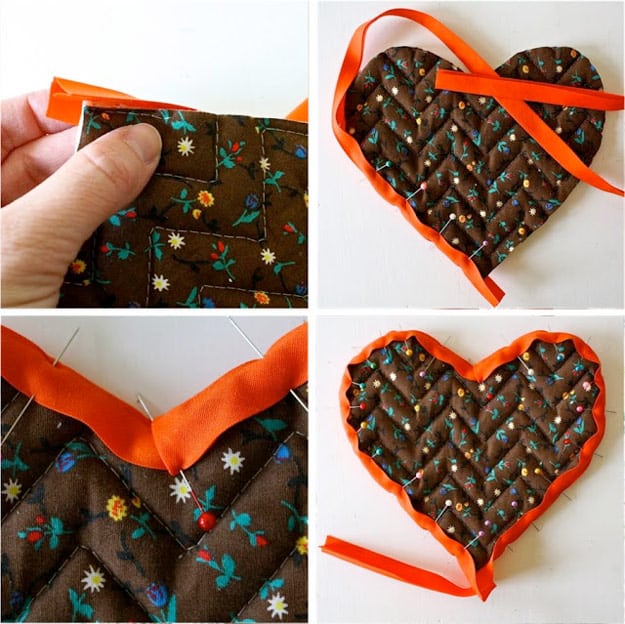
The proper way is two passes. Unfold the tape, pin the slightly wider side to the back of the piece, sew along the first fold line about half an inch in, then flip the work over, fold the tape to the front, pin all the way round and stitch close to the edge. The advantage is that you never have to worry about whether you caught the back. The one pass cheating method sandwiches the edge and sews once, which is faster and only reliable on straight edges.
Get the full tutorial at MADE EVERYDAY.
19. Use A Plastic Grocery Bag as Stabilizer when Sewing Fluffy Cloth
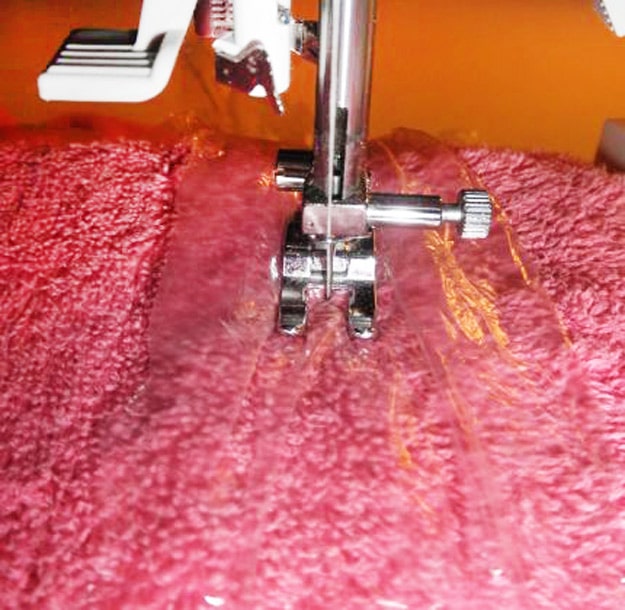
Pile fabric, fleece and anything fluffy swallows the feed dogs and the stitches sink into the nap and disappear. A strip of plastic carrier bag laid on top acts as a temporary stabilizer, giving the foot something firm to glide on and keeping the stitches sitting on the surface. Because plastic perforates cleanly along the stitch line it tears away afterward in one piece, with none of the picking out that a paper or tissue stabilizer leaves behind in the nap.
Get the full tutorial at Threads Magazine.
20. Helpful Hacks on Understanding Sewing Machine Stitches
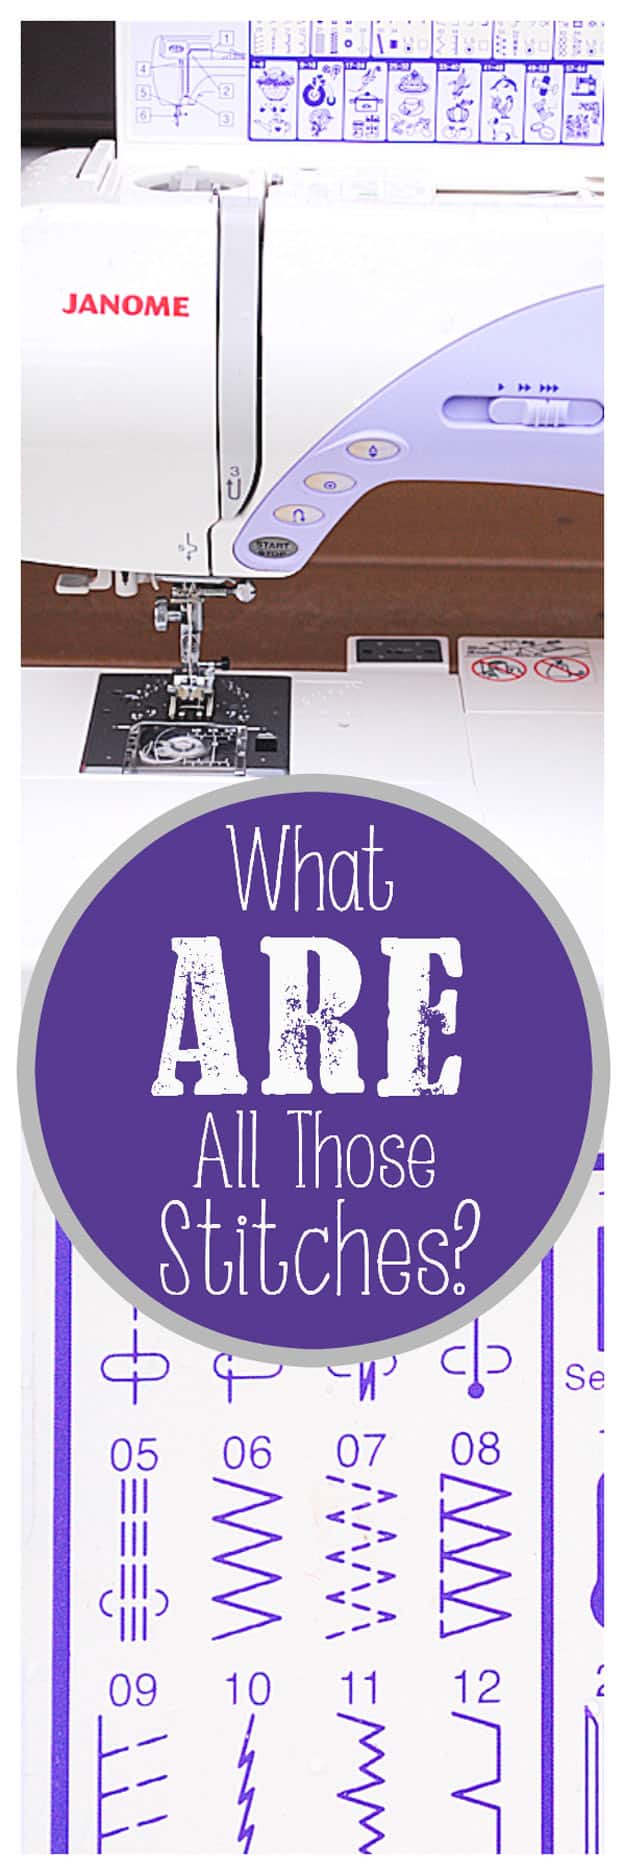
Most people use three of the stitches their machine offers and ignore the rest of the dial forever. The numbered diagrams on the front panel are the key to the other dozen, and working through them on a scrap is an hour that pays back for years, because there is usually a proper overcast, a blind hem and a stretch stitch already built in. Photograph the panel and keep the picture on your phone, since the manual will be lost inside a year.
Get the full tutorial at Crazy Little Projects.
21. Use a Sewing Machine to Sew Knit Fabric
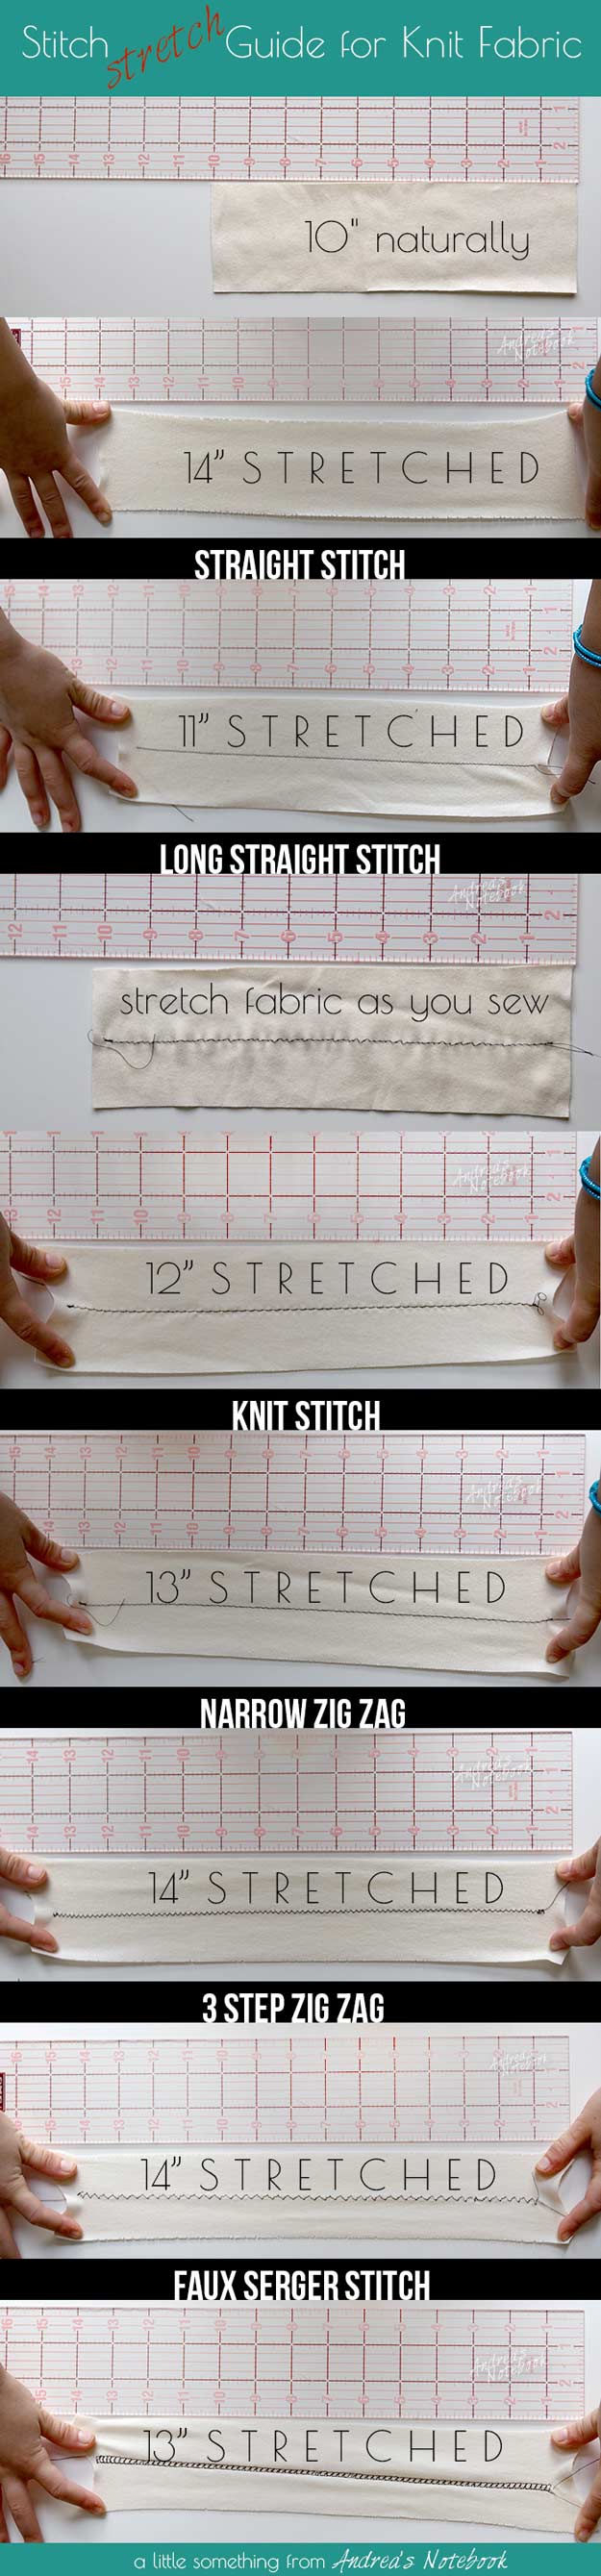
You do not need a serger for knits. The maker tested four stitches on a knit with roughly forty percent stretch and measured what each one gave back. A straight stitch needs the fabric stretched as you feed it and still puckers. A narrow zigzag is available on nearly every machine and lies flatter than a wide one. The built in knit stitch is straight but stretches and presses flat. A faux serger stitch is the best of the four if your machine has one.
Get the full tutorial at Andrea's Notebook.
22. File and Organize your Fabric
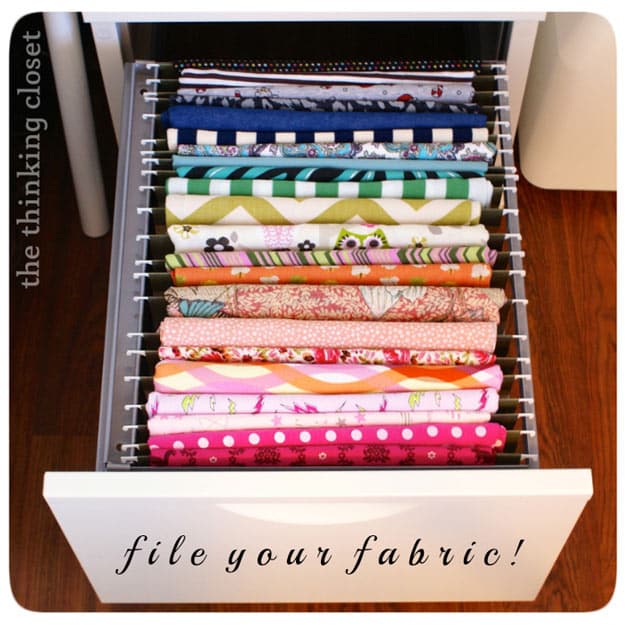
Fabric filed upright in a drawer, standing in dividers made from acid free hanging file folders cut in half lengthwise, arranged in rainbow order. Stacking is the enemy, because the piece you want is always at the bottom and the stack topples when you pull it. Filed upright every piece is visible and any one of them comes out without disturbing the rest. The maker’s own summary of why it works is that sometimes she just opens the drawer to stare at it.
Get the full tutorial at The Thinking Closet.
23. Use a Bodkin to Easily Insert Elastic Into a Casing
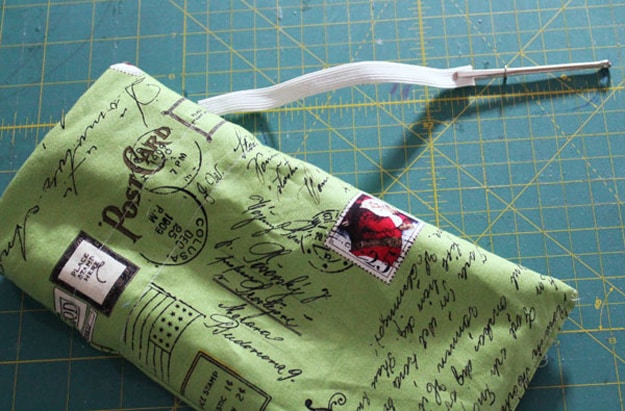
A bodkin looks like tweezers with a sliding metal ring. Push the ring back, clamp the elastic between the teeth, slide the ring forward to grip it, then feed the tip through one hole in the casing and glide it round to the other. It beats a safety pin because it does not chew ribbon, handles lace without snagging and slides through multiple layers cleanly. One caution from a reader on the page: the clamp can release mid casing, so test the grip before you commit.
Get the full tutorial at The Sewing Loft.
24. How to Sew Zippers Without Waves
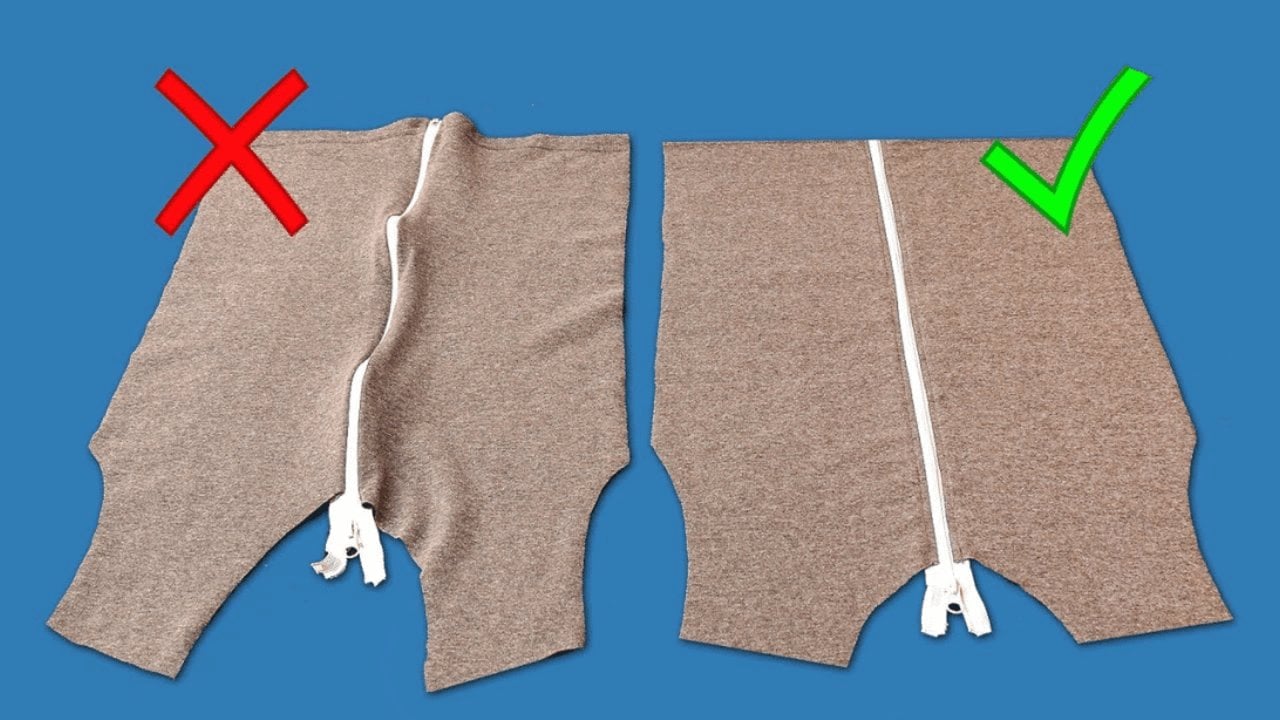
Zippers ripple because the fabric either side of the opening stretches while you sew and the zipper tape does not. A strip of fusible interfacing along each side of the opening, cut to match the length of the zipper tape and ironed on before anything is pinned, stops that movement entirely. Then place the zipper face down with the edges matched, pin at both ends and the middle, and sew. The stabilised edge is what keeps the finished zipper flat instead of wavy.
Get the full tutorial at DIY Joy.
25. 5 Sewing Tips You Haven't Heard Before
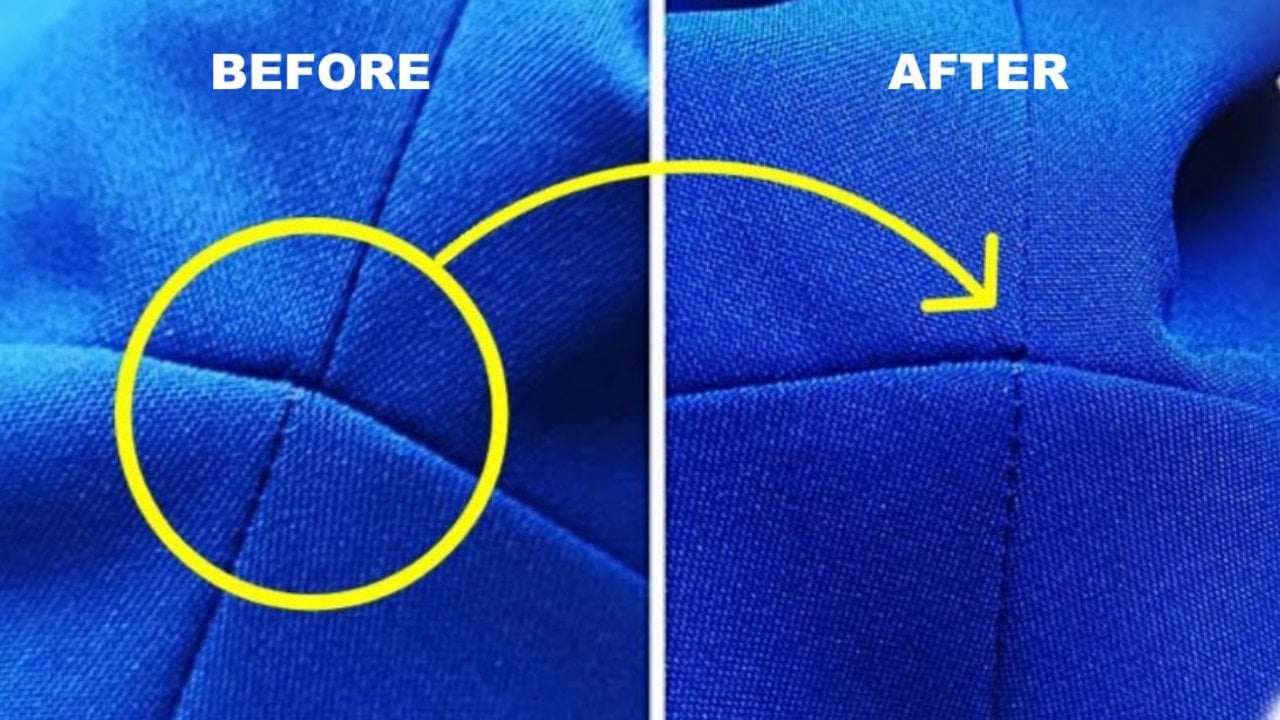
Five tips that are all about the fiddly bits. Matching seams by unpicking about four tenths of an inch either side, repositioning and pinning right through the middle of both seam lines before you sew. Marking grainline on knits with a baste stitch along the knit columns. Standing a big thread cone in a clean cup behind the machine. Shortening a plastic zipper from the bottom rather than the top. Each one fixes something you have probably just been living with.
Get the full tutorial at DIY Joy.