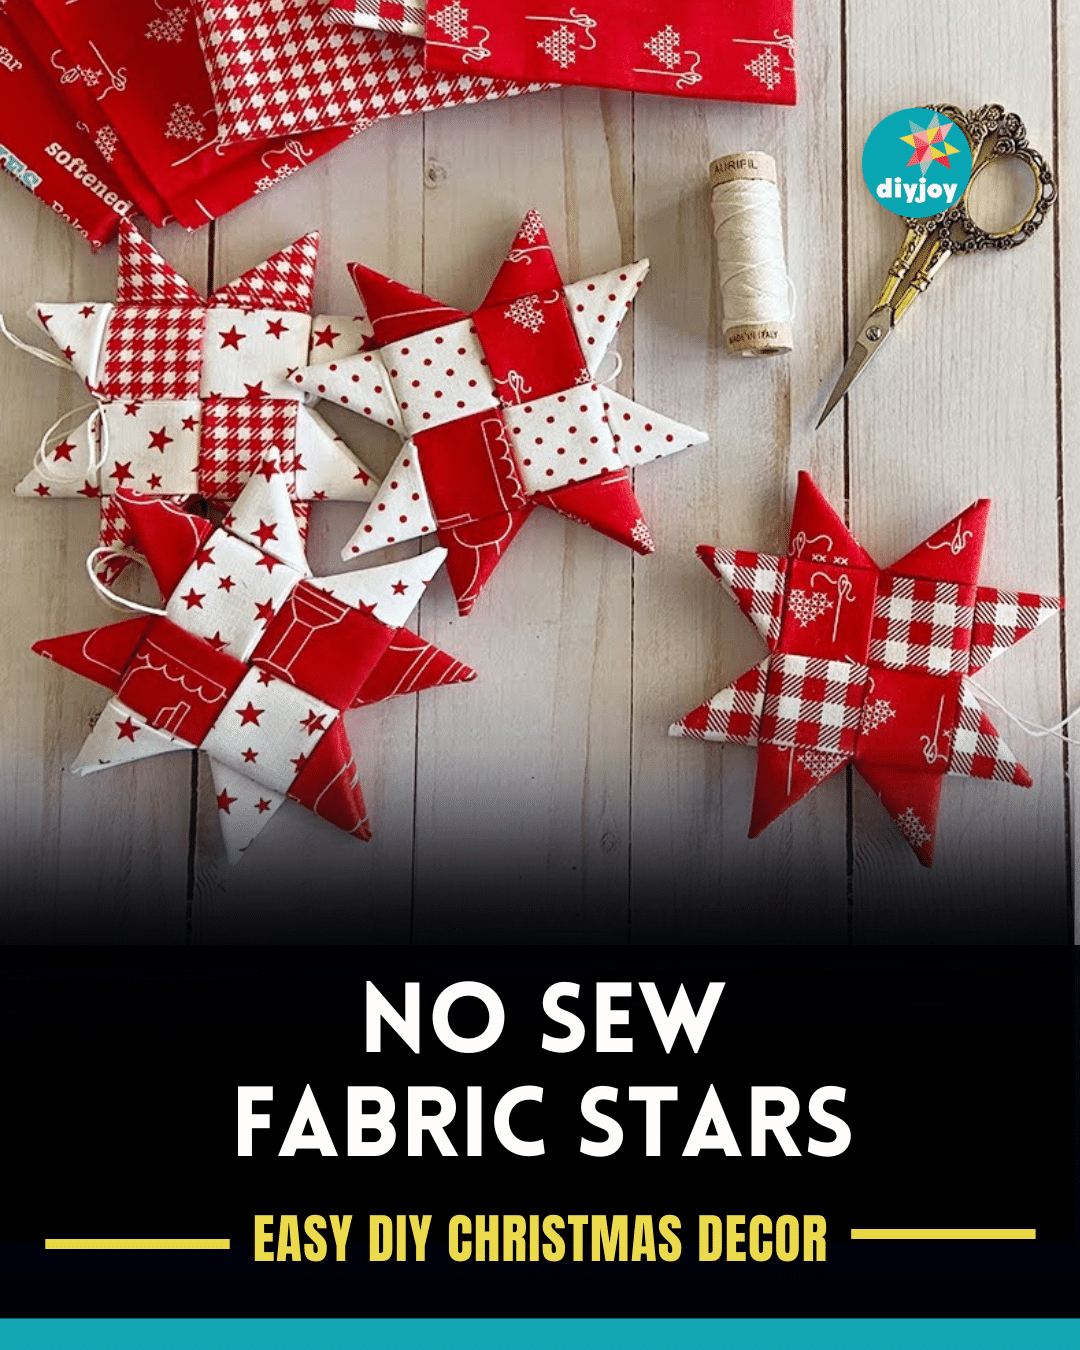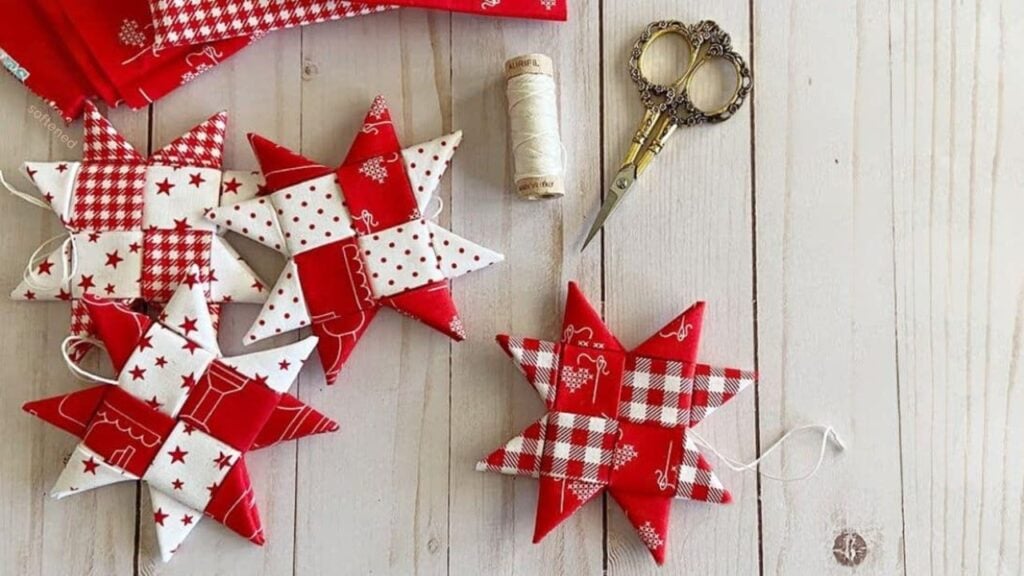
Christmas is just a few days away. Have you decorated your house yet? If you still haven’t, here’s an easy no-sew fabric stars tutorial by Erica Arndt. You can use them to decorate your tree or hang them on your wall. As mentioned in the title, you don’t need to sew these ornaments, but you have to thread a strand of floss so you can hang them. These DIY fabric ornaments are definitely the perfect Christmas decorations this year!
RELATED: DIY Fabric Ornaments
Have tons of fabric scraps at home? Now is the perfect time to use them! I had fun making these stars last weekend with my family using my red and green fabric scraps. Even the kids helped me to finish all the stars I needed for our Christmas tree. At first glance, they may look hard to make, but trust me, the steps are easy to follow. Once you finish one star, the rest is going to be a breeze. For the step-by-step instructions, watch the video below.
Handmade Scandinavian Ornament Materials
- 1 fat quarter cut into 4 pieces of 4″ x 14″ fabric strips
- embroidery floss (6 strands)
- glue
- Best press starch
- tweezers
- stiletto sewing tool
[social_warfare buttons=” Facebook,Pinterest, Twitter,whatsapp”]
How to Make Fabric Stars
Step 1:
Spray the best press to your fabrics and iron them until they dry. You can do one side or both.
Step 2:
Take one strip and place it right-side down. Fold it in half on the long side and press with an iron. Once cool, open it, then take the outside edge and press towards the center. Fold it in half again and give it one more press. Repeat with the other strips.
Step 3:
Fold all of them leaving about an inch and a half tail. Press them with iron.
Step 4:
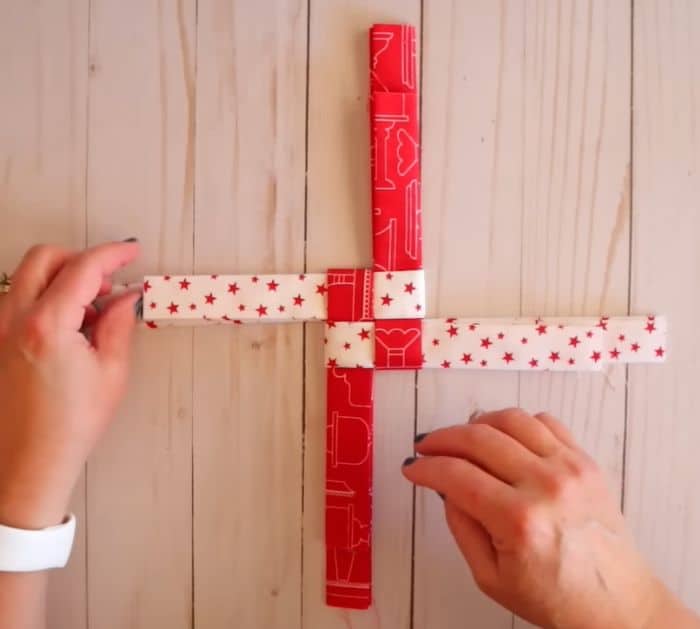
If you are using two different colors, you want them opposite each other just like in the photo below. Make sure that the folded edge is going around clockwise. Arrange so that the short side of the strip is facing up.
Step 5:
Take the open edge on the right one and put it inside the folded edge on the top. Next, take the open edge on the bottom and put it inside the folded edge on the right side. Lastly, put the open end of the top piece into the folded end of the left piece and the open end into the folded edge on the bottom. Carefully pull them so the pieces come together.
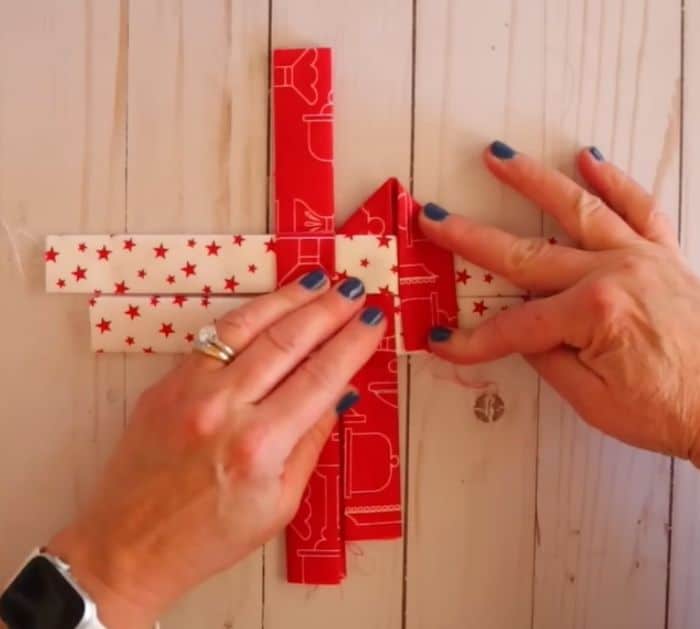
Step 6:
Flip it over. Take the top edge (leave the short piece down) and fold it down. Grab the next one that will cross over it, working counterclockwise. Tuck the last piece in.
Step 7:
Make the star points. Take the short end on the top left, pull it at a diagonal, then finger press. While holding it, flip it upside down, then pull it down towards us and fold it in half to make the star tip. Tuck the tail underneath. Repeat the same process with the other tips but in different directions. You always want to be ending on the side where you have a fabric to tuck it in. You can glue them together to make sure they stay in place.
Step 8:
Thread the floss into the star and tie it into a knot.
Easy No-Sew Fabric Stars