It’s been a while since I first explored the world of DIY beaded crafts, and the journey has been such a fun and creative one. I started with just a few basic bead sets, but over time, I’ve built up an entire organizer filled with different types of beads. My earliest projects were a beaded wind chime and a picture frame suncatcher, both of which turned out beautifully and inspired me to make even more bead projects.
When working with beads, one of the most exciting ways to use them is in handmade jewelry making. Beads can be turned into necklaces, earrings, and especially bracelets. There are endless bracelet designs to try—some are simple and beginner-friendly, while others are intricate and detailed, requiring more patience and skill.
RELATED: DIY Beaded Wind Chime Tutorial
If you’re just starting out, don’t feel pressured to dive straight into the complicated styles. Instead, try an easy bead bracelet tutorial that allows you to learn the basics while still creating something beautiful.
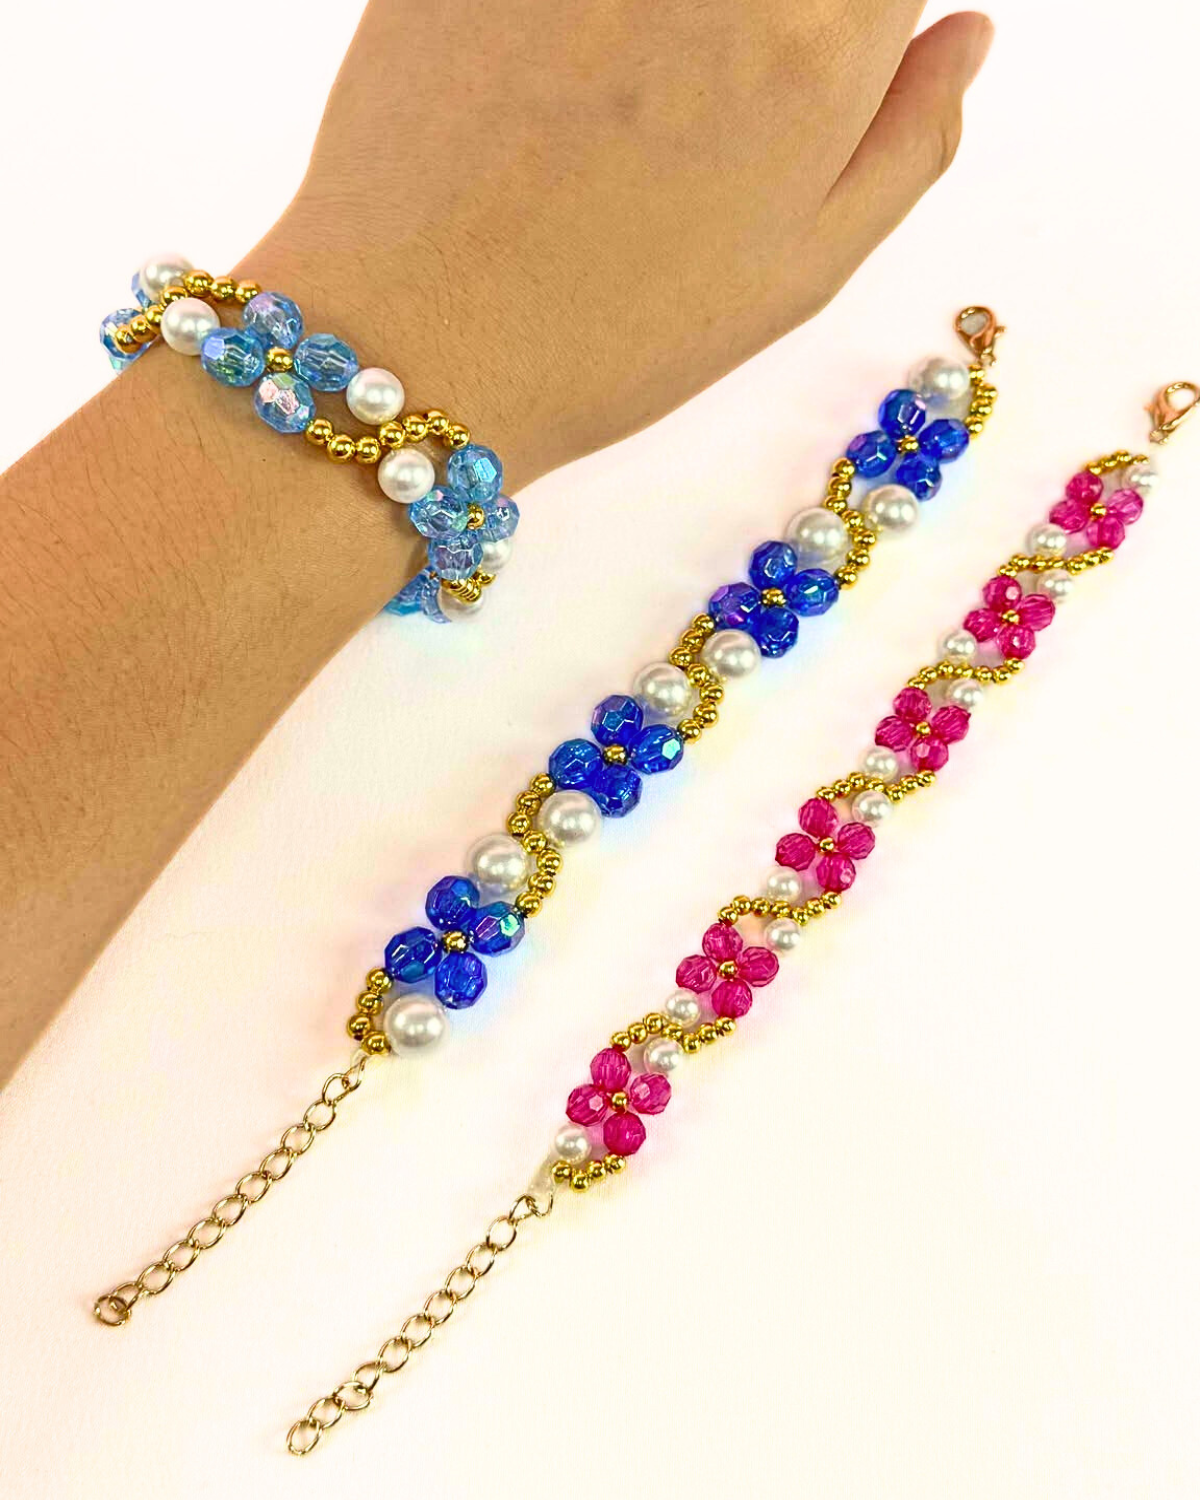
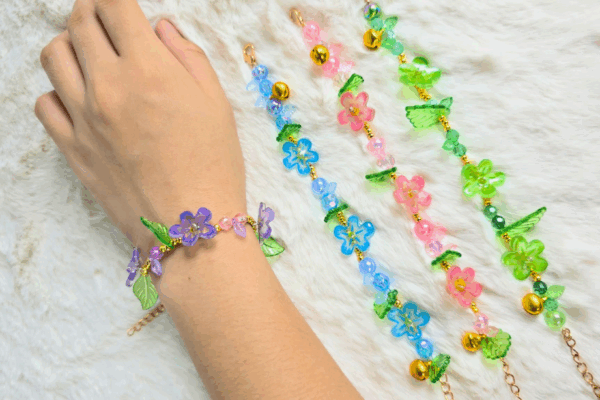
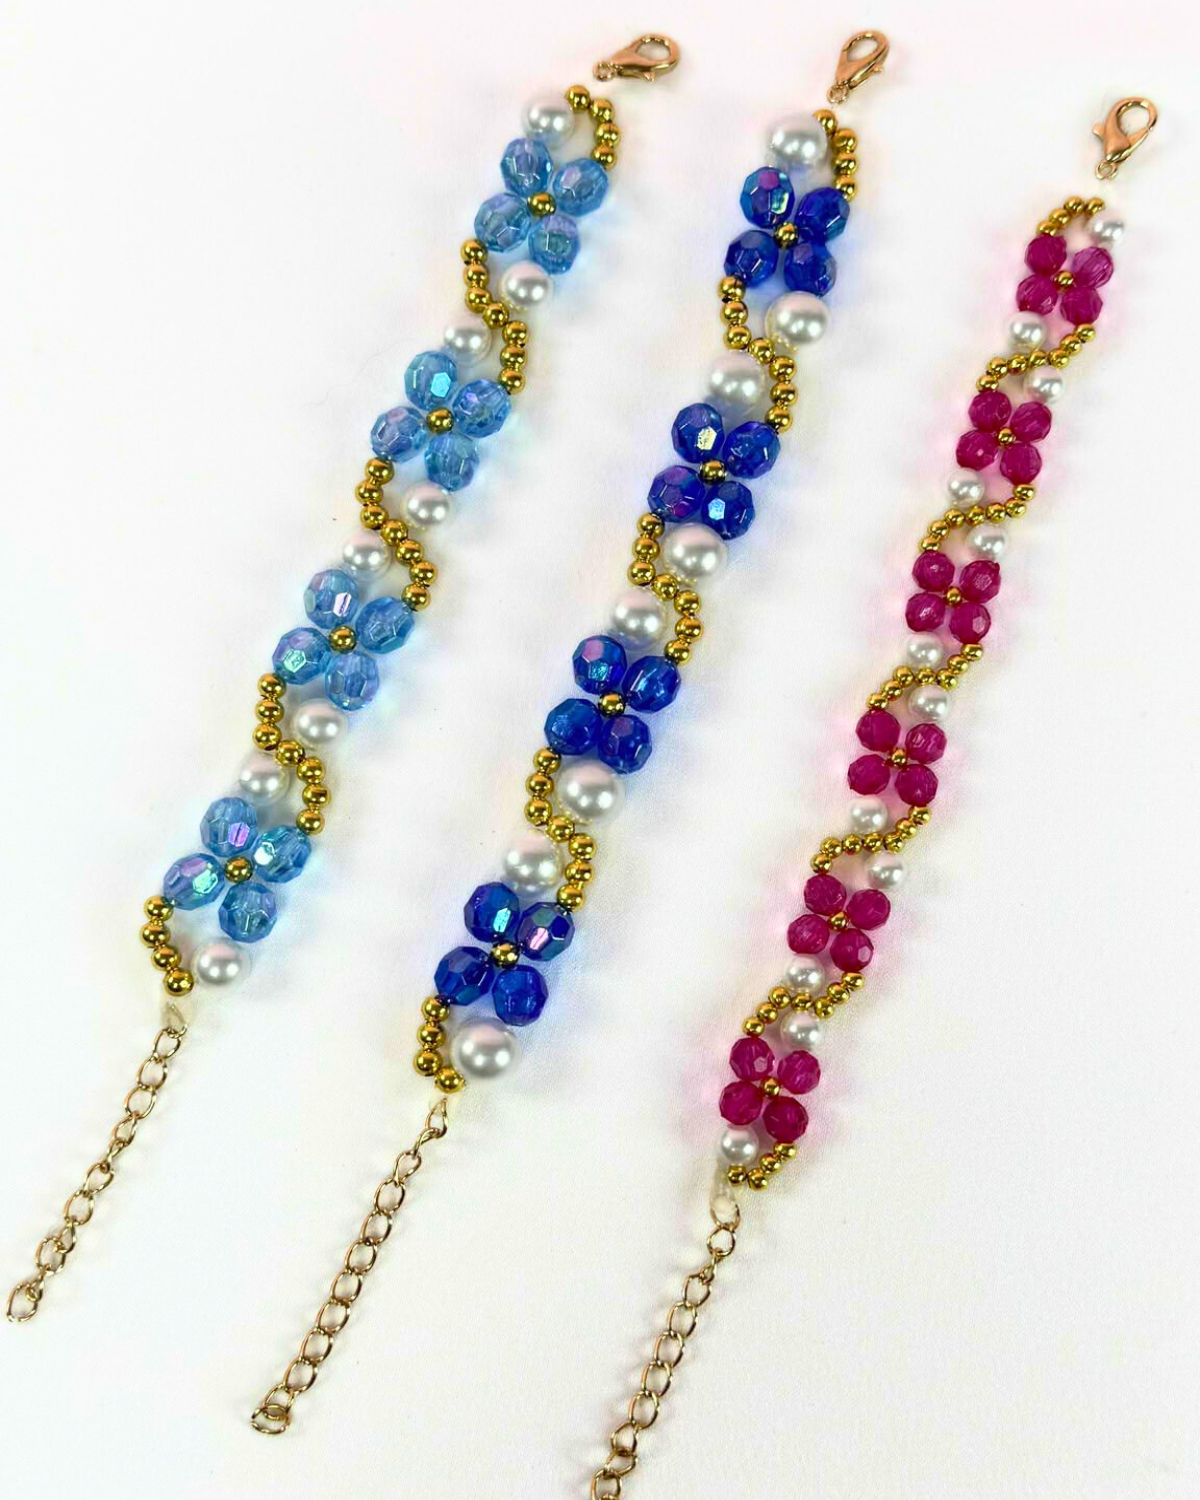
For beginners, I highly recommend making a flower bead bracelet. This project is fun, easy to follow, and perfect for learning the fundamentals of beading techniques. Even if it’s your very first time making jewelry, you’ll be able to create a bracelet that looks stylish and handmade with love.
The best part? This bead bracelet for beginners doesn’t require any special tools or advanced skills—just some beads, thread, and a little creativity. Once you finish your first bracelet, you’ll feel inspired to explore more DIY jewelry projects and expand your beading collection even further.
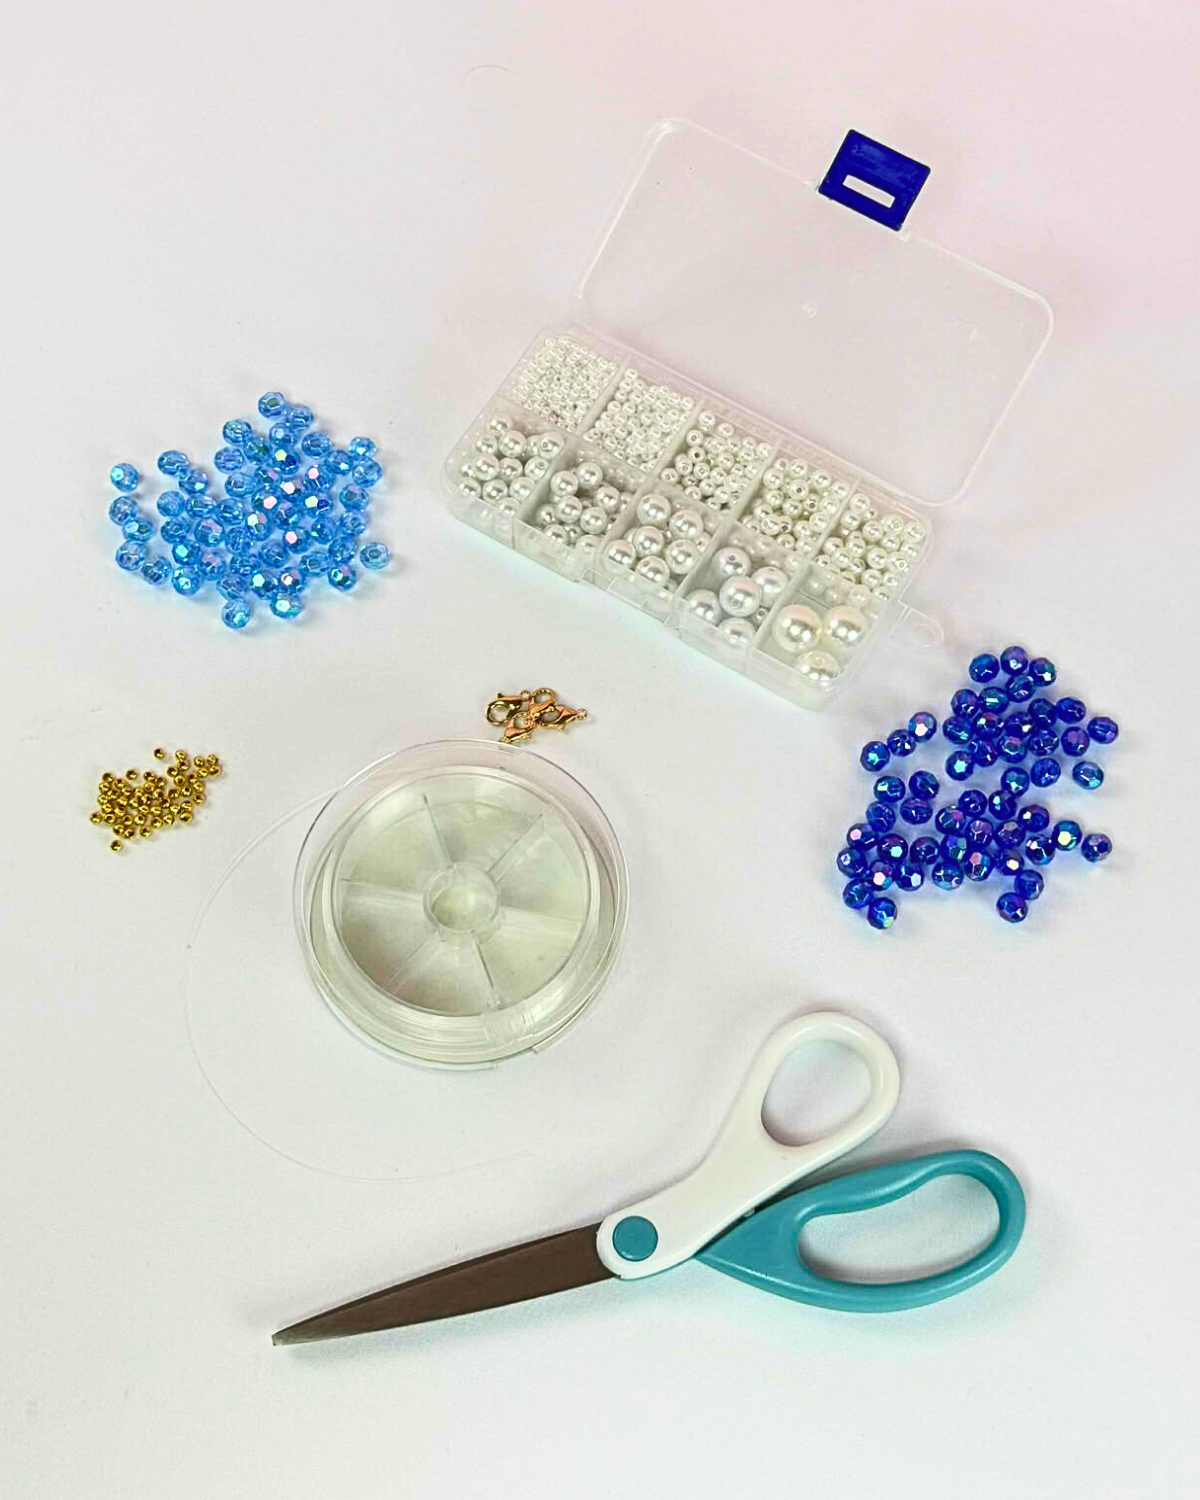
What You’ll Need for a Beaded Flower Bracelet
How to Make a Beaded Flower Bracelet
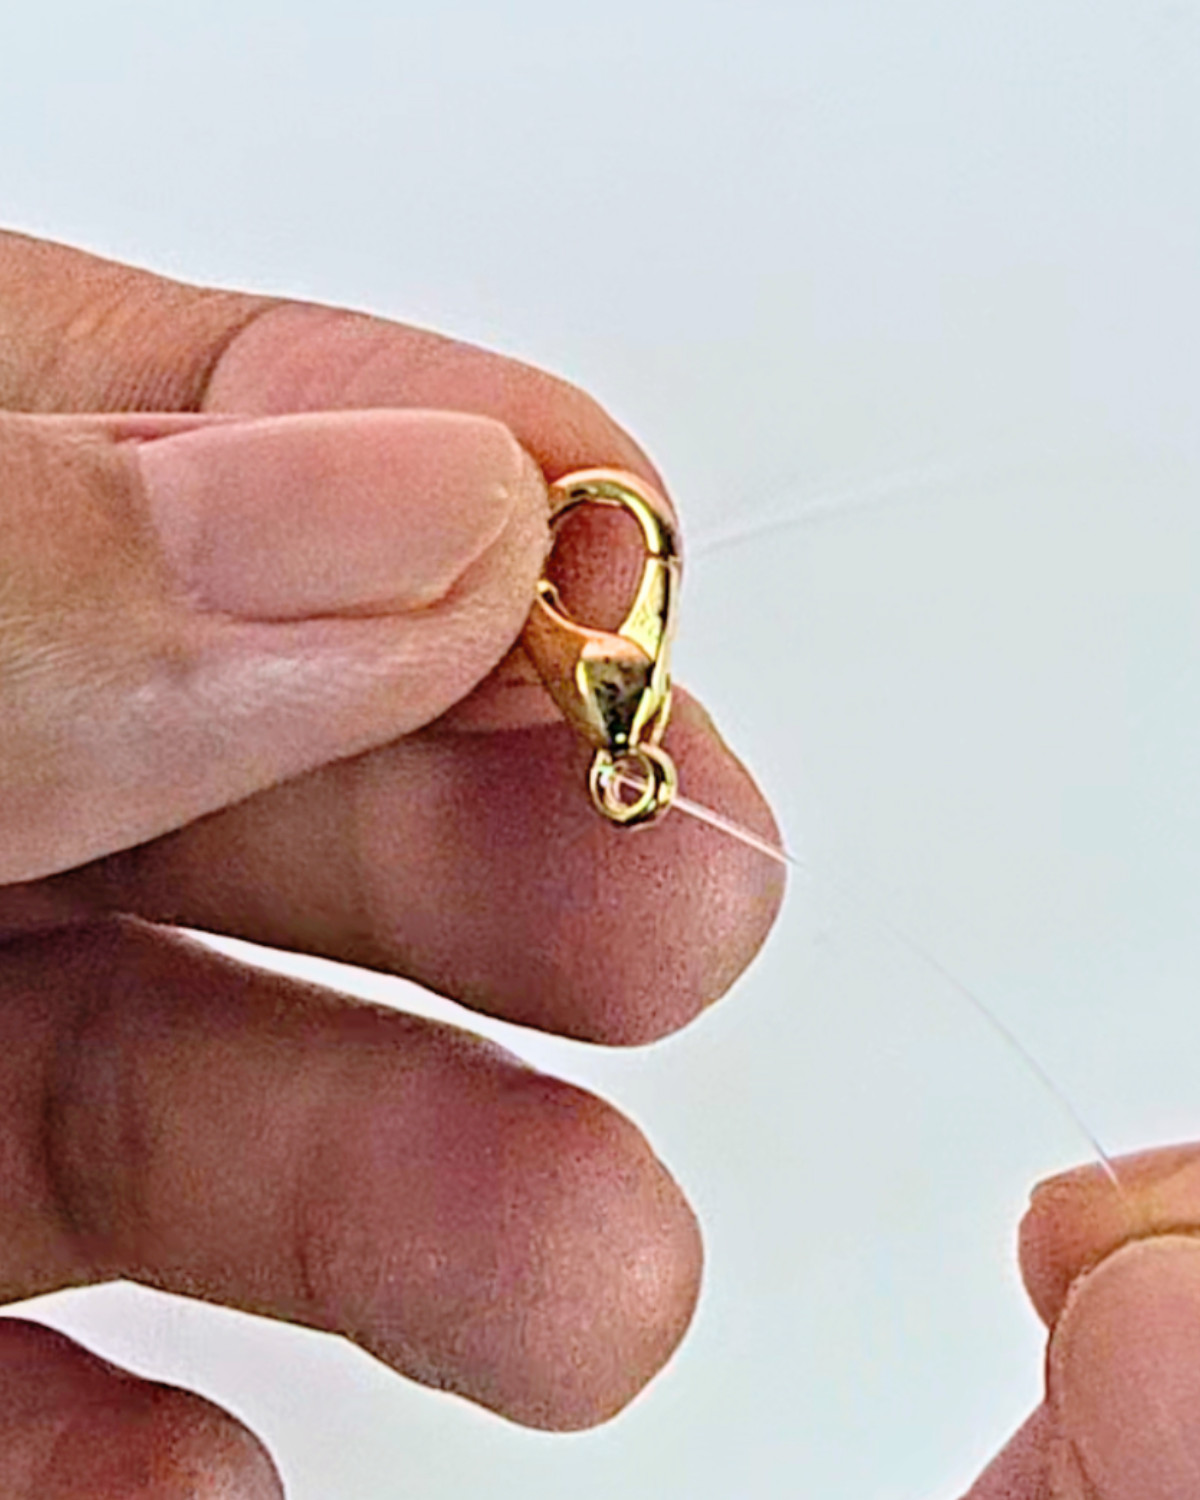
Step 1: Attach the Clasp

Take your clasp and thread the fishing line through its loop, then tie a secure knot to hold it in place. This will be the starting point for your beaded flower bracelet.Step 2: Add the First Bead
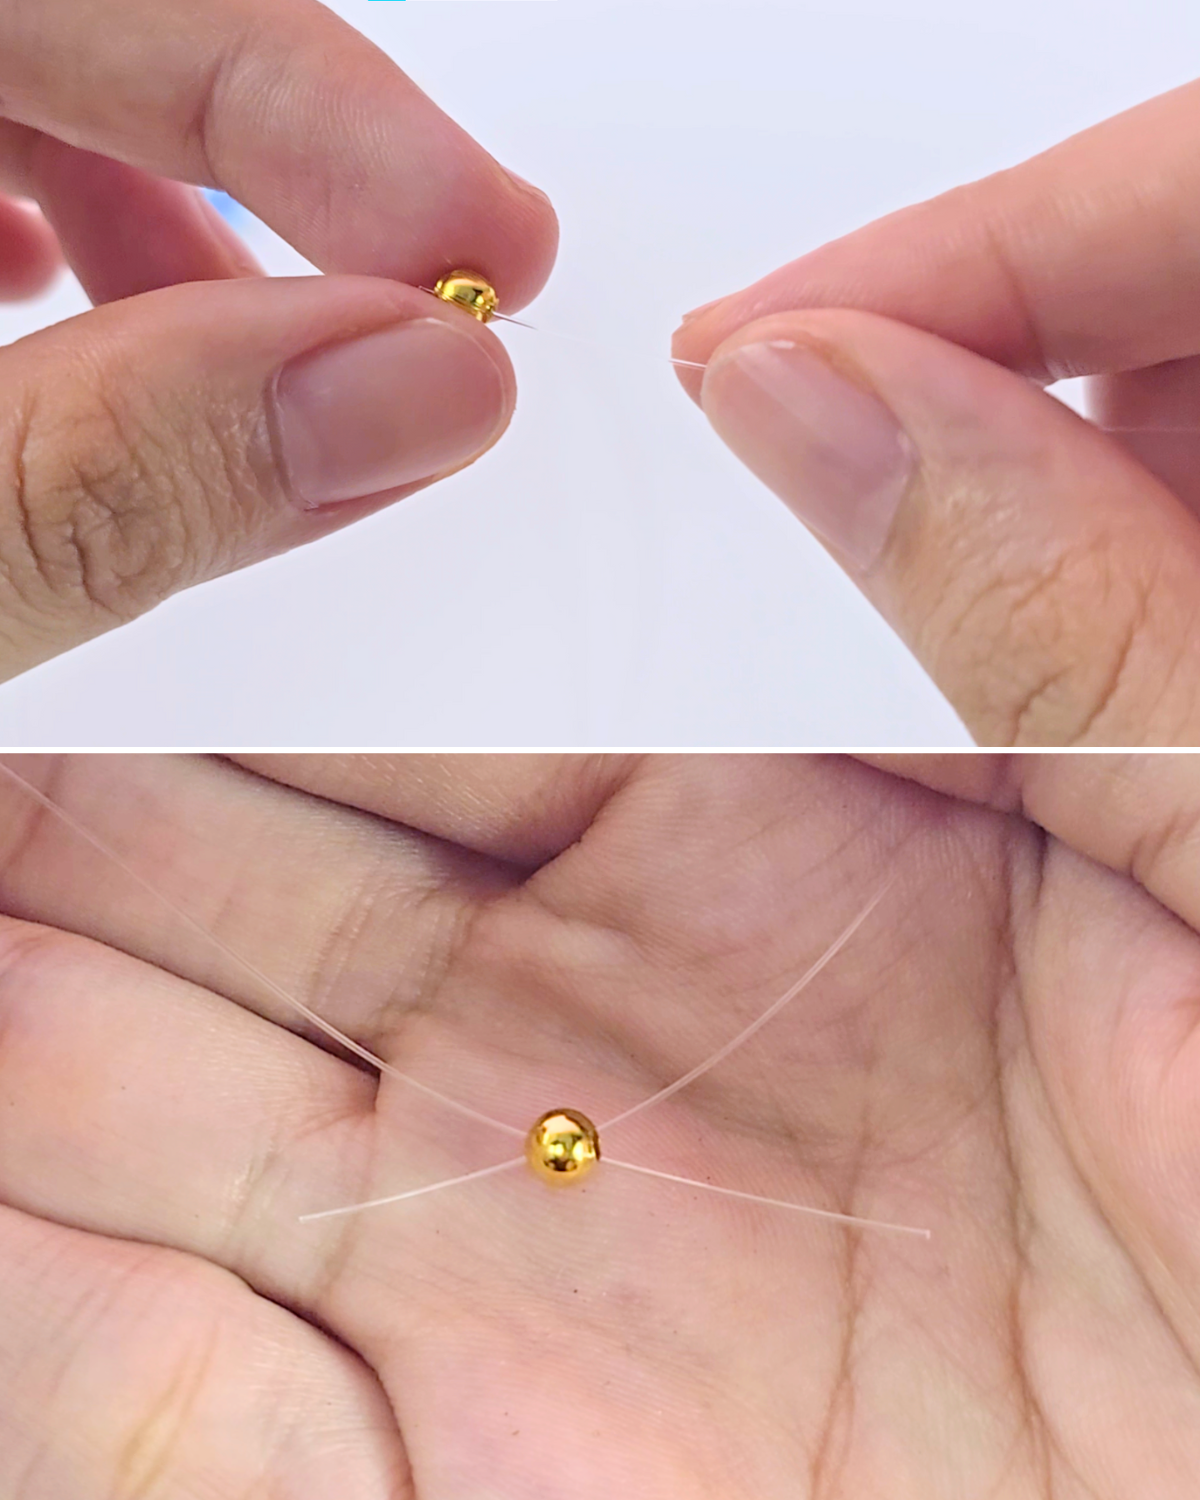
Slide a gold bead onto the fishing line, then cross the two ends over each other. Gently pull the fishing line ends in opposite directions so the bead rests securely in the center.Step 3: Form the First Beaded Flower
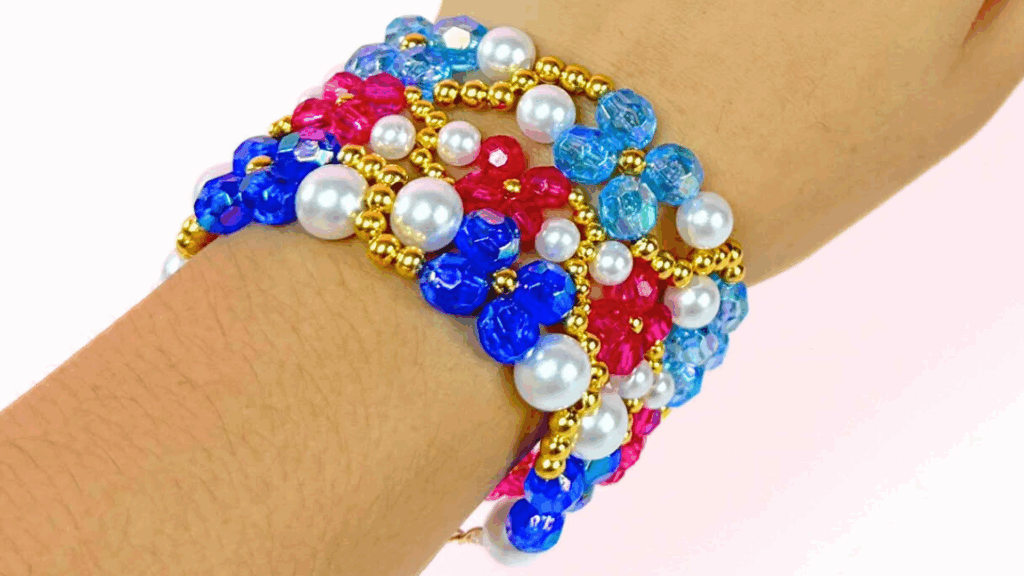
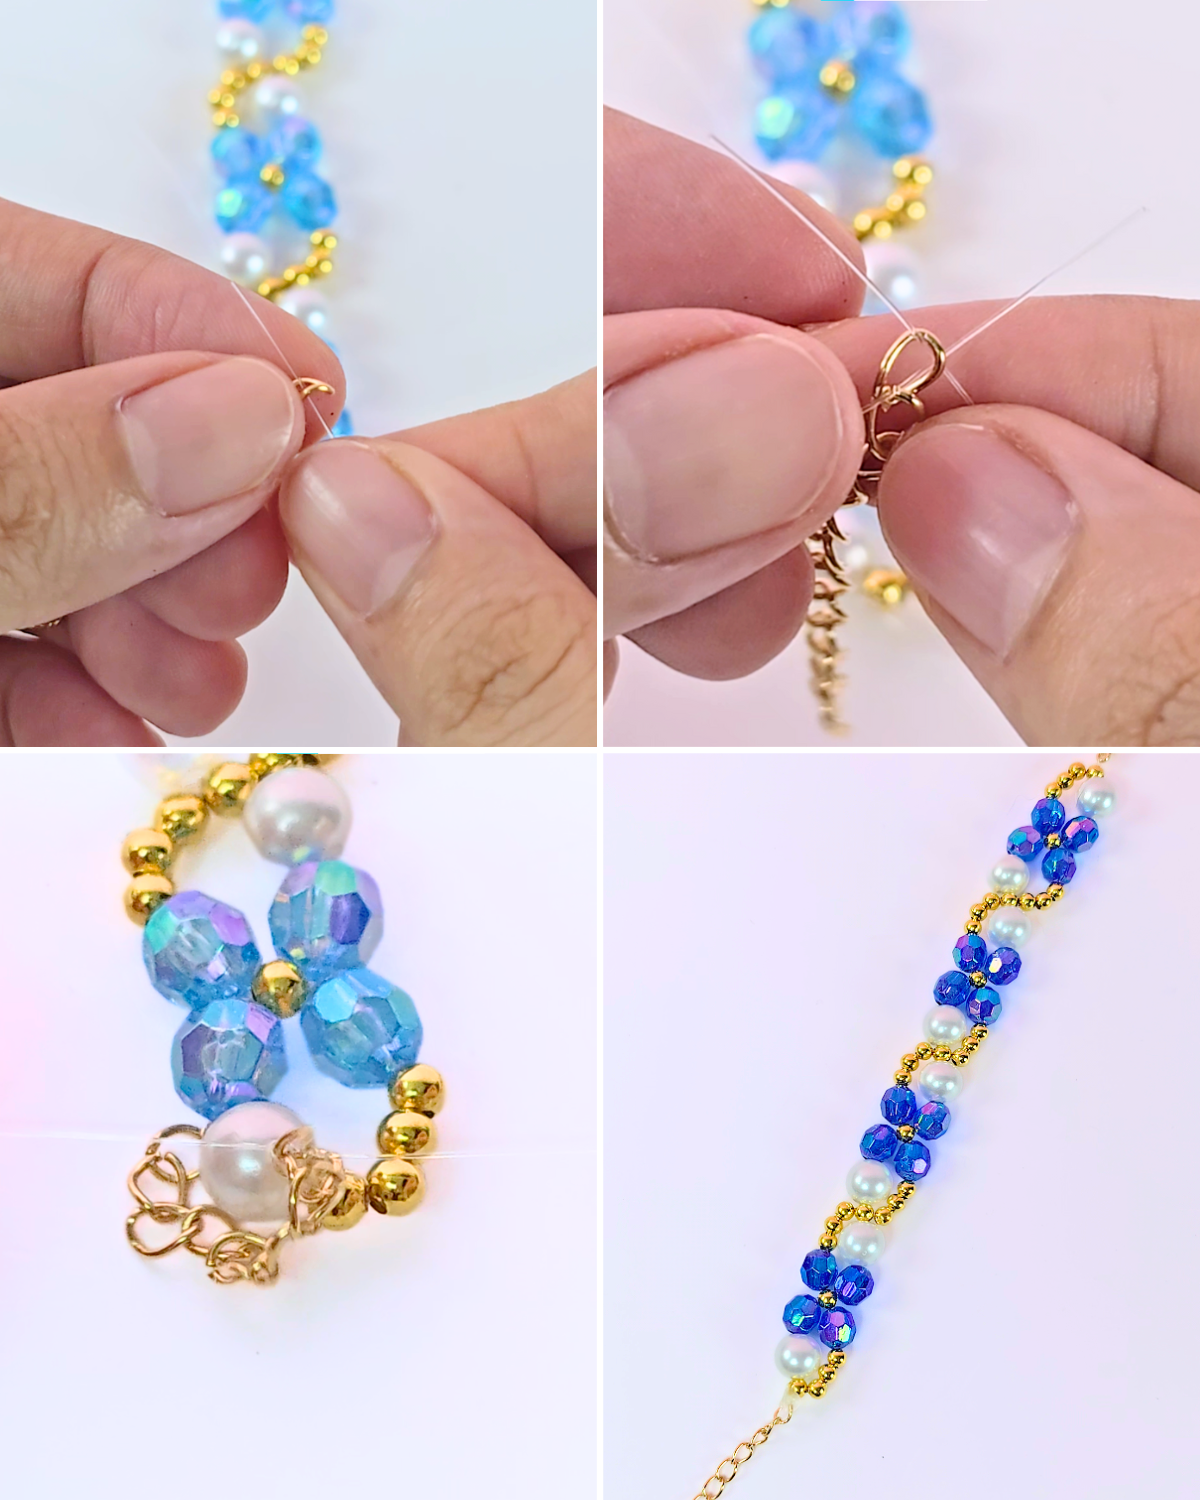
Thread three gold beads onto one line, then add a blue bead beneath them. On the other line, slide on a pearl bead followed by a blue bead. After this sequence, cross both lines through a gold bead, just like in Step 2, and pull gently to secure. This forms the center of your first flower.
To complete the flower, place one blue bead on each line, then repeat the same sequence on the opposite side of the line. Keep adding beads and crossing the lines through a gold bead to form flower shapes, continuing until your bracelet reaches the length you want.Step 4: Secure the Clasp End
Insert both ends of the fishing line through the bracelet chain hook, cross them together, and tie a tight knot to keep the bracelet secure. Trim off any excess fishing line with scissors for a neat finish.

Materials
- Beads
- Lobsters Clasps Chain Hook
- Fishing Line or Nylon Wire
- Scissors
- Bracelet Chain Hook
![]()
Pro Tips 💡
- Keep the fishing line pulled tight as you work to maintain even flower shapes.
- When you reach your desired bracelet length, secure the final knot tightly, then add a small dab of hot glue around the knot for extra durability before trimming off the excess fishing line.
Must-Try Viral Crafts

Paper Flowers

Crafts

Paper Flowers

Crafts
*If you love this craft, then visit our official website, follow our Facebook page, and subscribe to our YouTube channel for more!
Easy Flower Bead Bracelet for Beginners