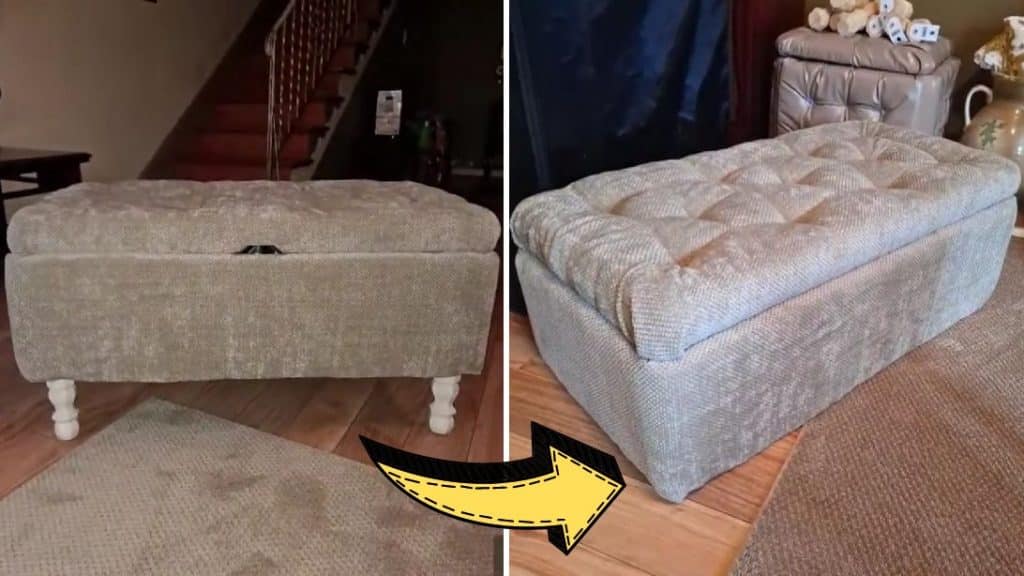
Do you want to have a pretty tufted bench but find them too expensive? Then, don’t buy it and instead make one on your own using some materials that you can easily purchase from the nearest Dollar store. What’s even better is that this bench also serves as storage! Try this fun DIY project by Heart In Hand Creations & Event on YouTube this weekend, you won’t regret it.
Materials:
Fabric
- 3 feet by 19 inches chenille fabric, outer
- 4 feet by 18 inches 100% cotton, lining
- 1-inch foam, for the base
- 2-inch foam, for the lid/top
- Batting
- ½-inch upholstery cardboard edge trim
Tools
- 1½-inch wood nails
- Hammer
- Drill
- Hot glue
- Screwdriver
- Staple gun and staples
- Wood glue
- ¾-inch corner braces
- Thumb tacks
- Hinge
Plywood
- 17 by 35 inches and 1 inch thick, for the top/lid
- 3 pieces of 2 by 15¼ inches and 1 inch thick, for the leg braces/brackets
For the base (they are all ½-inch thick)
- 2 front panels @ 9½ by 34¾
- 2 side panels @ 9½ by 15½
- 1 bottom panel @ 15 by 33
Directions:
Step 1
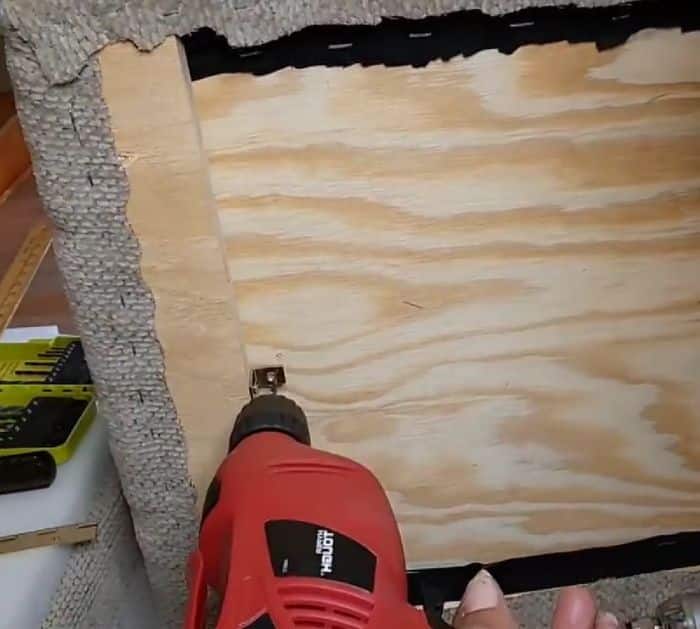
Glue the wood pieces for the bottom of the bench together, then secure them with nails, and adhere the foam around the sides with hot glue. Cut and trim the excess foam, then install the support bracket at the bottom of the bench. Measure and cut the fabric that you’ll need to cover the whole bench, then sew the outer pieces together, and insert them on the bottom part of the bench. Make sure that the seam is in the middle so it’s neat and presentable, then staple the fabric all the way around nicely, hot glue the lining fabric all the way around the inside of the bench, and install the upholstery cardboard edge trim. Cover the other wood panel with the lining fabric, then staple in place, insert, and place at the bottom of the bench.
[social_warfare]
Step 2
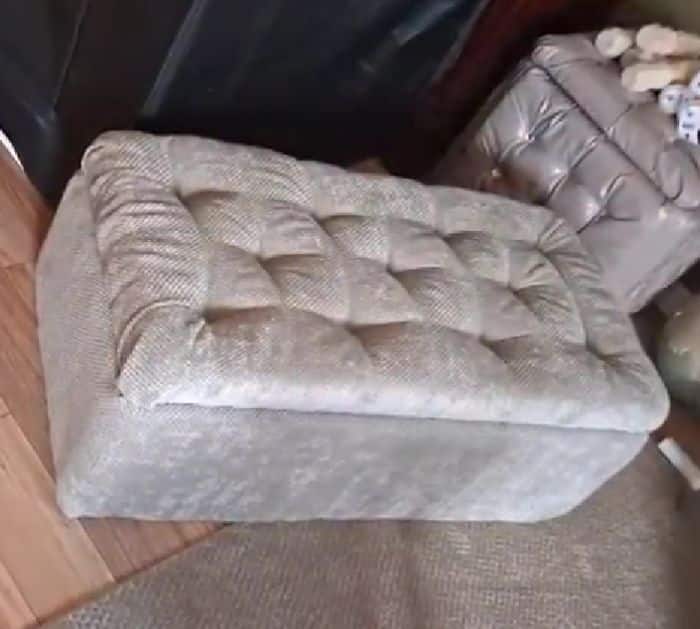
Make sure to add some brackets underneath to secure the bottom panel. Cover the bottom of the bench with another fabric and staple it securely in place. For the lid of the bench, double the foam, adhere it to the wood, then cut, and mark the areas where it would be tufted. Staple the batting fabric all around the top of the lid, then lay the outer fabric on top, and start tufting. Pull all of the edges of the fabric underneath, then staple in place, and trim the excess. Use the same fabric you used underneath the bench to cover the bottom of the lid, then secure it with thumb tacks, and install the hinge to connect the lid to the body of the bench. Spray paint the legs and let dry completely before installing underneath the bench.
*All image credit belongs to Heart In Hand Creations & Event via YouTube. Follow and subscribe to her channel for more!
Easy DIY Tufted Storage Bench Tutorial


