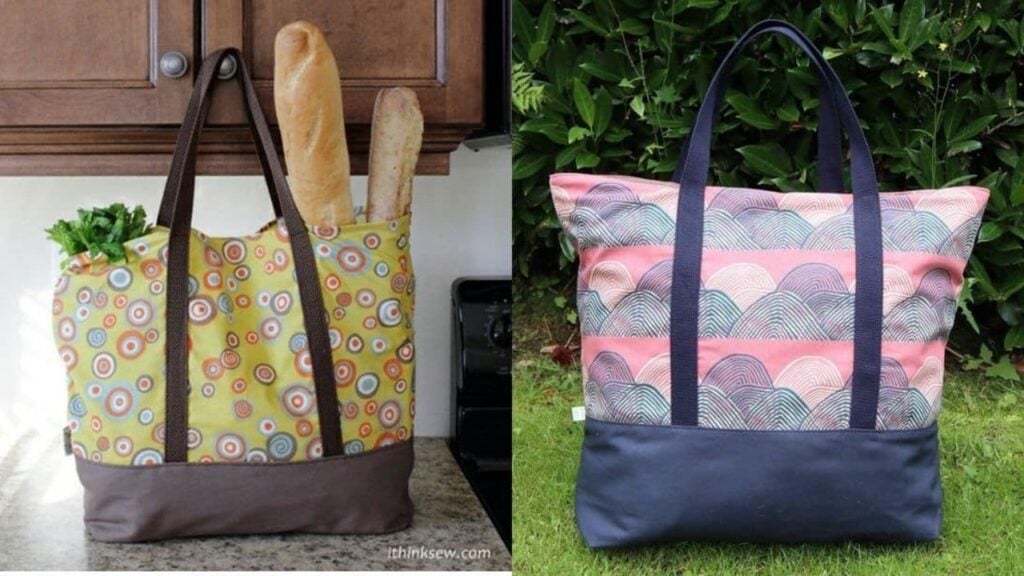
Try sewing your own market bag today with the help of this video tutorial by IThinkSew on YouTube. It’s sturdy, pretty, inexpensive, and reusable, everything you’ll ever want in a market or grocery bag! So go ahead and proceed to read down below for the full instructions.
Materials:
4-inch wide heavyweight home decorator or quilting weight cotton
- ½ yard for the exterior fabric
- ¼ yard for the exterior solid fabric
- 1 yard for the lining fabric
Other things you’ll need
- 2 yards of 22-inch wide medium weight fusible interfacing
- 78 inches of webbing strap
- Sewing ruler
- Marking pen
- Scissors
- Pins
- Sewing machine
- Iron
- Pattern and exact sizes (click here to download the pattern as well as the exact sizes)
Step 1
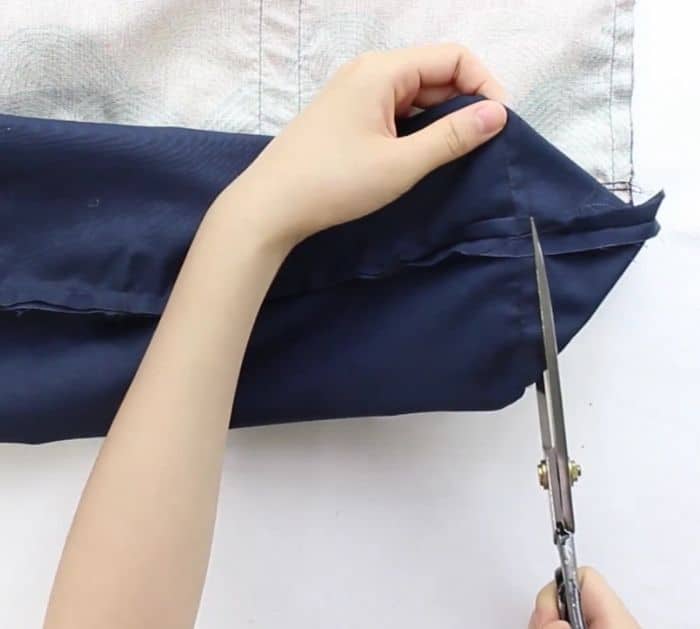
First, cut the fabrics that you will need. Cut 2 pieces of exterior fabric for the upper front and back of the bag, 2 pieces of solid exterior fabric for the lower front and back of the bag, 2 pieces for the lining fabric, 2 pieces of the interfacing fabric, and 2 pieces of webbing straps at 39 inches long for the handles of the bag. Start by making the exterior, fold it in half across then notch the upper midpoint, mark 3 inches from each side of the notch for the location of the handles, attach the handle and pin in place, and mark the stitch line 1½” from the top seam. Sew the handle around onto the upper piece stopping at the marked stitch line, folding it in half, then notching the bottom midpoint.
[social_warfare]
Step 2
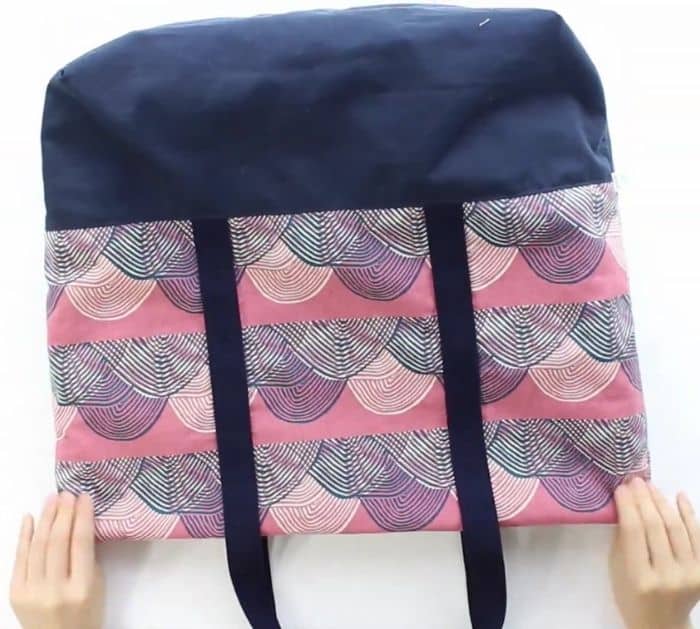
Fold the lower piece in half and notch both midpoints, spread open and lay on top of the exterior, pin the bottom in place, and stitch the upper and lower piece together at the bottom. Fold the lower piece down, then topstitch with a 1/8″ seam allowance. Repeat all of the steps above with the other set of upper fabric, lower fabric, and webbing strap. Lay the pieces together with their right sides facing, pin them around together, then sew around the sides and bottom with a ½ seam allowance, draw a 3*3″ square on every bottom corner for the stitch line, pinch the bottom corner, and pull it sideways so that its pointed corner is exposed. Spread the seams at the bottom open, pin them in place, and repeat on the other side. Sew it straight down using the stitch lines on each corner as a guide, and trim off the remaining corner at about ¼” from the stitched line.
Step 3
Attach the interfacing fabrics onto the lining fabrics, then place the fused lining fabric pieces with their right sides together. Mark 5 inches at the bottom for the opening, pin them around in place, then stitch around the lining leaving the 5 inches gap and the top seam unsewn. Draw a 3*3 inches square on every bottom corner for the stitch line then proceed with the process done above. Turn the exterior bag right side out then insert it in the lining fabric so that their right sides are facing, match the side seams and pin the exterior and lining together. Sew them together, make a notch on the side seams, and turn it right side out through the gap at the lining fabric. Press them nicely, then tuck and stitch the gap nicely, sew the gap close, and insert the lining nicely inside the bag. Topstitch around the upper seams of the bag.
*All these images are credited to IThinkSew via YouTube and her official website. Give her channel a visit and subscribe for more!
Easy DIY Market Bag Sewing Tutorial


