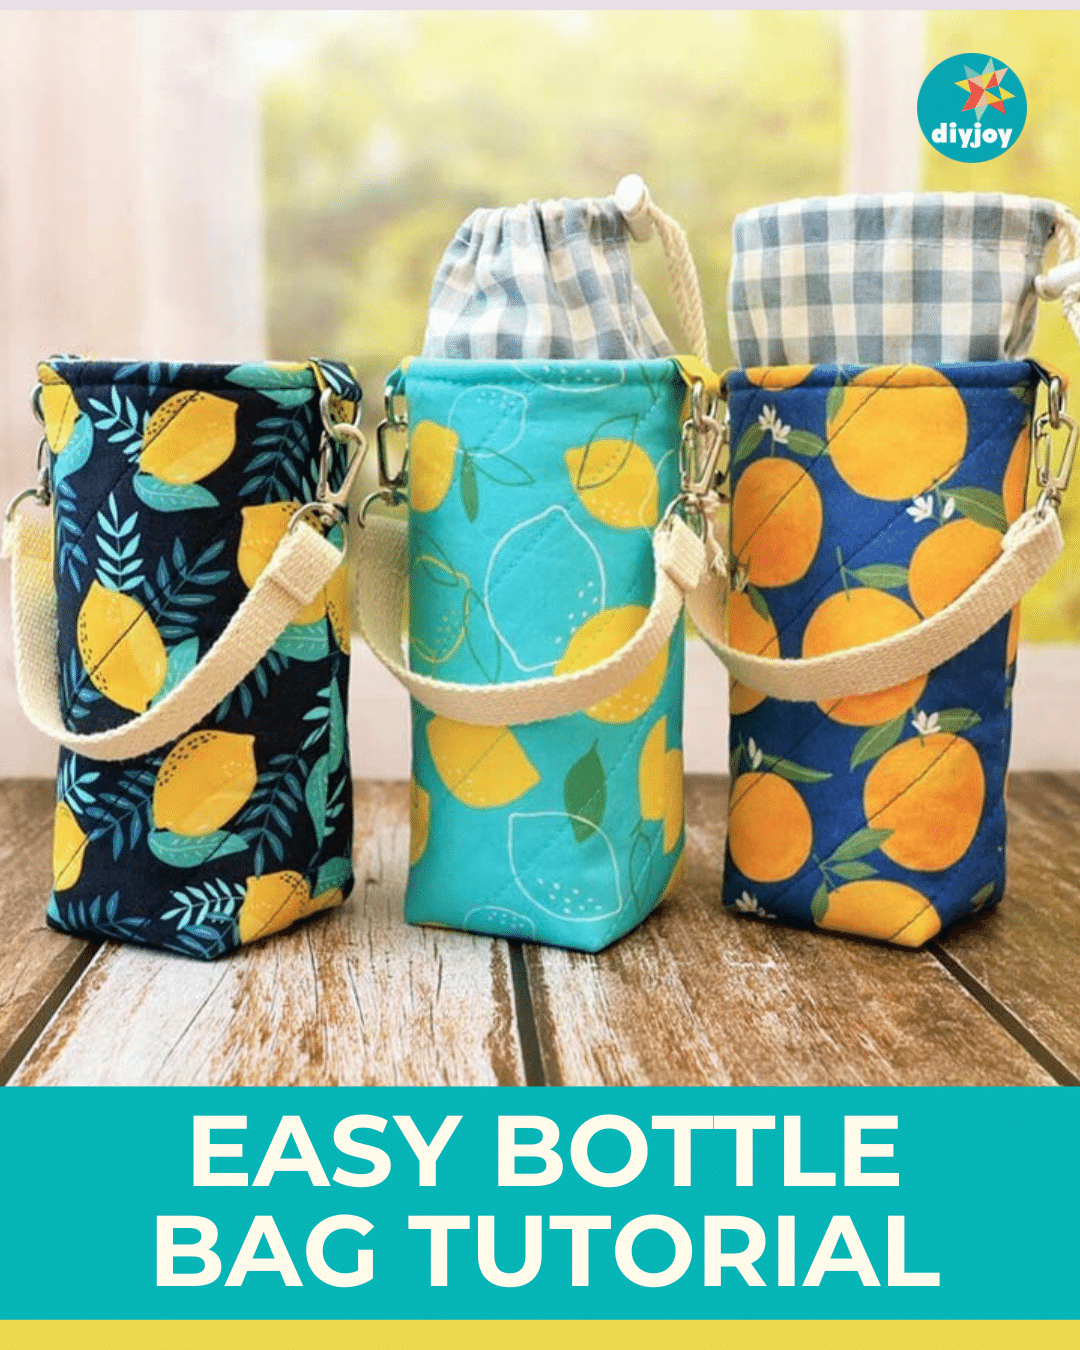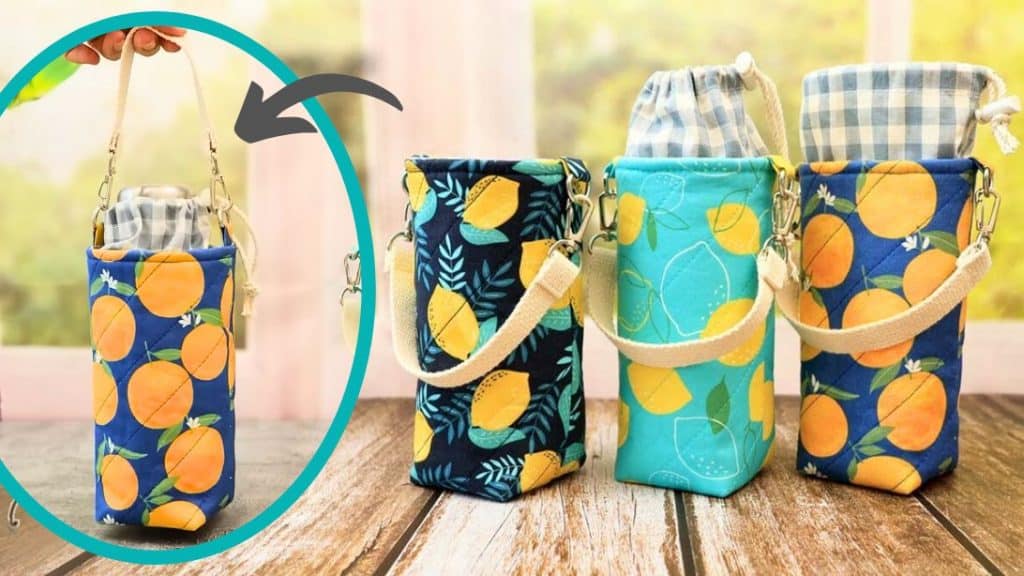
Searching for your next sewing project? How about you make these cute bottle bags?
I bring my tumbler everywhere. Sometimes, I have too much in my hands and wish I could just insert the handle into my hands so I can carry everything at once. But the handle of my tumbler is too small to fit my wrist. This bag solved that problem. I even made the strap adjustable so I could sling it across my body.
RELATED: DIY Macrame Tumbler Bottle Holder
I am absolutely in love with these DIY bottle holders by sewingtimes. The one that I made snug perfectly to my tumbler. I brought it to my friend’s house, and I received a ton of compliments. They all loved it. It’s definitely worth making!
DIY Bottle Holder Materials
- 2 pieces 6″ x 16 7/8″ printed rectangles – one lining and one outer fabric
- 1 piece of 11 1/8″ x 4″ printed rectangle (A)
- 2 pieces of 1 1/4″ x 2″ printed rectangles (B)
- 2 pieces of 5/8″ wide D ring
- 10″ long of a 5/8″ wide webbing strap
- 2 pieces of 5/8″ swivel snap
- 17 3/4″ cotton string
- cord lock
- 5 1/8″ x 16 1/8″ of fusible fleece
How to Make a DIY Water Bottle
Step 1:
Start by measuring 6 3/4″ from the top of the fusible fleece and mark it. Repeat to the bottom part. Draw straight lines on those marks. Make two points that are 2 5/8″ apart on the center of each line. Connect the marks from the top to the bottom. Cut the outside rectangles.
Step 2:
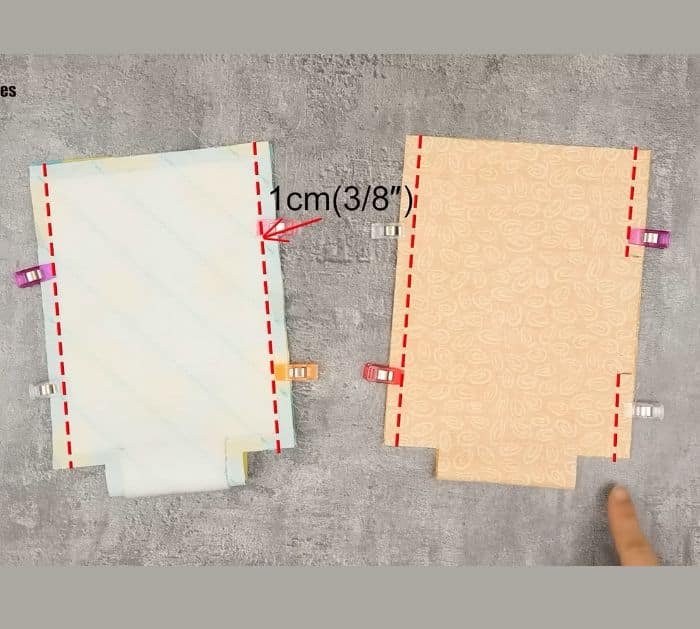
Place the fusible fleece on top of one of the outer fabric (A). Make sure it is centered. Iron it in place. Place it on top of the lining (A) right sides together. Cut the rectangles on the center with a 3/8″ allowance. Set the lining aside. Sew the outer fabric with the fusible diagonally from top to bottom.
Step 3:
Fold both of them in half right sides together. Sew both on the sides with a 3/8″ seam allowance, but make sure to leave an opening on the lining
Step 4:
Open the outer fabric, and pin the corners together. Sew with a 3/8″ seam allowance on both sides to close. Repeat with the lining.
Step 5:
Get the 2 small rectangles (B). Fold the sides of each one lengthwise towards the center, then insert the wide D ring on each one. Flip the outer fabric, then sew the strips with the D rings on each side. Set aside.
Step 6:
Fold the rectangle A in half right sides together and measure 1 5/8″ from the bottom. Sew 3/8″ from that mark to the bottom. Press the seams open and sew. Fold 3/8″ from the top, then fold 5/8″ again. Sew all the way around.
Step 7:
Insert the unit from step 5 into the outer bag with the folded part facing down. Sew them together around the edges.
Step 8:
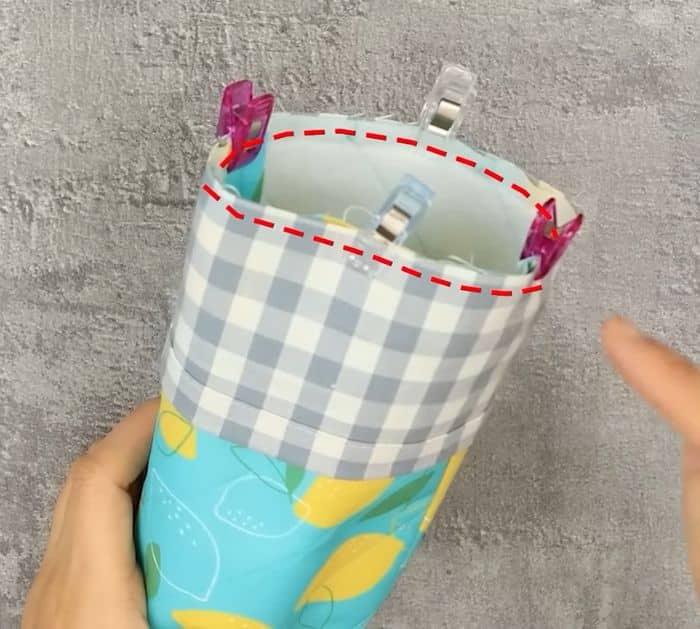
Insert the outer bag inside the lining and sew around the top edge. Flip it right side out from the opening. Sew the opening.
Step 9:
Tuck the lining and opening inside and sew the outer edge.
Step 10:
Insert the string into the opening, then attach the cord lock.
Step 11:
Sew the swivel snaps to the webbing strap. Attach to the bag.
Easy Bottle Bag Tutorial