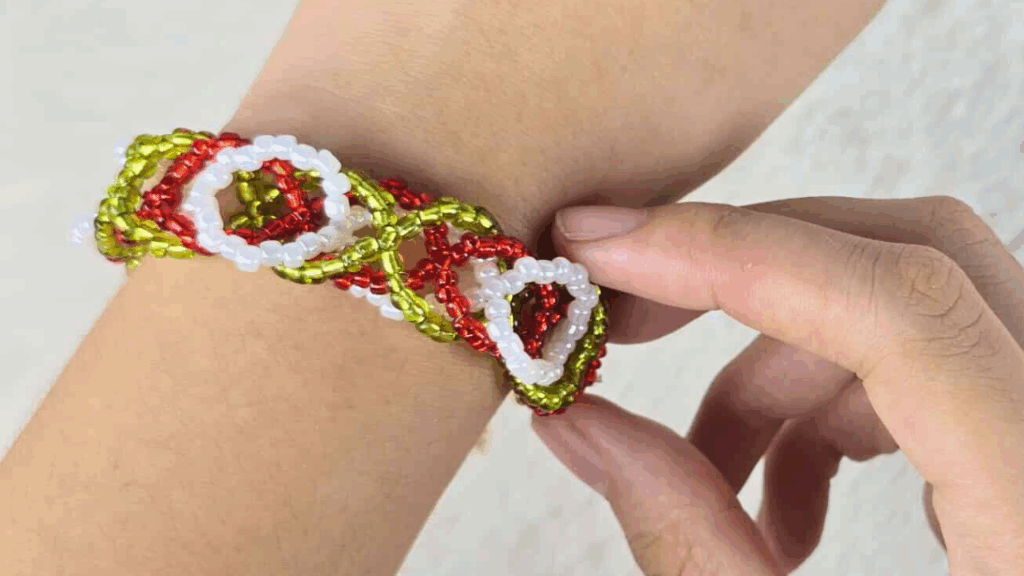
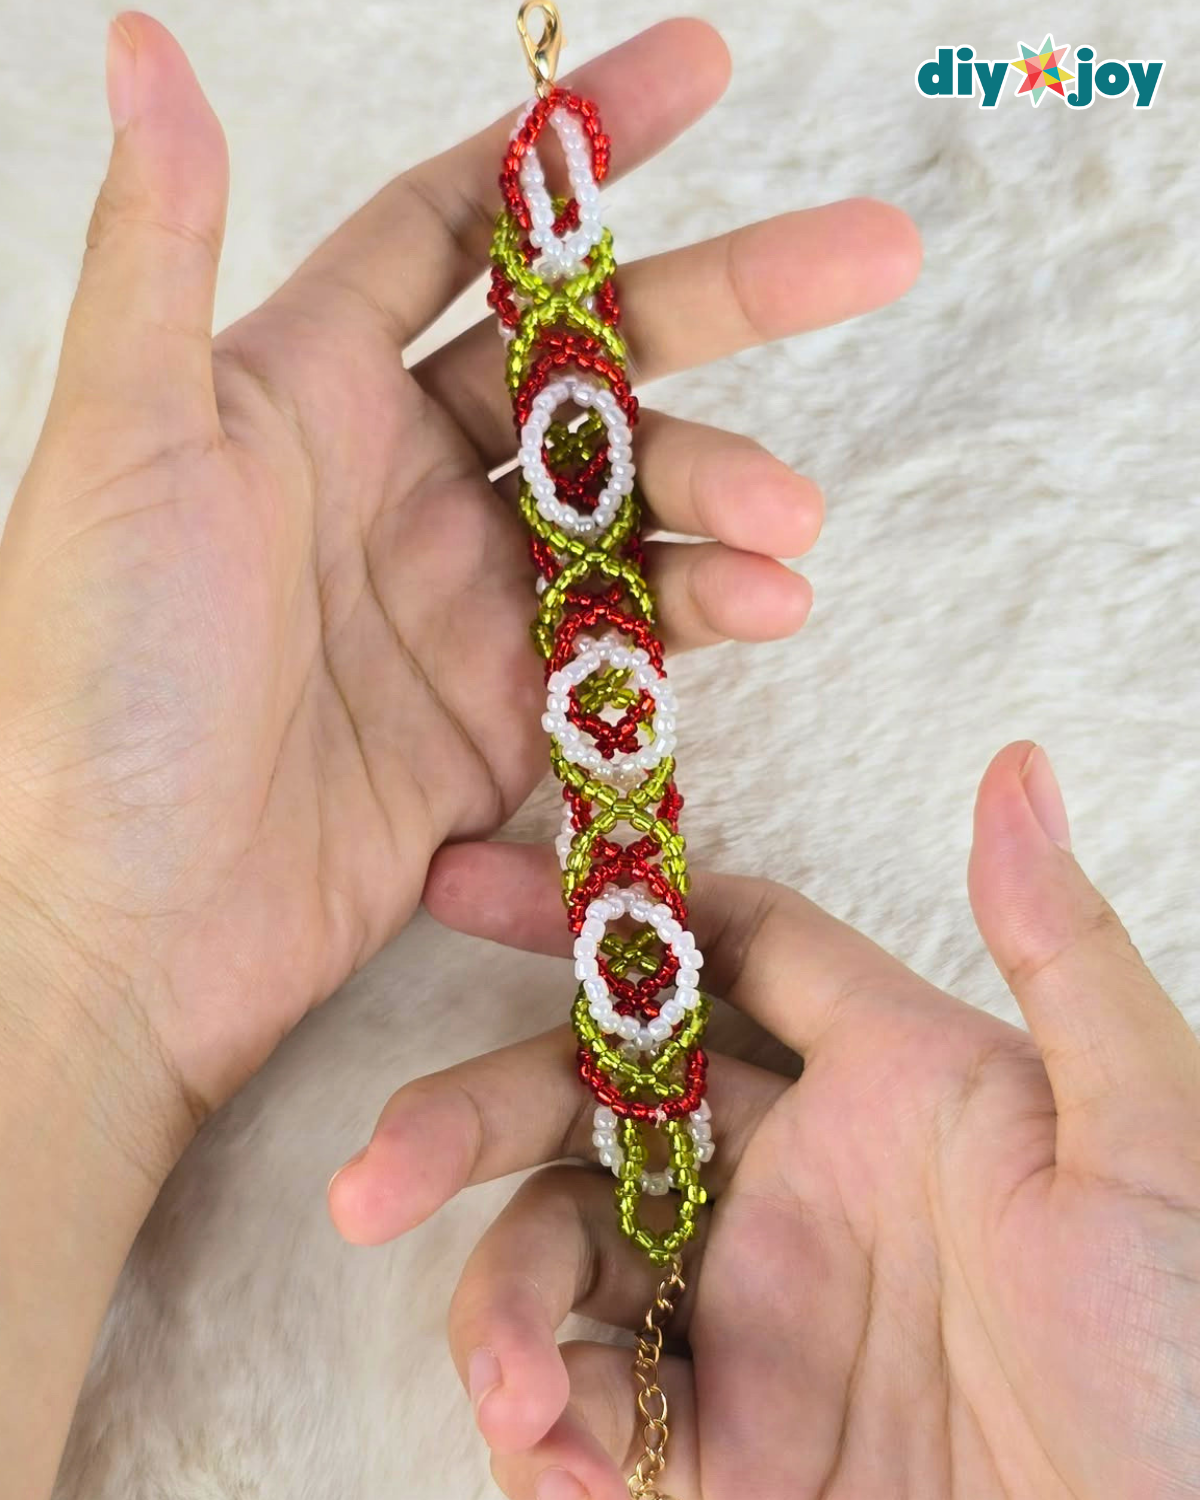
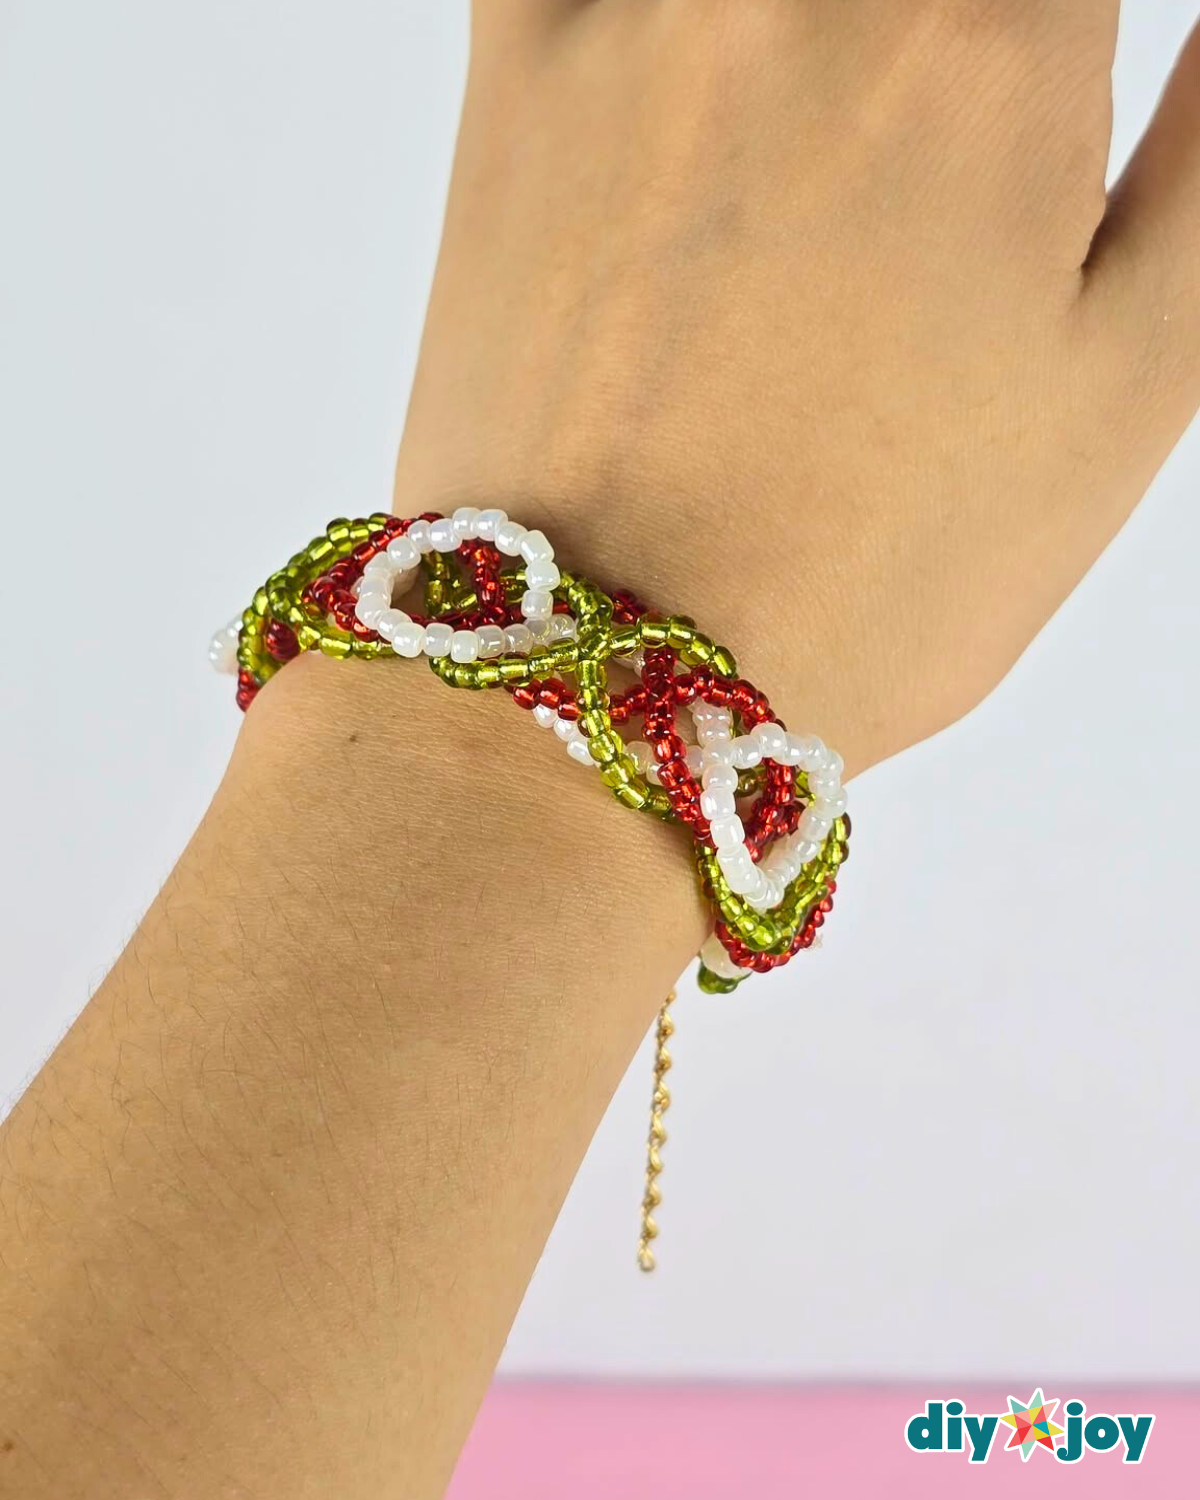
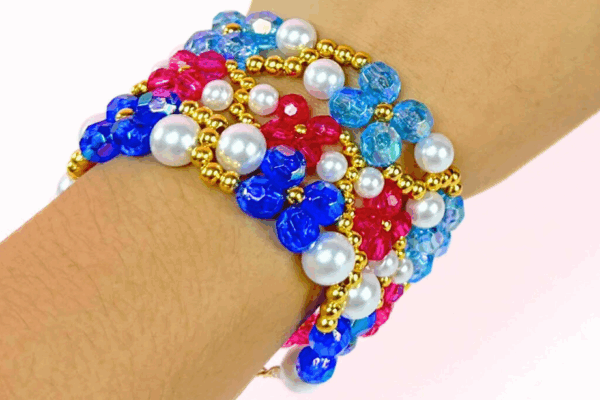
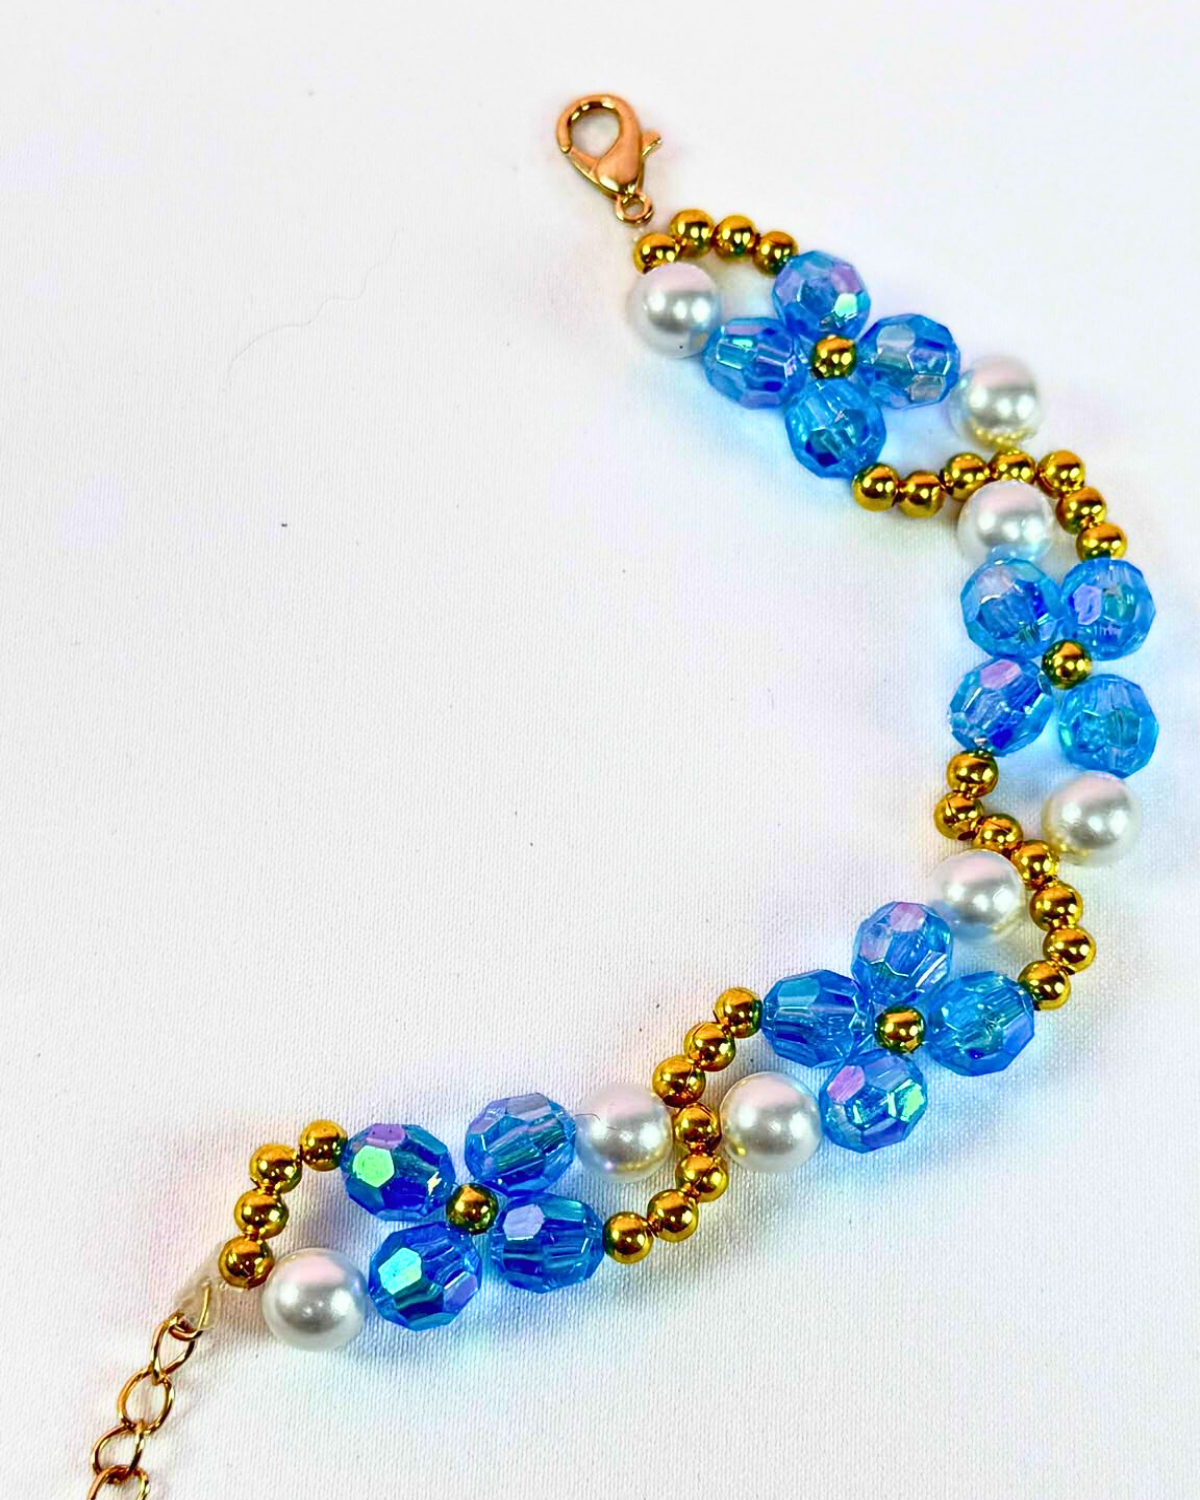
I’ve made several beaded bracelets already, but this one has quickly become one of my favorites. While it requires more patience than some of my earlier projects, since it uses more beads and a fuller nylon cord, it’s still an easy beadwork project that anyone can try. The extra effort is worth it because this bracelet turns out sturdier and less likely to break compared to simpler designs.
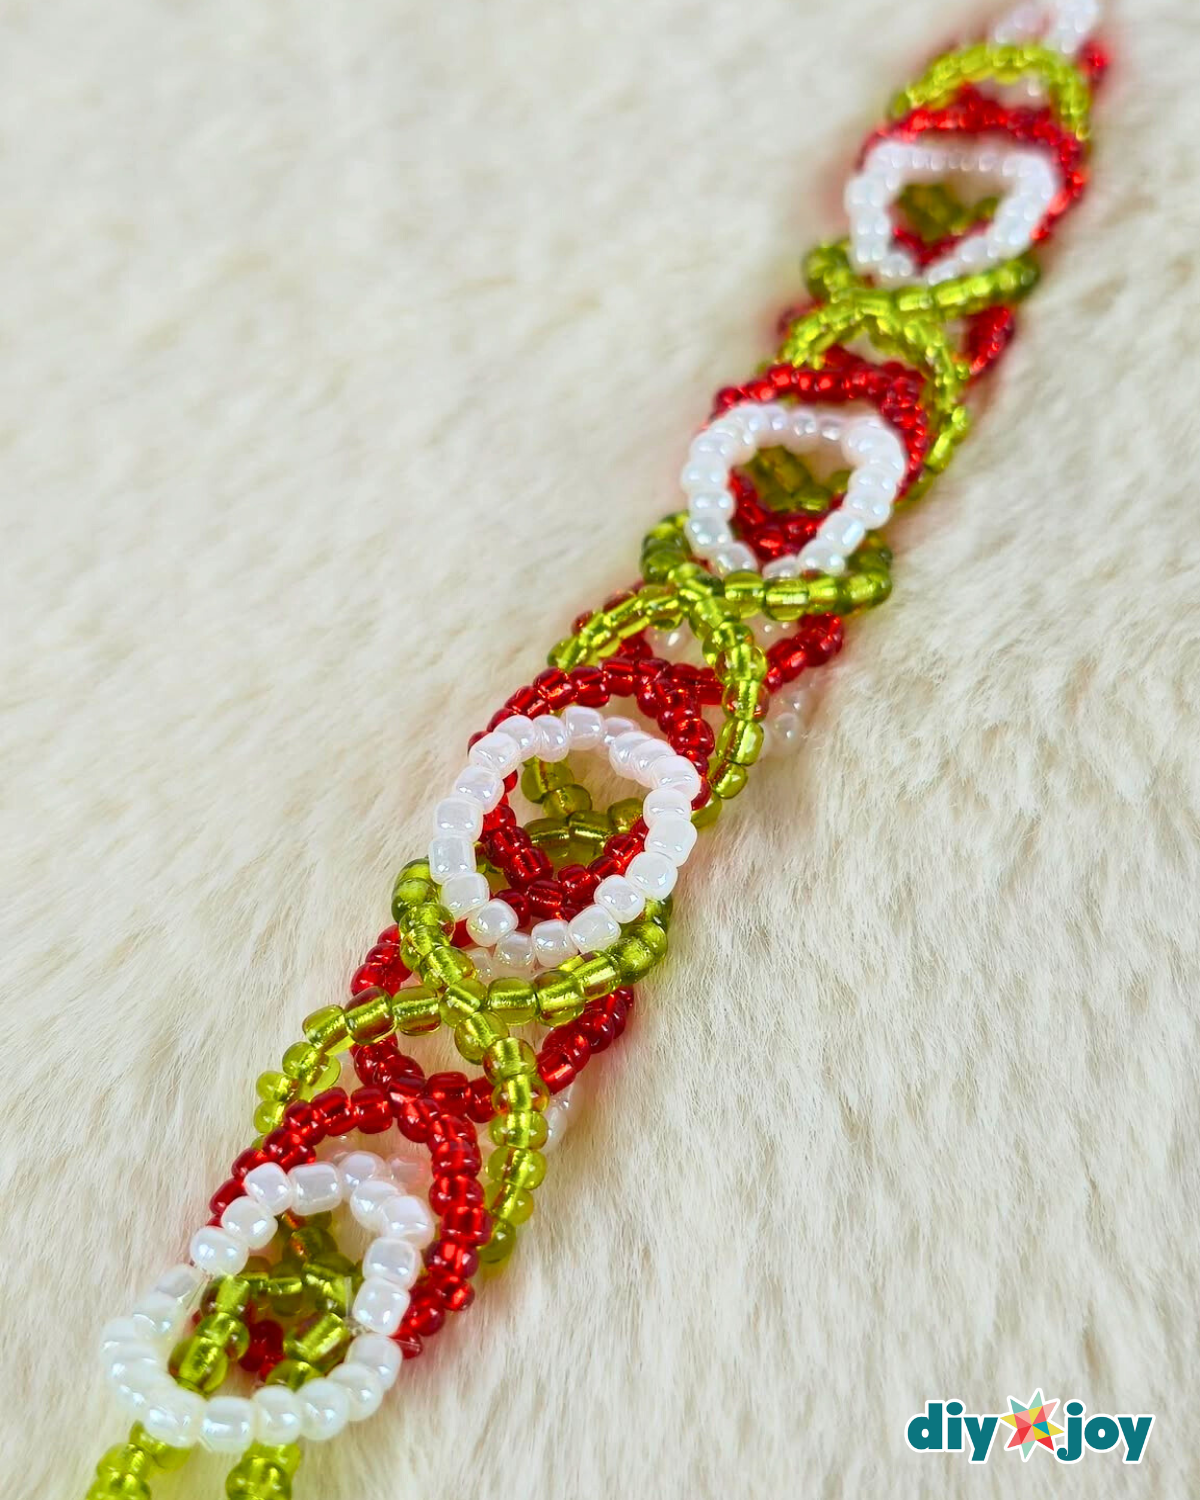
What I love about this DIY beaded bracelet is its versatility. The design is simple and neutral enough to suit almost anyone, making it a great gift idea for handmade presents. If you’re making one for someone with a more masculine style or someone who prefers muted tones, you can easily swap the colors to match their taste. Shades of black and gray, deep greens, or even different tones of blue all work beautifully for a sleek, understated look.
Making bracelets has become one of my favorite hobbies and is an activity I truly enjoy. Over time, I’ve even received requests from family and friends for customized designs, which makes the process even more rewarding. The best part is that bracelet-making is both easy and budget-friendly — beads are inexpensive, often sold in bulk, and versatile enough to create multiple unique designs.
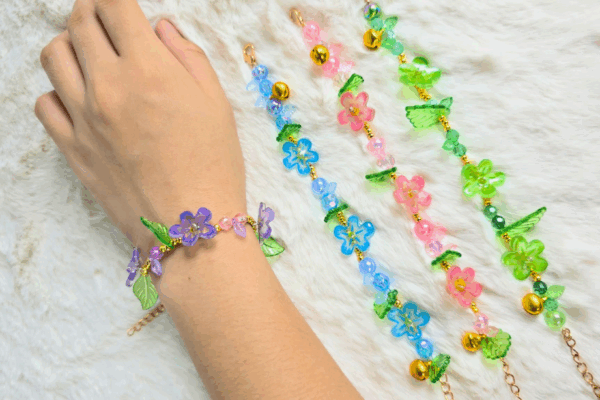
RELATED: Easy Flower Bead Bracelet for Beginners
This particular bracelet pattern is simple yet beautiful, which is why it has quickly become one of my favorites. If you’re new to beadwork, don’t be intimidated — this DIY beaded bracelet tutorial is beginner-friendly, and you’ll be surprised at how professional your bracelet looks even on your very first try.
How to Make a Beaded Bracelet
Step 1: Start the Bracelet Loop

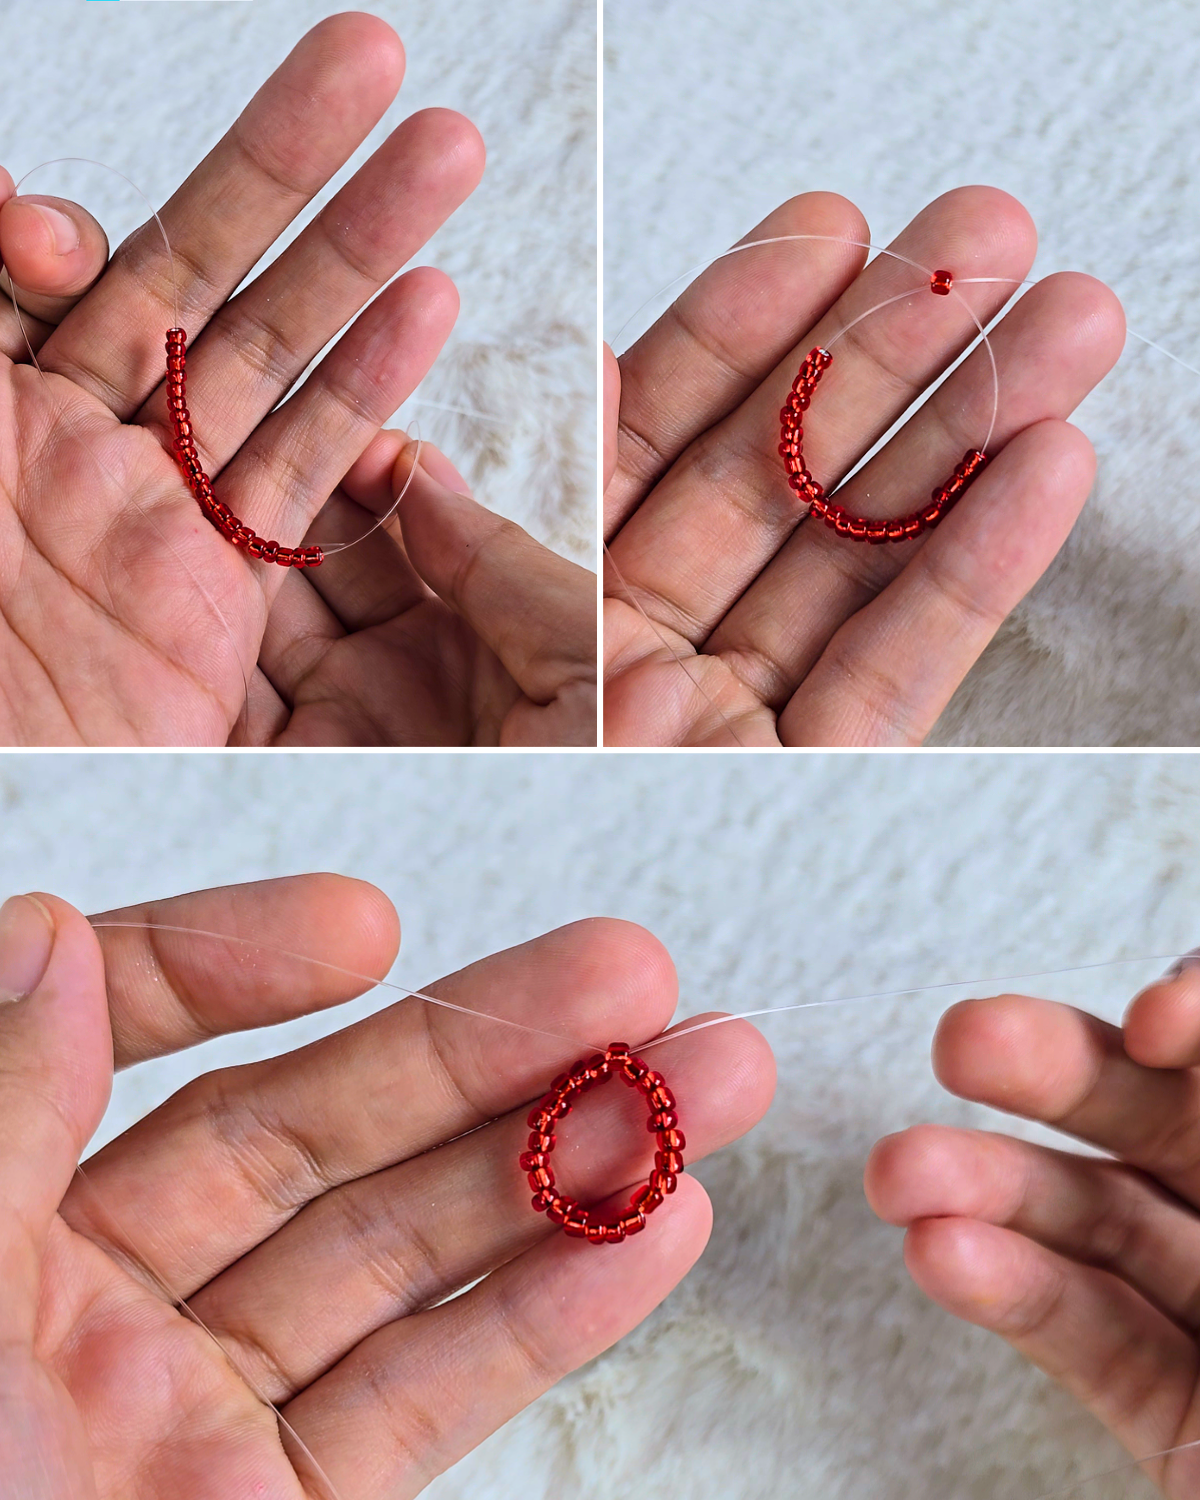
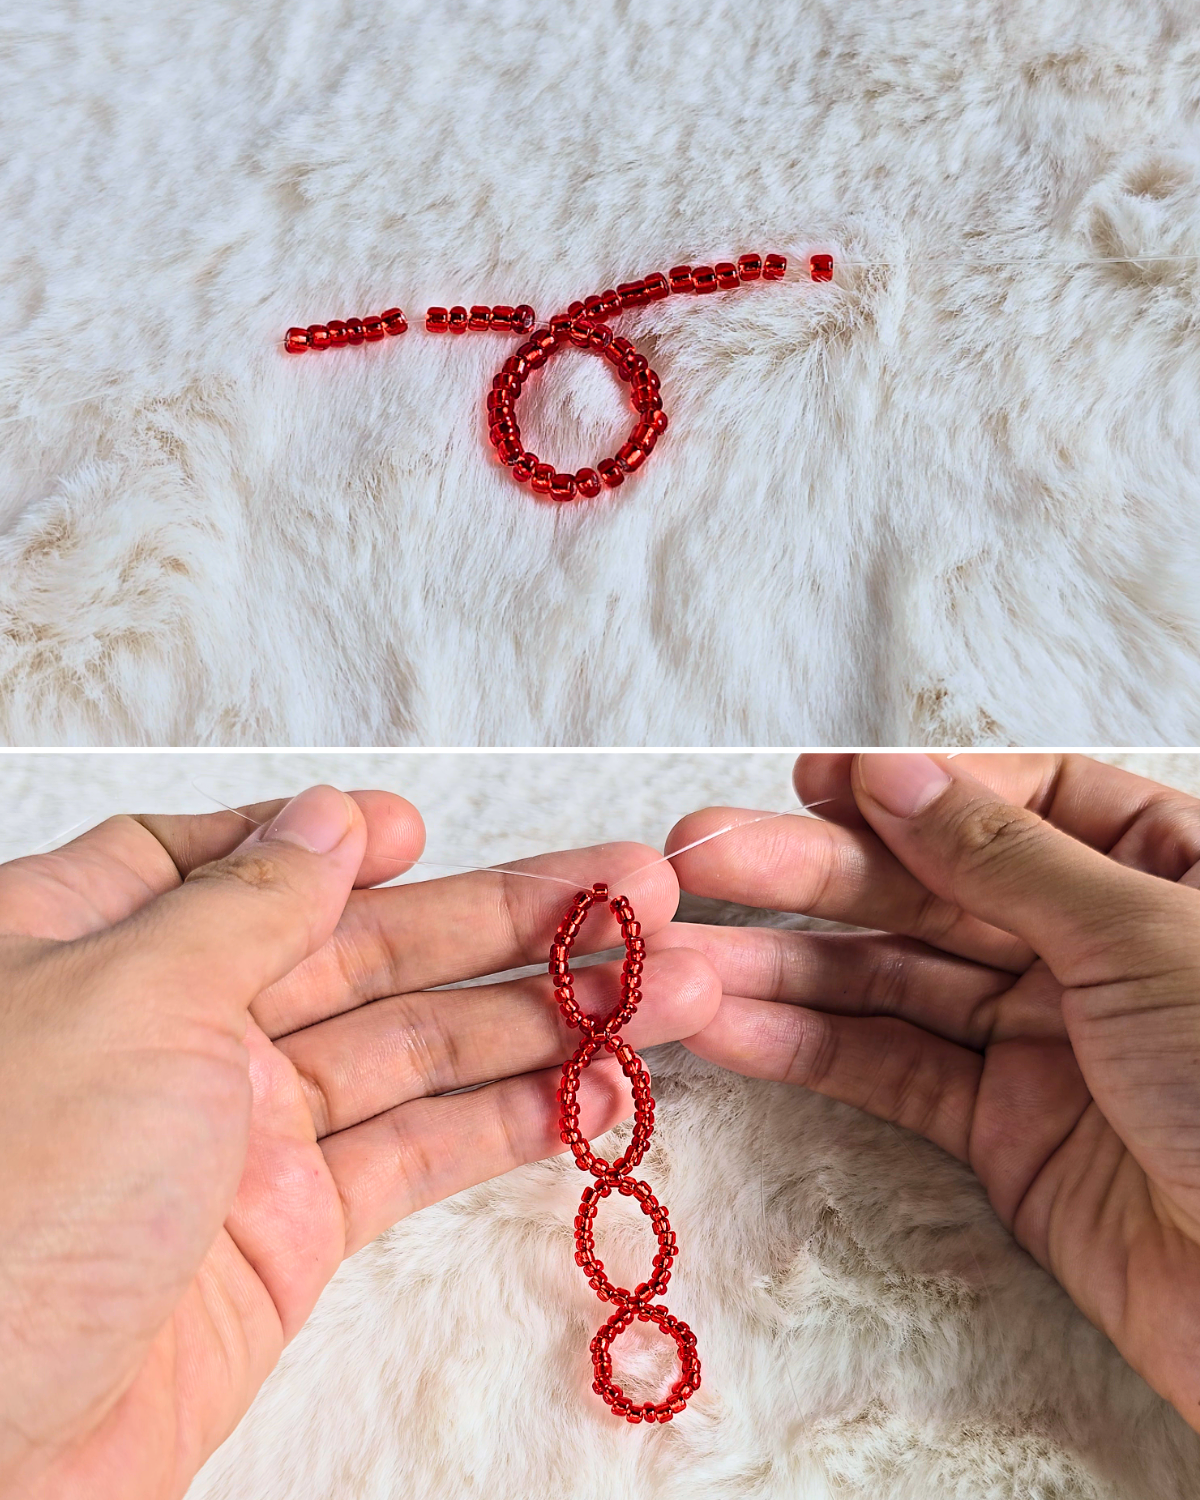
Thread 22 red seed beads onto the nylon cord. Then, take both ends of the cord and cross them through a single seed bead. Pull the cords tightly together to form a neat loop, locking the beads securely in place.Step 2: Create Beaded Loops Along the Cord
String 11 seed beads onto each tail of the nylon cord. Then, cross both ends through a single bead to interlock them and form another loop. Repeat this process—adding beads to each side and interlocking at the center—until you have a total of 12 loops, or enough loops to comfortably wrap around your wrist.
Tip: Keep your tension even when pulling the cord so the loops stay uniform in size and shape.Step 3: Make Additional Beaded Strands
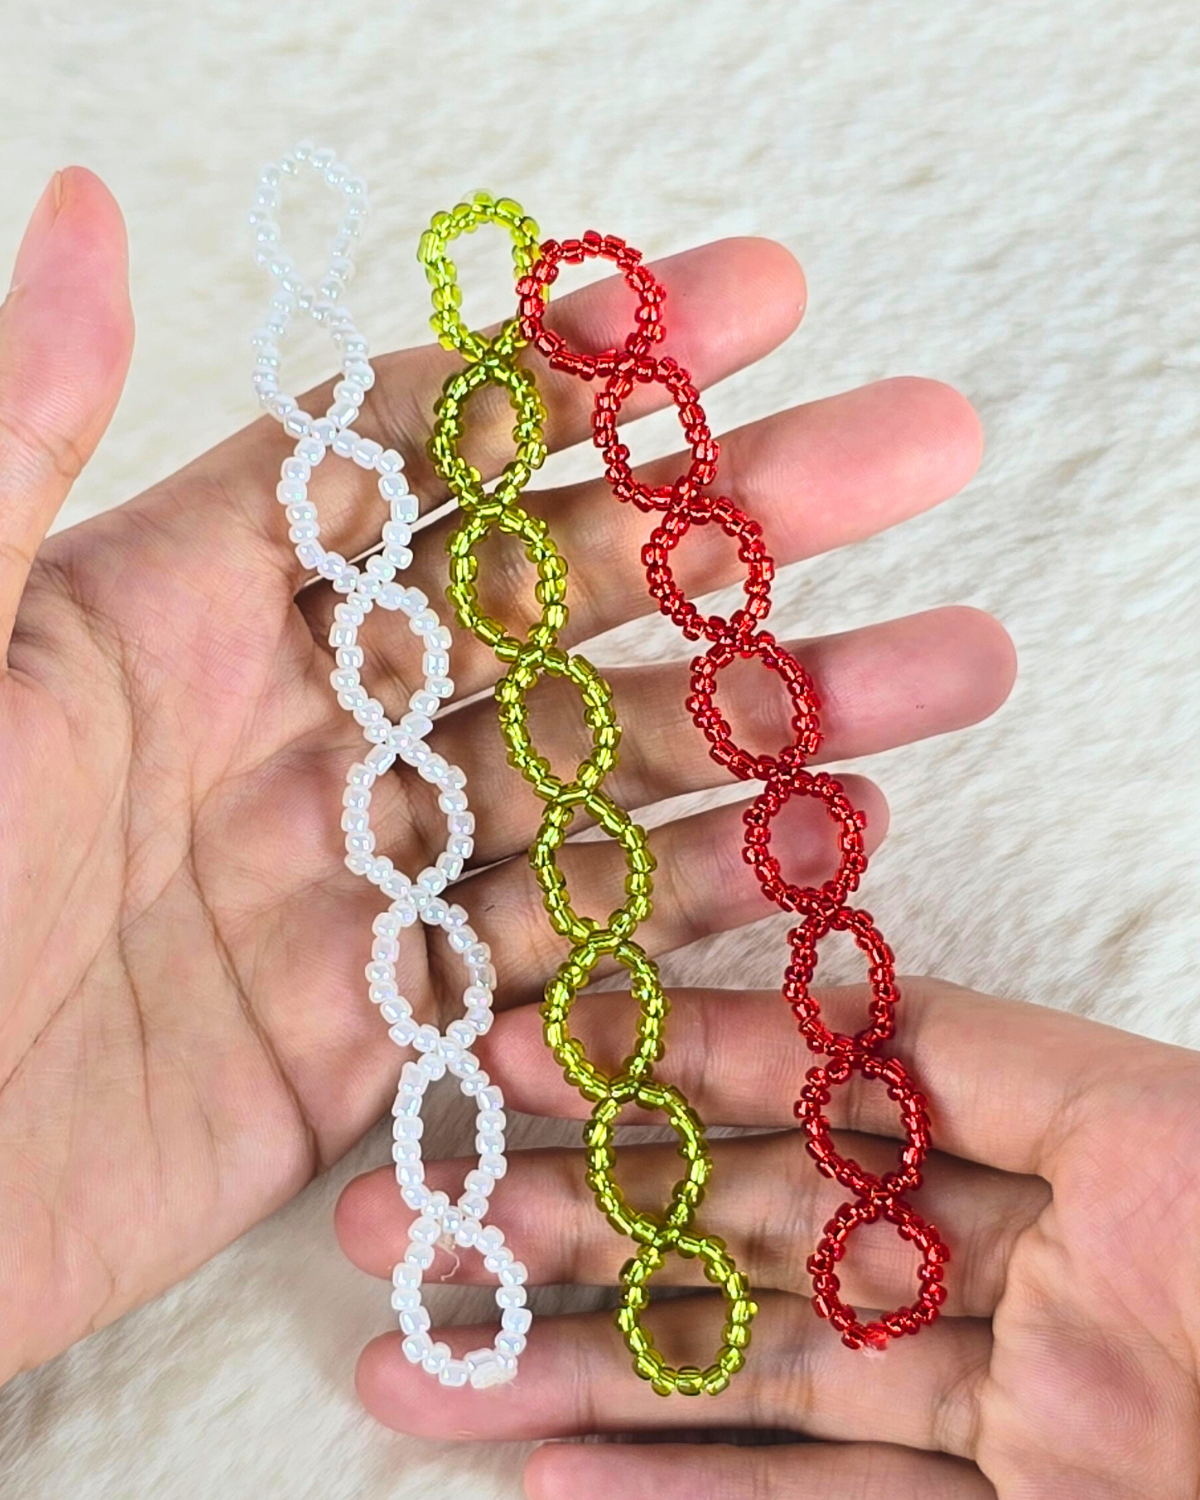
After completing the red beaded strand, create two more using white and green seed beads. Follow the same looping process—threading beads onto both sides of the cord and interlocking them through a single bead—until each strand is long enough to fit around your wrist.
Tip: Keep your bead counts consistent across all strands so they align evenly when joined together.Step 4: Weave the Bracelets Together
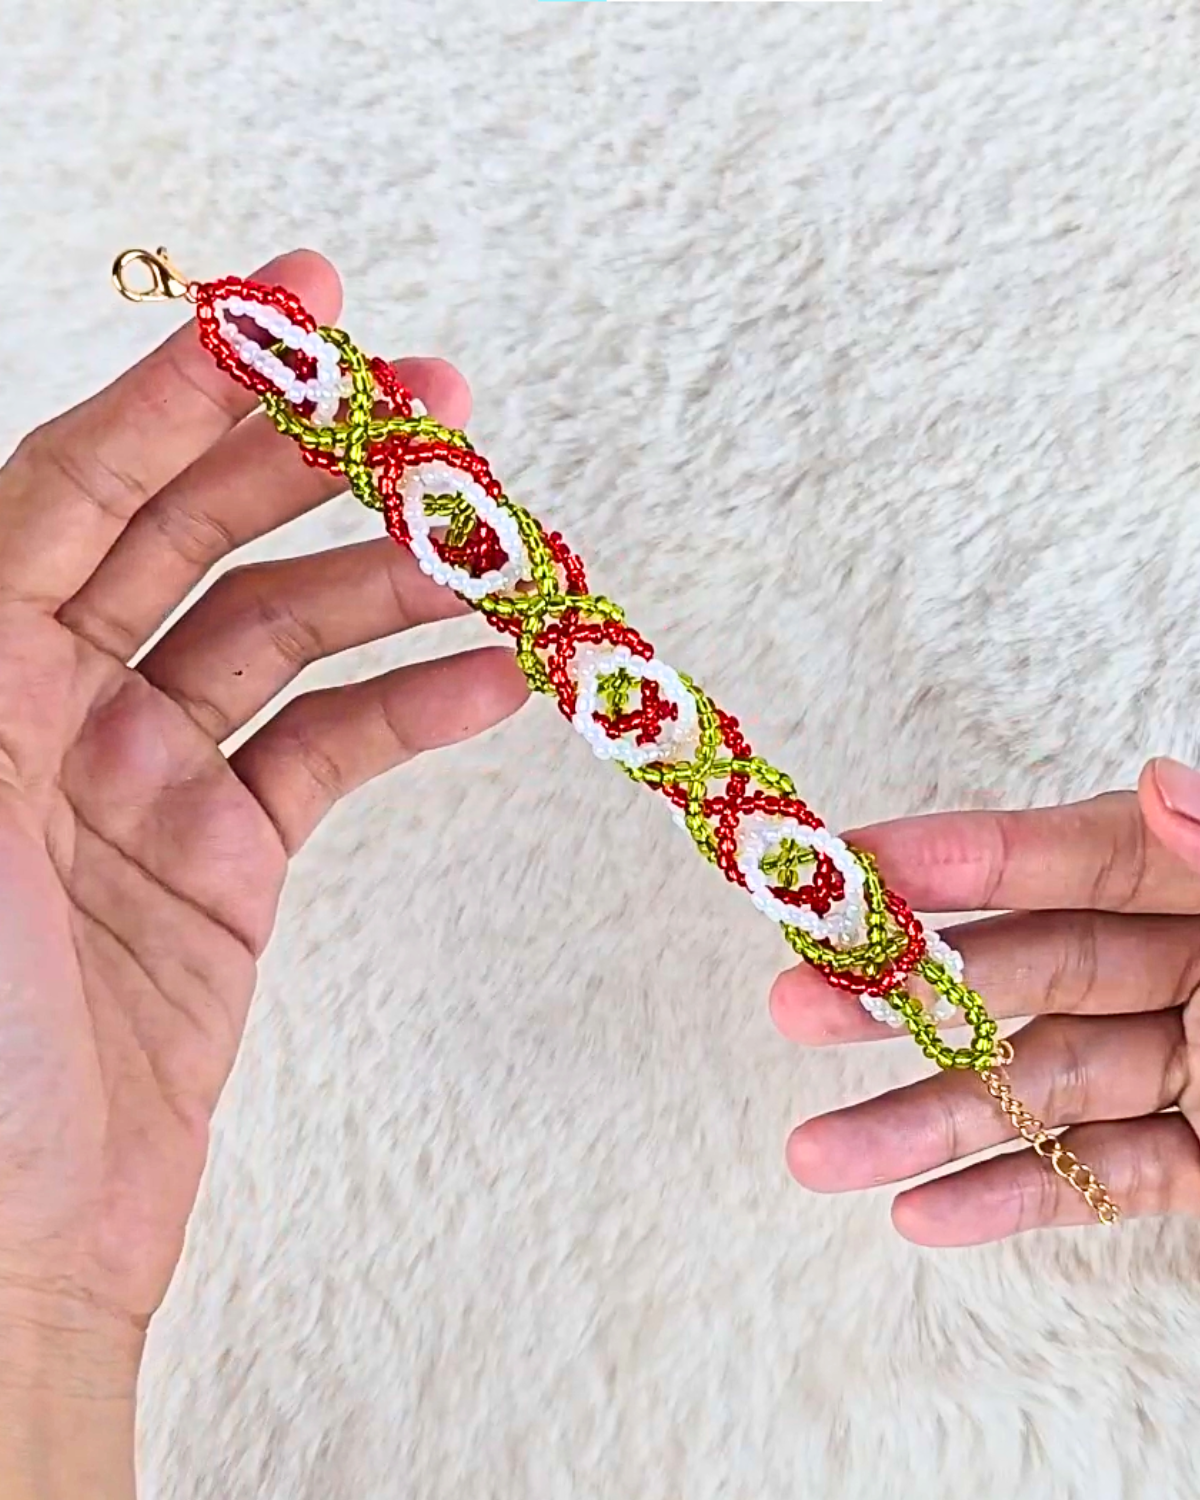
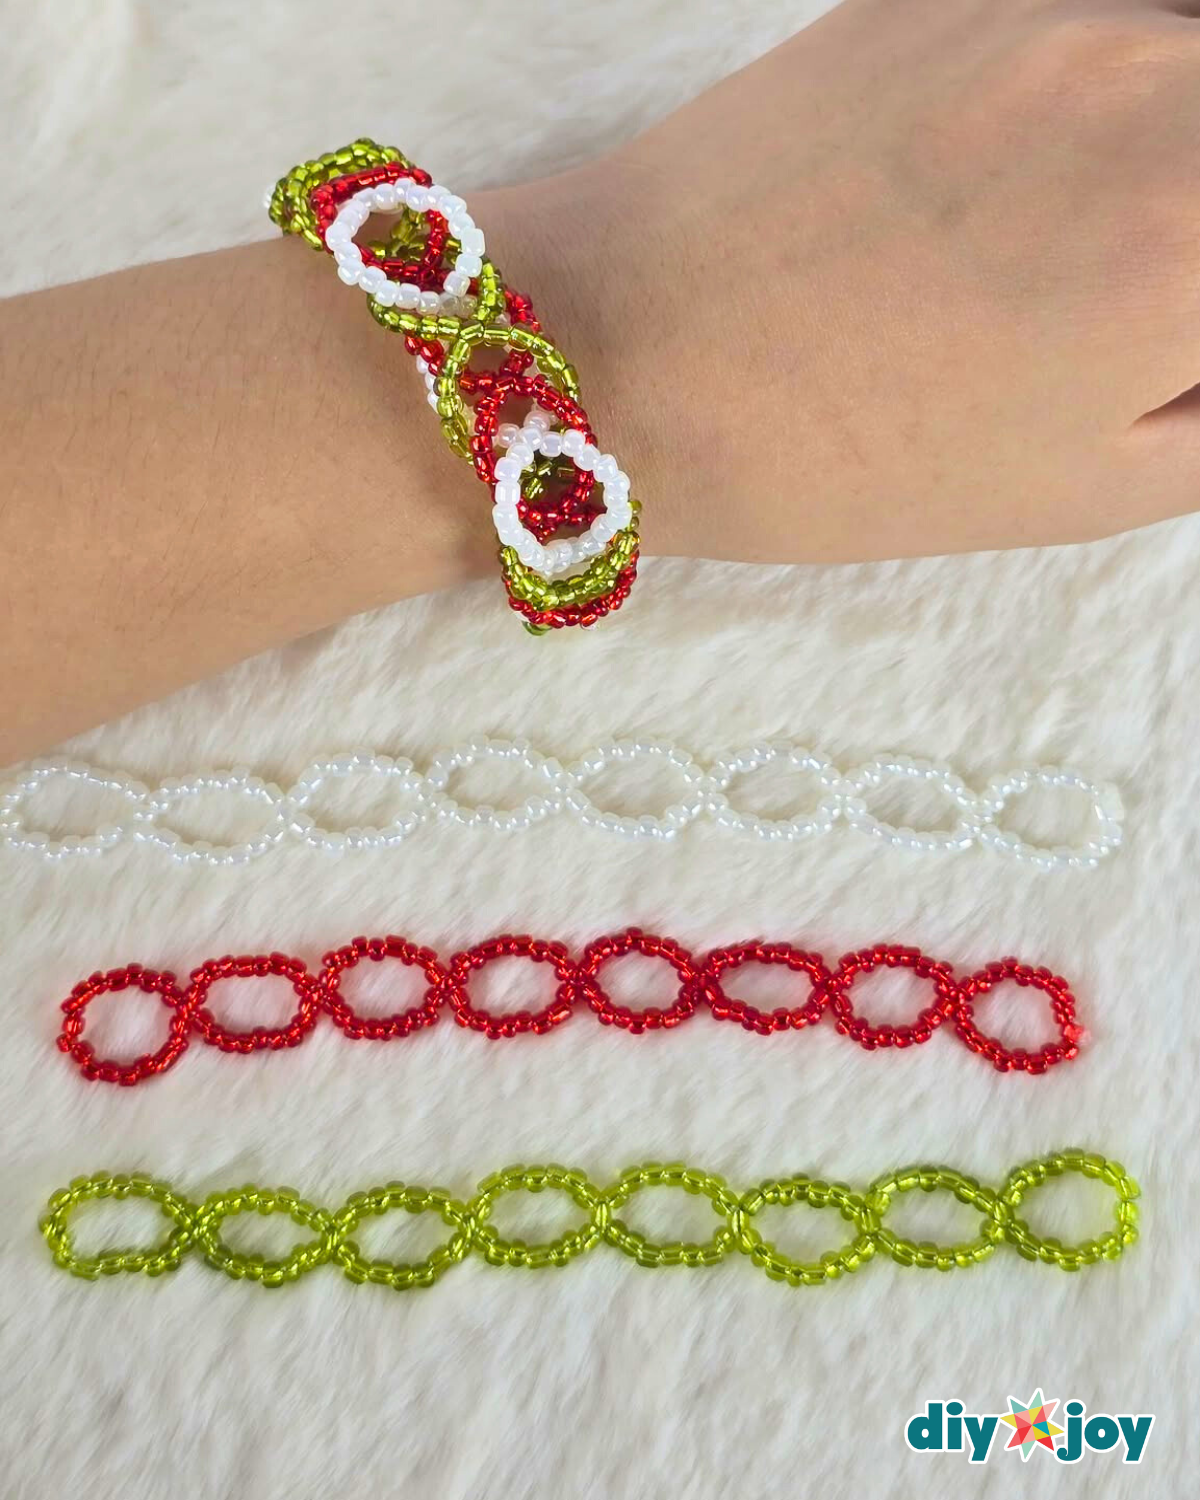
Take the red bracelet and thread it through the holes of the green bracelet. Alternate directions as you go—threading up through one hole, then down through the next—until the bracelets are fully woven together. Repeat the same process with the white bracelet, threading it through the holes just as you did before, until the white bracelet is fully woven into the design.Step 5: Secure the Bracelet with the Hook
Thread both ends of the nylon cord through the bracelet chain hook. Cross the ends over each other and tie a tight knot to secure the bracelet. Trim any excess fishing line with scissors for a neat finish. Finally, tie a bracelet chain on one end for the hook to clasp onto.

![]()
⭐ Pro Tips
- Measure your wrist first – Always measure your wrist or the recipient’s wrist before stringing beads to ensure a comfortable fit.
- Double-knot for security – When finishing your bracelet, tie a double knot (or surgeon’s knot) to keep it sturdy and long-lasting.
- Seal the knot – Dab a little clear nail polish or jewelry glue on the knot to prevent it from loosening over time.
What’s Viral Recently

Paper Flowers

Crafts

Paper Flowers

Crafts
*If you love this craft, then visit our official website, follow our Facebook page, and subscribe to our YouTube channel for more!
Beginner-Friendly Beaded Bracelet Tutorial

