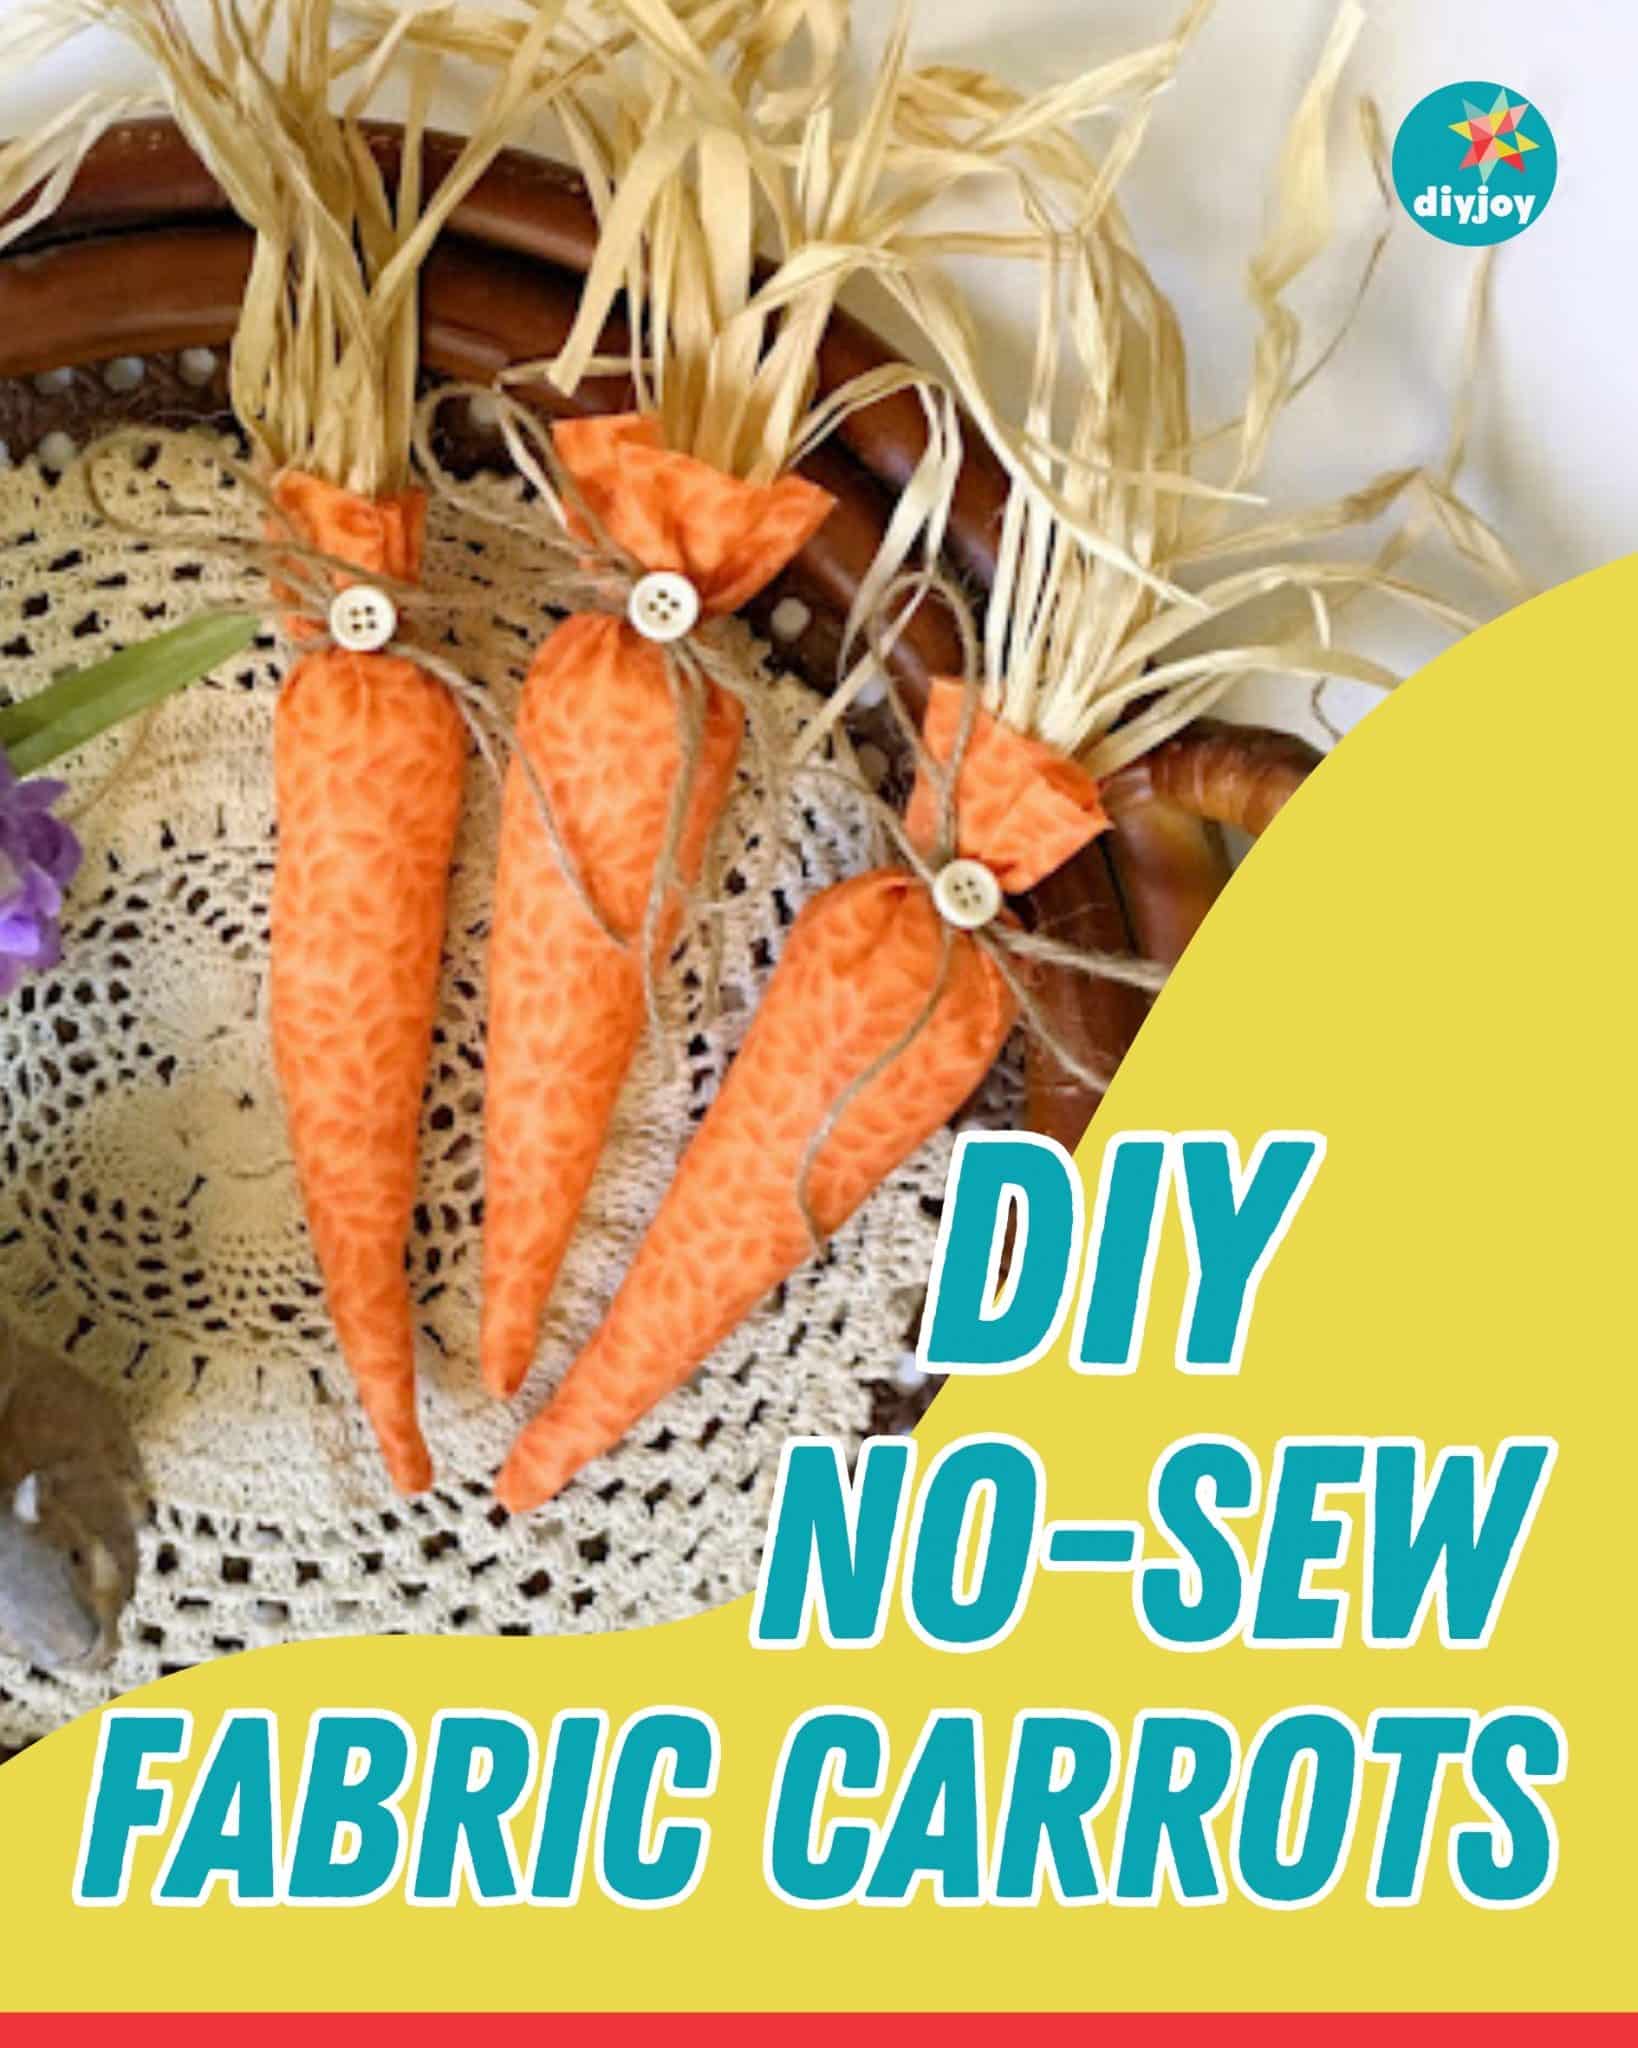
What better way to celebrate the season than by adding a touch of homemade charm to your décor, like these DIY fabric carrots from Pumpkin Emily on YouTube? It’s a quick, easy, and fun DIY project you can make with your friends or family as springtime approaches.
RELATED: Carrot Drawstring Treat Bag for Easter
In this tutorial, Pumpkin Emily will demonstrate how to craft these adorable fabric carrots, perfect for adorning your home or gifting to loved ones. The best part? No sewing is required! Whether you’re a seasoned DIYer or just an individual looking for a fun springtime activity, these charming fabric carrots are sure to add a dash of whimsy to any space.
Materials:
- 5 1/2″ x 9″ paper triangle template
- orange fabric
- scissors
- pen, for tracing
- hot glue gun
- pillow stuffing
- raffia
- a piece of twine
- buttons
Directions:
Step 1
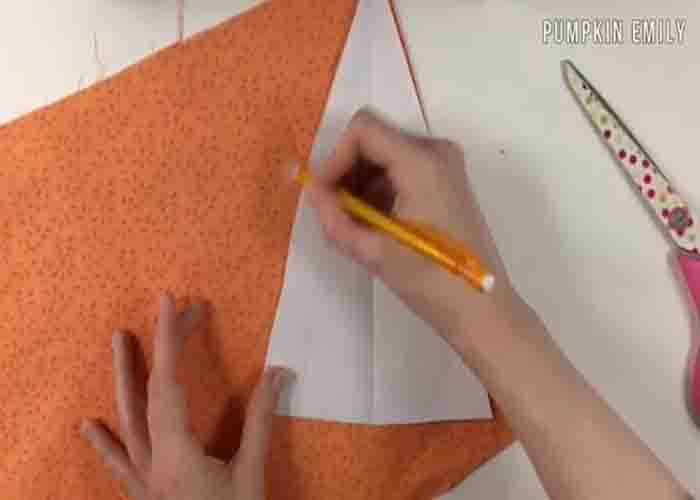
To start, trace a 5 1/2″ x 9″ triangle template on a piece of paper, then cut it out. (You can make other template sizes according to your liking.) Next, place the template onto the back of your fabric and trace it using a pen. After tracing, cut out the triangle. Lay it down, front side facing up, then apply glue on one long side. Once done, take the other long side and fold it over onto the glue. Let it dry. Once dry completely, flip the carrot inside out. Trim the rough edges to make it even.
Step 2
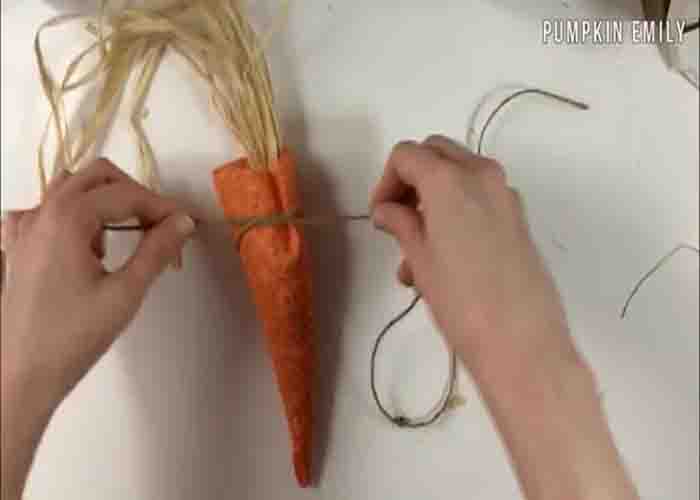
Stuff the carrot with pillow stuffing, leaving some space at the top. (Use a dowel or a pencil to help push the stuffing up to the end of the carrot.) Next, cut about 15 pieces of raffia and bunch them all together. After this, twist the end of the raffia together, put some glue on it to secure them, then put a little bit more, then put it inside the carrot. Tie a piece of twine at the top of the carrot, securing the raffia in place. Glue a button in the middle of the bow twine to finish it.
DIY No-Sew Fabric Carrots Tutorial