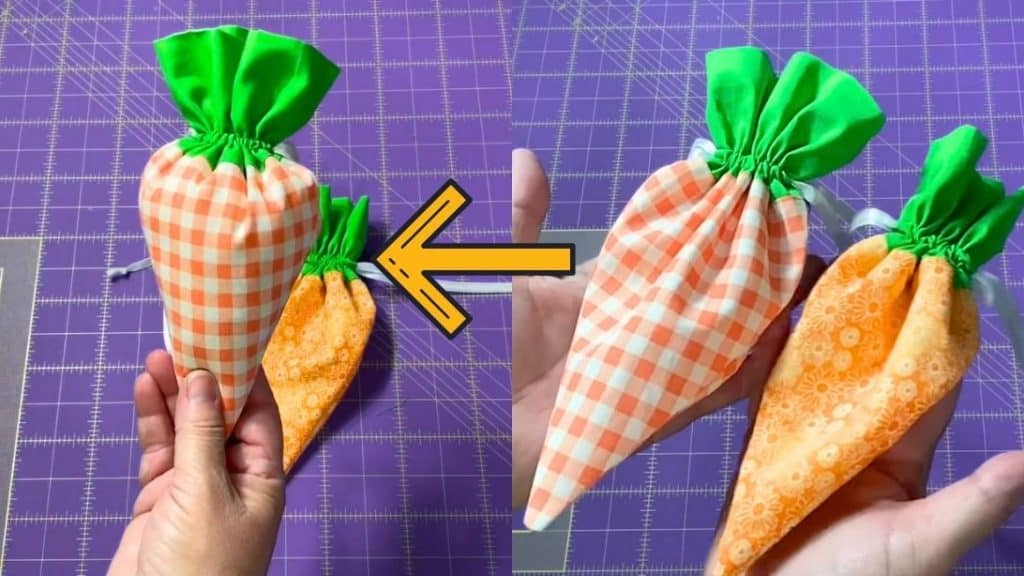
Celebrate Easter with this carrot drawstring treat bag. Isn’t this cute? It’s a small project by RsIslandCrafts – Robin! You can use this to store candies, chocolates, or gifts. If you don’t want to use it as a treat bag, you can make it into a decor piece by stuffing it with fiberfill. Make them into different sizes for variation.
Materials:
- 2 pieces of 6″ by 7″ orange fabric rectangles
- 2 pieces of 6″ green squares
- 15 to 18 inches long quarter-inch ribbon
[social_warfare buttons=”facebook,pinterest,twitter,whatsapp”]
Instructions:
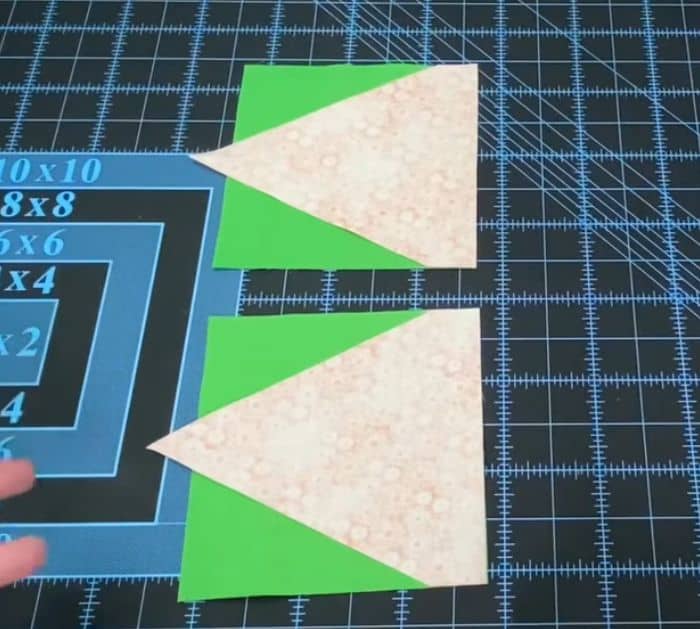
Step 1:
Fold the orange rectangles in half lengthwise wrong sides together. Make sure the folded edge is on the left.
Step 2:
Measure 1 inch from the upper right corner towards the bottom, then mark it. Place your ruler in a diagonal position from that point to the bottom left corner and cut using your rotary cutter. If you don’t have one, you can draw a line first and cut it using scissors. Set aside the right pieces.
Step 3:
Place the triangles on top of the green squares, right side down. Stitch on the straight edge with a quarter of an inch seam allowance. Once done, press one of the seams on the green fabric and the other on the opposite side.
Step 4:
Place the carrots right sides together, matching the green and orange fabrics. Pin them together. Sew it all the way around except for the top edge of the green fabric. Trim the excess fabric on the corners and press the green seams open.
Step 5:
Fold the green fabric up to the stitching line. From the end of the green fabric, measure 3/8 of an inch and draw a line. Make the next line, half an inch up from the previous one. Repeat on the back. Secure it with pins.

Step 6:
Flip the fabric right side out and sew on the lines.
Step 7:
Take a seam ripper and carefully remove the stitching on the two edges between the two lines.
Step 8:
Put a safety pin on the end of one ribbon and insert it around the opening from the right side. Repeat with the other one but insert it on the left side. Tie the ends into a knot.
Carrot Drawstring Treat Bag for Easter