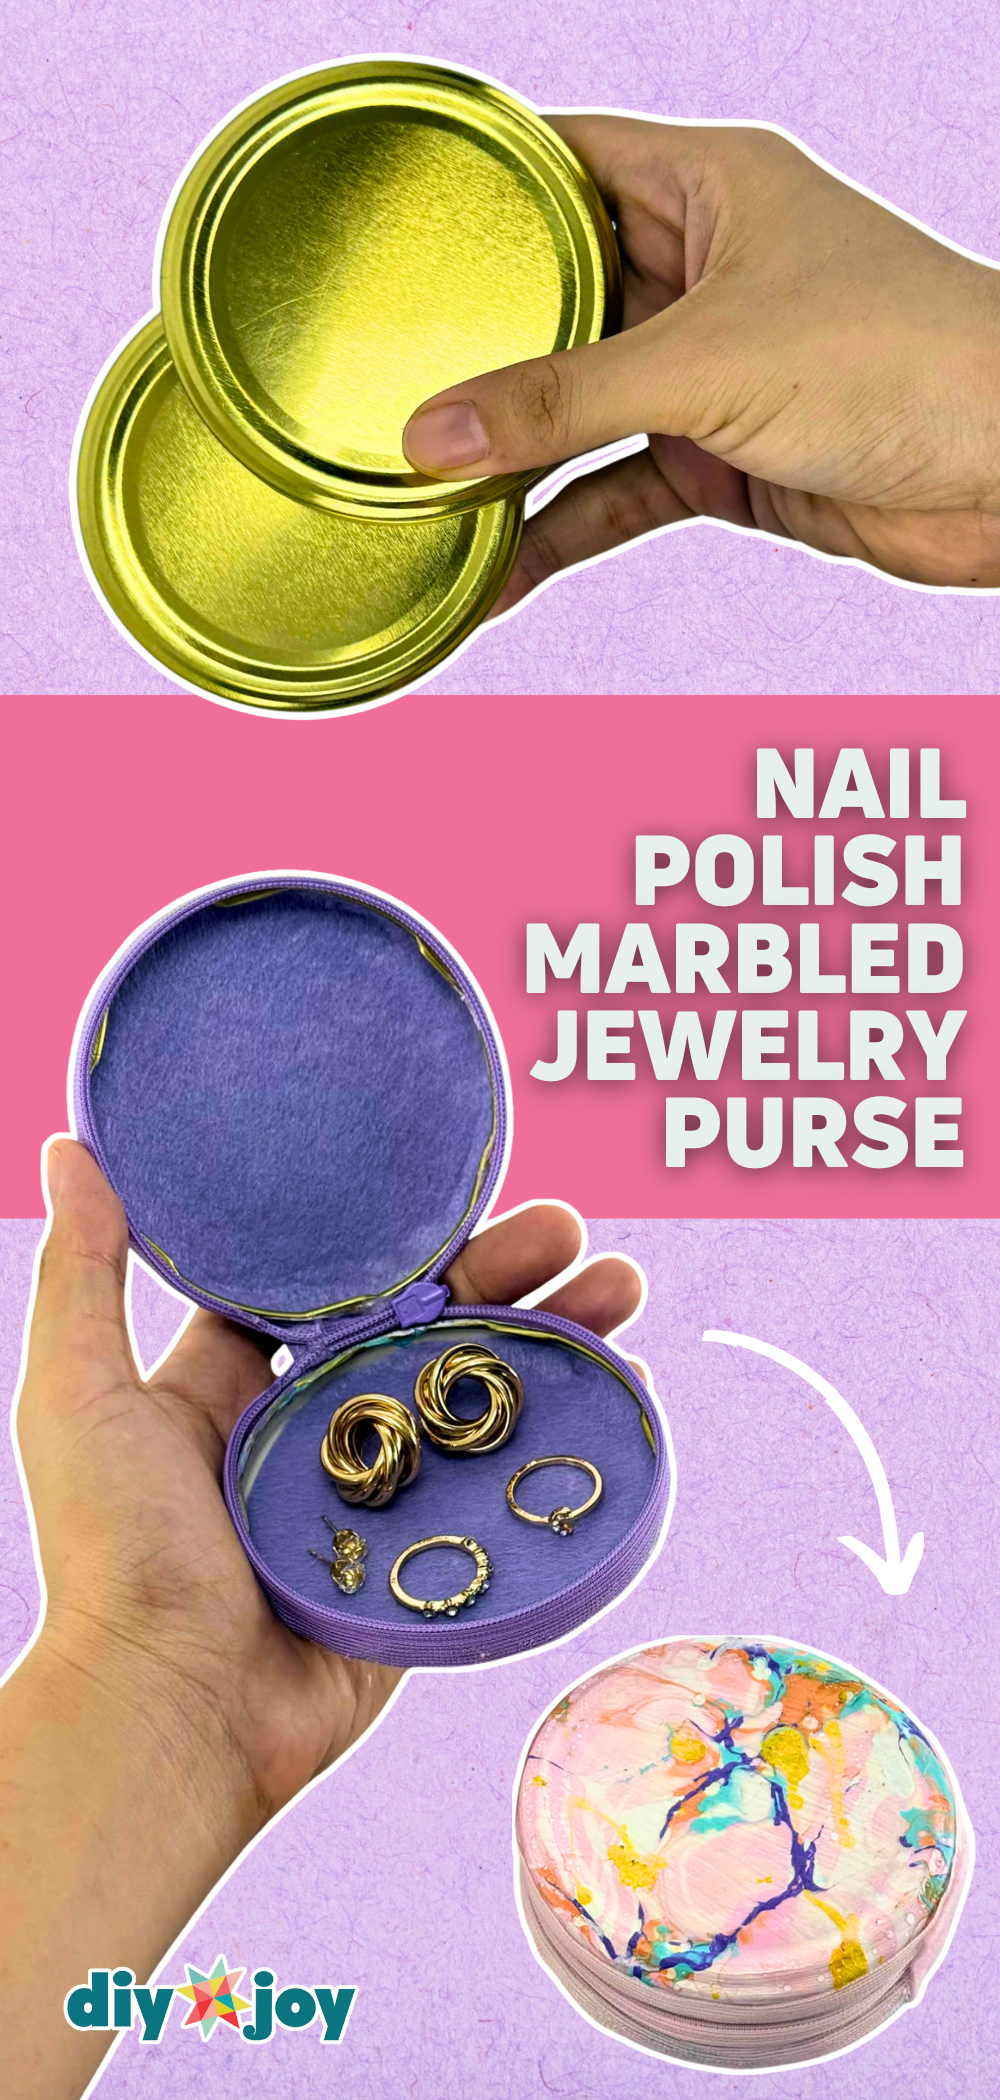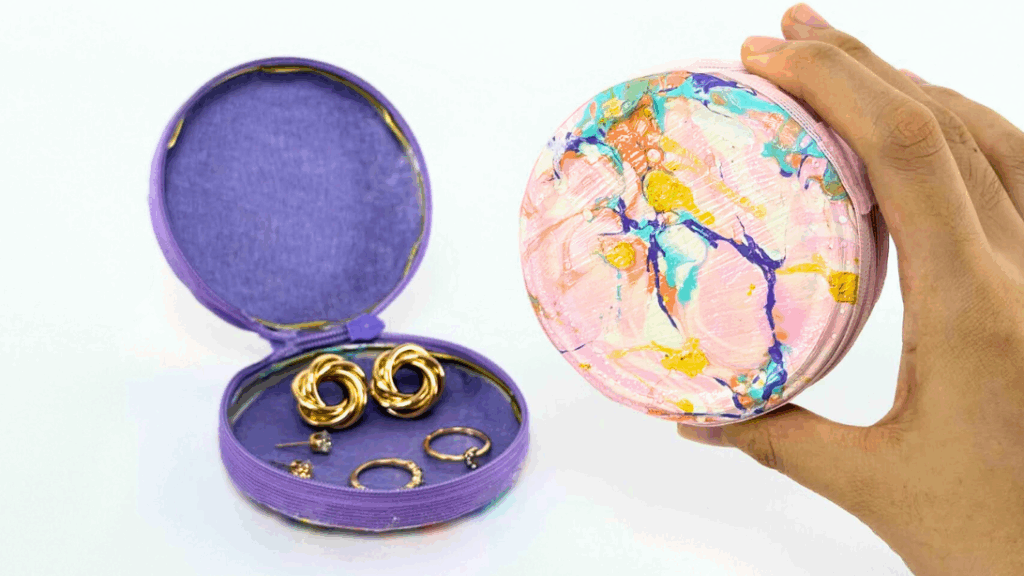
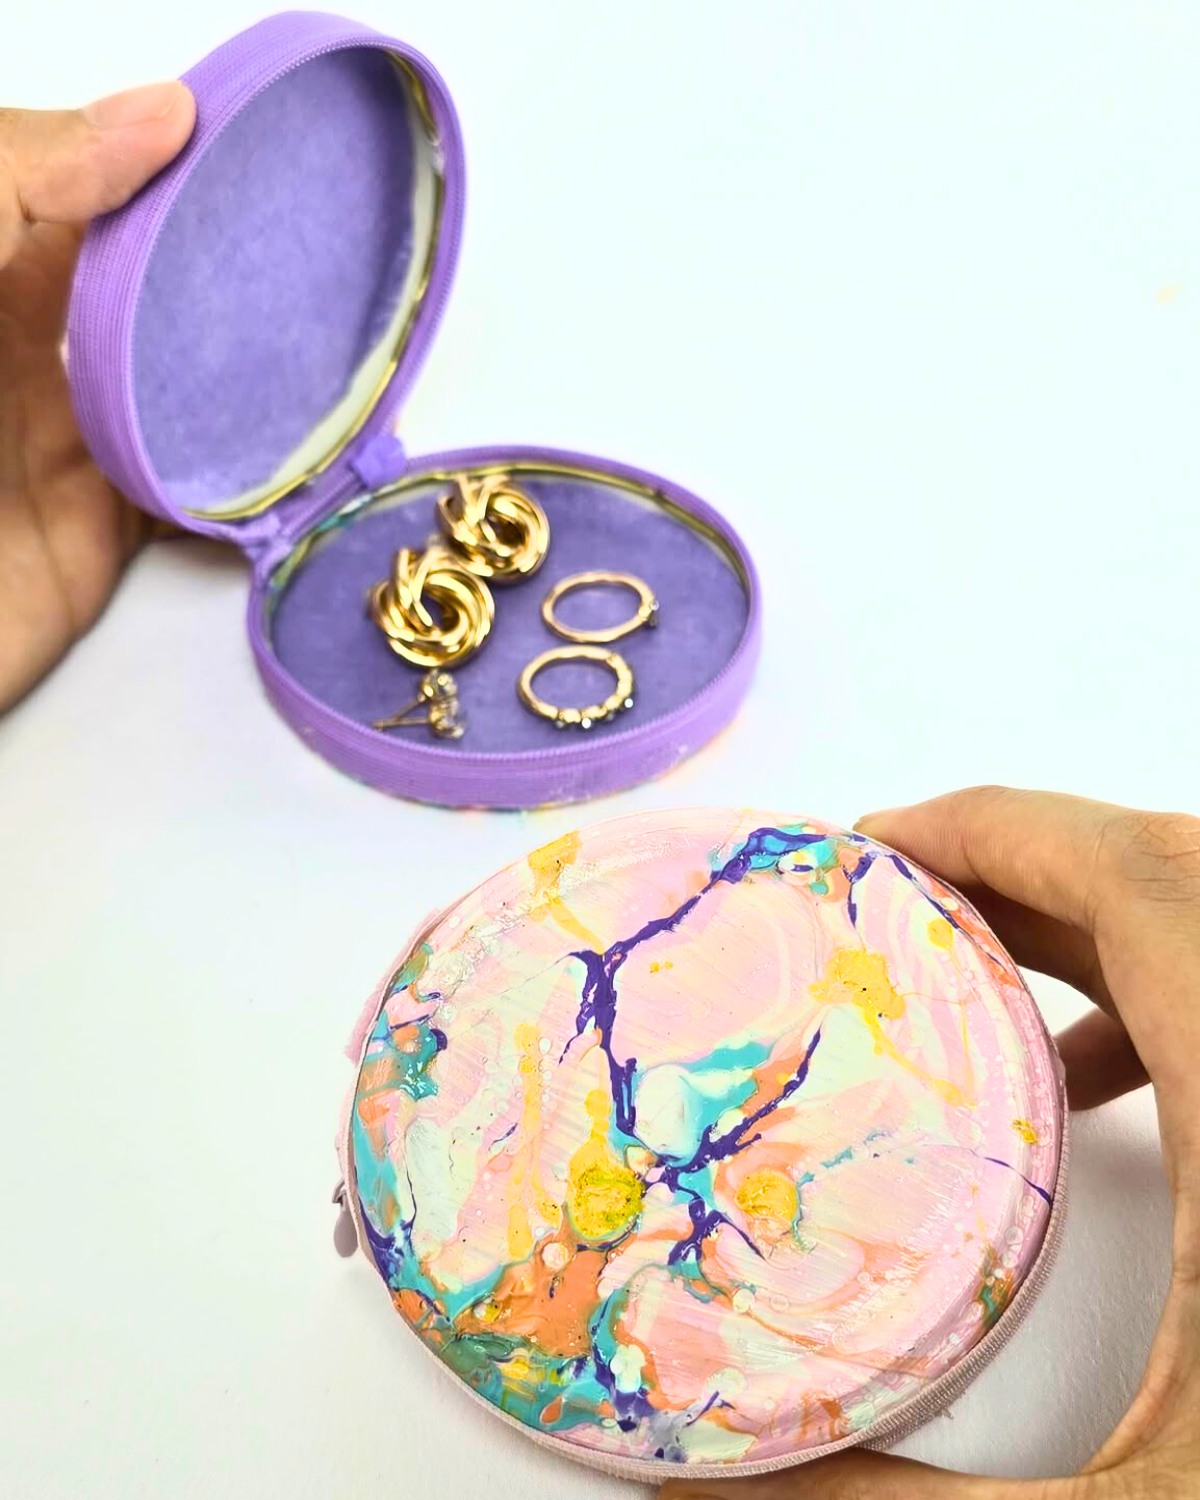
Marbling is a classic technique used to create colorful, patterned designs on everything from paper and fabric to ceramics. Traditionally, it involves paints, inks, or special kits, but you can achieve similar results using nail polish, a simple and budget-friendly alternative. Got old nail polish sitting around? Don’t throw it out just yet—you can use it to make a fun, colorful DIY jewelry purse!
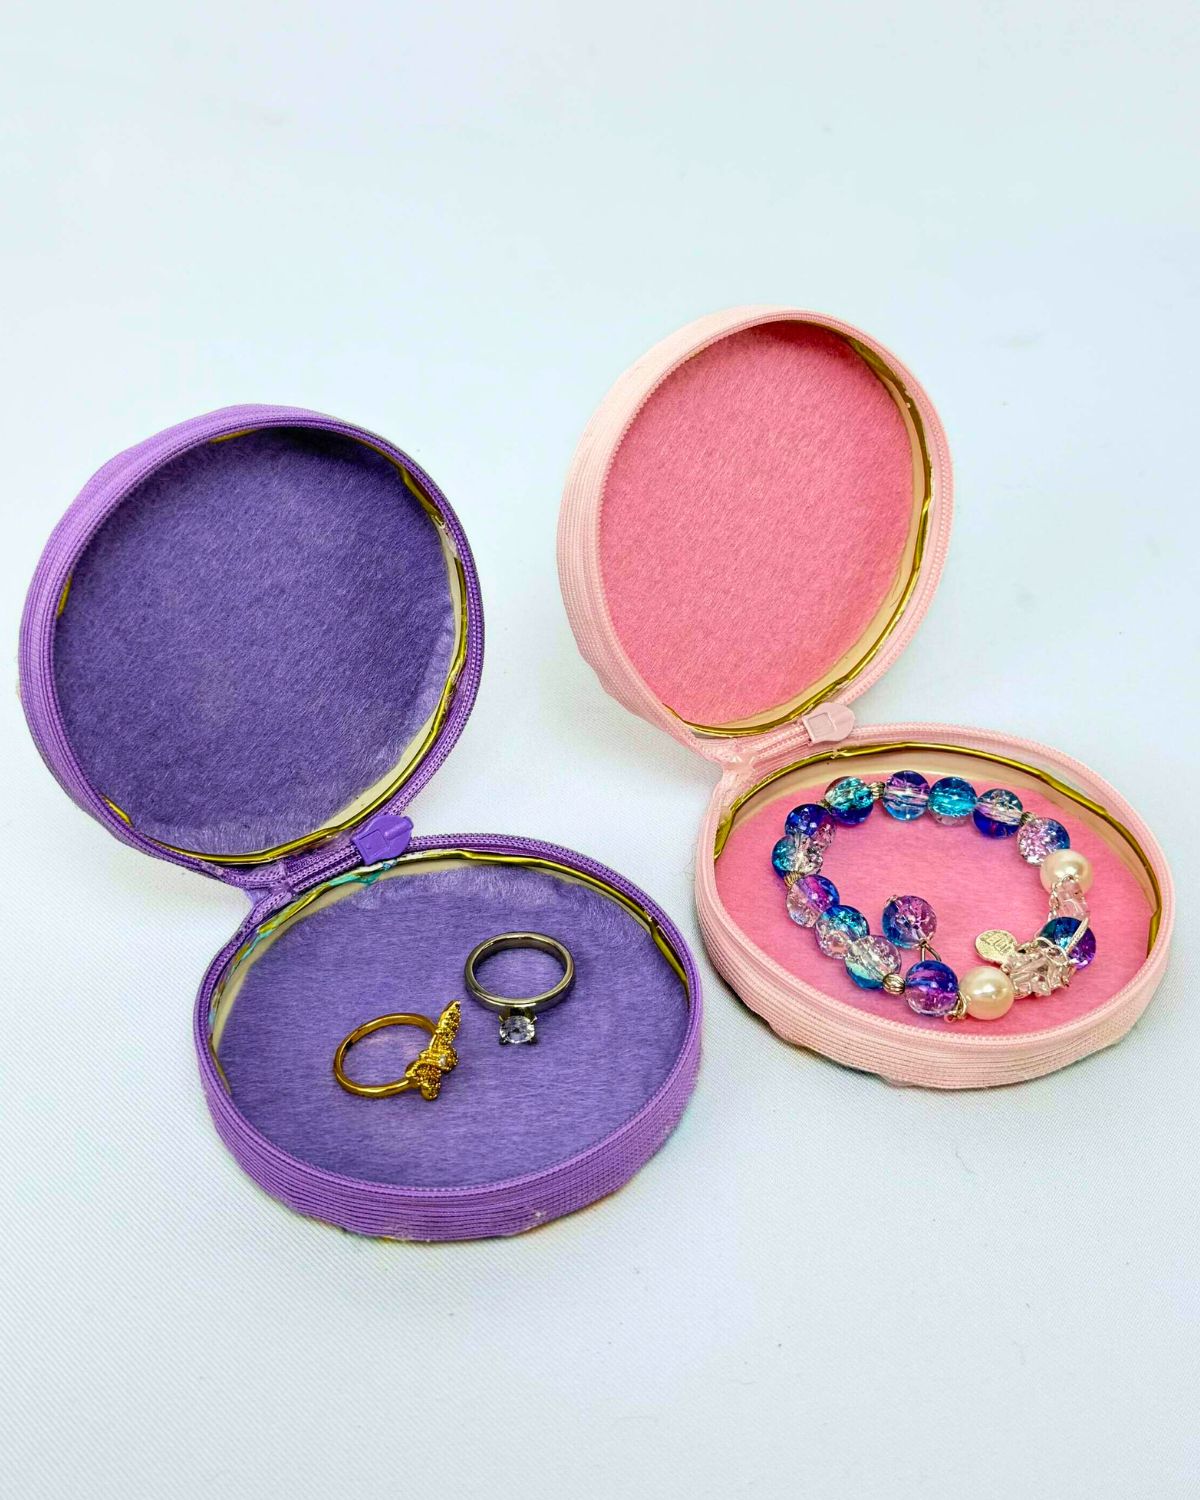
Using two metal lug caps (metal jar caps) as a sturdy base, this project is quick, easy, and completely beginner-friendly. Simply pour the nail polish into a container with water and dip them directly—no swirling or special techniques needed. Each jewelry purse turns out slightly different, making every piece truly one of a kind.
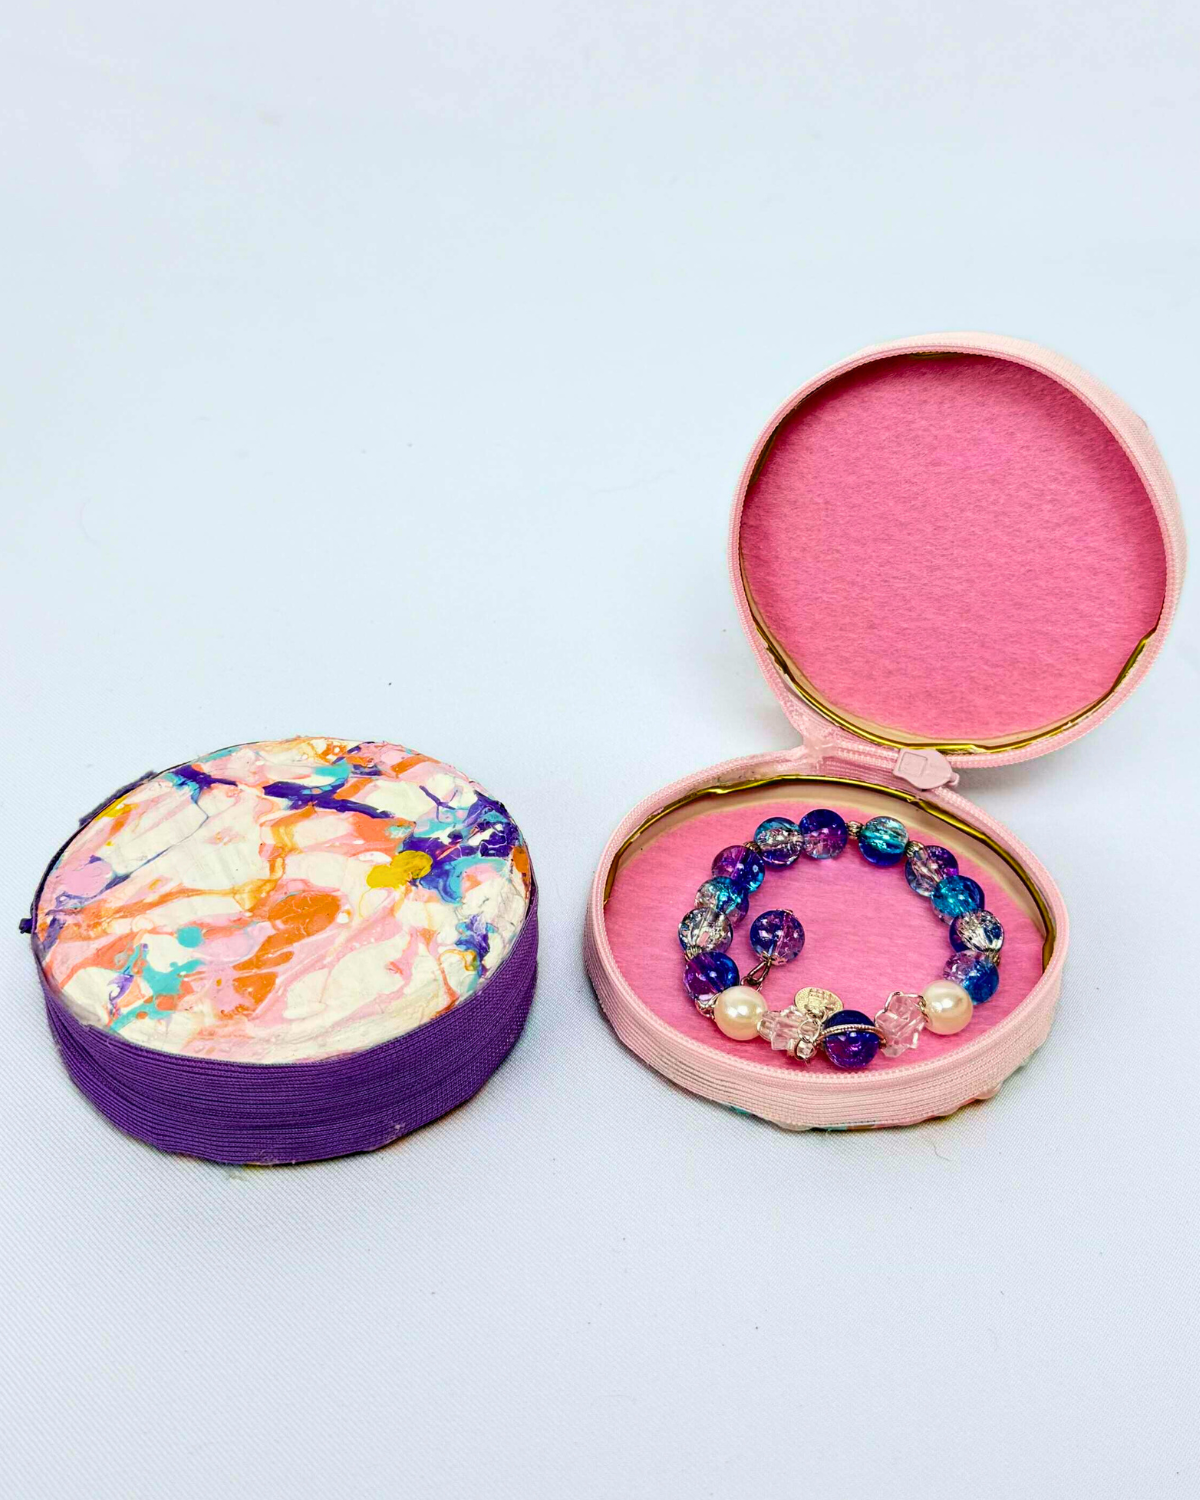
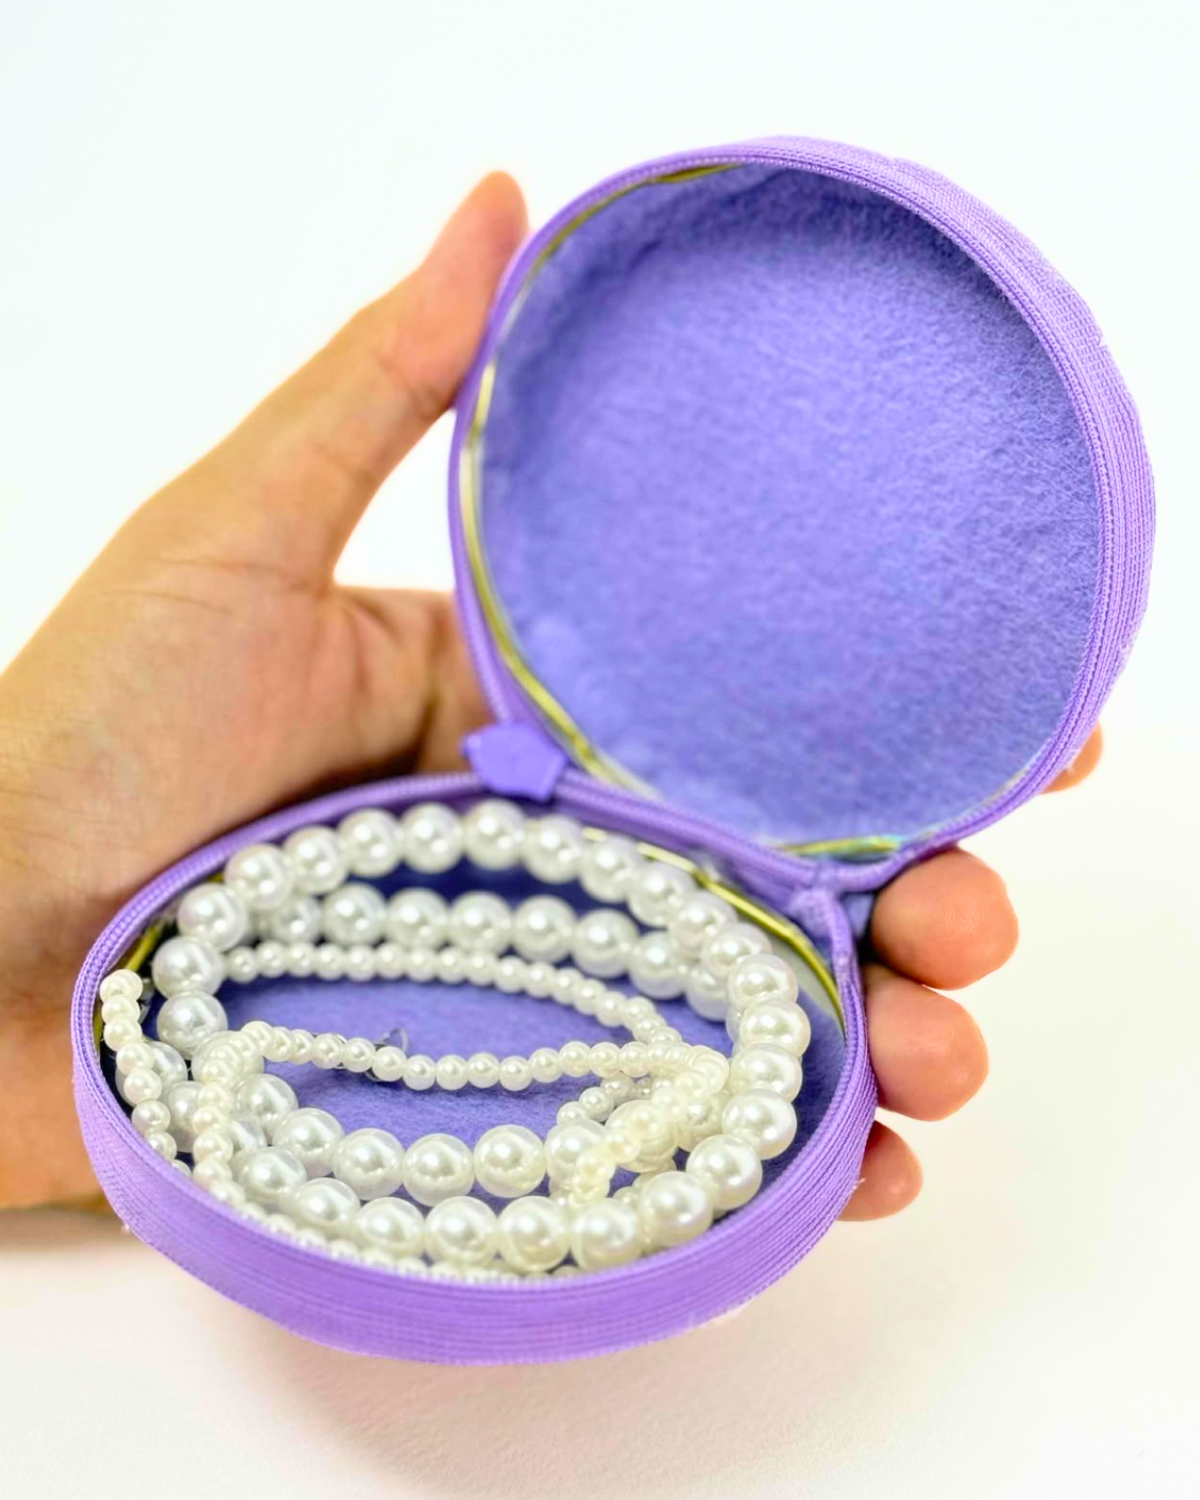
This DIY nail polish jewelry purse is a fun way to repurpose materials while creating a stylish and practical accessory. Combine the two metal caps and experiment with colors to make a personalized purse that’s perfect for gifting, wearing, or even selling. Its compact size also makes it ideal as a travel kit—you can store jewelry, wired earphones, charger cables, or any small cords you want to keep organized on the go.
What You’ll Need for Marbled Jewelry Purse
How to Make a Marbled Jewelry Purse
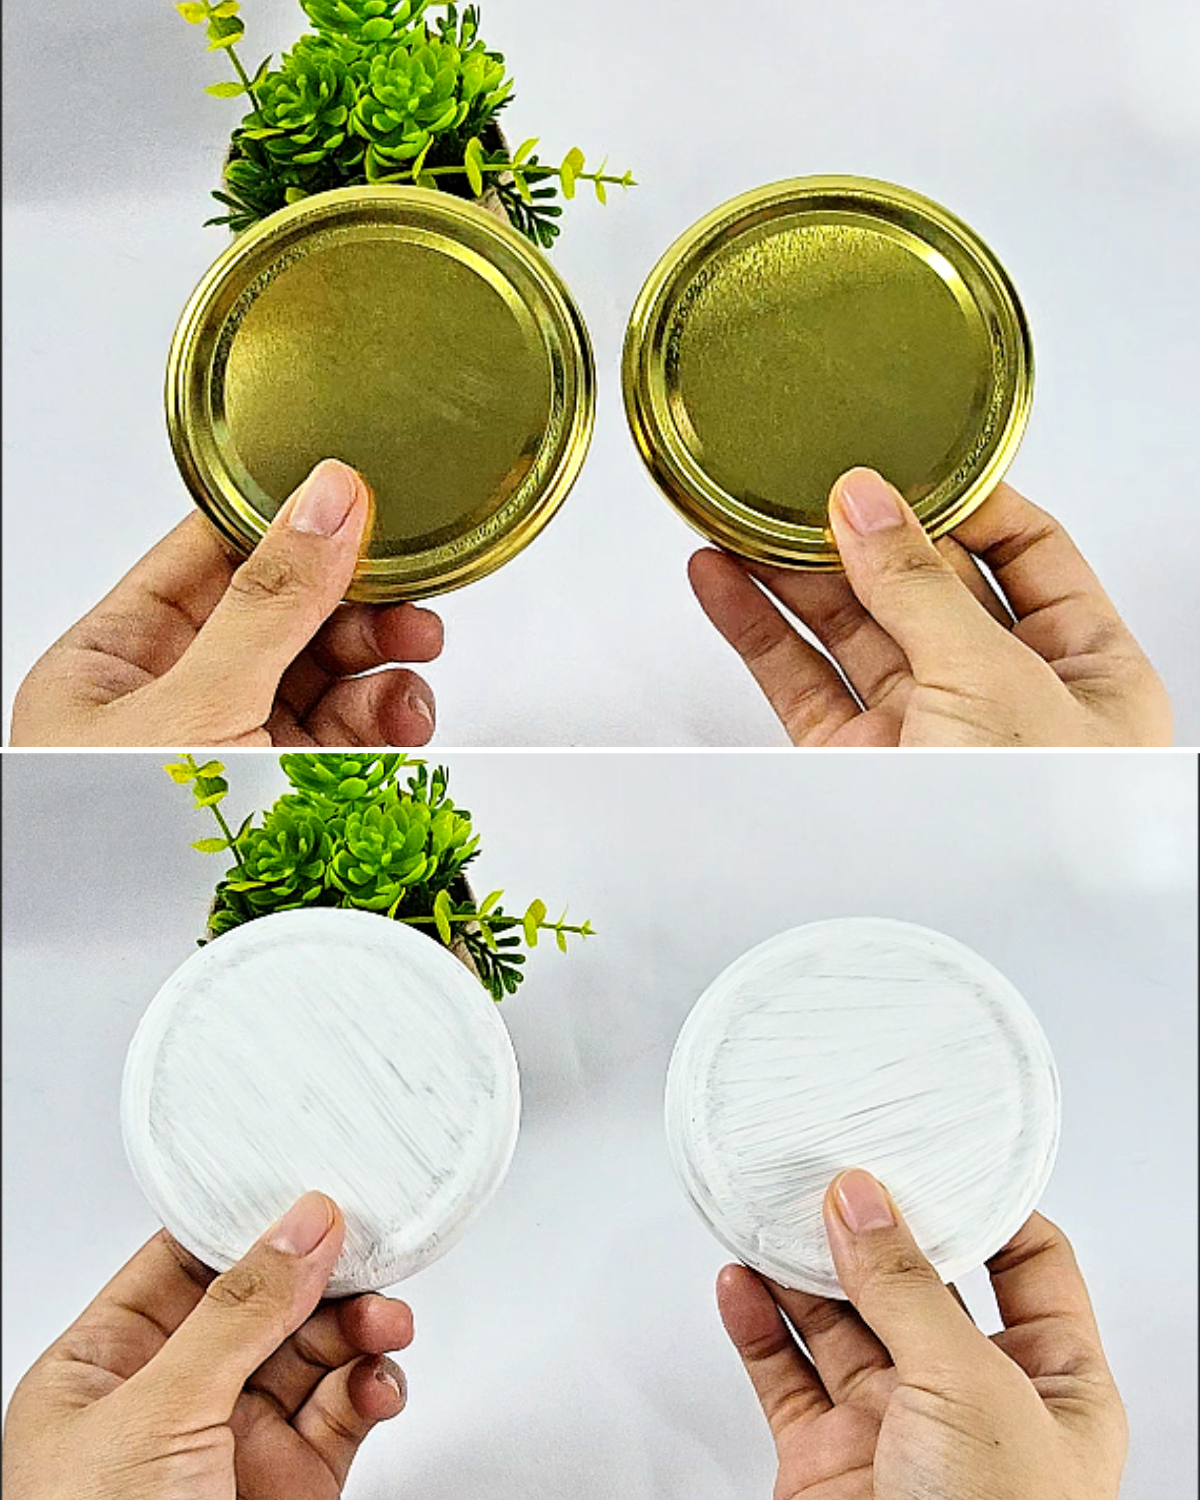
Step 1: Prep the Metal Caps

Take two metal jar caps and make sure they are clean and free of dust. Apply a coat of white primer or gesso to prepare the surface—this helps the nail polish adhere better and ensures a smooth finish.Step 2: Prepare Your Nail Polish and Water
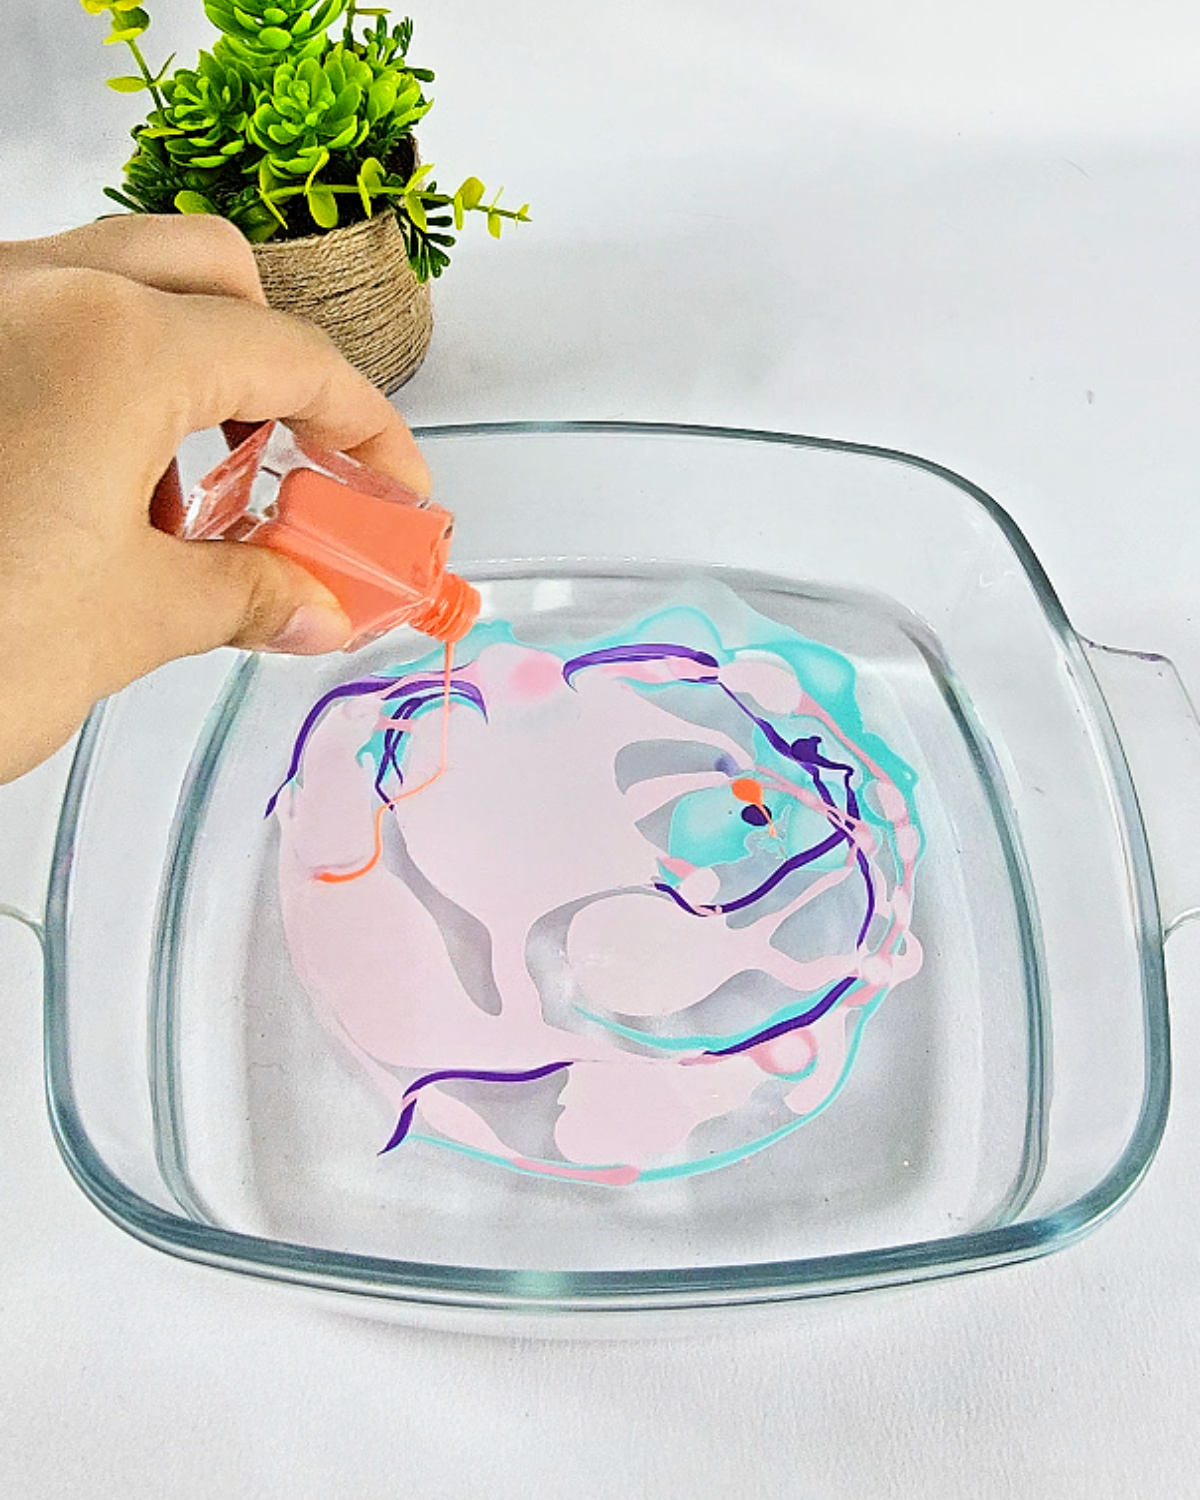
While the primer dries, fill a container with enough water for dipping. Choose the nail polish colors you want to combine for your design. Once the primer is dry, pour your chosen nail polish colors onto the surface of the water.Step 3: Dip the Caps in Nail Polish
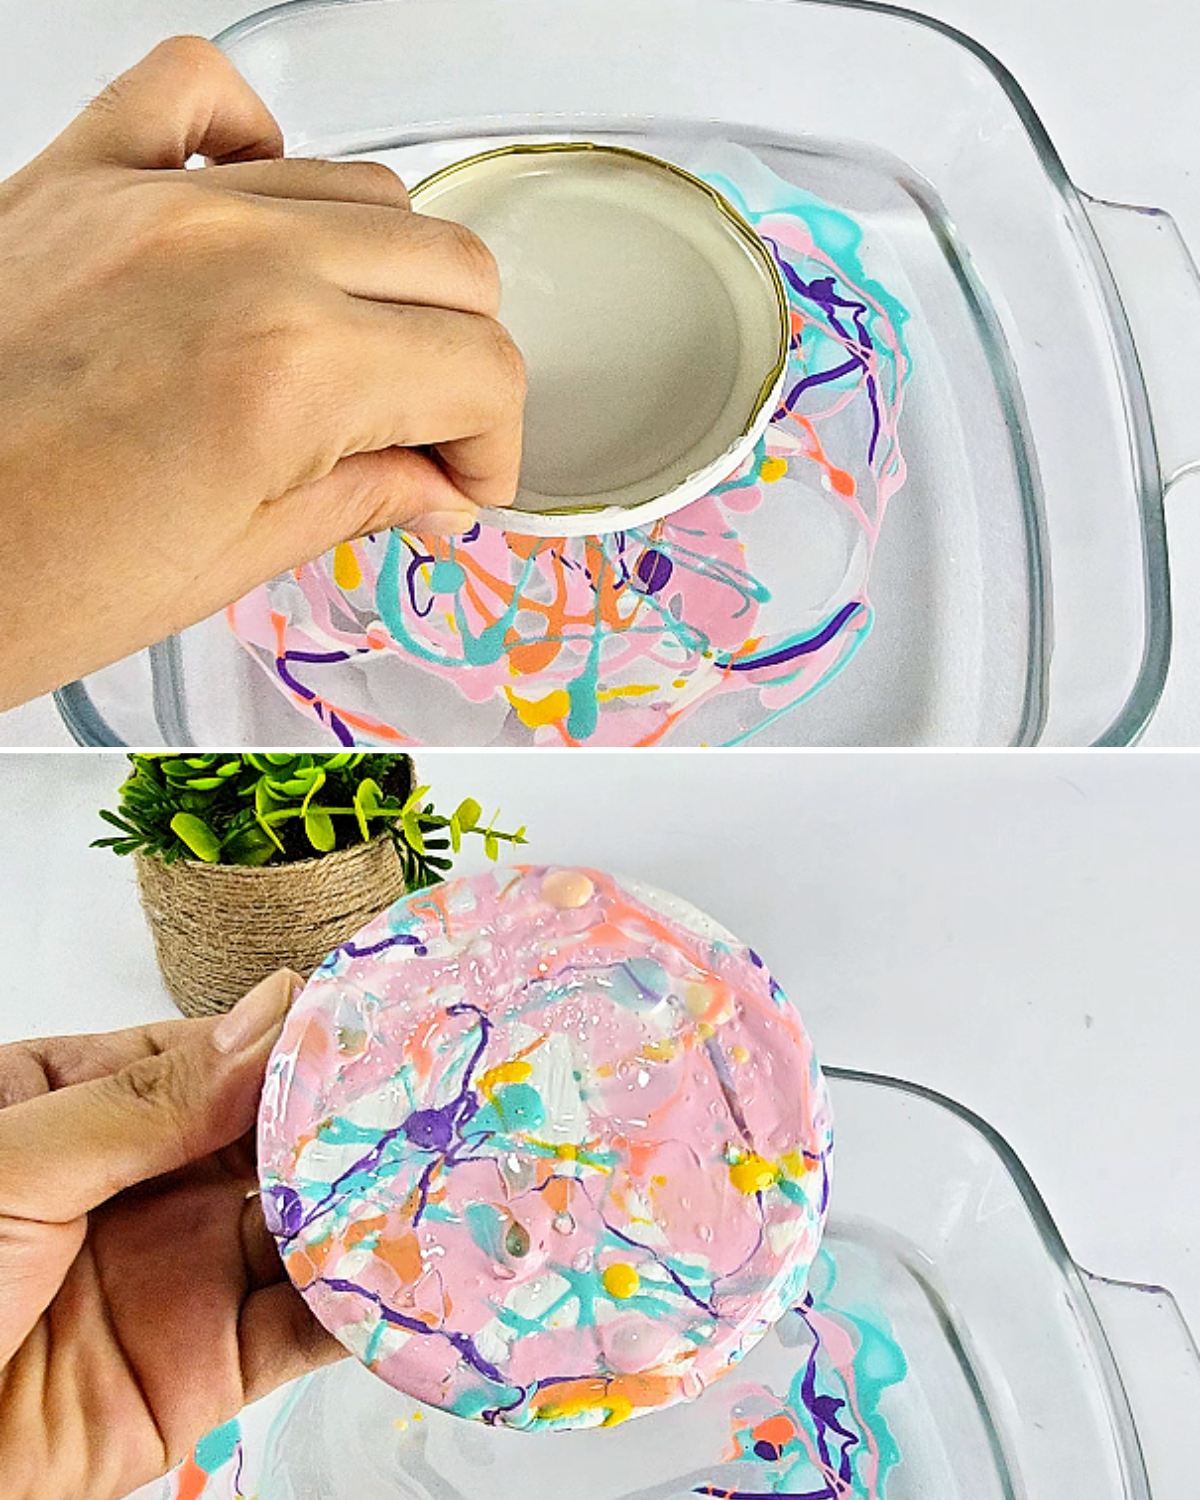
Carefully dip each metal cap into the water, then gently shake it to remove any excess polish from the sides. Place the caps on a clean, safe surface where nothing will stick to the wet polish, and allow them to dry completely.Step 4: Cut and Insert Felt Circles
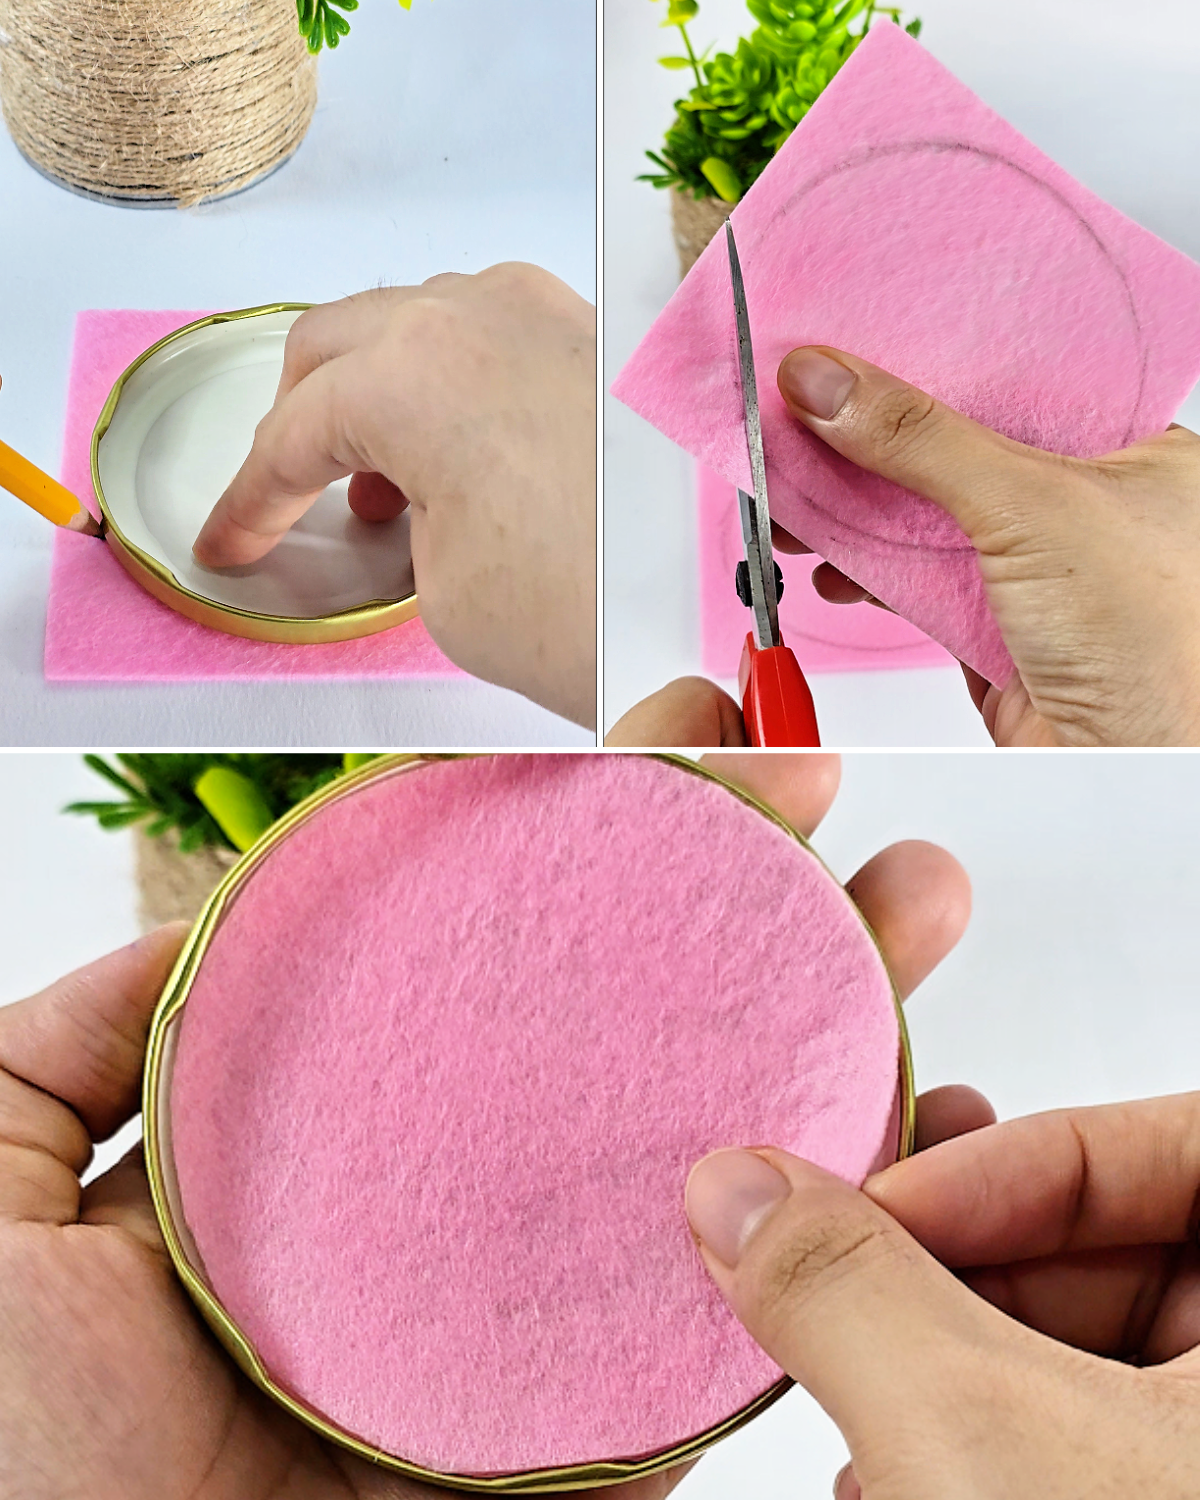
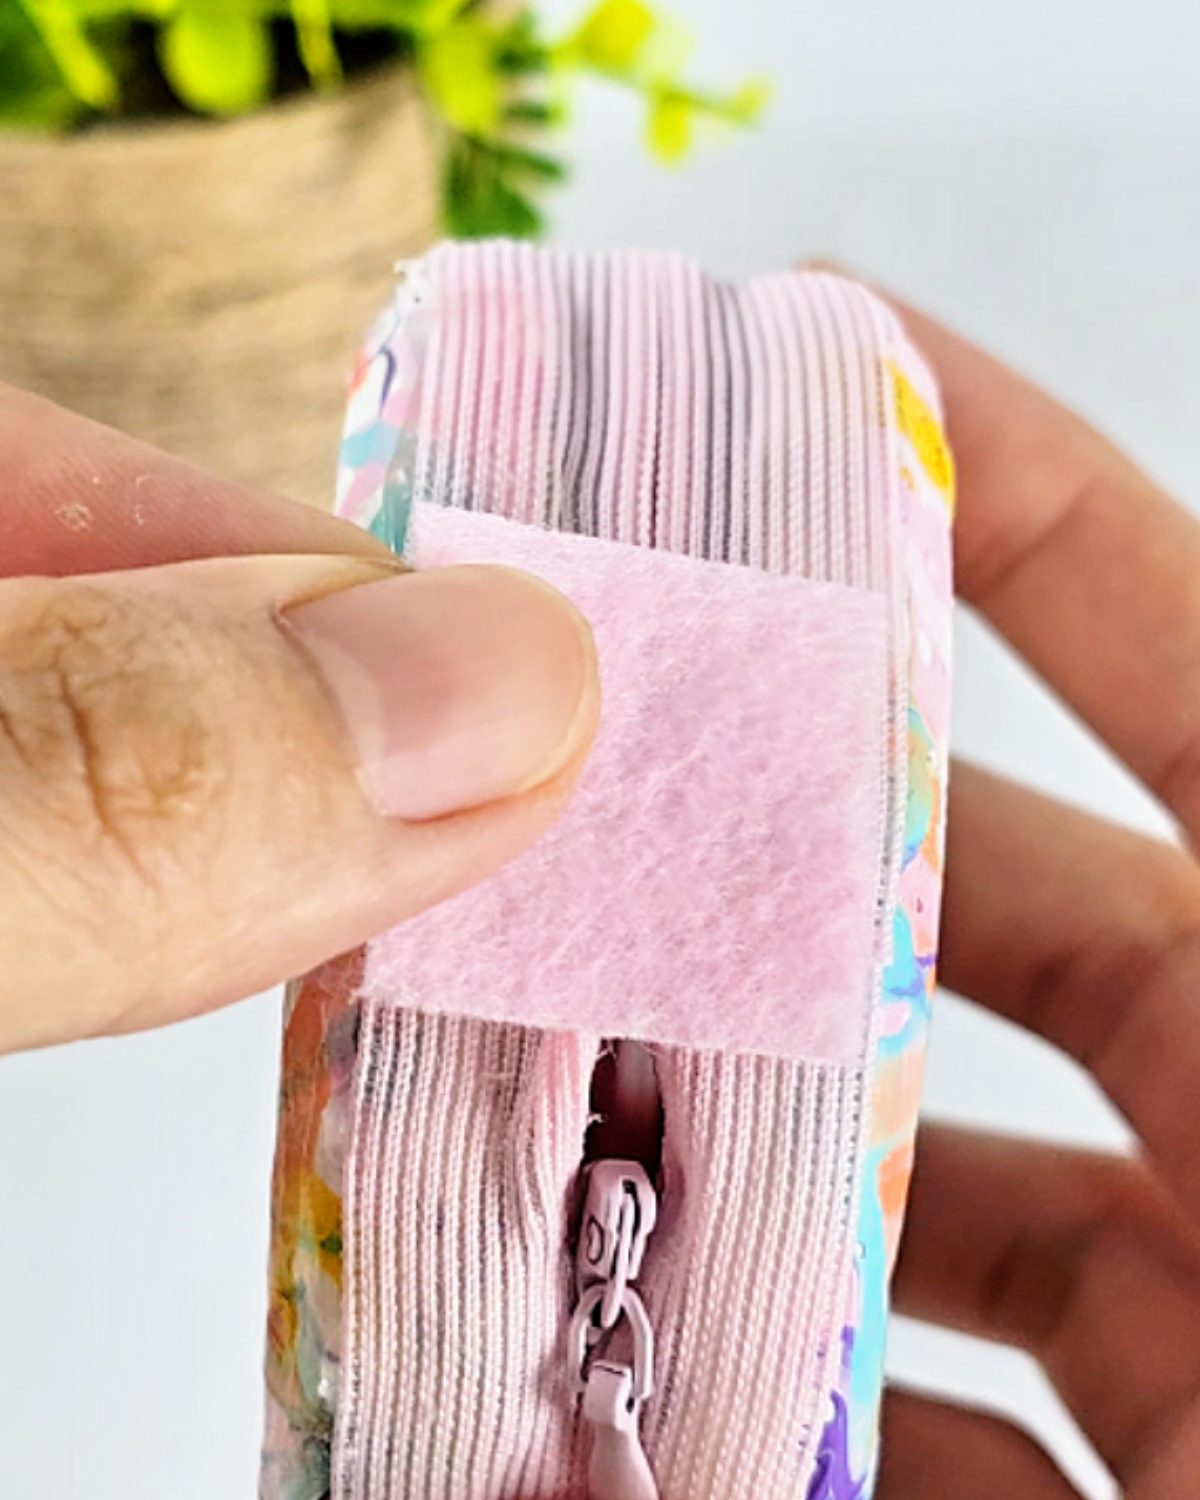
Choose a small piece of felt that coordinates with the nail polish colors on your caps. Trace the metal cap onto the felt and carefully cut out the circle. Make two felt circles and insert one inside each cap to create a neat, finished look.Step 5: Attach the Zipper and Assemble the Purse
Choose a zipper that coordinates with your nail polish colors and cut it to the right length. Use hot glue to attach the zipper around the edge of one metal cap. Once the zipper is secure, hot glue the second metal cap to the other side to complete your jewelry purse.Step 6: Finish and Personalize Your Purse
Cut another piece of felt, preferably the same one you used earlier. Hot glue it to the end of the zipper to hide the raw edge, then add any embellishments you like. Personalize your purse with charms, beads, or decorations to make it truly unique.

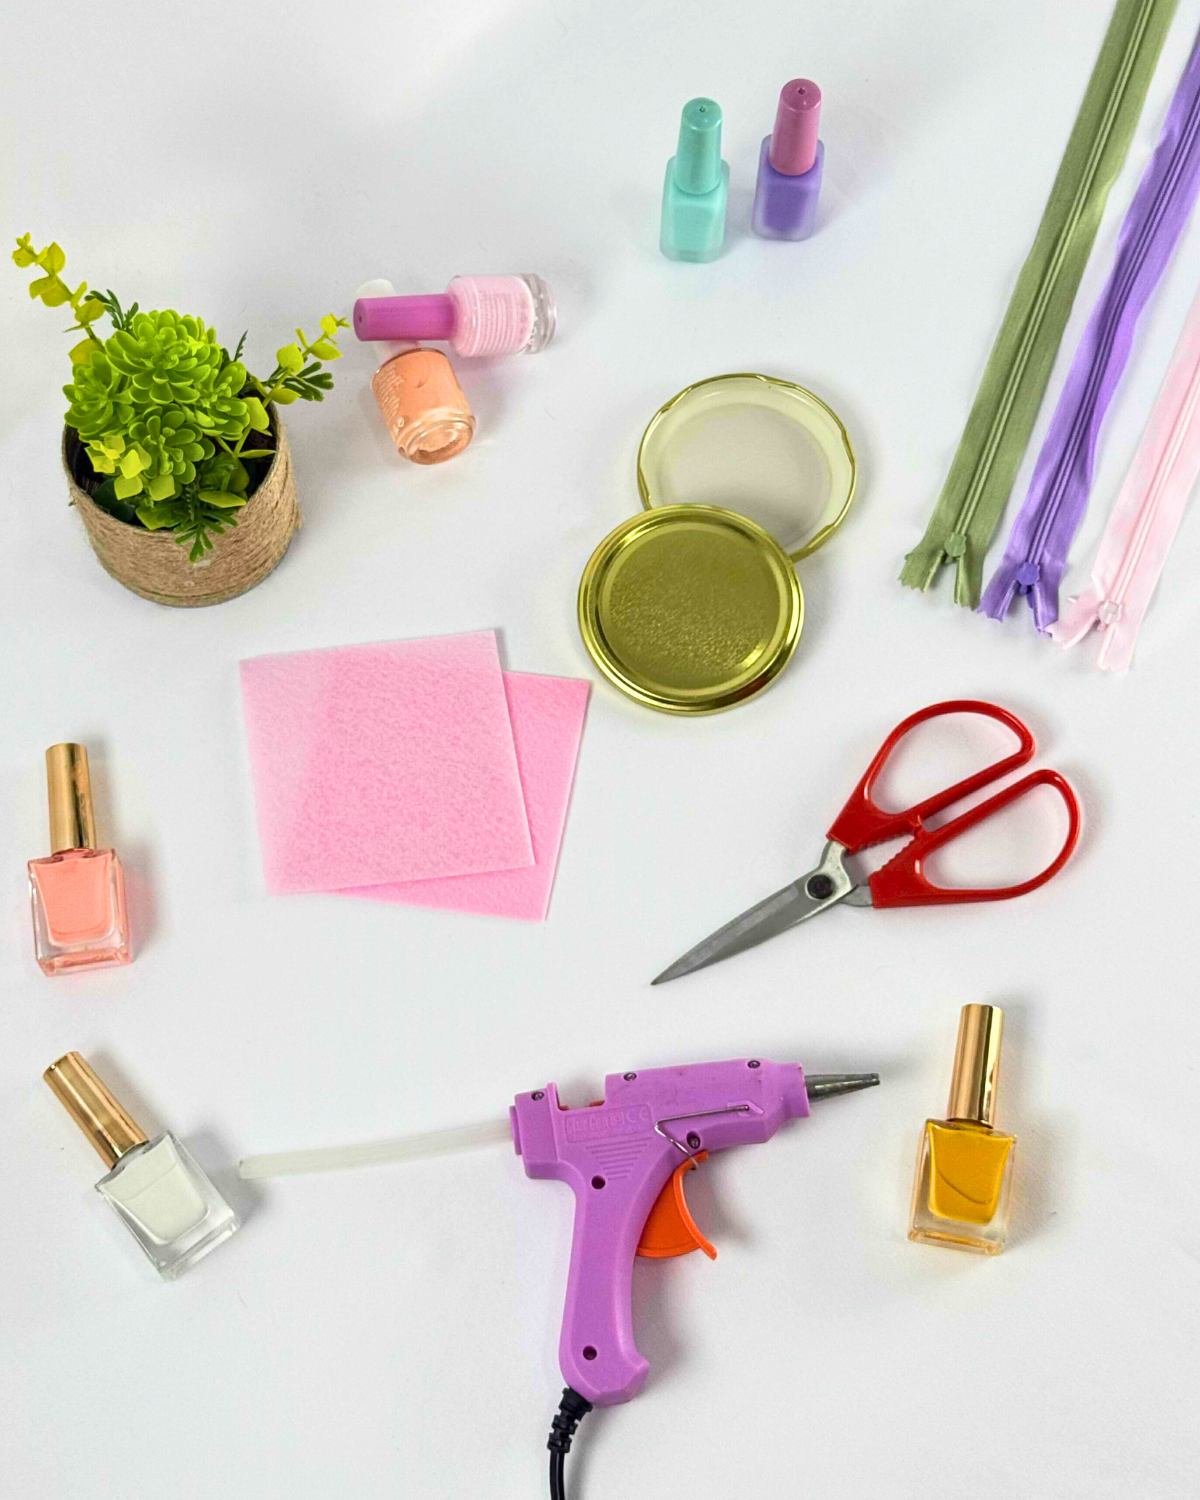
Materials
- Jar Lids, Lug Caps, or Metal Caps
- Felt
- Zipper
- Nail Polish
- Primer Paint
- Glue Gun and Glue Sticks
- Scissors
![]()
Pro Tips 💡
- Use leftover nail polish for this project—it’s a great way to repurpose old polish that’s too thick or almost empty.
- Make sure the primer is completely dry before dipping the caps; this prevents smudges and ensures the polish sticks evenly.
- To hold the nail polish in place and make it more durable, apply a top coat of clear nail polish once it’s dry.
- If the nail polish is taking too long to dry, place the caps directly under sunlight or use a UV/nail lamp to speed up the process.
Must-Try Craft Ideas

Paper Flowers

Crafts

Paper Flowers

Crafts
*If you love this craft, then visit our official website, follow our Facebook page, and subscribe to our YouTube channel for more!
DIY Nail Polish Marbled Jewelry Purse