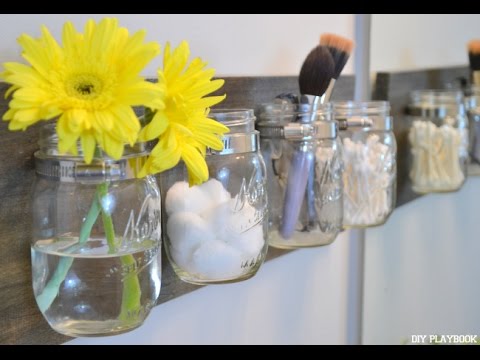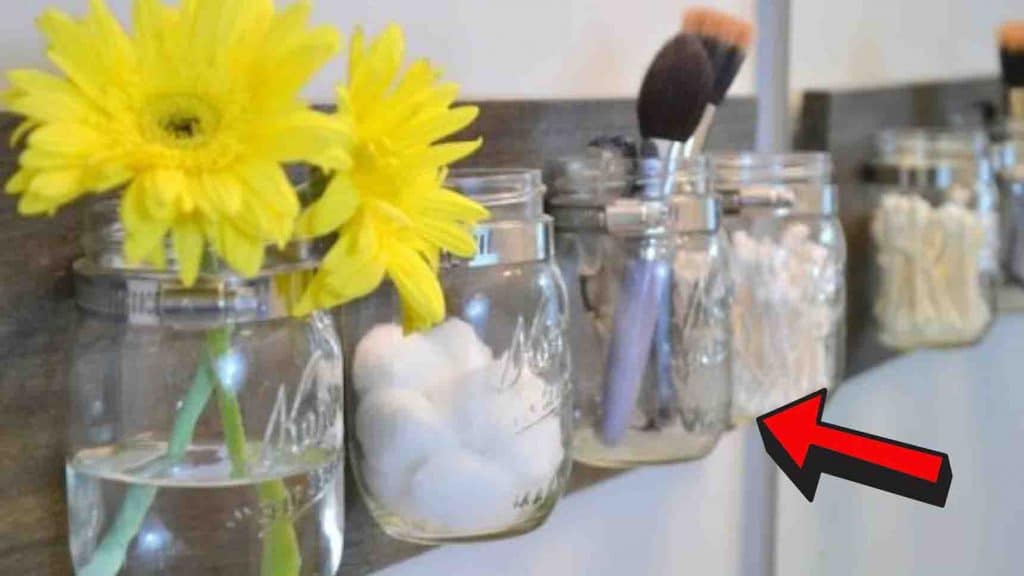
Are you looking for a weekend project to do? This mason jar organizer from DIY Playbook on Youtube is a great project that offers extra storage. It’s super quick and easy to make with just a few materials. Moreover, this organizer will definitely freshen up your space, as it looks so chic! Learn the step-by-step instructions by watching the video tutorial below.
Materials:
- 8, 12, or 16oz mason jars (4 pcs.)
- hose clamps
- wood (about 2 ft x 7″)
- wood stain
- picture hanging kit
- hammer
- rag
- drill
- titanium drill bit
- screws
Directions:
Step 1
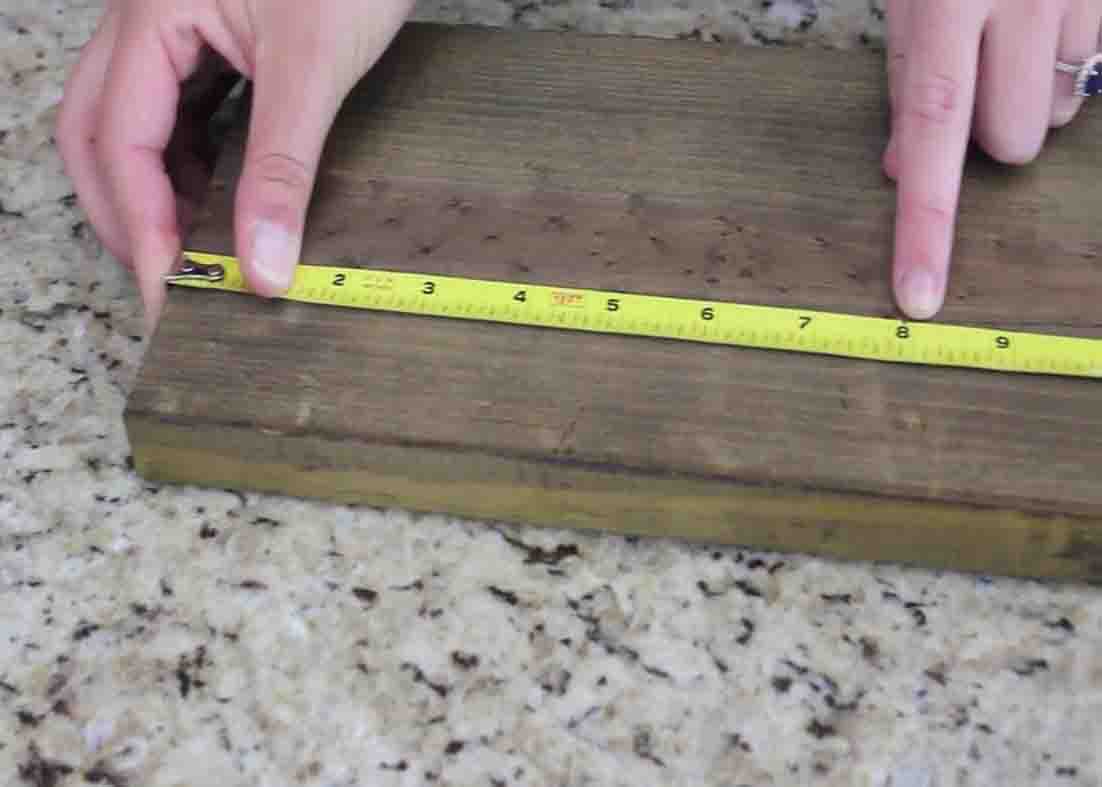
Stain your wood and let it dry for 24 hours. After it dries, measure and hammer the picture hangers into the back of the wood. After this, mark and measure the front of the wood to evenly space out the mason jars. Grab your drill and drill a pilot hole through the clamp into the wood, then change out the drill bit and screw the hose clamp into place.
[social_warfare]
Step 2
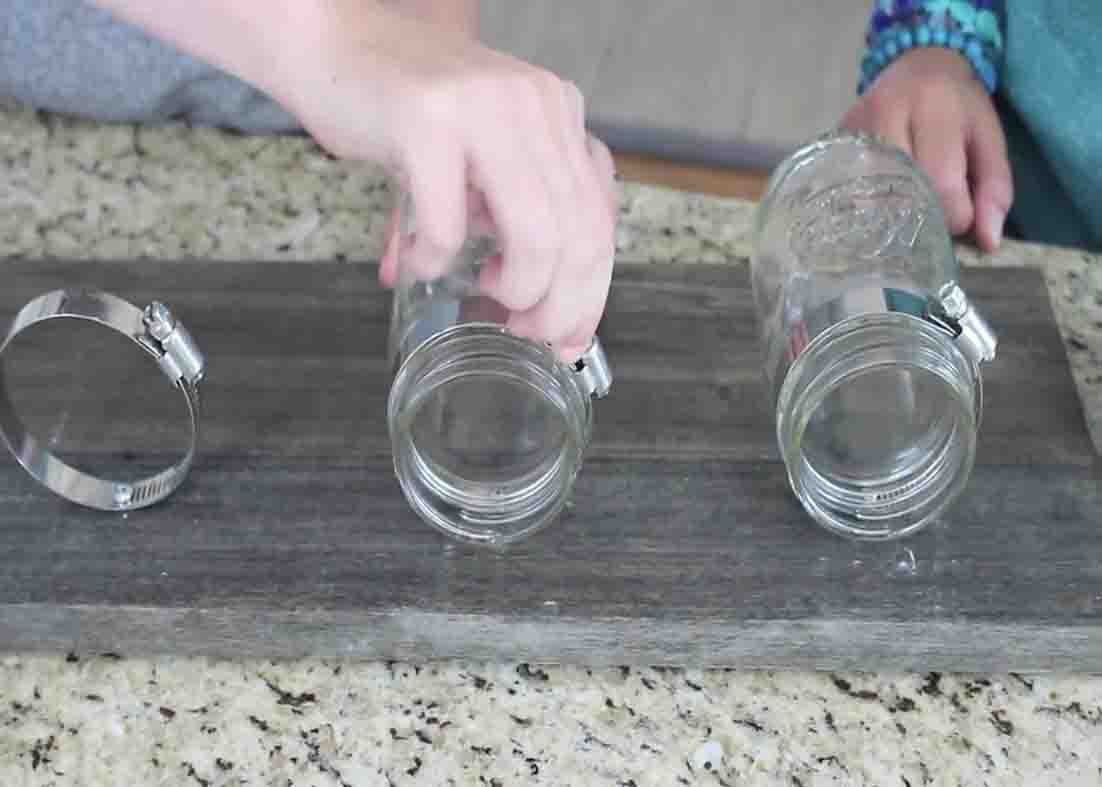
Now, it’s just drill and repeat until all four hose clamps are attached. After attaching all the hose clamps, it’s time to get the mason jars onto the board. Simply slide them through the clamps and hand-tighten the clamp until the jar is nice and snug. Finally, fill those jars up with anything you like! Your mason jar organizer is now complete.
DIY Mason Jar Organizer Tutorial