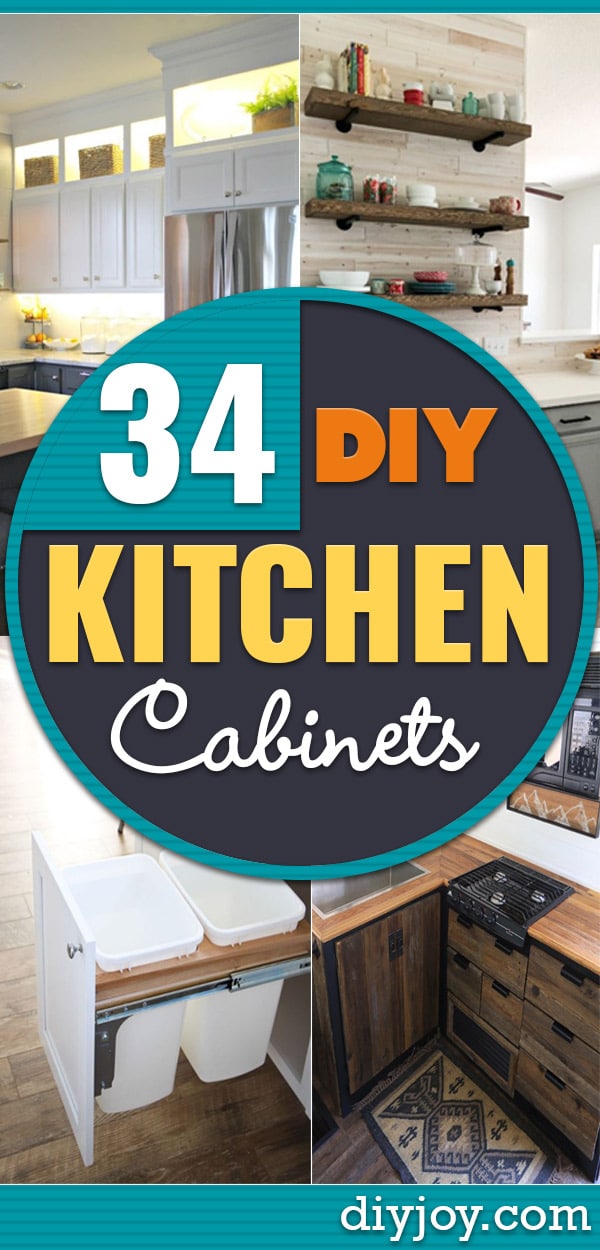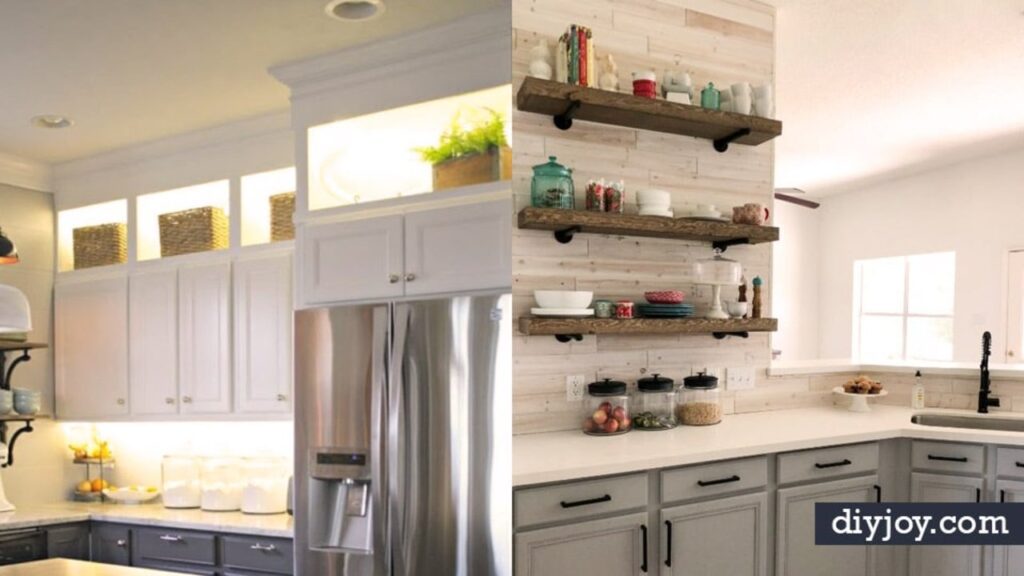
Paint is only the beginning with these 21 DIY kitchen cabinet ideas, which run from a $10 door organizer to plywood cabinets you build from scratch. Most cabinet makeovers mix paint, trim and smarter storage, so you’ll find chalk paint and no sprayer painting tutorials, shaker trim added to flat doors, fabric backed open shelves, chicken wire panels and LED lighting above and below. Then come the storage fixes: pull out drawers for that awkward cabinet over the fridge, a slim rolling pantry beside it and boxes that stretch the uppers to the ceiling. Start with one door and see how fast it changes the room. Need more storage this weekend? These $10 DIY roll outs for kitchen cabinets are a quick win.
1. Fabric Backed Open Kitchen Cabinets
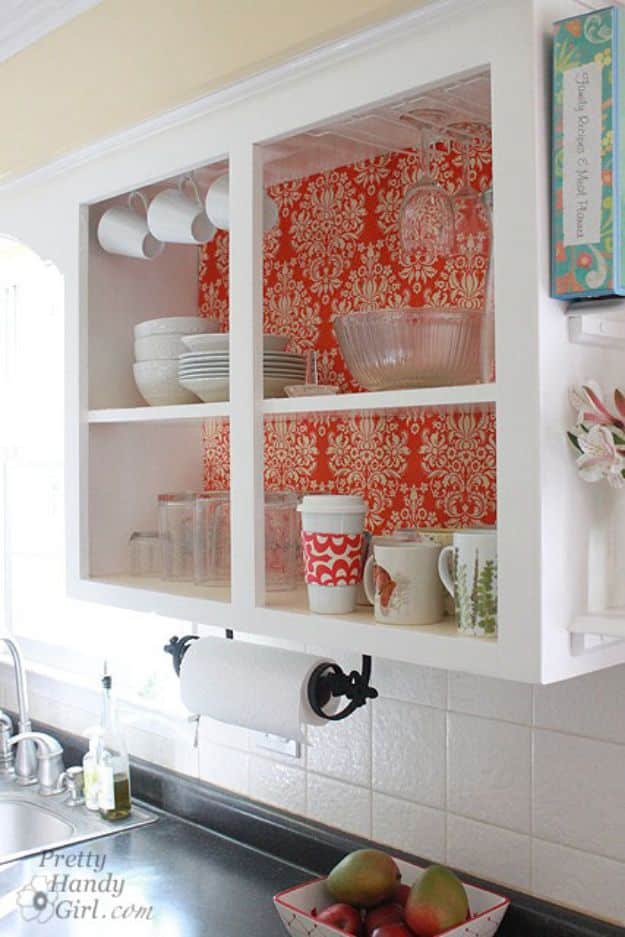
Fabric backed open kitchen cabinets turn dark uppers into a bright display for your dishes, and the whole change can be undone if you move. Take the doors off, fill the hinge holes with wood putty and sand them smooth, then paint the insides if they are dark. Cut foam board to the exact size of the cabinet back, wrap it in ironed fabric cut 3 inches wider and tape the edges behind. Press it into place. Tension holds it, so there is no glue.
Get the full tutorial at Pretty Handy Girl.
2. Chalk Paint Kitchen Cabinet Refresh
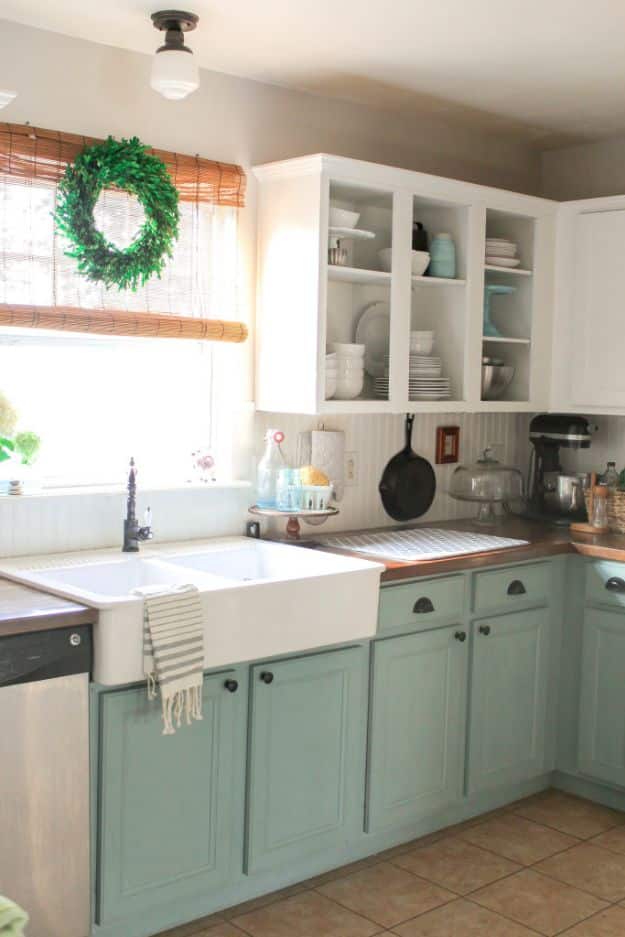
Chalk paint kitchen cabinets can skip the sanding and priming that scare most people off. This two year update paints the uppers white and the lowers a soft duck egg blue, brushed on rather than rolled, after a wipe down with dish soap and water to cut the grease. Doors stayed on the whole time. The lowers got three coats of wax for durability, and the full makeover, new hardware included, came to about $170. Use good brushes, since they make the finish.
Get the full tutorial at Our Storied Home.
3. Rustic Modern RV Kitchen Cabinet
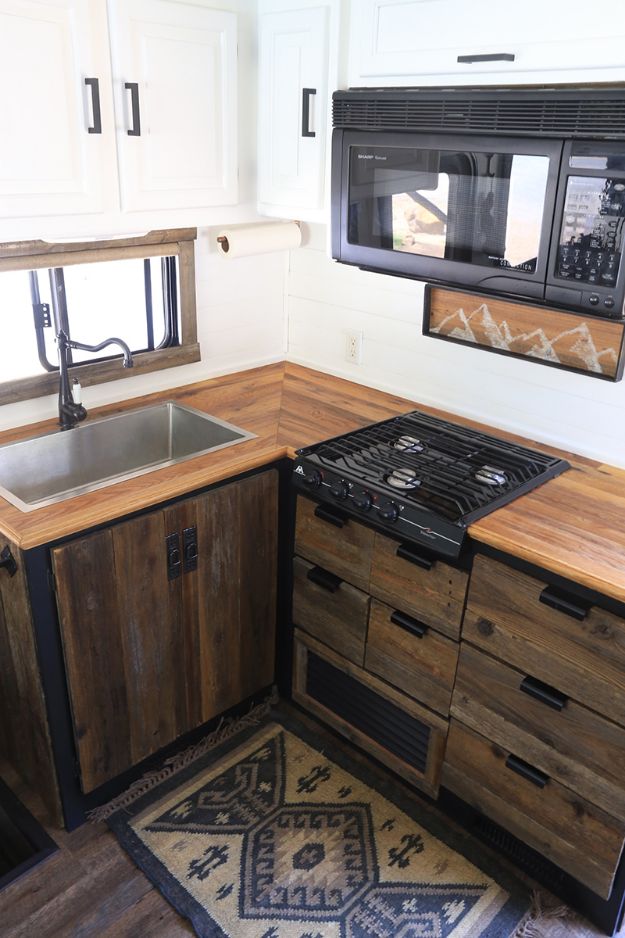
Reclaimed wood kitchen cabinets give a small RV kitchen real warmth without a full tear out. Only the doors and drawer fronts were replaced, and the cabinet frames stayed black. The rough boards came from a local lumber yard and were milled thin to save weight on the road, then scrubbed with a wire brush and a steamer and cut with a circular saw. Peel and stick wood planks are an easier route if you want the look with less work. A video walks through it.
Get the full tutorial at Mountain Modern Life.
4. DIY Shaker Style Cabinets
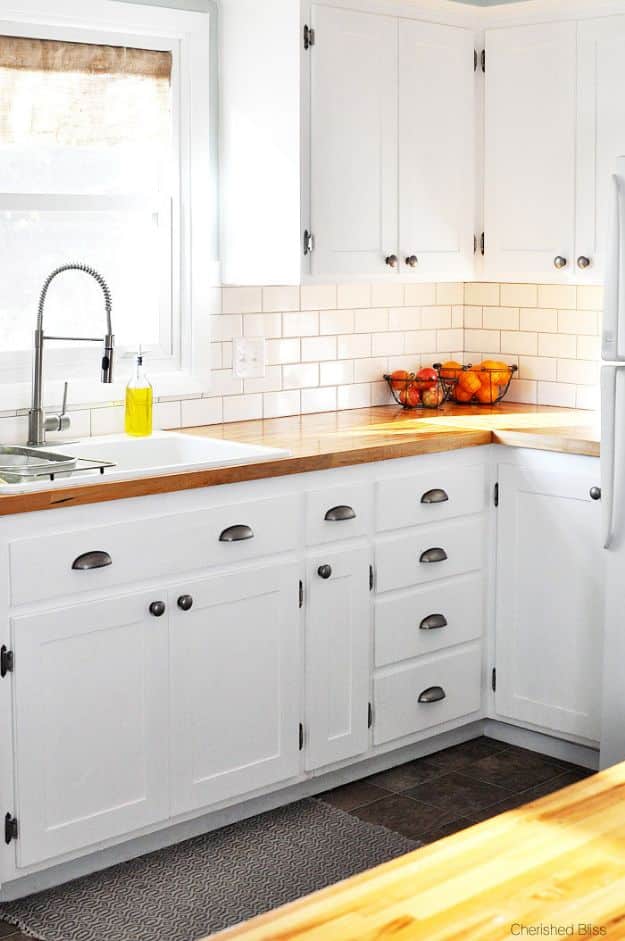
DIY shaker style cabinets can start from plain flat doors, which saves the cost of new ones. Take the doors and hardware off, clean them with a strong degreaser and sand with 80, then 150, then 220 grit. Have the hardware store rip quarter inch plywood into 2.5 inch strips, miter them into a frame and nail the frame onto each door. Wood filler and a final sanding hide the seams before paint. It takes time, but the steps are simple.
Get the full tutorial at The Crafty Blog Stalker.
5. DIY Upper and Lower Cabinet Lighting
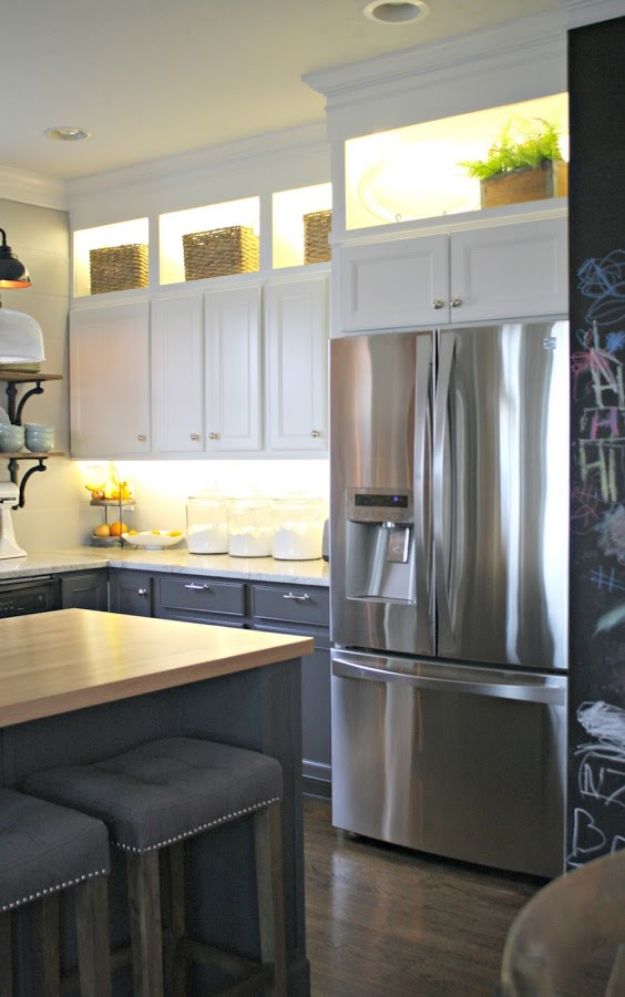
DIY cabinet lighting adds a warm glow above and below your cabinets without hiring an electrician. The easy version uses LED strip lights with a sticky back, plugged into outlets you already have, like the one for an over the range microwave or behind the fridge. A small hole cut in the side of a cabinet lets the cord pass through out of sight. Rechargeable motion sensor lights with magnets are even simpler, though they need a charge about once a month.
Get the full tutorial at Thrifty Decor Chick.
6. Upcycled Barnwood Style Sideboard
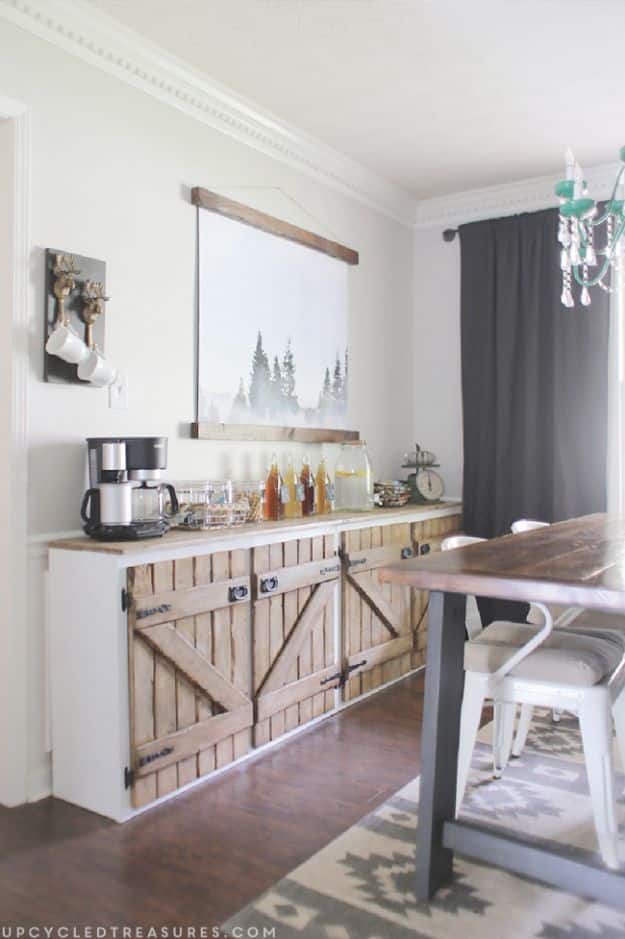
This upcycled barnwood style sideboard started as two old kitchen cabinets tossed out during an apartment renovation. The flaking paint came off, new tops were built from 1×3 boards joined with a pocket hole jig and the custom doors got a barnwood look from stain, carriage house strap hinges and mission style pulls. There is no full step by step, since the doors were built to fit, but it is great inspiration for giving salvaged base cabinets a second life as a buffet.
Get the full tutorial at Mountain Modern Life.
7. DIY Kitchen Cabinet Door Organizer
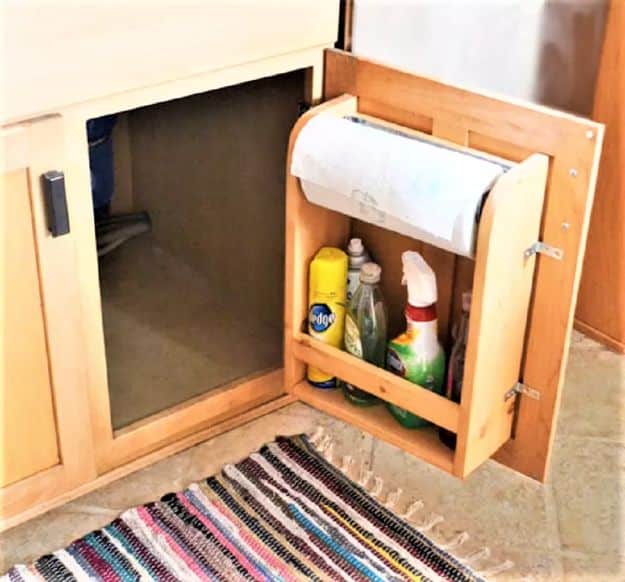
A kitchen cabinet door organizer puts paper towels and cleaning sprays right where you need them, and it costs under $10 in lumber. The free plan needs one 1×6 and a short 1×2. Two 18 1/2 inch sides with curved tops sit on a 12 inch bottom, with rails added for strength or a shelf in place of the towel bar. Four small L brackets mount it to the inside of the door. Plan on about half an hour of work.
Get the full tutorial at Ana White.
8. Painted Kitchen Cabinets
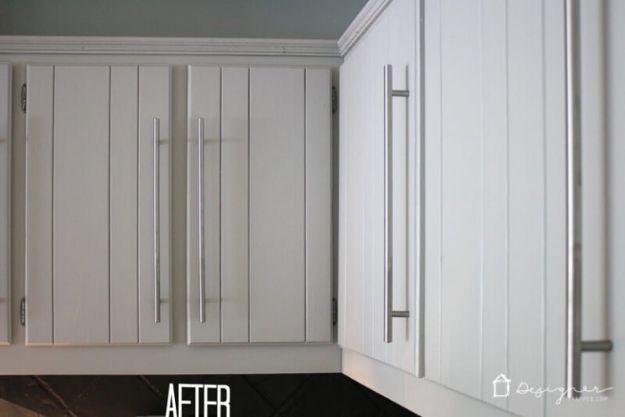
Painted kitchen cabinets do not have to mean days of sanding and priming. This guide compares two tested methods. The first uses milk paint with no sanding or priming, takes about four days and finishes with three coats of topcoat, and it held up for more than five years. The second uses mineral paint after a light scuff sand, leaves the doors hanging and wraps in about two days with two topcoats. Each method has a full tutorial.
Get the full tutorial at Kaleidoscope Living.
9. Paint Kitchen Cabinets without Professional Equipment
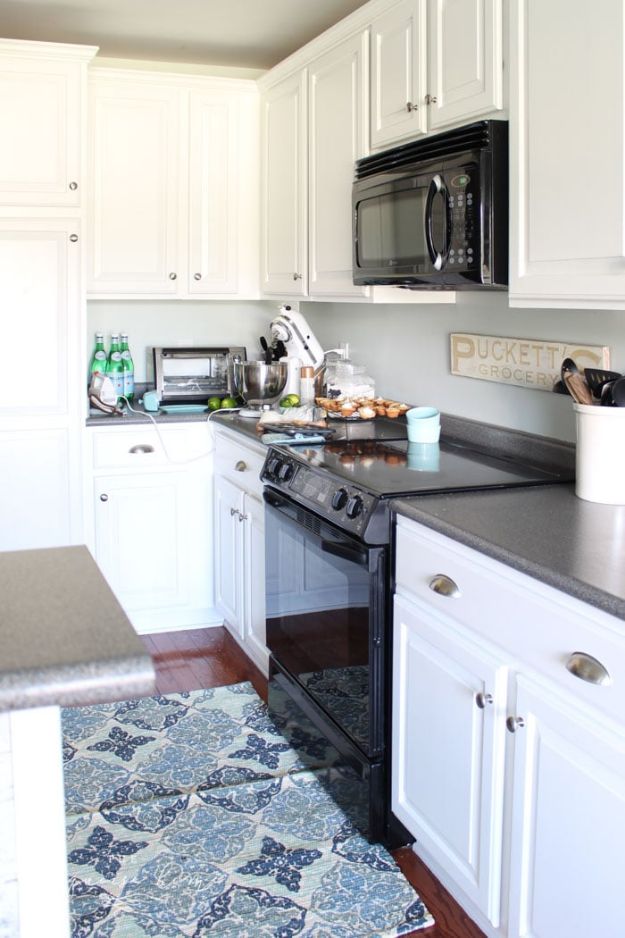
You can paint kitchen cabinets with a roller and a brush, no sprayer required. Take off every door and piece of hardware, degrease, then sand or degloss before priming. Choose a semi-gloss or gloss paint made for cabinets, since the harder finish wipes clean. Thin coats keep drips away, and a paint conditioner helps a fast drying paint level out without brush marks. Set aside a few weeks if you are working in short sessions. The result looks factory fresh.
Get the full tutorial at The Turquoise Home.
10. Base Cabinet for the Kitchen
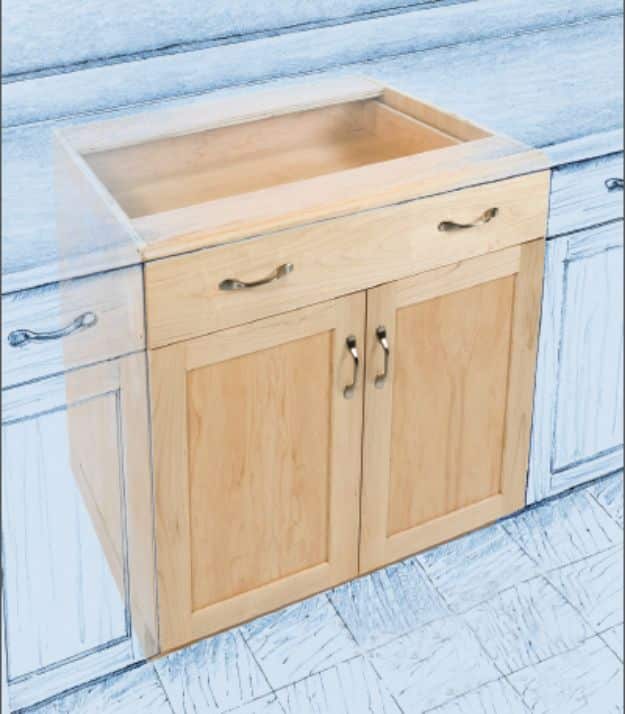
Building a base kitchen cabinet is the perfect starter project before you take on a whole kitchen. This plan uses the frameless Euro style, so the doors and drawer front cover the edges of the box. The finished cabinet is 30 inches wide, 34 1/2 inches high and 24 inches deep, with a full width drawer over two doors and an adjustable shelf. The 4 inch base is built separately, which makes leveling much easier. Prefinished maple plywood saves finishing time.
Get the full tutorial at Rockler Woodworking and Hardware.
11. Painted Kitchen Cabinets The Easy Way
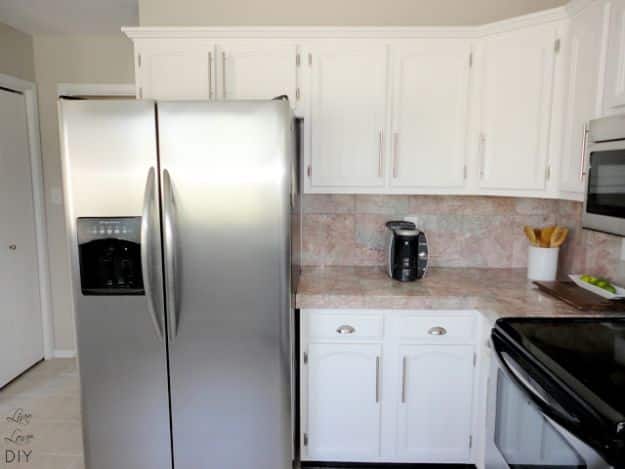
Painting kitchen cabinets the easy way comes down to ten clear steps and basic supplies: semi-gloss paint, primer, an angled brush, a mini foam roller, sandpaper, a drill, wood filler and caulk. Remove the doors and hardware and stick a bit of masking tape on the back of each door so you know where it goes. Sanding is the key step, since it removes old paint or a glossy finish. The same process works on bathroom vanities too.
Get the full tutorial at LiveLoveDIY.
12. Open Shelf End Wall Cabinet
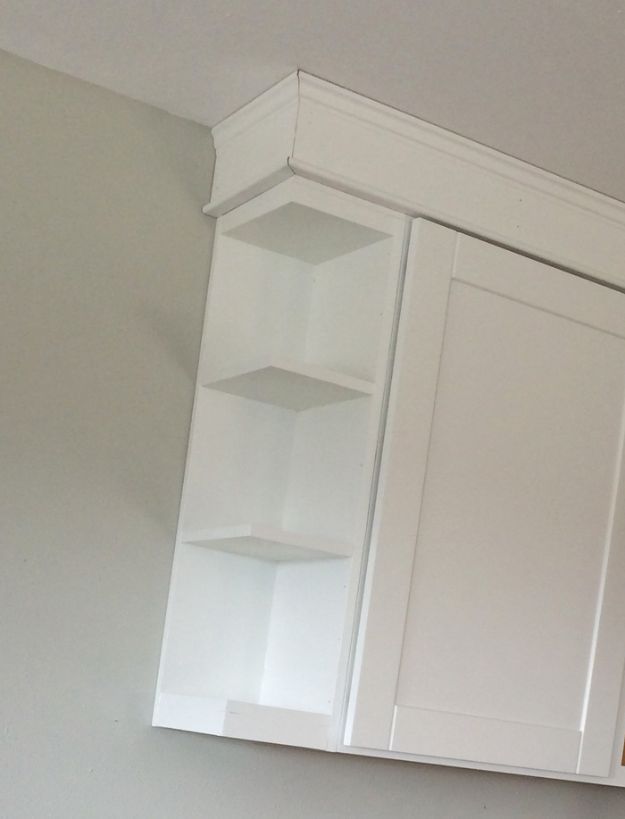
An open shelf end wall cabinet is a clever way to finish a run of upper cabinets, especially above a peninsula or bar where a full cabinet would feel heavy and be hard to reach. It is open on the front and the side, so it wraps the corner and gives you a spot for plants, bowls or cookbooks. The free plan includes a cut list, shopping list and diagrams. Paint or stain it to match, and build a second for the opposite end.
Get the full tutorial at Ana White.
13. Build Your Own Kitchen Cabinets
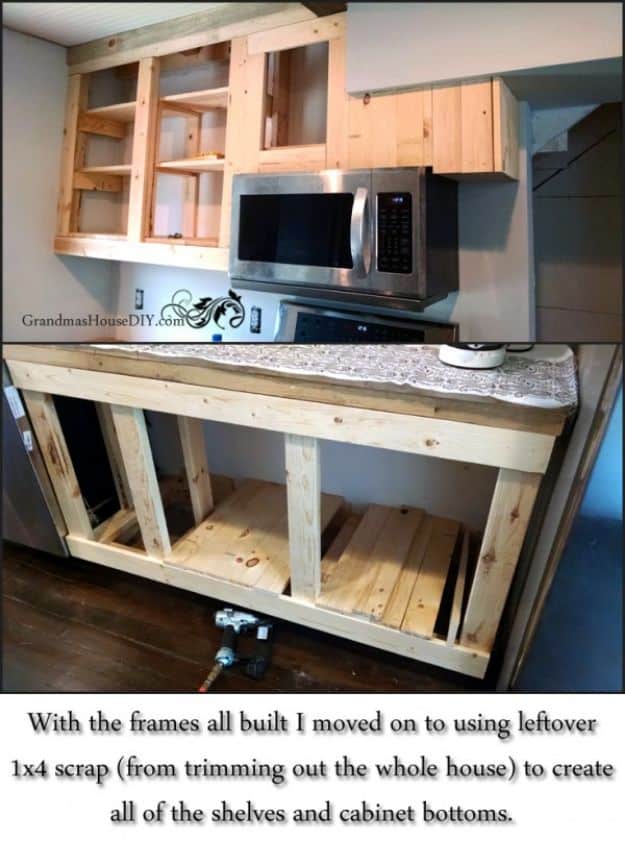
Building your own kitchen cabinets in place, rather than as boxes, solves two problems: crooked old walls and cabinets too heavy to lift alone. Each frame goes up one board at a time, leveled as you go and fastened with 3 inch deck screws, with the top rail screwed into the joists. Vertical boards tie the top and bottom frames together, scrap 1x boards form the bottoms and 1x4s cover the face. Doors cut from smooth 3/4 inch plywood get the same paint and poly finish.
Get the full tutorial at Grandmas House DIY.
14. Kitchen Cabinet Facelift
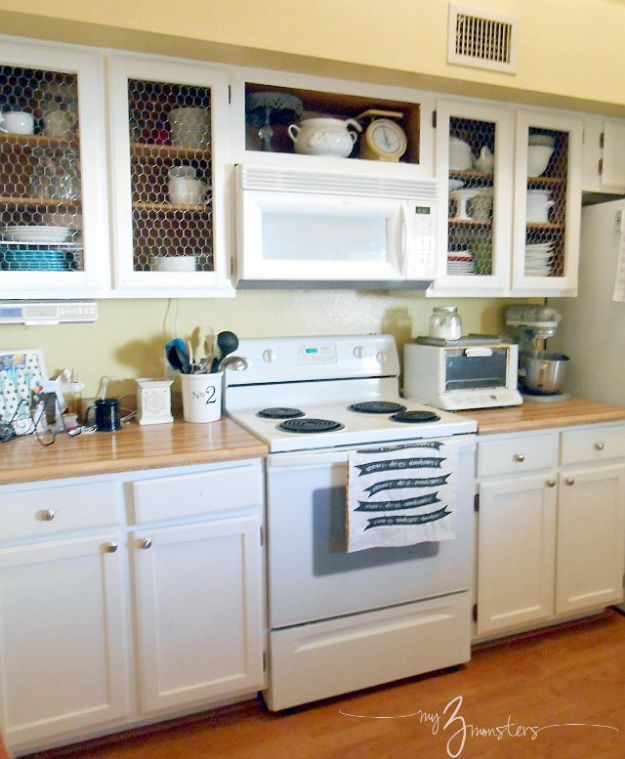
This kitchen cabinet facelift swaps the solid center panels of upper cabinet doors for chicken wire, for about $10 in supplies. Drill a hole in each corner of the panel with a Forstner bit, rout along the edges to free it and chisel the corners square, then sand. Repaint the raw edges, cut chicken wire to size and staple it in place. Narrow screen molding, mitered with a hand saw and a cheap miter box, covers the cut wire edges on the back of each door.
Get the full tutorial at My 3 Monsters.
15. Kitchen Cabinets Up to the Ceiling
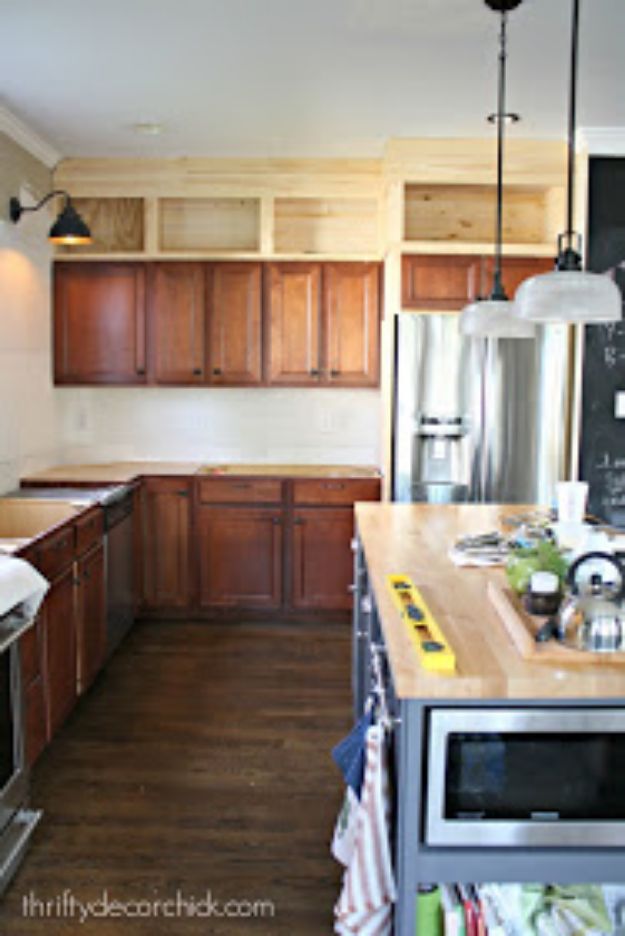
Extending kitchen cabinets up to the ceiling makes builder grade cabinets look custom. Build simple boxes from plywood and screws, one at a time, and set each on top of the existing cabinets to check the fit. Screw them into the wall studs and to each other. With about two feet above the cabinets, 16 inch boxes leave room for a header and trim, and face trim makes them match the lowers. Leave them open for display or add doors.
Get the full tutorial at Thrifty Decor Chick.
16. Plywood Upper Kitchen Cabinets
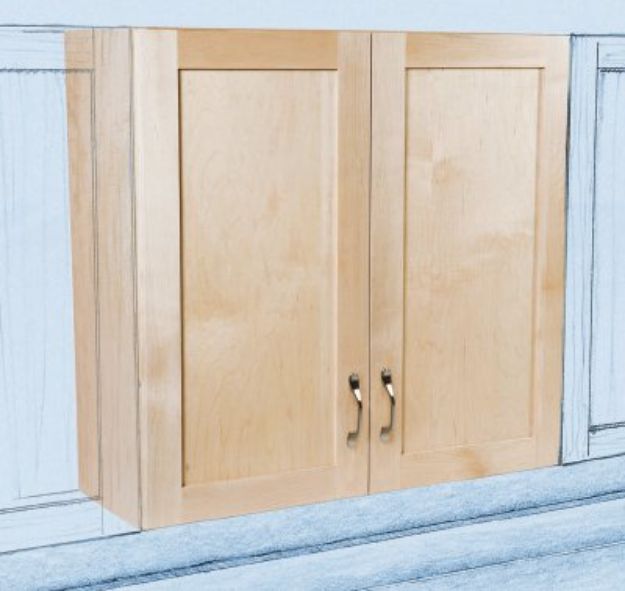
Plywood upper kitchen cabinets are the easiest way to learn frameless construction, where every part is cut and finished before anything is assembled. Stacks of flat parts store in far less space than finished boxes, and you can carry them to the kitchen and assemble there. All you need is a pair of sawhorses, four to six clamps, a drill, screws, biscuits and glue. Rows of 5mm holes spaced 32mm apart hold the hinges and shelf pins, so every box stays flexible.
Get the full tutorial at Rockler Woodworking and Hardware.
17. Fixer Upper Inspired Kitchen
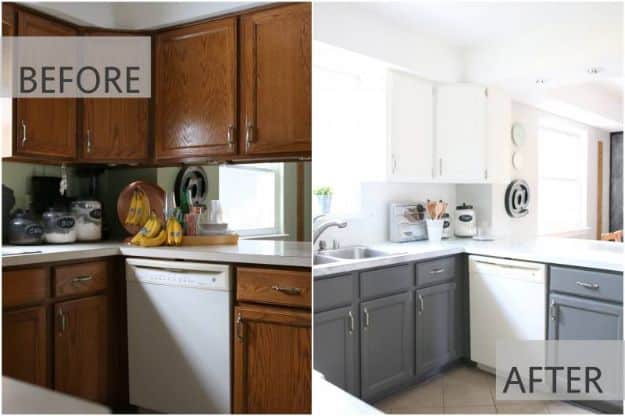
This Fixer Upper inspired kitchen makeover came in around $300 by working with what was already there. The uppers were primed with a bonding primer and painted soft white, the lowers went charcoal and two doors came off for open shelving. A faux shiplap backsplash is made from peel and stick vinyl floor planks, and the counters got a faux marble paint finish. A $20 secondhand lower cabinet turned an old pantry into a coffee bar.
Get the full tutorial at All Things with Purpose.
18. DIY Canned Food Organizer
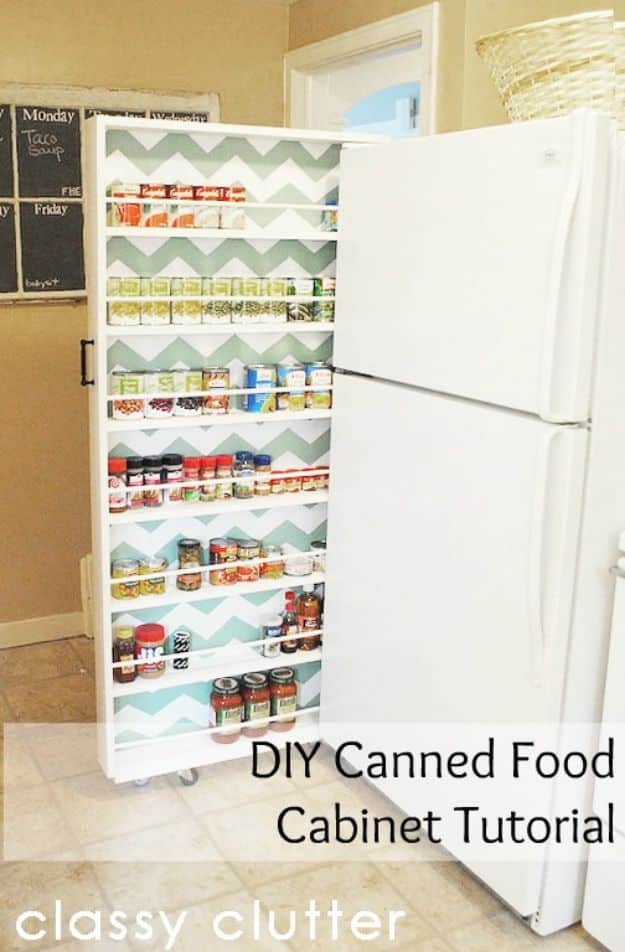
A DIY canned food organizer turns the skinny gap beside the fridge into a rolling pantry. This one fits a 6 inch opening and stands 64 inches tall. Build a ladder frame from 1×4 boards with seven shelves, then drill holes just above each shelf and glue in 7/16 inch dowels as rails so cans cannot roll off. Nail on a beadboard back, add four casters rated for at least 50 pounds and a handle, and paint the inside a fun color.
Get the full tutorial at Classy Clutter.
19. Refinishing and Cleaning Kitchen Cabinets
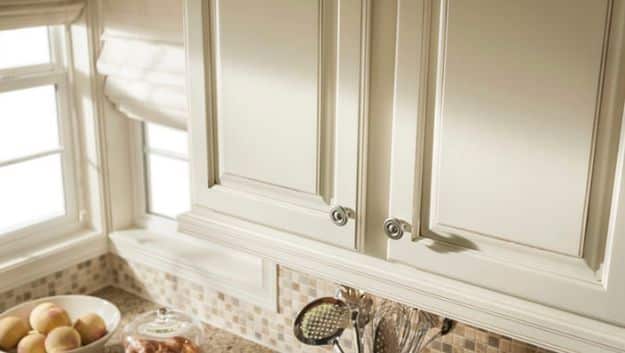
Refinishing and cleaning kitchen cabinets starts with a deep clean, which may be all they need. Number the doors as you remove them, cover counters and floors, and wash with a cleaner such as TSP while wearing gloves and eye protection. Soak greasy hinges and knobs in soapy water for 30 minutes, then scrub and polish. If they still look tired, test a hidden spot to find out what finish you have before buying a stripper, and pick a gel or semi-paste type if the cabinets stay on the wall, since it won’t drip.
Get the full tutorial at Lowe's.
20. Lower Cabinet Drawers
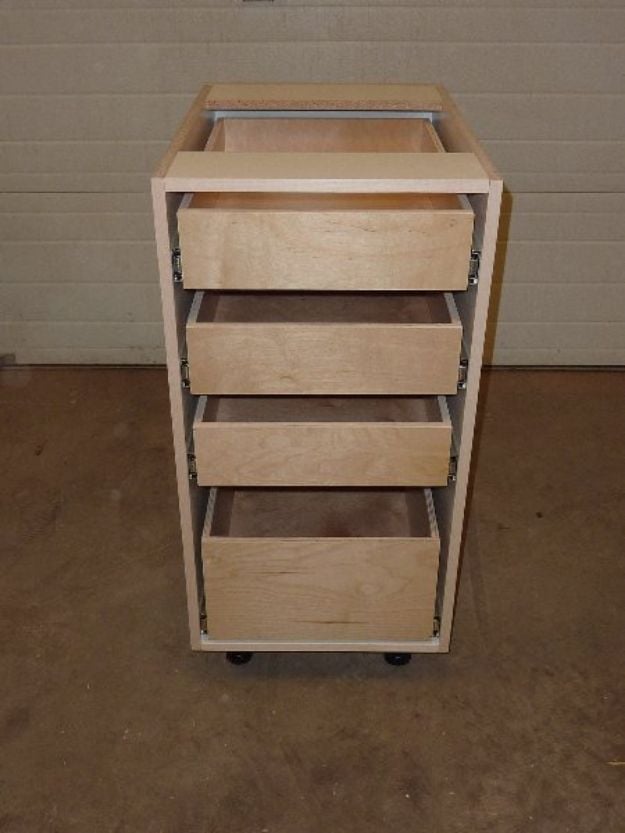
Building lower cabinets with drawers is a modular job: make a series of matching box units, then fit them with slides and fronts. These boxes are cut from 5/8 inch white melamine, with sides sized to counter height minus the counter thickness and a 4 inch kick space, and a bottom that is the box width minus twice the side thickness. Glue edge banding to the front edges, join the parts with dowels about 6 inches apart rather than nails and mount the drawer slides inside.
Get the full tutorial at Dowelmax.
21. Pull-out Drawers in Cabinet above Fridge
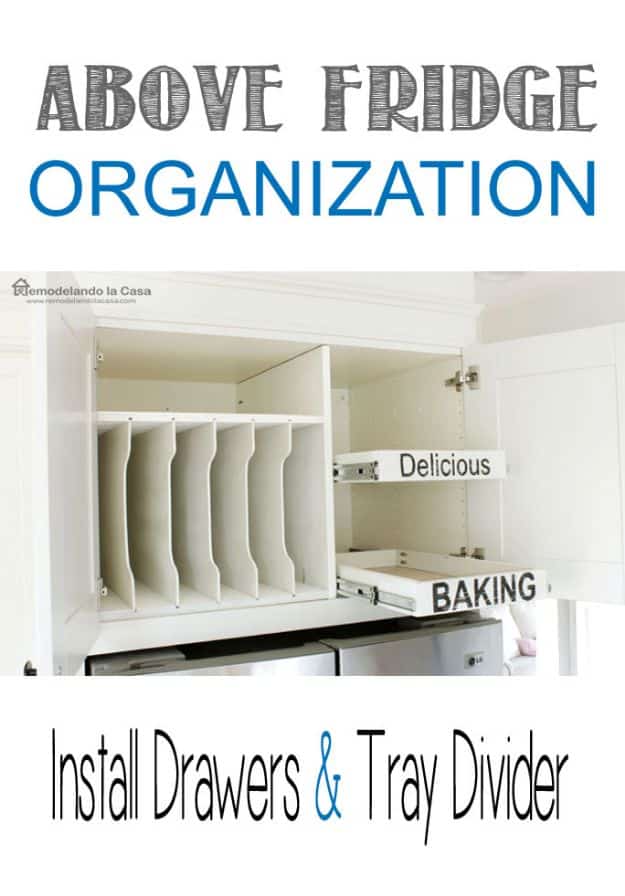
Pull-out drawers in the cabinet above the fridge finally make that hard to reach space useful. Measure the inside depth and check that it is level, then add wooden supports on one side so the slides clear the door. In this cabinet the depth was 23 1/2 inches, so the drawers were cut at 22 inches long and 2 1/2 inches high. Subtract 1 1/8 inches from the width for the slides. A tray divider fills the other side.
Get the full tutorial at Remodelando la Casa.