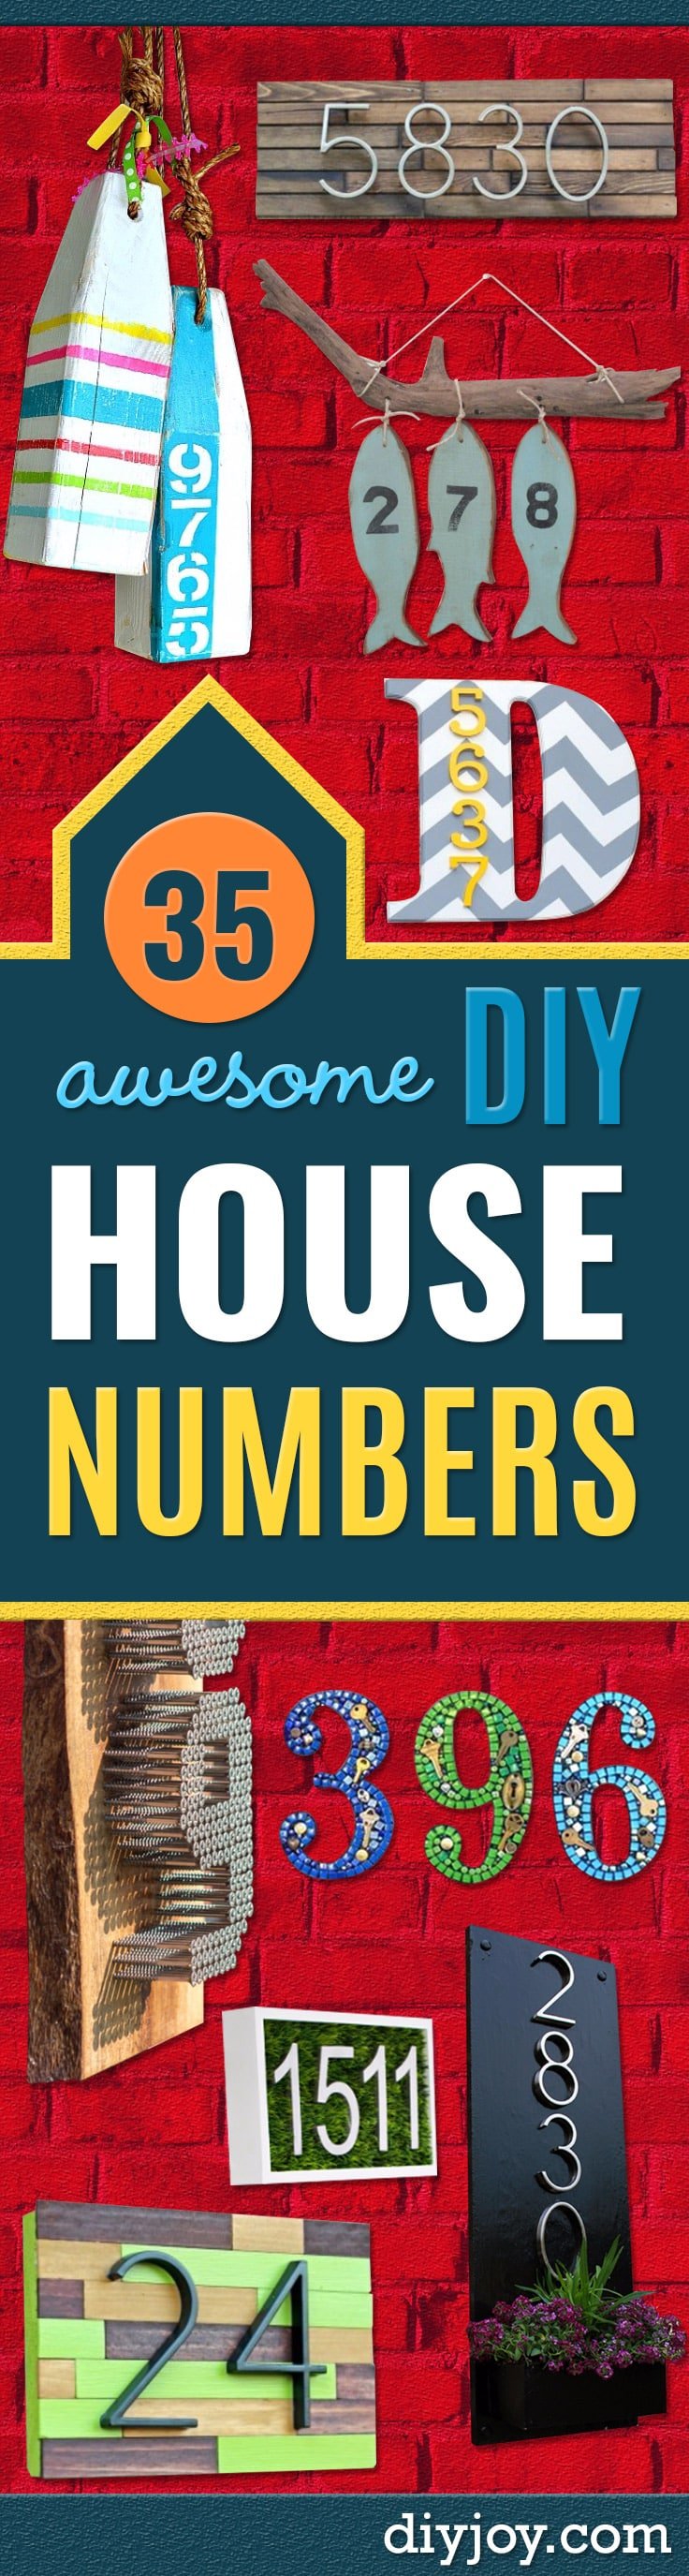
Nobody has ever complimented a builder-grade address plaque. These 21 DIY house numbers are the reason a delivery driver finds your door on the first pass and a guest says something about it on the way in, and most of them cost less than the brass set at the hardware store. There are mosaic numbers set in silicone with old keys pressed into them, nautical buoys cut from a ten dollar length of 4×4 pine, floating numbers mounted on stained paint sticks, a tiered planter with the number on the bottom pot, and a wreath with the numbers wired straight into the twigs. Some want a miter saw. Some want a thrift store frame and a paint pen. Start with the one that matches your front door.
DIY House Numbers
1. Modern House Number DIY
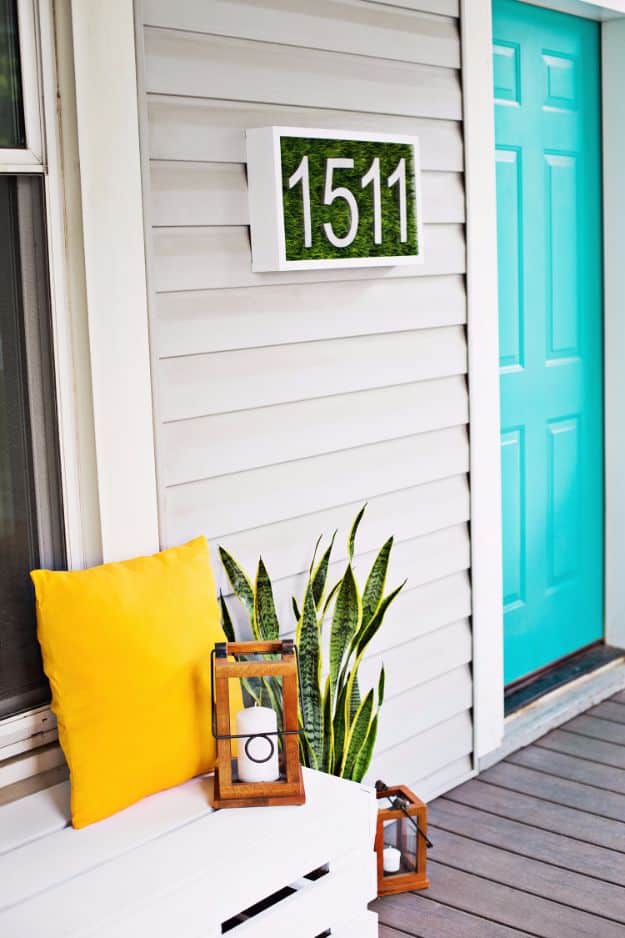
A shadow box with the glass taken out, or a box built from three quarter inch wood, and it does more for a porch than a whole afternoon of weeding. Paint it in exterior paint, cut faux grass mats to fit and glue them to the inside bottom with multi-surface glue. Drive screws into the back panel to match the holes on your numerals, keeping them a little shorter than the grass is tall so the numbers sit nestled in it. Hang the finished box on vinyl siding clips or on brick clips. It is a good first move among budget DIY home improvement ideas, and it suits a porch you decorate farmhouse style just as well.
Get the full tutorial at A Beautiful Mess.
2. DIY Nautical Address Buoys
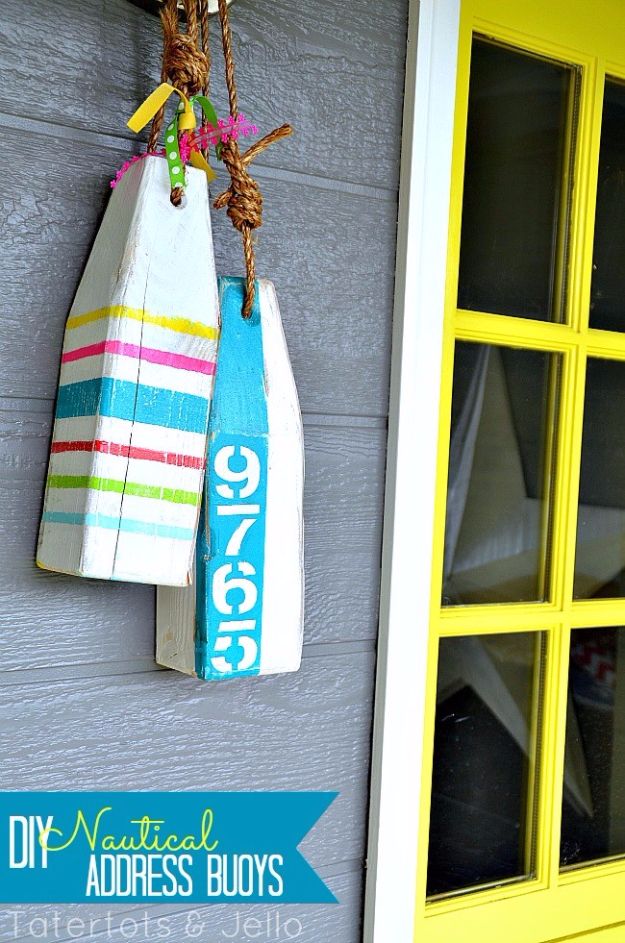
Buoys cut from a single eight foot length of 4×4 pine, about ten dollars, and one board yields four one foot blanks with wood to spare. Skip the pressure treated stuff, it is hard to cut and full of chemicals you do not need. Remember a 4×4 is really three and a half inches square. Mark and cut the taper on one side with a miter saw, flip the board 180 degrees and cut the opposite side, then rotate 90 degrees and repeat. Drill a 3/8 inch hole for quarter inch rope, chamfer both sides, then stencil the numbers.
Get the full tutorial at Tatertots and Jello.
3. Mid Century Modern Floating House Numbers
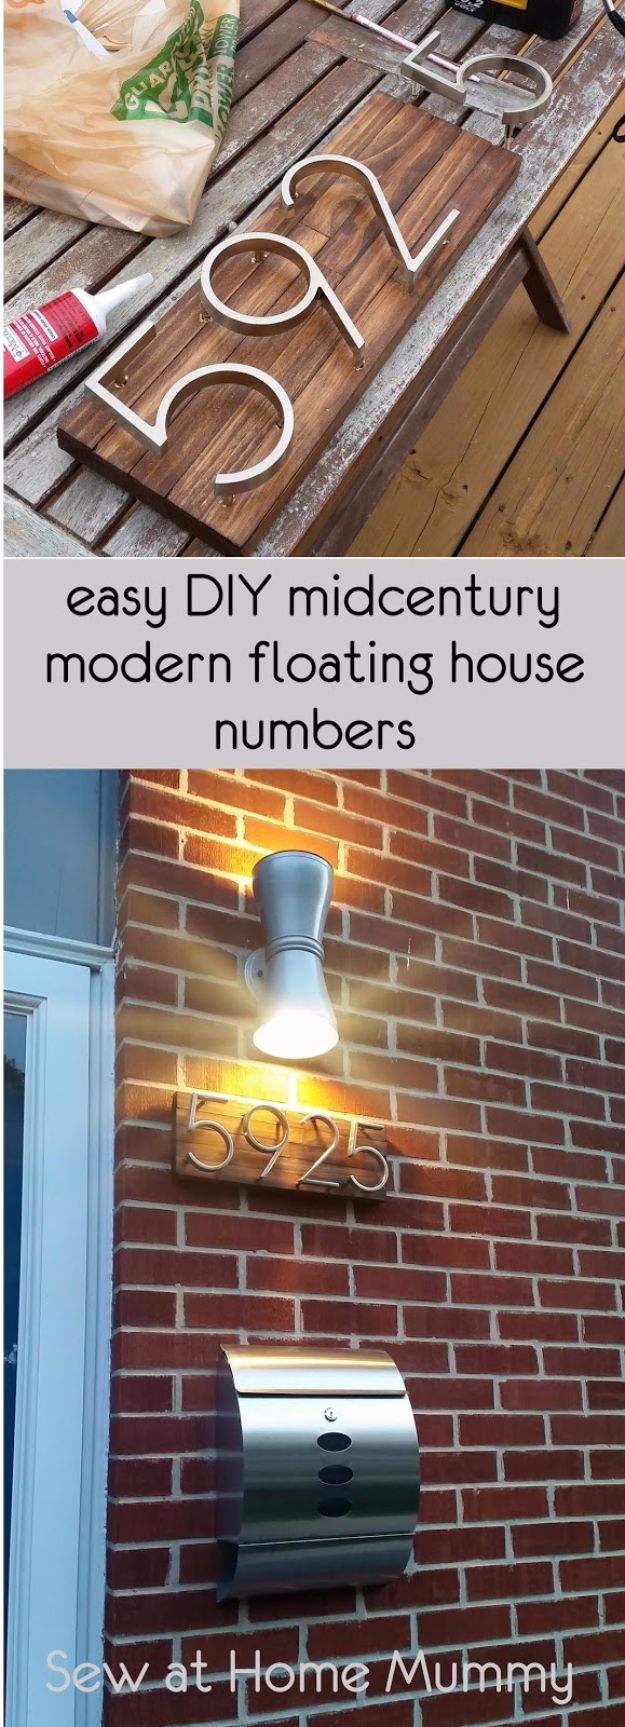
Paint sticks, of all things, and the finished board looks like a hundred dollar plaque. The base is a 2×6 cut to about 24 inches, which the hardware store will do for you, faced with roughly ten paint sticks laid in staggered rows so no two seams line up. Stain the fronts and edges only, one light coat of gel stain with a foam brush, because a heavy coat buries the grain that makes this work. Seal it, then mount stand-off numbers with construction adhesive and silicone caulk and hang it on keyhole hangers.
Get the full tutorial at Sew at Home Mummy.
4. Mosaic House Numbers
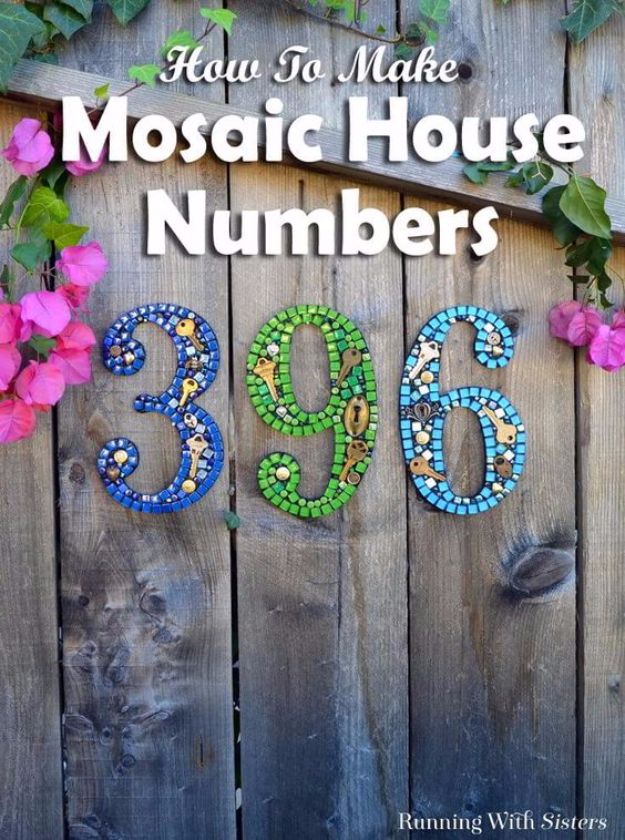
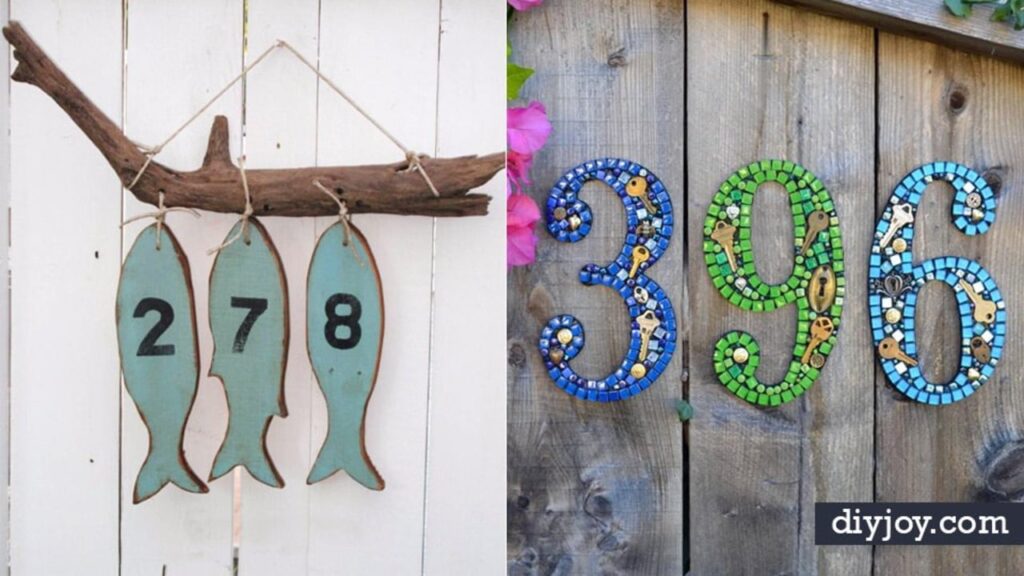
No grout, which is the reason a first time mosaic comes out looking deliberate here. Start with wooden or MDF numbers around nine and a half inches, spray them black on the front, back and sides, then spread a one eighth inch layer of black silicone over the face with a putty knife like frosting a cake. Press old keys in first, then charms and shank-less buttons, then build a single color border of mini tiles, then fill every remaining gap with smaller tiles and 4mm cube beads. Let it cure overnight before hanging.
Get the full tutorial at Ideas for the Home by Kenarry.
5. Vintage Paddle Address Sign
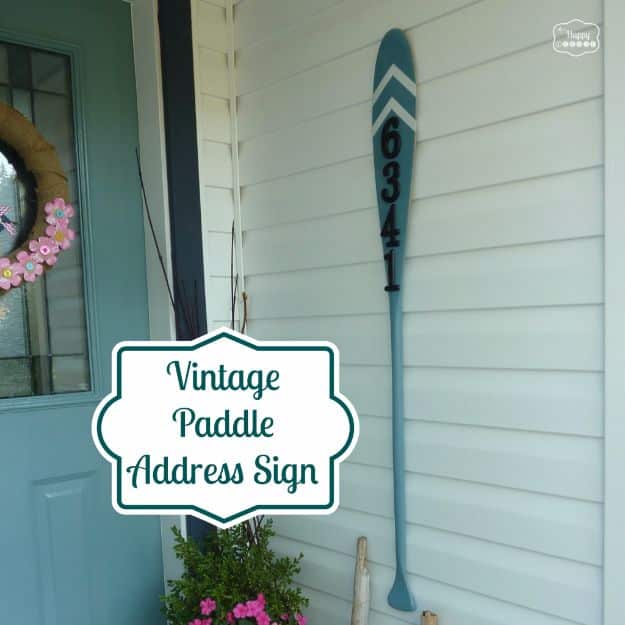
A thrifted wooden paddle, cleaned up and given a few coats of spray paint, then taped off near the top for a run of painted arrows. Masking tape laid alongside the painter’s tape is the trick for arrows thinner than the tape itself. Let the base color cure a day or two before you tape, or the tape lifts it. Two coats of white on the arrows, peel the tape the next day, then hot glue iron house numbers down the shaft. Glue is reversible, screws are permanent, and on a decorative sign like this one that matters.
Get the full tutorial at The Happy Housie.
6. Polka Dotted Tiered Planters House Number
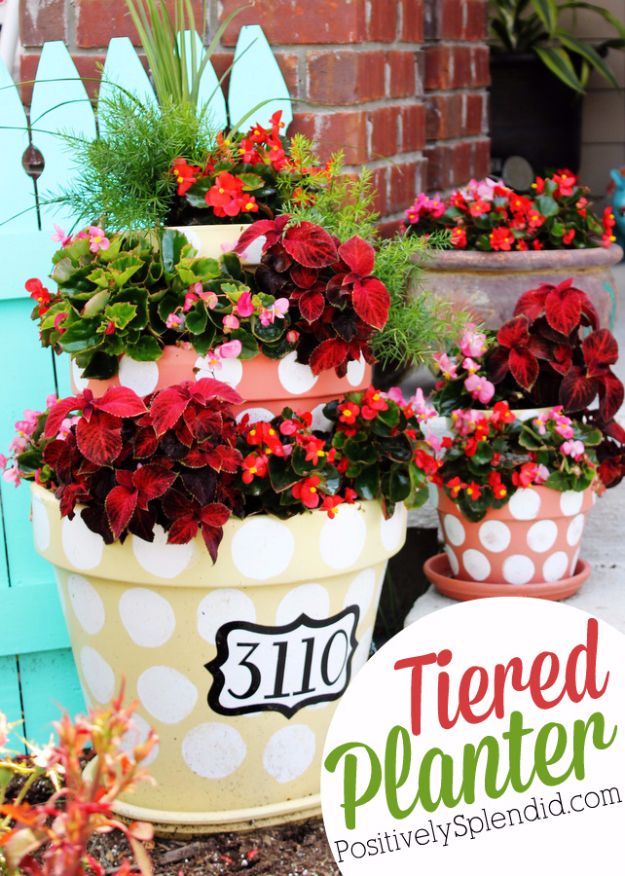
Flowers and an address out of the same stack of pots. Terracotta in cream and coral, hand painted with big white dots, stacked three high and planted with red begonias and dark coleus, with a small black and white number plate fixed to the face of the bottom pot. Fill the largest pot with soil right to the rim before the next one goes on, or the whole tower walks in the first storm. Polka dots forgive a shaky hand in a way stripes never will. Put the numbers on the biggest pot, where a car can read them from the curb.
Get the full tutorial at Positively Splendid.
7. House Number Frame
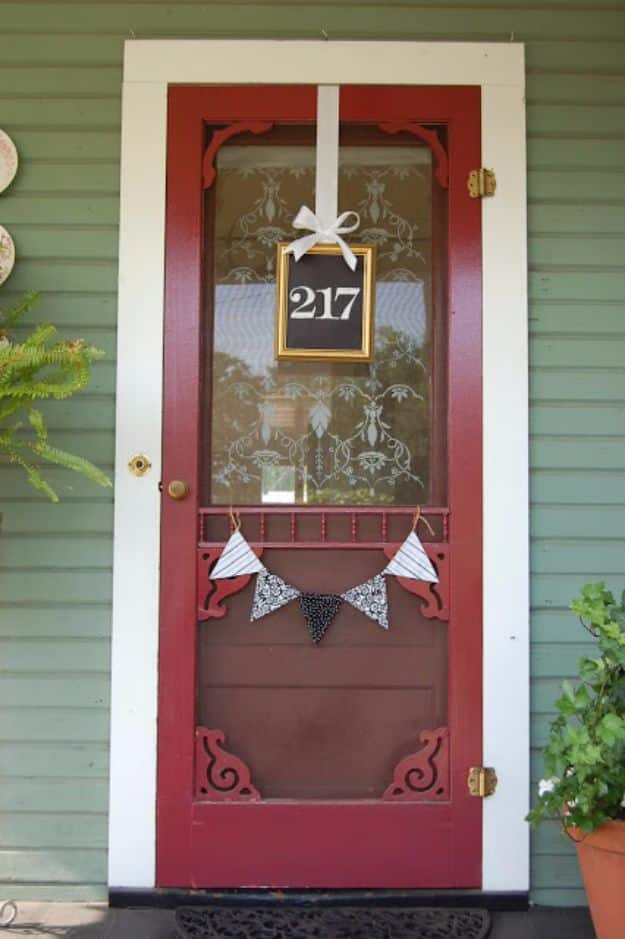
Under ten dollars, start to finish, and most of that is the ribbon. A thrifted 8×10 frame, glass popped out and set aside, black cardstock glued to the cardboard backing that came with it. Numbers printed from a font you like get transferred onto the cardstock and filled in with a chalkboard paint pen, which gives that hand-lettered look without any lettering skill. Hang the whole thing from a wide ribbon rather than a hook. Keep it under a covered porch, because cardstock and an open frame will not survive weather.
Get the full tutorial at Love and Life at Leadora.
8. Super Easy Concrete House Numbers

Numbers cast into a concrete slab, which is the version that will still be legible in twenty years. The photograph shows a poured rectangle with the word ONE standing out in raised black letters, set on a low bed of rocks at the end of a path rather than fixed to the house. That placement is the whole idea: numbers at the street, at eye level from a car, instead of up under the porch roof where a driver has to guess. The DIY JOY post is a written introduction around the full step by step video, which carries the mold and mix details.
Get the full tutorial at DIY Joy.
9. Old Wooden Door House Number Sign
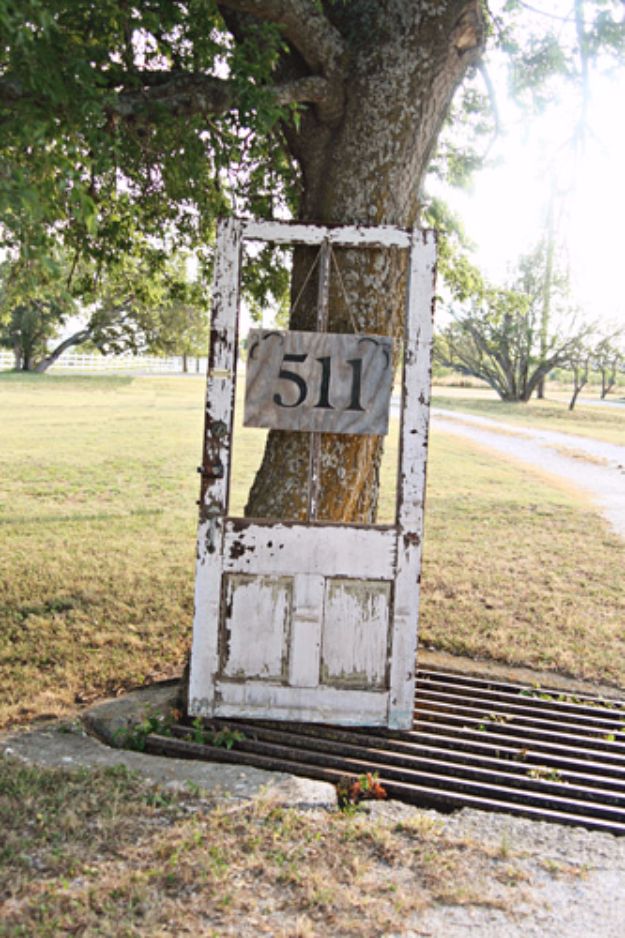
A salvaged door bolted to a tree at the end of a driveway, with a painted number sign hung on it, and the sign itself took about half an hour. The board is a worn scrap straight off the wood pile, used exactly as found, no cutting. Print your numbers in a font you like, slide carbon paper underneath and trace the outlines with a stylus. Outline in black craft paint and fill, but not completely, so it reads weathered. Then paint a thin white shadow line down the right and bottom edge of every numeral.
Get the full tutorial at The Pennington Point.
10. Old Milk Can Turned Address Marker
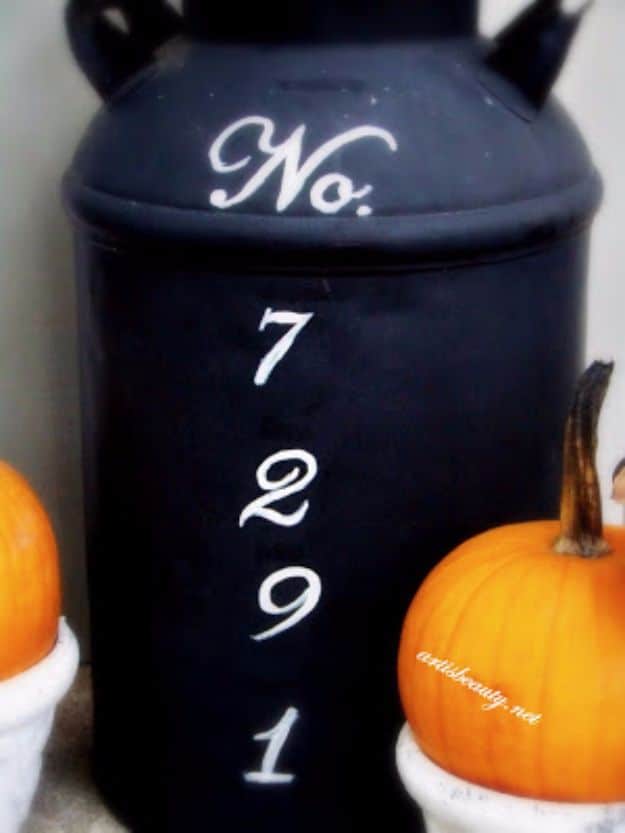
An old galvanized milk can, rescued on its way to the trash, painted black and lettered with the address down the front. The numbers were typed out on a computer at the size wanted, transferred with carbon paper, then painted on in acrylic and clear coated with urethane once dry. Curved metal is the only tricky part: work the carbon paper in short sections and press hard, because a sheet laid flat across a curve will skip. A can that heavy does not blow over, which is why it works standing on a porch rather than fixed to a wall.
Get the full tutorial at Art Is Beauty.
11. DIY House Numbers Sign From Pallets
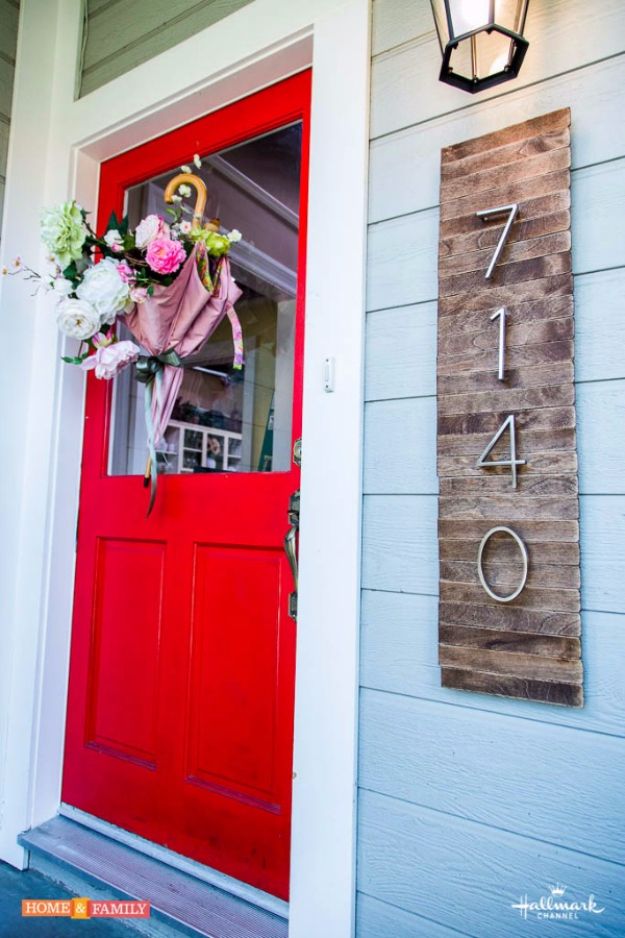
Metal numbers three or four inches tall, mounted on a board faced in stained paint sticks, and the sizing rule here is the useful part. Lay your numbers out vertically with one paint stick width of space between each, plus the same blank space above and below, and that total is the height to have the plywood cut. Allow a number’s width of blank on each side for the width. Cut the paint sticks half an inch wider than the plywood, sand, stain, then glue them down with waterproof polyurethane glue and seal the whole board with marine varnish.
Get the full tutorial at Family Focus Blog.
12. House Number Plaque From Paint Sticks And Scrap Wood
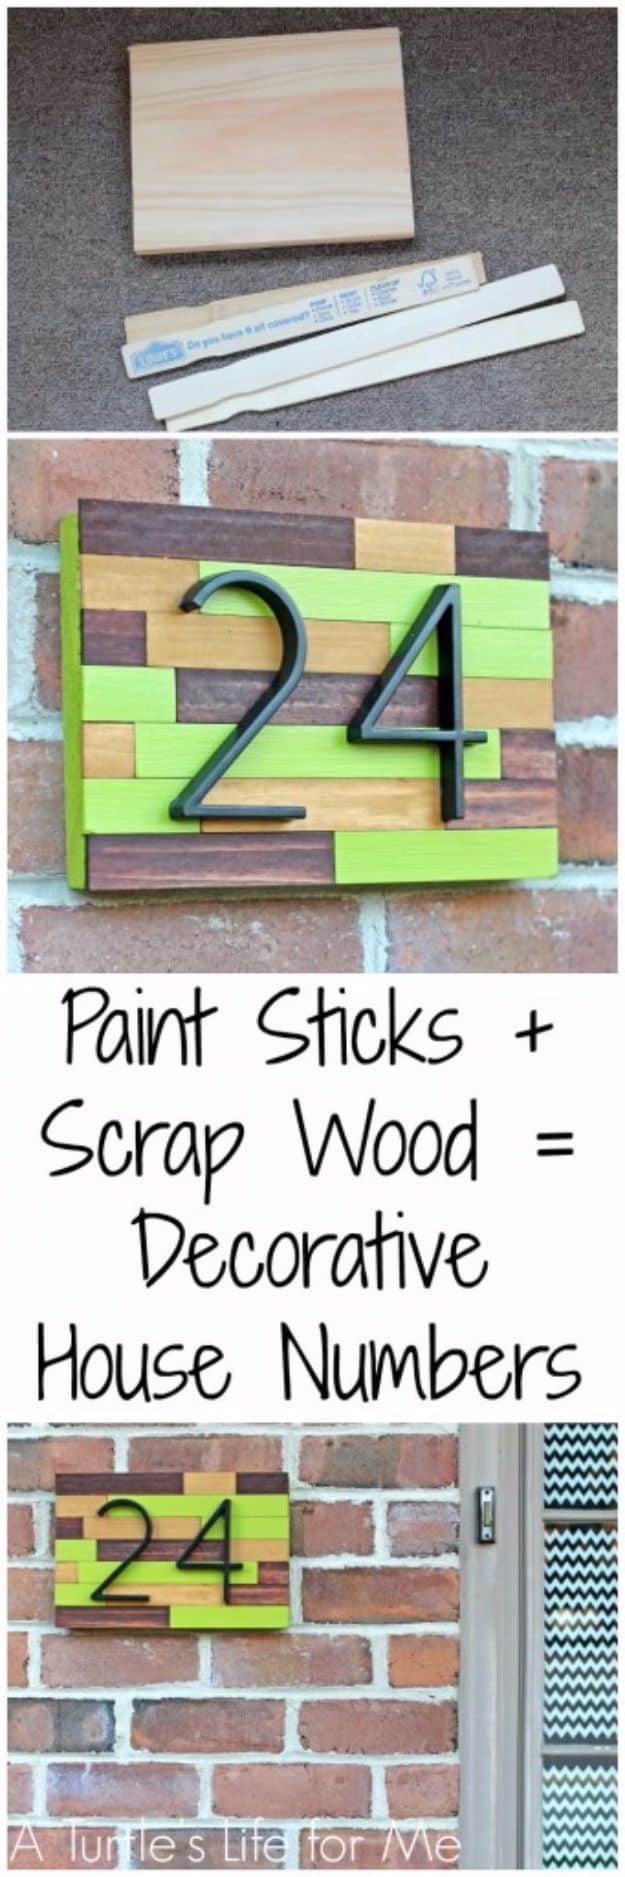
Scrap wood, paint sticks and three finishes, and the creator’s honest advice is not to copy anyone’s measurements. Find a piece of scrap that fits the number of digits in your own address, then cut paint sticks to varying lengths and lay them flat across it until it is covered, trimming a few for a clean edge. Some sticks get painted, others get two different stains, which is what gives the finished board its stripe. Label the back of every stick with its row and position before you glue, then weight the whole thing overnight.
Get the full tutorial at A Turtle's Life for Me.
13. Simple DIY House Number Board
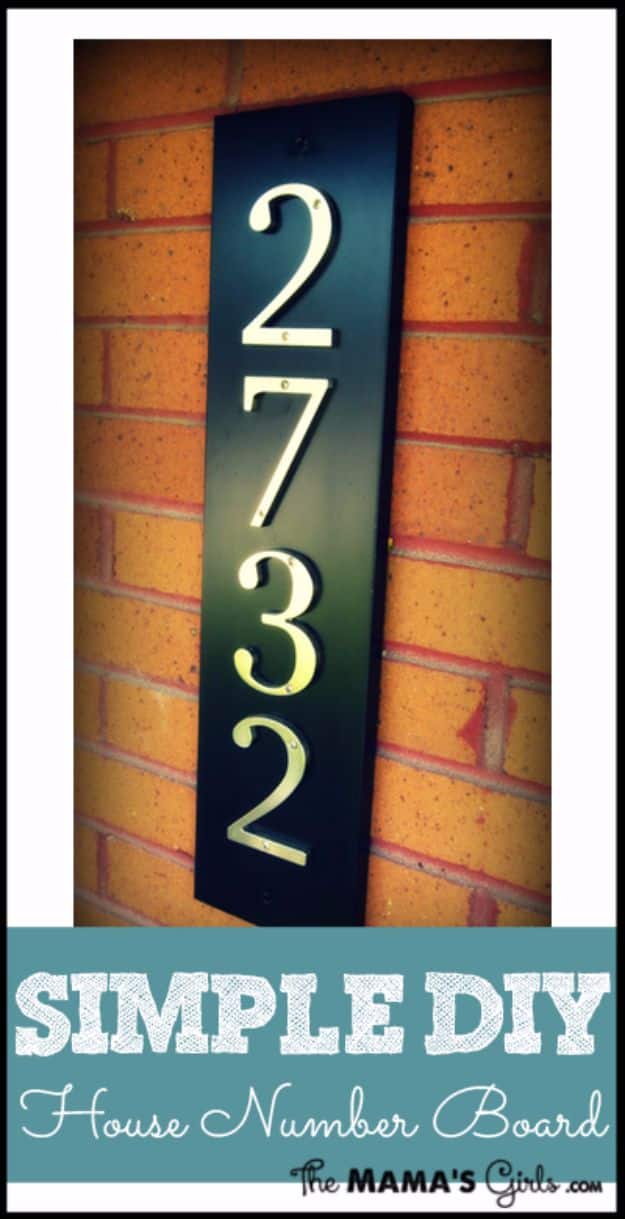
Twenty minutes, and the base is an IKEA EKBY LAIVA shelf in black, which is already the right width and already painted. Cut it to length with a miter saw, about 22 and a half inches for a vertical layout, and touch up the raw end with matching paint. Mark a center line down the board and a matching center on each number, then space them roughly three quarters of an inch apart and two inches in from each end. Tap a nail into each pencil mark to make a pilot hole, erase the pencil, and screw the numbers on.
Get the full tutorial at TheMamasGirls.
14. DIY Wooden House Number Sign
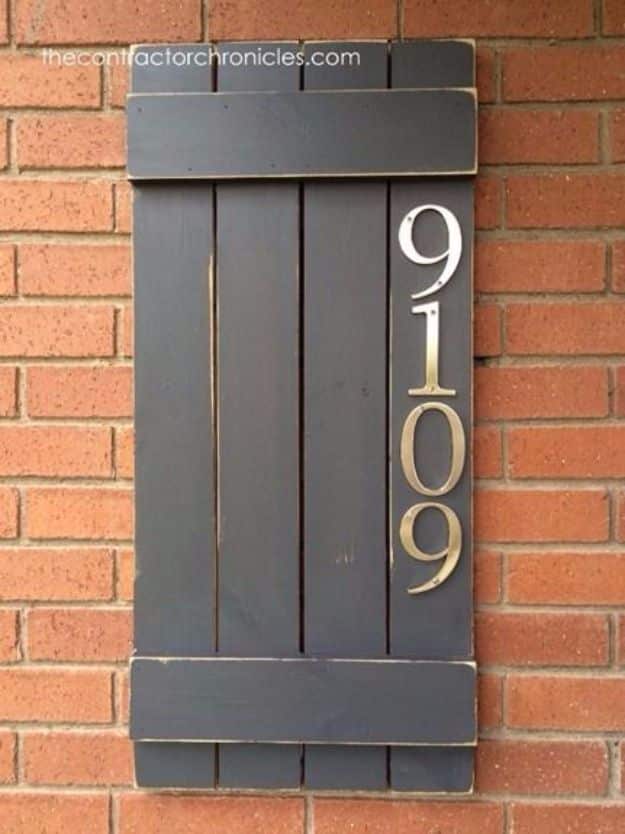
An acacia wood cutting board with house numbers screwed to it, and the whole job takes under an hour. Lay the numbers on the board first to work out the spacing, mark the screw holes in pencil, drive them in with a screwdriver, then hammer a hanging kit to the back. Acacia and cedar are the two boards that hold up outdoors, and even those want fresh stain or sealant every year or two. On brick, drill into the mortar rather than the brick itself, or skip the hole entirely and hang it from a brick clip on picture wire.
Get the full tutorial at Craftivity Designs.
15. House Number Post
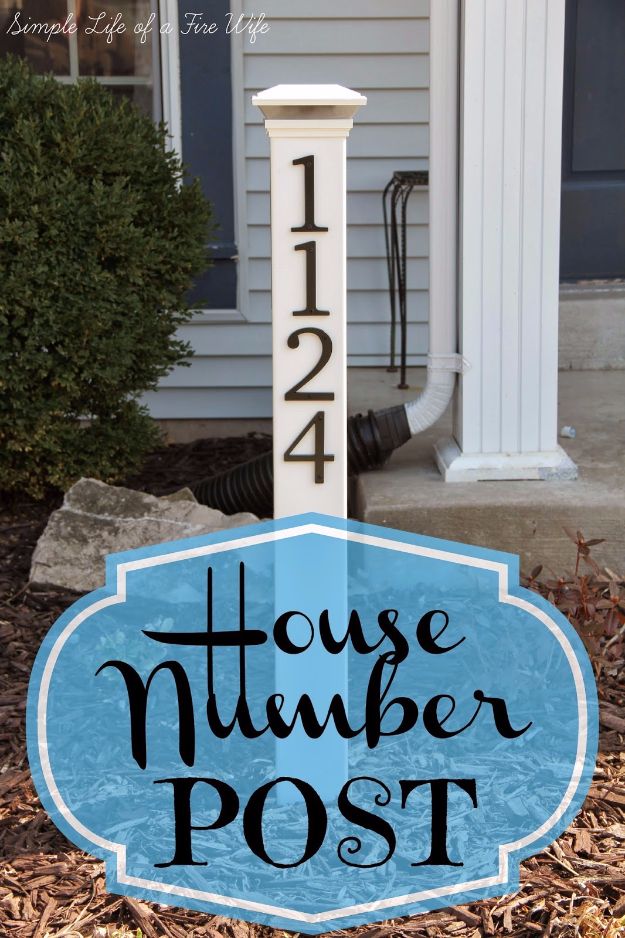
A freestanding post at the front of the yard, which is the answer when the house itself sits back from the road or up on a hill. Dig the hole, drop in a 4×4, then slide a white vinyl post jacket over it to match existing porch columns, holding the jacket with a couple of screws at the base while you work. Level it, then backfill the hole with paver gravel rather than concrete so it can be reset. A solar light cap on top lights the numbers after dark, and the numbers go high on the post, not centered.
Get the full tutorial at Simple Life of a Fire Wife.
16. Wooden Fish House Number
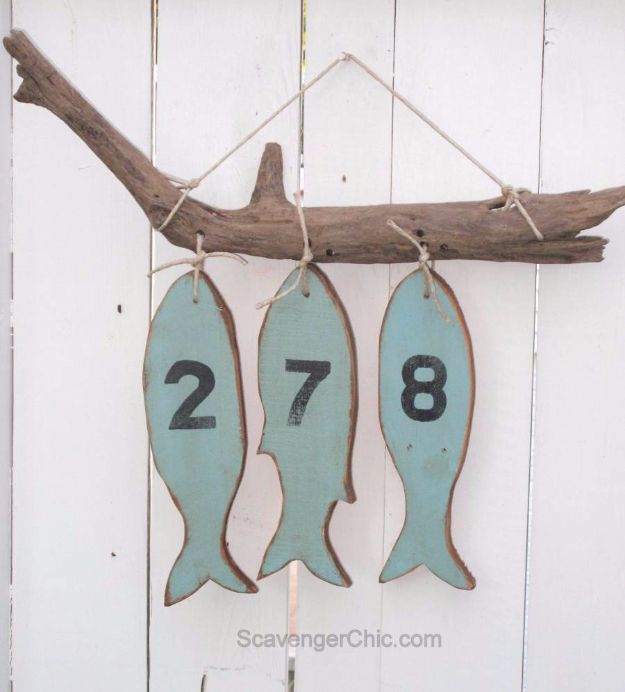
Free, if you have pallet wood and a beach walk in you. Draw a fish shape straight onto a foot-long piece of pallet wood, freehand, no template, and cut it out with a jigsaw or a scroll saw. Fins are optional. Paint each fish, stencil a number on, then go back with a fine brush and fill the breaks the stencil leaves in a 2 or an 8 so it stops looking stenciled. Palm sand, then dark wax the edges and clear wax the fronts and buff both off with a rag. Drill and hang from driftwood on jute.
Get the full tutorial at Scavenger Chic.
17. House Number Painted On Front Door
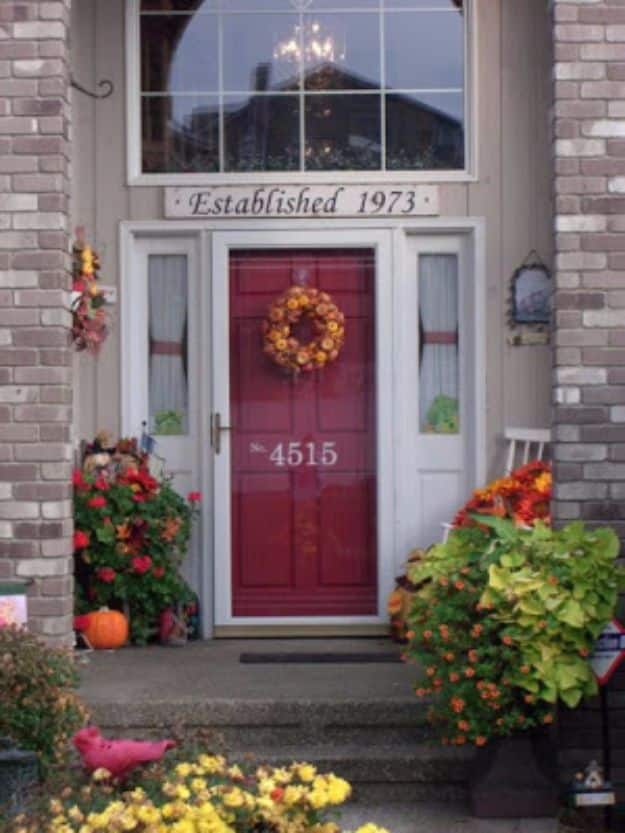
The simplest thing on this list and the cheapest, because the numbers are painted straight on with a white paint pen. No hardware, no drilling, nothing to mount. The version here runs them up the glass of a white storm door above a burgundy front door, which reads cleanly from the street since a pale numeral on glass has a dark interior behind it. A paint pen gives a crisp edge as long as you go slowly and keep the tip loaded. Work the spacing out in pencil or with low tack tape first, because there is no moving a painted numeral afterwards.
Get the full tutorial at It's the Little Things That Make a House a Home.
18. House Address Number Monogram
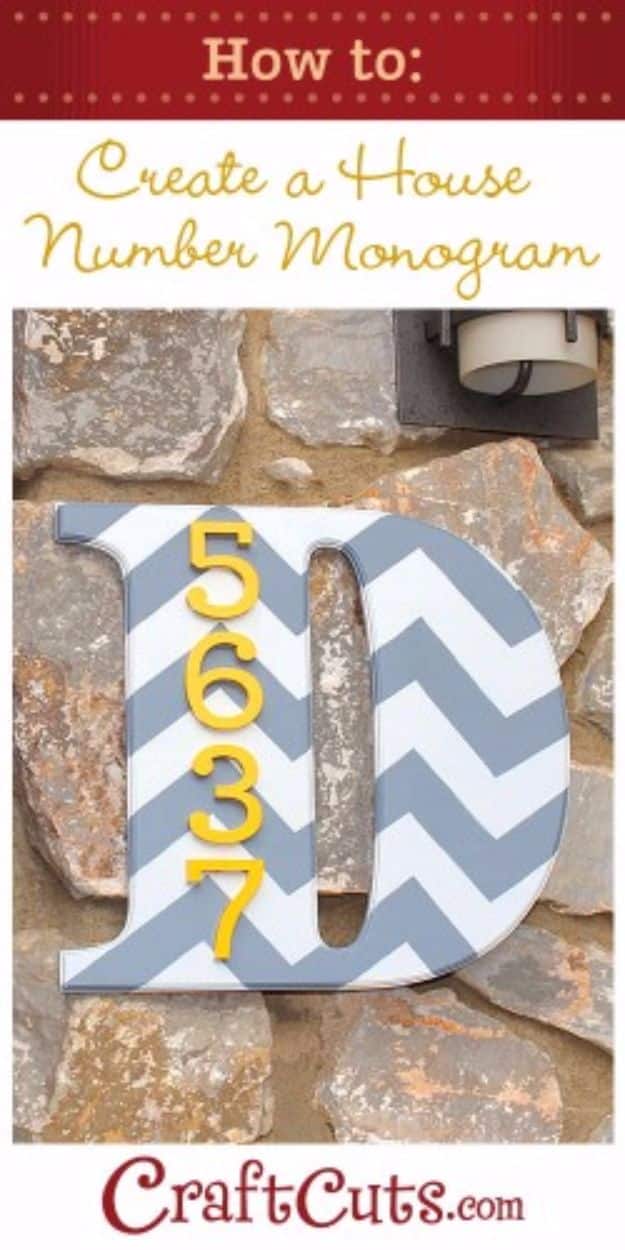
A large painted letter with the address numbers mounted across it, and the material choice is the thing that makes or breaks it. Use an outdoor rated MDF or Medex letter, around fifteen inches tall with a beveled edge, not the craft store letters, which fall apart outdoors inside a few weeks. Prime and paint with outdoor rated spray or house paint; if every product you use is outdoor rated you can skip a clear coat entirely, though a spray varnish never hurts. The chevron here is taped off, and the numbers go on last, centered on the letter’s upright.
Get the full tutorial at CraftCuts.
19. House Number Door Wreath
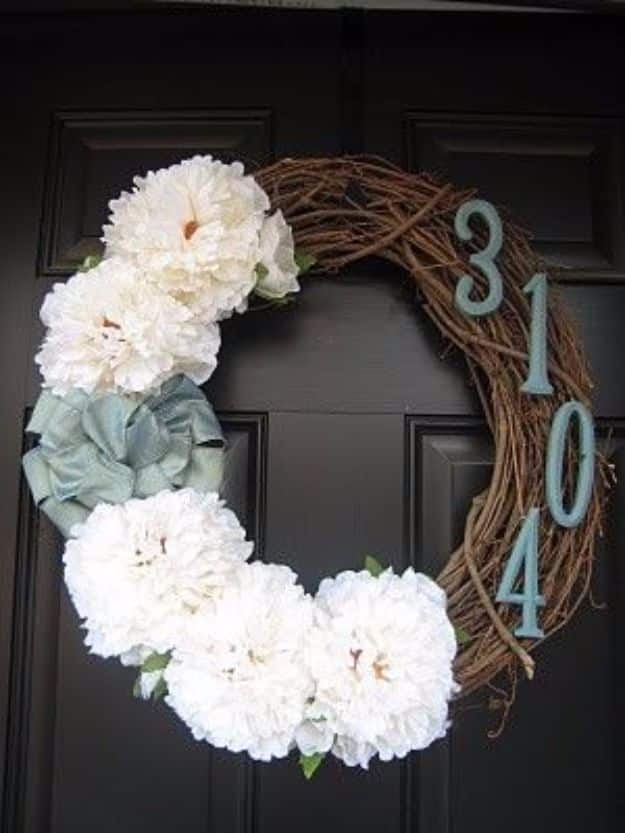
A twig wreath with the numbers set into it and a drift of felt flowers across one side. The flowers are the work, and there are sixty of them here, cut by hand and hot glued to the wreath in a crescent rather than spread evenly around it. That crescent is what stops it looking like a craft store wreath. Real metal house numbers from the hardware store go in last, pushed into the twig tangle and held by the screws they come with, so nothing needs drilling and the numbers lift straight back out for winter.
Get the full tutorial at One Dog Woof.
20. DIY Simple House Number Sign
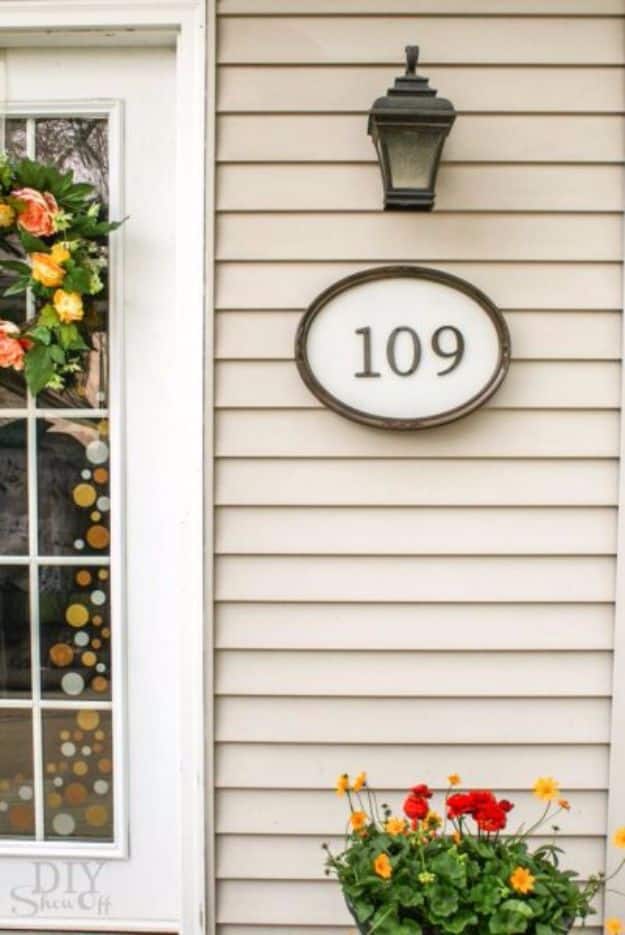
Everything here comes out of a garage: a picture frame with a wood backing, a scrap wood plank, spray paint and a can of clear lacquer. Take the glass out and recycle it, then spray the frame, the numbers and the backing board in light even coats, letting each dry properly. Put the backing back in, screw the numbers through the center of it, and use the scrap plank behind the backing as an anchor so the screws bite into something solid instead of cardboard. Lacquer the finished sign and it works indoors or out.
Get the full tutorial at Beneath My Heart.
21. DIY House Number Flower Hanger
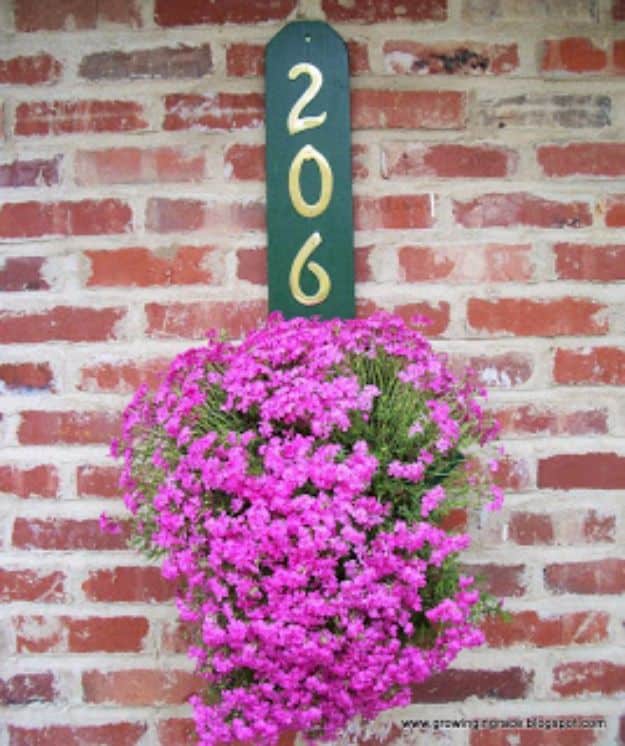
Two of these were built for under fifteen dollars, one for each side of a garage door. The sign is a 1×6 cut to eighteen inches with a short 45 degree cut taken off each corner, drilled at both ends to screw flat to the wall. The planter is a dollar store hanging pot cut in half, mounted on a 1x12x12 board turned on the diagonal so it sits as a diamond. Lay out the seat with a compass at a 2 3/4 inch radius, sand it, then fix the half pot with three #10 stainless sheet metal screws and large flat washers from inside.
Get the full tutorial at Growing in Grace.