
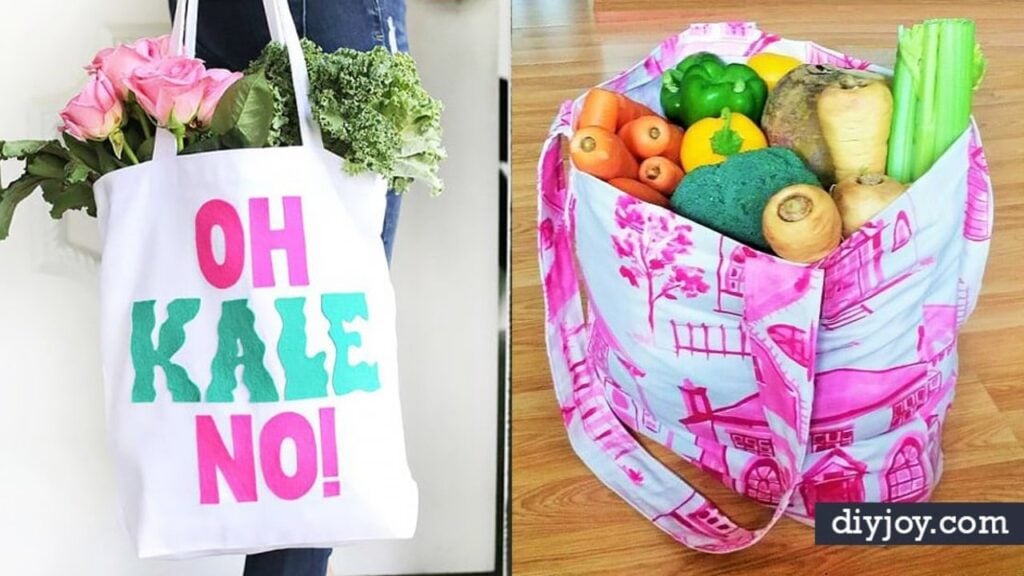
Reusable shopping bags pile up fast, but the handmade ones are the bags that actually make it to the store. These 22 DIY shopping bags cover every skill level, from a no sew T-shirt grocery bag cut with scissors to a fully lined market tote. Some are quick makeovers for a plain canvas tote: shibori dye, a photo transfer, a vinyl stencil, iron-on prints and ruffles made from fabric scraps. Others are real sewing projects, like an insulated grocery tote, foldaway bags that tuck into their own little case and sheer drawstring produce bags. Two are DIY JOY originals, a fruit embroidered tote and a denim bag made from an old pair of jeans. Keep one in the car and one in your purse.
1. DIY Shibori Shopping Bag
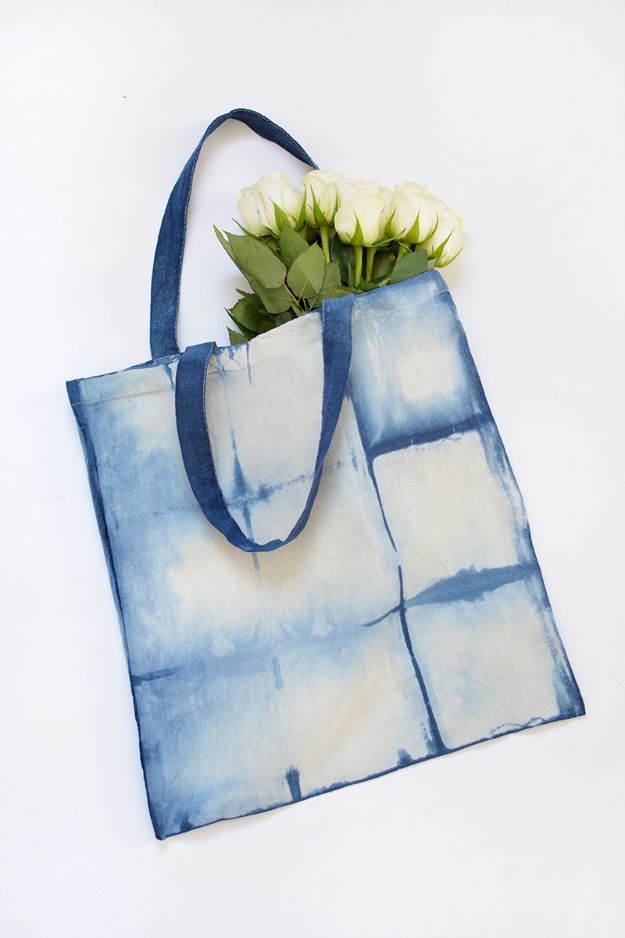
A plain cotton tote, a few rubber bands and a pot of navy dye are all it takes to get that folded indigo look. The tote gets accordion folded lengthwise, then folded the other way into a neat square with the handles left free. Two squares of wood or tile clamp it on either side, held with elastic bands. Into the dye it goes, turned now and then so the color soaks in evenly. About 10 minutes was plenty, far shorter than the packet suggested, and dipping only the edges gives a lighter result. Rinse, unwrap it and the grid pattern appears like a magic trick.
Get the full tutorial at Burkatron.
2. Easy DIY Fruit Embroidered Tote Bag
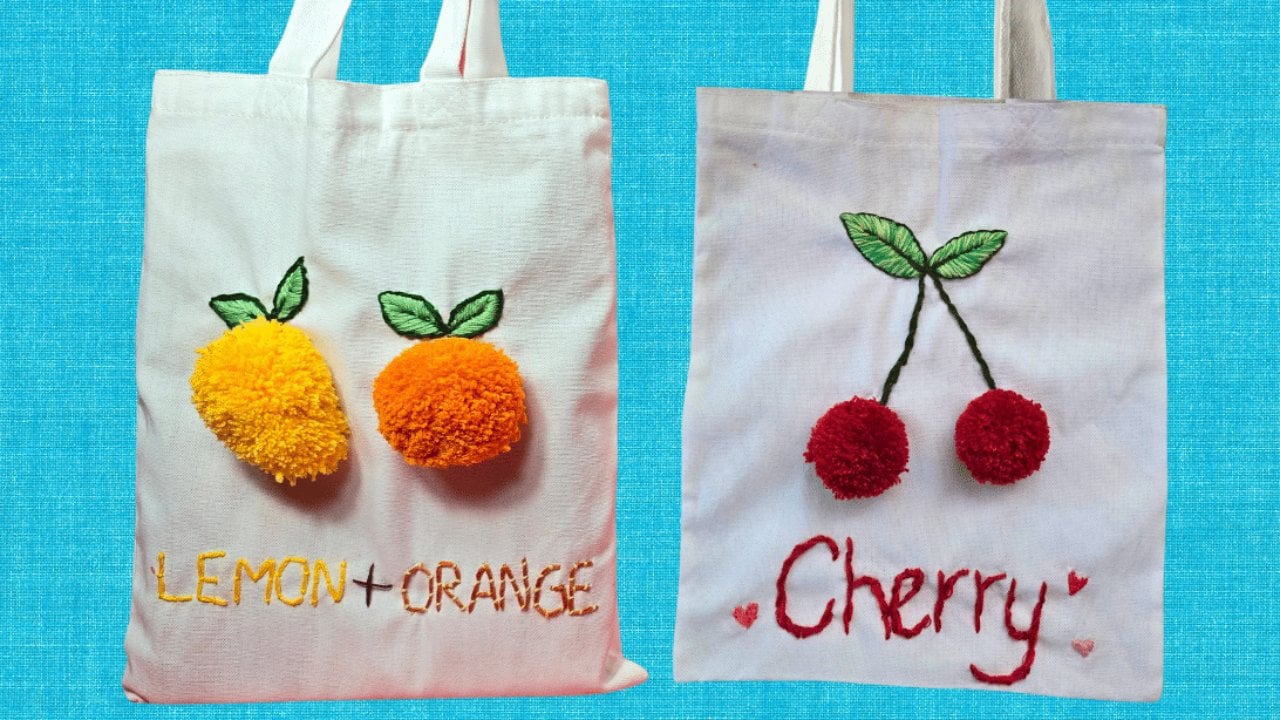
A blank canvas tote turns into a little fruit stand with embroidery thread, yarn and a hot glue gun. Sketch the design right onto the bag, outline the leaves in backstitch, run a stem stitch for the cherry stems and fill the leaves with satin stitch. The cherries are pom poms: yarn wrapped about 100 times around three fingers, tied tight in the middle, snipped and shaped into a ball, then glued to the ends of the stems. Twisting two thread colors together makes the leaves pop, and splitting the strands keeps them moving through the needle. Lemons or oranges work just as well.
Get the full tutorial at DIY JOY.
3. DIY Geometric Printed Tote Bag
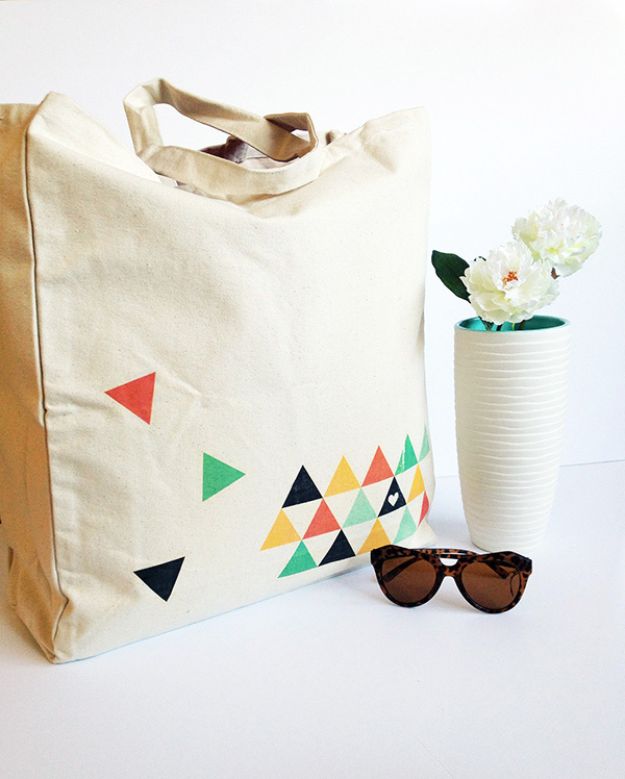
Iron-on transfer paper is the shortcut here, and the finished bag looks screen printed. Print the free triangle printable in color on an A4 transfer sheet, cut around it with a border of about 5mm and split off the three small triangles. Lay the big print face down along one side of a blank tote, scatter the small triangles around it and iron everything per the paper’s directions. The one rule that matters: let it cool completely before peeling the backing. Peel it warm and the print comes out patchy. Four steps, scissors and an iron, and a boring tote gets a whole new look.
Get the full tutorial at makeandtell.
4. Reusable Eco Bag
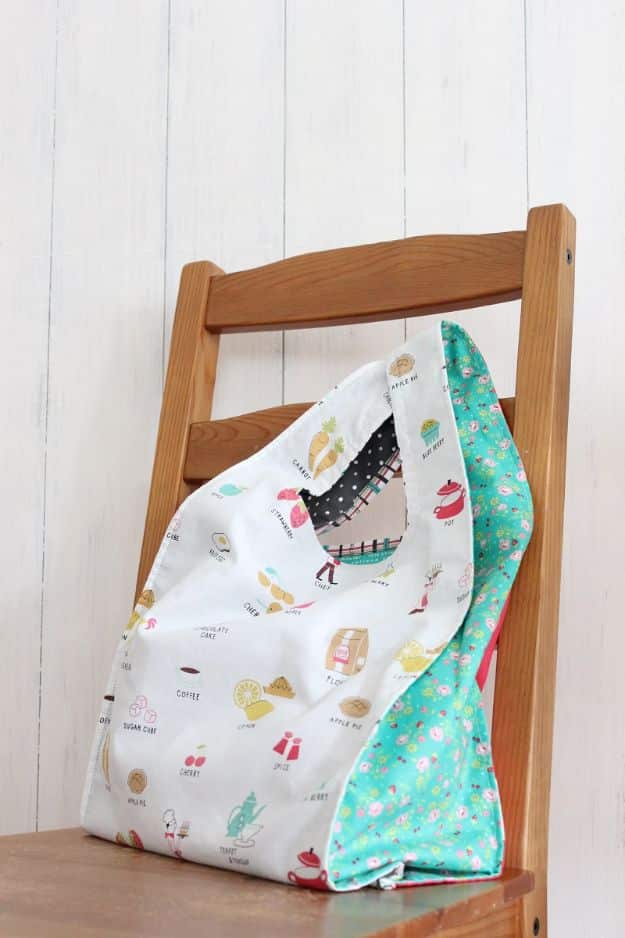
Shaped like the plastic shopping bag it replaces, this sewn eco bag finishes 38cm long, 30cm wide and 13cm deep. It is split into four panels and gussets so several fabrics can mix, with piping along the seams and narrow 5mm French seams hiding every raw edge. The handles curve right out of the panels, so the bag looks tidy even turned inside out. Best part: it folds into its own pocket and slides flat into a purse. Pick a regular weight cotton, since thick fabric makes those French seams a real struggle to finish.
Get the full tutorial at KOKKA-fabric.com.
5. Photo Transfer Tote
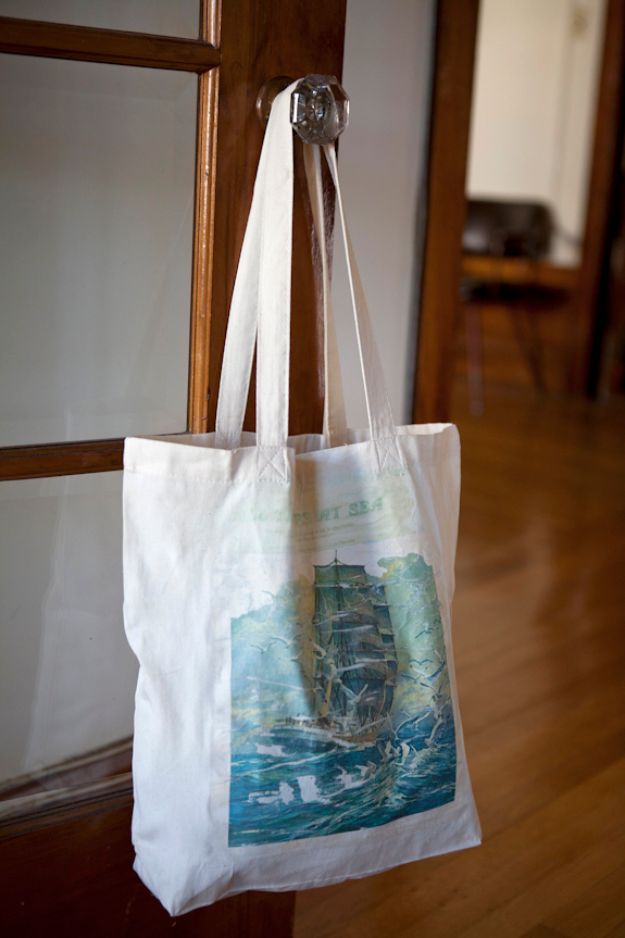
A vintage magazine picture, a bottle of Liquitex gloss medium and a canvas tote make a bag with a soft, worn look. Brush the cut image generously with gloss until it is saturated, press it face down on the bag and leave it overnight. Next day, spray a small section with water and rub until the paper pills away and the picture shows through. Words come out reversed, so flip any text before printing. Copy shop prints transfer better than home ink jet or plain printer paper. Some patches will lift, and honestly that is the charm.
Get the full tutorial at Say Yes.
6. Make A DIY Stenciled Grocery Tote
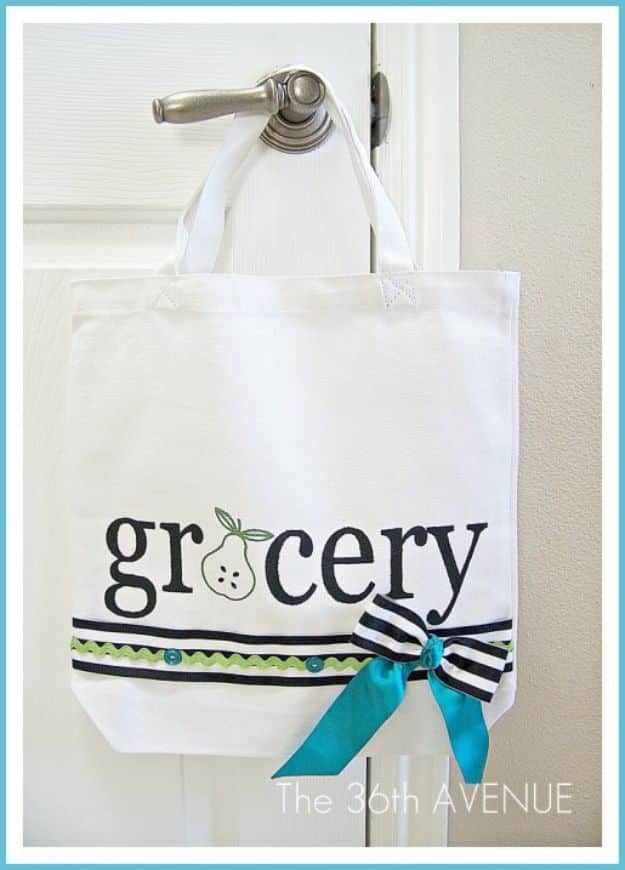
Inexpensive store totes, about $6 for three when this was written, get a 30 minute makeover with paint, ribbon and buttons. Iron the tote smooth, press a cut vinyl stencil down hard around every letter and slip paper inside so paint cannot bleed through. Dab fabric paint on with a flat brush; it dries softer than regular acrylic. Peel the vinyl when you are done, using a pin for the tiny bits. Then tuck ribbon ends into a few opened side stitches, sew them back in and anchor the rest with buttons and a little bow.
Get the full tutorial at Tatertots and Jello.
7. Knotted Fabric Shopper Tote
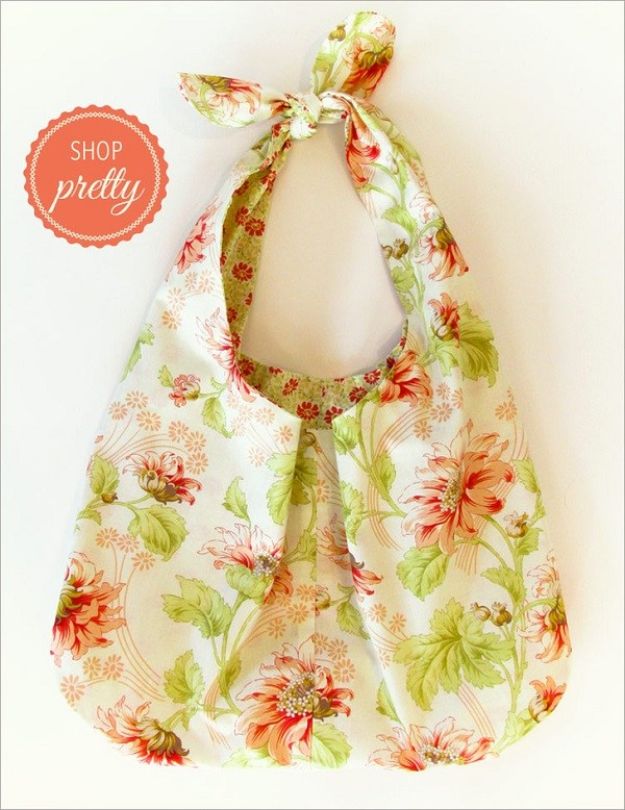
Two layers of quilting weight cotton with a little batting in the base make this shopping bag soft enough to roll up and stuff into a purse or glove box. The single shoulder strap ties in a knot at the top, and that knot is what makes it adjustable, so shorten it for a heavy load. Each bag finishes about 12 inches wide, 6 inches deep and 20 inches tall and holds more than a plastic bag. The free five piece pattern prints at 100 percent, and one bag takes 1 yard each of two cottons plus a package of 1/2 inch bias tape. Prewash the fabric, since these get washed often.
Get the full tutorial at Sew4Home.
8. Easy Upcycled DIY Denim Jeans Bag
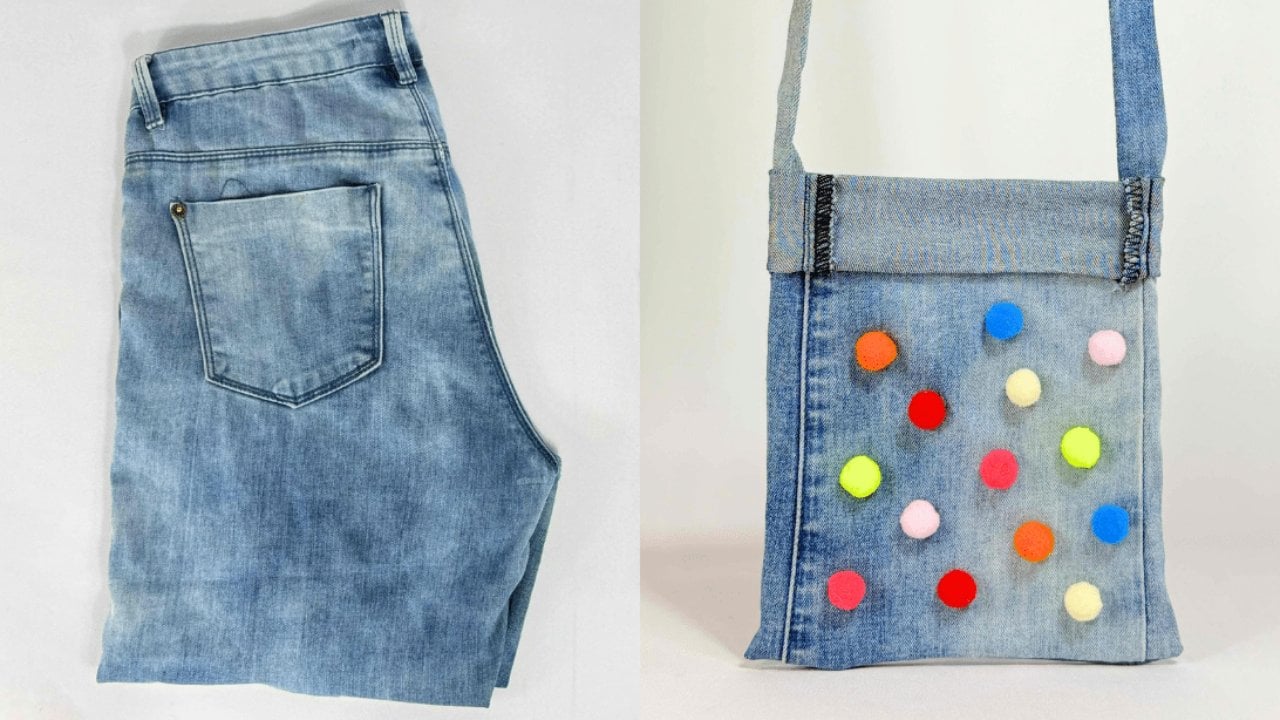
One leg of an old pair of jeans is already most of a bag. Cut it to size, turn it inside out, seal the bottom with hot glue, then turn it back and fold the top down about 2 inches. The other leg becomes the strap: two strips glued end to end with the long edges folded to the center. Glue the strap ends inside at the side seams, add a small Velcro tab to close it and move the jeans’ back pocket onto the bag. Beads, charms or even hair ties finish the front. No sewing machine required.
Get the full tutorial at DIY JOY.
9. Foldaway Shopping Bags with Carrying Case
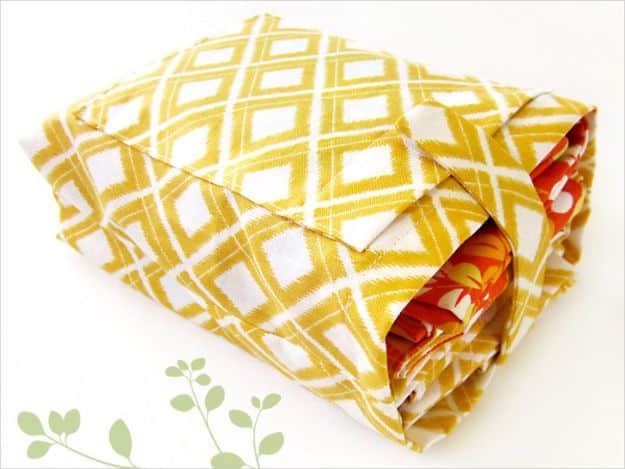
Two generous shopping duffles fold away into one carrying case about 5 by 7 by 2 inches, small enough for the glove box. The case even has a front pocket for the shopping list, cards and keys. A downloadable pattern gives each bag its one piece body and handle shape, and it is sized so Fat Quarters can stand in for yardage: two per bag lining, two per bag exterior and one for the case. Every seam is a quarter inch, so a quarter inch foot really helps, and a sew-on Velcro dot keeps the case closed.
Get the full tutorial at Sew4Home.
10. Fabric Grocery Bags
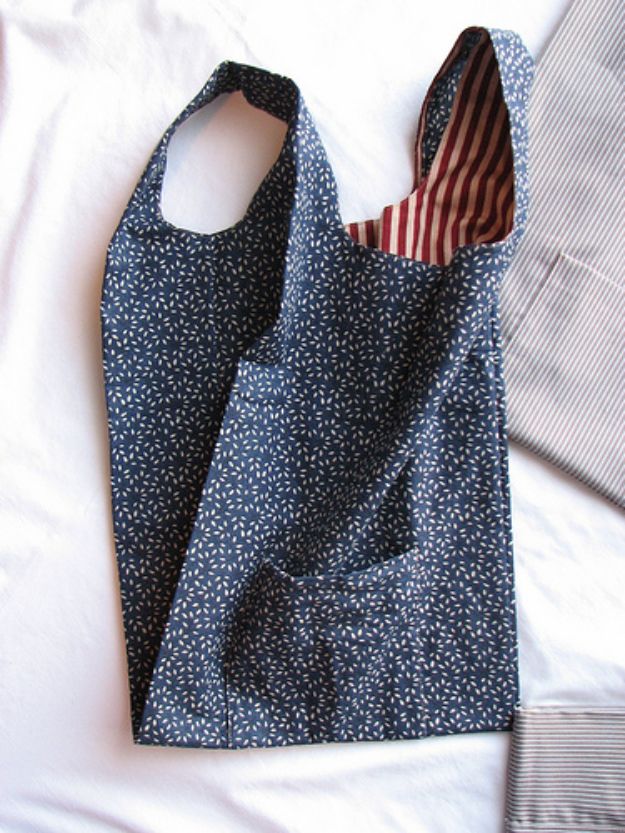
These look just like the plastic grocery bags stuffed under the sink, except they are fabric and they last for years. A real plastic bag serves as the pattern, and a small pocket on the side lets each bag fold into itself, small enough for a purse or the glove box. The fold is the clever part: lay the bag pocket side down, fold the sides in using the pocket edges as a guide, fold it in half so the handles meet the bottom, fold again, then reach into the pocket and turn the whole bundle inside out. They were sewn as Christmas gifts, and they make a very good one.
Get the full tutorial at My Sewing Space.
11. Strawberry Reusable Shopping Bags
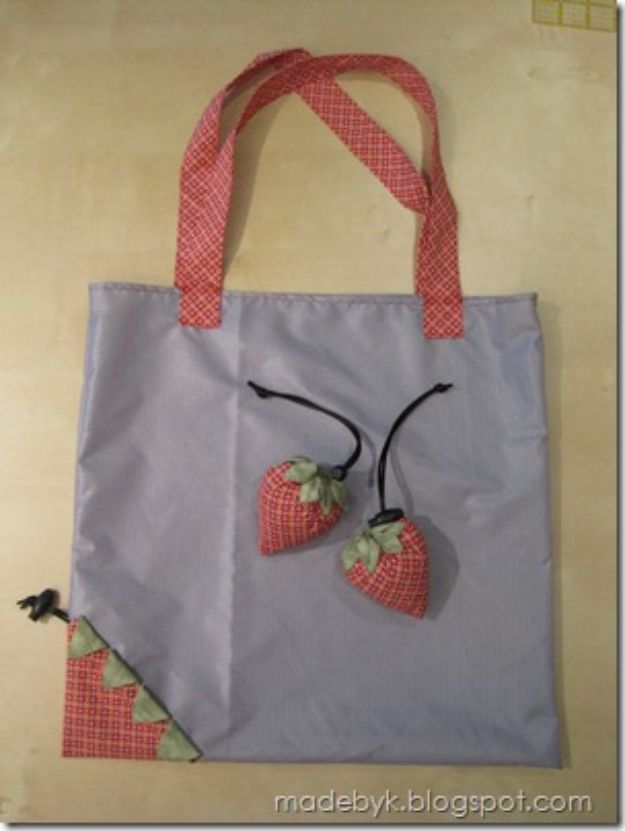
Shopping bags that cinch up into a tiny strawberry when they are empty are almost too cute to fill with groceries. These were sewn as end of year gifts for preschool teachers, which is a pretty brilliant thank you, and the post credits another sewing blog’s strawberry bags as the original idea. Pull the drawstring and the whole bag gathers into a little berry that fits in a pocket. The post is a photo story rather than a step by step, so treat it as the inspiration shot and pair it with any basic drawstring bag pattern.
Get the full tutorial at Made By K.
12. Insulated Tote Bag
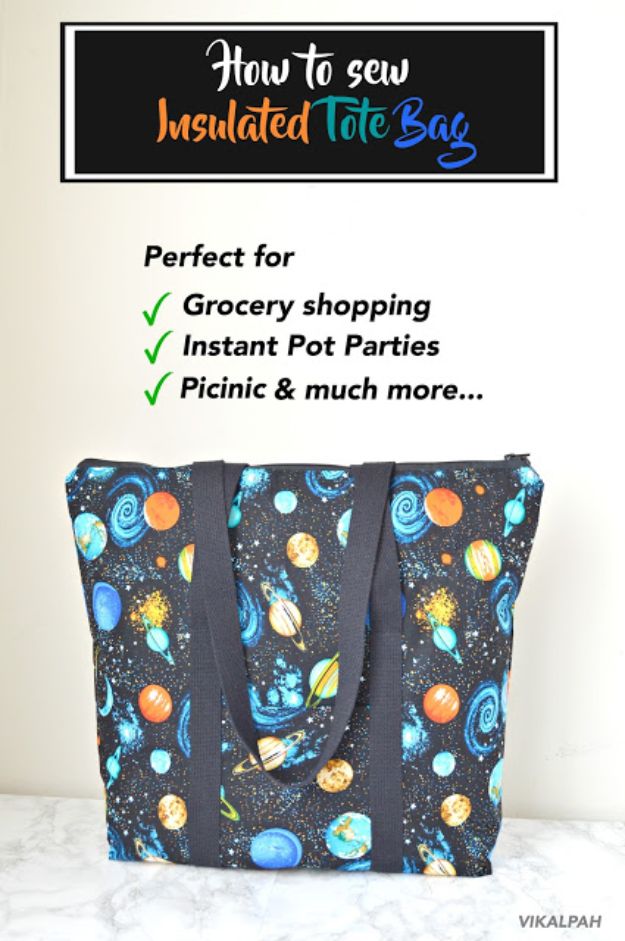
Milk and yogurt going warm in the car is exactly why this insulated grocery tote exists. Each layer is cut about 20 by 21 inches: printed cotton outside with interfacing, Insul-Bright in the middle and a breathable sports nylon lining, roughly 3/4 yard of each. Random lines of stitching hold the Insul-Bright to the nylon, so there is no careful quilting to fuss over. An optional front pocket, 4 yards of cotton webbing for the handles and a 22 inch two way zipper finish it off. Summer errands just got a lot longer.
Get the full tutorial at Vikalpah.
13. Fussy Cut Tote Bag
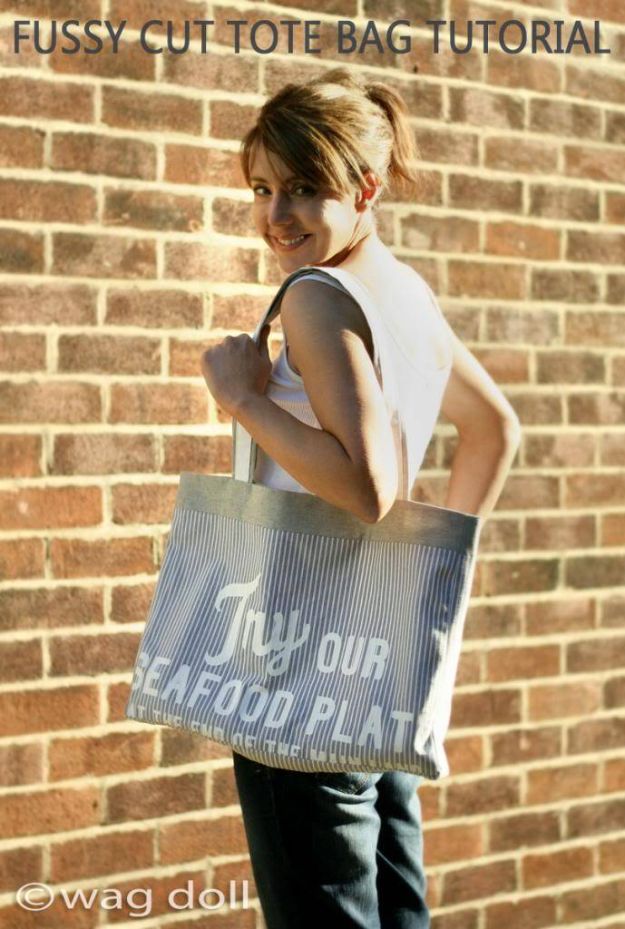
Fussy cutting means placing the pattern piece so the best part of the print, here a line of script, lands dead center and right side up. It is a quilting trick, and it looks great on a tote. This one is fully lined with a patch pocket, and the main fabric came from a table runner unpicked at the hems for every last inch. Front and back panels are 19 by 13 inches with a 19 by 3 inch bottom and 13 by 3 inch sides, so it holds a lot. Plan on 1 yard each of main fabric and lining.
Get the full tutorial at Wag Doll.
14. Cornishware Ruffled Shopping Bag
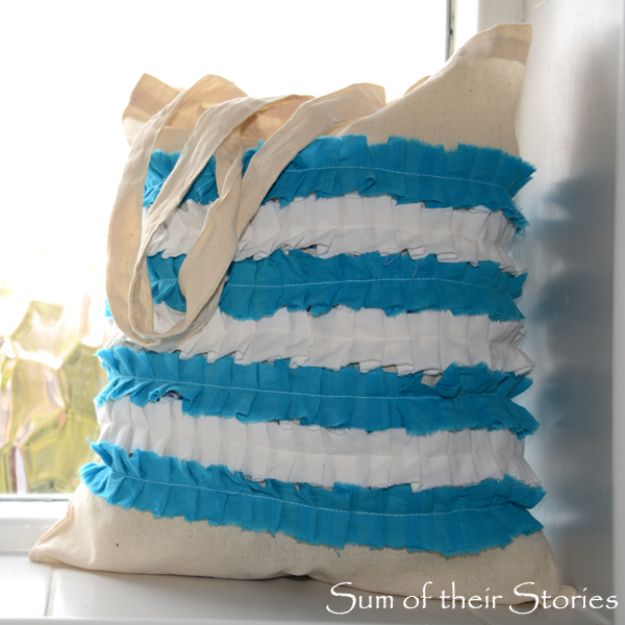
Free promotional tote with a logo nobody wants to carry around? Cover it in ruffles. Rip fabric scraps into long strips about 1.5 inches wide; ripping keeps them straight, and the frayed edges add a shabby chic finish. Mark a straight line where the ruffles start, pin the handles out of the way, then sew the strips on row after row. Mixing striped scraps nods to classic Cornishware pottery. The whole makeover takes about 30 minutes with a sewing machine, and nobody will ever know what was printed underneath.
Get the full tutorial at Sum of their Stories Craft Blog.
15. Canvas Eco-friendly Shopping Bag
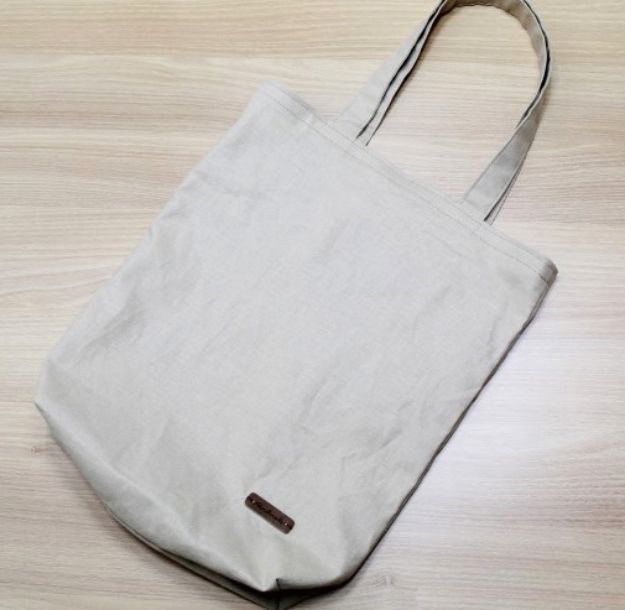
A small canvas shopping bag, 34cm wide and 38.5cm tall, told almost entirely in step by step photos. Canvas keeps it sturdy and washable for everyday shopping, and it is a nice blank base for decorating later. The comments double as a mini troubleshooting guide: one reader suggests tacking a lighter lining into the corners of the outer fabric so it does not shift, and another scaled the pattern up for big grocery runs. A great pick for visual learners who would rather follow pictures than paragraphs.
Get the full tutorial at Handmadiya.
16. Shopping Tote DIY
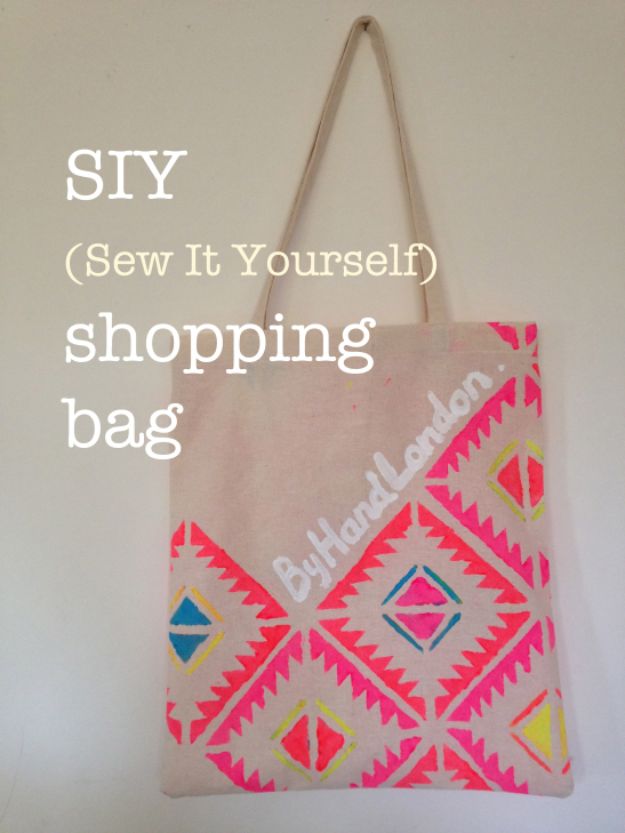
The most basic shopping tote there is, and a bold stenciled fabric is what makes it special. All it takes is 1 meter of medium to heavy cotton, calico, canvas or twill. Cut two 38 by 50cm rectangles and two 8 by 70cm straps, press and topstitch the straps, then sew the body with a 1cm seam. Double fold the top edge and trap the straps in as you stitch around. Flip the straps up and stitch a small rectangle where they meet the opening for strength. Five steps and done before the kettle boils.
Get the full tutorial at By Hand London.
17. Shopping Bag For Beginners
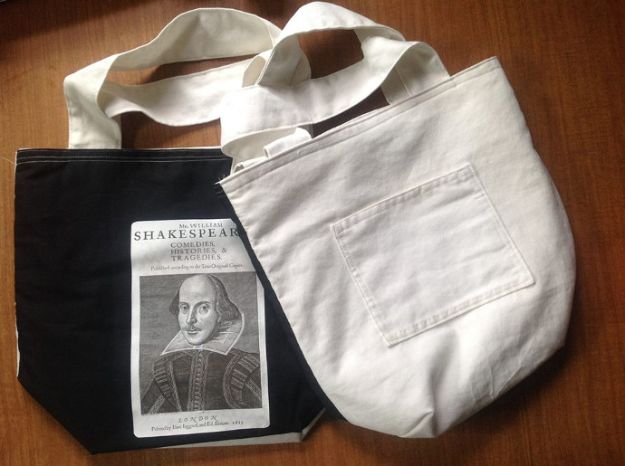
Squares, rectangles and a sheet of dark T-shirt transfer paper: that is the entire pattern for this lined bag, which works as a shopping bag or a purse. Two white squares make the lining and one black and one white make the outside, each about a foot and a half square, with a public domain picture ironed onto the black panel. A hemmed pocket goes on the lining, and the handles start as rectangles about 4 inches wide and up to 2 feet long, folded in half. Basic machine skills cover it, and old curtains are fair game.
Get the full tutorial at Happy Family Art.
18. DIY No Sew Reusable Grocery Bag
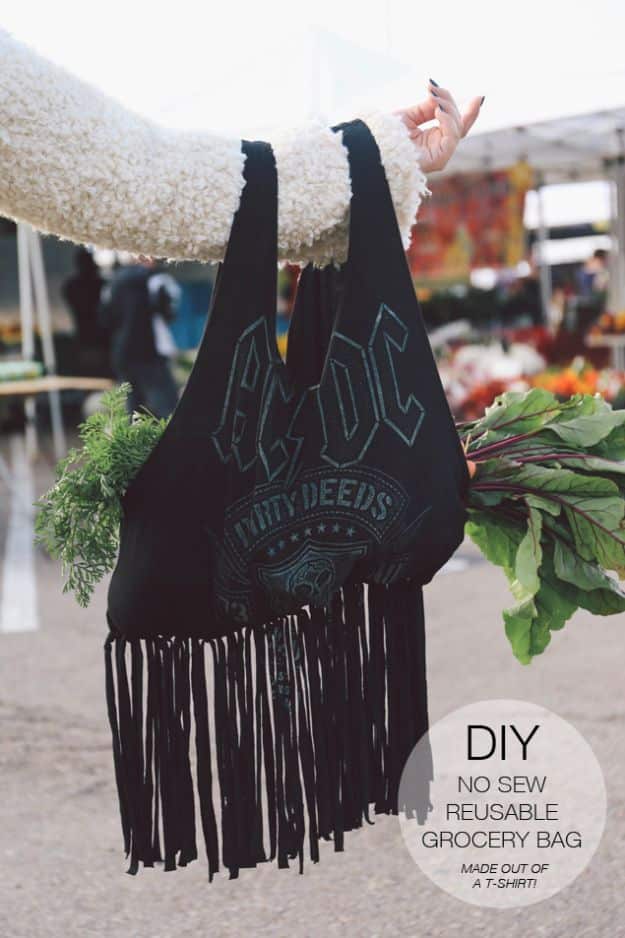
An old T-shirt and a pair of scissors make up the whole supply list. Cut off the neck about 2 to 3 inches below the neckline, then the sleeves and the bottom hem. Measure 6 inches down from each armhole and mark a line across: that is where the bag bottom sits. Below it, cut fringe every half inch through both layers, then double knot each front strip to the matching back strip to close the base. The bigger the shirt, the bigger the bag, and a band tee gives it some attitude. A rotary cutter keeps the fringe straight.
Get the full tutorial at Eat More Rabbit Food.
19. Make Your Own Shopping Bag
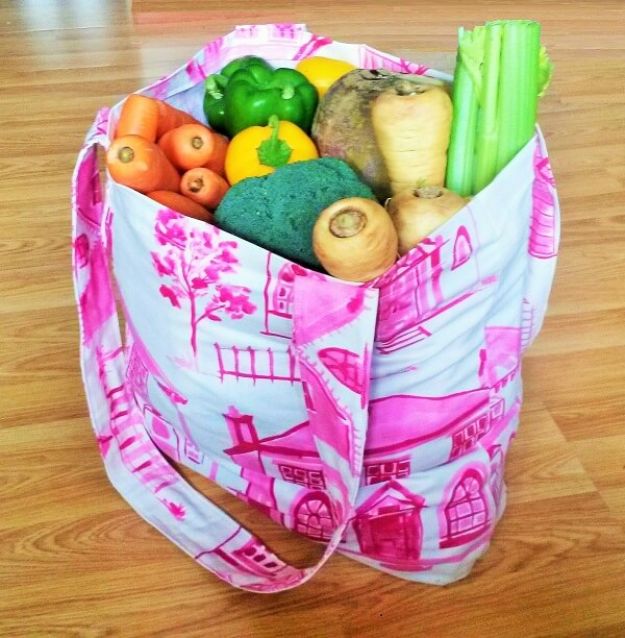
Sturdy cotton canvas, about 80cm of it, makes a big boxy shopping bag with a reinforced base. The body is one 110 by 45cm piece sewn around a 40 by 14.5cm base, cut twice and stacked for strength, with interfacing between if you want it stiffer. Two 15 by 110cm strips fold into tube handles topstitched along both edges. A small inside pocket from two 30 by 14.5cm pieces keeps the phone and keys from sinking to the bottom of a full bag. A quarter inch foot keeps every seam neat.
Get the full tutorial at Sewing Bee Fabrics.
20. DIY Iron-on Tote Bag
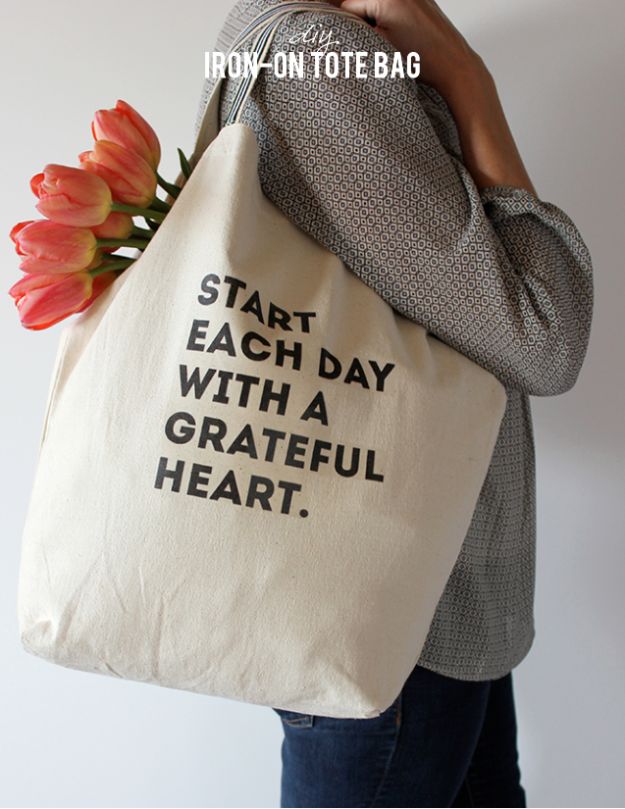
A sweet saying on a canvas tote, made as a Mother’s Day gift and easy enough to finish in an afternoon. Grosgrain ribbon, cut to the handle length plus half an inch at each end, gets tucked and sewn along each strap in a contrasting thread for a pop of color. No sewing machine? Strong fabric glue or thin fusible hem tape works too. Then print the free saying on iron-on transfer paper, press it on per the package and let it cool before peeling the backing away. A gift any mom would actually use.
Get the full tutorial at Alice and Lois.
21. DIY Reusable Produce Bags
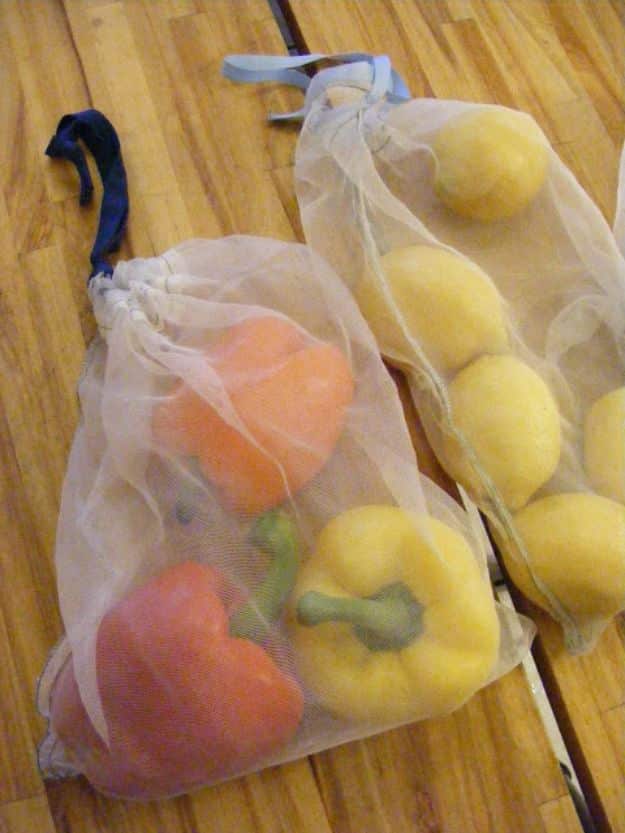
Eight produce bags in under an hour from about $4 of fabric. Sheer curtain fabric is the trick: it is wider than regular yardage, so 1 meter covers all eight, and old sheer curtains work too. Cut a piece roughly 22 by 16 inches, fold one edge over and stitch a drawstring casing, then fold in half and sew the side and bottom, stopping just below the casing. Zigzag the raw edges, turn it right side out and thread ribbon or bias tape through with a safety pin. They wash well and the cashier can see right inside.
Get the full tutorial at Imperfect Homemaking.
22. Poppy Market Tote
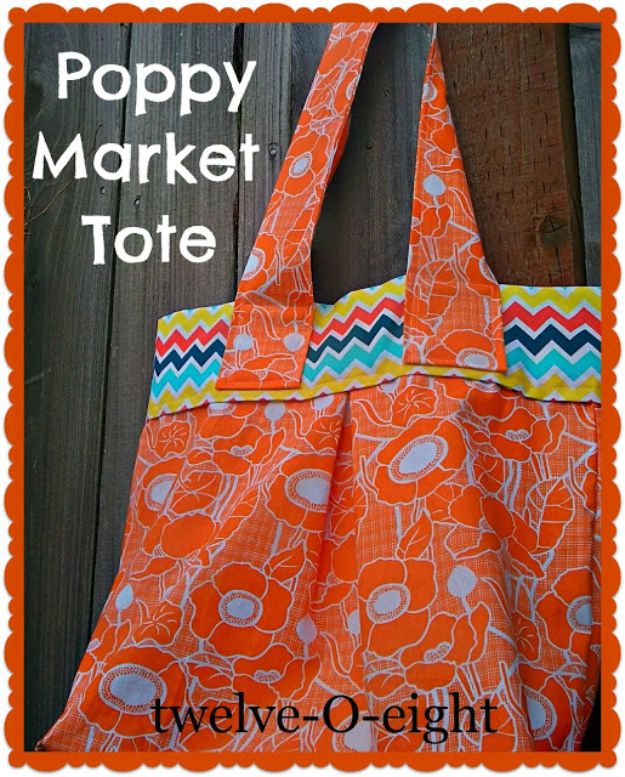
A sunny afternoon at the farmer’s market inspired this lined tote, which works as a purse or a catch-all for market finds. It takes 1 yard each of main fabric and lining, plus half a yard of contrast for the band at the top. Both are cut as a folded 18 by 18 inch square with a 3 inch square notched out of each bottom corner, which is what boxes the base. The straps are strips about 6 by 36 inches, pressed and stitched. Machine washable if the fabrics are, and quick enough for one afternoon.
Get the full tutorial at twelveOeight.






