DIY decor ideas for renters all have to pass one test: will the deposit come back? These 37 renter friendly decor projects do. Faux Roman shades hang on tension rods, a fabric “wallpaper” goes up with liquid starch and peels off with water, and washi tape turns flat doors into paneled ones without a drop of paint. There’s furniture you build or flip once and take to the next place (a storage mirror that leans, a freestanding door headboard, a folding plant stand), plus small things that fill a room fast: beaded plants that never need water, pressed flower jar lights, suncatchers, a tapestry hung with no holes. Plenty of these cost less than a takeout dinner. One tip before you stick anything to a wall: test the tape or strip somewhere hidden first, because old paint in rentals can lift with it.
DIY Ideas for Renters
1. Faux Roman Shade Tutorial

Faux Roman shades dress a window with nothing but fabric and two small spring tension rods, so there are no brackets to drill into the frame. Measure the window, then hem the fabric (sewing, hem tape, fabric glue or even hot glue all work). Set the rods about 8 inches apart inside the window frame, tuck the top edge over the upper rod and drape the rest over the lower one. Fold the bottom up into a soft pleat and fluff. Let it down for privacy and fold it back for light.
Get the full tutorial at Home Stories A to Z.
2. Stenciled Herringbone Entryway Bench

A stenciled herringbone entryway bench turns a $10 secondhand find into storage with personality, and it moves with you to every new place. Sand the bench, then give it two coats of flat white paint, since stencil paint grips flat paint better and dries faster. Lay a herringbone stencil over the lid and front and dab on several bright colors for a shuffled pattern. Swapping a flimsy lid chain for a stay open hinge makes it safer to use. Shoes and boots go inside, and the entry finally looks finished.
Get the full tutorial at Mad in Crafts.
3. DIY Stepladder Side Table

A stepladder side table squeezes shelves into a tight spot beside the bed where a bulky nightstand won’t fit. Lean a full wooden stepladder against the wall at the angle you like and secure the top so it can’t tip. Cut scrap boards to fit each step for shelves. For an aged stain, mix black and brown craft paint unevenly, water it down a lot, brush it on in long strokes and sand lightly once dry. Books, a clock and baskets fill it fast. In a rental, a removable strap anchor beats screwing hinges into the wall.
Get the full tutorial at Funky Junk Interiors.
4. DIY Bedroom Canopy

A DIY bedroom canopy makes a plain rental bed look like a hotel suite with a painted embroidery hoop and four sheer curtain panels. Paint the hoop, thread the sheers onto it and tie white ribbon at the top for hanging. The whole thing hangs from a single ceiling hook, which leaves one small hole that’s easy to fill when you move out. Two hooks or tiebacks at either side of the headboard hold the sheers open. It’s soft, romantic and costs a fraction of a canopy bed.
Get the full tutorial at Spindles Designs.
5. Clay Flower Mirror
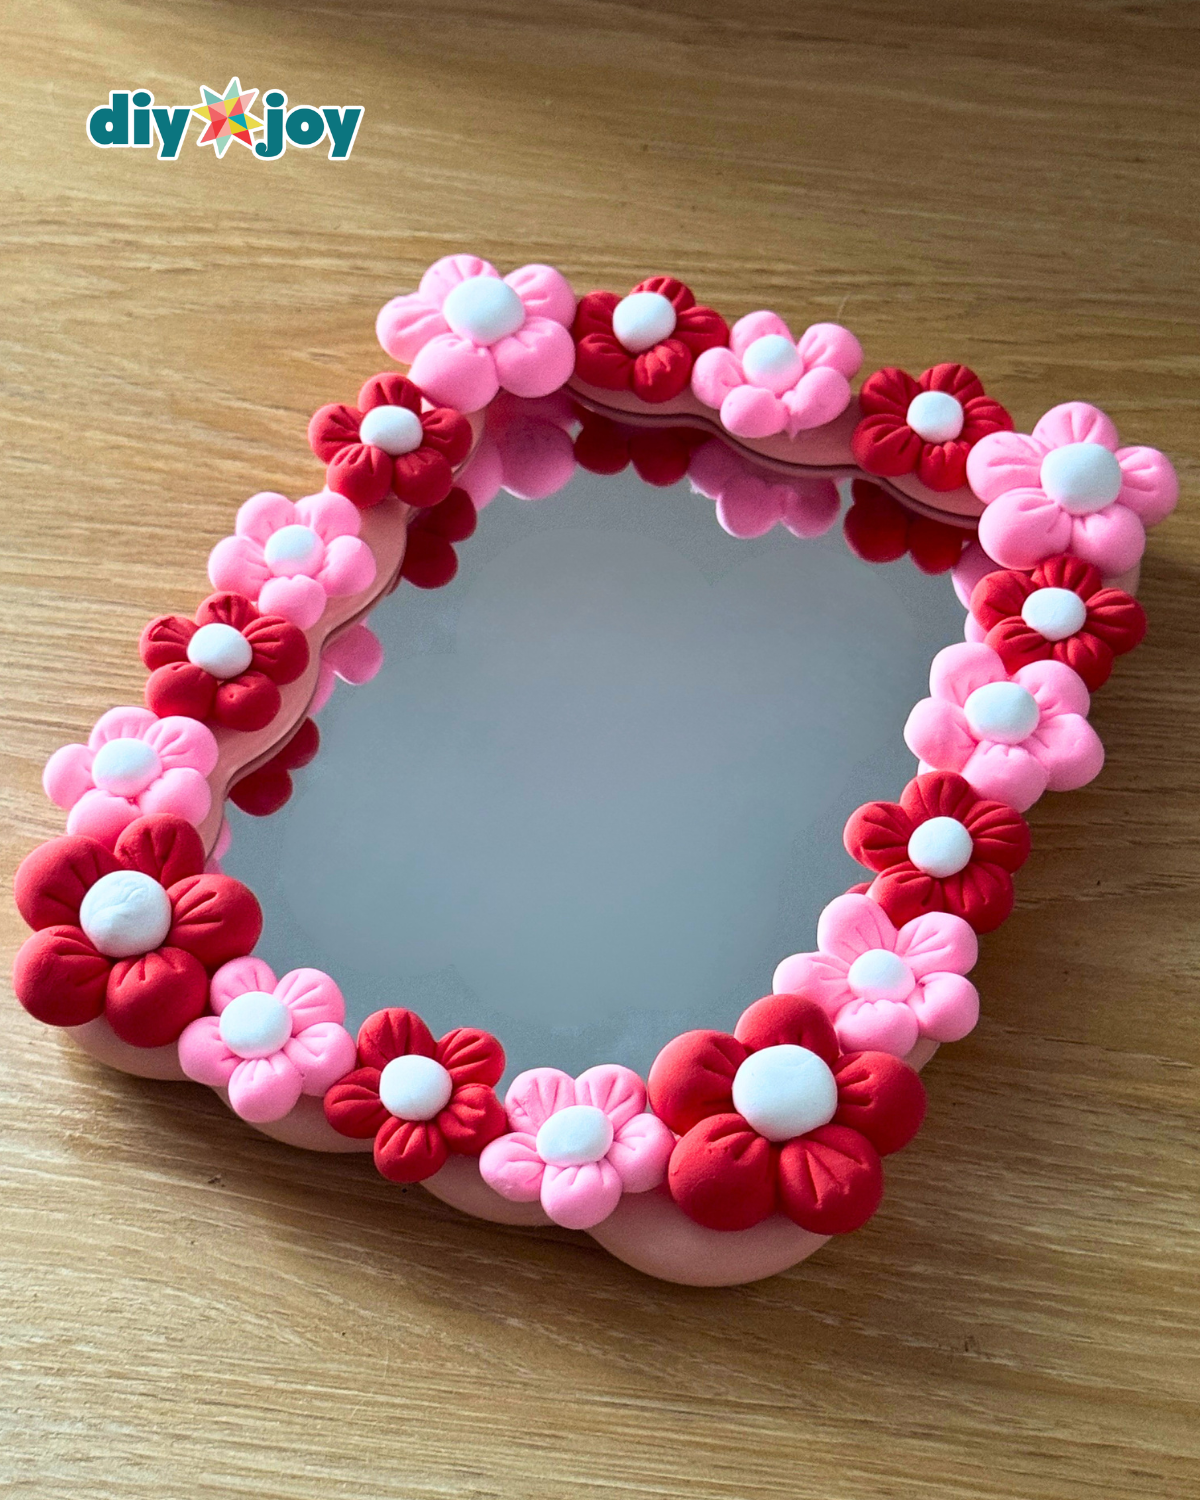
A clay flower mirror adds personality to a rental without a single new nail, since it can lean on a dresser or hang from removable strips. Roll soft clay into balls and press three lines into each with a sculpting tool to make petals, then group five petals around a small white center. Make flowers in a few colors and sizes and let them firm up until they’re no longer sticky. Hot glue them around the frame of a plain or dollar store mirror. A coat of gloss varnish helps them last.
Get the full tutorial at DIY JOY.