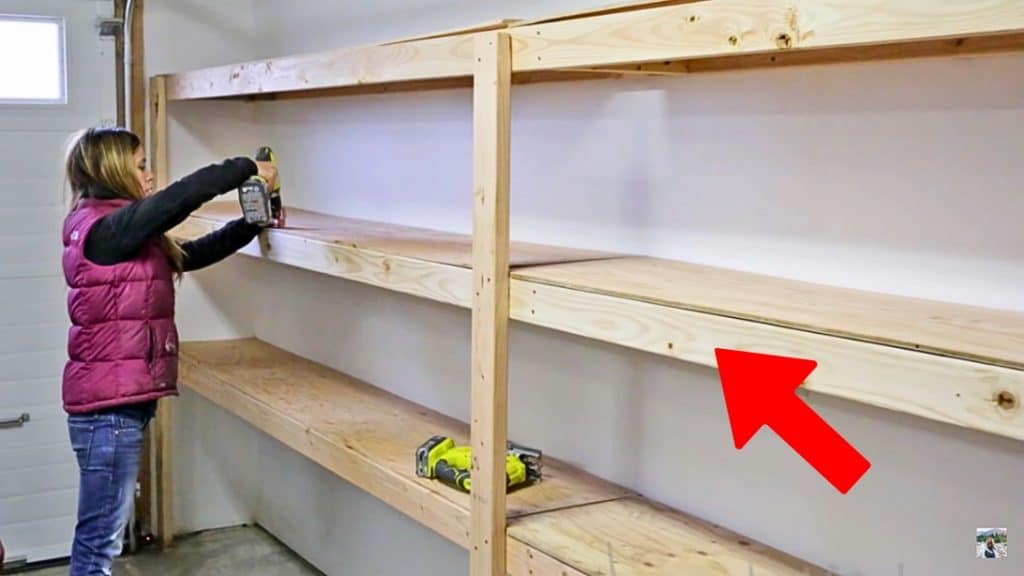
Do you have a messy garage? Do you need more storage space for your things? This garage shelving is the solution to your problems! It’s easy, cheap, and fast to make. Build this simple project with the help of this tutorial by Ana White.
Materials:
- 6 pieces of 2x4s for the shelving
- 2 pieces of 2x4s for legs (you need more if you have a long span)
- level
- 3-inch screws
- driller
- Kreg jig
- plywood
[social_warfare buttons=”facebook,pinterest,twitter,whatsapp”]
Instructions:
Step 1:
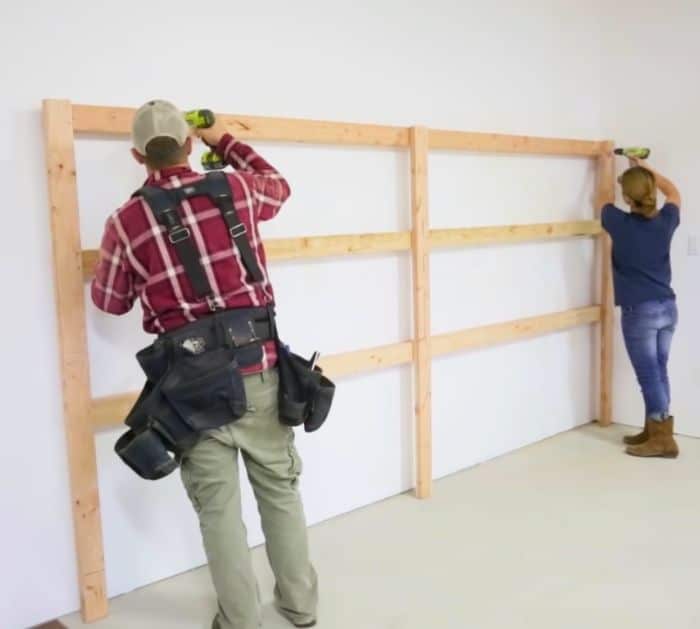
Start by marking the studs on your wall. Once you are done, screw a 2 x 4 the length of your shelving at a desired shelving height to the stud to the wall. Use a level to make sure that the board is leveled.
Step 2:
Add 2 additional 2x4s on the wall through studs in the wall at desired shelving heights. Consider the height of the things you will store on the shelving as you are placing them on the wall. Use the three-inch screws to screw them into the studs.
Step 3:
Take an additional 2×4 and screw it to the first set. Leave the screws protruding out a little bit because you’ll be removing the screws later on. Repeat for the other two. You just need two screws to hold these boards in place.
Step 4:
Get another piece of 2×4 for the leg and screw it to the second set of 2x4s. Do on the other end. If you have a long span, place a third or fourth leg in the center for additional support. Make sure to screw them properly.
Step 5:
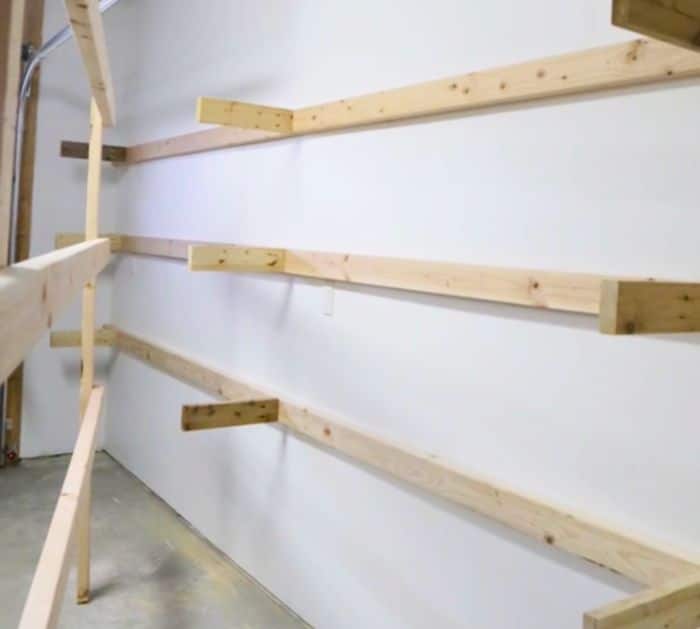
Remove the screws that attach the second set of 2x4s to the first set. Remove the second layer with the legs. Now you have a perfectly matched second leg for the shelving.
Step 6:
Use Kreg jig to attach cleats to the first set of 2x4s. Take the full leg set and attach it to the cleats.
Step 7:
Cut the plywood into sizes, then attach it to the 2×4 framing using screws. You won’t need a lot of screws for this. You can also use a smaller screw for this step.


