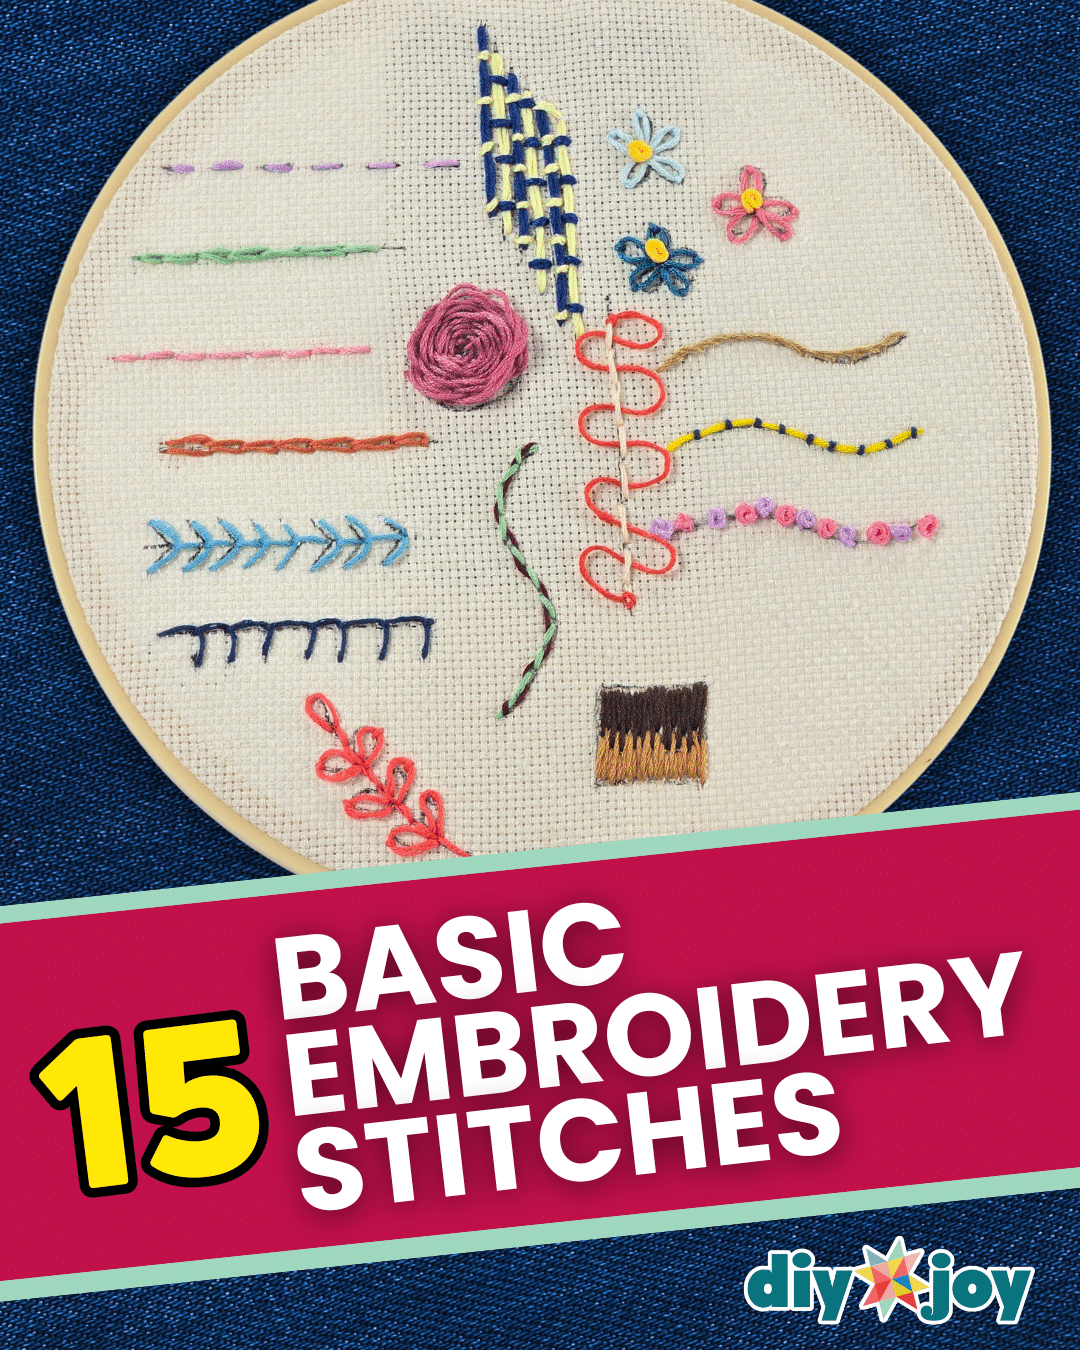
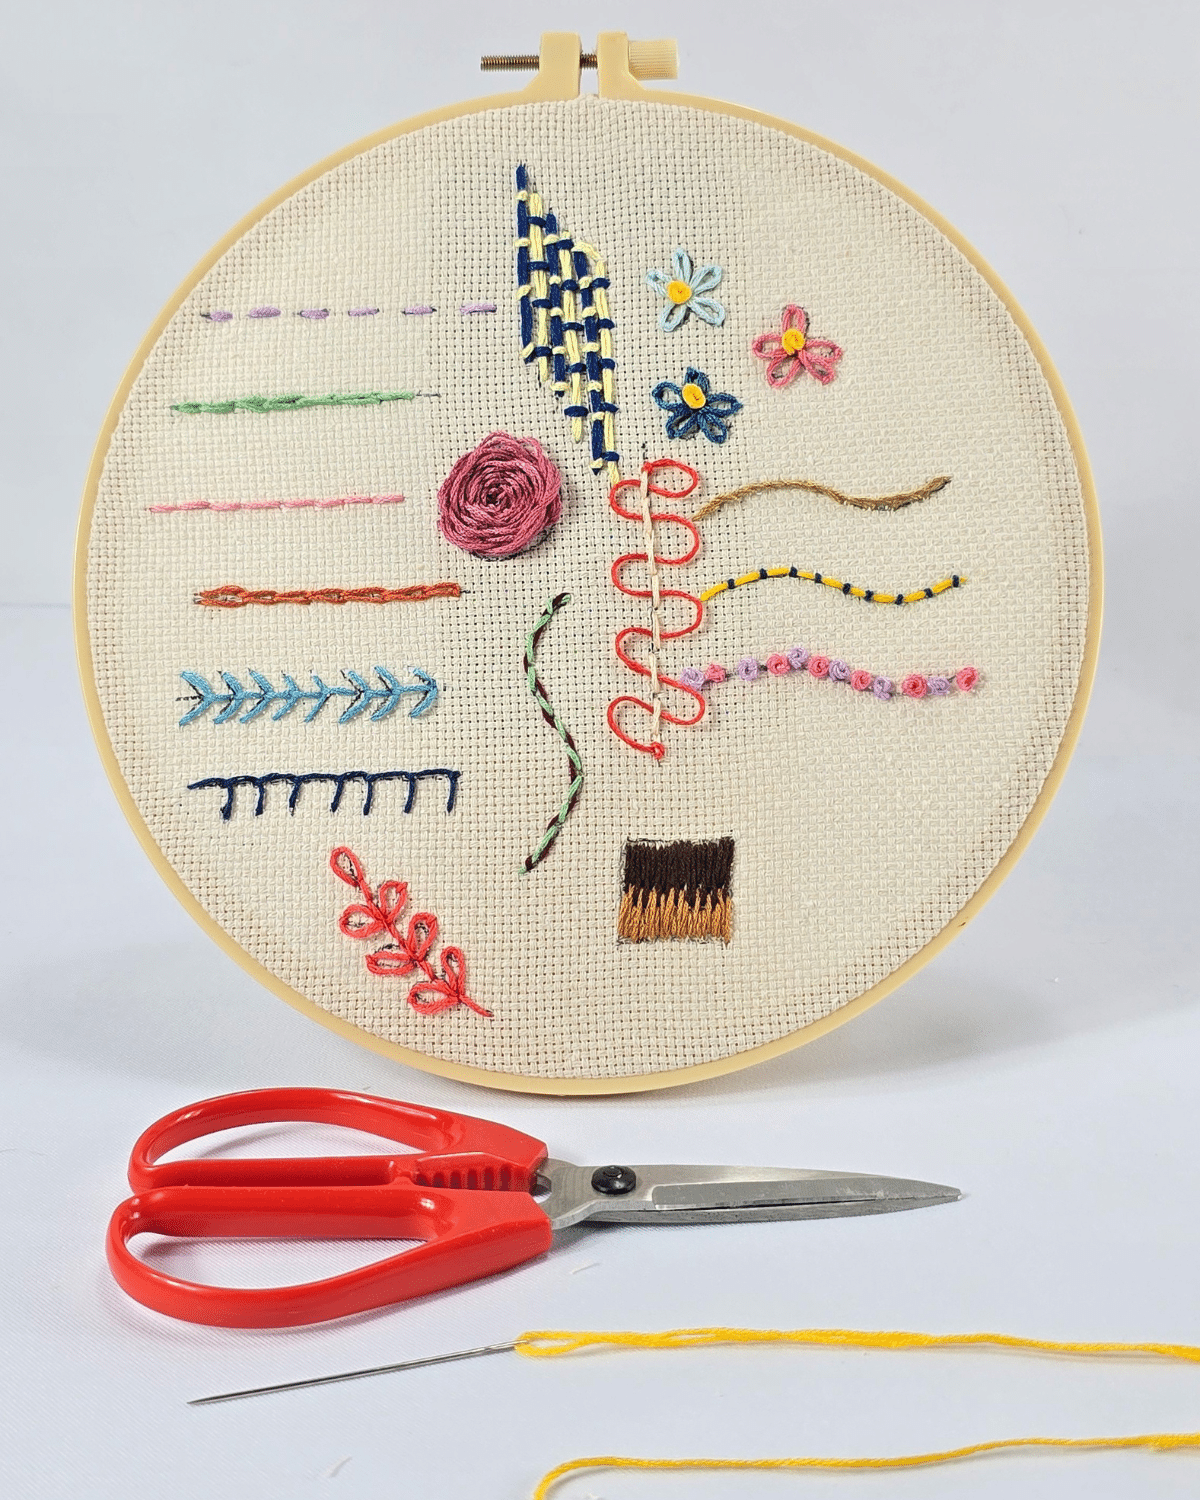
If you’ve ever wanted to try embroidery but didn’t know where to start, this tutorial is for you! As a beginner myself, I decided to learn the 15 most basic hand embroidery stitches, and to my surprise—it only took me less than an hour to pick them all up. So if I can do it, you should feel confident that you can do this, too.
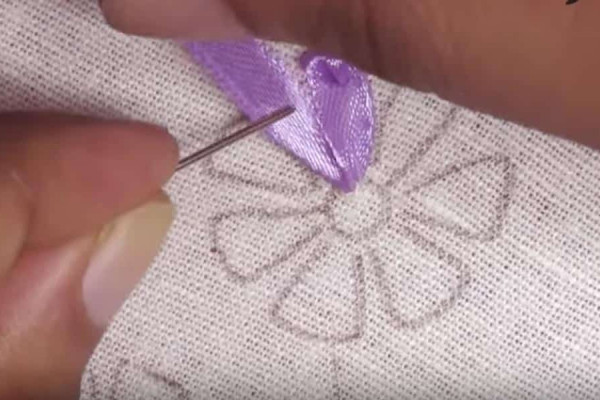
RELATED: Sewing Tutorial: Ribbon Embroidery
In this tutorial, I’ll walk you through each stitch step by step, using simple techniques that anyone can follow. Whether you’re brand new to embroidery or just looking to refresh your skills, these easy stitches are the perfect foundation to start your stitching journey!
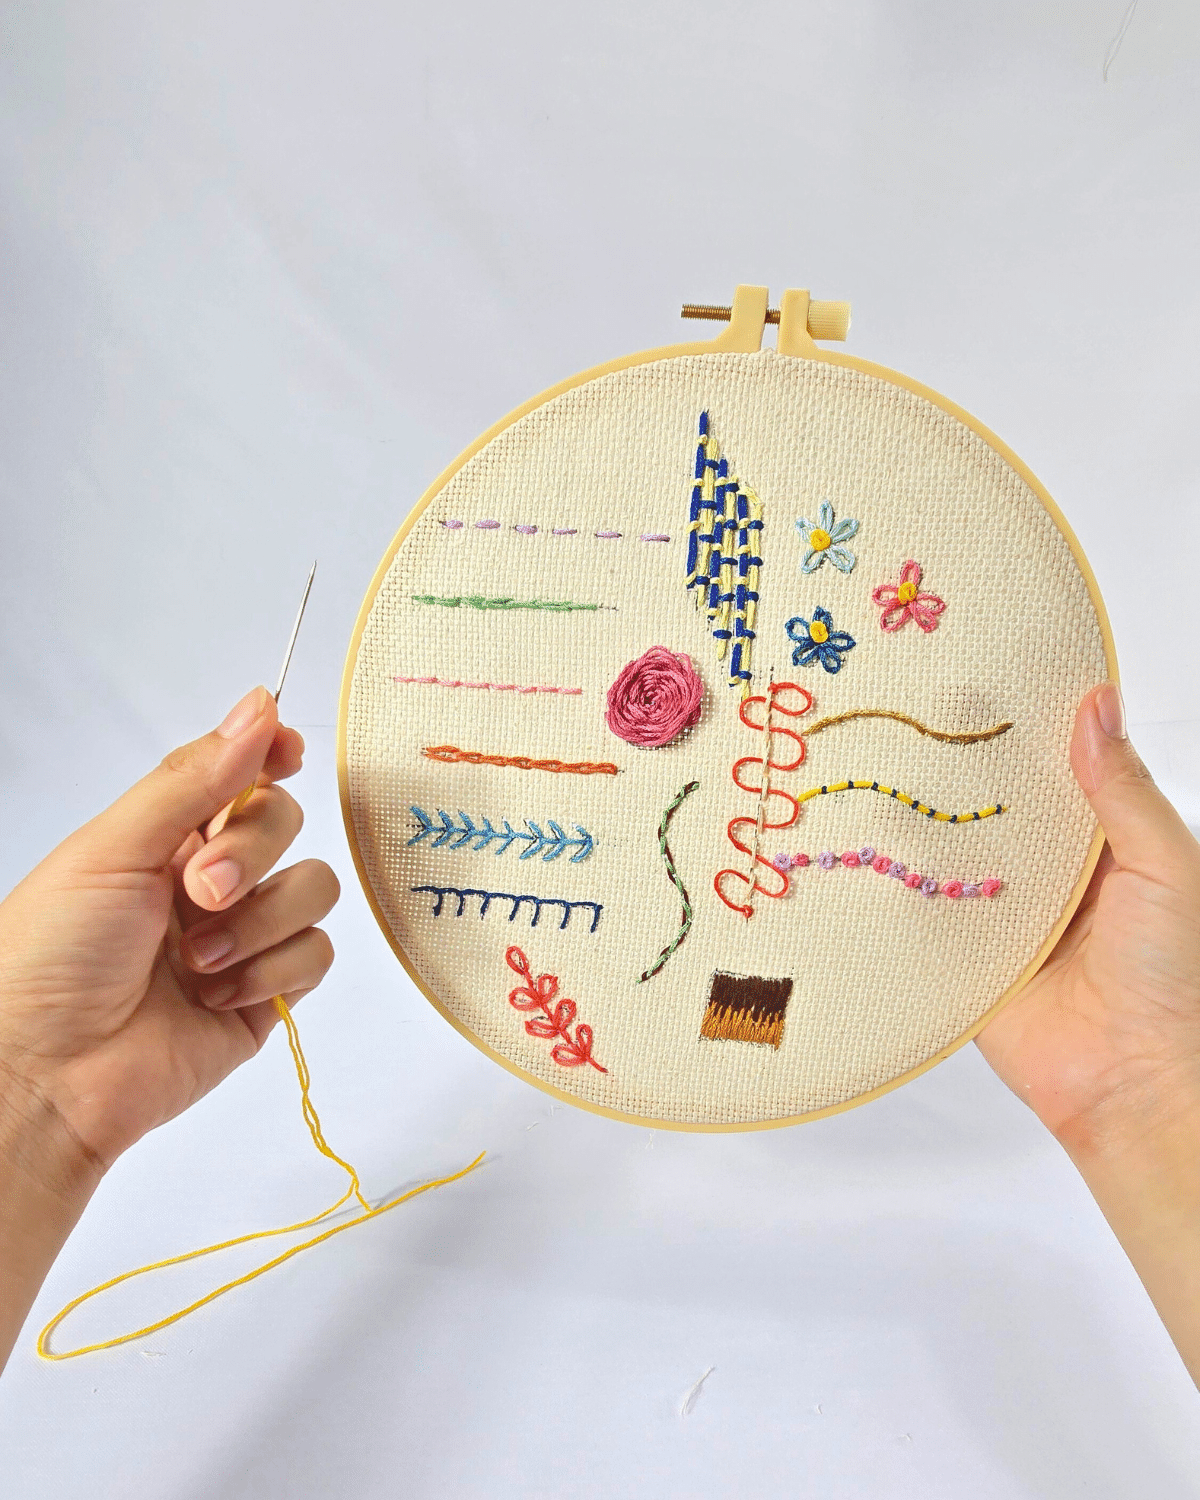
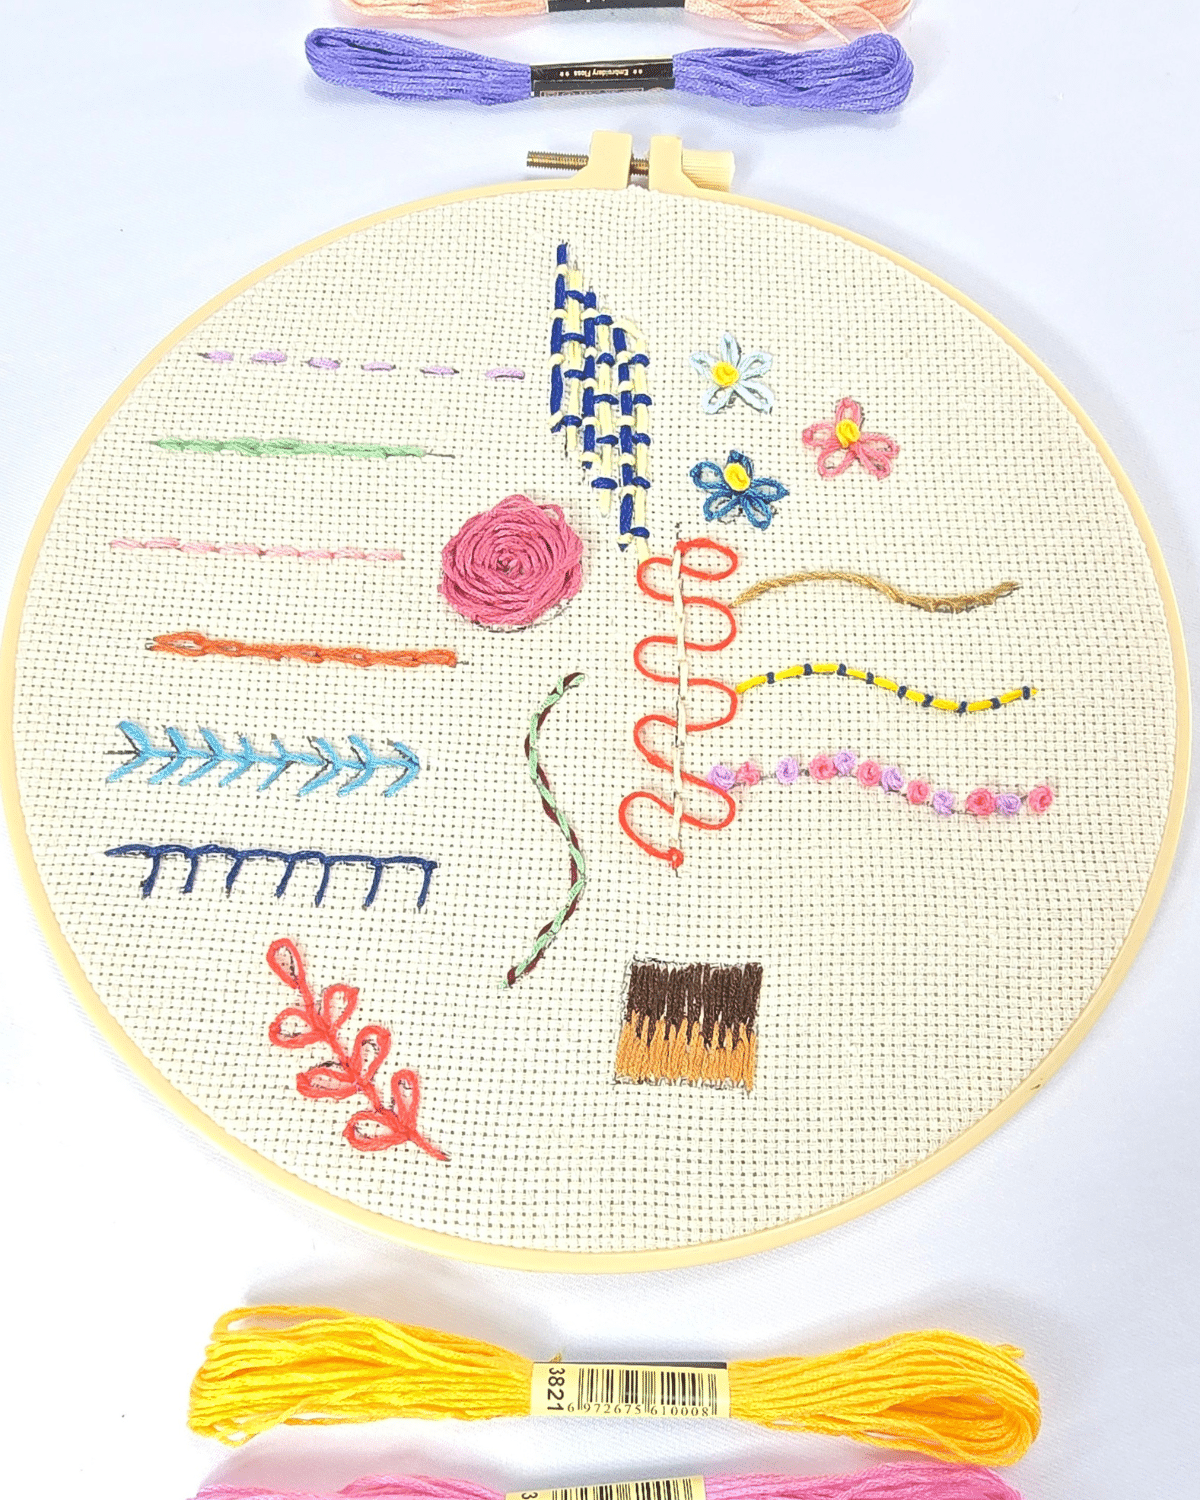
Ready to give it a try? Grab your hoop, needle, and thread, and follow along as we go through each of the 15 embroidery stitches together. Whether you’re crafting a simple design or just practicing on fabric, you’ll be surprised how quickly you can get the hang of it. Let’s start embroidering!
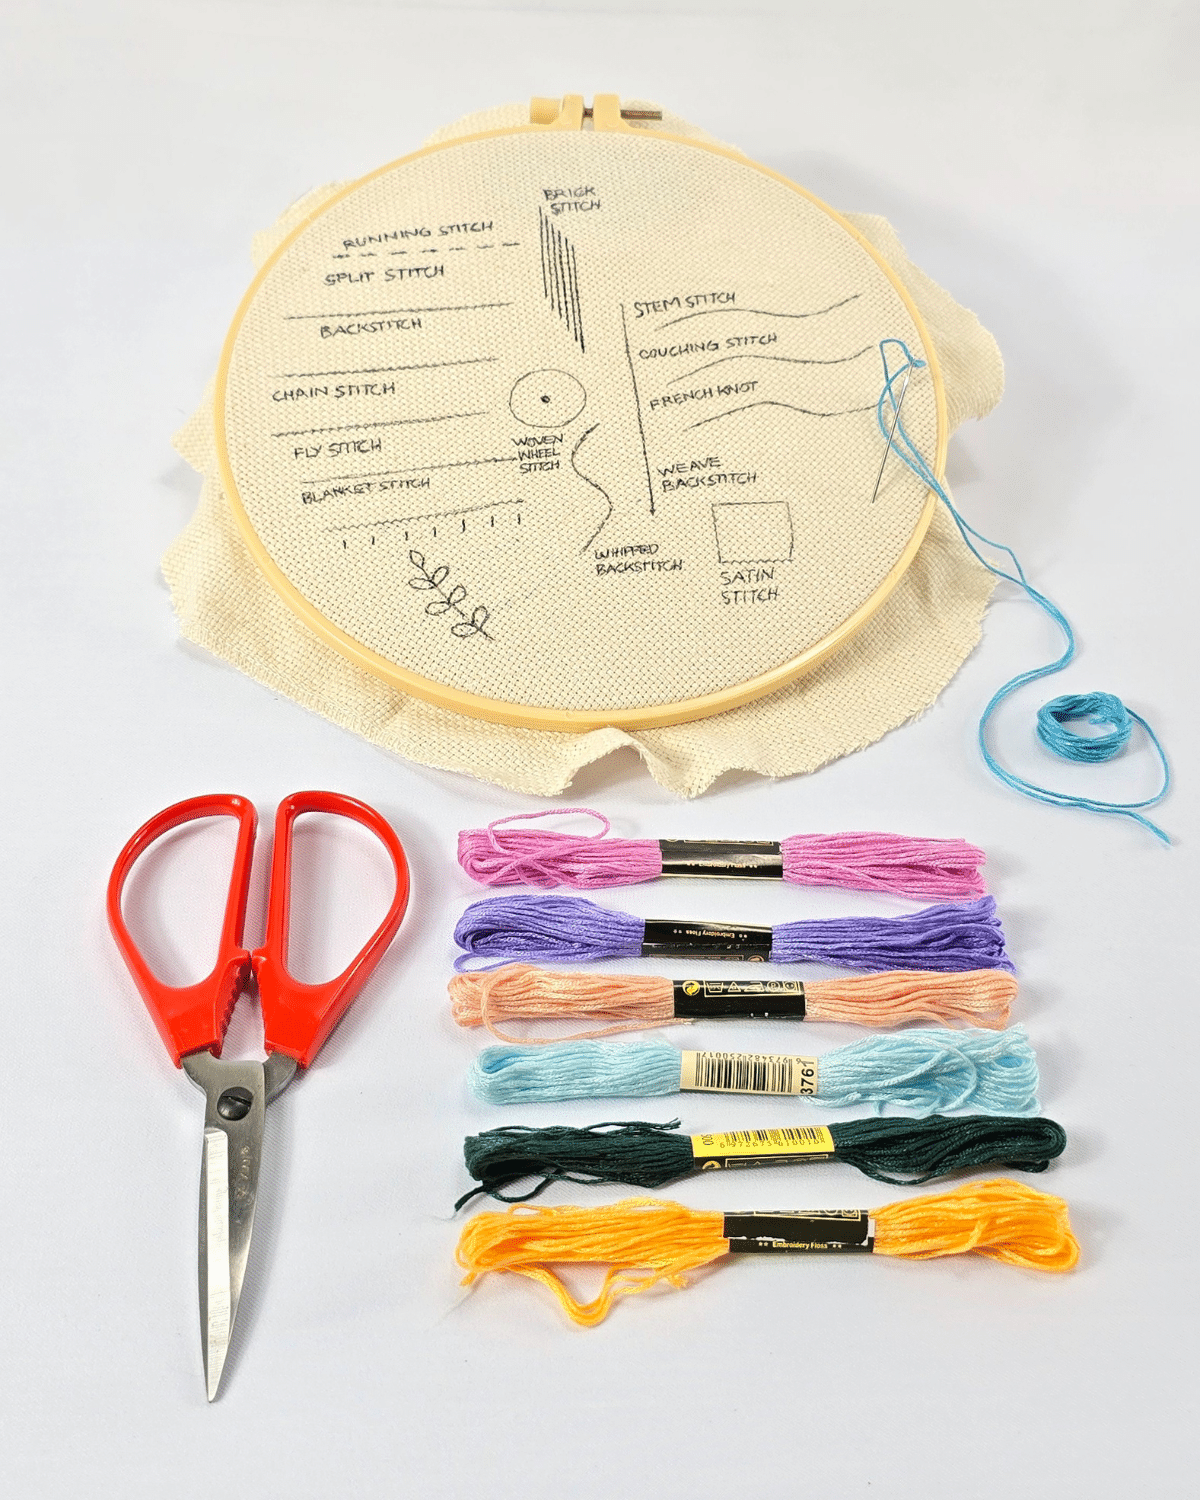
What You’ll Need for Embroidery
- An embroidery hoop
- Needle and thread
- Scissors
![]()
Pro Tip
You can buy an embroidery cloth with a guide drawn or printed on it already, but if you can’t find one, you can just draw it yourself, just like I did for this project.
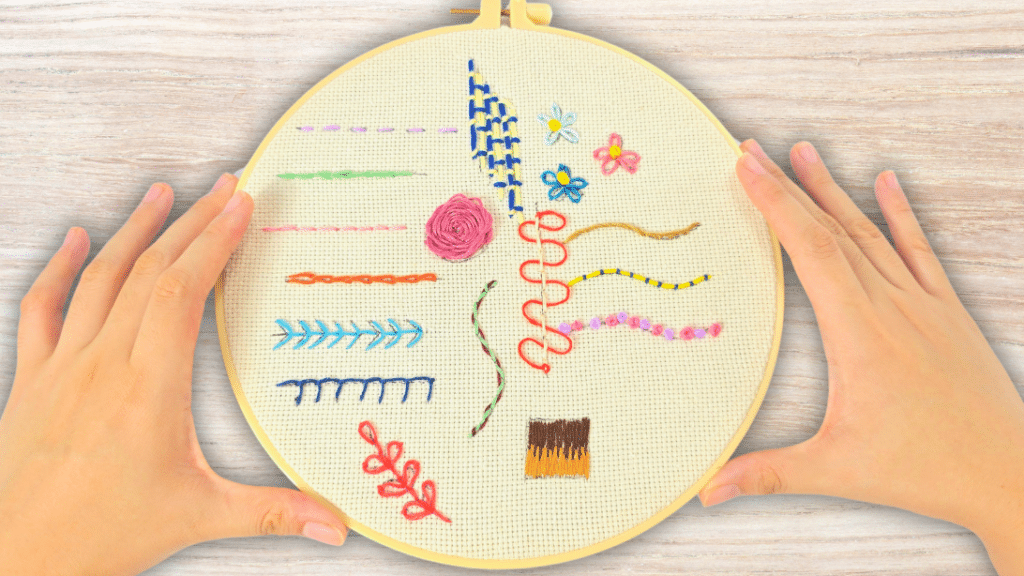
How to Make Basic Embroidery Stitches
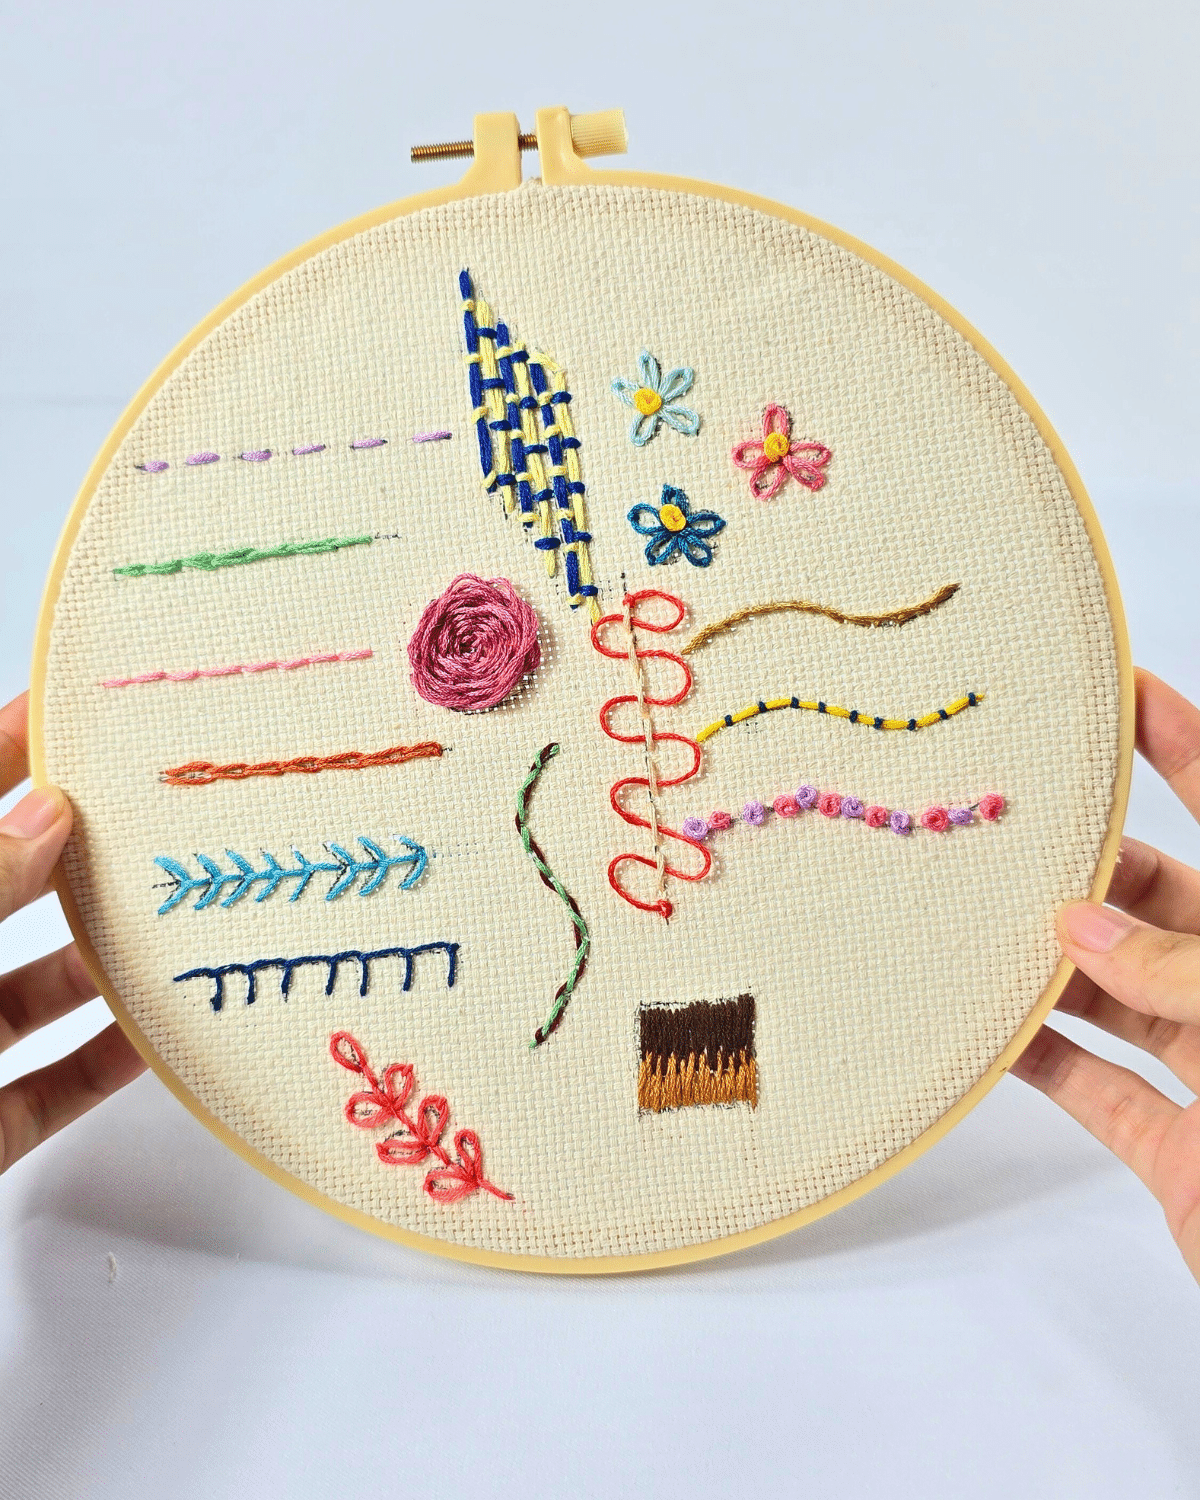
Step-by-Step Guide to 15 Basic Embroidery Stitches
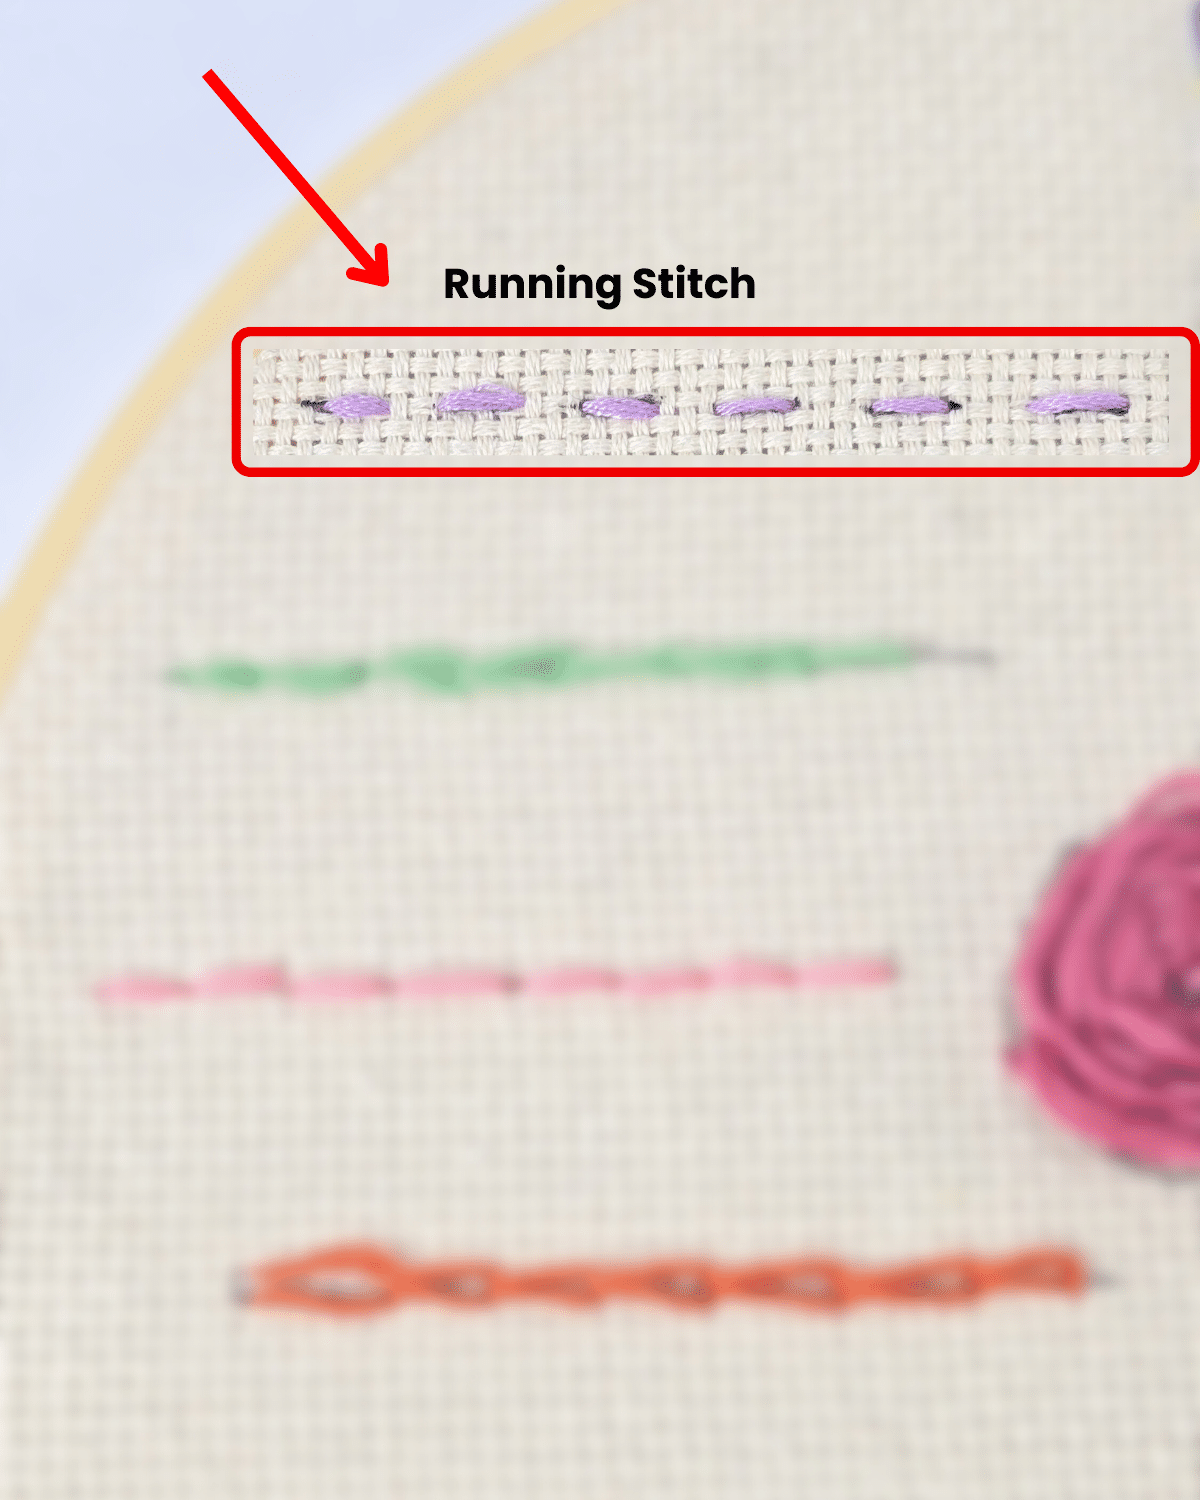
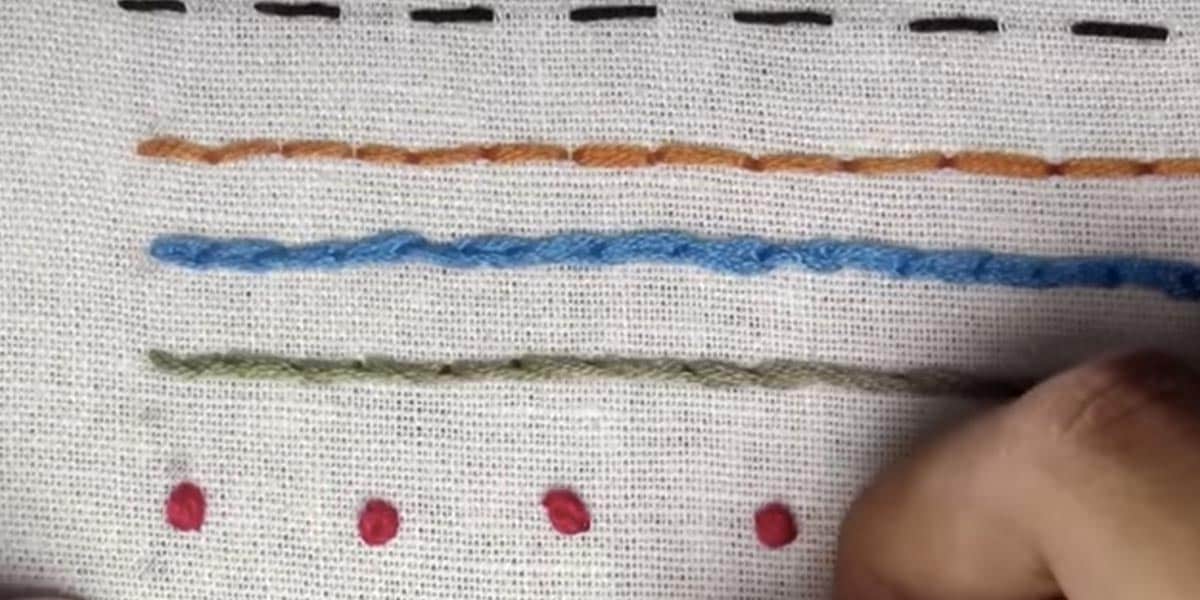
Running Stitch
 Start by bringing the needle up through the fabric at your starting point. Then, insert the needle back down through the fabric about 1/4 inch away to create one stitch.
Next, bring the needle up again at the same distance from the last stitch, and continue stitching up and down in a straight line, ensuring that your stitch lengths are even. Finally, knot the thread on the back of the fabric to secure your work.Split Stitch
Start by bringing the needle up through the fabric at your starting point. Next, insert the needle down about 1/8 to 1/4 inch away, pulling the thread through to create a small straight stitch.
Then, bring the needle up about 1/4 inch away and insert it down, splitting the previous stitch in the middle. Bring the needle up again a short distance ahead, pull the thread through, and repeat these stitches until you reach the end.Backstitch
Start by bringing the needle up through the fabric at your starting point. Next, insert the needle back down about 1/4 inch away to create your first stitch.
Then, bring the needle up a short distance ahead of the first stitch and push it back down through the end of the previous stitch. Pull the thread through to secure it.
Continue this motion of going backward and forward to make additional stitches, and be sure to knot the thread on the back side when you are finished.Chain Stitch
Bring the needle up through the fabric at your starting point, then insert the needle back down close to the same point without pulling it all the way through.
Next, bring the needle up approximately 1/4 inch ahead, ensuring that the needle goes in between the loop. Gently pull the thread through to create the first chain link.
Continue this process by looping and pulling the thread to form additional chain links. Finally, secure the last loop with a small straight stitch and knot on the back.Fly Stitch
To create a fly stitch, begin by bringing the needle up through the fabric at the top point of the V shape.
Next, insert the needle down into the fabric at the bottom point of the V, then bring the needle back up at the center point, making sure to keep the thread under the needle, and pull the thread through to form a V shape.
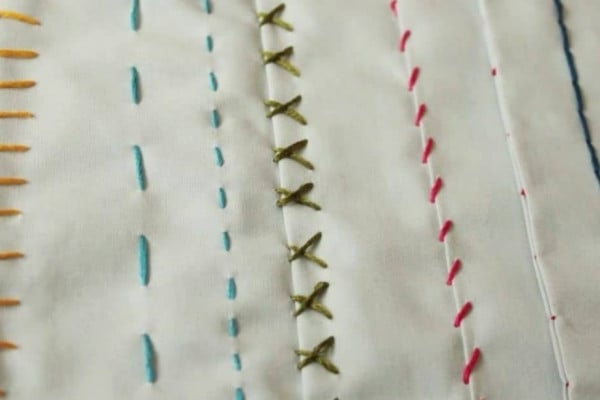
To secure this shape, make a small straight stitch from the center point to the next point about 1/4 inch away. Continue to make more fly stitches, and make sure to secure them at the back with a knot once finished.Blanket Stitch
Start by bringing the needle up through the fabric at your starting point. Insert the needle down 1/4 inch below and slightly to the right. Bring it up directly above the last stitch, keeping the thread looped under the needle to create a reversed L-shaped stitch.
For the next stitch, insert the needle down 1/4 inch to the right and below the upper stitching line, then bring it up at the edge with the thread looped again. Repeat this to form a row of interlocking L shapes.
To finish, make a small anchoring stitch over the last loop and knot the thread on the back or weave it through other stitches to secure it.Stem Stitch
To begin, bring the needle up through the fabric at the starting point, then insert the needle down about 1/4 inch ahead, but do not pull it all the way through. Instead, bring the needle up halfway back, slightly to one side of the thread, and pull the thread through, ensuring it stays on that side.
Then, insert the needle down again about 1/4 inch ahead and bring it up about 1/8 inch away from the previous stitch, keeping the thread on the same side. Continue stitching forward while maintaining the thread on the same side to create a twisted effect.Couching Stitch
To begin, place a thick thread along the desired path on the fabric. Next, use the couching thread needle to come up just beside the laid thread, then insert the needle down on the opposite side, pulling it through to create a small stitch that hugs over the thread.
Now, move approximately 1/4 inch along the laid thread and bring the needle up from underneath the fabric, then stitch over the laid thread again and pull through, ensuring that the distance between your stitches remains consistent. Finally, secure the threads on the backside once you have finished.French Knot
To create a knot, bring the needle up through the fabric at the desired knot point, then hold the thread taut with one hand and wrap the thread around the needle 2-3 times, close to the fabric.
Next, insert the needle back down very near the starting point, while holding the thread away, then gently pull the thread through to form a knot on the surface. After that, you can continue making additional knots. Lastly, make sure to secure it at the back.Brick Stitch
Start with six long vertical stitches, leaving a gap in between each thread while making sure they are still sitting really close to each other, then switch the color of your thread, and fill in the gaps you left in between the first stitches.
Now, bring the needle up on the left side of the first stitch, then insert it down on the right side. Repeat the same stitch about 1/8 to 1/4 inch down the first stitching point, and knot the back for a neat finish.
Switch your thread once more, then do the same stitching, only this time make sure that it’s offset from the first set of horizontal stitches you made. Keep doing the stitches until you’ve covered all rows.Lazy Daisy Stitch
Bring the needle up at the base of the petal, then insert the needle back down near the same point, but don’t pull through. Bring the needle up to the tip of the petal, looping the thread under the needle. Pull the thread to form a teardrop loop.
Make a small straight stitch over the loop’s tip to secure it, then continue to make about 5 petals around the center of the flower. Knot or weave the thread on the back for a neat finish. For the center of the daisy, make a single French knot.Weave Backstitch
Make a single line of backstitch, then switch your thread, and weave the needle under the first small stitch from right to left without piercing the fabric, and pull the thread but not all the way through, making sure you create a half loop on the side.
Now, insert the thread from left to right, then continue weaving under each stitch in alternating directions. Keep the tension even to avoid distorting the base stitches. When complete, bring the weaving thread to the back and knot or weave to secure.Whipped Backstitch
Start with a line of backstitch, then secure it with a knot, and switch your thread. Next, bring your needle up near the starting point, then insert the needle through the first small stitch, and pull all the way. Insert the thread into the next stitch going from the opposite direction, and keep doing so until you reach the endpoint.Long and Short Stitch
Pick the side you want to work on first, then from one end start making stitches alternating short and long, and keep doing so until you reach the other end.
Now, switch threads, then do the same stitch to the opposite side, making sure to fill in the gaps alternating the long and short stitches as well. Feel free to adjust the lengths of the stitches to meet the set of stitches on the other side.Woven Wheel Stitch
Create 5 straight stitches radiating from a center point, forming a star. Bring the needle up near the center, weave over one spoke, then insert under the next, and bring it over again.
Continue this motion all the way around, then make sure to weave tightly in circles until all spokes are covered, forming a rose-like shape. Knot or weave the thread on the back for a neat finish.
 Start by bringing the needle up through the fabric at your starting point. Then, insert the needle back down through the fabric about 1/4 inch away to create one stitch.
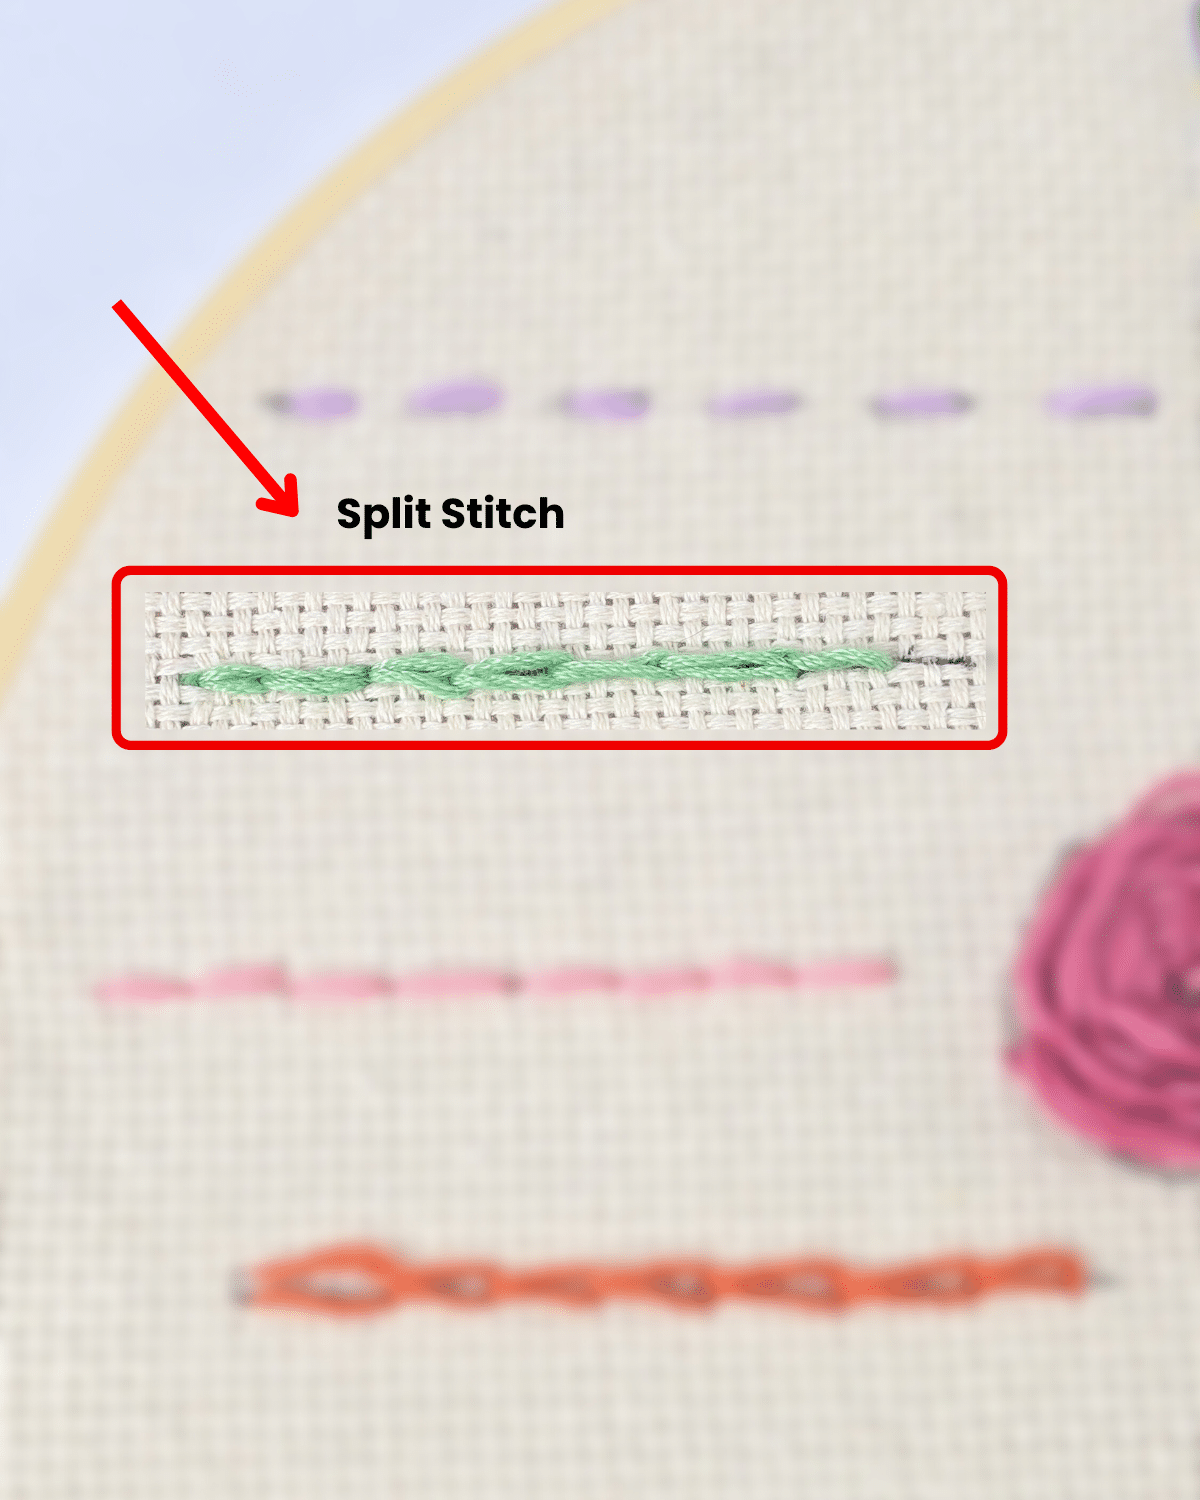 Start by bringing the needle up through the fabric at your starting point. Next, insert the needle down about 1/8 to 1/4 inch away, pulling the thread through to create a small straight stitch.
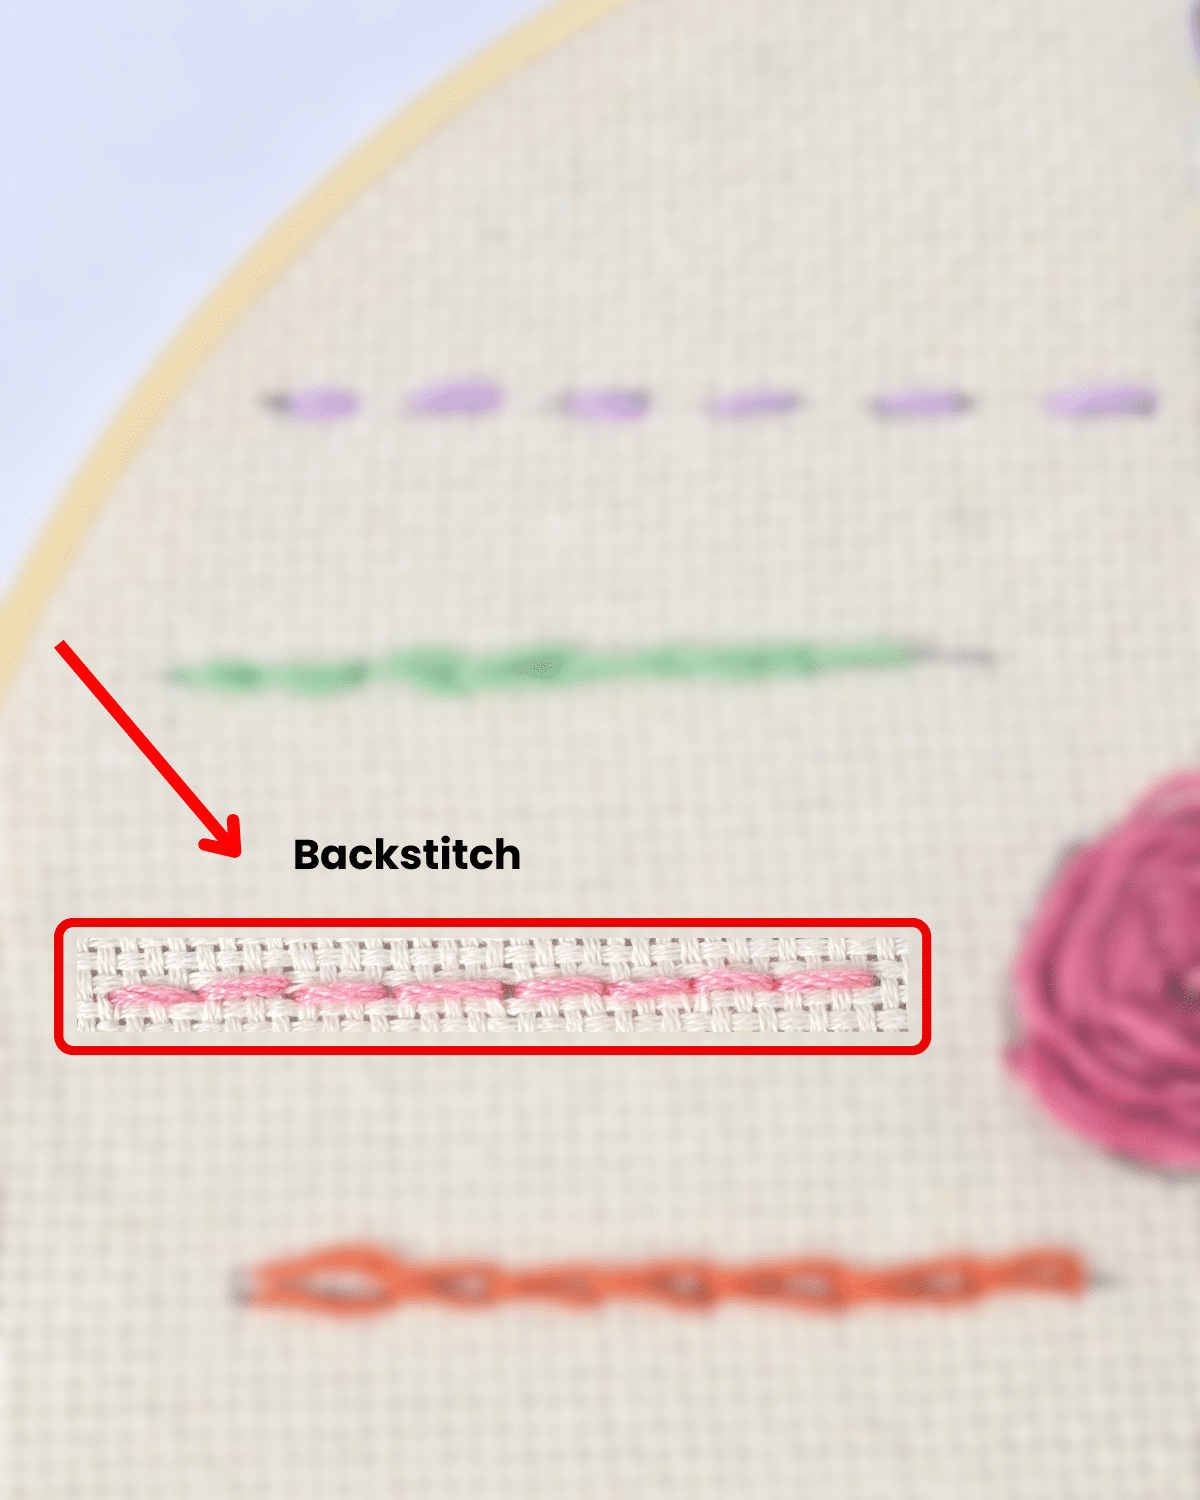 Start by bringing the needle up through the fabric at your starting point. Next, insert the needle back down about 1/4 inch away to create your first stitch.
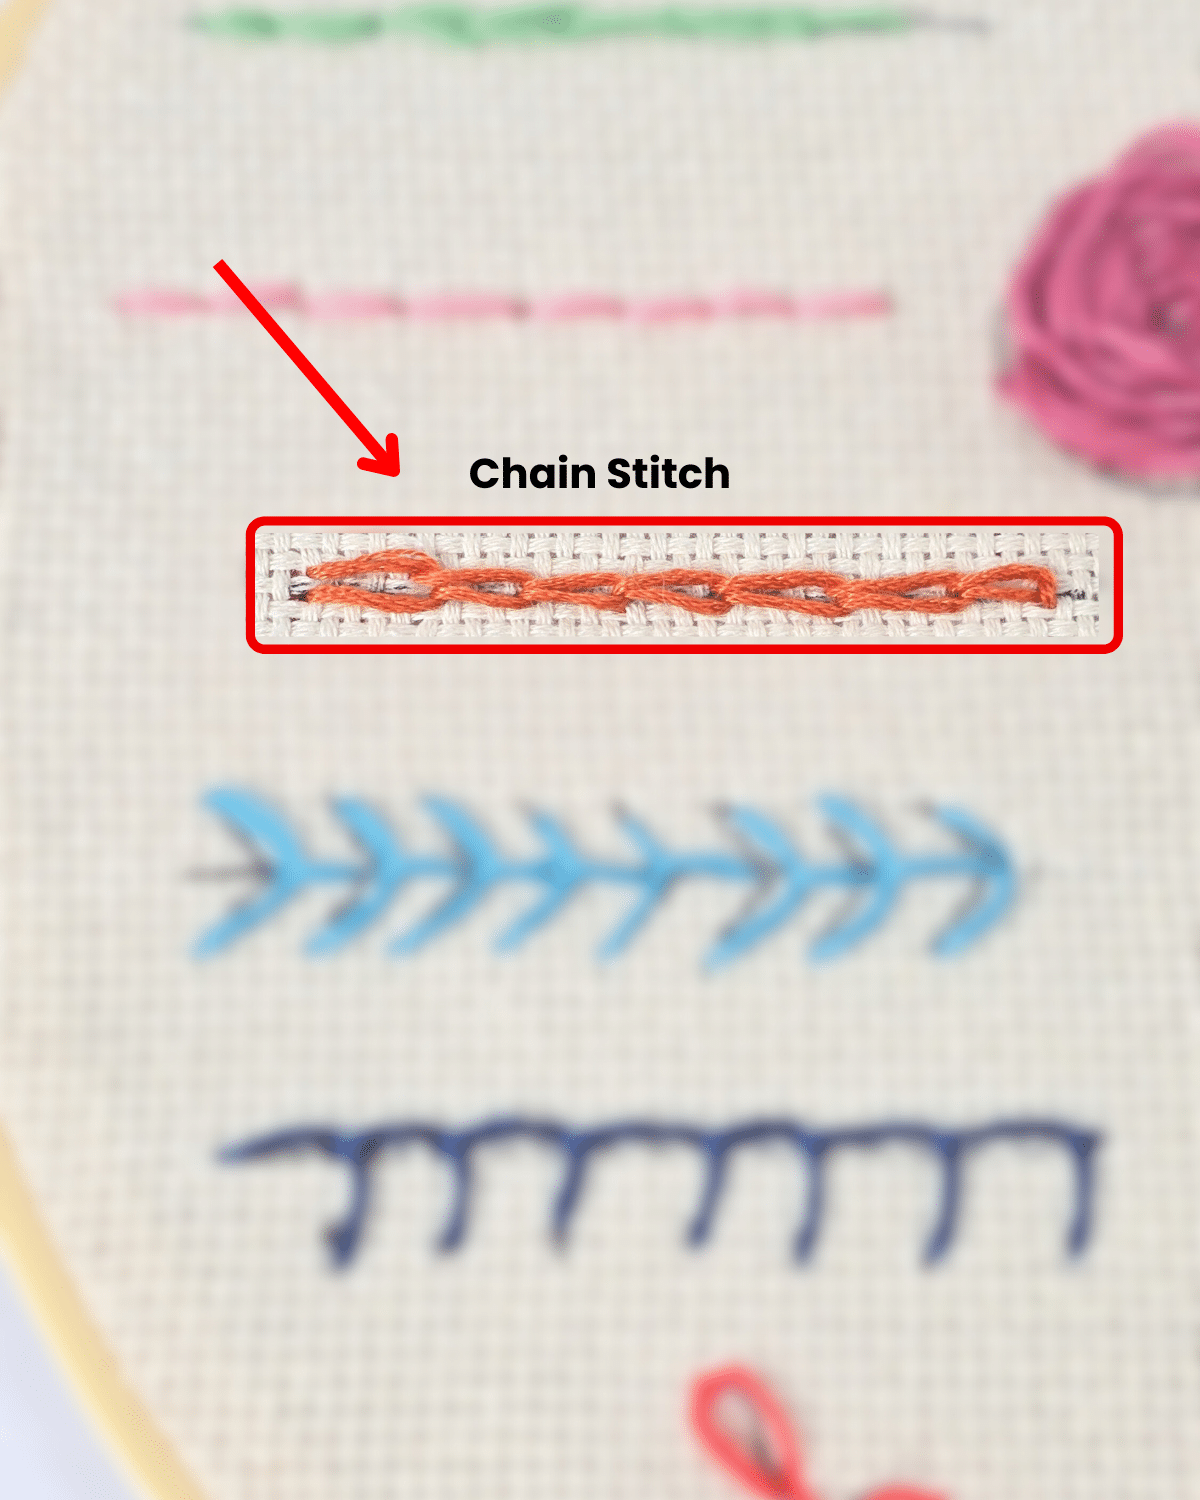 Bring the needle up through the fabric at your starting point, then insert the needle back down close to the same point without pulling it all the way through.
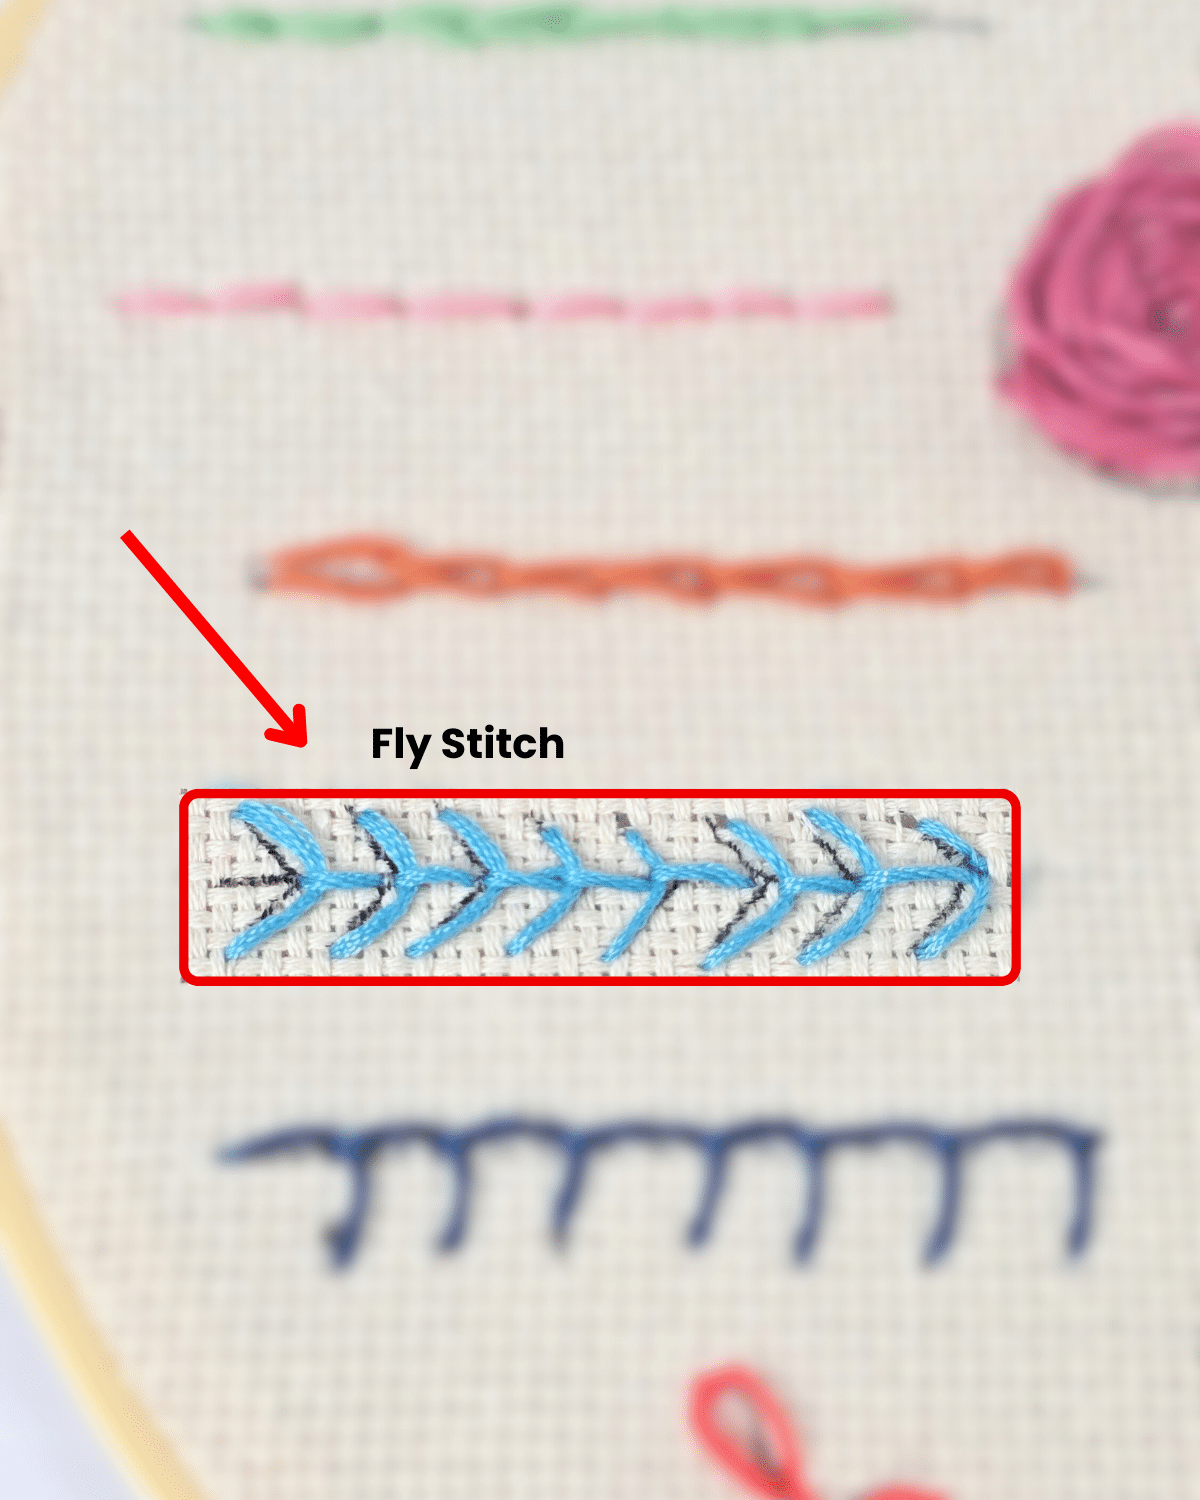 To create a fly stitch, begin by bringing the needle up through the fabric at the top point of the V shape.
 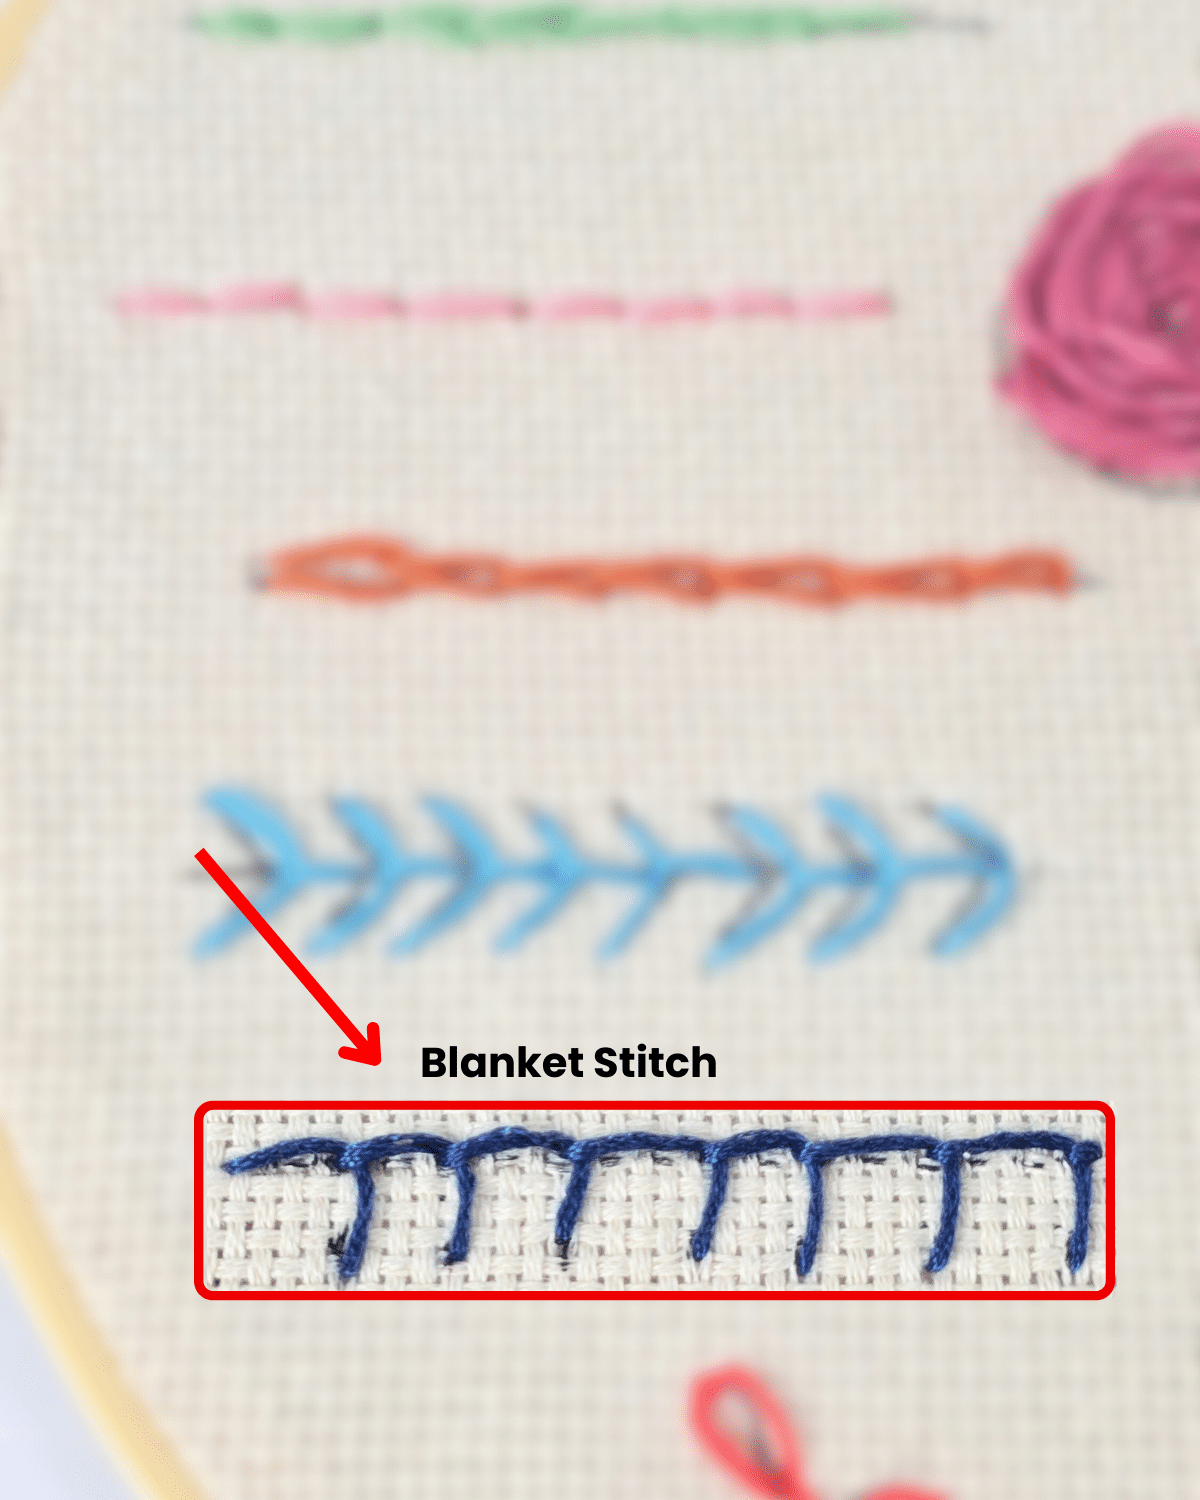 Start by bringing the needle up through the fabric at your starting point. Insert the needle down 1/4 inch below and slightly to the right. Bring it up directly above the last stitch, keeping the thread looped under the needle to create a reversed L-shaped stitch.
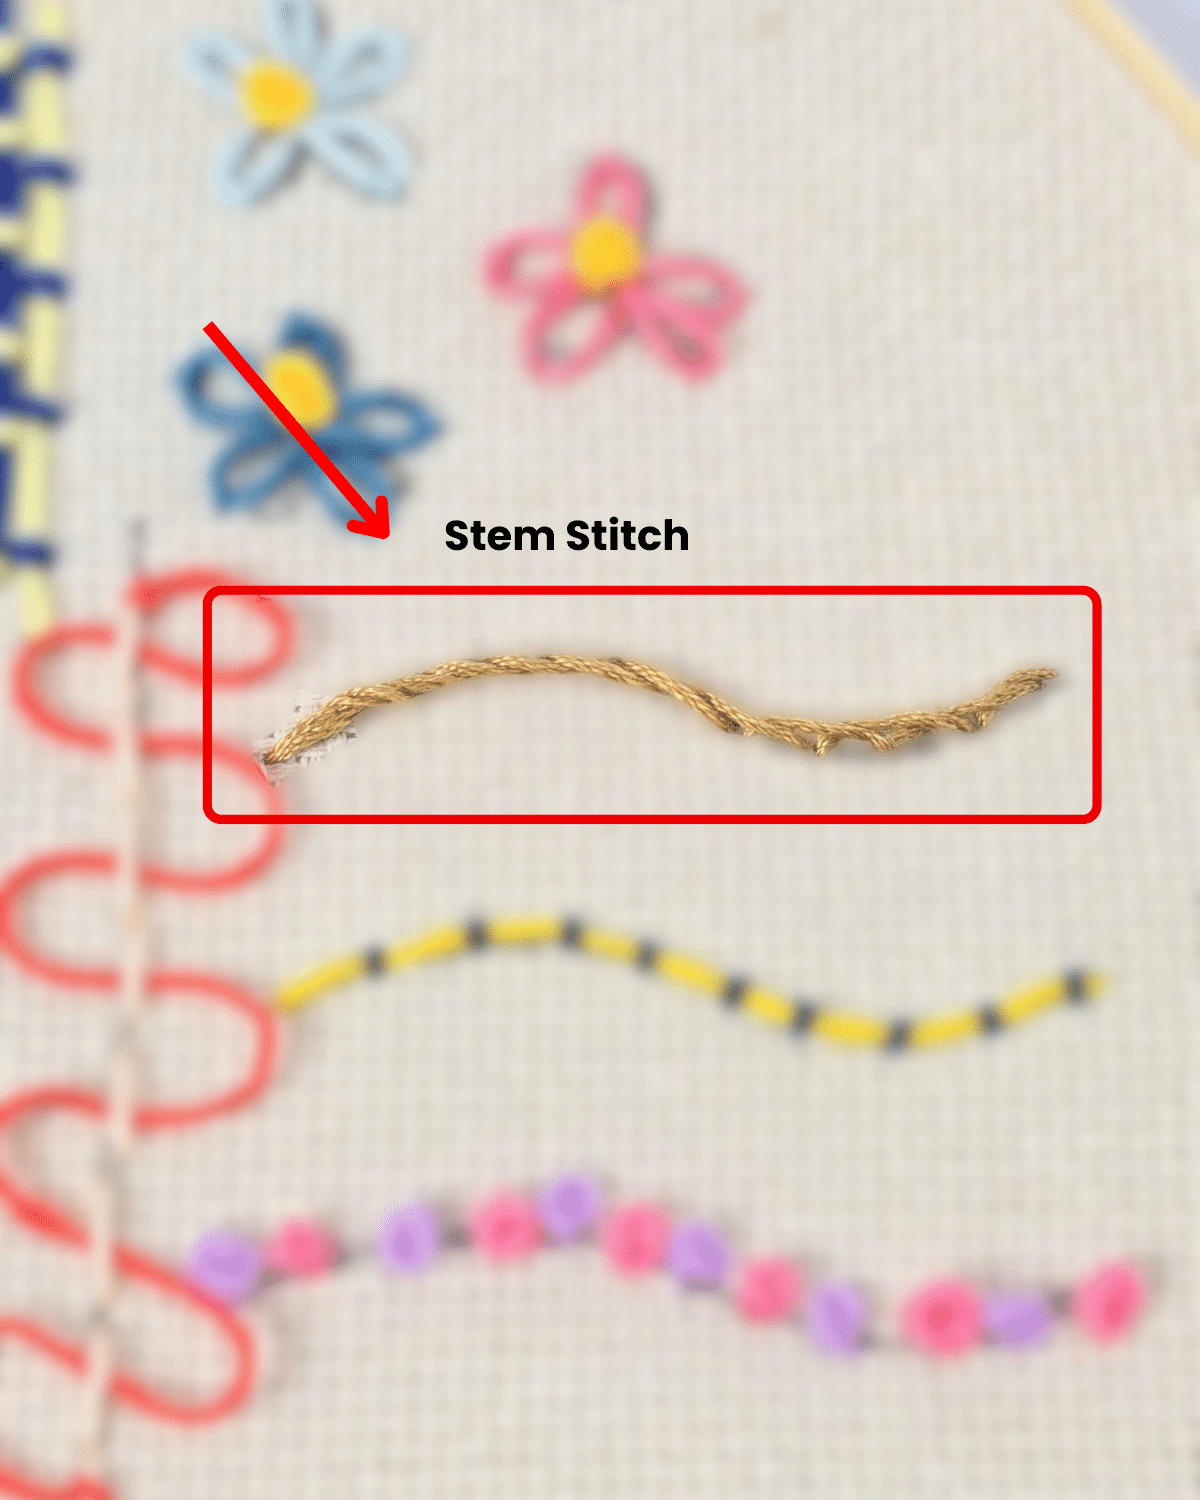 To begin, bring the needle up through the fabric at the starting point, then insert the needle down about 1/4 inch ahead, but do not pull it all the way through. Instead, bring the needle up halfway back, slightly to one side of the thread, and pull the thread through, ensuring it stays on that side.
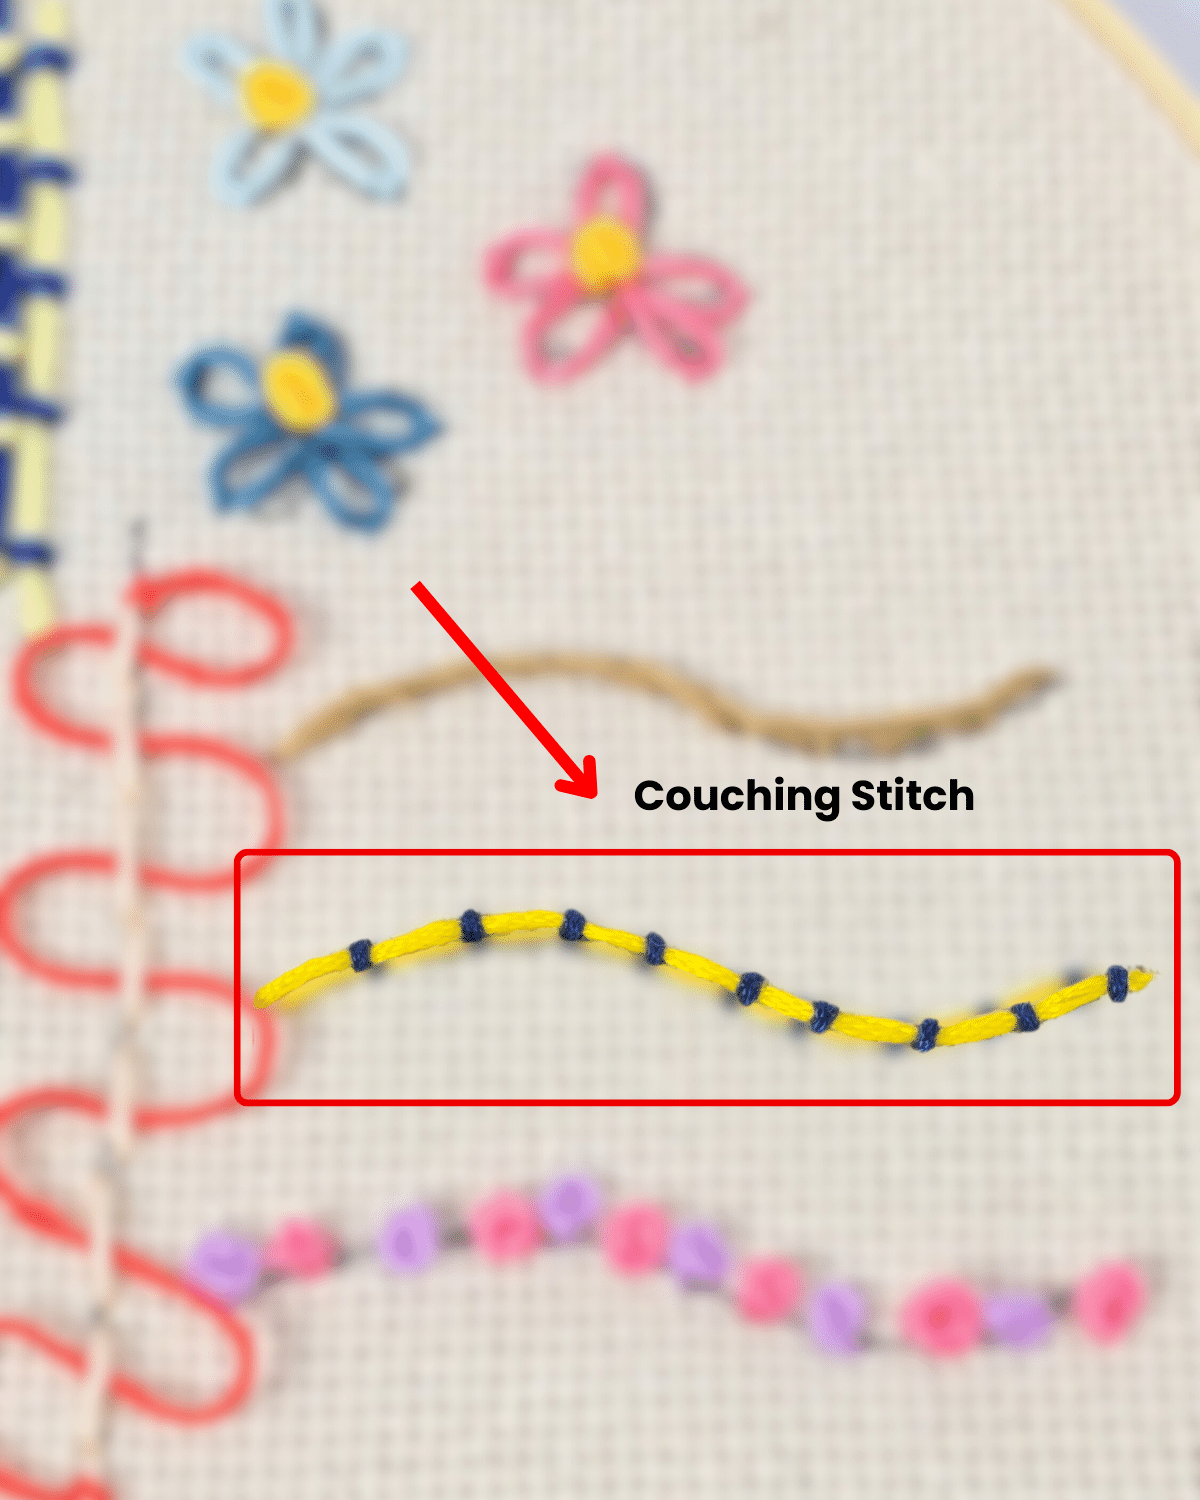 To begin, place a thick thread along the desired path on the fabric. Next, use the couching thread needle to come up just beside the laid thread, then insert the needle down on the opposite side, pulling it through to create a small stitch that hugs over the thread.
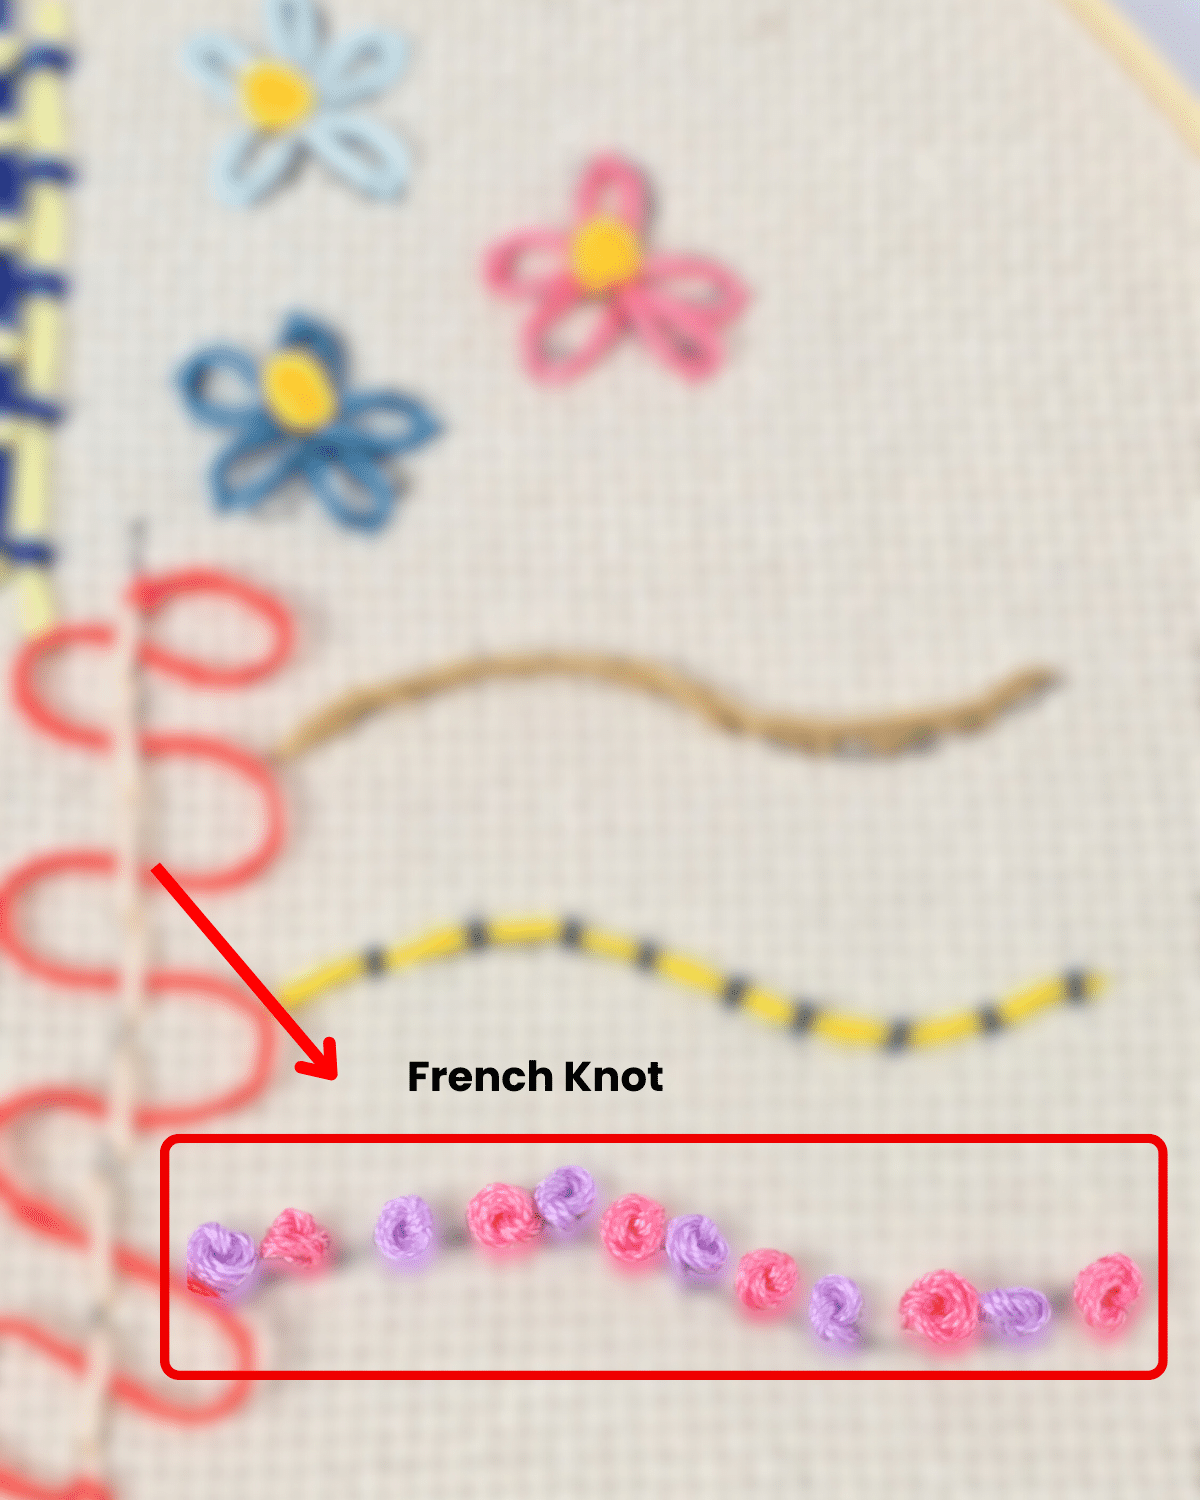 To create a knot, bring the needle up through the fabric at the desired knot point, then hold the thread taut with one hand and wrap the thread around the needle 2-3 times, close to the fabric.
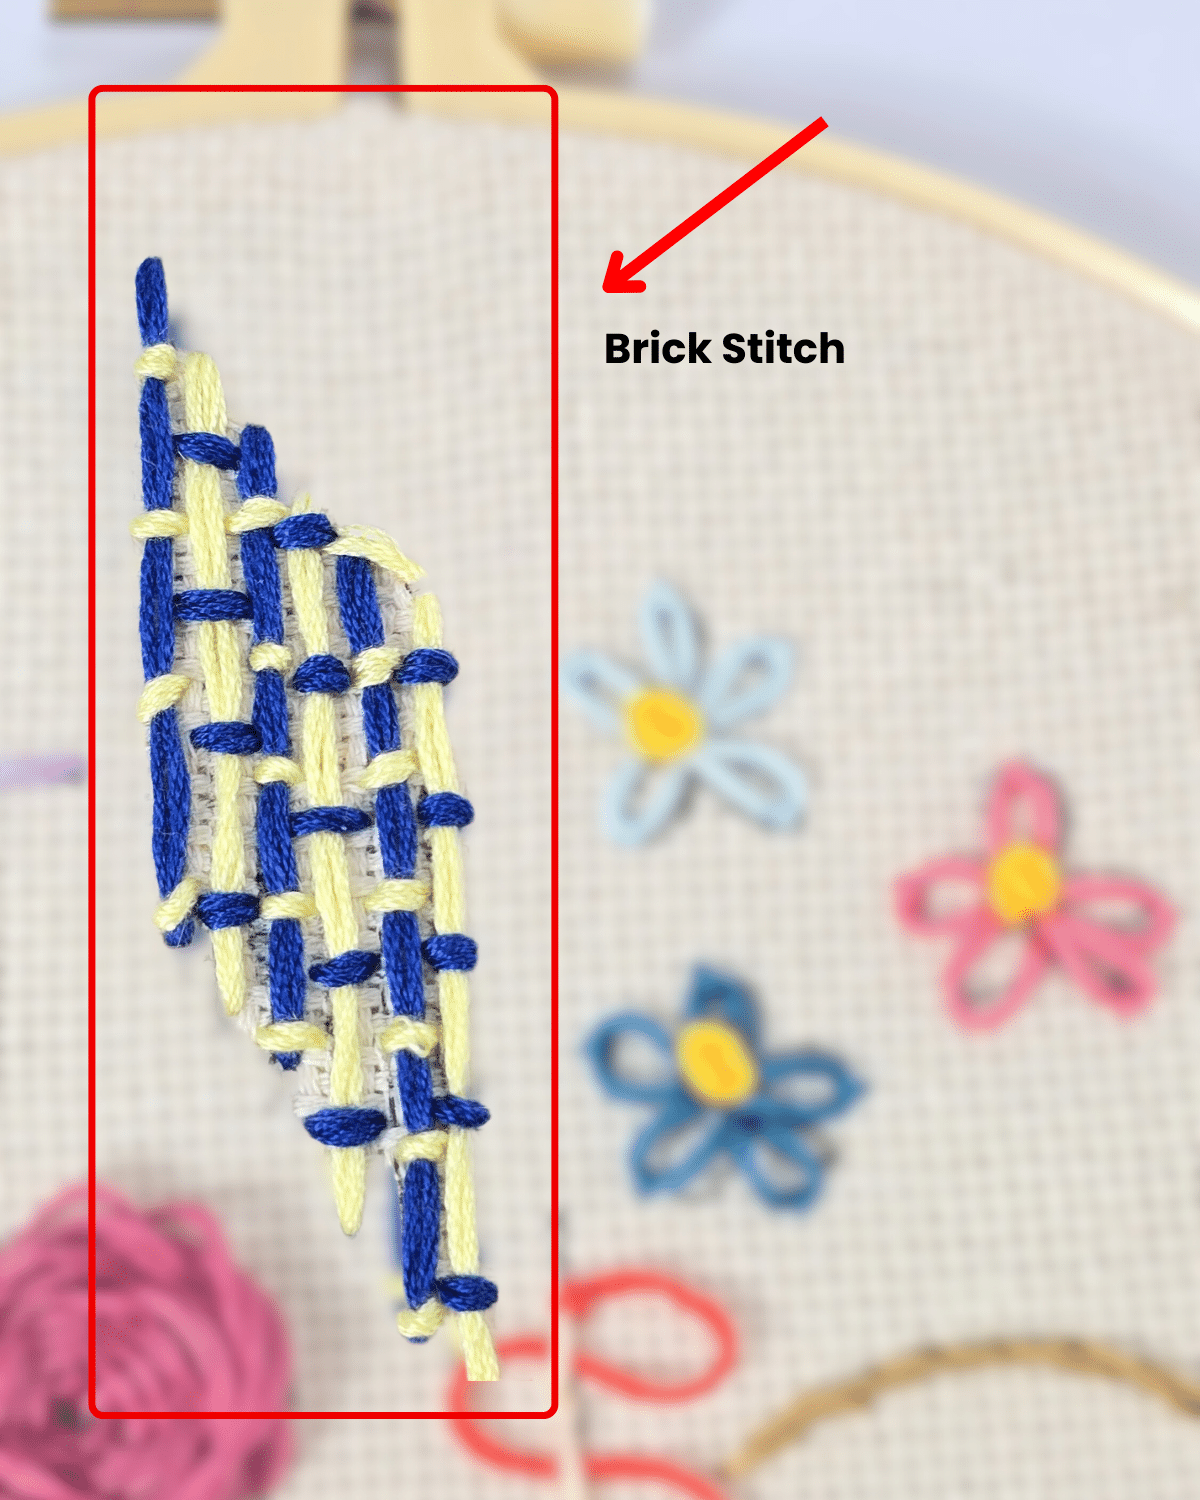 Start with six long vertical stitches, leaving a gap in between each thread while making sure they are still sitting really close to each other, then switch the color of your thread, and fill in the gaps you left in between the first stitches.
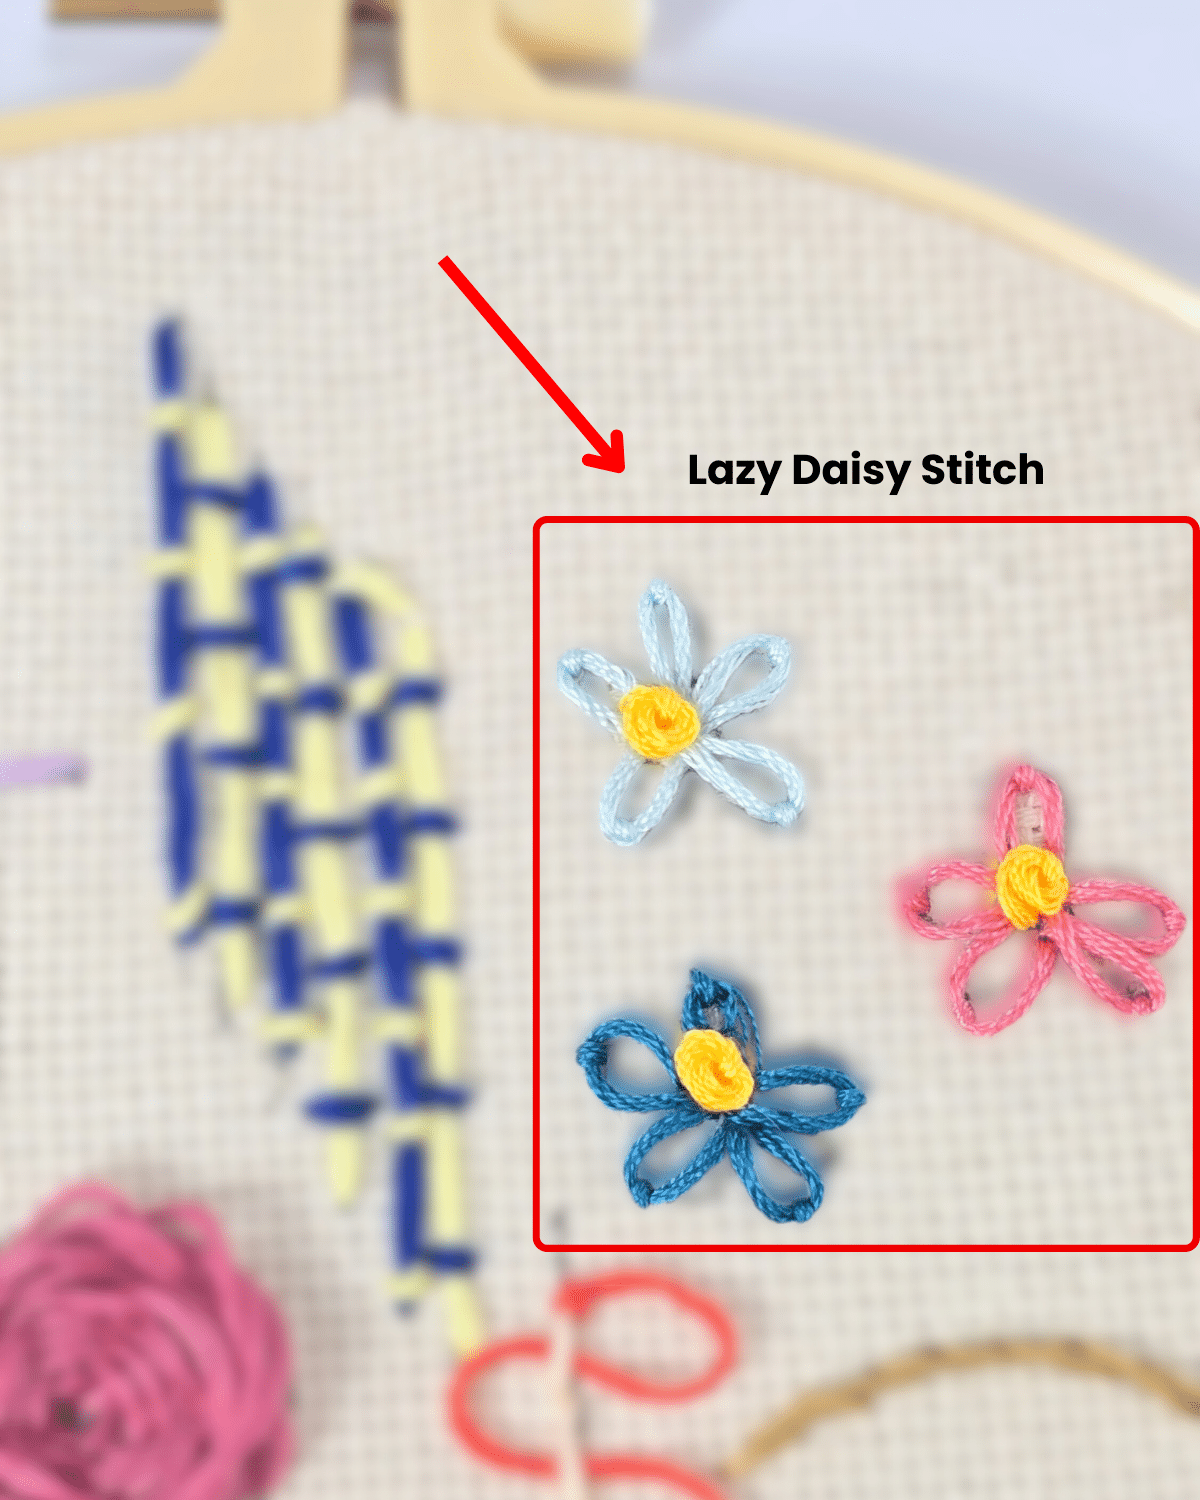 Bring the needle up at the base of the petal, then insert the needle back down near the same point, but don’t pull through. Bring the needle up to the tip of the petal, looping the thread under the needle. Pull the thread to form a teardrop loop.
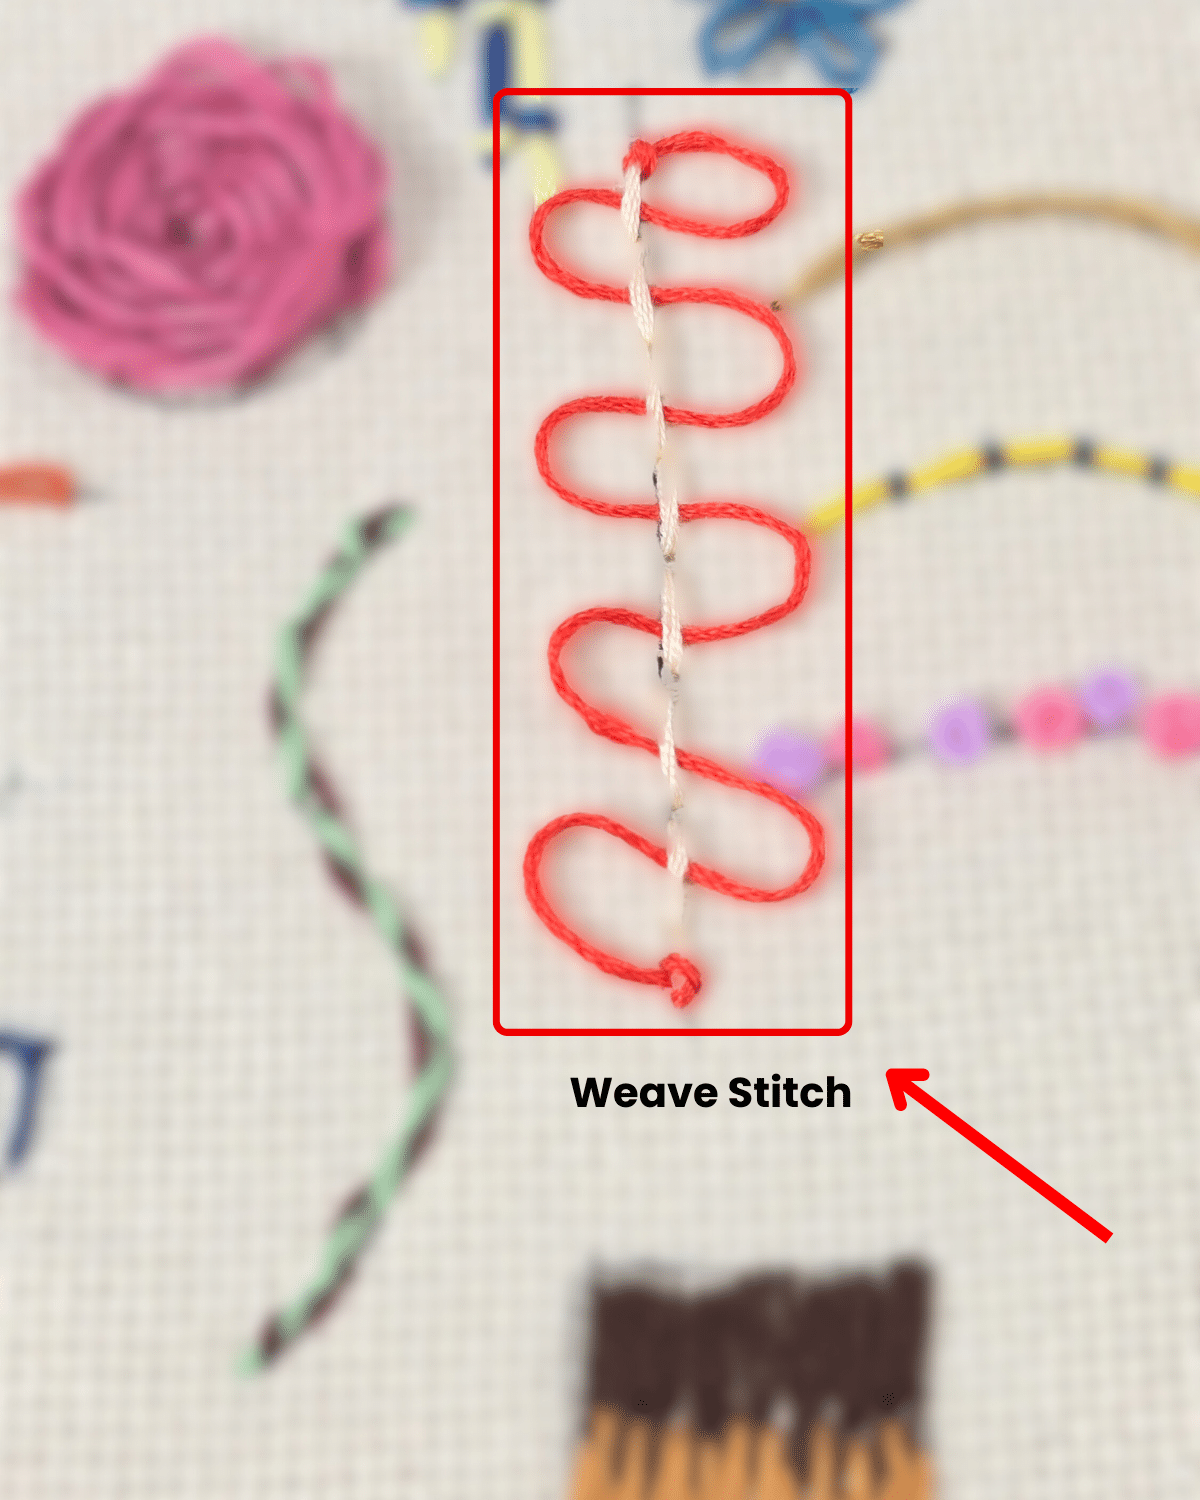 Make a single line of backstitch, then switch your thread, and weave the needle under the first small stitch from right to left without piercing the fabric, and pull the thread but not all the way through, making sure you create a half loop on the side.
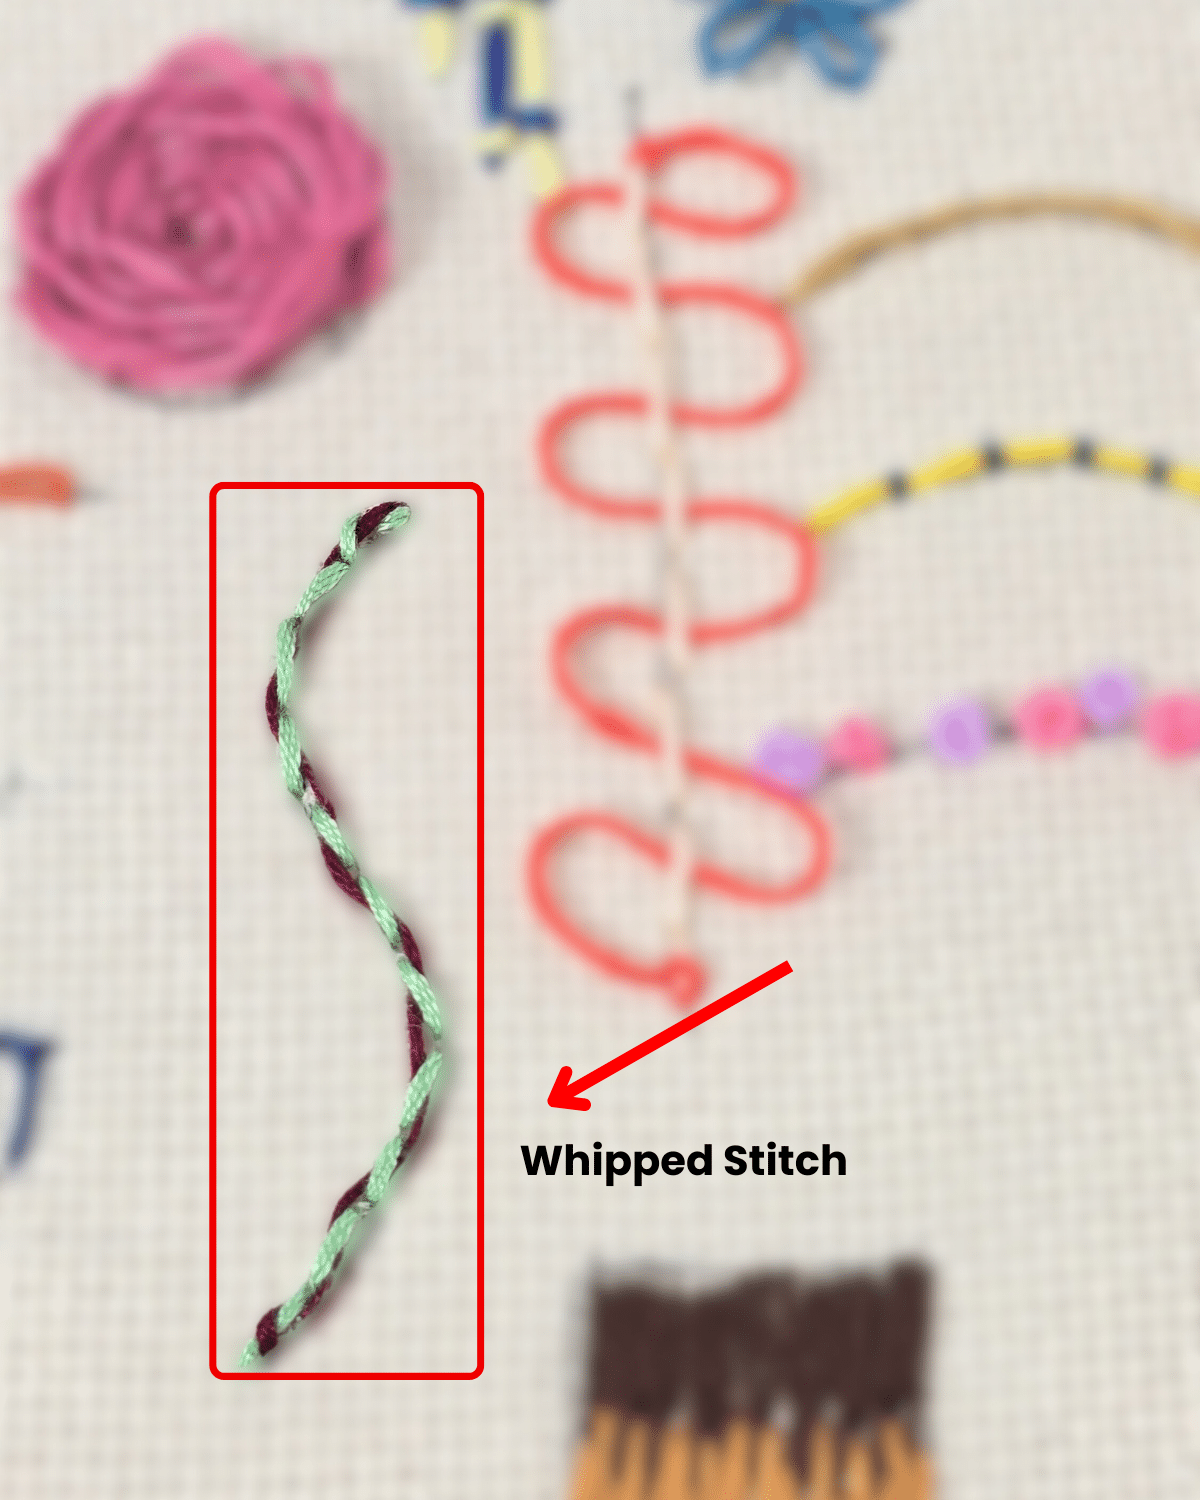 Start with a line of backstitch, then secure it with a knot, and switch your thread. Next, bring your needle up near the starting point, then insert the needle through the first small stitch, and pull all the way. Insert the thread into the next stitch going from the opposite direction, and keep doing so until you reach the endpoint.
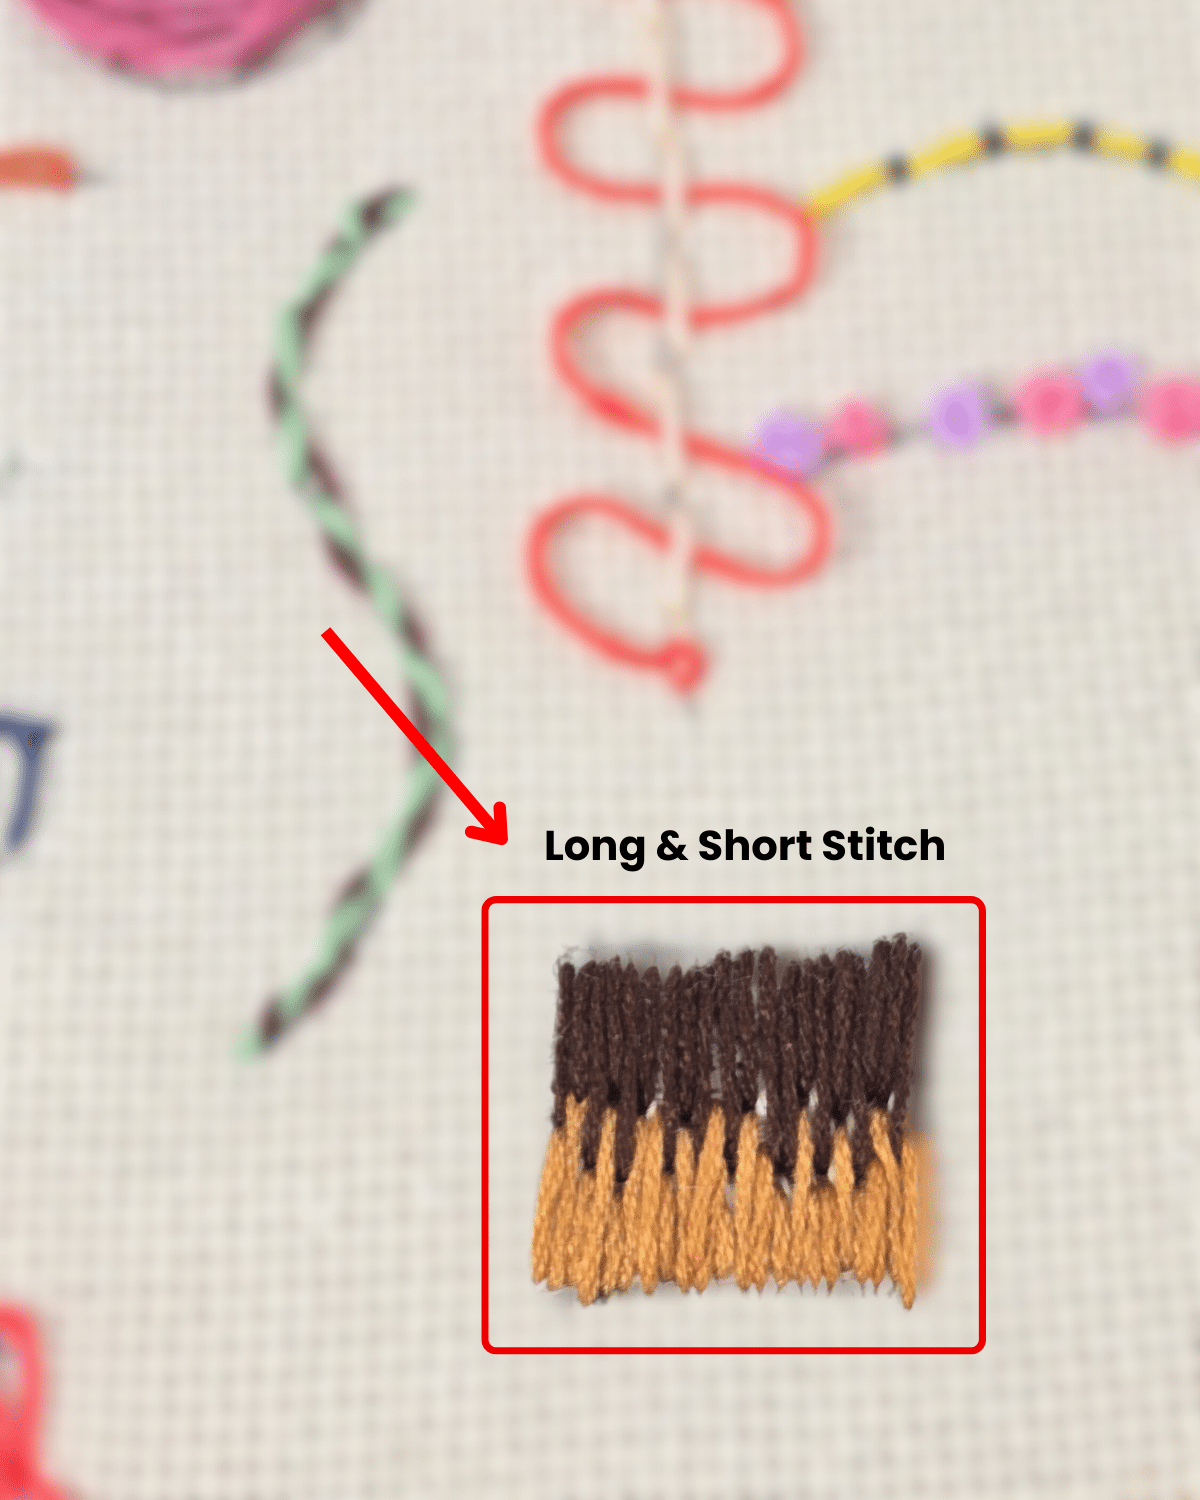 Pick the side you want to work on first, then from one end start making stitches alternating short and long, and keep doing so until you reach the other end.
 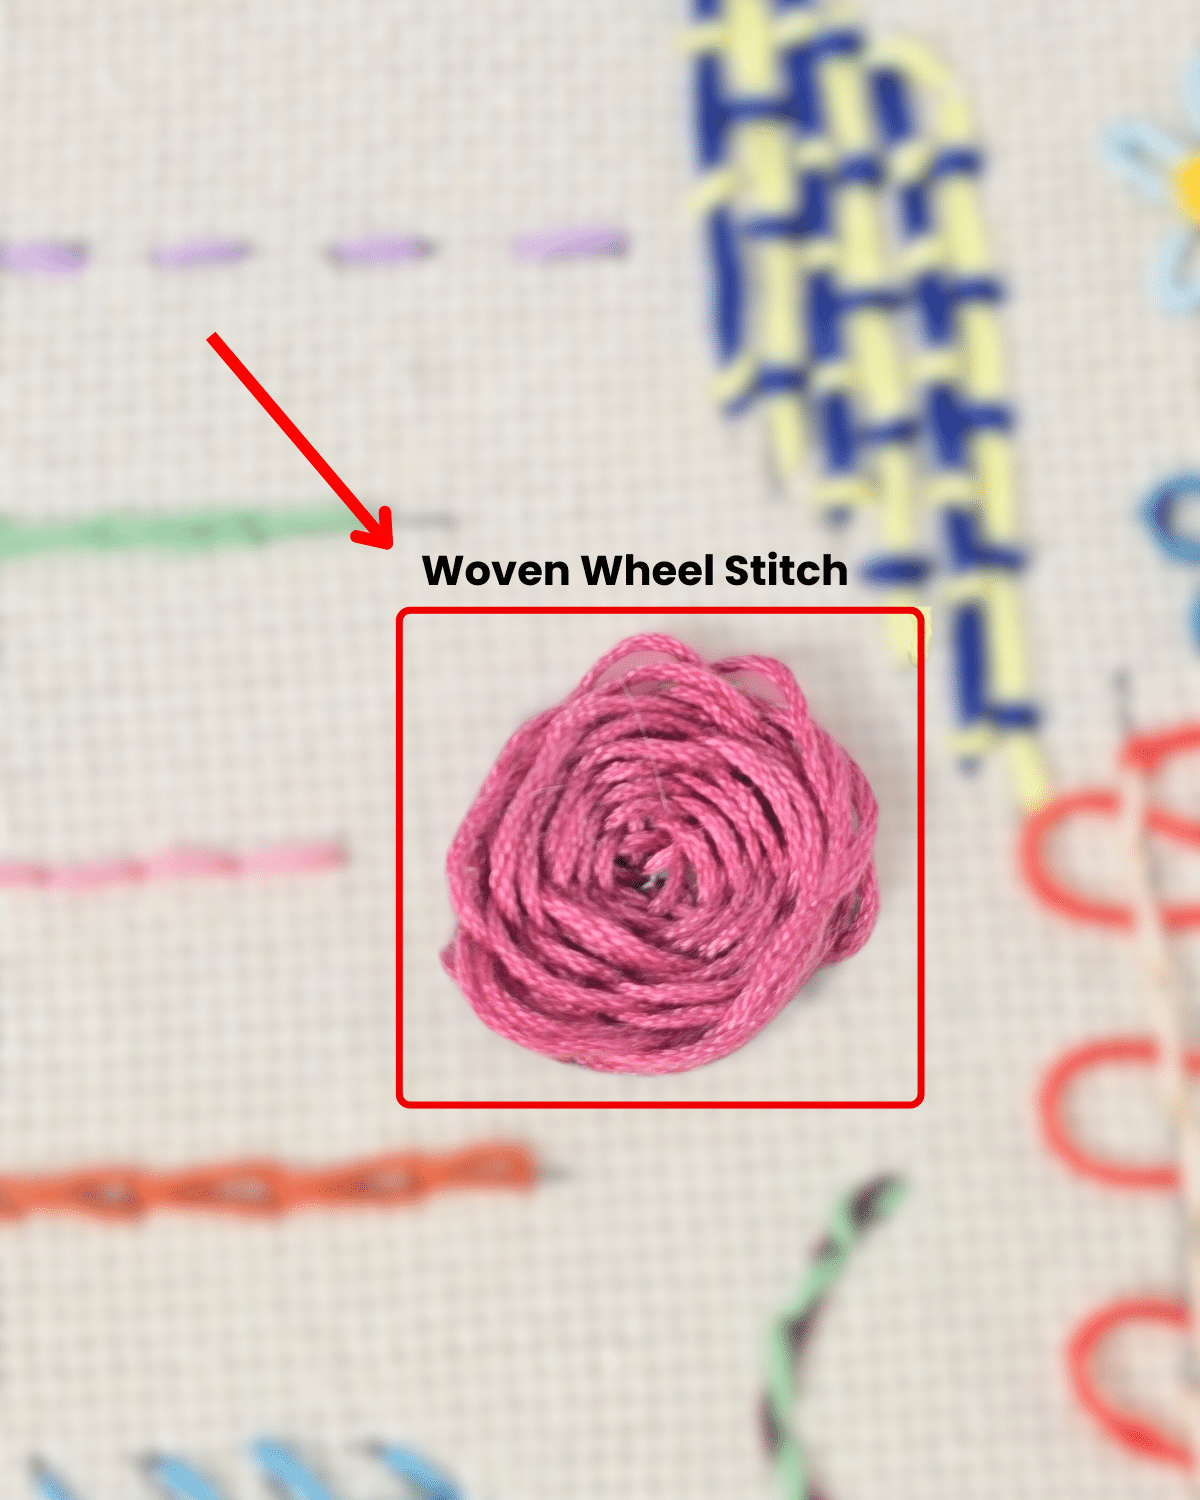 Create 5 straight stitches radiating from a center point, forming a star. Bring the needle up near the center, weave over one spoke, then insert under the next, and bring it over again.
Materials
- Embroidery Thread
- Embroidery Needle
- Embroidery Hoop
- Monk or Linen Cloth
- Friction pen, pen, or pencil
- Scissors
Now, you can try it on your own!
Other Tutorials for You

*If you love this craft, then visit our official website, follow our Facebook page, and subscribe to our YouTube channel for more!
14 Embroidery Stitches