The problem with a fall wardrobe is never that you own nothing, it is that you own four things you have stopped reaching for. That is what these DIY clothes for fall are for. Pom poms sewn onto a plain sweater sleeve, star stencils dabbed onto jeans with fabric paint that stays soft, a ruffle sleeve cut freehand with no pattern drafting at all, and a hooded cape that resizes for a child or an adult. Confession: I can get almost anything out of almost anything, and if I cannot, I know how to dye it or turn it into something else, which is how half this list gets used in my house. I have been meaning to write that stain post for years and still have not. Some of these need a sewing machine, plenty of them do not, and none of them look homemade in the bad way.
DIY Clothes for Fall
1. Pom Pom Sweater DIY
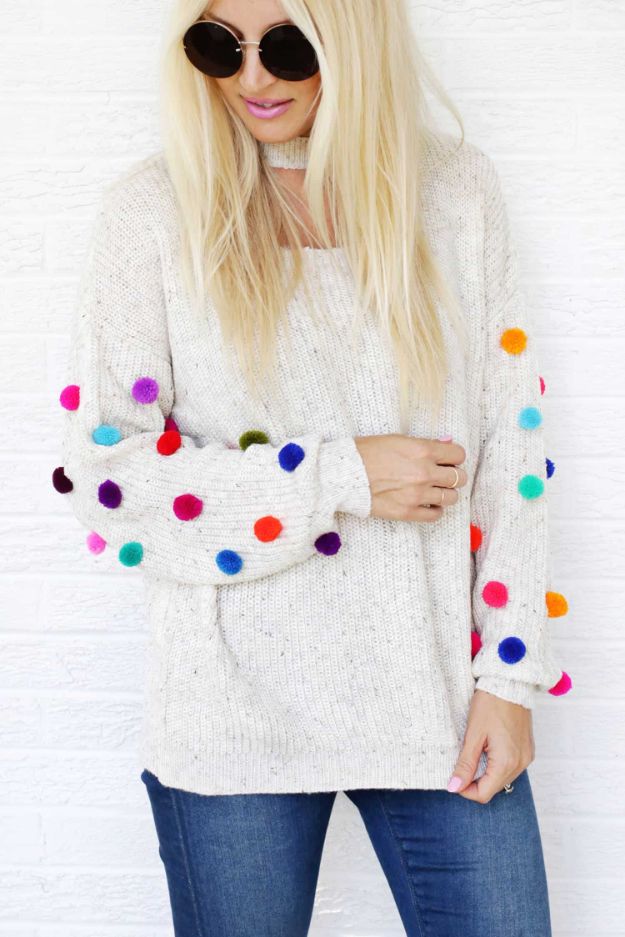
About twenty-six one inch pom poms per sleeve, in a rainbow mix. The trick that makes it look balanced is dividing each sleeve’s pile into warm and cool colors before you place anything, so both sides of the arm carry the same weight. Safety pin every pom from the underside first, space them out, check them, then turn the sweater inside out and sew each one down with matching thread. It is tedious rather than difficult, so put a film on.
Get the full tutorial at A Beautiful Mess.
2. Festive Sleeves For Fall
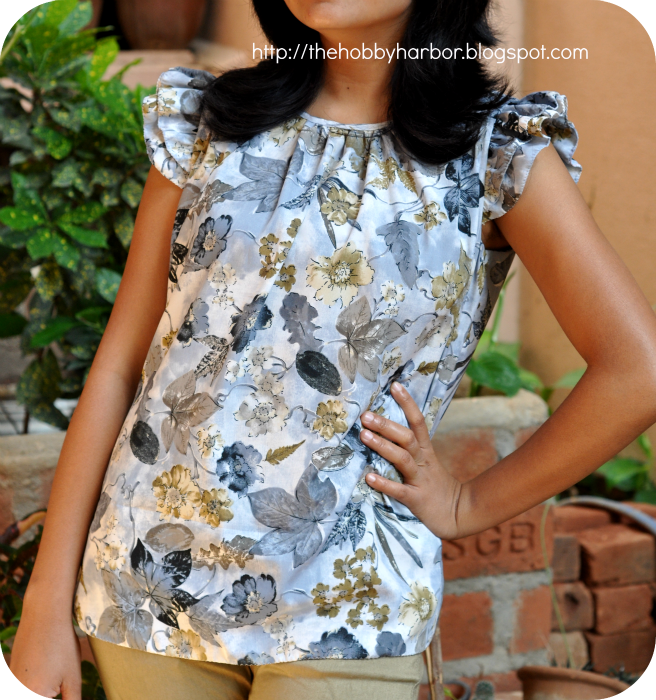
Sleeves without drafting a set-in sleeve, which is the part of a blouse most people give up on. Ruffle shapes get cut straight from leftover fabric, gathered along the top edge and stitched into the armhole exactly the way an ordinary sleeve would be. The maker tried it on a second top afterward specifically to check it was not a fluke, and it worked the same way twice. Perfect if you have a sleeveless blouse you never wear because of the arms.
Get the full tutorial at So Sew Easy.
3. Star Stencil Painted Jeans
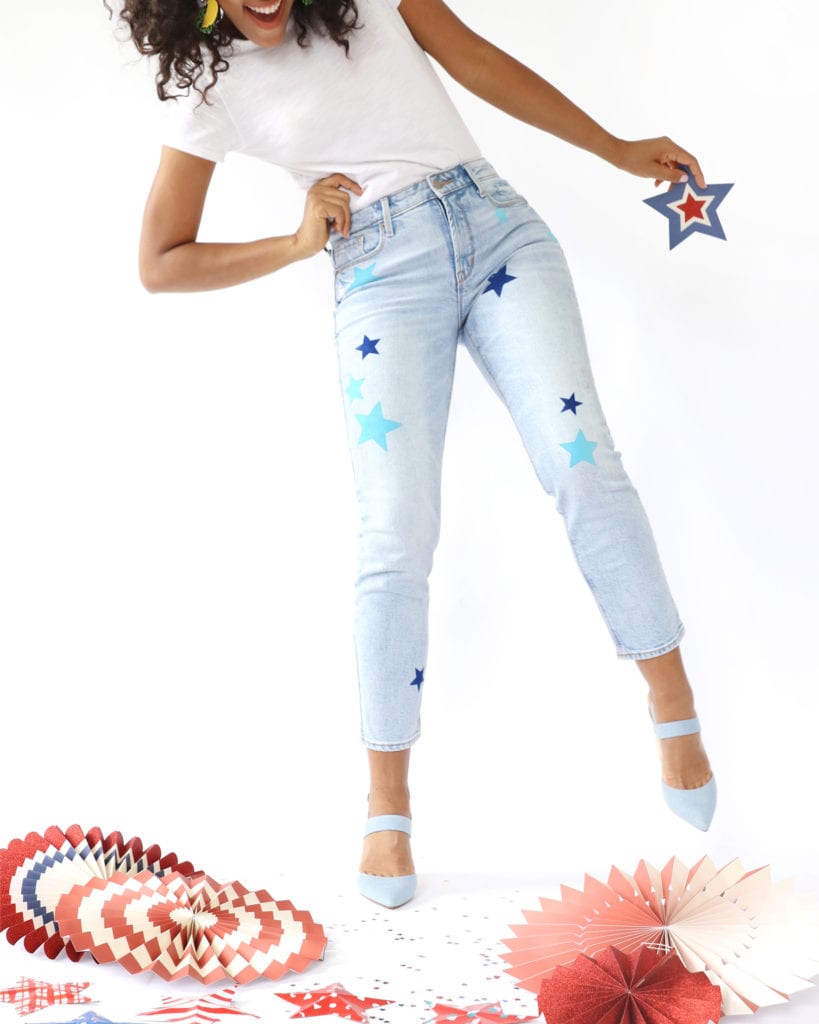
Punch star shapes out of permanent adhesive vinyl, cut them apart so every star becomes its own little stencil, and press them onto the denim. Dab fabric acrylic over each one with a sponge dauber and peel the vinyl away while the paint is still wet. Use DecoArt So Soft rather than ordinary acrylic, because it dries soft instead of stiff and cracked, which matters enormously on something you actually sit down in. A paper punch works, no cutting machine needed.
Get the full tutorial at Damask Love.
4. DIY Burberry Inspired Jeweled Trench
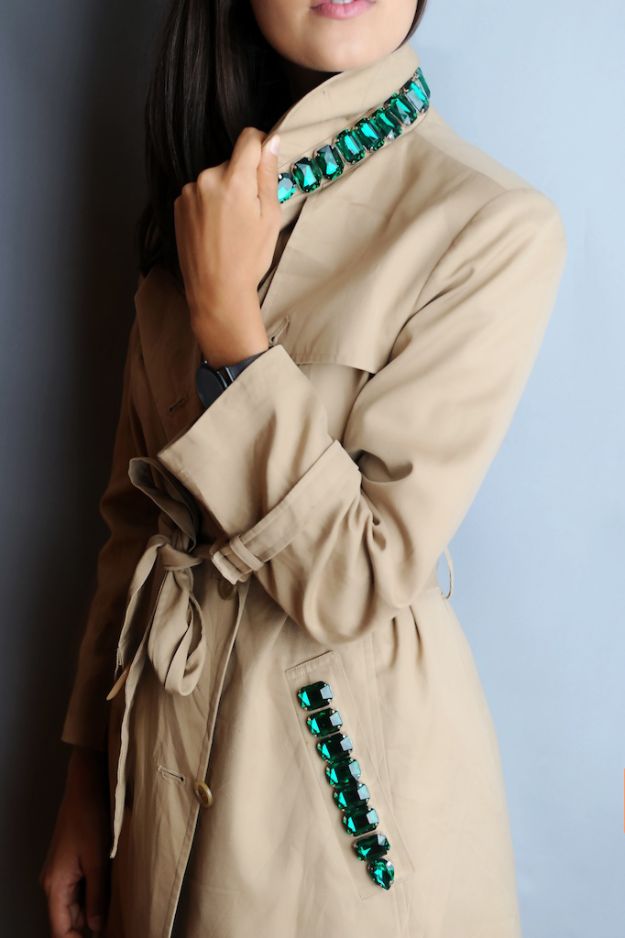
Emerald rhinestones set along the collar of a plain trench, with a second line of them running down the front, and suddenly a coat you have had for years reads as a designer piece. It is not the easiest project here and the placement is what decides it: lay the whole arrangement out before anything is fixed, and keep the line following the collar edge rather than drifting inward. Best on a classic camel trench, where the green really lands.
Get the full tutorial at Geneva Vanderzeil.
5. DIY Embellished Sweater
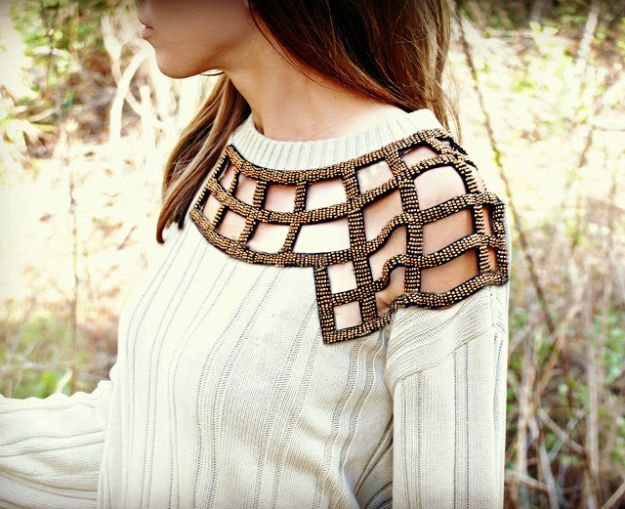
An old sweater and one good applique, and that is genuinely the entire supply list. The maker’s own account puts it at about five minutes: hand sew around the outside edge of the applique, then cut away the sweater underneath the opening. Hot glue works too where the beading makes stitching awkward. The honest catch is that finding the right embellishment is harder than the sewing. A husband’s cast-off sweater is the ideal starting garment here.
Get the full tutorial at Trash To Couture.
6. DIY Monogrammed Poncho
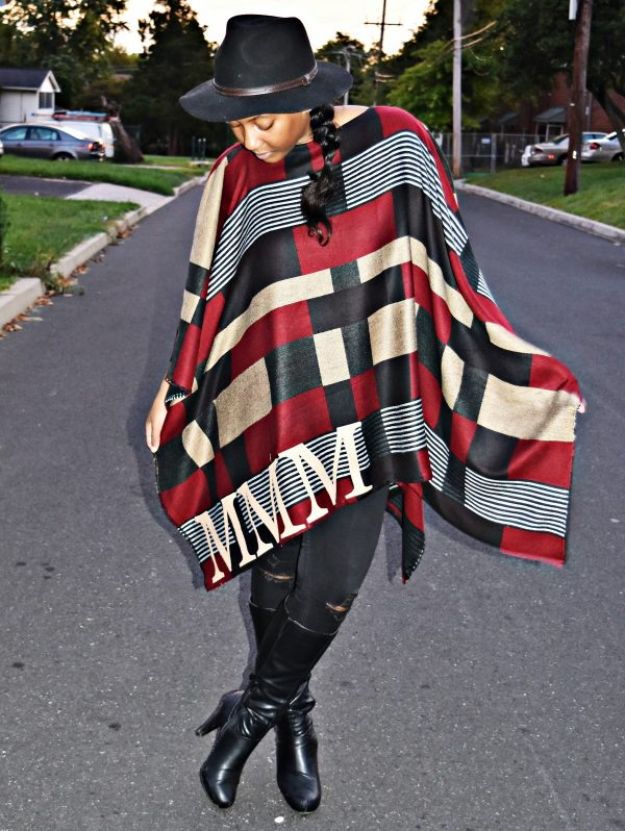
Two yards of fabric folded in quarters, with the neck hole cut through the fold the same way you would cut a circle skirt. The selvage edges become the sleeve openings, so the sides never get hemmed at all, only the collar and the hem. Wool felt letters go on with iron-on adhesive, blown up large, and bigger is genuinely better here. Do not cut the neckline too wide or the whole thing slides off your shoulder all day.
Get the full tutorial at WeAllSew.
7. Pom Pom Sweater Refashion
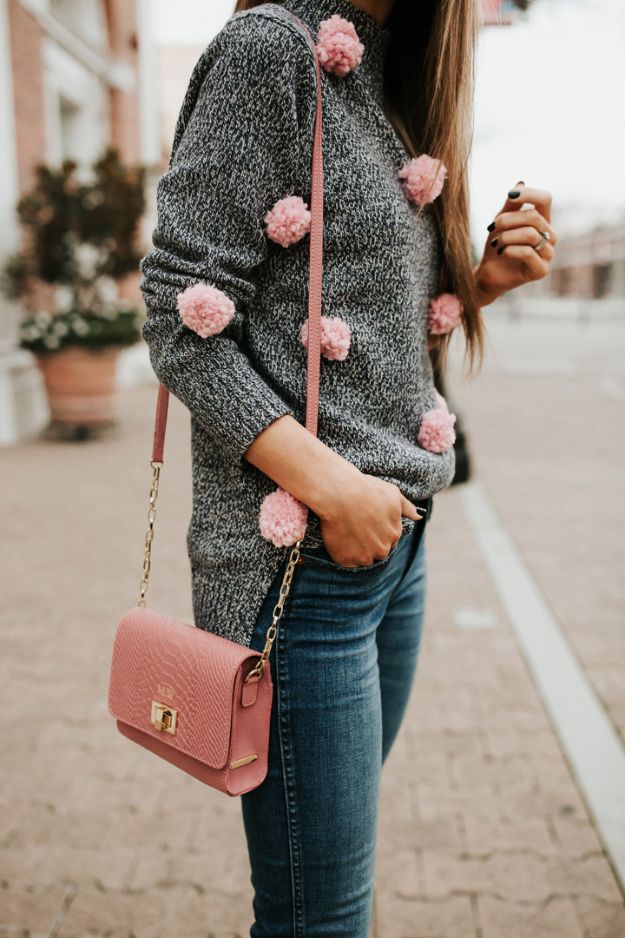
The beginner version of the pom pom sweater, and the difference is that you make the pom poms yourself on a kitchen fork. Wrap yarn around the middle two prongs thirty-five times, counting so they all come out the same size, tie the center tight, then cut both loops. Half a skein covers a sweater. Sew them on with embroidery thread and a large eyed needle. Pink on gray marl is a softer look than a full rainbow if that is more your thing.
Get the full tutorial at Merrick's Art.
8. Sewn Hooded Cape
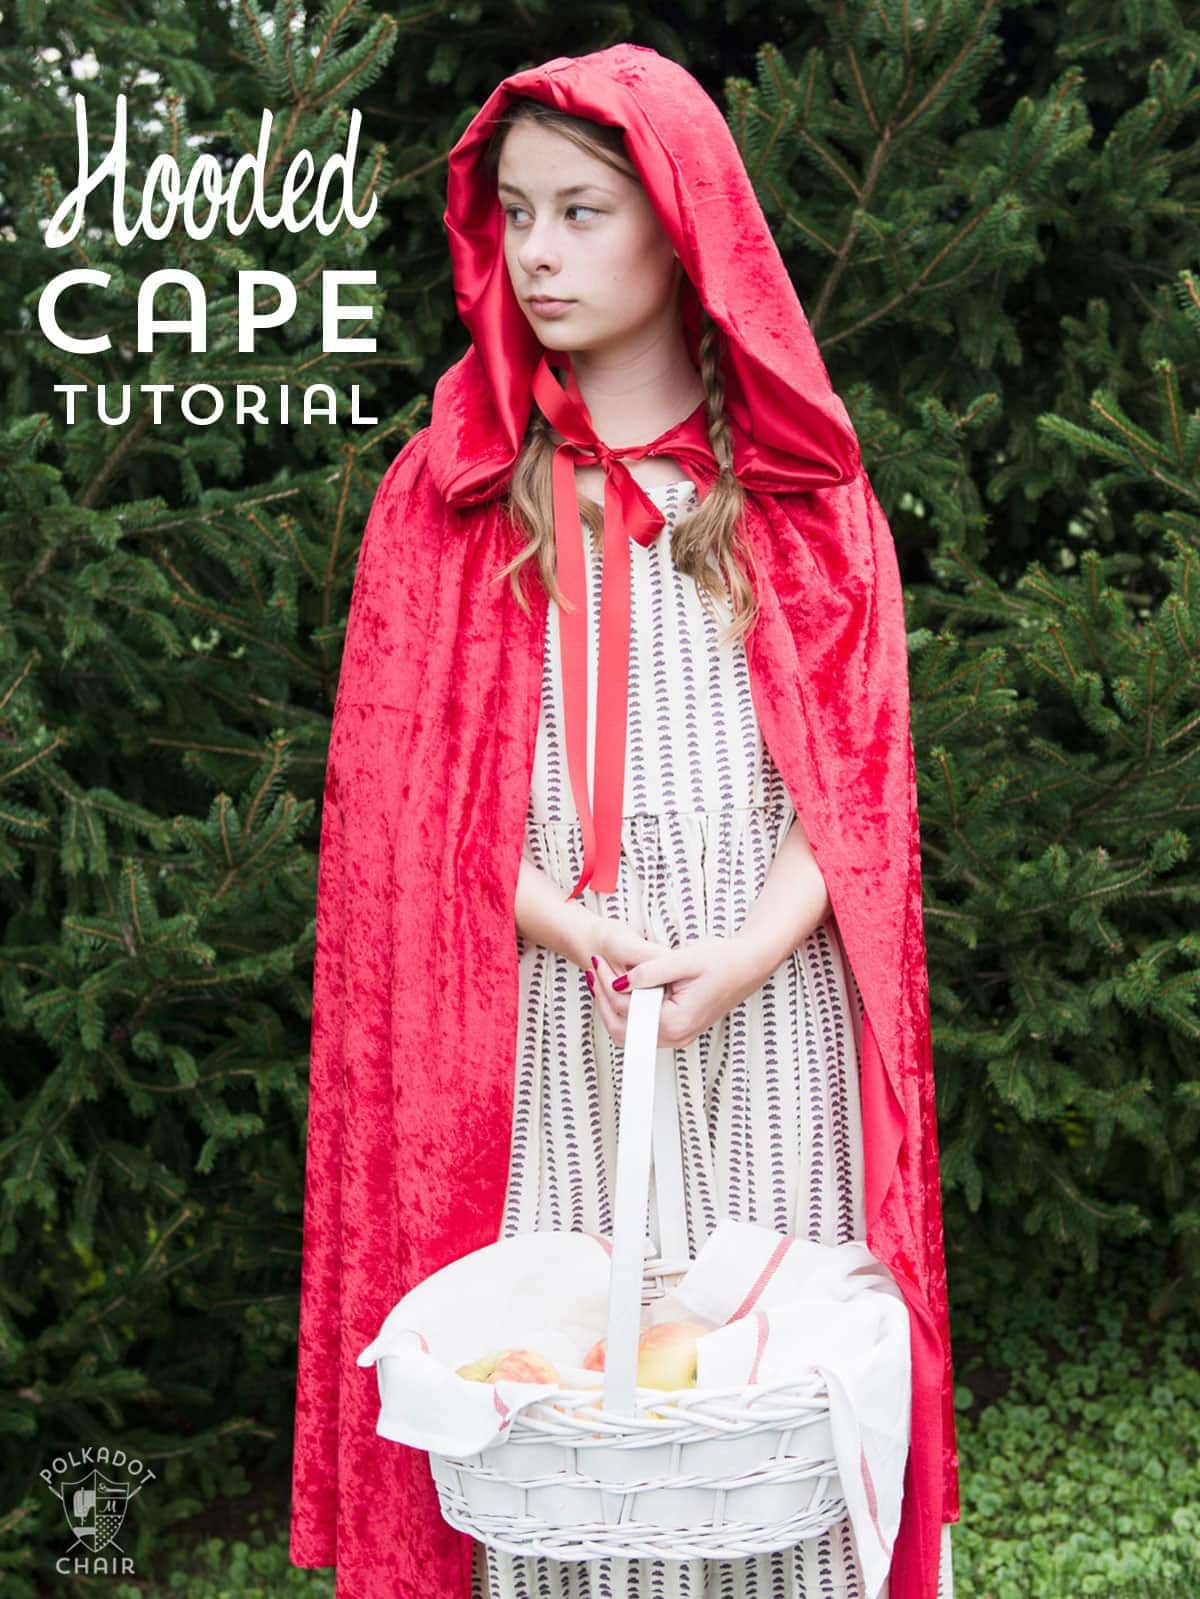
One cape pattern that resizes for a child or an adult, which is worth having on file because capes come up again and again in costumes: Red Riding Hood, a witch, a vampire, a Jedi. It is a lined hood sewn onto a simple cape shape, and the fabric choice does the heavy lifting. Stretch velour does not fray and needs no hemming at all, which takes hours off the build. Not for small children. Two to three yards for the cape.
Get the full tutorial at Polka Dot Chair.
9. Cozy Blanket Cardigan
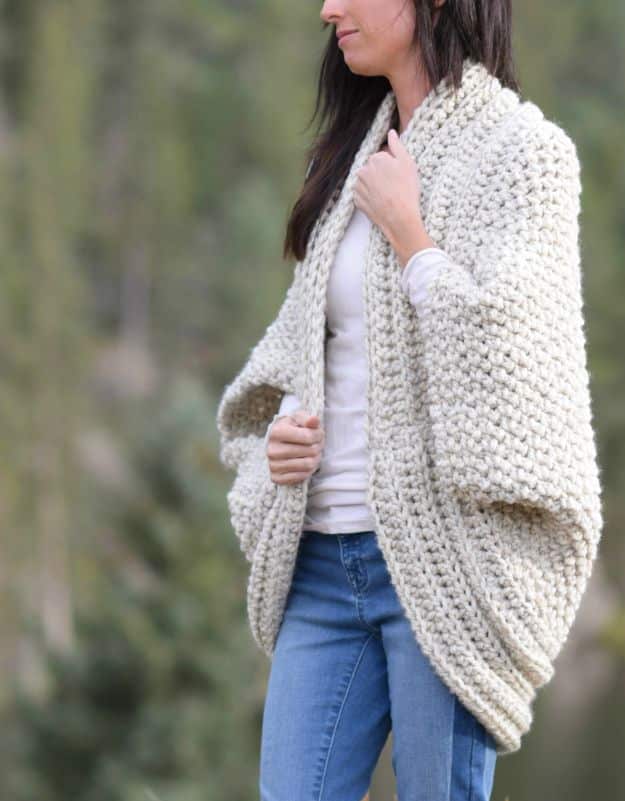
A crocheted cocoon cardigan that works up exactly like a blanket: crochet one plain rectangle in a simple stitch pattern, then fold the corners in and seam them to make the arms. That is the entire construction, which is why it suits a first garment. Super bulky yarn works it up fast and the stitch gives a lofty, knit-looking fabric that stays light instead of heavy. There is an optional button, though the drape here holds it on the shoulders without one.
Get the full tutorial at Mama In A Stitch.
10. Blouse to Dress Refashion
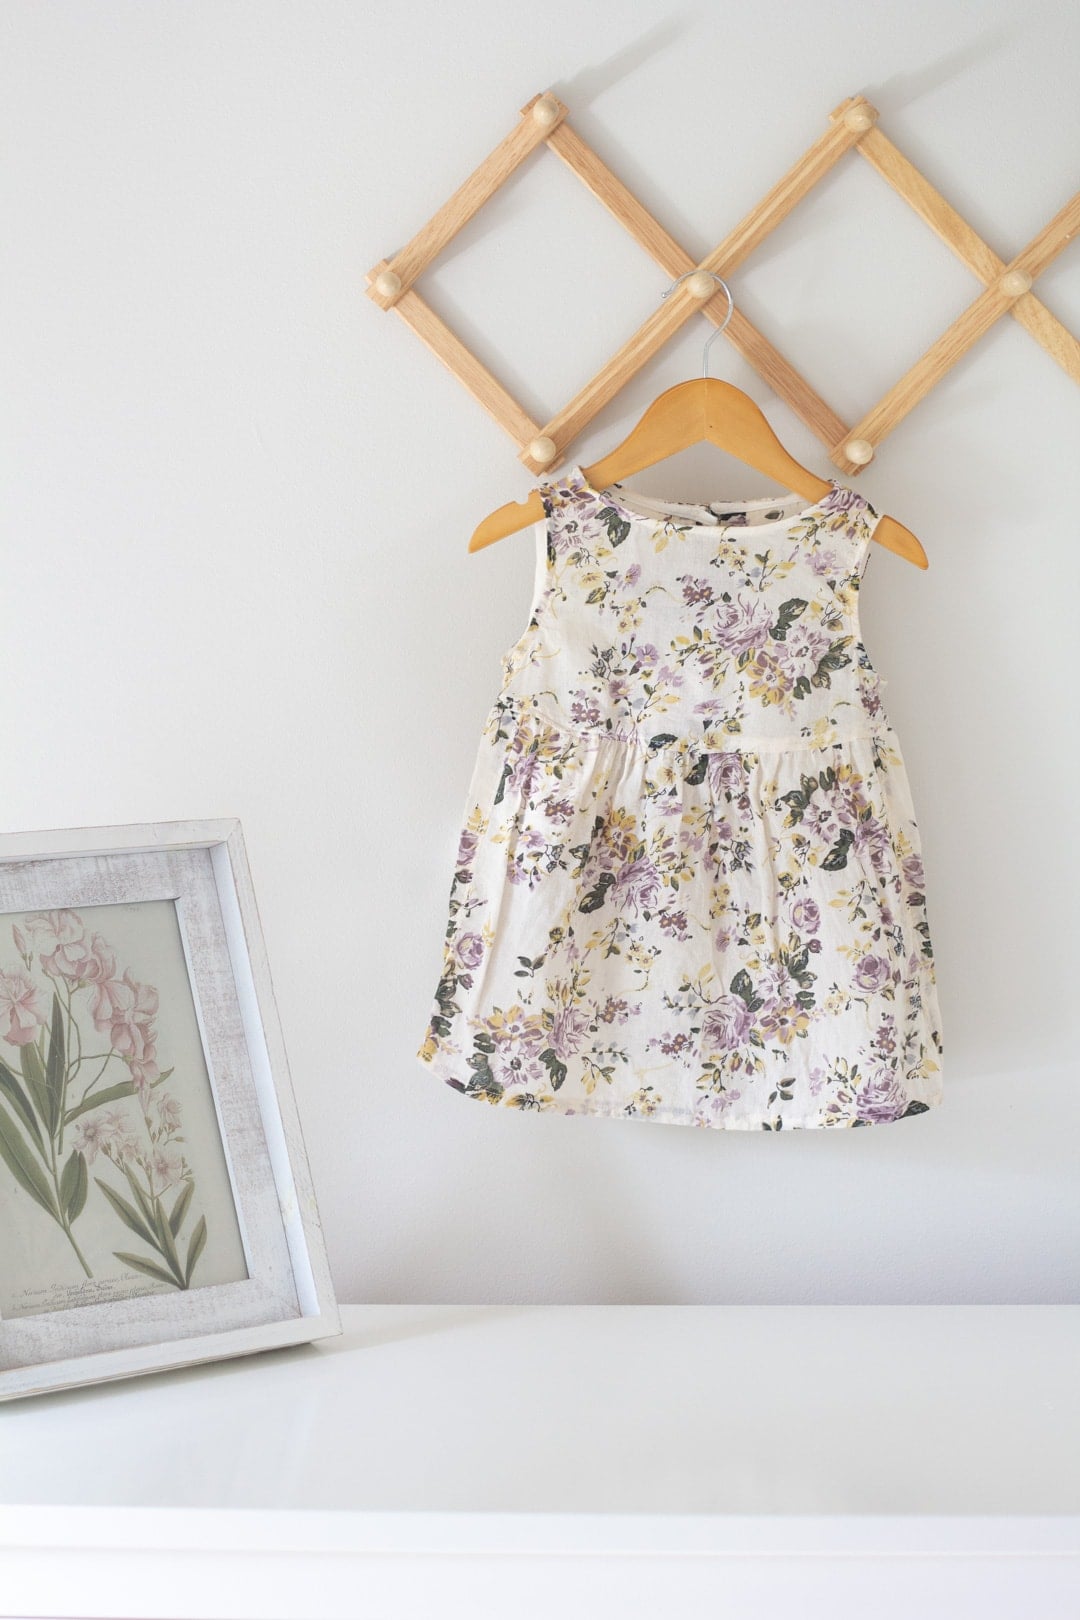
Refashioning from a finished garment is easier than sewing from yardage and almost nobody says so. The blouse arrives with its fabric already washed and settled, its hem already sewn and often its buttons and facings ready to reuse, so a good share of the fiddly finishing is done before you cut. Here the sleeve buttons were salvaged into a row up the back and the back ties reused as button loops. Choose a garment with plenty of fabric in the skirt.
Get the full tutorial at Bellewood Cottage.
11. Tie Dye For Casual Fall Fashion
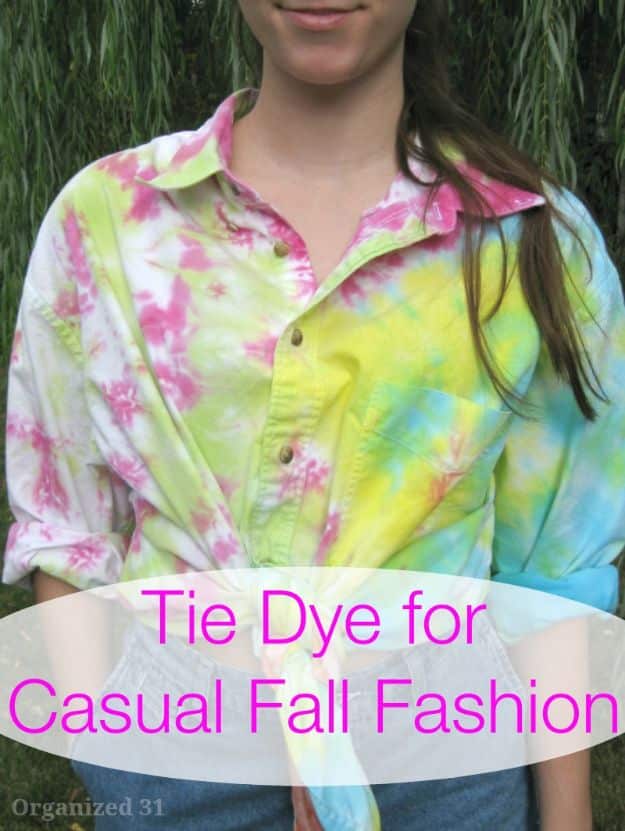
An oversized man’s Oxford shirt tie dyed in bright colors, made deliberately as an antidote to gloomy fall dressing rather than as a summer piece. A swirl on each side of the shirt, rubber banded tightly, with two colors on one side and two different ones on the other. Wash the shirt first and skip the fabric softener, because softener stops dye taking properly. Wear it tied up at the waist or long and loose over leggings.
Get the full tutorial at Organized 31.
12. DIY Bow Sweater With Open Back
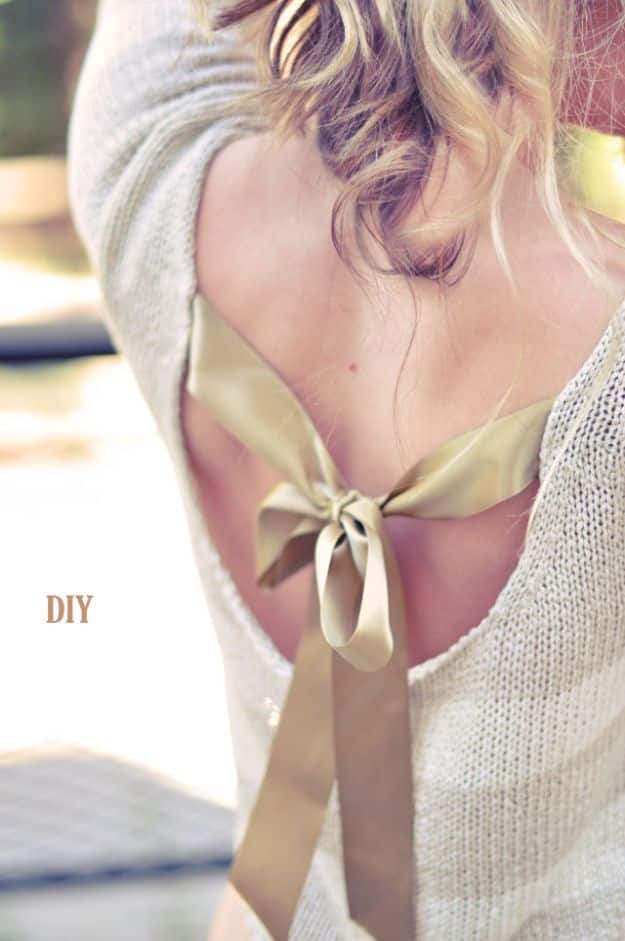
A satin ribbon closing an open back sweater with a bow, and there is a genuinely useful detail here: fold the straight cut end over about an inch and pin it to the underside so the fold hides, then hem stitch around the edges in thread that matches the sweater, not the ribbon. Cut the other end on an angle and singe both ends with a lighter to stop fraying. Grosgrain gives a stiffer bow than satin if you prefer structure.
Get the full tutorial at Love Maegan.
13. DIY Sweater Dress for Girls
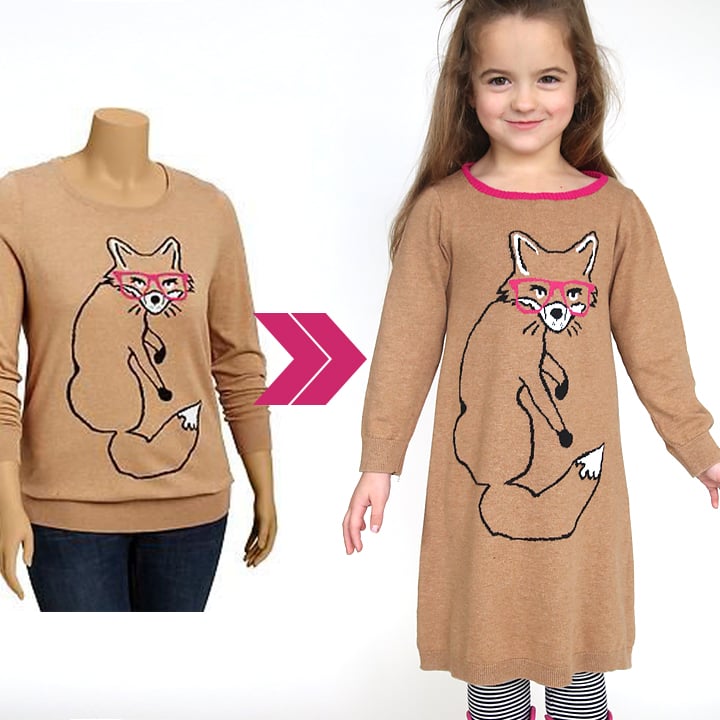
Turning an adult sweater into a little girl’s dress is so easy the maker ended up doing it over and over. Lay a long sleeve tee that already fits her flat on top of the sweater, cut around it with extra room for the seams, then sew it exactly the way you would resize a shirt, with a couple of small changes for the dress length. A three dollar thrift store sweater is plenty for the whole thing. Keep the original hem and cuffs.
Get the full tutorial at It's Always Autumn.
14. DIY Statement Jumper
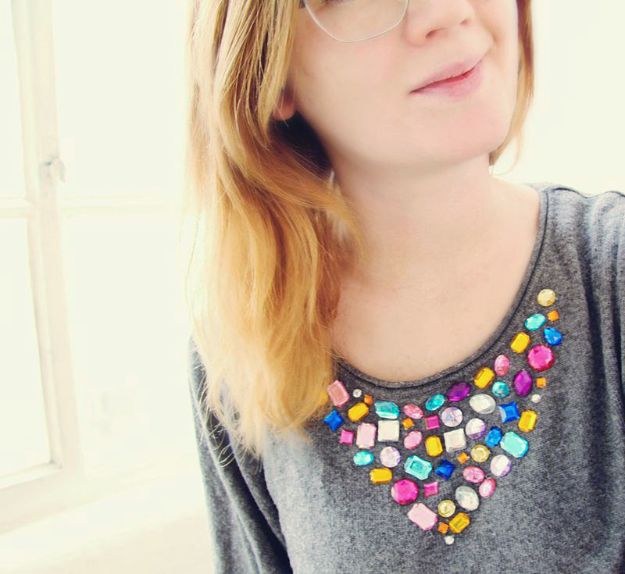
Multicolored crystal shapes glued across the neckline of a plain jumper, which is a direct answer to a gray, black and navy winter wardrobe. Lay the whole arrangement out and shuffle it until you like it before any glue comes out, then work slowly with a glue gun or a strong fabric glue. About three quarters of the way through, lay the remaining stones out to check the spacing still works. The maker reports they survive the wash, mostly.
Get the full tutorial at Fall For DIY.
15. Make Over Old Sweaters with DIY Details
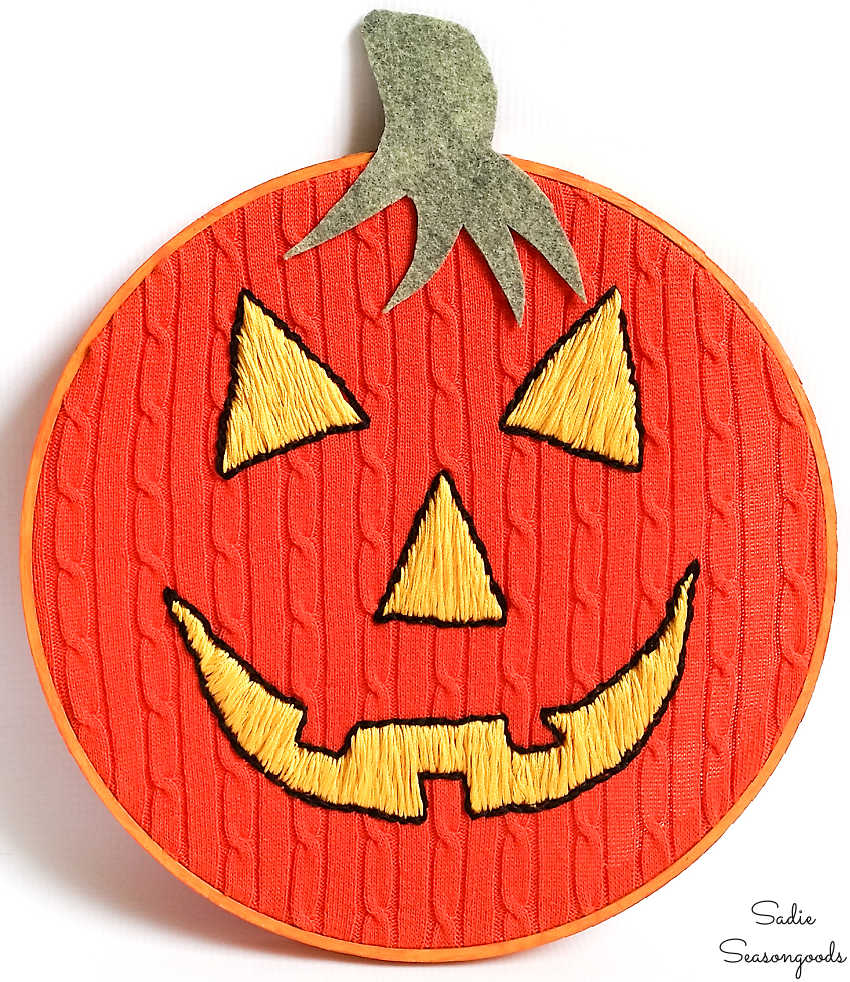
An orange cable knit sweater from a thrift store rack, picked specifically because the cable ridges look like the ribs of a pumpkin. Hoop a section of the knit and hand embroider a jack-o-lantern face straight onto the sweater itself, so the detail is stitched in rather than glued or ironed on. That is why it survives real wear and washing in a way no iron-on patch ever does. It was a dollar, which is the best part.
Get the full tutorial at Sadie Seasongoods.
16. Easy Flower Embroidery on Jeans
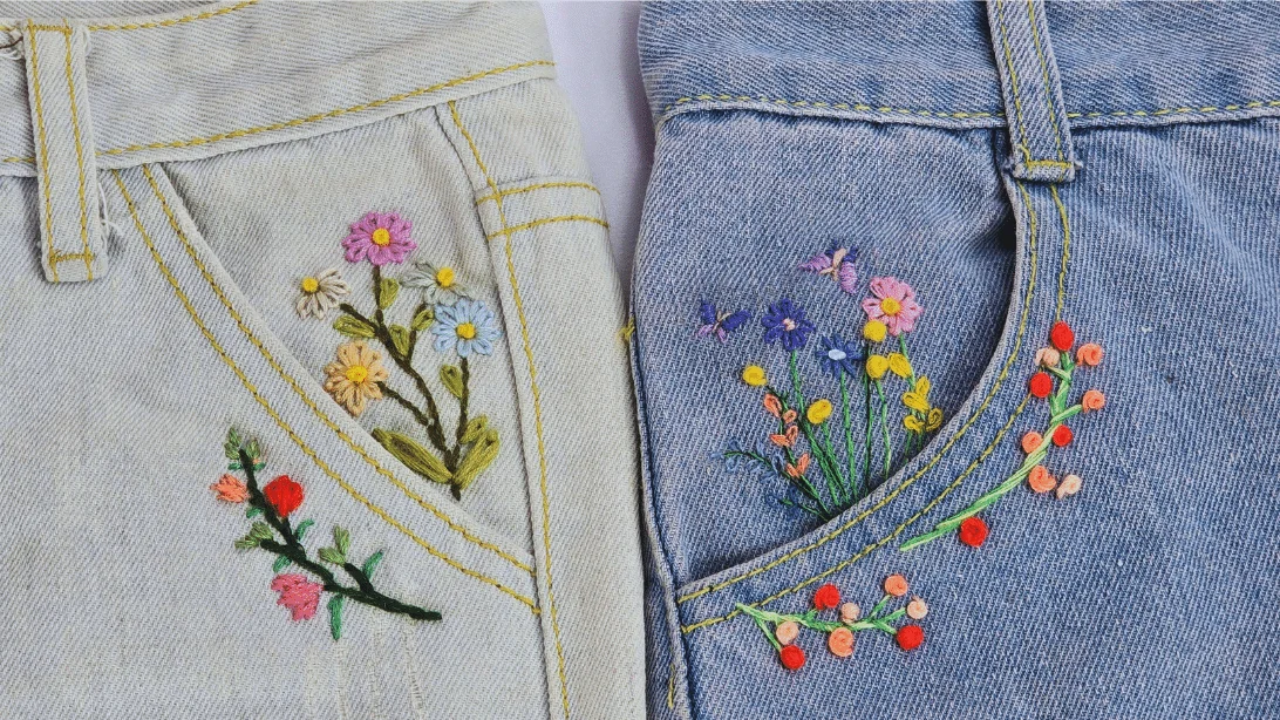
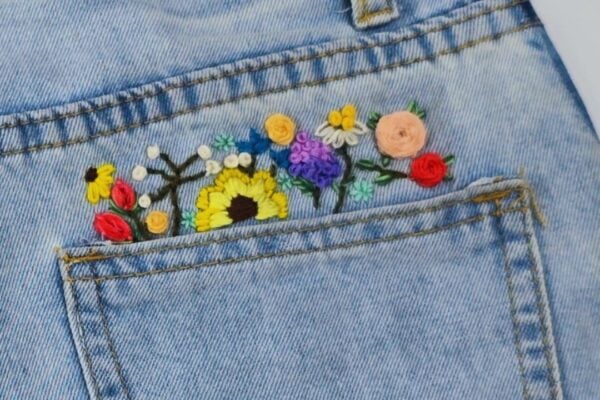
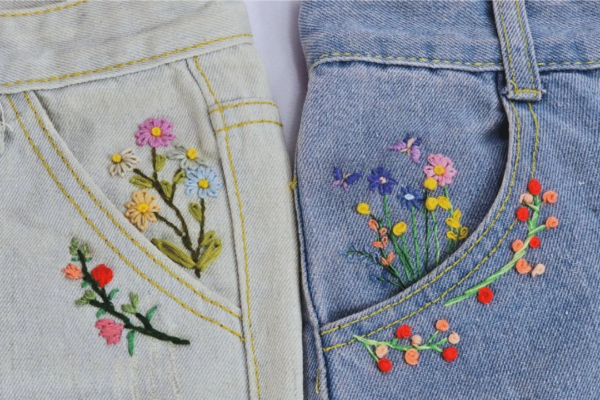
Embroidery this pretty takes about six stitches. Lazy daisies make the petals, French knots fill the centers, a satin stitch fills the leaves and a backstitch joins it all with a line, and that is the entire vocabulary. Denim is the friendliest fabric to learn on, thick enough to hold its shape without a hoop fighting you and forgiving enough to hide a wobble. Trace the pattern onto water soluble stabilizer, stitch through both layers, then rinse the stabilizer away.
Get the full tutorial at DIY Joy.
17. How to Make a Cute Bow Embroidery on Jeans
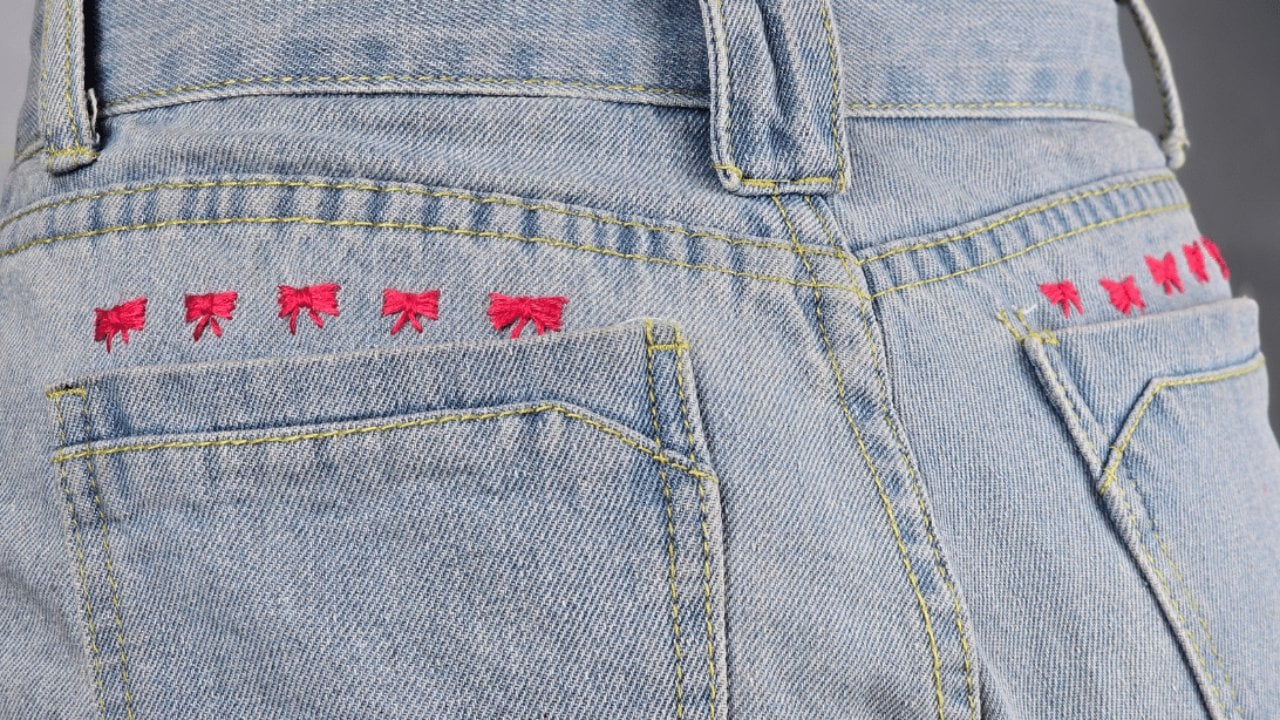
Little stitched bows in a neat row along the back yoke, and a single bow takes under five minutes even if you have barely picked up a needle before. The supply list is a pair of jeans, a needle, thread and scissors, and ordinary sewing thread works fine, so there is nothing to go and buy. It is also the easiest way to cover a small tear or a worn patch without anything looking like a repair. A row across the yoke reads deliberate, and scattering them instead reads softer.
Get the full tutorial at DIY Joy.