Easy DIY Drawstring Produce Bag Sewing Tutorial

Image credit: Notches Sewing via YouTube
Store your fruits or veggies in this beautiful drawstring bag that you can sew easily using only a few fabrics and a cotton netting or mesh! Learn how to sew this step by step with this video tutorial by Notches Sewing on YouTube. Hope you find this sewing project fun and helpful.
Materials:
- Non-stretch cotton netting or any type of strong mesh
- Main fabric
- Lining fabric
- Marking pen or pencil
- Ruler or tape measure
- Fabric clips or pins
- Iron, for pressing
- Needle and thread
- Sewing machine
- Pattern (Click here to download the pattern)
Directions:
Step 1
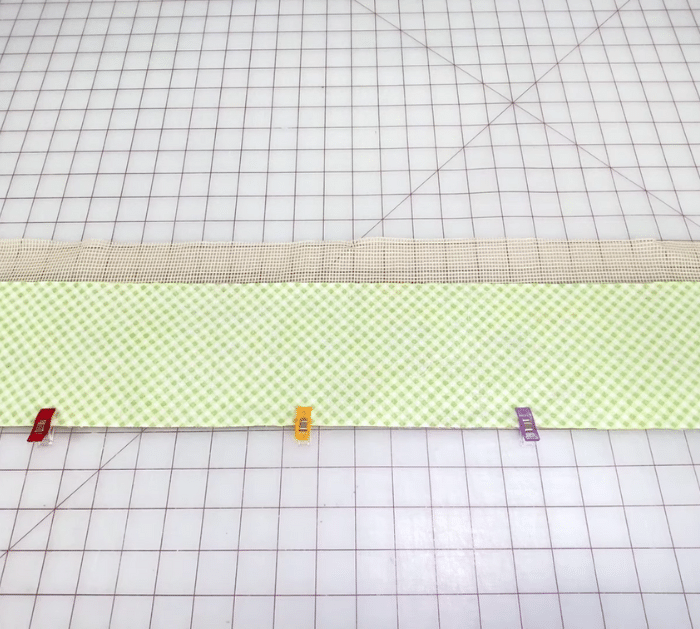
First, cut off the salvage edges and straighten out the bottom of the netting or mesh, then cut off 1 bottom and 1 top mesh piece, and the top band and center band from your main fabric, you can also cut your drawstring and lining pieces from the main fabric or use a contrasting fabric instead. Next, fold the drawstring fabric in half lengthwise with the wrong sides facing and press, then open the fabric, fold the outer edges towards the center leaving a very small gap in the middle, and press nicely. Fold it in half again and press, then open the ends, fold over by half an inch, push the corners to create a triangle at the center, fold in half again, and clip in place. Repeat this method to the other end of the drawstring, then sew the long sides of the drawstring together back tacking on each end, no need to sew across, and set it aside. Lay the center band right side up, place the bottom mesh on top followed by the center band lining with its wrong side facing up, and match the bottom edges nicely.
[social_warfare]
Step 2
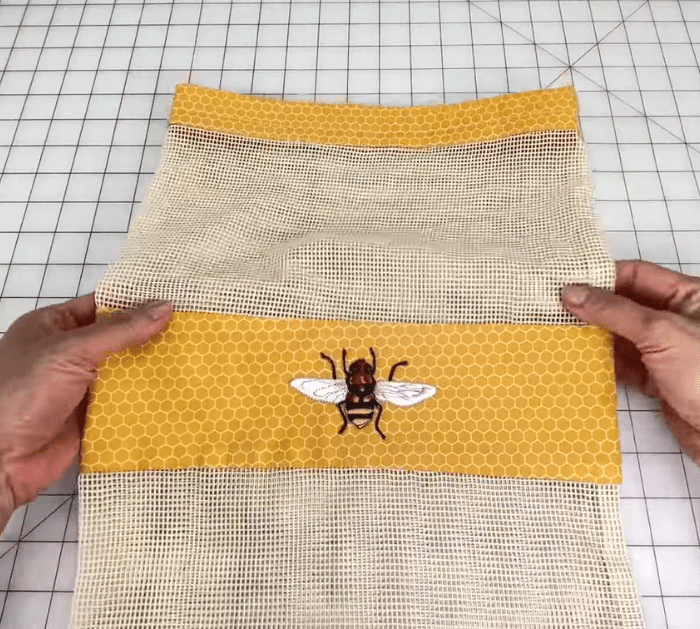
Sew them together at the bottom with a 3/8″ seam allowance, then fold down the mesh and lining, and place the other mesh piece on top lining up the top edges. Roll up the bottom of the mesh pieces together nice and skinny away from the top area, then flip up the center band lining, match the top edges, and clip it in place. Sew the seam closed with a 3/8″ seam allowance, then carefully pull the mesh out, and press flatly on each side. Fold the whole piece in half crosswise with their wrong sides together and match the center seams nicely, then clip the side and bottom edges together, and stitch with a ¼” seam allowance. Reduce the bulk at the center seam by trimming half of the seam allowance width, then turn over the side and bottom seam on the corner, and hold it in place as you turn the whole piece over to its wrong side out. Adjust the seams at the center, then clip around the center band, and sew over the sides and bottom. Turn the bag right side out, then prepare and sew the top band, and add the drawstring to finish the bag. Watch the video tutorial for more details and to see how to finish the bag.
*All image credit belongs to Notches Sewing via YouTube. Follow and subscribe to her channel for more!

")


