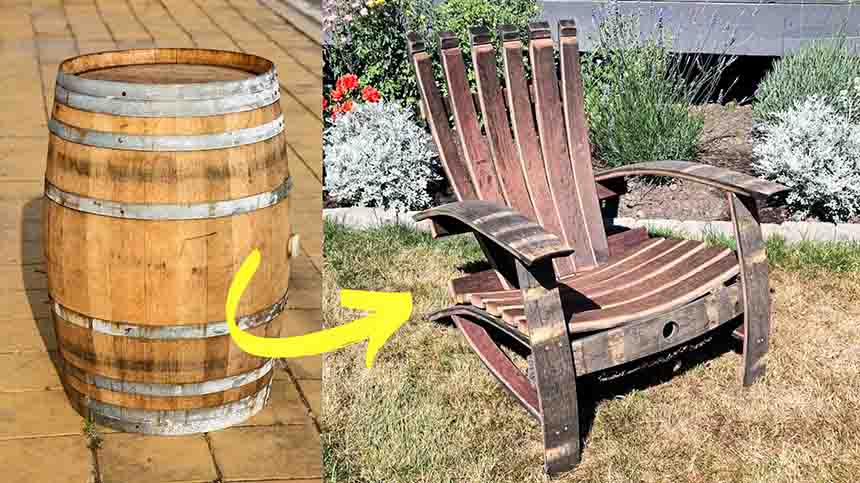
If you have a lot of wine barrels or thinking of a project out of wine barrels, then this DIY chair from Spoon’s Projects on Youtube is the perfect project for you. This gorgeous chair out of staves is just too gorgeous – perfect furniture to elevate your space! What’s more, though this may look complex, this chair is actually super easy to do. Just follow the steps by watching the video tutorial below.
Materials:
- a barrel
- drill
- 1 5/8″ and 2 1/2″ outdoor screws
- 1/8″ drill bit
- yardstick or measuring tape
- clamps
- chop saw
- sander
- level
- outdoor urethane
Directions:
Step 1
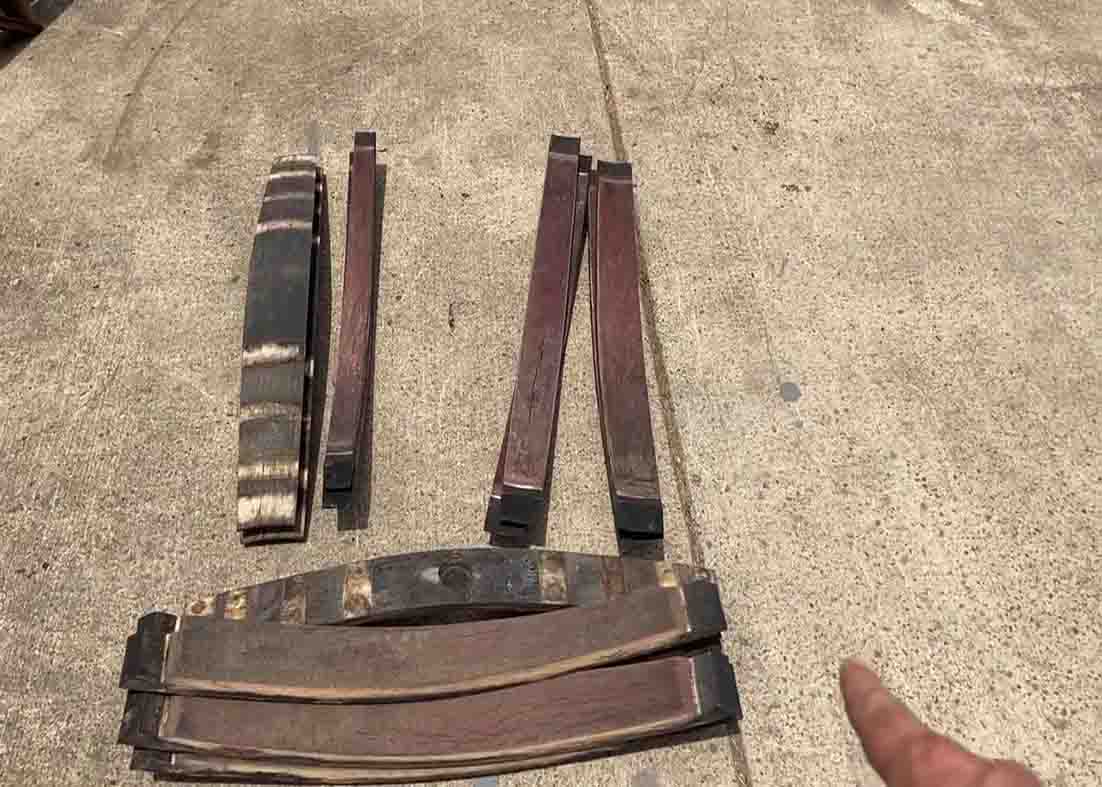
The first thing you need to do is disassemble the barrel. (You should end up with 25 – 30 staves.) Next, take the staves and lay them out according to what part of the chair they’re going to be placed. For the seat: 2 arm pieces (the widest staves) at full length, 2 wide front legs at 23″ (cut top at a 22-degree angle), 2 medium back legs at 33″ (cut only 1 side, and each leg is at 5-degree angle so they point inward at each other), 5 – 6 mix pieces at 28″ (cut each end) and when lined up, 16″ – 18″ deep, 2 medium leg supports at 21″ (flat at one end and then 45 degrees on the other), and lastly, the front piece at 28″ (ideal for bunghole board.) For the back, you will need: 5 – 6 mix staves at full length and 3 back support at 28″, 27″, and 21″ (they can be the ugly staves.) After cutting the staves to the right dimensions, sand them down. (it’s also recommended that you put a stain on them.)
[social_warfare]
Step 2
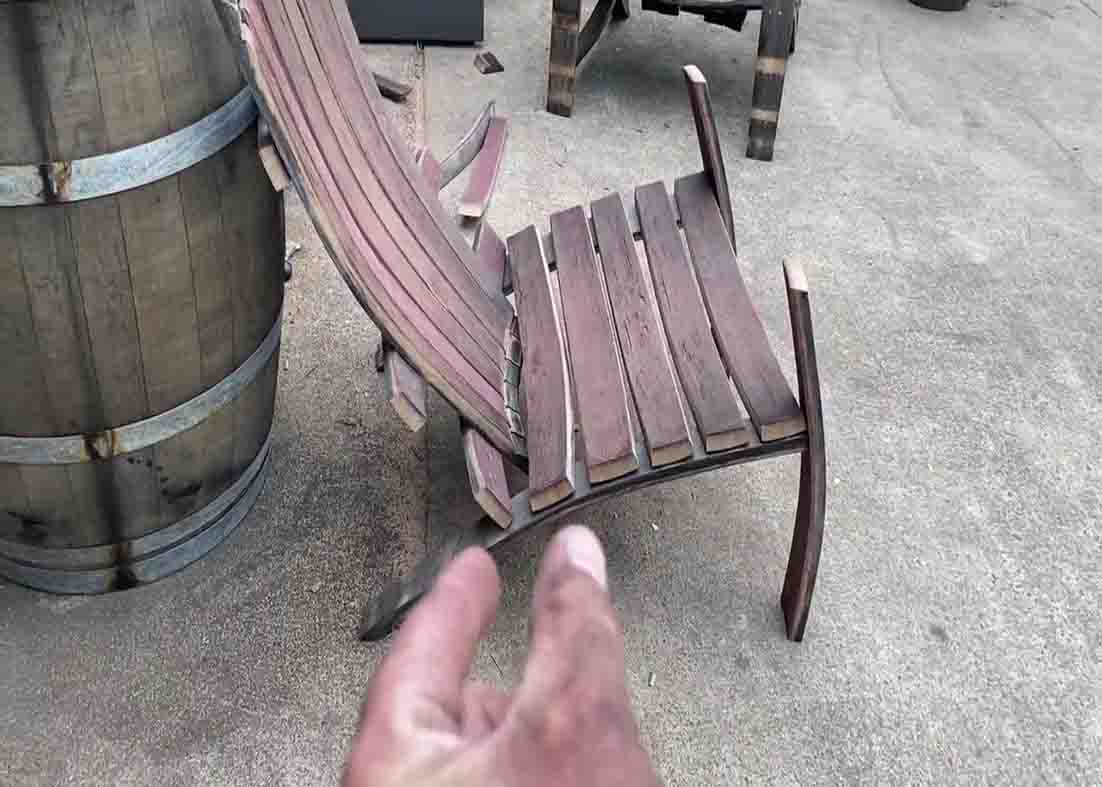
It’s now time to assemble the chair. Put together the back first, and line them up to your satisfaction. Next, on the outside edge, measure 7 & 1/4″ and mark it. Mark the opposite edge also. For the center, mark 7 & 1/2″ so that way, it’s going to arch. Take the 21″ board and mark the center of it and attach each end piece with a single screw, then flip it over. For the bottom side, mark 3″ on both edges and then find the center of your 28″ board. Screw the middle first and check both ends to see if it’s square before screwing. For the middle board, you want the top to the bottom to be 11″, then proceed on screwing it down. Next, for the seat, take the boards and then mark each one at 18″. After this, take your first sit board, put it under so when it’s faced up, it’s going to be curved. Attach it to the back one at 18″ and then move on to the front one. Fill in the middle after you attach the front board. Next, line up the front legs and mark 14″ from the bottom, then attach each to the seat. Clamp the backrest and seat together once you’ve attached the front legs. After this, attach the armrest with a 4″ overhang and screw each down. Flip the chair over to attach the backrest and the seat together by screwing them down. Lastly, attach the bunghole board to the front bottom of the chair.
Easy DIY Wine Barrel Chair Tutorial