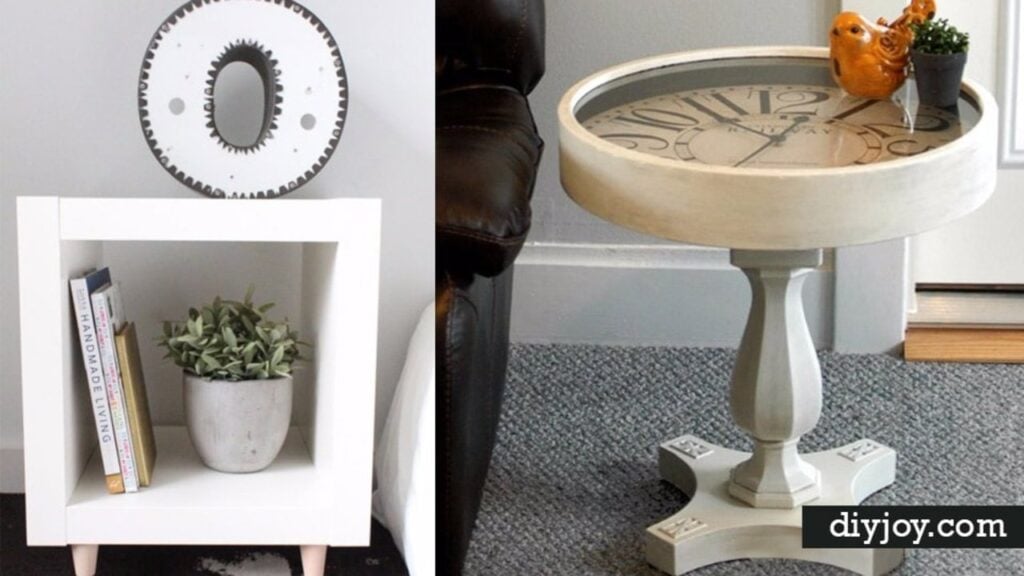
Need a spot for your coffee, lamp or late night book? These 35 DIY end tables and side tables cover every style and skill level. You’ll find weekend woodworking builds like a geometric stacked table and a walnut nightstand with drawers, plus easy upcycles that turn a thrift store lamp, a wine crate or a pair of wire baskets into something brand new. There are smart space savers too, like a table that slides over your sofa arm and a cover that turns the dog crate into furniture. Perfect for living rooms, bedrooms, reading nooks and the patio!
1. DIY Tree Slab Side Table

If you can drive six screws, you can build this side table. A thick round of tree slab gets a set of hairpin legs, and that really is the whole project. Slabs turn up at flower markets and online craft suppliers, and hairpin legs run roughly $12 to $40 each depending on the finish. The version shown sits on 18 inch powder coated legs in a bright orange, which cost more but look fantastic against warm wood. The legs also come in white, green, blue and plenty of other colors.
Get the full tutorial at Emily Henderson.
2. Stacked Trunk End Table

Sometimes the easiest end table is already sitting in the attic. Two old wooden trunks, stacked one on top of the other beside the sofa, make a rustic end table with real character and zero building. The worn patina of the wood looks lovely next to a white slipcovered sofa. Set the slightly longer trunk on the bottom so the stack looks steady, then style the top with a lamp, a few books and a plant. Hunt for trunks at flea markets, antique malls and estate sales.
Get the full tutorial at Liz Marie Blog.
3. DIY Side Table

Splayed legs make this side table look like it came from a pricey furniture store, but the trick is just a miter saw set to seven degrees. Small blocks on the front of each leg fake the look of mortise and tenon joinery without any of the fuss. The free plans include a tool list, materials and a full cut list, with pocket holes and figure 8 fasteners holding it together. Budget about $35 and four hours per table, and expect a moderate build. A slatted lower shelf adds storage.
Get the full tutorial at Build Basic – Easy Building Plans and Tool Tutorials.
4. Nesting Side Tables

Pottery Barn style nesting tables cost a lot less when you build them yourself, and these cottage pieces are rated a beginner project. The free plans cover both a small and a large table, with separate shopping and cut lists for each. Most of the wood is basic 2×2, 2×4 and 1×4 boards, plus a stick of cove moulding for a finished edge. Two inch screws and finish nails hold it all together. Building the small one first uses up scraps for the larger table.
Get the full tutorial at Ana White.
5. Step Ladder Side Table

An old metal step ladder with chipped green paint and a bit of rust turns into a side table full of character. Every piece came out of an antique dealer’s back shed, so the whole thing is a true salvage project. The top is a sheet of glass with holes drilled by a professional glass company, then screwed down with vintage hardware. Leave the drilling to a glass shop, since glass cracks easily. The steps underneath hold books, plants or a stack of magazines.
Get the full tutorial at Neeleys Knits.
6. Homemade End Table From Old Windows

The original pair of these end tables used salvaged old windows as cabinet doors, and the free plans that followed make the look easy to copy with stock lumber. Select pine 1×6 boards form the top and bottom, furniture grade plywood builds the box and base cap moulding dresses up the edges. Furniture feet, a knob, inset hinges and a catch finish it off. A pocket hole jig and a brad nailer do most of the work. They double as nightstands in a bedroom.
Get the full tutorial at Beth Bryan.
7. DIY 5 Board End Table

Five boards, some screws and wood glue make a slim end table that is sturdy without taking up much room. Measure the depth and height of your couch first, then cut the top board and the two side boards to match and screw them into a frame. Lay the frame on its side, set the angled boards across it and mark them in place, so the cuts fit perfectly. The finished table was painted a soft buttery yellow and sealed with wax. It is narrow enough for tight spaces.
Get the full tutorial at Liz Marie Blog.
8. Ballard Knockoff Spool Accent Table

A thrifted rope basket is the secret behind this spool accent table, a knockoff of a catalog favorite. Two 24 inch wood rounds become the base and a lid, both stained, with short dowel pieces glued in to keep the top from sliding. Arched lettering is stenciled on top in black craft paint using a dry brush. The basket screws to the base from inside. Since the lid lifts off, there is hidden storage inside for blankets or toys.
Get the full tutorial at Flamingo Toes.
9. Copper and Leather Weave Side Table

Copper pipe and strips of leather make a side table that looks like it came from a high end design shop. Two 10 foot lengths of 3/4 inch copper pipe, cut down with a tube cutter, fit together with cross bar and corner connectors to form the frame. Leather from a scrap bin is cut into 1 inch strips, folded over at each end and fastened with grommets so the loops slide onto the pipe. Weave the strips tight across the top, then glue the connectors once everything fits. A homemade polish of white vinegar, water and salt brings the copper back to a shine.
Get the full tutorial at Emily Henderson.
10. DIY Custom Side Table

Long, slim and about $10 in lumber, this side table fits the tight spot between a sofa and a walkway. The base is two sets of legs made from 1×3 and 1×4 boards, joined by short 1×3 pieces mitered at 45 degrees, all held with wood glue, screws and a nail gun. Two 2×6 boards drop into the top as the tabletop, so measure your own boards before cutting, since widths vary. Paint the base, stain the top for a two tone look and sand the corners round. Build it as long as the side of your couch for a perfect fit.
Get the full tutorial at Thrifty and Chic.
11. DIY Upcycled Coloured Wax Side Table

A dated orange lacquer side table gets a shabby chic makeover with homemade chalk paint and homemade dark wax. Wipe it down with vinegar, then brush on chalk paint made from warm white latex, sanding lightly between coats. Sand the corners and high spots down to bare wood for an easy worn look. The dark silver wax is just clear furniture wax mixed with dark acrylic paint, buffed on with old t-shirt scraps. It settles into the carved details and adds a subtle sparkle.
Get the full tutorial at Cozy DIY Home.
12. Curvy Side Table

One 10 foot 2×10 board, about $12, builds this curvy side table with legs that look custom made. Two pieces join edge to edge with pocket screws and glue, then a screw, string and pencil trace an 18 inch round top. Printable leg templates come in two heights, 23 inches for a kid room and 27 inches for grown ups. Print them at 100 percent, not fit to page, and nest the legs on the board to save wood.
Get the full tutorial at Her Tool Belt.
13. Terracotta Pot Accent Table

A big terracotta pot and its saucer, about $20 together, turn into a sturdy accent table that stands up to wind. Paint the pot with white semi gloss latex, then hot glue jute around it for texture. Flip it upside down and glue the saucer on top with a strong glue, and that is the whole build. The finish was left unsealed to see how it weathers outdoors. It is wide enough for a couple of glasses and a small plate.
Get the full tutorial at Thrifty and Chic.
14. Geometric Stacked Wood Side Table
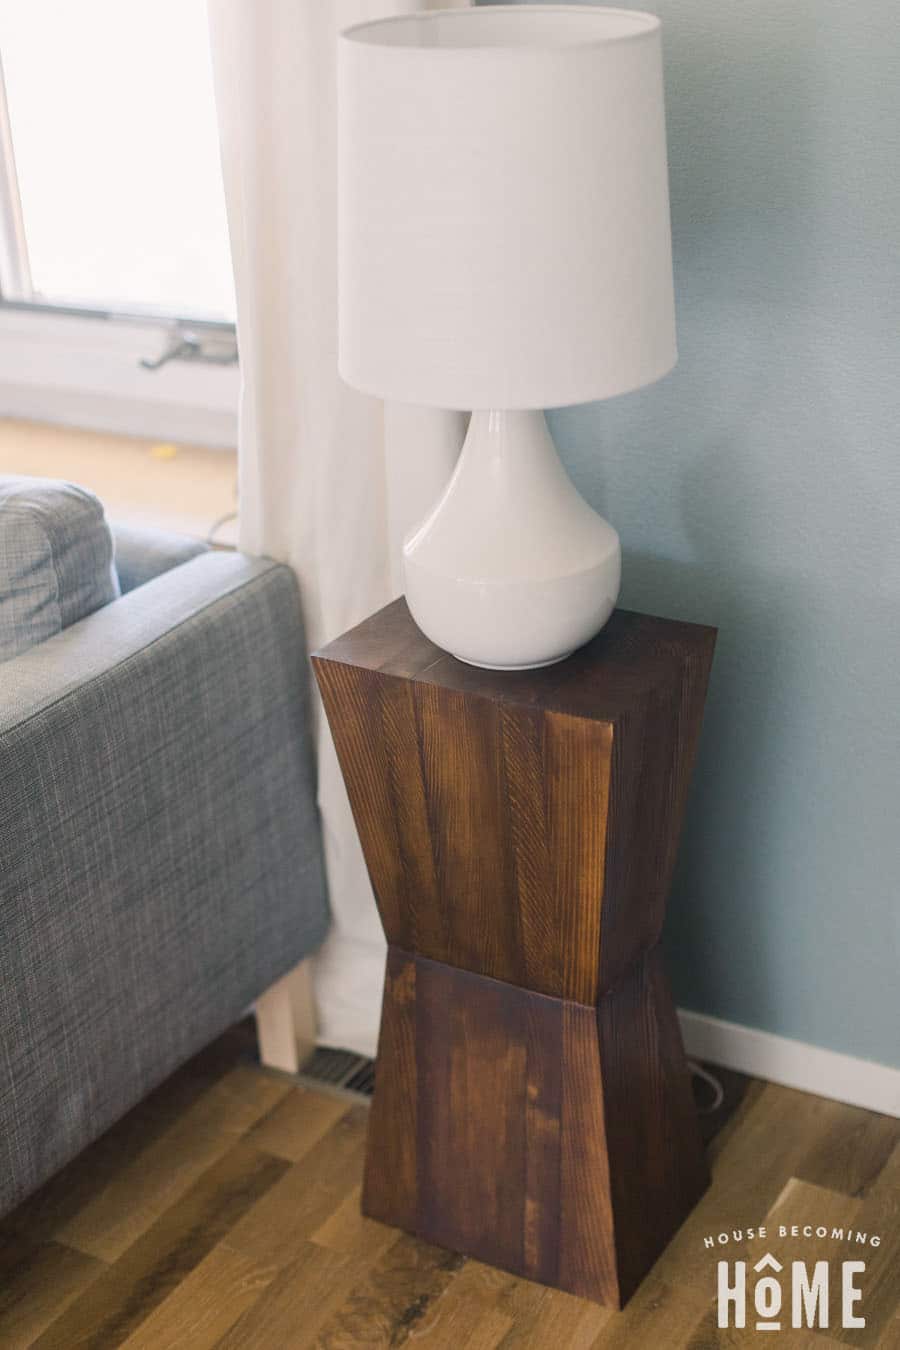
Love a designer look without the designer price? This geometric side table is built from 4×4 and 2×4 lumber cut into 13 inch pieces, glued into two identical stacked sections. The magic is in the tapered cuts on every outward-facing piece, which pinch the table in at the middle for that cool hourglass shape. You’ll need a miter saw, a table saw with a taper jig, wood glue and plenty of clamps. Trim the rounded edges off the boards first so everything sits flat without gaps. It stands about 26 inches tall, perfect next to a sofa or reading chair.
Get the full tutorial at Jen Woodhouse.
15. Charred Wood Sofa Arm Rest Table
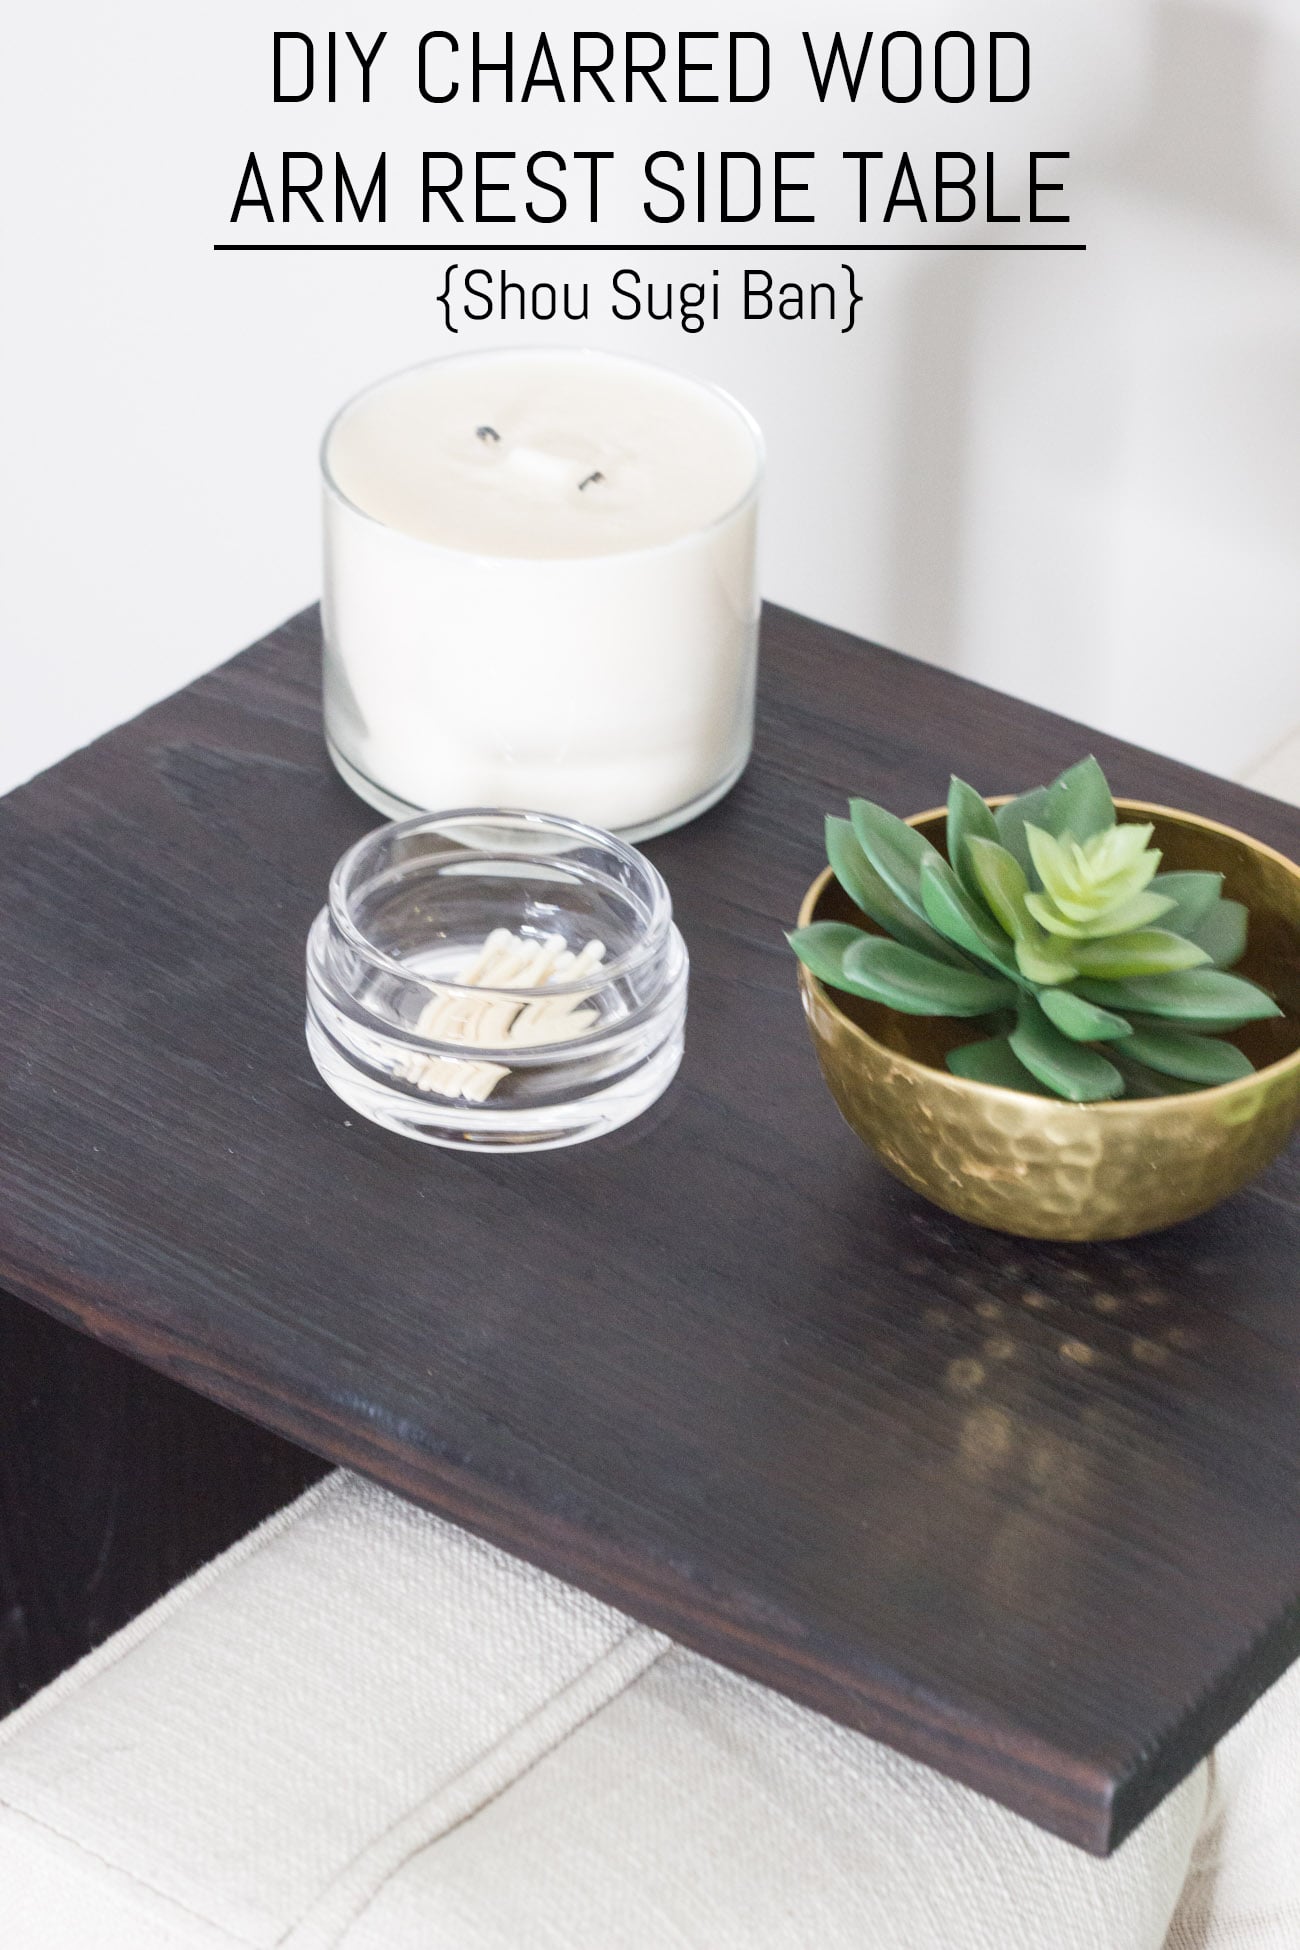
No room for an end table? Slide this one right over the arm of your sofa! It’s made from a single 1×12 board cut into one long top and two short sides, joined with pocket hole screws. Measure your sofa arm first and add a little extra so it slips on easily. The fun part is the finish. A torch chars the wood in the Japanese shou sugi ban style until it turns deep black, then you brush it, wipe it and seal it with polycrylic. The build only takes minutes. Keep a fire extinguisher close and wear eye protection and a mask.
Get the full tutorial at Erin Spain.
16. Half Moon Plywood Side Table
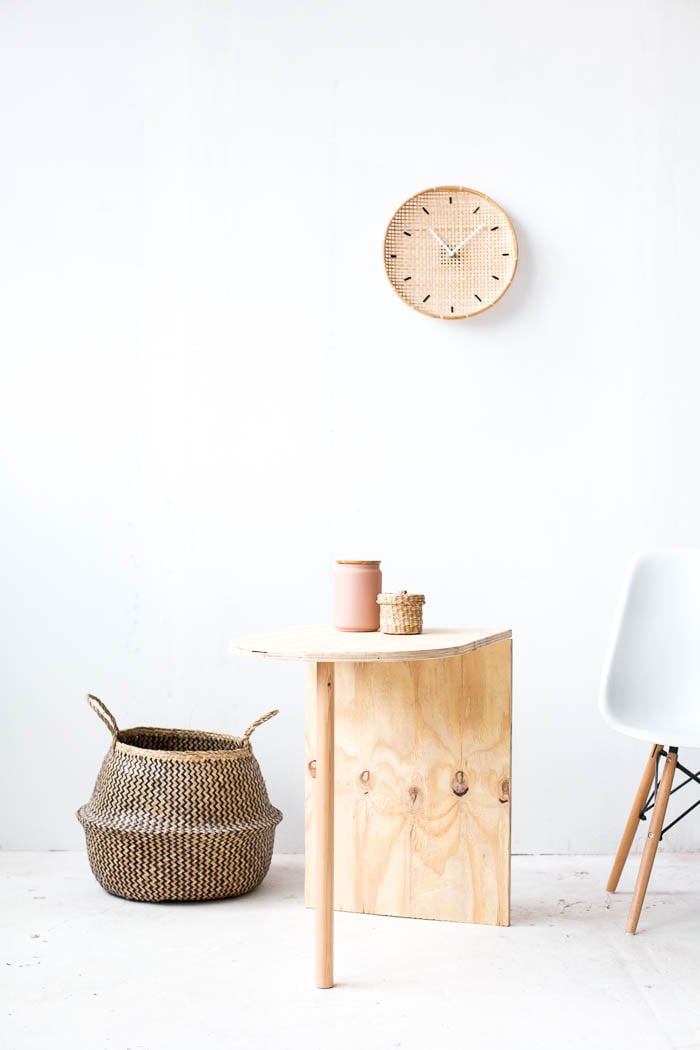
Here’s a minimalist side table with just three parts. A rectangle of wood forms one side, a half circle forms the top and a single 30mm dowel stands in as the leg. To draw the curve, tie a pencil to a string half the width of your board and swing it from the center, then follow the line with a jigsaw. Cut the dowel to the same length as the side, sand every edge and join the pieces with brackets underneath so no screws show on top. It’s light, modern and simple enough to make with scrap wood.
Get the full tutorial at Fall For DIY.
17. Hexagon Pallet Wood Side Table
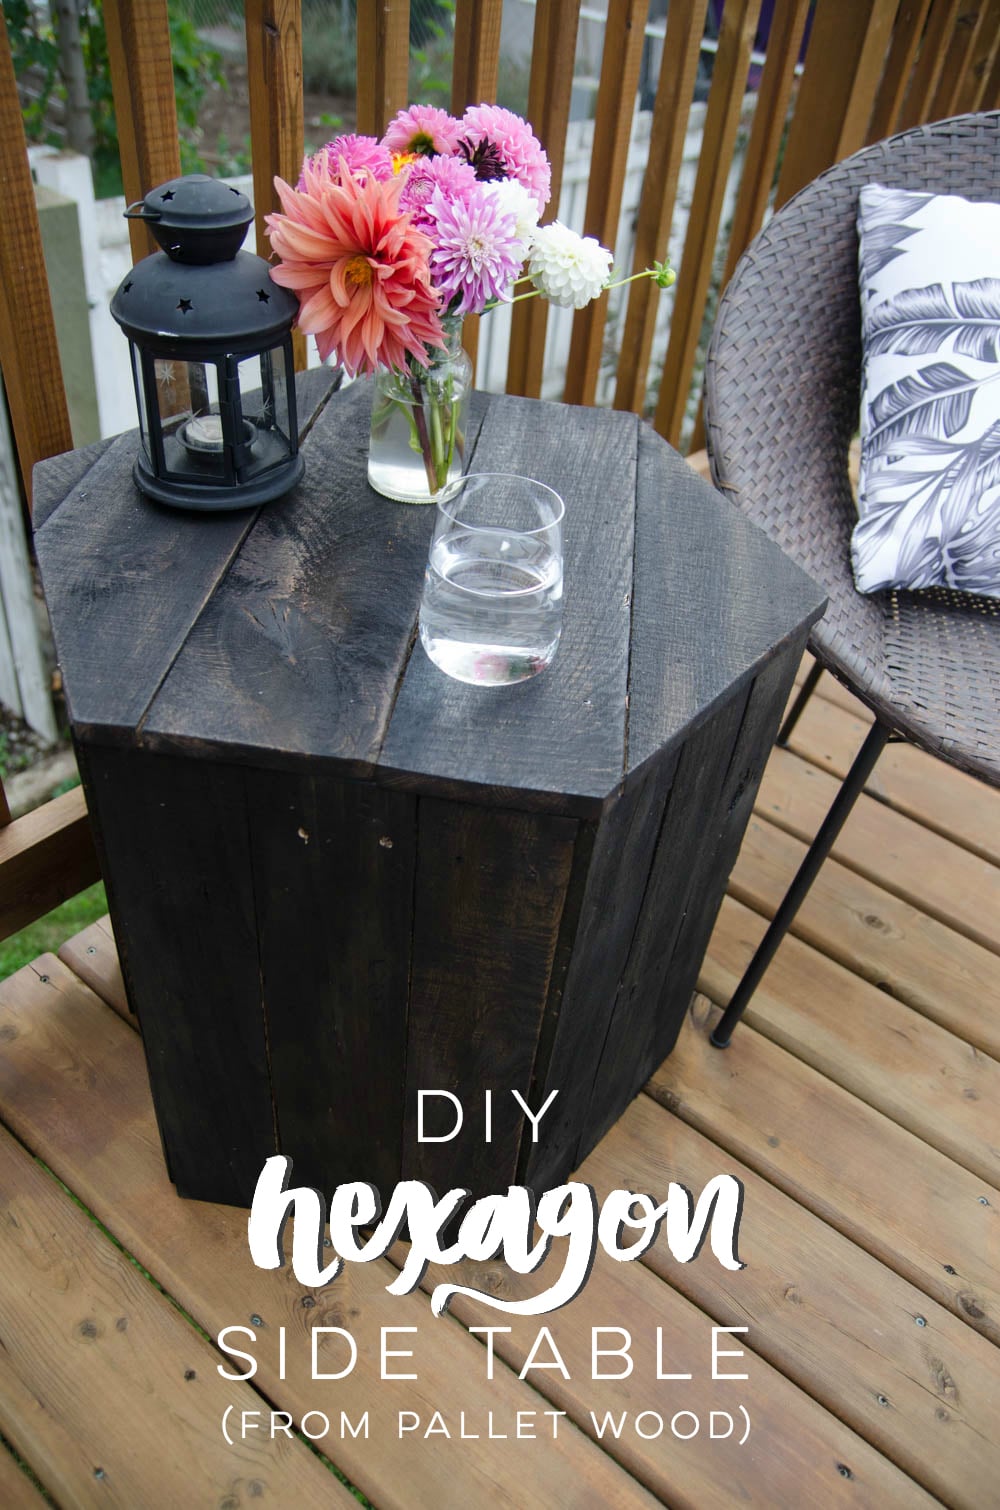
Got a couple of pallets leaning by the garage? Turn them into a hexagon side table for your deck or patio! You’ll take the pallets apart, save both the top planks and the chunky 2×4 pieces, then cut the planks on a miter saw to form six sides. Wood glue and a nail gun hold it together, and a sander smooths out the rough pallet texture. A coat of ebony stain gives it a rich, dark finish. Choose pallets stamped HT for heat treated, not chemically treated. It comes together over a few evenings.
Get the full tutorial at Lemon Thistle.
18. Crate Style Wood Side Tables
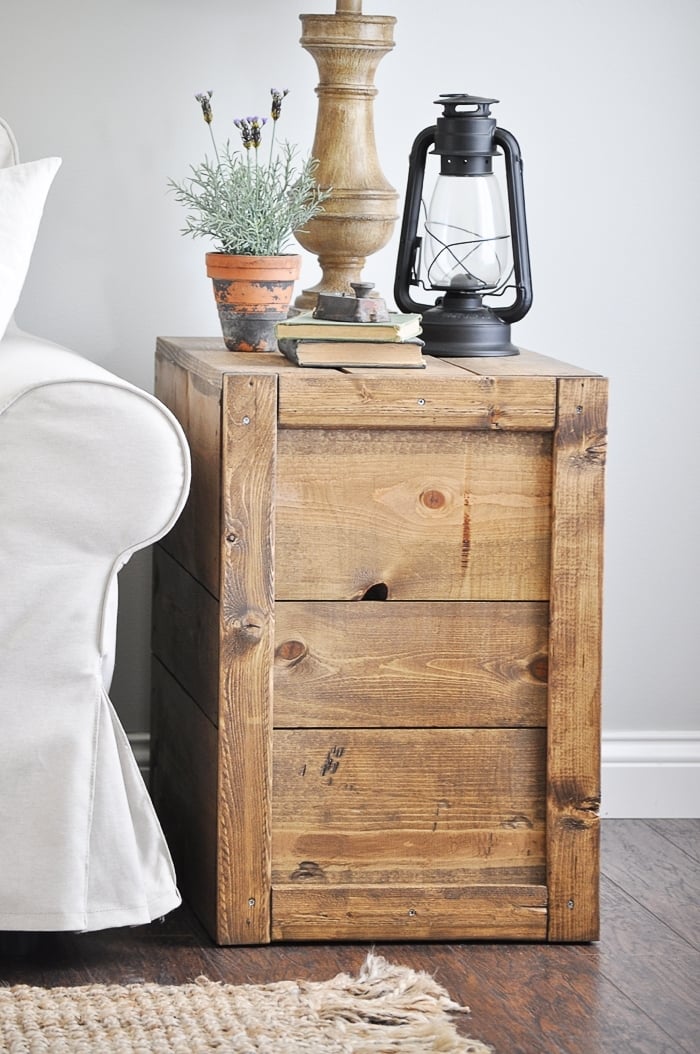
Fall for a pair of pricey vintage shipping crates at an antique shop? Build your own instead! These crate inspired side tables use common 1×6, 1×10 and 1×3 boards with 2×2 strips inside for strength. The post gives you a full cut list for a table about 25 inches tall, so it lines up with a sofa arm. Nickels make handy spacers for even gaps between boards, and you can finish with stain or paint plus a coat of polycrylic. They’re sturdy enough to last for years and you can size them to fit your space.
Get the full tutorial at Little Glass Jar.
19. Simple White Wood Side Table
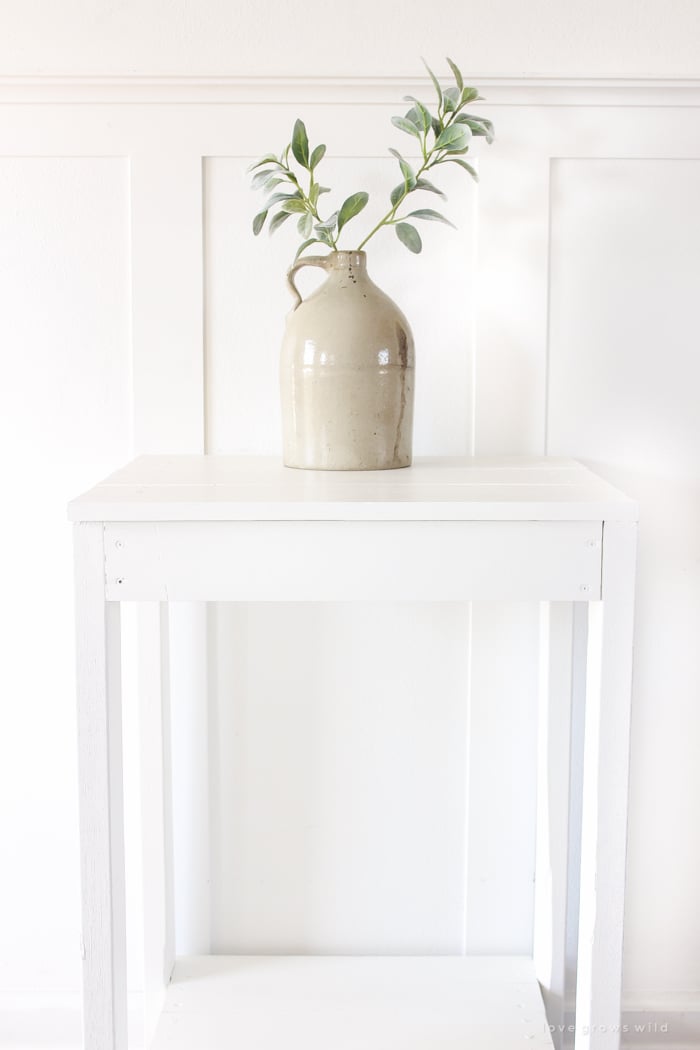
Need a clean, classic side table that goes with everything? This white wood table has a slatted top shelf and a bottom shelf for baskets or books. It’s built from 2×4 legs and side aprons and 1×4 front and back aprons and shelf boards, all joined with wood glue and screws. The plans are written for a 3 foot tall table, so shorten the legs to around 24 inches for a side table or nightstand and follow the rest as written. Paint it white or stain it, then style it with a vase of greenery.
Get the full tutorial at Love Grows Wild.
20. Upcycled Lamp Pedestal Side Table
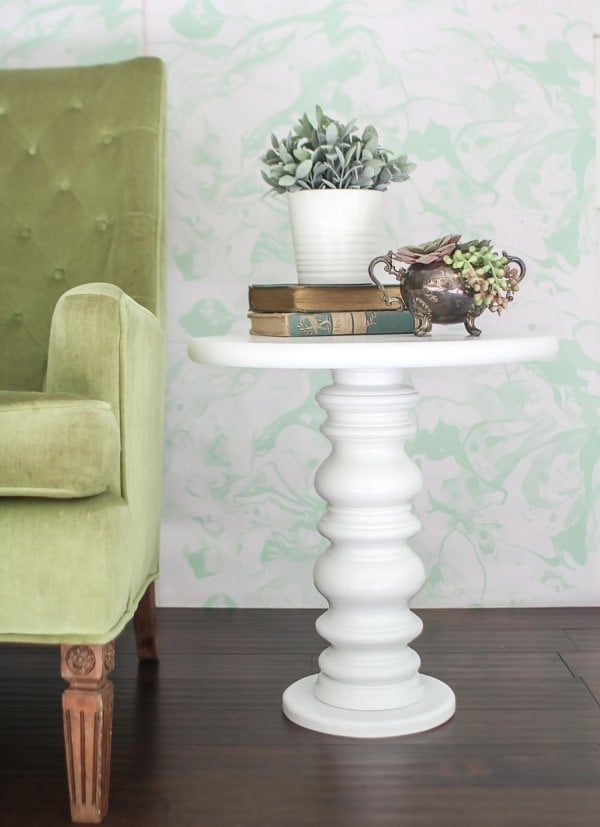
Next time you’re at the thrift store, check the lamp aisle! Big, curvy wooden lamps make perfect pedestal bases for a round side table. Remove the lamp hardware, add a plywood scrap for a sturdy base and top it with an 18 inch premade round tabletop. Sand it, prime it and paint everything white so the turned base looks like it was always meant to be a table. No lamp luck? An old bird bath base or a turned leg from a broken chair works too. It’s a budget friendly way to get a pretty pedestal table.
Get the full tutorial at Lovely Etc.
21. Dog Crate Side Table
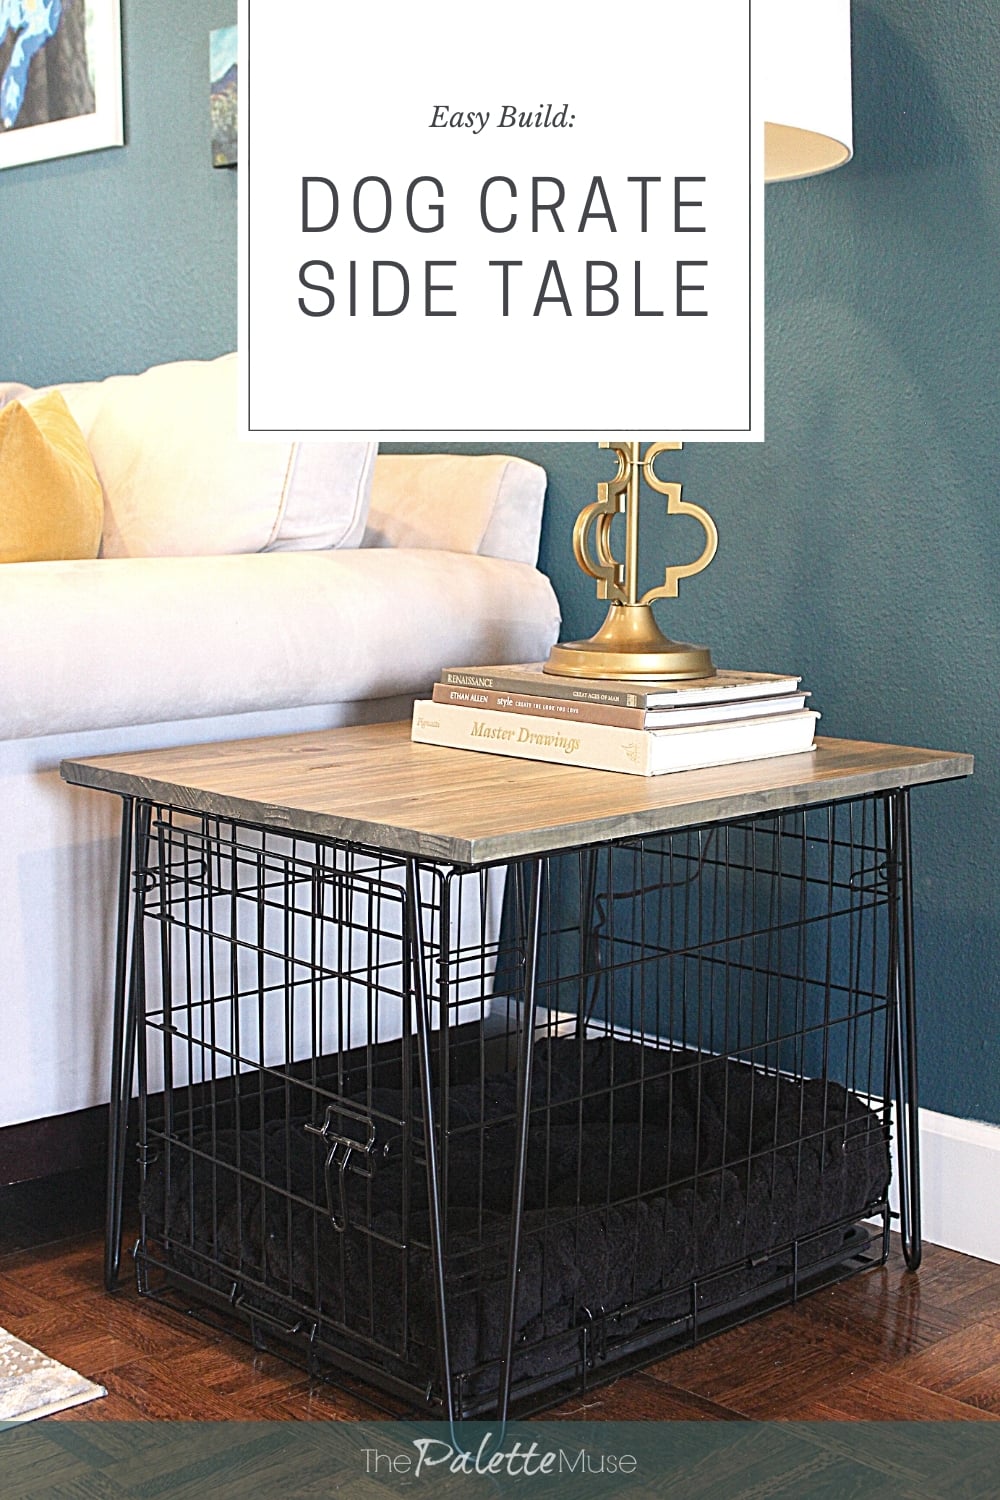
Does your dog’s crate sit right next to the sofa? Give it a job as an end table! This crate cover table is just two parts, a wood top and a set of hairpin legs that straddle the wire crate. Size the top a little bigger than the crate, stain it and add a poly finish so your coffee cup won’t leave rings. The legs carry all the weight, so the crate stays free to move. Your pup keeps a cozy spot near the family, and the dorm room look disappears. Perfect for living rooms where every inch counts!
Get the full tutorial at The Palette Muse.
22. IKEA Hack Side Table With Shelves
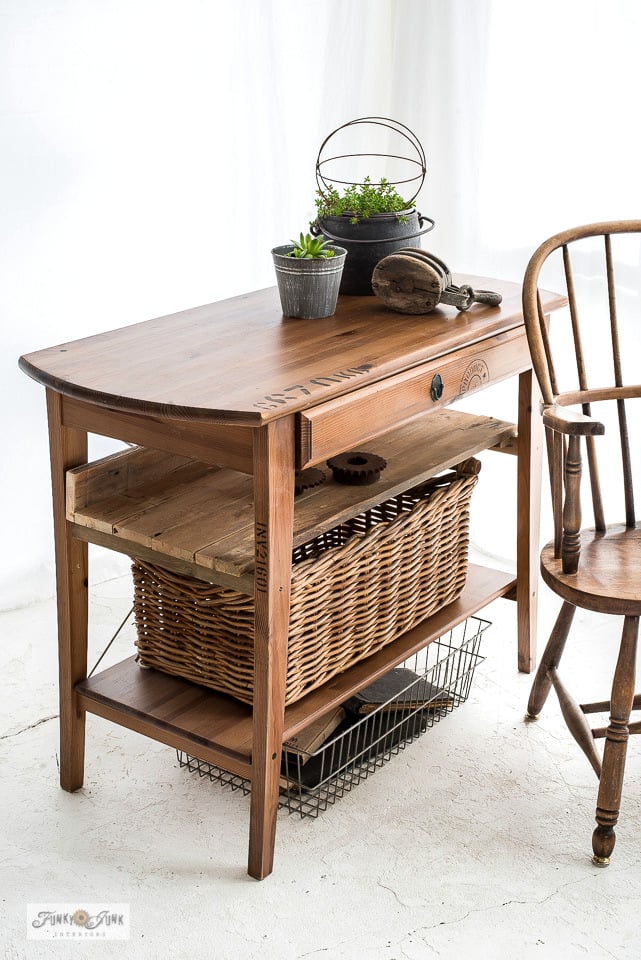
Spot a plain IKEA table at the curb? Grab it! This one was a discontinued Leksvik computer desk with a too-orange finish and a wobbly flip-down drawer. It got strengthened, refinished in a rustic pallet style and given added storage shelves underneath, so it’s sturdy enough for something heavy like a fish tank. It works as an accent table, a console or even a bedside table for a tall bed. The post walks you through each fix, from the drawer front to the shelves. Perfect proof that a roadside find can be a showpiece.
Get the full tutorial at Funky Junk Interiors.
23. Wire Basket Side Table
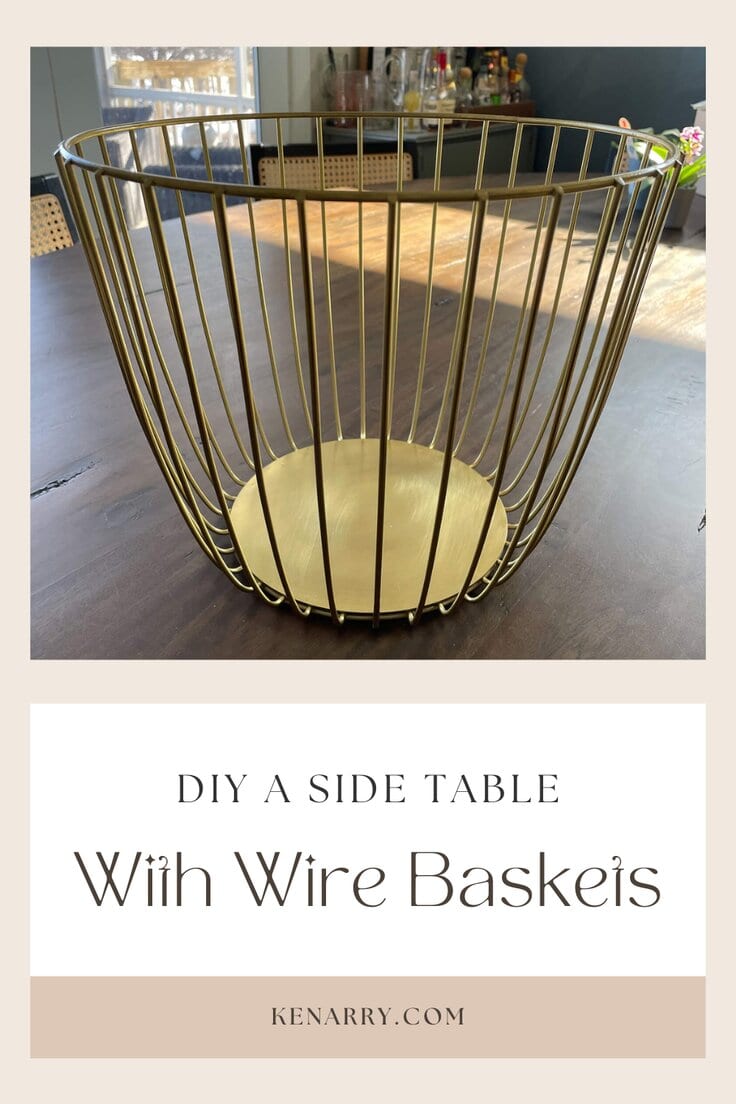
Two gold wire baskets plus a plywood circle make this airy little side table! Glue the baskets together rim to rim with construction glue, then add a plywood top with a 4 to 6 inch overhang. The top gets a skim coat of Feather Finish for a smooth concrete look. Mix it to the thickness of peanut butter, spread it like icing, sand lightly and repeat. Seal it with several coats so your morning coffee won’t stain it. It’s simple enough for beginning DIYers, and thrifted baskets keep the cost low.
Get the full tutorial at Kenarry: Ideas for the Home.
24. Wine Crate Nightstand
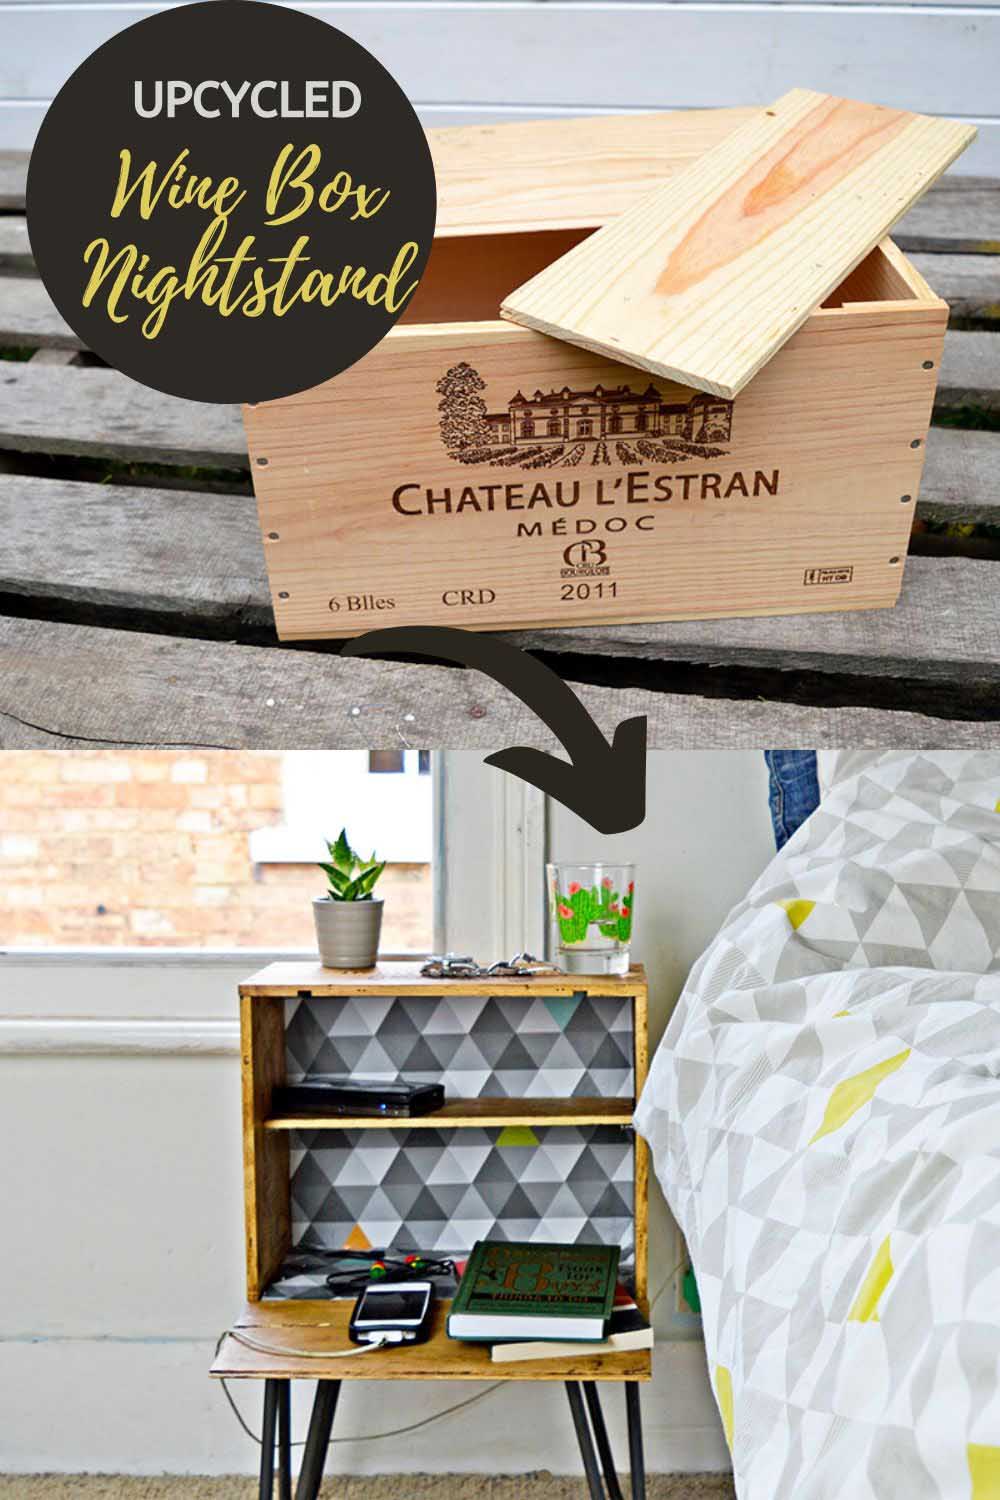
A wooden wine crate is just the right size for a nightstand! Saw part of the lid down to fit inside as a shelf and rest it on four screws, then use the rest of the lid as a lip. Rub dark wax into the wood for an aged look and buff it smooth. For a pop of pattern, line the inside with geometric wrapping paper and seal it with Mod Podge. Screw on a set of 16 inch hairpin legs and it’s done. There’s room for a glass of water, a charging phone and a few books.
Get the full tutorial at Pillar Box Blue.
25. Wire Base Round Accent Table
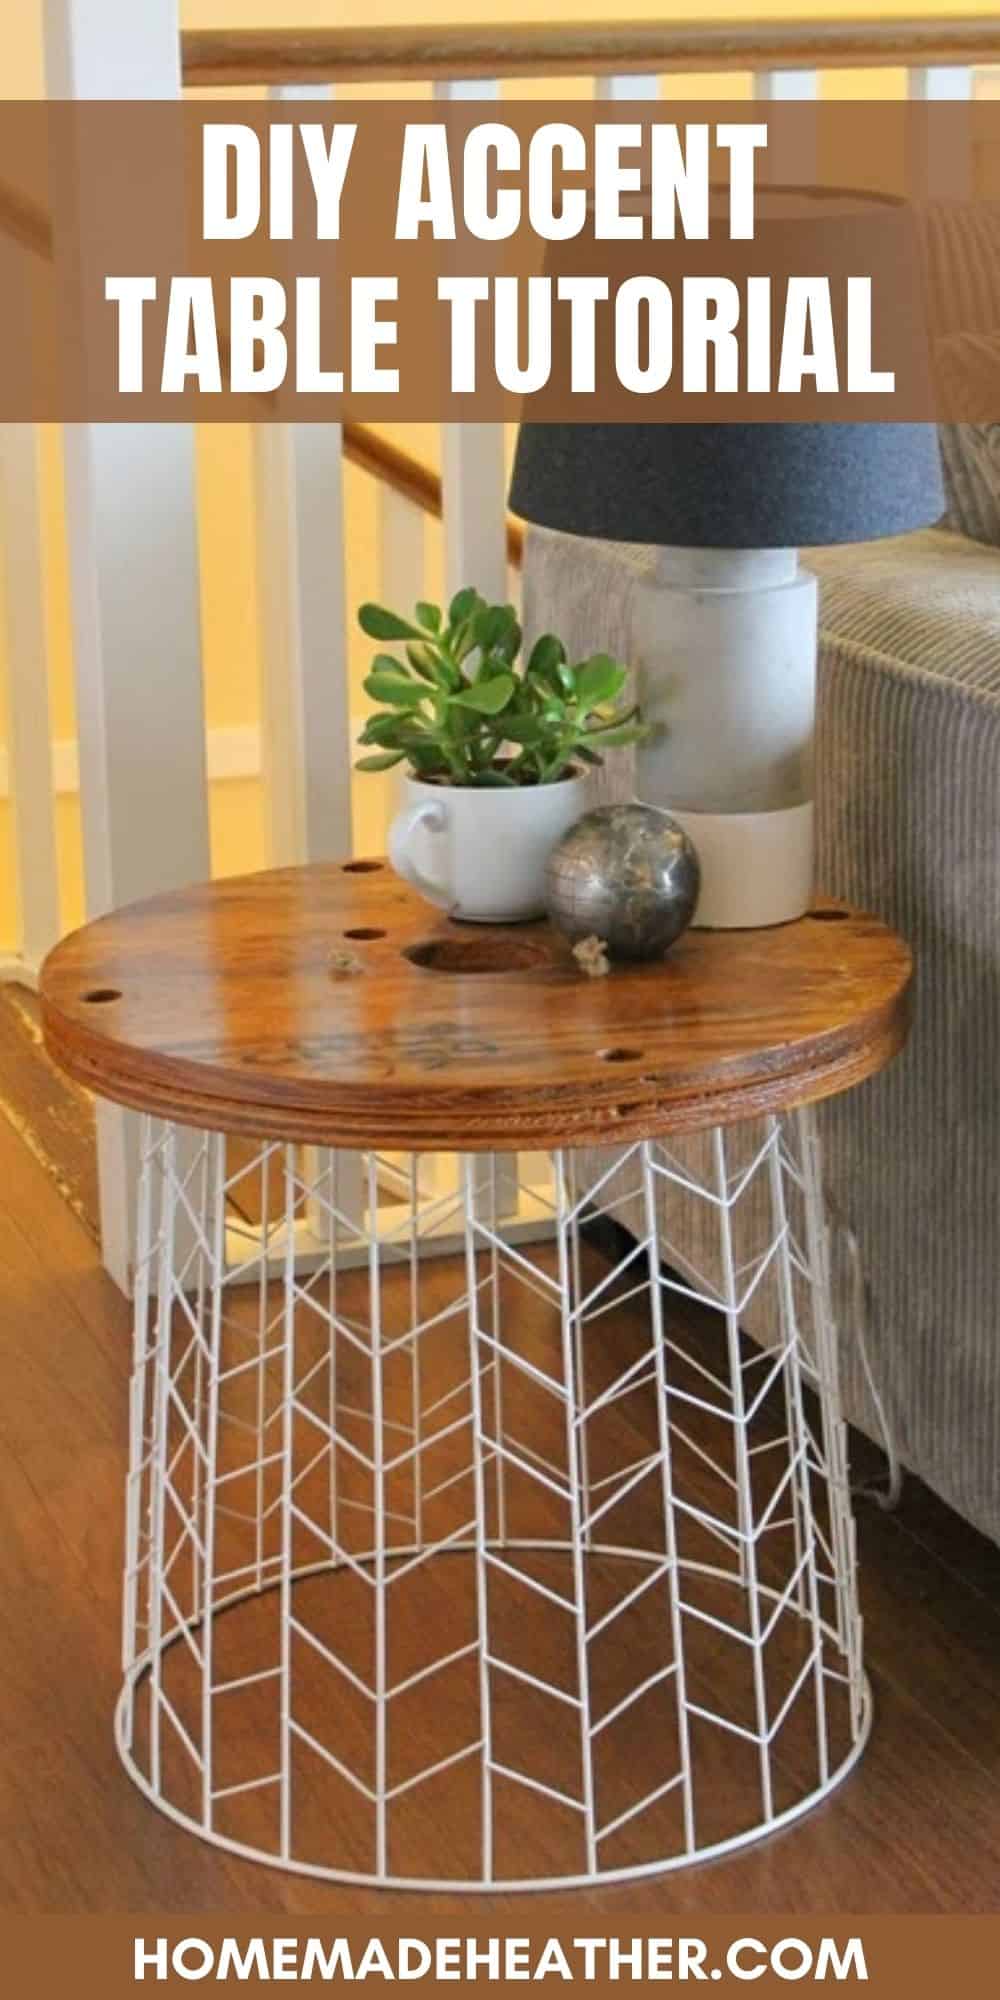
Here’s a Target knockoff that comes in around $12! An upside down wire laundry basket becomes the base, and two cable spool ends glued together form a thick round top. Ask at your home improvement store, since spool ends are often free. Sand the top, stain it a warm tone and seal it with polyacrylic. Thread jute through the holes and add a little all purpose glue underneath to hold it to the basket. The center hole in the spool works as a built-in cup holder. Perfect as a sofa side table!
Get the full tutorial at Homemade Heather.
26. Walnut Nightstand With Drawers
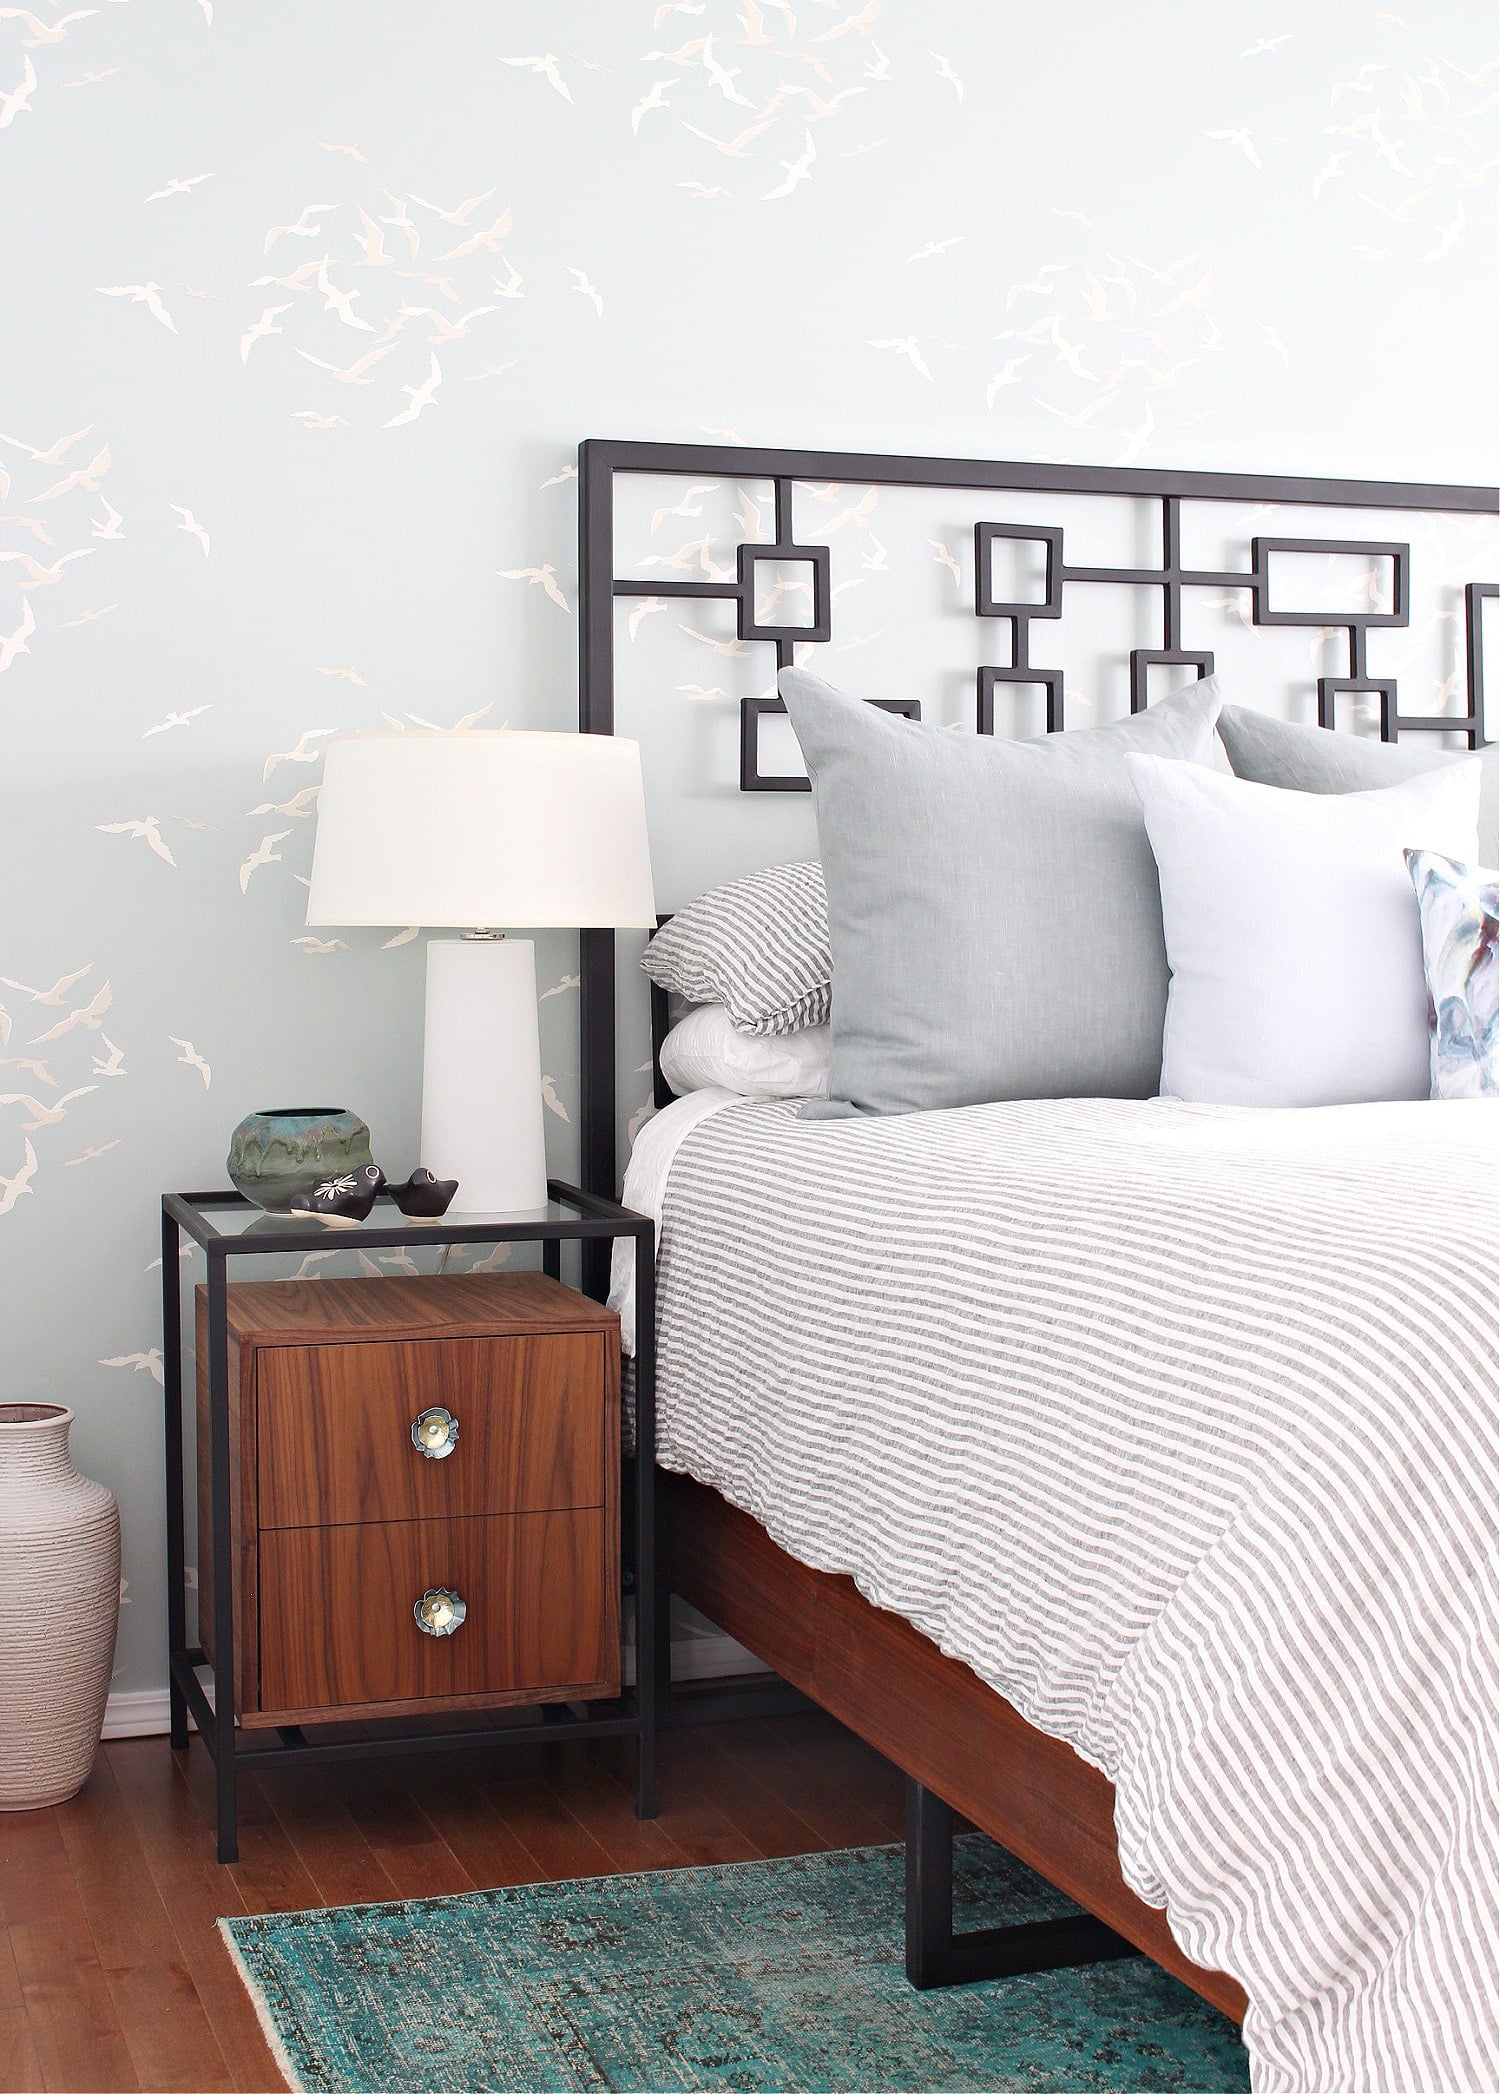
Wish your nightstand had drawers? This walnut veneer drawer unit gives you that high end look for far less than a $1,600 store version. The box is cut from walnut veneer plywood, joined with wood biscuits and glue and finished with iron-on edge banding for clean edges. Drawer slides make the two drawers glide, and Danish oil brings out the warm walnut grain. It was built to fit inside an existing metal nightstand frame, but make it larger and add legs and it’s a stand-alone nightstand. Sketch your size first!
Get the full tutorial at Dans le Lakehouse.
27. Wallpaper Nightstand Makeover
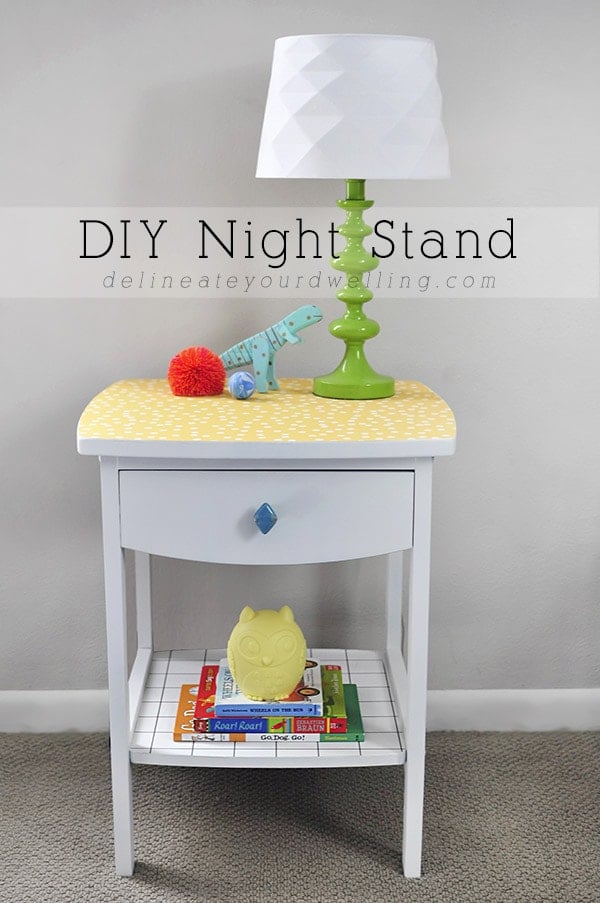
Give a tired old nightstand a fresh, playful look with spray paint and removable wallpaper! Clean it, sand it and spray it with two or three coats of flat white. Then trace the top onto removable wallpaper, cut it out and smooth it into place. A small grid print lines the bottom shelf and a new blue knob finishes it off. Because the paper is removable, you can lift it and reposition it until it’s just right. It’s a fun way to change a kid’s room or guest room without any commitment.
Get the full tutorial at Delineate Your Dwelling.
28. Faux Stone Accent Tables
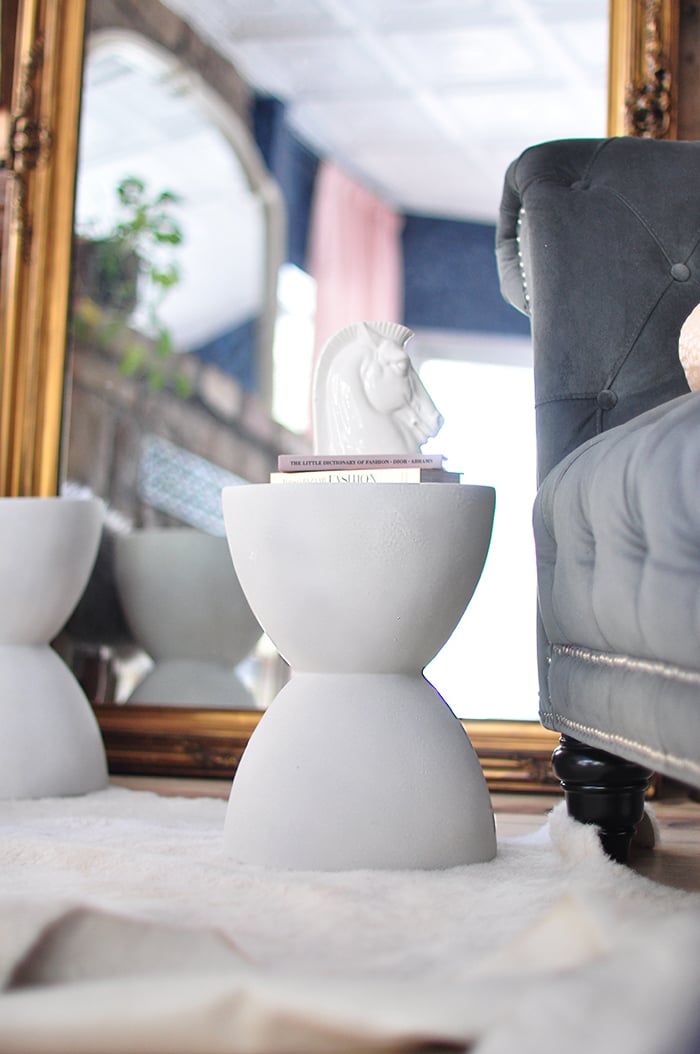
Love the look of stone tables but not the price tag? Fake it with spray paint! These hourglass accent tables were old resin pieces that had yellowed and chipped. A few layers of stone textured spray paint turned them into what looks like carved stone. You can use this trick on almost any old table you’re tired of, and it fits that old world meets 80s contemporary style that’s everywhere right now. It’s quick, inexpensive and only takes a little patience between coats. Pair them as nightstands or tuck one beside a chair.
Get the full tutorial at Love Maegan.
29. Hairpin Leg Storage Side Table
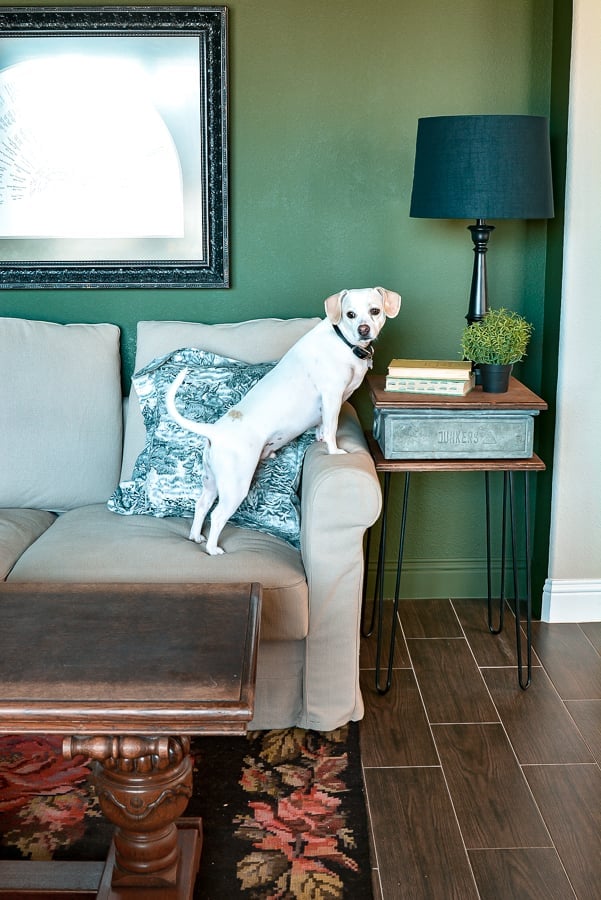
Have an old metal box or crate begging for a new life? Make it a side table with hidden storage! A piece of stain grade wood forms the bottom plate, and a matching piece becomes the lift-off lid. Cut both a little larger than the box and run a router along the edges for a clean finish. Attach sturdy hairpin legs to the bottom board, then use construction adhesive to fix the box in place so you don’t drill the metal. Small rails under the lid keep it from sliding. It works as a nightstand or chairside table.
Get the full tutorial at Kim Pepper.
30. Gloss Painted Bedside Tables
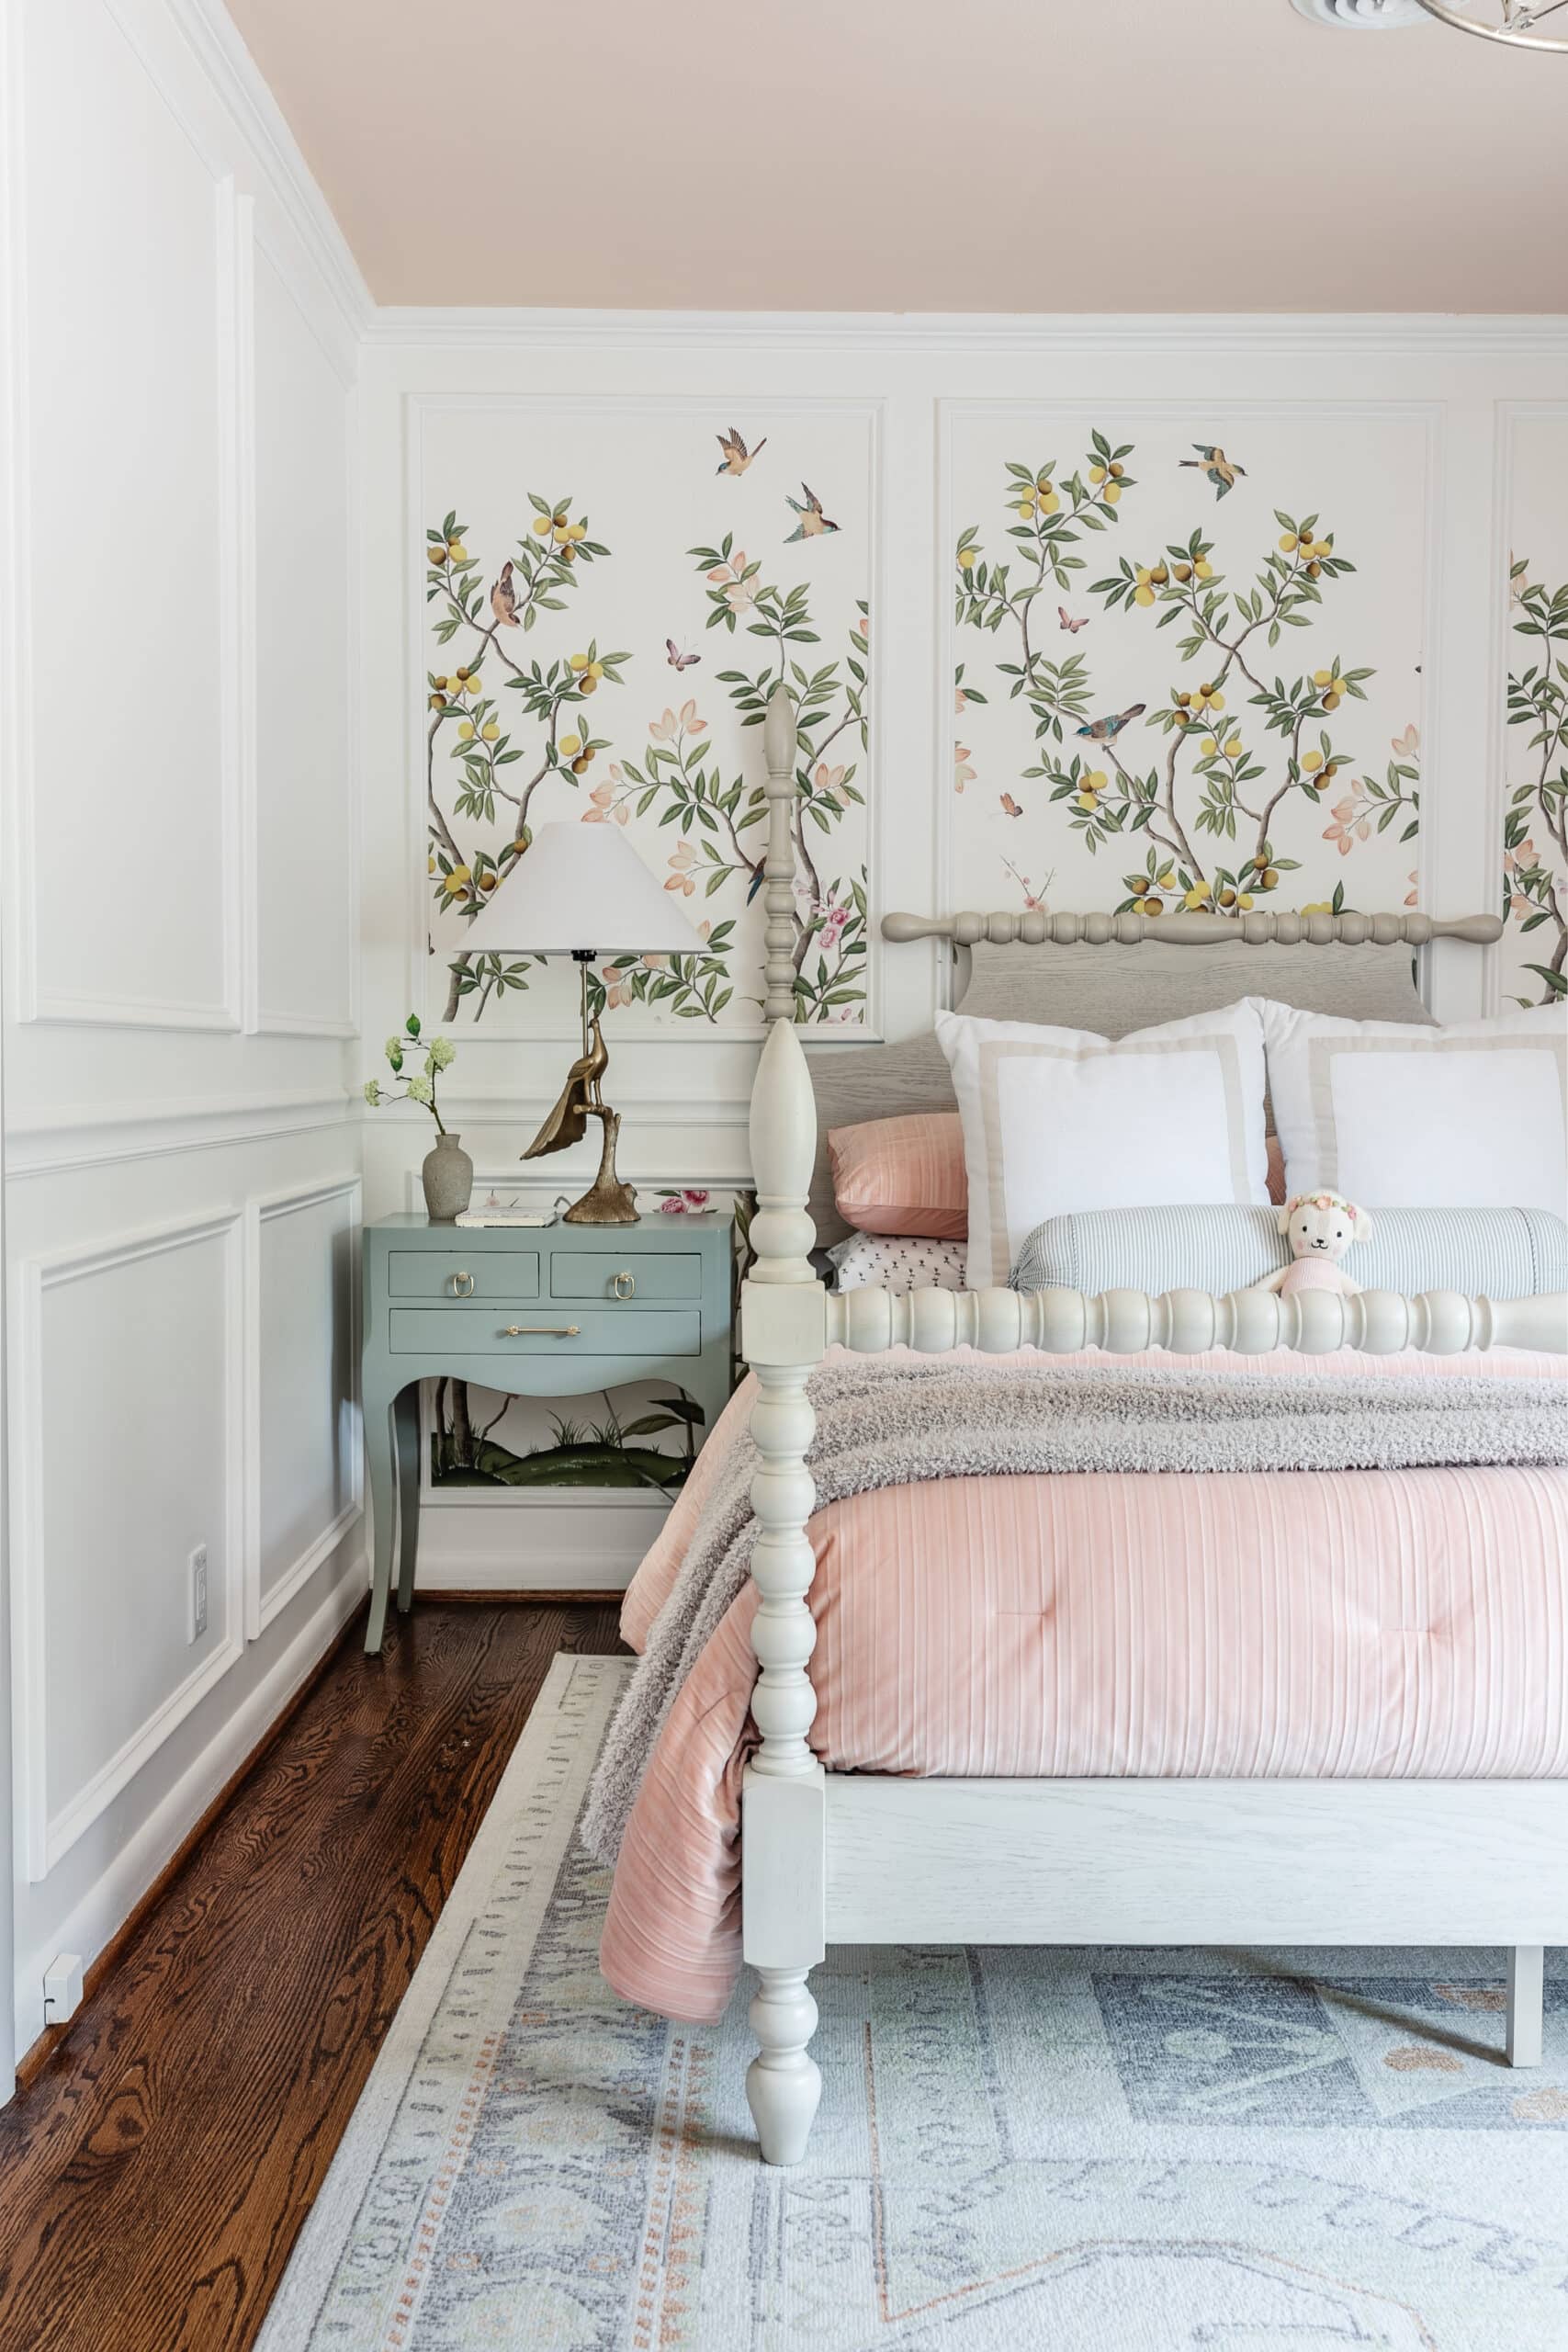
Shiny lacquered furniture is back, and you can get the look on secondhand nightstands! Start with solid wood pieces with dovetailed drawers. Sand off any old distressed finish, working from coarse to fine grits, since gloss paint shows every flaw. Fill old hardware holes with wood filler if you’re moving the knobs. Prime with a bonding primer, then brush on a gloss enamel trim paint in a soft minty green. The post shares a clever slow cooker trick for smoother brushing. It’s a perfect fit for grandmillennial and traditional bedrooms.
Get the full tutorial at Bless'er House.
31. Herringbone Top Side Table
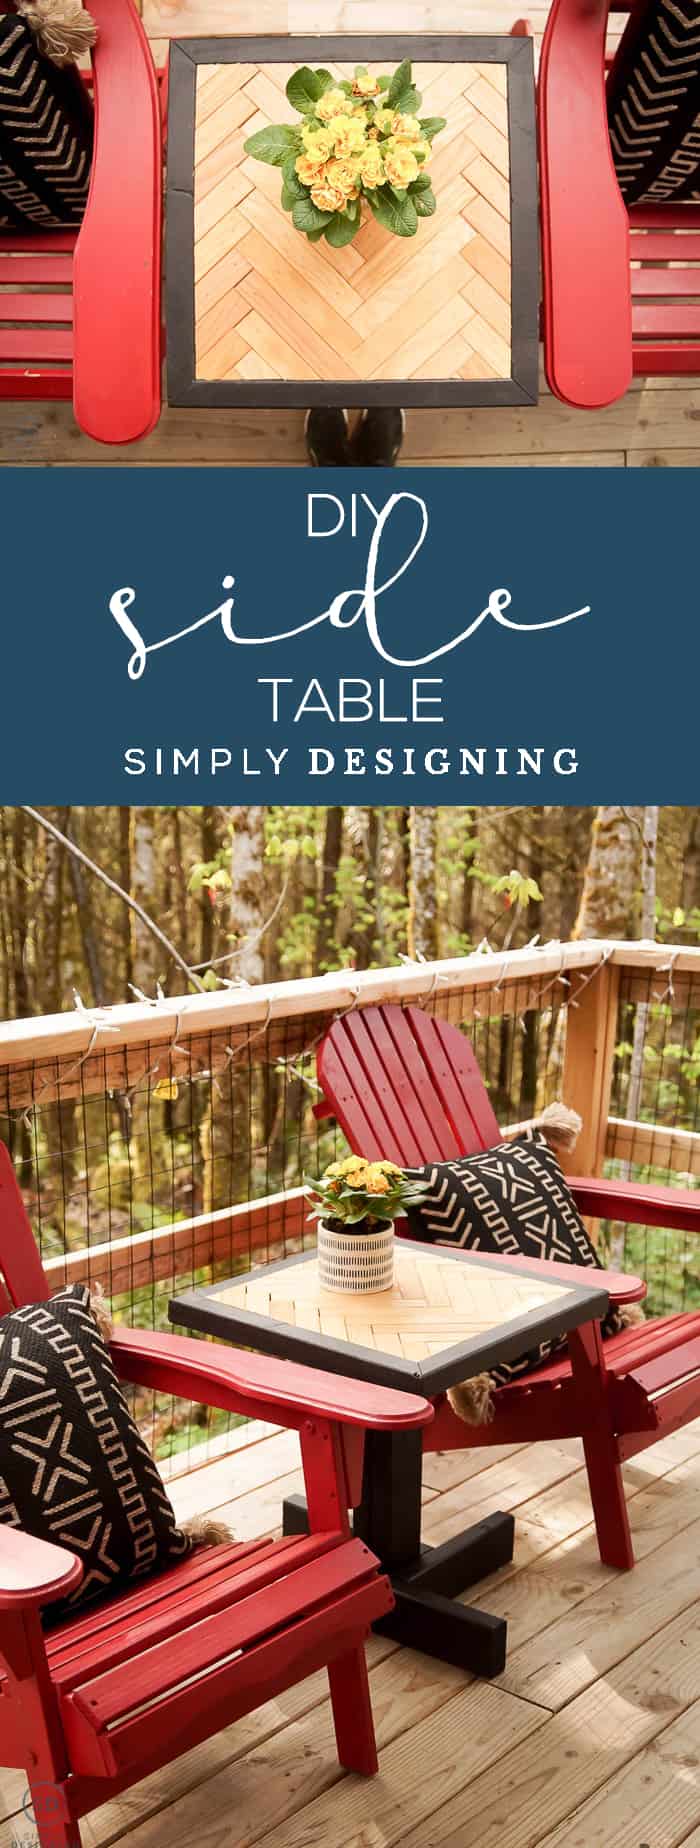
Scrap wood plus a herringbone inlay makes this side table something special! The base and tabletop are built from cedar and pine with pocket holes, then small scraps are cut and fitted into a herringbone pattern on top. Stain the inlay and paint the frame for a two-tone look, and use an outdoor stain if it’ll live on the patio. Plan a few hours to build, plus overnight drying time. Don’t love herringbone? Leave the top solid or make your own pattern. It fits nicely between two outdoor chairs or beside the sofa.
Get the full tutorial at Simply Designing.
32. Painted Laminate Nightstand
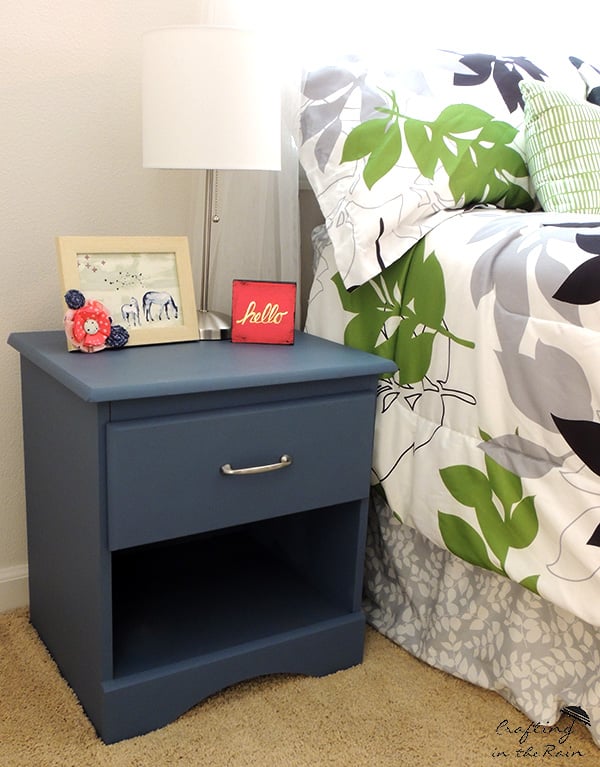
Scared to paint laminate furniture? Don’t be! Lightly sand all the laminate surfaces with a sanding block, a little harder on the top if there are water rings. Fill small divots on the edges with spackle so the particle board look disappears. Then brush on two coats of an all-in-one paint in deep navy. The big tip is patience. Let the first coat dry a full day before the second, or it can pull up. Finish with natural wax and buff it smooth. Silver pulls look sharp against the navy, and adhesive paper can line the drawers.
Get the full tutorial at Crafting in the Rain.
33. Modern Boho Side Table With a Drawer
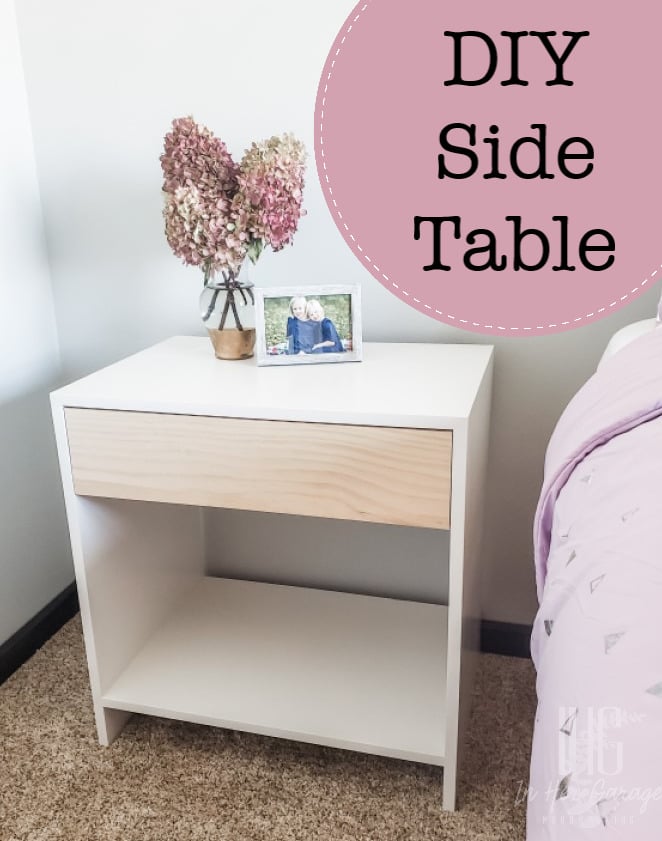
Love that clean, modern boho look? This side table is made from one sheet of 3/4 inch birch plywood, and the crisp corners come from 45 degree bevels you can cut with a circular saw or a table saw. Painter’s tape holds each beveled joint while the glue sets, a neat little trick that works like closing a book. Pocket holes attach the bottom shelf, and a single drawer slides in on a bottom mount slide. Iron-on edge banding hides the plywood edges. It measures 24 inches wide and tall, perfect as a nightstand or living room side table.
Get the full tutorial at Pretty Handy Girl.
34. Thrift Store Boho Nightstands

Don’t pass up a dated nightstand at the thrift store! This $12 pair got a fresh boho look with paint and one simple change. The scalloped bottom trim comes off, then a jigsaw cuts a new straight profile with little square feet. Fill the old hardware holes with epoxy putty, sand the tops down to bare wood and prime the bodies with a shellac based primer so nothing bleeds through. A soft sage and cream paint mix, a tinted clear coat and brass knobs finish them off. Perfect for a budget bedroom refresh!
Get the full tutorial at Salvaged Inspirations.
35. Vintage Suitcase Side Table
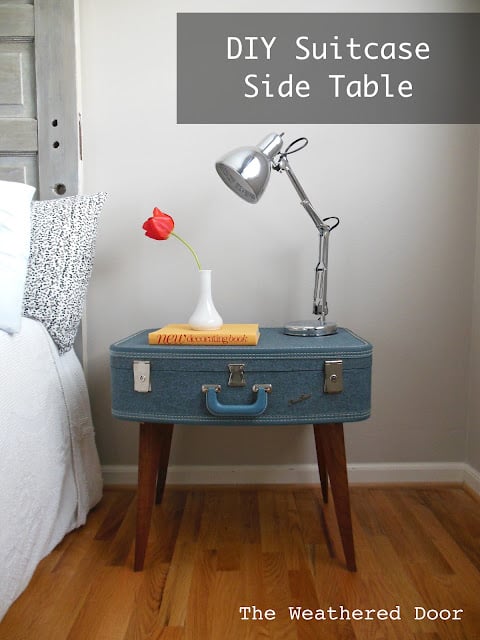
Got an old suitcase tucked away in the closet? Give it legs and it becomes a side table with hidden storage! This one pairs a vintage blue suitcase with four angled mid century legs saved from a free yard sale table. Lay the suitcase top down, arrange the legs so they splay out a little, then drill through the leg plates and the case. Short post screws keep everything flush on the inside, so your stuff won’t snag. It came together for under $12 and makes a sweet nightstand. Perfect for a reading corner or guest room!
Get the full tutorial at The Weathered Door.