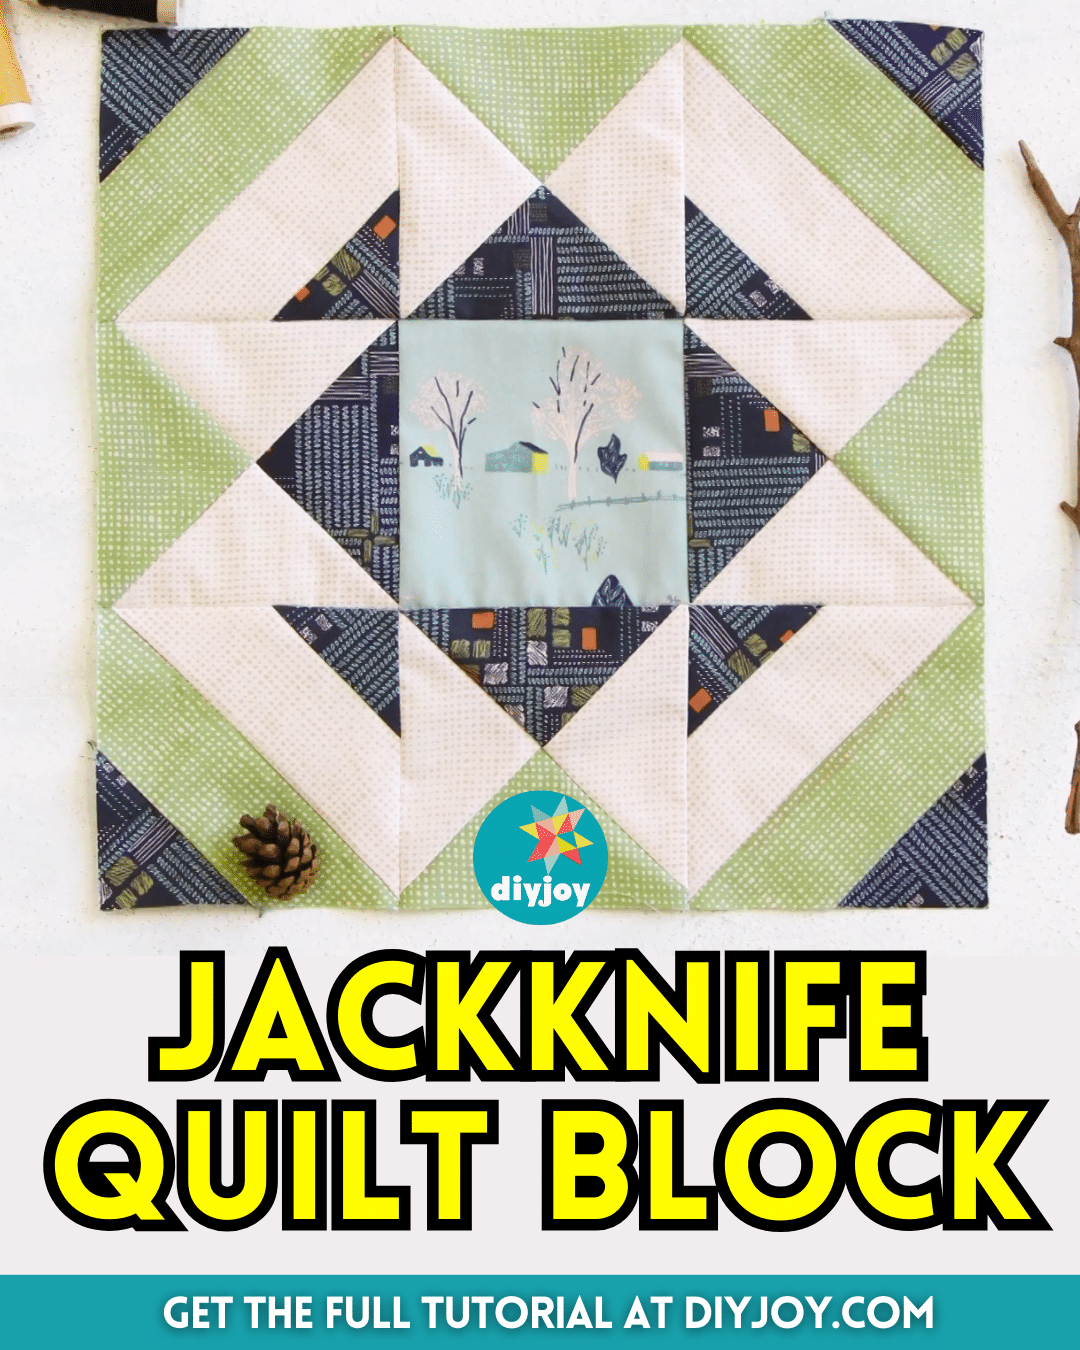
If you’re a newbie in quilting looking for a project to start this week, then check out this jackknife quilt block by Art Gallery Fabrics on YouTube. At first glance, you’d be intimidated thinking that this is a pretty complicated quilt block to make, but you’ll be surprised by how easy and basic this actually is, and you can even finish it in just one sitting.
RELATED: Easy Jack-in-the-Box Quilt Block Tutorial
This is one of my favorites to make because the pattern is lovely and neat, and there are a lot of fabric colors that you can combine and play with in this quilt block. If you’re a seasoned quilter, this is also perfect for you, and I bet that you can make a couple of this quilt block within just a few minutes. Learn how now by watching the video tutorial below.
Materials for Jackknife Quilt Block:
- Print or solid fabric, for the center
- Dark blue print fabric
- Green print fabric
- White or low-volume print fabric
- Marking pen, pencil, or chalk
- Ruler
- Scissors or rotary cutter and a cutting mat
- Fabric pins
- Needle and thread
- Iron, for pressing
- Sewing machine
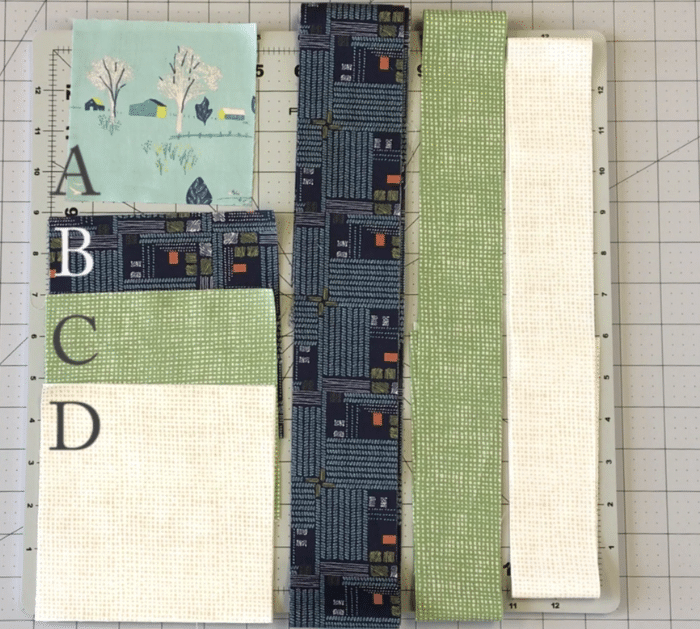
Cutting Requirements
- Center fabric – (1) 4½” square
- Dark blue – (1) 5½” square and (2) 2½” x WOF strips
- Green – (1) 5½” square and (2) 2″ x WOF strips
- White – (2) 5½ squares and (1) 2″ x WOF strip
How to Make Jackknife Quilt Block:
Step 1
Lay the dark blue strip horizontally on your work surface, then place the green strip below followed by the white strip, and place another dark blue strip at the bottom.
Step 2
Stitch them together and press the seams as you go, then place a 4-inch square ruler on top, then rotate as shown in the video, and cut out the strip unit. Do the same steps for the rest and set them aside for later.
Step 3
Place a white square on top of the dark blue and green square each, then draw a diagonal line at the back of the white square, and stitch them on either side with ¼ inch seam allowance.
Step 4
Cut them apart along the drawn line, then press the seams toward the lighter fabric, and cut them in half across the seams.
Step 5
Swap their matching halves and stitch them together, then do the same for the rest, and trim them to 4½” squares.
Step 6
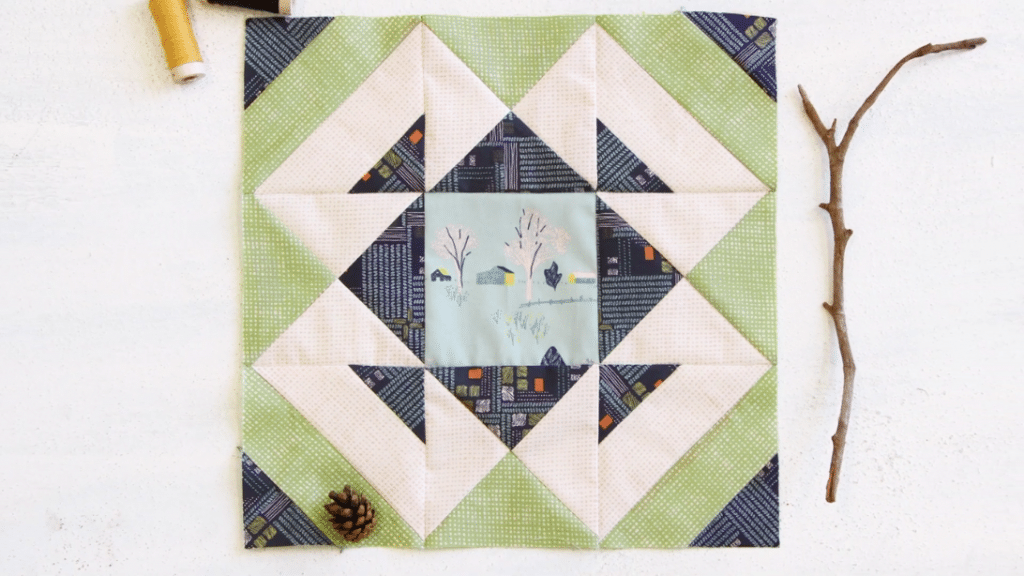
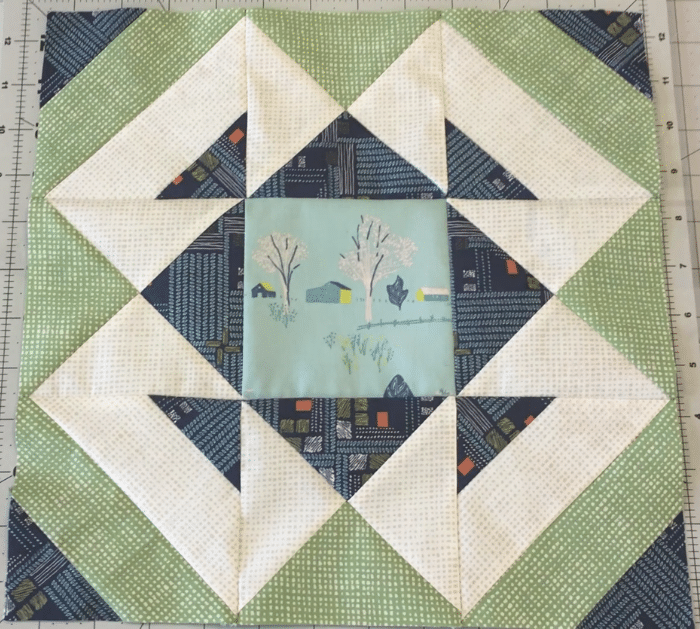
Arrange all of the block units as demonstrated in the video, then stitch them per row and then the rows to each other, and make sure to press as you go.
*All image credit belongs to Art Gallery Fabrics via YouTube. Follow and subscribe to her channel for more!
How to Make a Jackknife Quilt Block