A blank wall over the bed is the perfect excuse to make something with your own hands. These 25 DIY wall art ideas for the bedroom cover every style and skill level, from a painted diamond focal wall and a boho yarn hanging to wood shim signs, washi tape mountains and simple canvas paintings. Many start with cheap basics like a canvas, scrap wood, cardstock or a roll of tape, and plenty are done in an afternoon. A few DIY JOY video tutorials are mixed in too, including string art and two flower painting tricks that use bubble wrap and a plastic bag. Before you start, hold a piece of paper the size of your art against the wall, because scale makes or breaks the look. Find more wall decor on the wall art ideas page.
1. Retro Diamond Focal Wall

A retro diamond focal wall gives you bold art without buying a single frame. Center the diamond above a dresser or headboard, mark the width and a quarter of it up and down, then connect the dots. Divide it into six stripes and pencil them in. Paint in two rounds, taping off stripes 1, 3 and 5 first, then 2, 4 and 6 once dry. For crisp lines, brush the neighboring color over the tape edge before each new stripe so any bleed matches. Pick colors from a painting you love.
Get the full tutorial at Vintage Revivals.
2. Faux Pallet Antler Wall Art

Faux pallet antler wall art pairs warm wood planks with a white antler mount for a cozy cabin feel. Gather pallet boards in light and dark tones, cut them to size and lay them out alternating colors. To darken some boards, try a steel wool and vinegar stain, but test it on a scrap first because the color can turn gray. Brace the boards from behind, then paint a faux antler mount and an ornate oval frame white. Hang the frame on the planks with the antlers centered inside.
Get the full tutorial at Blitsy.
3. DIY Wall Art With Wood Shims

DIY wall art with wood shims gives you the look of a pallet sign without prying apart a pallet. Buy the contractor pack, since those shims are longer and wider. Glue them together in pairs so they’re sturdy, then lay ten pairs side by side and glue three more across the back as braces. Leave the edges a little uneven. Spray on three paint colors, sand to let them peek through and expose raw wood at the edges. Chalk a word like “hello” in the corner, then paint over it.
Get the full tutorial at My 3 Monsters.
4. Rustic Wood Arrow Wall Art
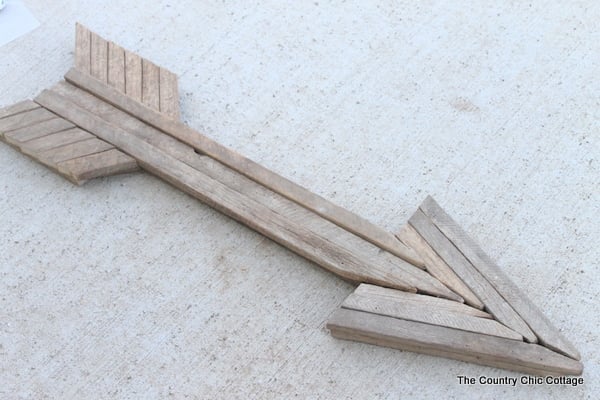
Rustic wood arrow wall art uses weathered wood over a foam core, so it looks heavy but hangs easily. Cut arrow pieces from foam using paper templates, then join them with toothpicks and glue. Paint the whole form dark brown, so no white shows through the gaps later. Cut old tobacco sticks or any worn wood strips and fit them on like a puzzle, wrapping the sides first and then the front. Use plenty of hot glue, then flip it and glue the back seams too.
Get the full tutorial at The Country Chic Cottage.
5. Wooden Block Mosaic Art DIY

Wooden block mosaic art gives a wall the warmth of wood without a single power tool. Pick up a set of 2 inch craft blocks, lay them out in one layer and measure the area, then cut or buy a backing board about an inch and a half smaller so the blocks hide its edges. Rub stain on every side, since the end grain soaks it up darker and adds to the pattern. Glue the blocks down row by row, slipping thin wood shims under a few for depth, then add sturdy hangers.
Get the full tutorial at A Beautiful Mess.
6. DIY Copper Wall Art

DIY copper wall art is one of the fastest projects here, and it shines in any light. Trace the insert of a frame onto poster board and cut it out as your canvas. Peel the end of a roll of copper tape, wrap it over the board edge, then smooth it diagonally across the board. Keep going in a radial burst, with every strip crossing at the same point. Wear gloves, because fingerprints show on the tape. The finish ends up looking like soft copper leaf.
Get the full tutorial at Homey Oh My.
7. Easy Boho Yarn Wall Hanging
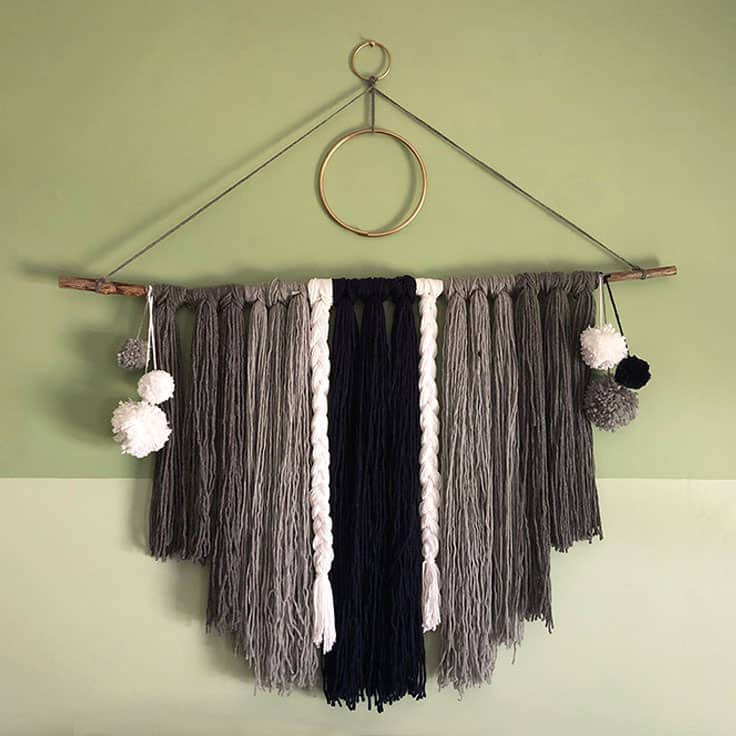
An easy boho yarn wall hanging gives you the macrame look with no knots to learn. Find a stick in the yard, cut it to size and sand off the bark, or use a wooden dowel. Wrap yarn around a picture frame about 20 times to make long loops, then cut and fold them over the stick. Mix gray, black and cream, braid a few strands for texture and trim the bottom into a V. A metal craft ring on top and a few pom poms add a little extra charm.
Get the full tutorial at Ideas for the Home by Kenarry.
8. Modern Triangle Geo Wall Art
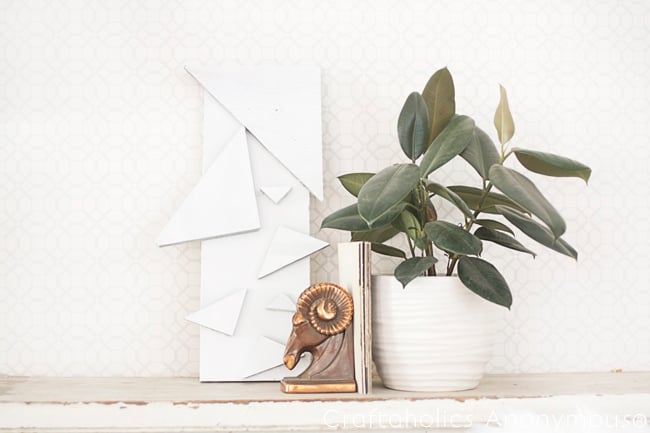
Modern triangle geo wall art comes together with precut wood shapes and a can of spray paint. Start with a wood plank for the backdrop and a bag of craft store triangles. Play with the layout until it feels balanced, then trace around each piece so you don’t lose the arrangement. Hot glue the triangles in place, holding each until it sets. Spray paint the whole piece one color, so the shadows between layers do the decorating. White is crisp, but a bold color works too.
Get the full tutorial at Craftaholics Anonymous.
9. DIY Rustic Reclaimed Wood Star Wall Art

This rustic reclaimed wood star is a patriotic piece that doesn’t shout. Cut ten 13 inch lengths of pallet wood with mitered ends to build a star about 33 inches wide. Paint a few more pallet scraps red and white, sand the edges and rub on a tinted wax. Mark and cut the painted pieces to fit behind the star in alternating colors, then nail them in place with finishing nails. Flip it over for a star with stripes peeking through, and hang it from Memorial Day to Labor Day.
Get the full tutorial at Scavenger Chic.
10. Pop Art Pet Portrait

A pop art pet portrait puts your favorite furry face in the spotlight, and you don’t need any photo editing software. Print an 8×10 photo of your pet and cut away the background. Scan or copy the cutout, turning up the brightness and contrast until the whites are bright and the darks are bold, then print it on bright cardstock. Print a textured background on a contrasting color, trim your pet with a thin border and mount it with spray adhesive. Trim it all to fit an 8×10 frame and hang.
Get the full tutorial at A Beautiful Mess.
11. Easy DIY String Art Ideas
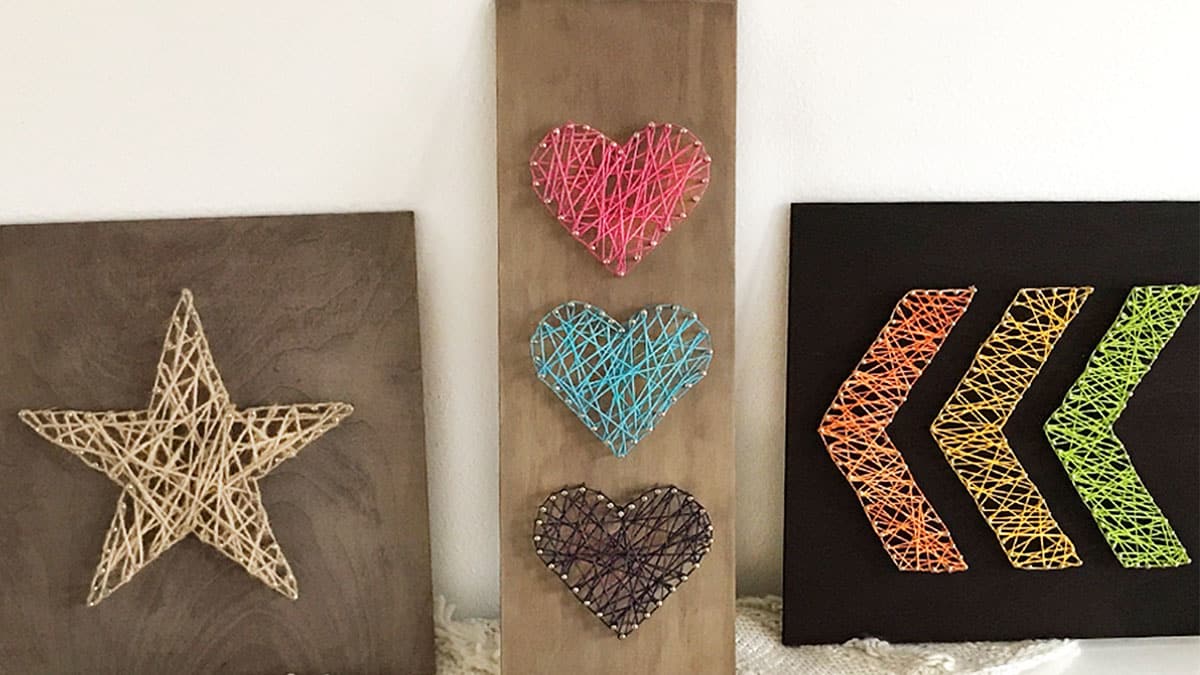
Easy DIY string art makes a big impact with a hammer, small nails and a wood plank. Print a simple shape like a star, a heart or chevrons, tape it to a stained board and tap nails around the outline. Tear the paper away, tie your thread to one nail and wrap it back and forth across the shape until it fills in. Twine looks rustic, while embroidery floss comes in every color. Make a set of three to hang above the bed as a little series.
Get the full tutorial at DIY JOY.
12. Geometric Mountains DIY

Geometric mountains in washi tape are the easiest wall art you’ll ever peel off. Sketch a mountain range on paper first, so you know the shape before you start. Use a dark masking or washi tape and press it straight onto the wall, building one big peak flanked by two smaller ones. Add a short zigzag inside each peak to suggest snow lines. It works fine on textured wallpaper too. Want more detail? Run parallel lines inside the big triangle or add a few tape cacti around the base.
Get the full tutorial at Make it boho.
13. DIY Canvas Art

DIY canvas art like this needs zero artistic skill, just a few plain canvases and a color palette you love. Buy an odd number in different shapes and sizes, ideally on sale for a few dollars each. Tape the edges with half inch painter’s tape, pressing it flush so nothing seeps under. Brush a thin coat of craft paint over the top with a foam brush, let it dry for 15 minutes and add one or two more coats. Peel the tape, lay the canvases out on the floor and hang your favorite arrangement.
Get the full tutorial at Design Improvised.
14. Easy Flower Painting Idea With Bubble Wrap
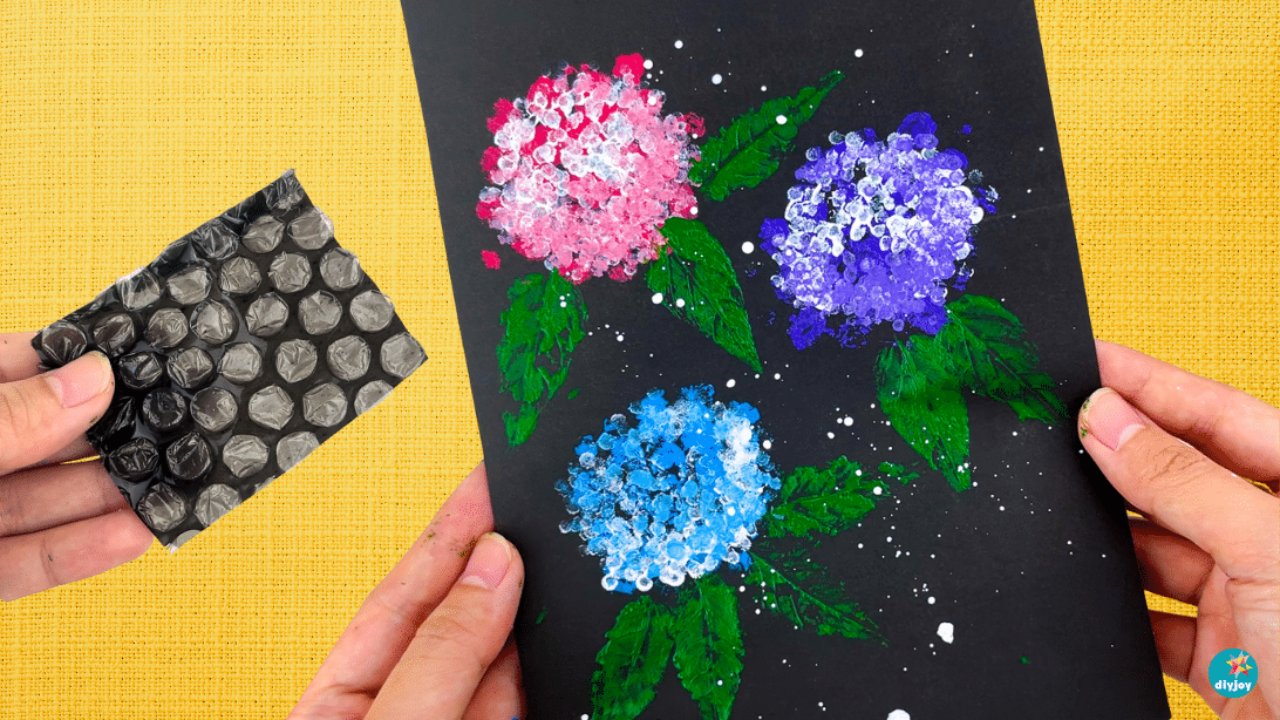
This easy flower painting idea uses bubble wrap to print fluffy hydrangea blooms. Wrap a small piece of bubble wrap around a flat, round object, brush paint over the bubbles and press it onto black paper or canvas. Repeat in blue, violet and pink, leaving space between blooms. Dab white dots with a bundle of three cotton swabs, then add lighter shades for depth. Paint the back of a real leaf green and press it under each flower. Finish with a flick of white splatter for sparkle.
Get the full tutorial at DIY JOY.
15. Hot Glue Canvas Art

Hot glue canvas art gives a painted quote raised, touchable letters. Print a phrase or pattern on paper, then trace it onto a stretched canvas in pencil. Go over the lines with hot glue, working quickly for a smooth finish, and add extra layers on thicker letters. Once it cools, pick five paint colors and blend them from the darkest at the bottom to the lightest at the top, switching brushes for each shade. The glue lines catch the light, so the words show up from across the room.
Get the full tutorial at The Crazy Craft Lady.
16. Wooden Kilim Wall Art

Wooden kilim wall art copies a woven rug pattern in strips of stained wood. Rip a 2×4 into quarter inch slabs or use paint sticks, then cut 8 large trapezoids, 8 medium ones and 110 small parallelograms, all at 45 degree angles. A miter saw makes this quick. Sort the pieces into groups and give each group its own finish, from light walnut to deep cabernet stain. Paint some white, sand them and stain over for a distressed look, then glue everything onto a board in the pattern.
Get the full tutorial at Reality Daydream.
17. Colorful Chevron Paper Wall Art
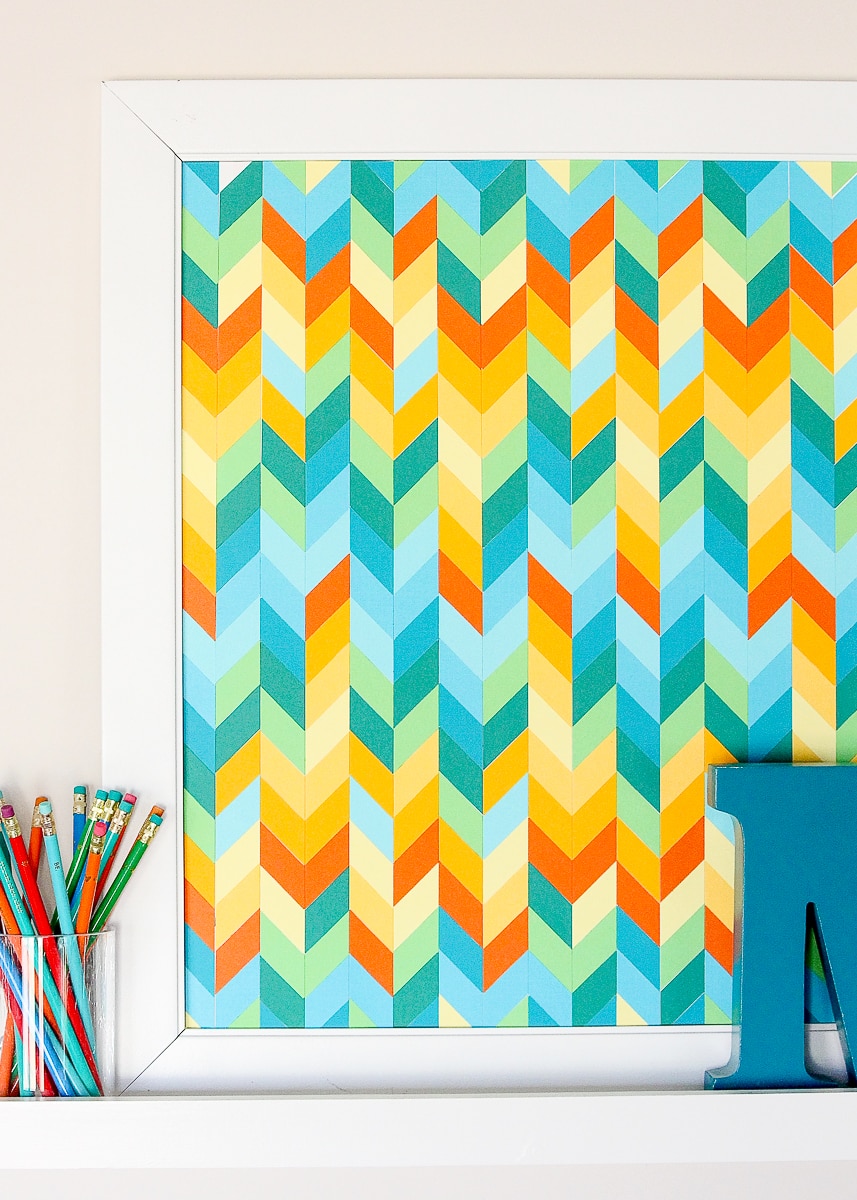
Colorful chevron paper wall art turns cheap cardstock into a piece that looks woven. Measure your frame first, then cut white poster board and foam core to fit. Cut a big stack of identical chevrons from colored cardstock with an e-cutter, or trace a printed template by hand. Glue the chevrons onto the poster board in rows, nesting each one into the last so they form a herringbone. Mix colors at random or plan a gradient. Mount it on the foam core and frame it.
Get the full tutorial at The Homes I Have Made.
18. Painted Pebble Wall Art

Painted pebble wall art is a modern abstract you can paint with craft supplies in an evening. Lightly pencil a grid of pebble shapes in different sizes onto cardstock or board. Then draw a line across each pebble, any angle you like, to split it in two. Fill each half with a different acrylic color, mixing your own shades as you go. Let it dry for a full 12 hours, frame it and hang it. Soft pinks, teals and grays feel fresh, and a white mat makes the colors pop.
Get the full tutorial at Oh Everything Handmade.
19. Lighted Mountain Wood Wall Art
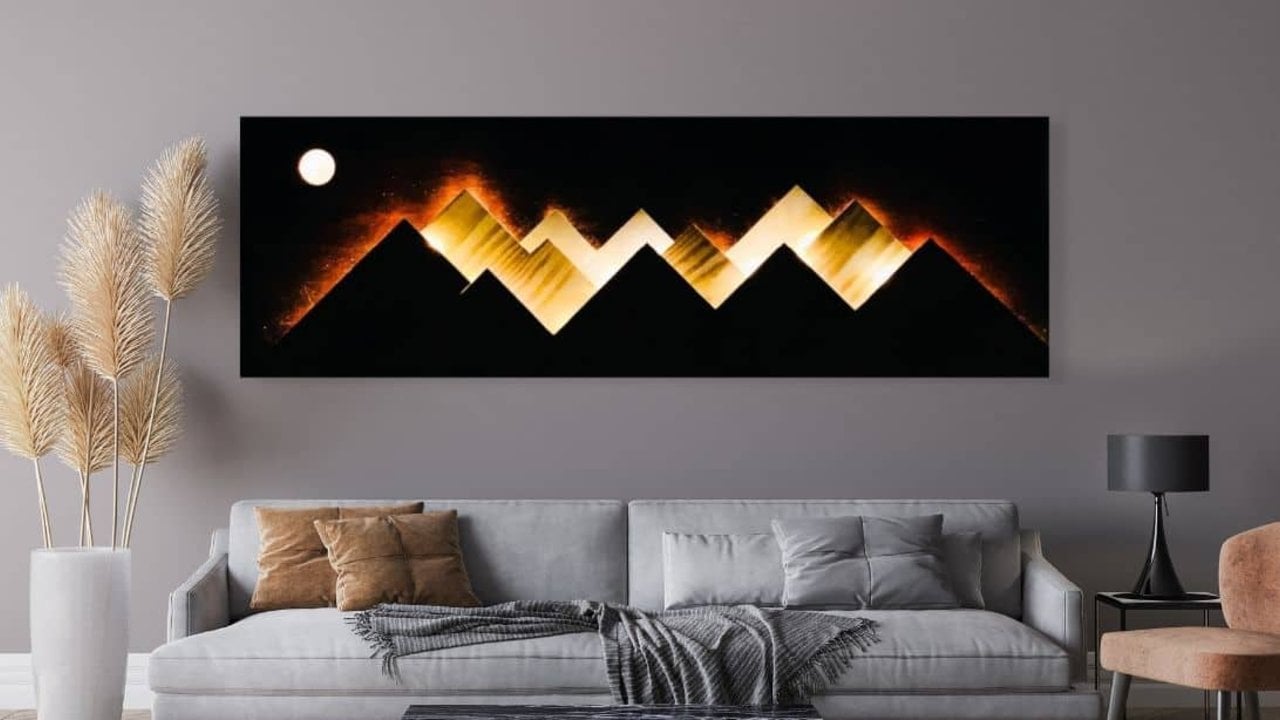
Lighted mountain wood wall art glows like a sunset over the bed. Sketch a mountain range on a stained wood board, keeping every peak at 45 degrees. Cut three layers of mountains from thin wood strips, glue each layer together and oil the wood to keep its color. Glue small blocks behind the back layers to create gaps, then stack the layers so light can spill between them. Drill a 2 inch hole for the moon, cover it with paper and tuck string or LED lights behind each layer.
Get the full tutorial at DIY JOY.
20. How to Paint Flowers With a Plastic Bag
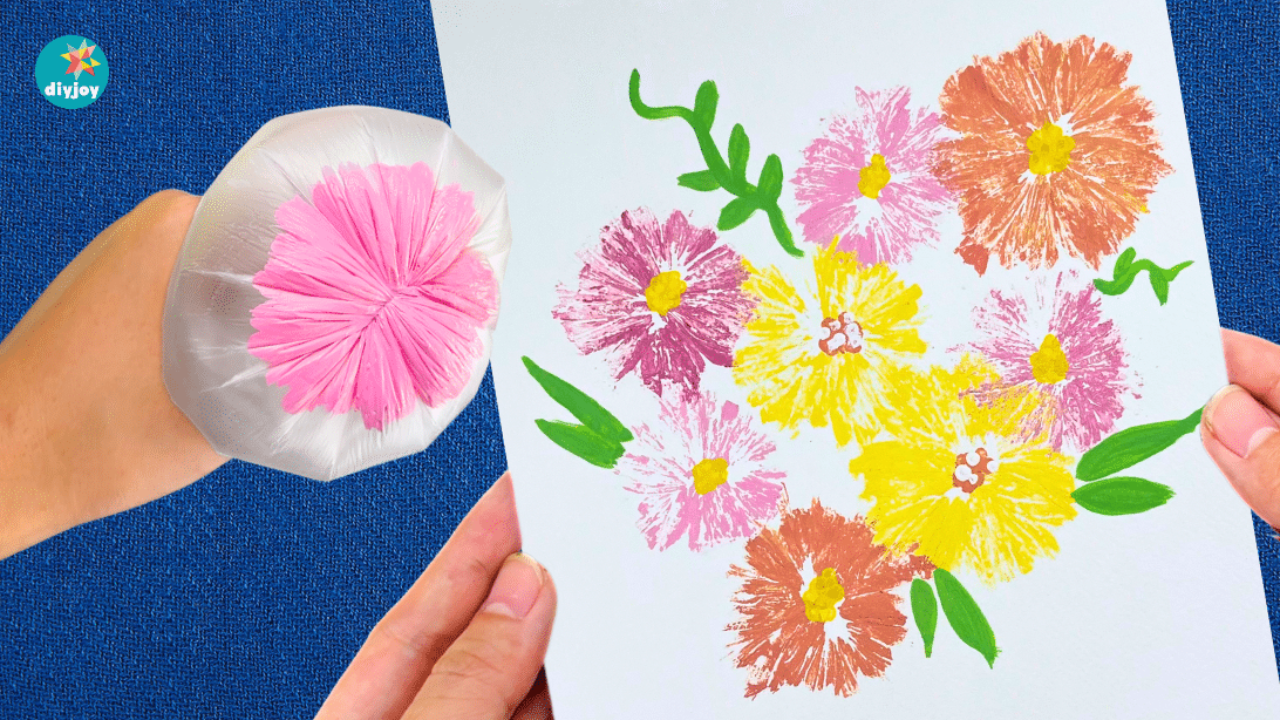
Painting flowers with a plastic bag is a fun way to reuse packaging and get pretty, textured blooms. Knot the closed end of a bag, turn it inside out, puff it with air and tie it again. Brush paint on the flat side from the center outward, then press it onto paper or canvas for an instant flower. Dot the centers with a cotton swab in a contrasting color and let it dry. Add stems and leaves with a brush, or press on a painted real leaf.
Get the full tutorial at DIY JOY.
21. Pallet Wood Wall Art

This pallet wood wall art carries an uplifting message you’ll see every day. Take apart a few pallets, sawing through the nails rather than prying, which is much faster. Keep some broken nails in for a rustic look. Lay seven boards out at the size you want and nail two boards vertically across the back to hold them together. Cut a cardstock stencil of your words with a cutting machine, tape it together and paint the letters in white with a few in yellow. Wrap wire across the back to hang it.
Get the full tutorial at Blooming Homestead.
22. Hand Brush Lettered Canvas Art
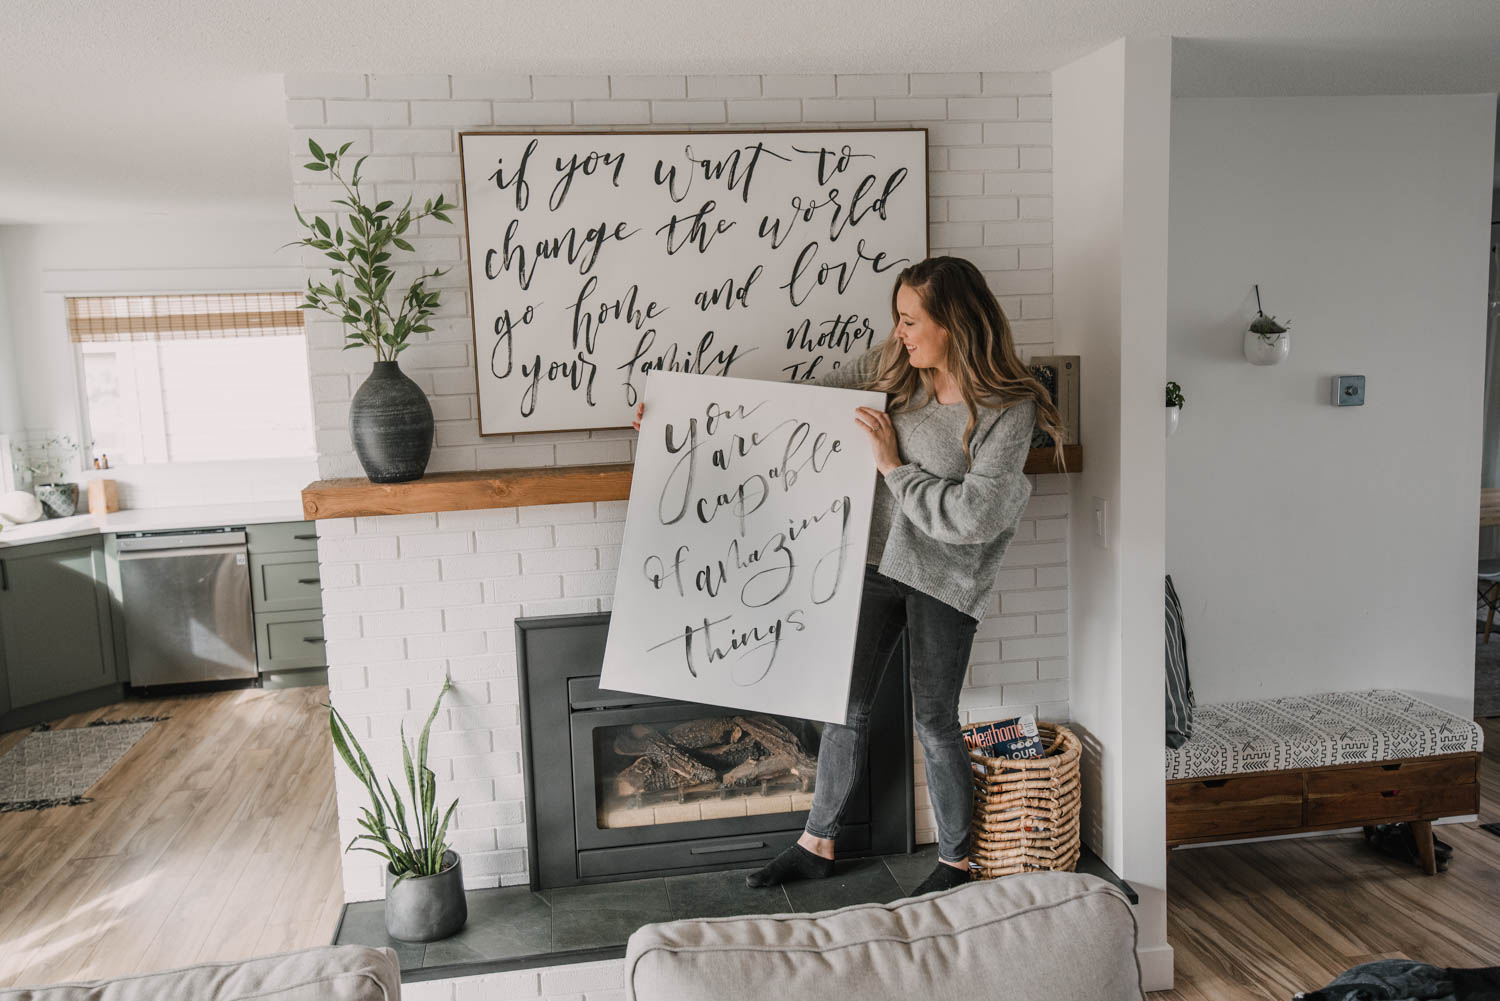
Hand brush lettered canvas art gets its inky, painterly strokes from watered down acrylic and one round brush. Sketch your quote lightly in pencil, or trace a font if you’d rather not freehand it. Mix the paint with a little water in a small cup until it flows like ink. Press down on the downstrokes for thick lines and ease up on the upstrokes for thin ones, lifting the brush as often as you need. Think of it as drawing letters, not writing them. Erase the pencil once it’s dry.
Get the full tutorial at Lemon Thistle.
23. DIY Graphic Circle Wall Art

DIY graphic circle wall art is bold, black and white and made with a paper punch. Trace the inside and outside of your frame’s mat onto poster board and cut along the outer line. Punch a stack of 1.5 inch circles from black cardstock. Glue them in a tight grid, edge to edge, using the inner pencil lines as your guide so they fit the mat opening exactly. Pop it in the frame behind a white mat for crisp contrast. Make a few as a black and white gallery wall.
Get the full tutorial at Homey Oh My.
24. Textured Heart Canvas Art

Textured heart canvas art uses tissue paper mache for a raised, embossed finish. Paint the canvas a base color, let it dry and lightly draw a few hearts. Tear tissue paper into small pieces, soak it, squeeze out the water and tear it smaller still. Mix in glue and paint until it’s evenly colored. Spread the mixture inside each heart, covering the pencil lines, and add more layers for extra texture. Smaller, even pieces give a smoother finish. Let it dry completely before hanging.
Get the full tutorial at DIY JOY.
25. DIY Scrabble Tiles

DIY Scrabble tiles blown up to wall size are a playful way to spell out what matters at home. Have the hardware store cut a 6 inch pine board into 6 inch squares, then wipe on a light coat of dark walnut stain. Find a font close to the game’s, print the letters and back trace them onto each tile. Use a ruler as a painting guide for straight edges, wiping it between lines, and paint the tiny point numbers in the corners. Seal with water based polycrylic and hang with picture hooks.
Get the full tutorial at Whats Ur Home Story.