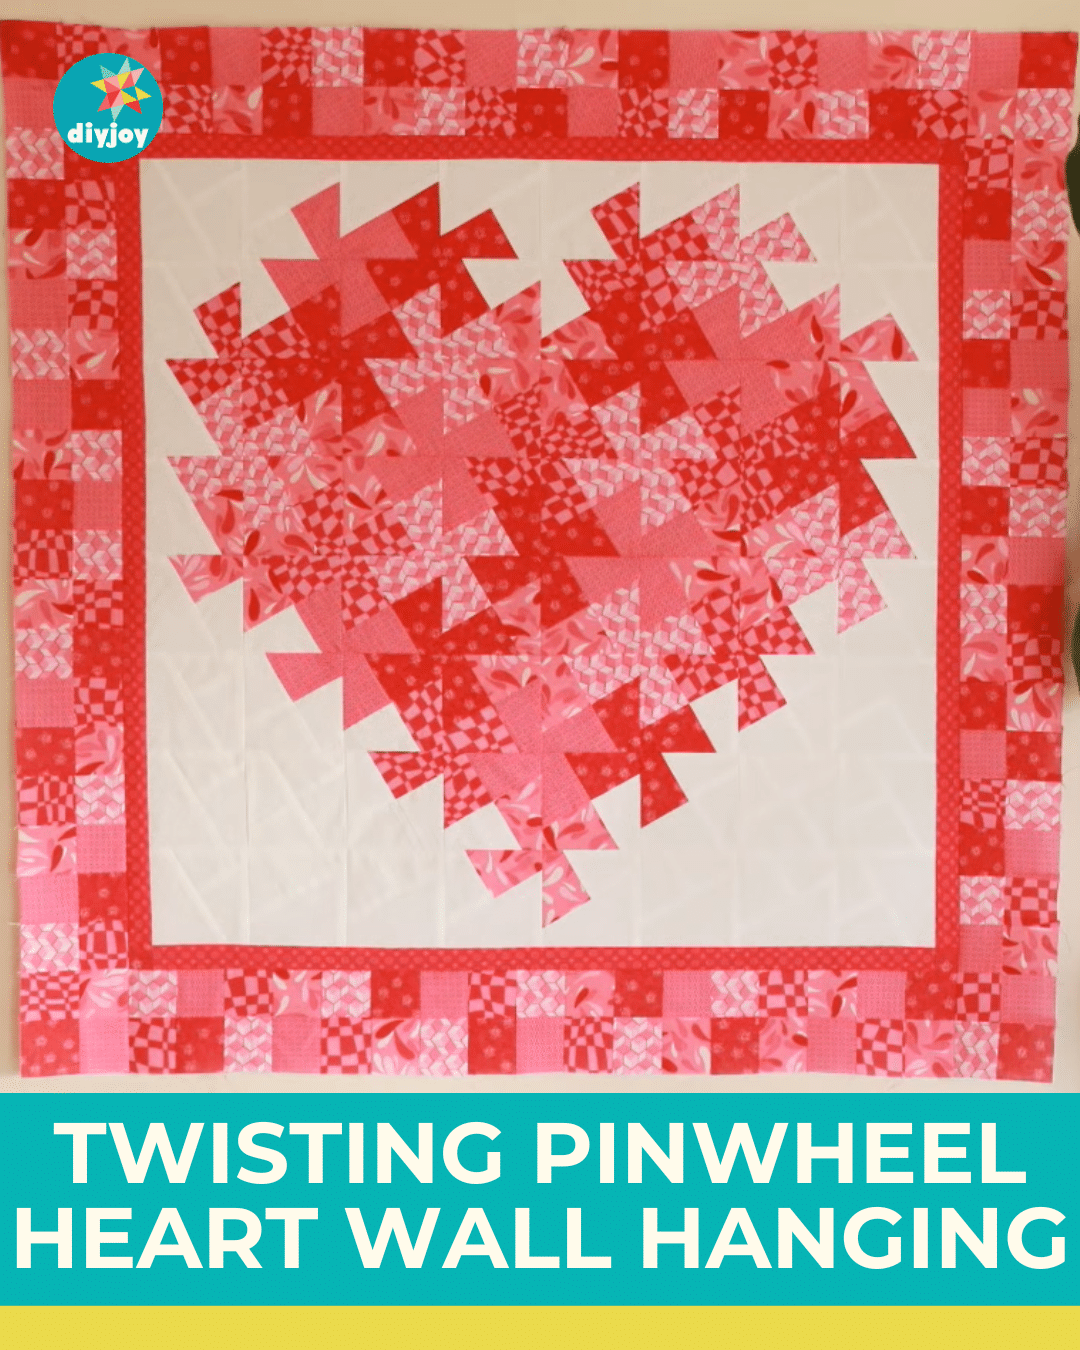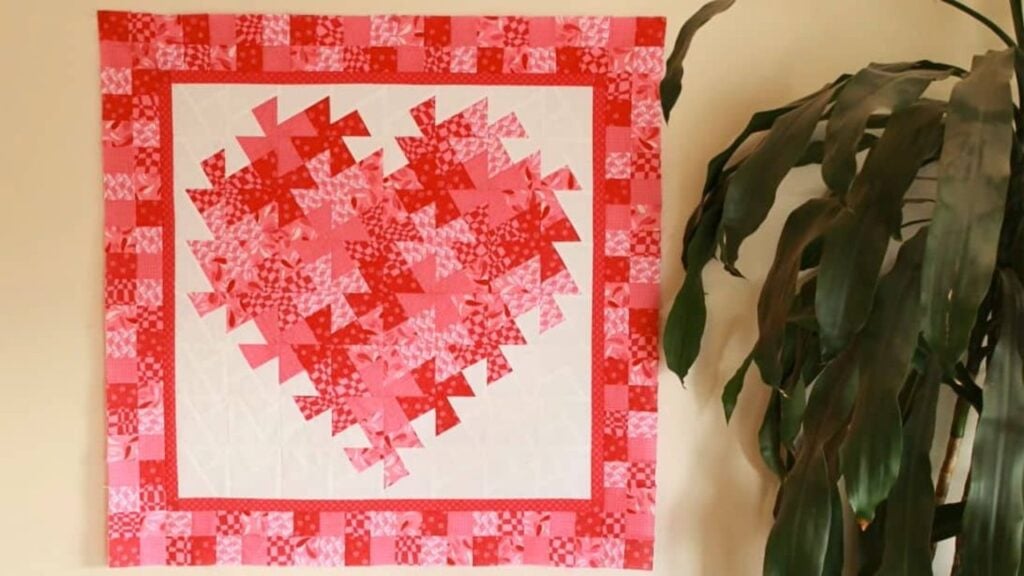
Isn’t this twisting pinwheel heart wall hanging beautiful? The first time I saw it, I instantly fell in love with it. How can you not like this masterpiece? The colors of the fabric that Crouton Crafts picked for this project are amazing, as they all complement each other. It definitely made each piece stand out. Whenever I see a twisting pattern like this, I always think of puzzle pieces. It does look like it, right?
RELATED: Beginner-Friendly Quilt Heart Ornament
It may look hard when you first look at it but trust me, it is surprisingly easy to make. It may just take some time to finish since you have to sew it twice, but it is so worth it and might even become one of your favorites. The border even matches the heart in the center.
Be ready when you make this quilt project, as you will get a lot of compliments. Happy sewing!
For more easy heart quilt projects, check these out: Super Easy Jewel Heart Quilt Tutorial for Beginners, How to Make a Cross Heart Quilt, How To Make Pieced Heart Quilt Blocks
Easy Twisting Pinwheel Heart Wall Hanging
- 1/6 yard of 5 different pink fabrics
- 2/3 yard of background fabric (white)
- 1/2 yard for border
- 1 yard for backing
- 1 yard for backing
- 4 yards for binding
- twister template
Cutting list:
- 4 pieces of 5″ pink squares
- 15 pieces of 5″ background squares
- 4 pieces of 3″ x 42/44″ strips
For the border
- 4 pieces of 1.25″ x 42/44″ strips of dark pink
- 152 pieces of 2″ pink squares
How to Make Twisting Pinwheel Heart Wall Hanging
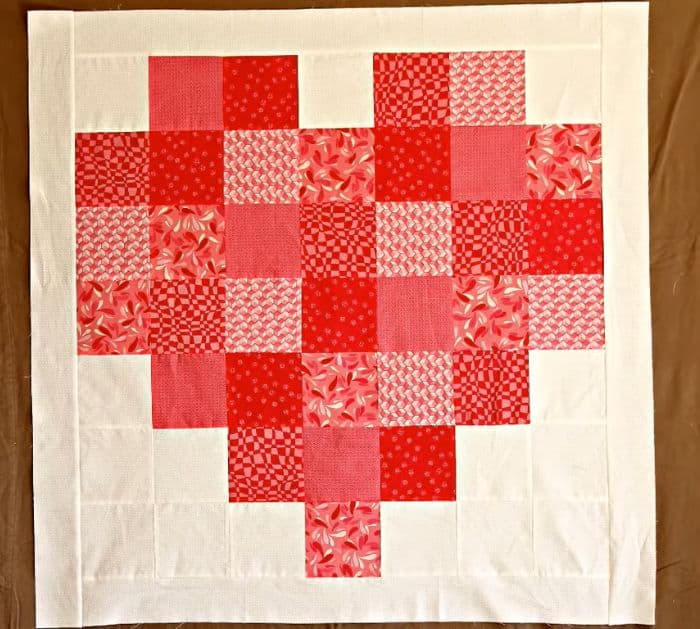
Step 1:
Start by arranging the squares just like in the photo below, then sew them together. Once done, add white strips on all sides.
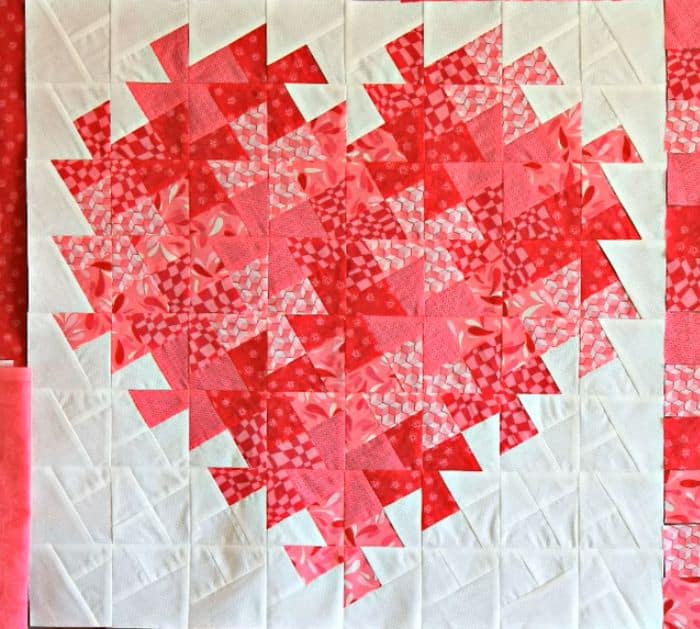
Step 2:
Get your twister template and line the black lines to the intersection on your quilt top. Carefully cut the square. Make sure not to cut go beyond the ruler. Turn it counterclockwise and place in your design wall before you cut the next square. Do this step for every intersection. You should have a pattern just like in the photo below. Make sure all of your pinwheels are going in the same direction. Sew them together.
Step 3:
Add a 3/4″ dark border. Sew the 2″ squares into two rows then sew them for the outer border.
Twisting Pinwheel Heart Wall Hanging