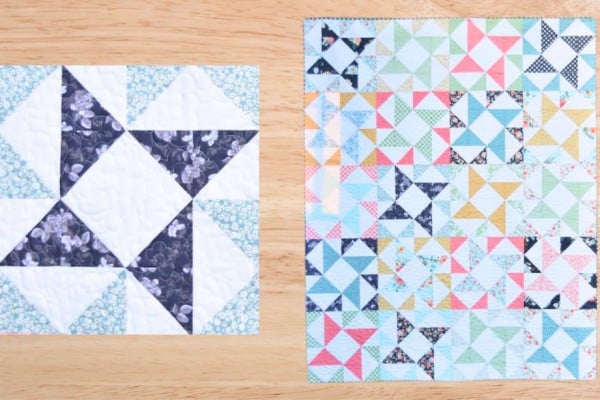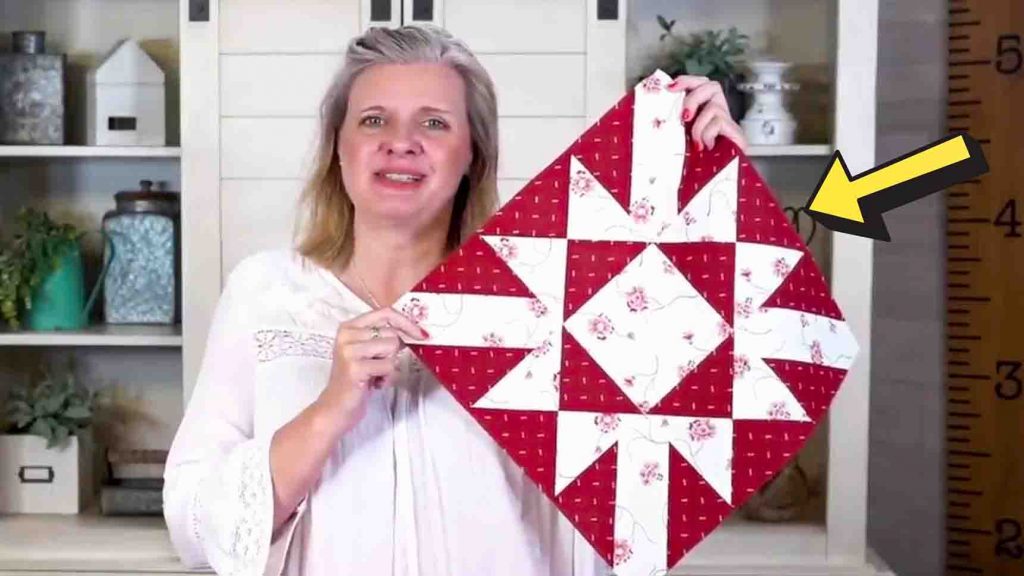
This classic and vintage quilt block called the turnabout from Fat Quarter Shop on Youtube will surely blow you away. This quilt block is so beautiful and will work on any fabric you have. It also doesn’t matter if you’re a beginner or an advanced quilter; you’ll find this tutorial easy enough to follow. Watch the video below to learn the step-by-step instructions.
Materials:
For throw quilt size:
- 2 & 5/8 yards light print fabric
- 3 & 1/4 yards dark print fabric
- 7/8 yard setting stars
- 5/8 yard binding
- 3 & 1/2 yards backing
- click here for the free pattern
Cutting instructions:
Light print:
- fabric A: 2 – 6 & 1/2″ squares
- fabric B: 5 – 5 & 1/2″ squares
Dark print:
- fabric C: 2 – 6 & 1/2″ squares
- fabric D: 8 – 4″ squares
Directions:
Step 1
Take fabric B square which is your light square and a fabric D square which is your dark square. On the wrong side of your dark square, draw a line from corner to corner. Pick the top right corner and place your square on the top. Pin to secure and stitch directly on that line with a 1/4″ seam. Press after sewing. Take another fabric D square and do the same thing: pin, stitch, have your piece, and press. Make four of these for each block.

[social_warfare]
Step 2
Now, for the hourglass blocks, take both fabrics’ A and C squares and cut diagonally on both sides. From here, make one hourglass unit according to the pattern, just background opposing and your dark opposing. Pin and sew with a 1/4″ seam. After this, press it, then trim it to 5 & 1/2″. Make four of these.
Step 3
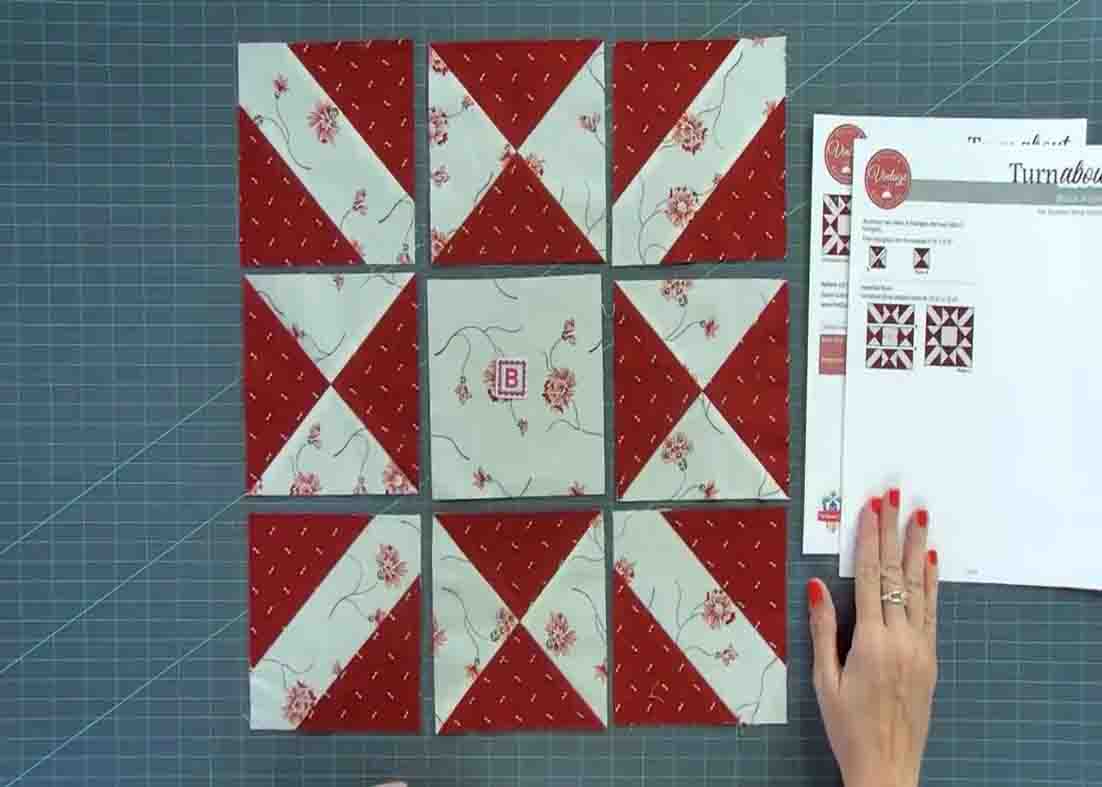
Now, for the laying part, put your fabric B light square at the center. Pay attention to where the lights are in your hourglass blocks and where your lights are in your corner units. To get your blocks really nice, put your fabrics together, pin them, and sew all the way down. Once you’ve sewn all of those together using a 1/4″ seam, your block is now complete.
The Turnabout Quilt Block Tutorial