
Are you looking for a quilting project that is cool yet easy enough for beginners? Look no more; this cool water quilt from Fons & Porter’s Love of Quilting on Youtube is what you’ve been looking for. This batik quilt is beginner-friendly, and you’ll surely fall in love with the pattern. Make this your weekend project by learning the step-by-step instructions in the video tutorial below.
Materials:
- 40 pcs. 2 & 1/2″ strips
- rotary cutter
- cutting mat
- square ruler
Directions:
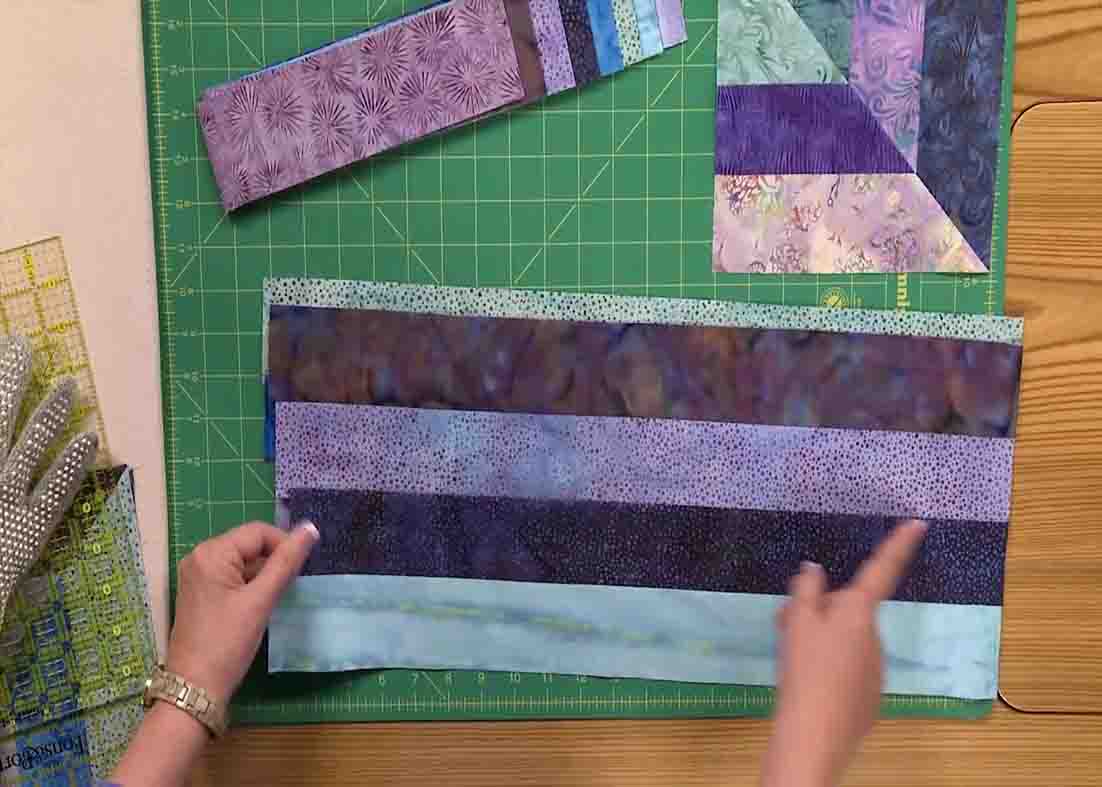
Step 1
First, divide your 40 strips into twenty light and twenty dark piles. Next, make a strip set with four strips, two dark and two light. You must press all the seams toward the dark fabrics. Now, take two strip sets, right sides together, with the other strip having the dark strips on the top and light on the bottom, while the other has the dark strips on the bottom. Line the top edges together, then cut 8 & 1/2″ sections out of those strip sets that are stacked on top of each other. (Trim the excess edges also.)
[social_warfare]
Step 2
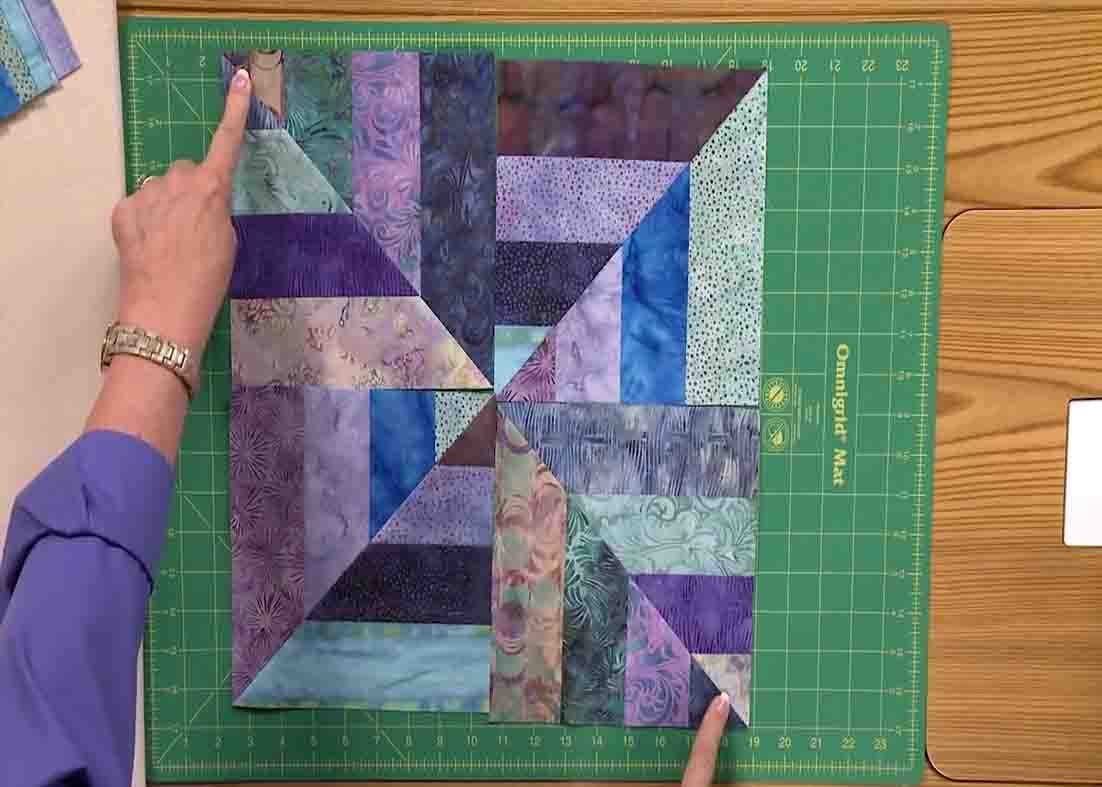
Once you have your 8 & 1/2″ sections, get a long ruler, and cut in half diagonally from corner to corner. Sew those together. Make four of these to make a block. Once you have four pieces, lay them out according to the image below. Join each row together and make 12 of those big blocks.
The Cool Water Quilt Tutorial


