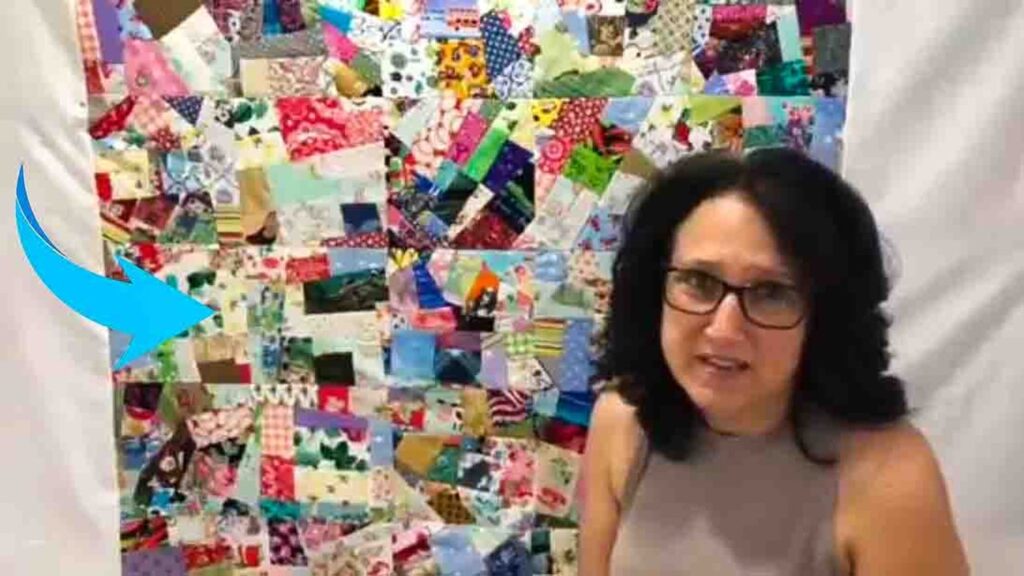
I’ve never seen such a beautiful scrappy quilt as this scrappy crumb quilt from The Sewing Channel on Youtube. It’s so gorgeous; I can’t help but make a version of mine. As a quilter for quite some time, I’ve already made a few scrappy quilts, but this one is absolutely my favorite. It’s scrappy like the others, but the pattern is quilt unique, and it’s definitely a scrap-buster, whatever size you may have. So if you’re looking for a project to use your building scraps, try this one out. Watch the video tutorial below to learn the step by step instructions.
Materials:
- fabric scraps
- rotary cutter
- clear ruler
- iron, for pressing
Directions:
Step 1
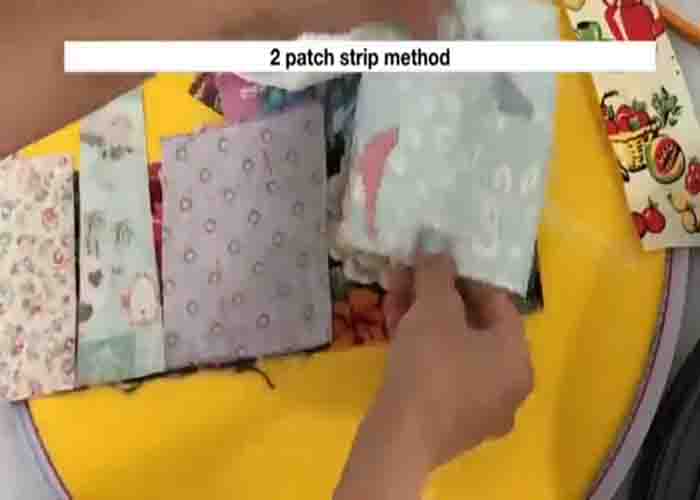
First, press all your fabric scraps nicely. Next, take a regular strip of fabric, then take single fabric scraps and lay them along the edge of the strip. Sew them with a 1/4″ seam allowance. After sewing, cut them up to the slit. Now you have a bunch of two patches. Press them to the side afterward. For a four-patch, sew a couple of two patches with a 1/4″ seam allowance. (These don’t need to be perfect as you’re making a scrappy quilt.)
[social_warfare]
Step 2
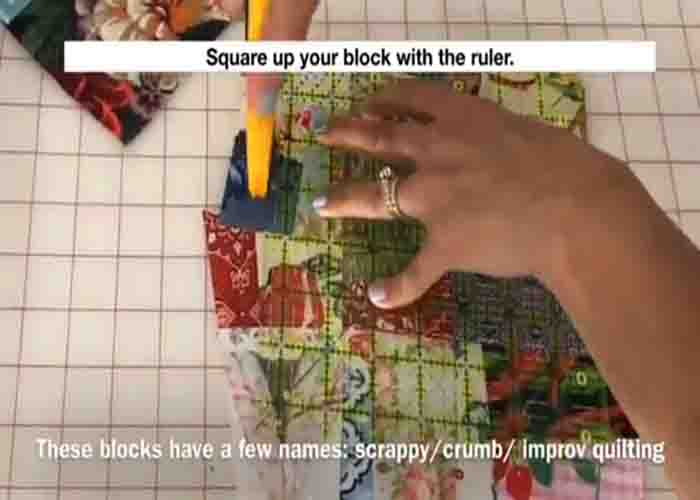
Now, just keep going to make a lot more two patches and four patches pieces. You can even make it spicier by adding some fabric on the diagonal. (Make sure to trim off the excess seam as less bulk is better.) When trimming your block to its final size, which is 7 1/2″, use a clear ruler to make it easier. Make 25 of the same blocks. Once you have all 25 of your scrappy blocks, lay them out 5×5. Sew those blocks to create rows, then sew those rows together to finish your quilt top.
Scrappy Crumb Quilt Tutorial


