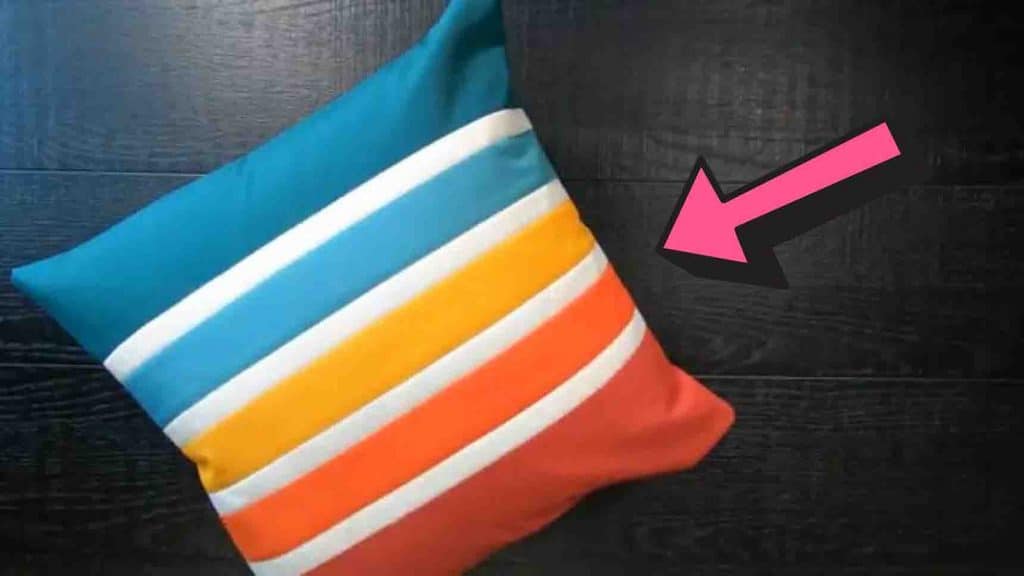
If you’re looking for a quick quilt project for the weekend, try this retro stripes pillow cover from Moonkin Stitchery on Youtube. This quilt project is also a great way to upgrade your dated couch throw pillow covers. It’s perfect for beginners, but seasoned quilters will also find this project fun to make. Watch the video tutorial below to learn how to make this.
Materials:
- 5 solid colors, for the stripes (fat eight per each color)
- fat eight background
- 22″ square batting
- 22″ square quilted backing
- 1/2 yard envelope backing
Cutting:
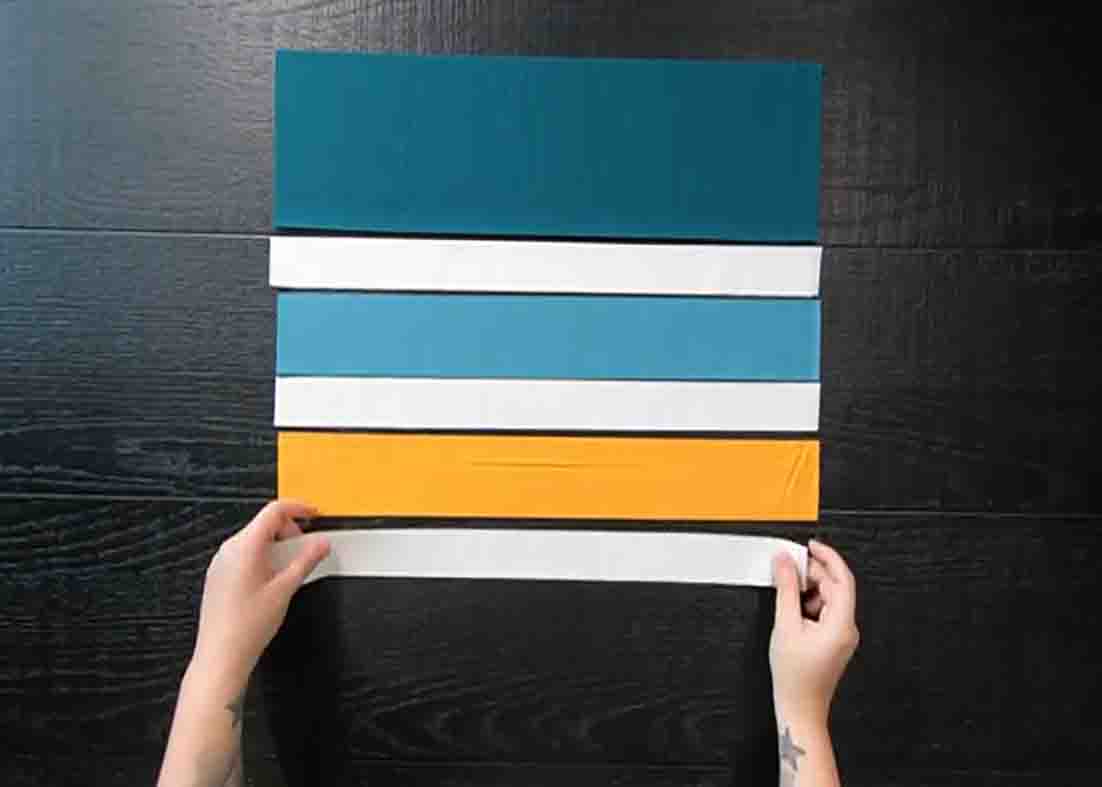
- select two solid colors, subcut into 5 & 1/2″ x 20″ rectangles per color
- with the remaining three solid colors, subcut into 1 – 2 & 1/2″ x 20″ rectangles
- with the background fat eight, subcut into 4 – 1 & 1/2″ x 20″ rectangles
- with the envelope backing fabric, subcut 1 – 16″ x 20″ rectangle and 1 – 14″ x 20″ rectangle
Directions:
Step 1
Start by cutting all your fabrics to the right measurements. Next, start piecing with a 5 & 1/2″ x 20″ rectangle for row one, a background 1 & 1/2″ x 20″ rectangle for row two, a 2 & 1/2″ x 20″ rectangle for row three, a background 1 & 1/2″ x 20″ rectangle for row four, a 2 & 1/2″ x 20″ rectangle for row five, a background 1 & 1/2″ x 20″ rectangle for row six, a 2 & 1/2″ x 20″ rectangle for row seven, a background 1 & 1/2″ x 20″ rectangle for row eight, and lastly, a 5 & 1/2″ x 20″ rectangle for row nine. Once everything is put together in this order, sew all of the rows together with a 1/4″ seam allowance. Next, take a 22″ square backing and place it wrong side up followed by a 21″ square piece of batting.
[social_warfare]
Step 2
After this, place your quilt block on top, pretty side up. Use a basting spray or pins to hold everything in place, then go ahead and quilt it. After quilting, trim the excess batting and backing fabric and cut it to a 20″ square. To create the envelope backing that is with an 11″ x 20″ rectangle on the longest side, take the ruler, and using a fabric marking tool, measure a 1″ line that is 20″ long from the raw edge. Take the raw edge and fold it up to that 1″ line that you just drew, then iron it down. Next, fold it over one more time with another 1/2″ to cover that raw edge, then iron it. Lastly, sew about 1/8″ away on both sides of the folds that you just created.
Step 3
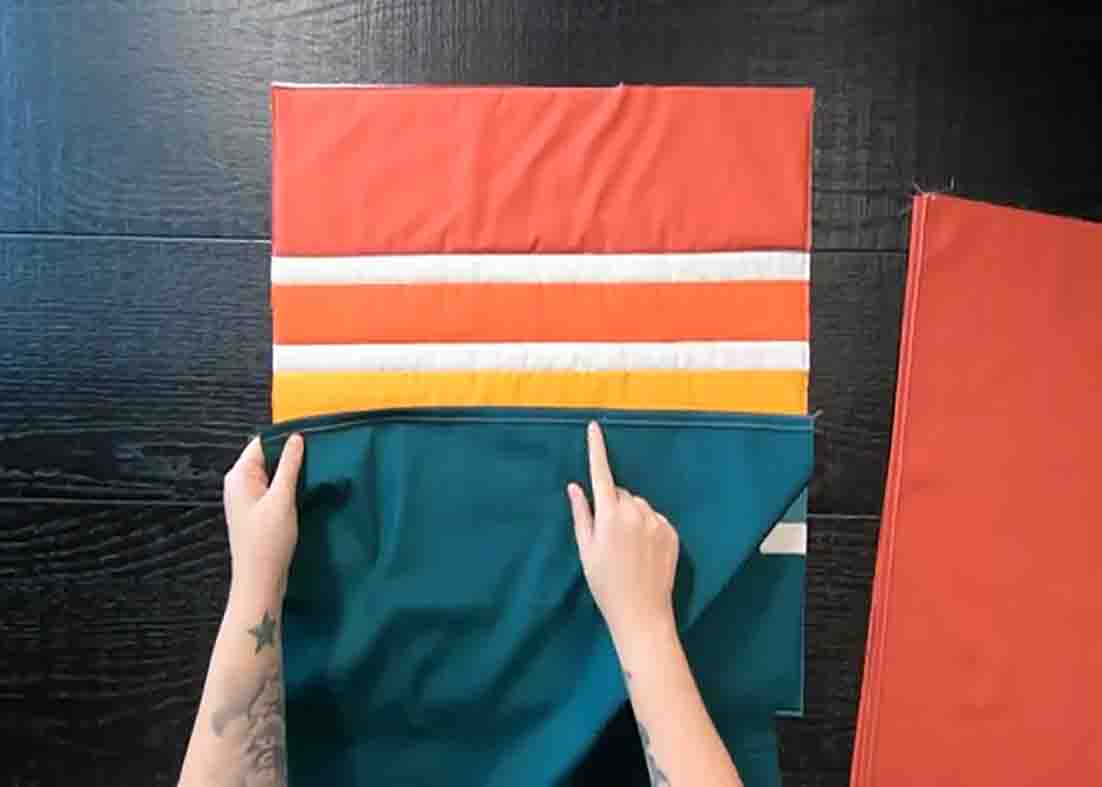
Repeat the same thing but to the 16″ x 20″ rectangle. Now, place your quilted pillow top, right side up, followed by the larger rectangle on top with the pretty side facing down. Place this either on top or bottom as long as your hem is towards the center of your pillow form. Then, take the smaller rectangle and place it on top of those two. Pin everything to hold everything in place, then sew a 1/4″ seam allowance around the square. Lastly, turn the pillow cover right side out and press along the edges.
Retro Stripes Pillow Cover Tutorial