If you’re a quilting beginner, you might want to try this quilt block from Cut and Create on YouTube for your next project. It’s a simple and pretty quilt block for beginners out there. But even if you’re a seasoned quilter, you’ll definitely find this quilt fun. This pattern is one of my favorites to do back when I was still starting out, as it’s super easy to put together. And even though I’ve been quilting for quite some time now, it’s still one of my go-to patterns to make. I also recommend this quilt pattern if you have beautiful solid-colored fabrics and you still don’t have a project to use them for. Try doing this pattern today! Watch the video tutorial below to learn the step by step instructions. Thanks to Cut and Create for this beautiful quilt project.
Materials:
fabric A:
- 1 – 7″ x 7″ square
fabric B:
- 4 – 3 1/2″ x 3 1/2″ squares
fabric C:
- 1 – 7″ x 7″ squares
- 4 – 3 1/2″ x 3 1/2″ squares
Directions:
Step 1
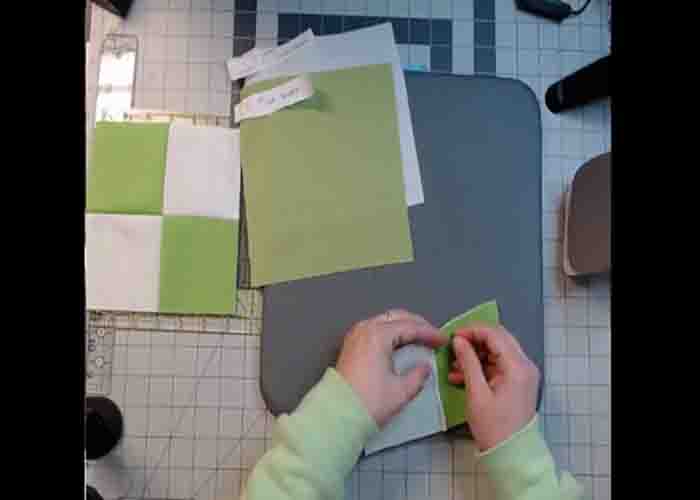
To start, cut your fabrics accordingly, label them, then set them aside. Now, take your 3 1/2″ squares and make a four-patch by sewing them together. After sewing, press them nicely. Next, take your 7″ squares, line them up, and cut diagonally from corner to corner. After this, sew them together to create two pairs of half-square triangles. Press them open afterward.
[social_warfare]
Step 2
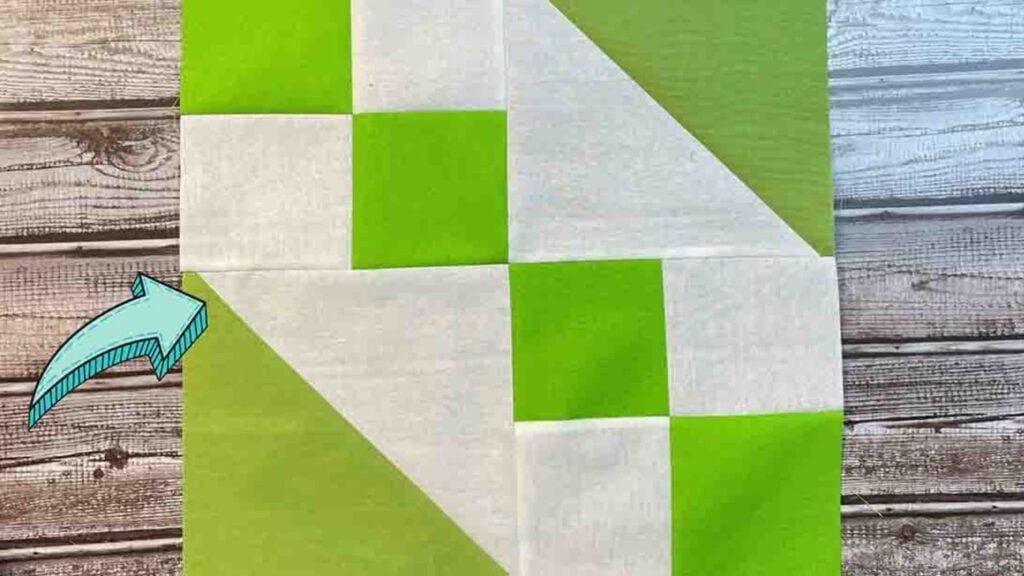
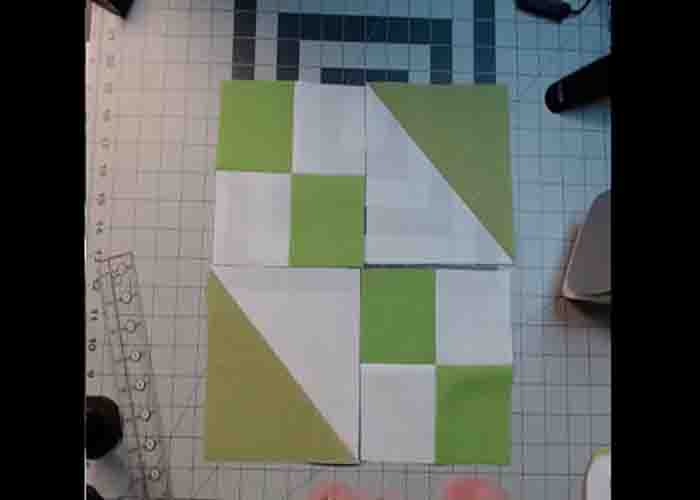
Now, trim down the half-square triangles to 6 1/2″, then start assembling the block. Lay one four-patch, then one half-square triangle beside it. Then, place the remaining units beneath them, the half-square triangle first, then the four-patch. (Refer to the image below for the placement.) Sew these pieces together, then press to create the railroad crossing block. Once done, just repeat these steps to create more blocks for your desired quilt size.
Railroad Crossing Quilt Block Tutorial


