Looking for the perfect Christmas sewing project? Look no further than this quilted Christmas stocking! Isn’t it cute? I absolutely love how it turned out. You can make one for each family member and customize them by adding their initials or names. If you want them to be extra, add some embellishments, like flowers, beads, or patches.
RELATED: DIY Corner Bookmark
It is super easy and fun to recreate. You can hang these Christmas stockings on your stairway, bed, dresser, door, window, coat hooks, or wall. Learn how to make one with Missouri Star‘s tutorial below. Happy quilting!
Here’s another fun project idea for you: Fabric Scraps Christmas Cards
Easy Quilted Christmas Stocking Materials
- 42 pieces of 2 1/2″ squares
- 2 pieces of 17″ x 12″ backing fabric
- 1 piece of 8″ x 16″ contrast fabric
- 17″ x 12″ scrap batting
How to Make a Quilted Christmas Stocking
Step 1:
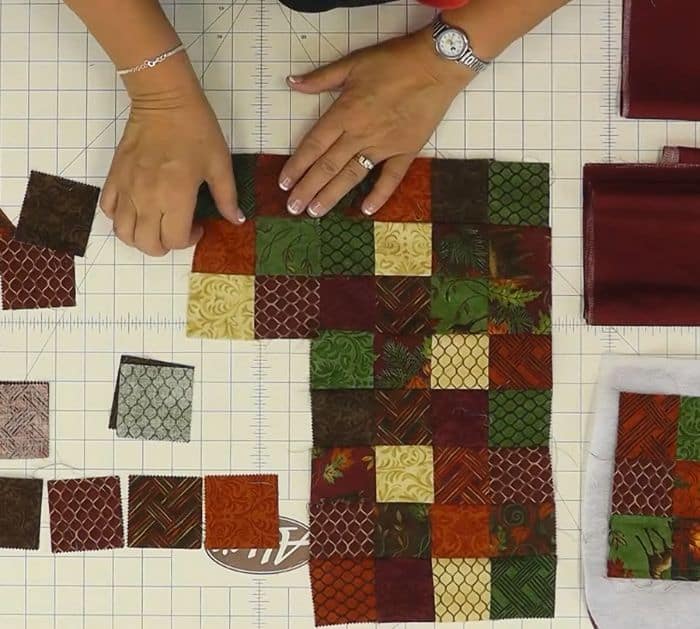
Arrange 8 rows with 4 squares each. Sew them in pairs, then sew the pairs together to make rows. Sew all rows together to make a rectangle. Press it flat.
Step 2:
For the toe, make 2 rows with 3 squares each. Sew them together to make a rectangle, then sew on the bottom right side of the rectangle. Now you have the stocking.
Step 3:
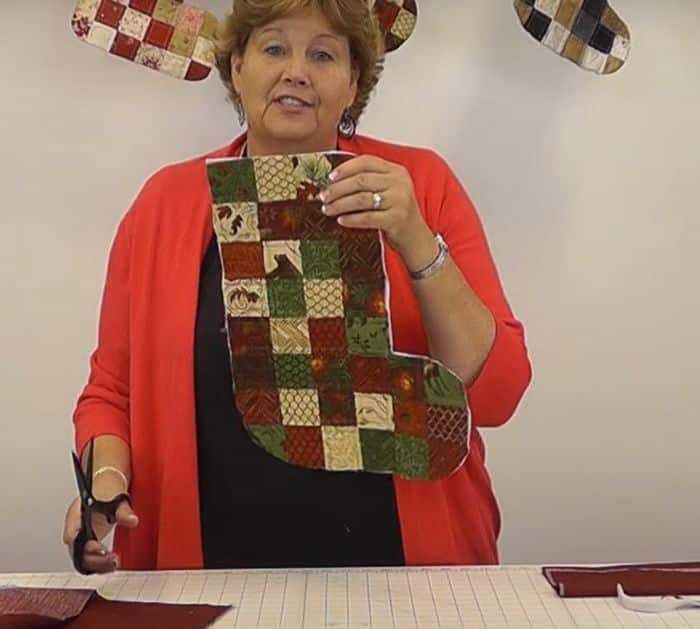
Place it on top of your batting and backing fabric. Pin it in place. Trim around the excess. Lay the presser foot right along the edge of the seam and then sew a row down. Sew on either side of the seam going vertically and horizontally. Trim the excess batting and background fabric. Round the toe and heel with a pair of scissors.
Step 4:
Place the stocking right side down on a background fabric. Pin it in place. Sew all the way around. Cut the excess background fabric. Flip it right side out.
Step 5:
Cut an 8×16″ background fabric. Fold it in half crosswise and iron. Open and fold lengthwise, right sides together. Sew the ends. Flip it, then insert it into your stocking. Sew all around the top edge of the stocking, making sure the back seams are lined up. Flip the cuff towards the top, and you are done.


