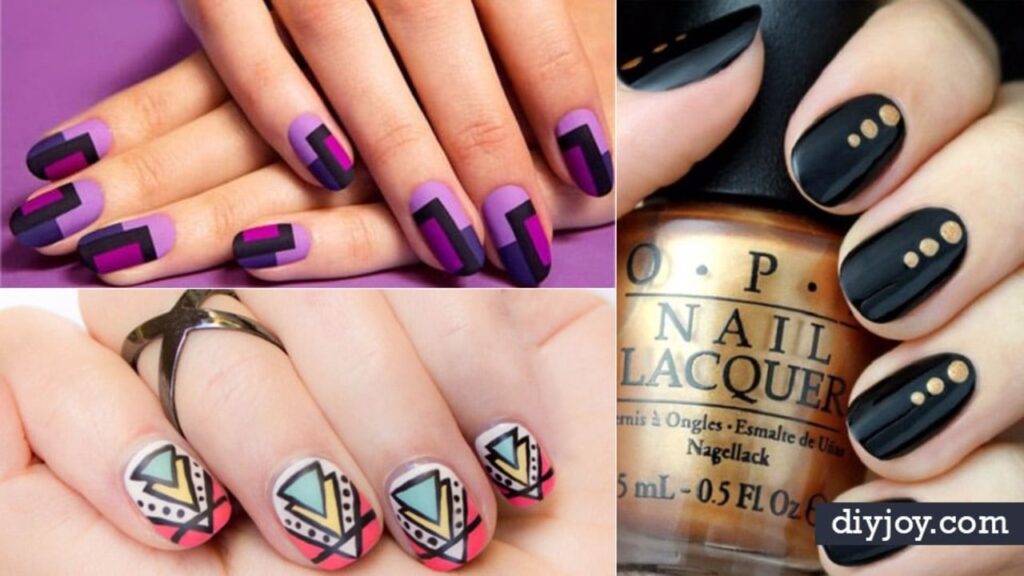
Fancy nails don’t need a salon appointment or a surgeon’s steady hand. These 30 quick nail art ideas lean on clever little shortcuts: a makeup sponge for galaxy and gradient effects, washi tape for a perfect heart or a crisp taped tip, netting for snake skin texture and a toothpick for water marbled daisies. Most start with polish already sitting in the bathroom drawer, plus a dotting tool, a toothpick or a roll of thin nail tape. There are cute seasonal designs like lemons, ladybugs and sugared stars, classy dotted French tips and copper chrome lines, bolder looks like flames and dripping paint, and even homemade tie-dye nail wraps and stamped designs for movie fans. Pick one design, practice it on a single accent nail, then work up to all ten once it feels easy. A glossy top coat at the end is the secret to making any of them last!
Quick DIY Nail Art Ideas
1. Romance Collection

Heart nail wraps are a no paint shortcut to Valentine’s Day nails. These overlay wraps have a clear background, so the base color shows through and the same set looks different on every polish. Paint the nails first, let them dry, then press the wrap on, file away the extra at the tip and seal with top coat. One design pairs red hearts on pale pink, and a metallic copper wrap from the same collection makes a shiny accent nail. A top coat can change the finish, so test one nail before doing all ten.
Get the full tutorial at lackfein.
2. Dotted French

A dotted French manicure swaps the usual white tip for a neat row of tiny white dots. Start with three coats of a sheer nude pink so the nails look clean and polished. Once dry, use a dotting tool to place small white dots along the free edge of each nail, following its curve. A final coat of sheer pink jelly over the top softens the dots so they look delicate rather than stark. It is a simple, classy look that works for the office, a wedding or any day a bold color feels like too much.
Get the full tutorial at The Polished Perfectionist.
3. Chrome Tips

Chrome tips are a fresh spin on the French manicure, painting a thin metallic copper line along the tip of a clean white base. Two coats of a soft white or pale gray creme go on first and dry fully. Then the brush from a mirror metallic polish is used on its own to sweep a slim copper band across the free edge of each nail, no stickers or guides required. A steady hand and a light touch keep the line crisp. The cool white and warm copper together look modern and polished.
Get the full tutorial at lackfein.
4. Mani Monday

This lemon manicure is one of the easiest summer nail designs around, done in four quick steps. Paint the thumb, index and pinky fingers a minty turquoise and the middle and ring fingers pure white. Use the back of a paintbrush to press small yellow dots onto the white accent nails for the lemons. Then use a mechanical pencil tip or fine tool to drag out two tiny green leaves on each lemon, one slightly bigger than the other. A clear coat locks in the fresh look.
Get the full tutorial at The Beauty Department.
5. DIY Galaxy Nails

DIY galaxy nails look complicated, but a makeup sponge does almost all the work. Paint every nail solid black and let it dry. Dab blue or purple polish onto a makeup sponge and press it onto the nails in patchy spots, then repeat with a clean sponge and a little white to make the cloudy nebula glow. Once dry, use a dotting tool or toothpick to add white star dots in different sizes. Finish with a coat of glitter polish for extra sparkle. A fun nail art idea to try with friends.
Get the full tutorial at DIY Projects for Teens.
6. DIY Flower Nail Art

DIY flower nail art made with water marbling gives each nail a swirl of color with white daisies floating on top. Drops of nail polish are layered in a cup of room temperature water so they spread into rings, then a toothpick drags the rings into a pattern before the nail is dipped through. Tape or liquid latex around the cuticle makes cleanup much easier. The same nail polish and water trick can marble glass jars, metal bowls and wooden gift tags, so leftover polish never goes to waste.
Get the full tutorial at DIY JOY.
7. Ombre Nail Art

Ombre nail art blends pink into white with nothing fancier than a makeup sponge. Paint the nails white and let them dry. Brush stripes of white and hot pink polish side by side onto a wedge sponge so the colors touch, then dab the sponge onto the nail, pressing a few times to build the fade. Repeat until the gradient looks smooth. Clean the skin around the nail with remover on a brush, then finish with a glossy top coat. A silver glitter accent nail makes the soft pink fade sparkle.
Get the full tutorial at Beautylish.
8. Washi Tape Glitter Heart

A washi tape glitter heart gives a perfect heart shape every time, because the tape works like a custom stencil. Paint the nails red and let them dry for a few hours or overnight. Fold a short piece of washi tape in half with the ends open, cut half a heart from the fold with small scissors, then open it up. Press the stencil onto the nail, paint metallic gold inside, add gold glitter on top and peel the tape away while it is wet. Washi tape is less sticky, so it will not lift the base color.
Get the full tutorial at The Beauty Department.
9. Flame Manicure

Flame manicure decals are made on a plastic sandwich bag, then peeled off and placed on the nail. Use white polish or a nail art pen to draw ten small flame shapes on the baggie, sized to fit each nail, and fill them in. Once dry, outline the edges in red, add orange inside the red, and fill the center with yellow, letting each layer dry. Paint the nails in black or teal, peel each flame off the bag and press it onto the wet base. Seal with quick drying top coat.
Get the full tutorial at Hey Wanderer.
10. Ladybug Nail Art

Ladybug nail art is freehand but beginner friendly. Start with a base coat and two coats of a bright red. Use a striper brush to paint a black line marking the ladybug’s face near the tip, then fill in the tip with black polish. Paint a thin black line down the center of the nail for the wings, and add black spots on either side with a dotting tool. Two white dots at the tip become the eyes, and a tiny black dot on each one makes them extra cute. Seal with top coat.
Get the full tutorial at Casa de Polish.
11. Snake Skin Nail Art

Snake skin nail art gets its scaly texture from a piece of netting and a makeup sponge. Apply a base coat, then a base color, a spring green here, and let it dry. Wrap a piece of netting tightly over the nail. Paint a contrasting polish, such as a metallic gold, onto a cosmetic sponge and dab it lightly over the netting. Let it dry for a few seconds, lift the netting away, and a textured scale pattern stays behind. A glossy top coat gives it a sleek reptile shine. Netting with larger holes makes bigger scales.
Get the full tutorial at A Little Bit of Everything.
12. Dripping Paint Nail Art

Dripping paint nail art plays with matte and glossy finishes so the drips look wet. Start with a base coat, then paint the nails a sheer pink. Add a matte top coat and let it dry so all the shine is gone. Use a big dotting tool to place two or three long drips coming down from the cuticle, then a smaller dotting tool to connect them with curved lines and fill in the gaps. Finish with a glossy top coat on the drips only, which makes them look freshly poured against the matte nail.
Get the full tutorial at DIY Projects for Teens.
13. Romantic Floral Mani DIY

A romantic floral mani uses a toothpick to swirl polish into tiny roses. After a base coat, apply two coats of white to every nail. Working one nail at a time, place small light pink circles randomly on the nail, then add slightly smaller dark pink dots on top while the first color is wet. Swirl the two pinks together with a toothpick into soft rose shapes. Dab green polish on paper, and with the other end of the toothpick, swipe it out from each flower to make thin leaves. Finish with top coat.
Get the full tutorial at michellephan.com.
14. Sugared Stars and Stripes Nail Art

Sugared stars and stripes nail art mixes smooth stripes with sparkly textured stars. Paint a lilac base, then use a nail art brush to add three dark purple stripes with space between them, and fill the gaps with yellow. Top coat the stripes now, since the textured stars stay uncoated. Paint a textured sugar polish onto wax paper, let it dry fully, then punch out stars with a star shaped hole punch from the craft store. Lay painter’s tape on the nail, tack each star down with a dab of polish and press gently.
Get the full tutorial at Chalkboard Nails.
15. Refined Gradient Nails

Refined gradient nails use a simple sponge technique for a smooth color fade. Paint the nails in the lighter of two colors and let them dry. On a plastic sheet, put a puddle of each polish side by side so the edges touch, then mix them at the meeting point with a toothpick. A longer blend zone gives a softer gradient. Dab a flat makeup sponge into the polish and press it onto the nail, repeating as needed and letting each layer dry. A top coat smooths the texture, and remover on a cotton swab cleans the edges.
Get the full tutorial at AllDayChic.
16. Cookie Crisp Lines

Cookie crisp lines pair a speckled base with bold taped stripes. Start with an opaque white polish, then add a coat of a cookies and cream style polish full of tiny black flecks so the white underneath keeps it bright. Once it is completely dry, lay strips of tape to mask a band across each nail. Paint stripes of a soft misty blue and a papaya orange inside the gap, then add thin black lines with a small striping brush. Peel the tape away carefully to reveal crisp, clean edges.
Get the full tutorial at Nailed It.
17. Easy Optical Illusion Nail Art

This one looks like it took hours, and it really is just lines. Paint the nails white, leaving the ring finger and thumb for a contrast color, then put a small black dot in the center of each white nail. A thin Y shape off that dot splits the nail into three sections, and each section gets its own set of straight or curved lines. Wobbly lines still read as a cool swirl, which is the best part. Tiny studs along the cuticle are an optional extra before the top coat.
Get the full tutorial at DIY Projects for Teens.
18. Fool-Proof Taped Tip Manicure

Short on time and steady hands? This taped tip manicure takes about 10 minutes and never goes near the cuticles. Tape off the ends of the nails straight across with washi tape (scotch tape works too), pressing it down firmly so no polish sneaks under. One or two coats of color go on the tips, and the tape peels off while the polish is still wet. Finish with a top coat over the whole nail, because a top coat really does make it last days longer.
Get the full tutorial at Lemon Thistle.
19. Cat Face Nail Decals
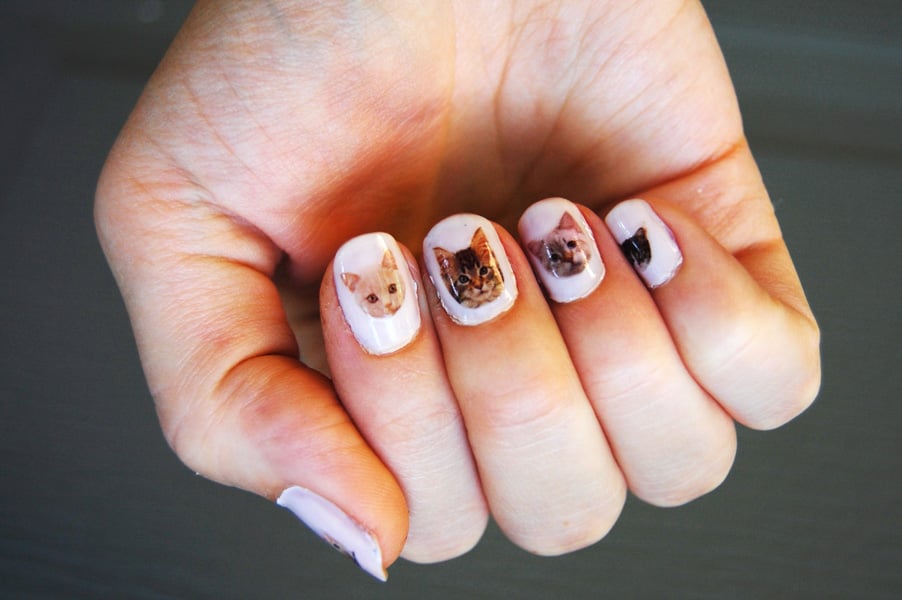
Anything that prints can go on a nail, and these cat face decals prove it. The secret is printable rub-on transfer paper. Cat faces are sized to fit the nails, printed on the matte side of the transfer film, then covered with the clear adhesive film and cut out close to the design. Paint the nails a light neutral first, then peel off the backing, place each decal face down and rub it gently to bond. It works a lot like a temporary tattoo, and an anti-chip top coat seals it in.
Get the full tutorial at DIY in PDX.
20. DIY Tie-Dye Nail Wraps

Homemade nail wraps are such a clever trick, especially for anyone who struggles to paint with the other hand. Fake nails get traced onto parchment paper, filled with a thick coat of white polish, then covered in little spiral strokes of rainbow colors with a nail art brush. After an hour of drying, the wraps peel right up with tweezers. Each one goes on over a wet base coat, gets pressed down, then filed to fit and sealed with top coat. The same method works for any design (so the possibilities are endless).
Get the full tutorial at Aww Sam.
21. 90s Throwback Manicure

Smiley faces, aliens, slime drips, paint splatters and a yin yang, all on one hand. Each nail gets its own bright base color, then black, green and white nail art pens draw the designs right on top. A toothpick adds the smiley’s pink tongue, cleans up the alien’s eyes and flicks on the paint splatter dots. The designs mix and match, so a whole hand of aliens is fair game. It’s a fun throwback that even beginners can pull off.
Get the full tutorial at Aww Sam.
22. Easy Metallic Striped Nail Art

Thin metallic nail tape is so cheap, and it does all the hard work here. After two coats of a bright color dry completely, short pieces of tape get pressed on at an angle from the cuticle and trimmed to the nail with small scissors. Three tape colors with a little space between them make a sharp diagonal stripe, and flipping the direction on the other hand is a cute touch. A top coat seals the tape so it lasts a few days.
Get the full tutorial at Club Crafted.
23. Easy 4th of July Stars and Stripes Manicure
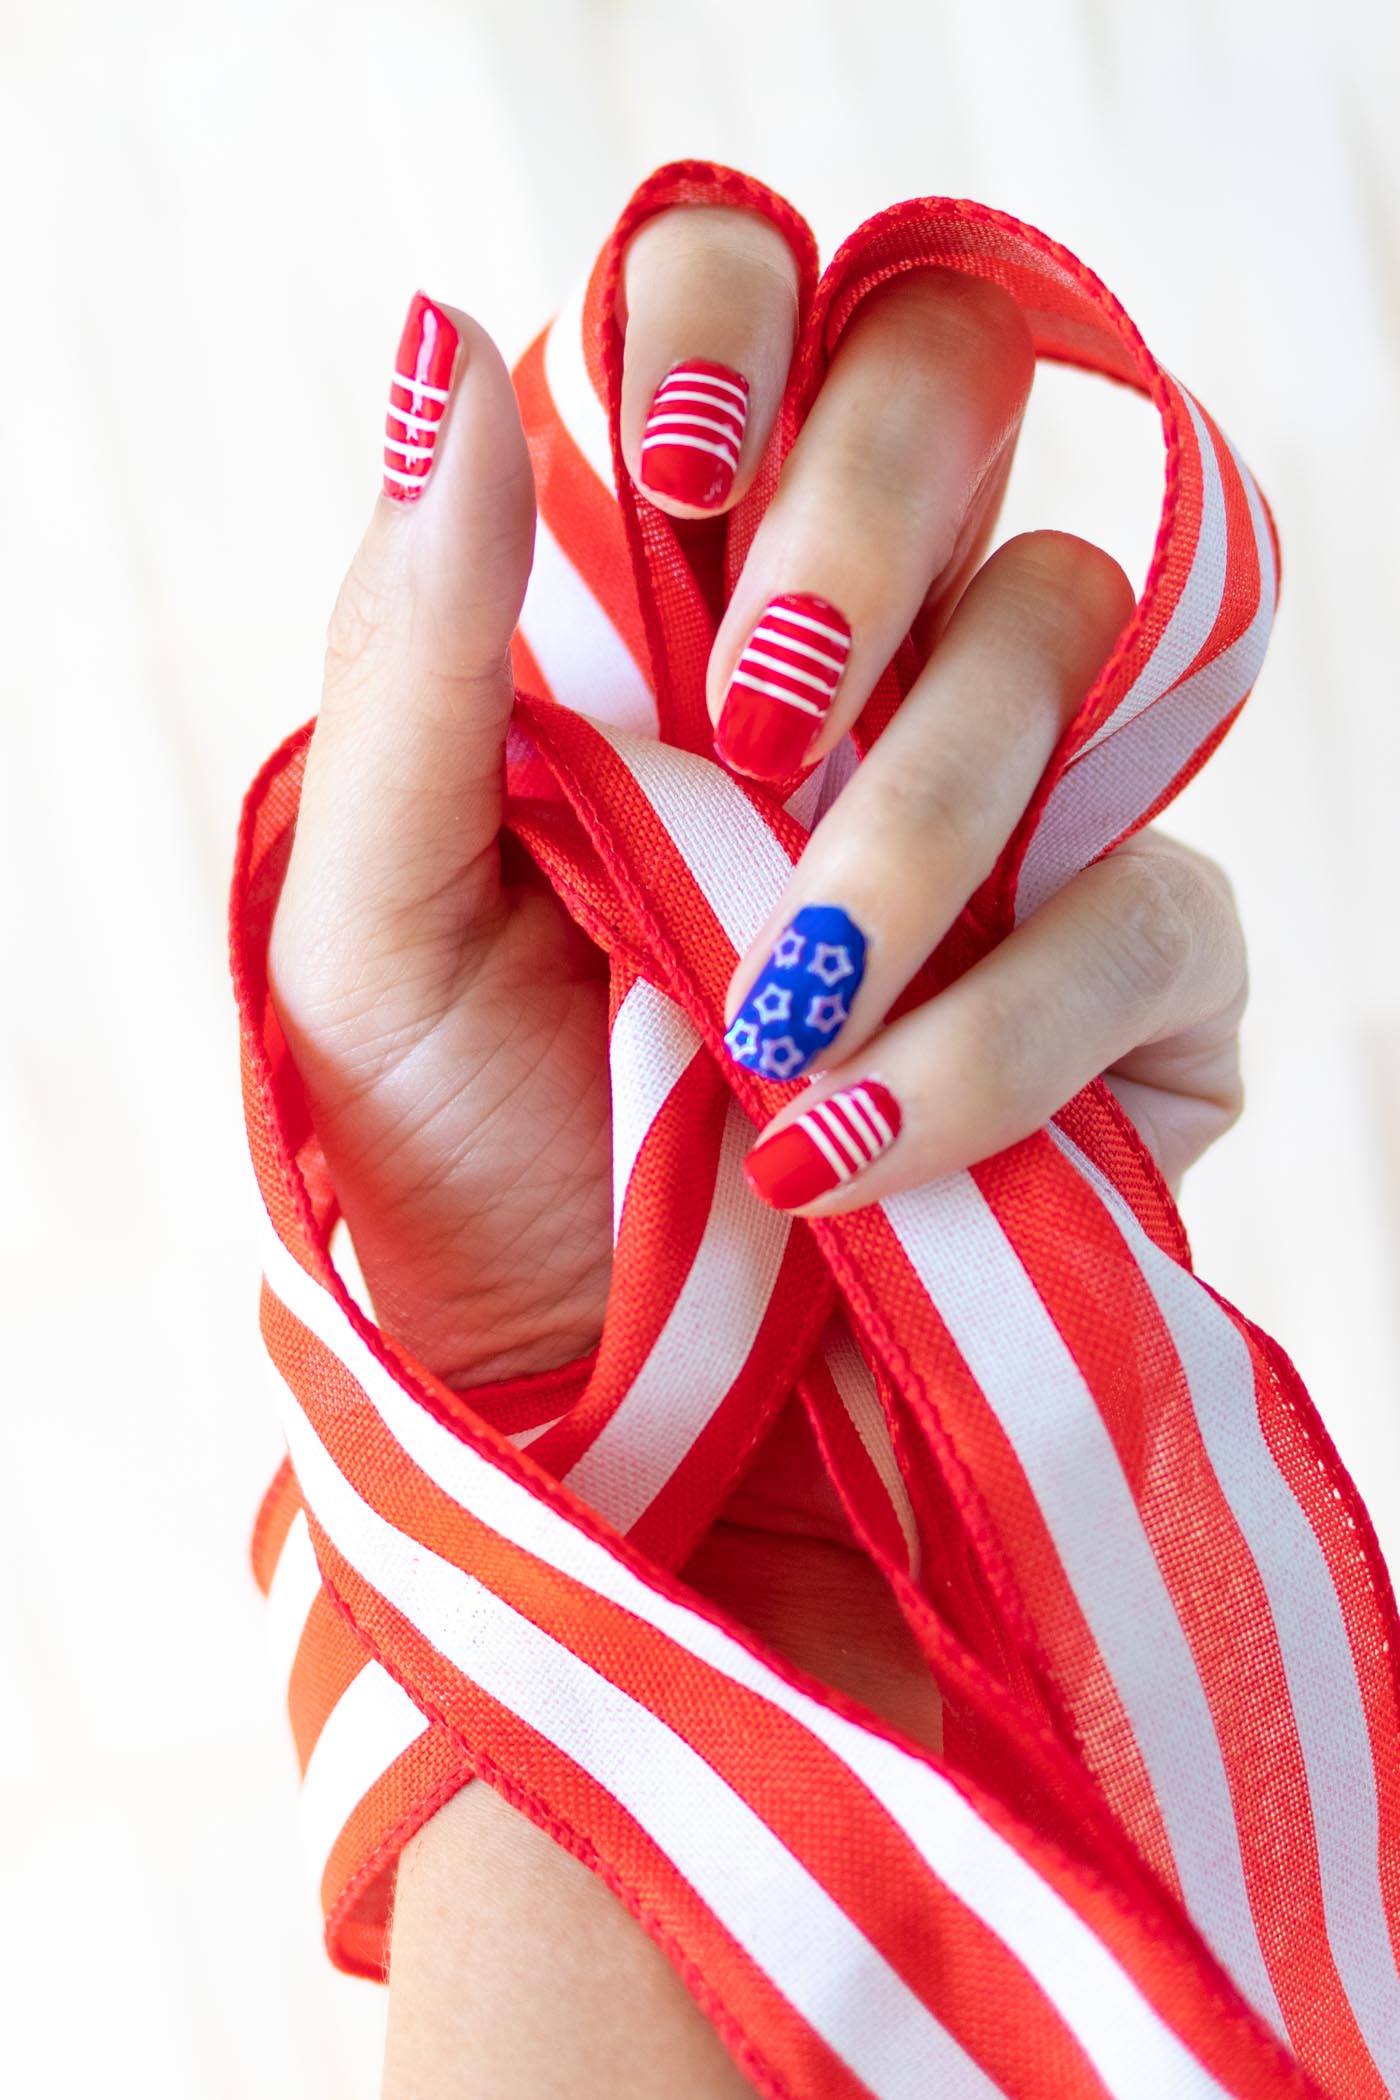
Stars and stripes the easy way, with tape doing the striping. Paint the nails white (skipping the ring fingers), add thin strips of nail tape across them once dry, then cover everything in a thick coat of red. Pull the tape off right away with tweezers, one nail at a time, so it lifts cleanly and leaves crisp white stripes. The ring fingers go blue, and tiny glitter stars are pressed into the wet polish. A top coat holds the stars in place.
Get the full tutorial at Club Crafted.
24. Easy Wide Stripe Nail Art
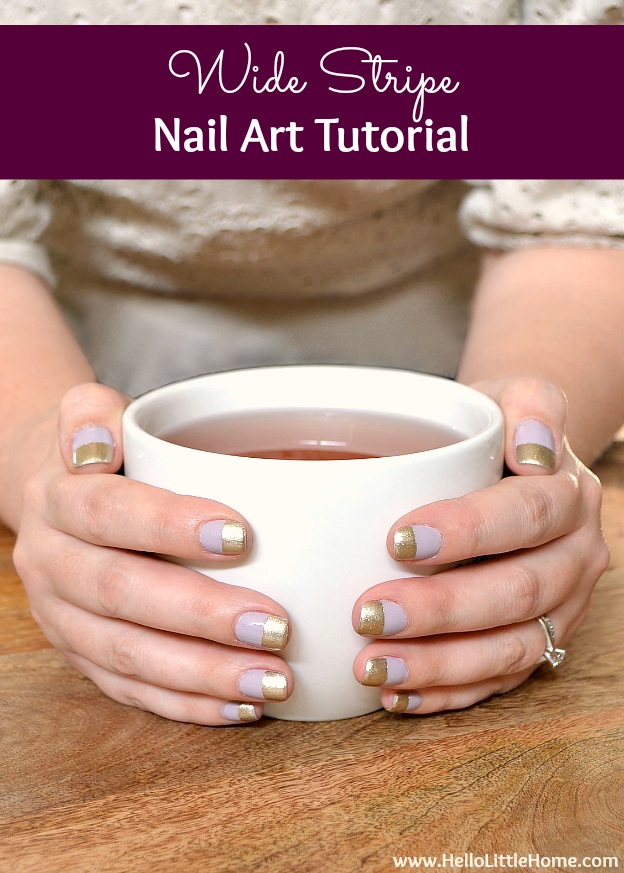
One wide band of color makes a big impact, and no special tools are needed. A base color goes on first and has to be completely dry (hard as a rock) before any tape touches it. A strip of tape goes across each nail about halfway, then the second color is brushed on toward the tip so it doesn’t seep under. Peel the tape while that coat is still wet, clean up the edges with polish remover and seal with a fast drying top coat. A lilac and gold combo is so pretty for the holidays.
Get the full tutorial at Hello Little Home.
25. Easy Polka Dot Nail Art
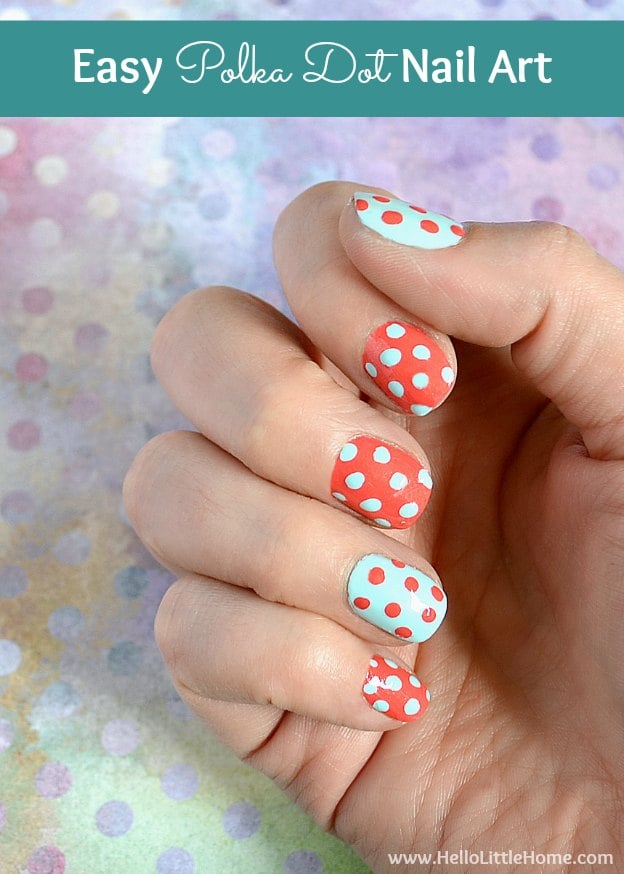
Polka dots are the perfect first step into nail art, and the only special tool is a dotting tool. Pick one light and one dark polish, then paint the thumb and ring finger light and the rest dark. A little polish goes onto a palette, the dotting tool dips in, and each dot forms with a light touch. Light dots go on the dark nails and dark dots on the light ones. Load the tool with plenty of polish and let the dot form on its own. Coral and mint look so cheerful together!
Get the full tutorial at Hello Little Home.
26. Harry Potter Stamped Nails
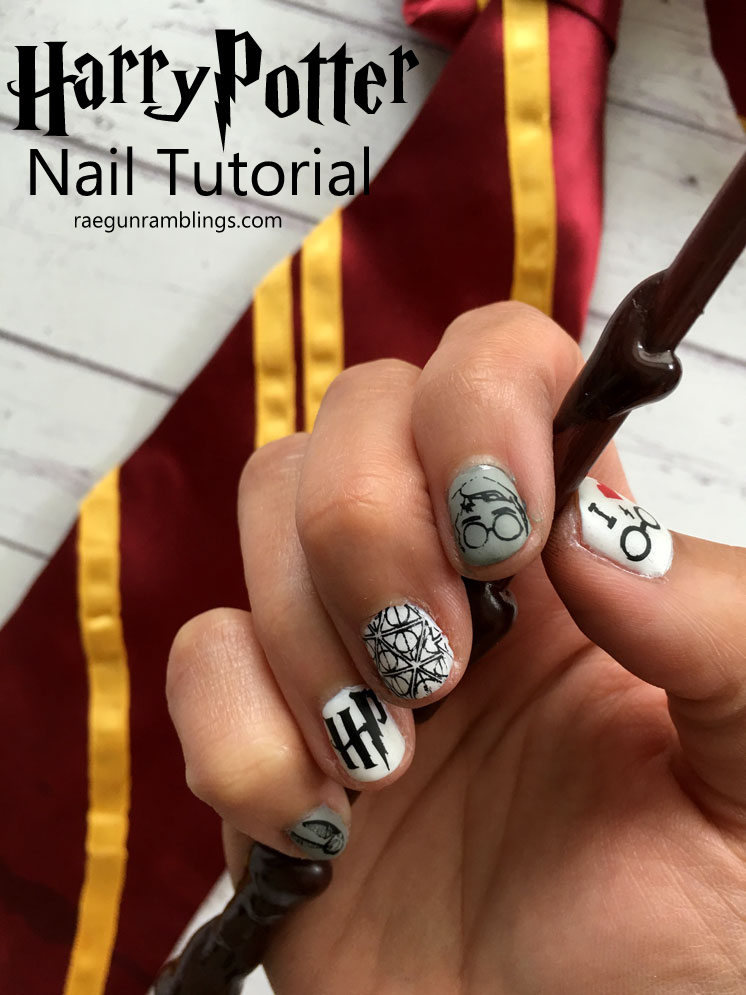
Lightning bolt scars, round glasses and the Deathly Hallows, with zero freehand painting. The trick is nail stamping, so no artist skill is needed. Each nail gets a base coat and a white or gray polish, then the designs are stamped on with a Harry Potter stamping plate, black and red stamping polish, a scraper and a double headed stamper. A stamping friendly top coat goes on next, then a matte top coat for that storybook look. There’s a small learning curve with pressure, and the page includes a video.
Get the full tutorial at Rae Gun Ramblings.
27. Grease Lightning Stamped Nails
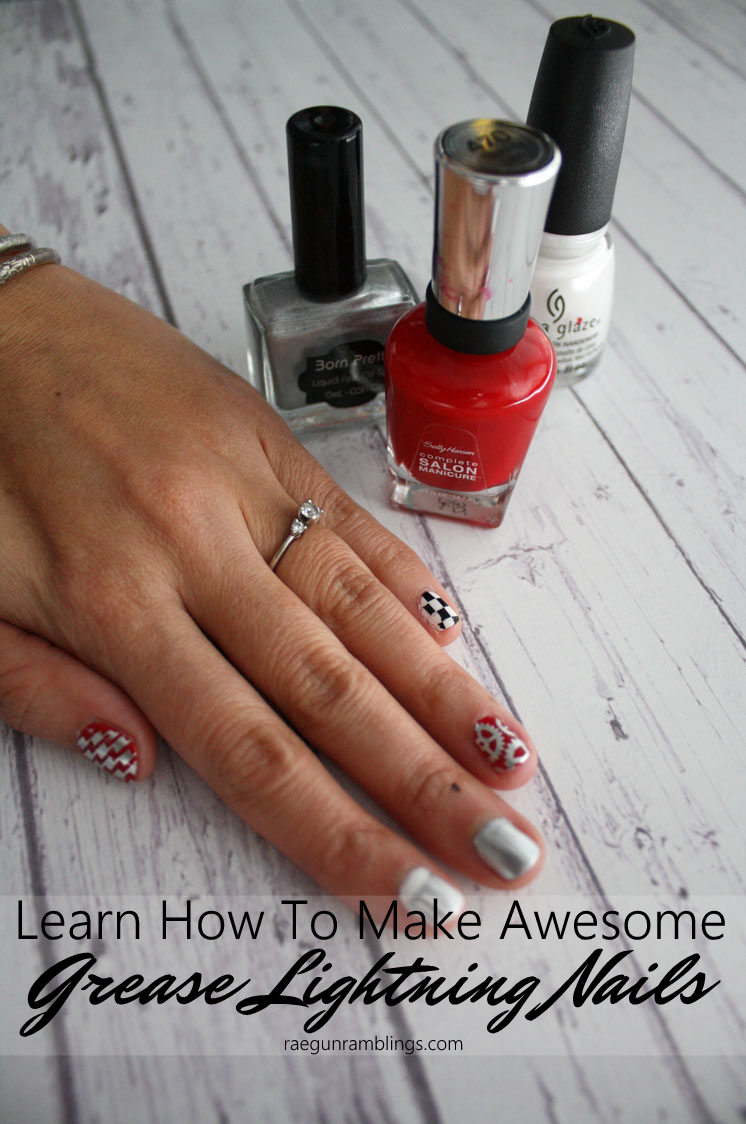
Checkered flags, lightning bolts, gears and car grills look like they took a steady hand, but they’re stamped. After a base coat and two coats of color on each nail, stamping polish goes on the plate and the excess is swiped off at a 45 degree angle. A rolling motion picks up the design with the stamper and rolls it onto the nail. Clean up any bits on the skin with acetone, then seal with a stamping friendly top coat. The swipe takes practice, so plan a couple of tries.
Get the full tutorial at Rae Gun Ramblings.
28. DIY Brush Stroke Abstract Mani
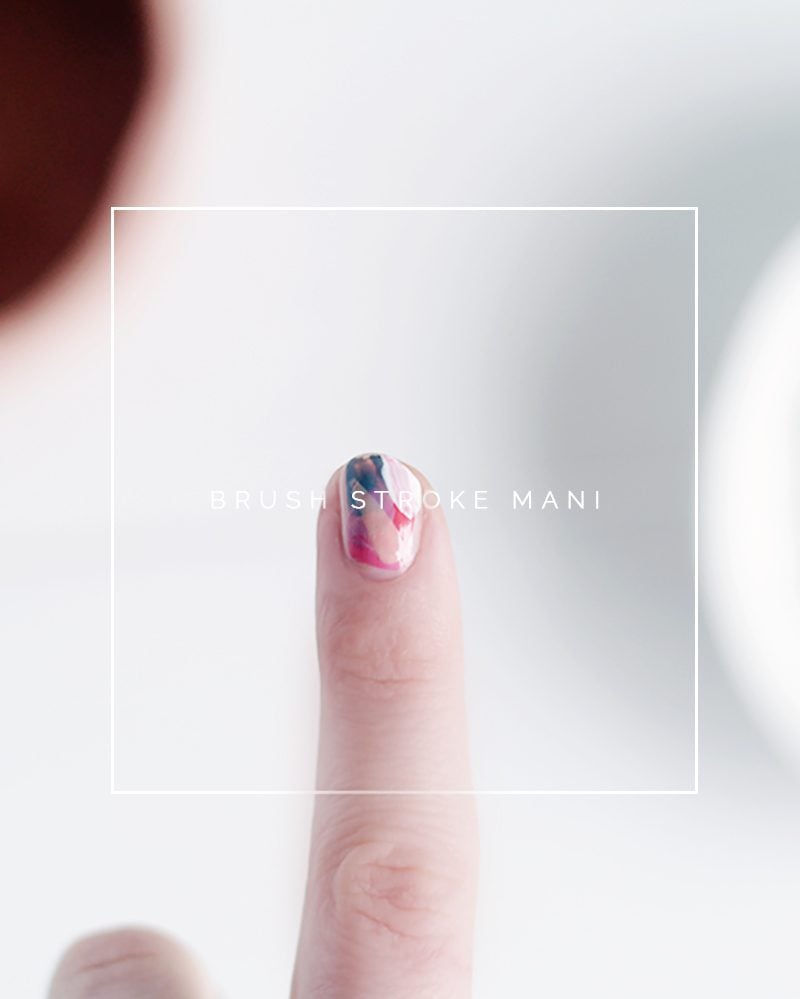
Messy on purpose, and that is exactly the charm. A base coat close to the skin tone goes on first, then an old, inexpensive paint brush adds irregular strokes of color randomly across each nail. Start with the darker colors and build up with lighter ones on top, cleaning the brush in polish remover between colors. There’s no need to wait for each stroke to dry, because the colors blending creates its own pattern. A top coat finishes this little piece of wearable art.
Get the full tutorial at Fall For DIY.
29. Abstract French Tip Manicure with Dots
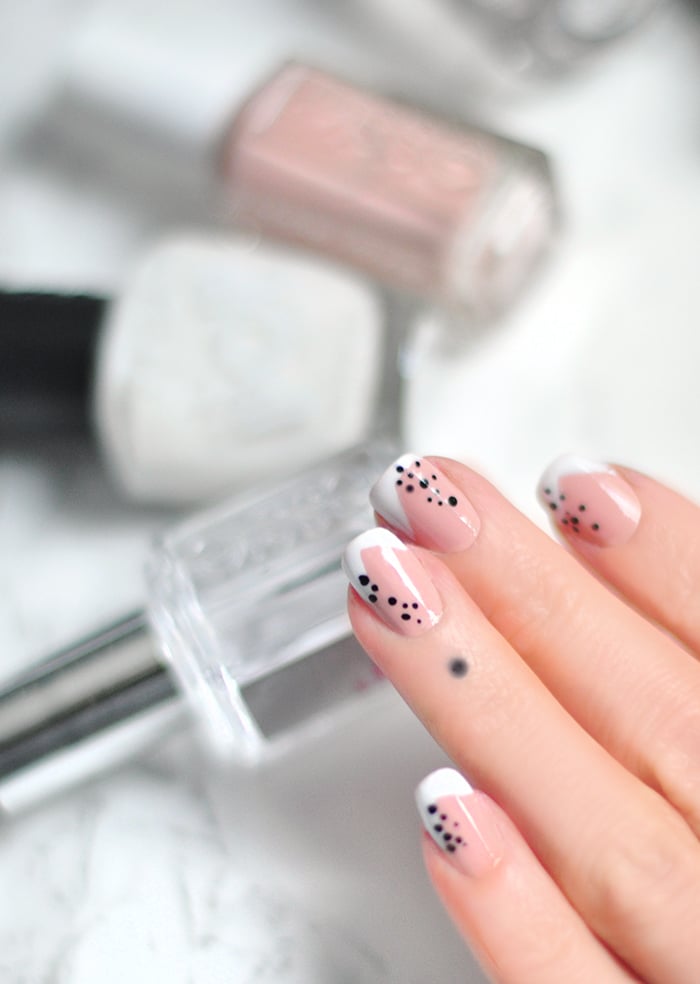
The French tip is back, and this version feels fresh and modern. Two thin coats of a quick dry flesh tone polish go on first. Then each white tip gets its own geometric shape, some with finer lines and some more angled, running a little down the sides. After a coat of gel setter, tiny black dots are tapped on with a fine nail art pen (or a toothpick and black polish), clustered toward the sides in different sizes. A glossy top coat seals it.
Get the full tutorial at Love Maegan.
30. Rainbow Dotted French Tip Nails
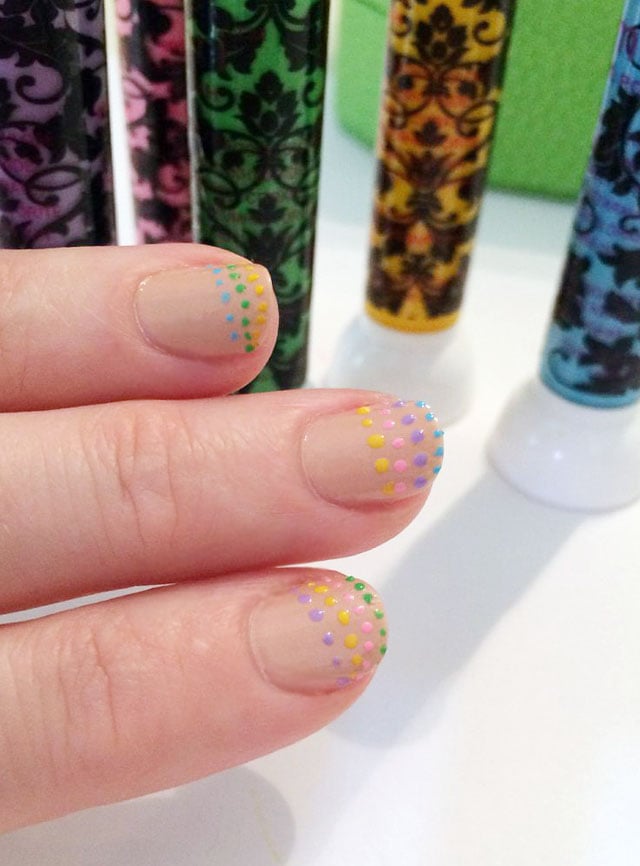
A rainbow French tip made of nothing but tiny dots. Start with three coats of a nude or beige polish and let it dry. Then dot on rows of color beginning at the tip, using thin nail art polishes or a dotting tool with any polish. Stop at a rainbow French tip or keep going down the whole nail. The bright colors soften into sweet pastels against the nude base, which makes it perfect Easter nail art. Finish with a favorite top coat.
Get the full tutorial at Love Maegan.