Here’s a another simple, fun DIY project tutorial for you. This was actually my Sunday afternoon project and I’m so excited how it turned out!
I love this DIY ribbon pearl bracelet for its classic girly look and of course, how easy it is to do! It works well as a stand alone bracelet or even stacked with some other bracelets for arm party.
It’s a very elegant piece, and I think it would look fabulous worn at a more formal event such a wedding!
There are so many ways to change up the appearance of this bracelet by the type of beads and color of ribbon you use…so many options for this easy craft project.
I can’t tell you how many of these I’ve made and given as gifts. People love these are are so excited to receive them. There’s something that’s so special about receiving a gift that someone has spent time, effort and thought doing for you.
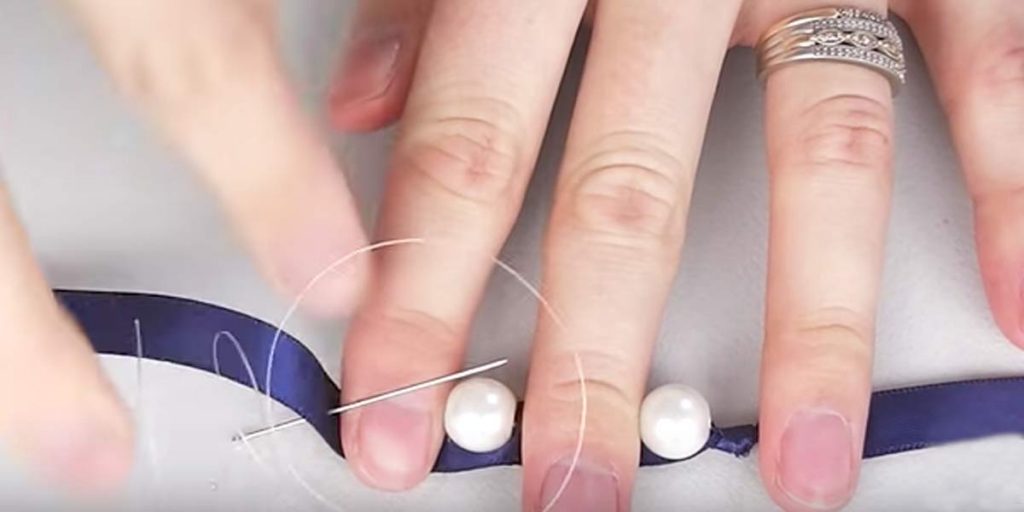
Materials Needed for this ribbon pearl bracelet:
– You will need approximately 20 inches of ribbon – about 3 times the length of your wrist.
– Pearls or beads. I’ve used 12mm beads
– Stretch cord or stringing material
– A needle
Watch how Style Novice makes this cool bracelet in her step by step tutorial.