Paper is the only craft supply that is already in your house, costs almost nothing when you do buy it, and forgives every mistake you make with it, because the fix is another sheet. These paper crafts run the whole range: origami bowls that hold paper clips, a cut paper chandelier hung on invisible thread, quilled dragonflies made from coiled strips thinner than a shoelace, roses rolled out of crepe paper in ten minutes, pinwheels that genuinely spin, and a bracelet folded from last week’s watercolor paintings. Some need nothing but scissors and a glue stick. A few want a cutting machine and a free evening. Start with whatever is in the printer tray and see how far it goes.
1. DIY Geometric Bowls
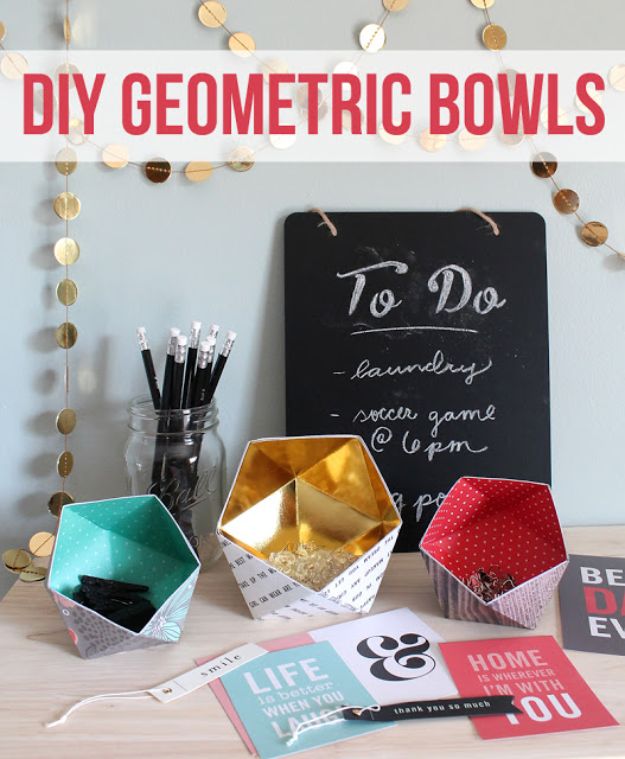
Hexagonal origami bowls folded from scrapbook paper, with a second sheet folded inside out and slotted in as a lining, so the pattern shows outside and the metallic shows within. The template prints onto the back of the paper, which is the step that makes this work: every fold line is already drawn. Cut two 12 by 12 sheets down to letter size, print, cut around the hexagon, fold, then glue the numbered triangles over one another. Leave two flaps of the outer piece unglued so the liner can be dropped in before the bowl is closed up.
Get the full tutorial at The Craft Patch.
2. DIY Pocket Fan
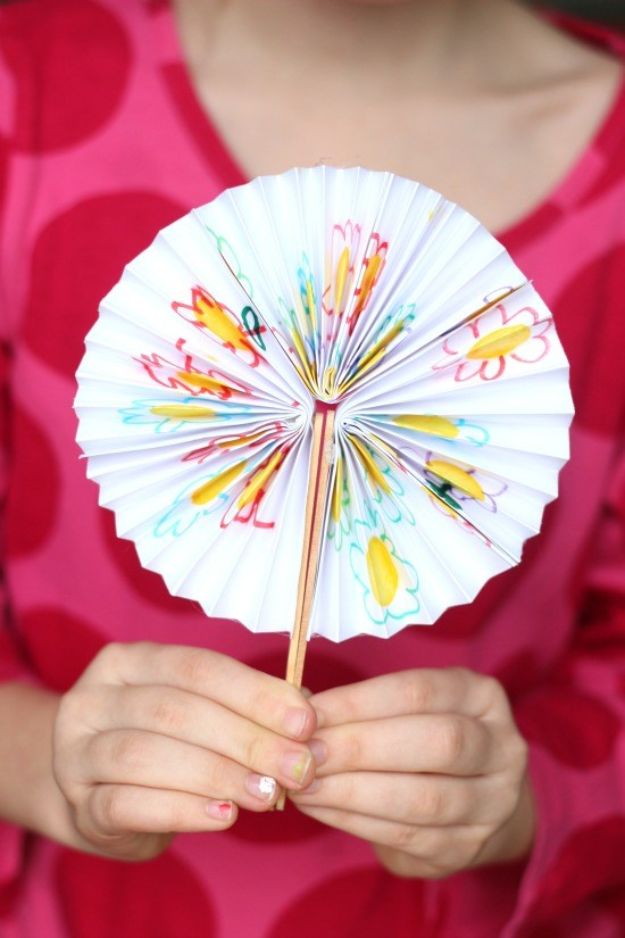
An accordion folded paper fan that closes onto itself and rides in a pocket, made from three 5 by 8 inch rectangles of ordinary copy paper. Score every half inch before folding, which is the difference between neat pleats and a mess, and matters most if a child is doing the folding. Accordion fold all three, fold each in half, then glue them edge to edge until one seam is left. A craft stick glued to each outer face becomes the handle, and a mini hair band slipped over the closed pair holds the whole thing shut.
Get the full tutorial at Glue Sticks Blog.
3. Paper Roses For Beginners
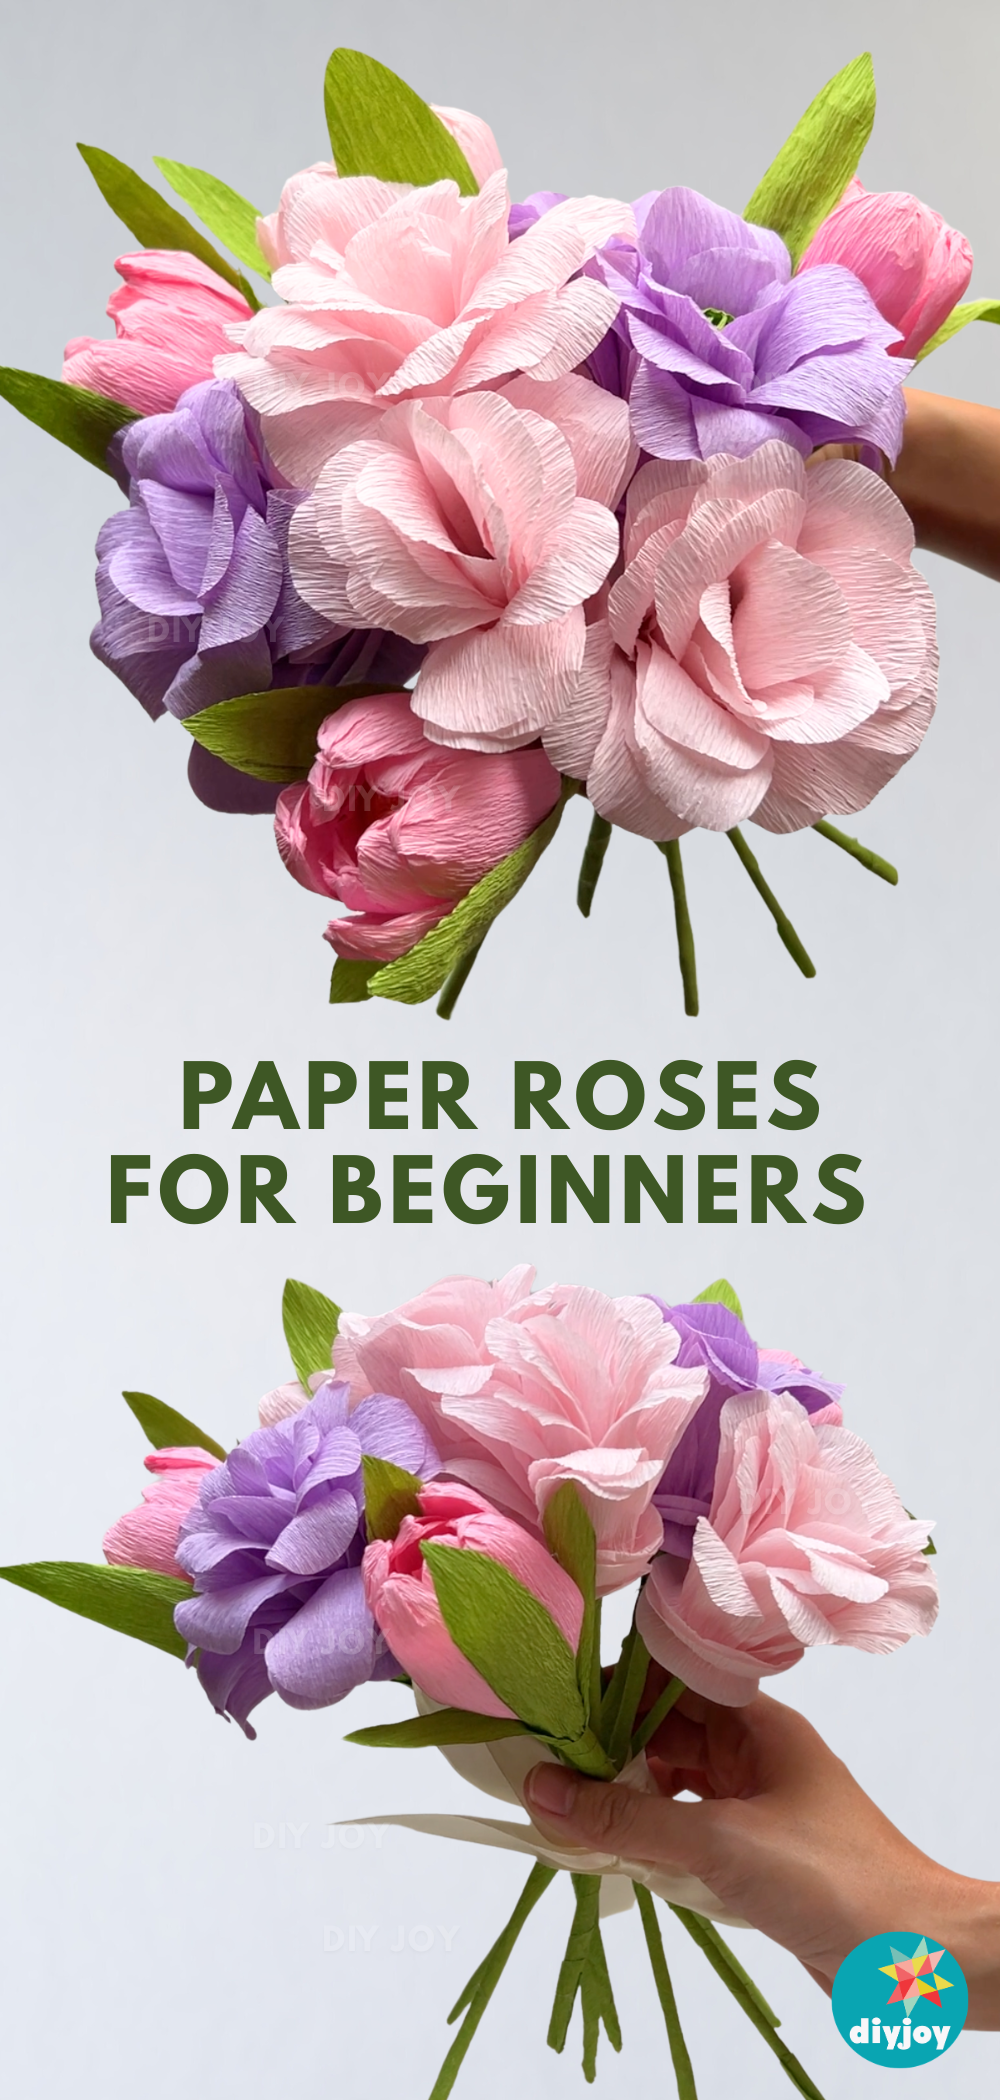
Crepe paper roses that take about ten minutes each once the technique clicks, and there is not a single cut petal involved. One long strip of pink crepe paper, one strip of green and a wooden skewer is the entire supply list. The strip is rolled and shaped as it goes, which is why this version suits a beginner when most rose tutorials do not: nobody is cutting forty identical petals before the first flower exists. Gathered into a bouquet with paper tulips for height, they read as florist flowers from a step back.
Get the full tutorial at DIY Joy.
4. Fruity Paper Medallions
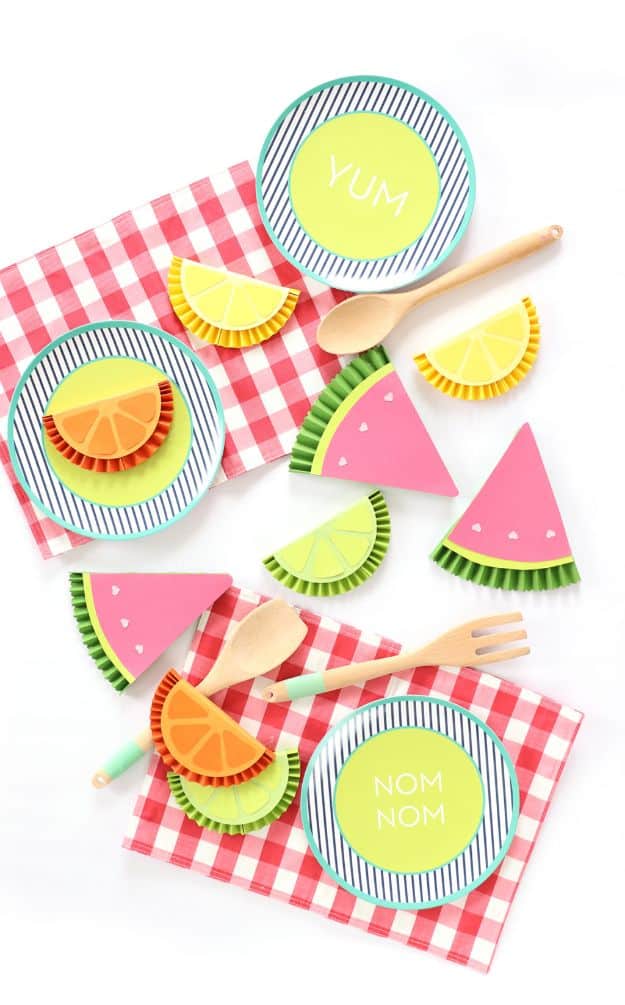
Accordion folded cardstock medallions cut into citrus slices and watermelon wedges, which sit on a table as party decor or go home as favors. The citrus starts as three inch strips of orange cardstock scored every half inch, accordion folded and glued, with half a craft stick fixed to the underside of each end so the fold can be pulled round into a circle. A five inch circle on the front and a four inch circle cut into wedges finishes it. The watermelon version uses a scalloped punch for the rind and tiny punched hearts as seeds.
Get the full tutorial at Amber Kemp-Gerstel at Damask Love.
5. DIY Paper Gift Bows
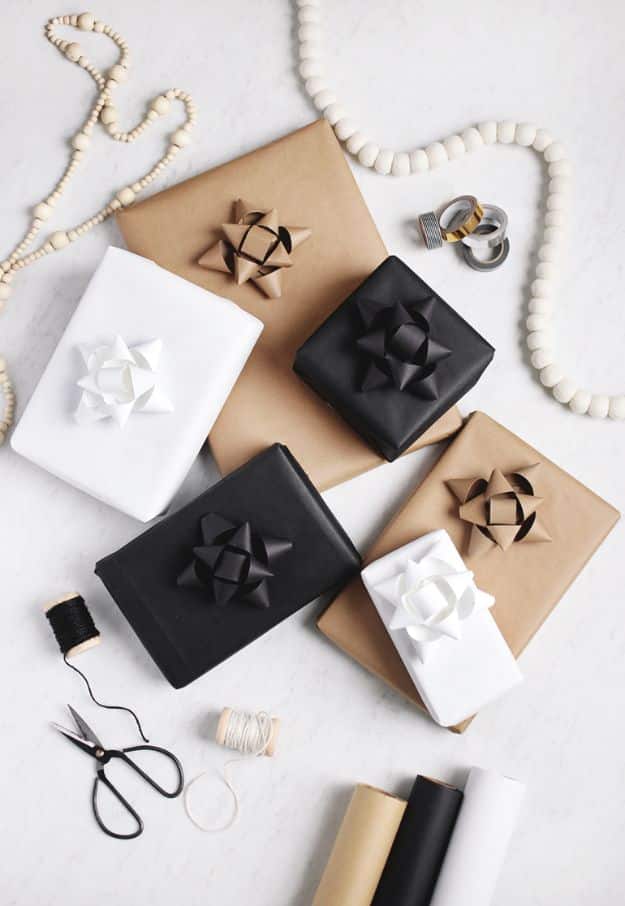
Gift bows folded from strips of the same paper the present is wrapped in, so a kraft parcel gets a kraft bow and a black one gets black. The supply list is paper, a paper cutter and tape, nothing else. Cut four strips at one by six inches, four at one by five and one at one by four. Fold each of the longer strips into a loop and tape the back. Pair the small loops, nest them inside one another, add the larger loops behind, then roll the last strip into a circle for the center.
Get the full tutorial at Manda at The Merrythought.
6. Paper Succulent Centerpiece
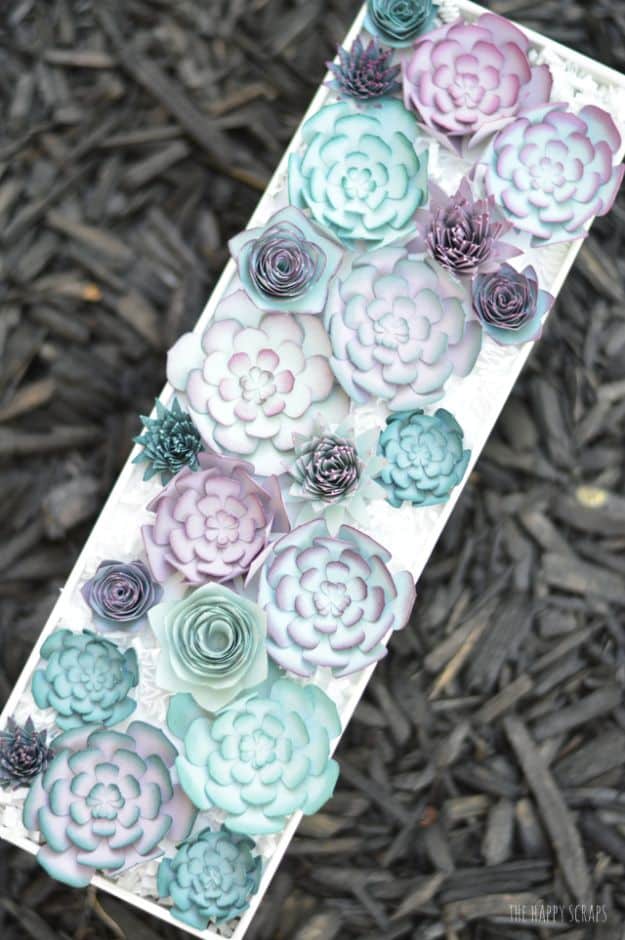
A long tray packed edge to edge with layered paper succulents in dusty teal, lilac and pale green, which reads as a real planter from a step away. The petals are cut on a machine, then every edge is inked with a dauber before assembly, and that is the step doing all the work: the ink shades each layer slightly differently so no two rosettes match. Curl the edges afterward, then hot glue the layers up. A block of white foam core cut to fit the container gives every succulent something to push into.
Get the full tutorial at The Happy Scraps.
7. Aesthetic Paper Flower Bouquet With Paper Towels
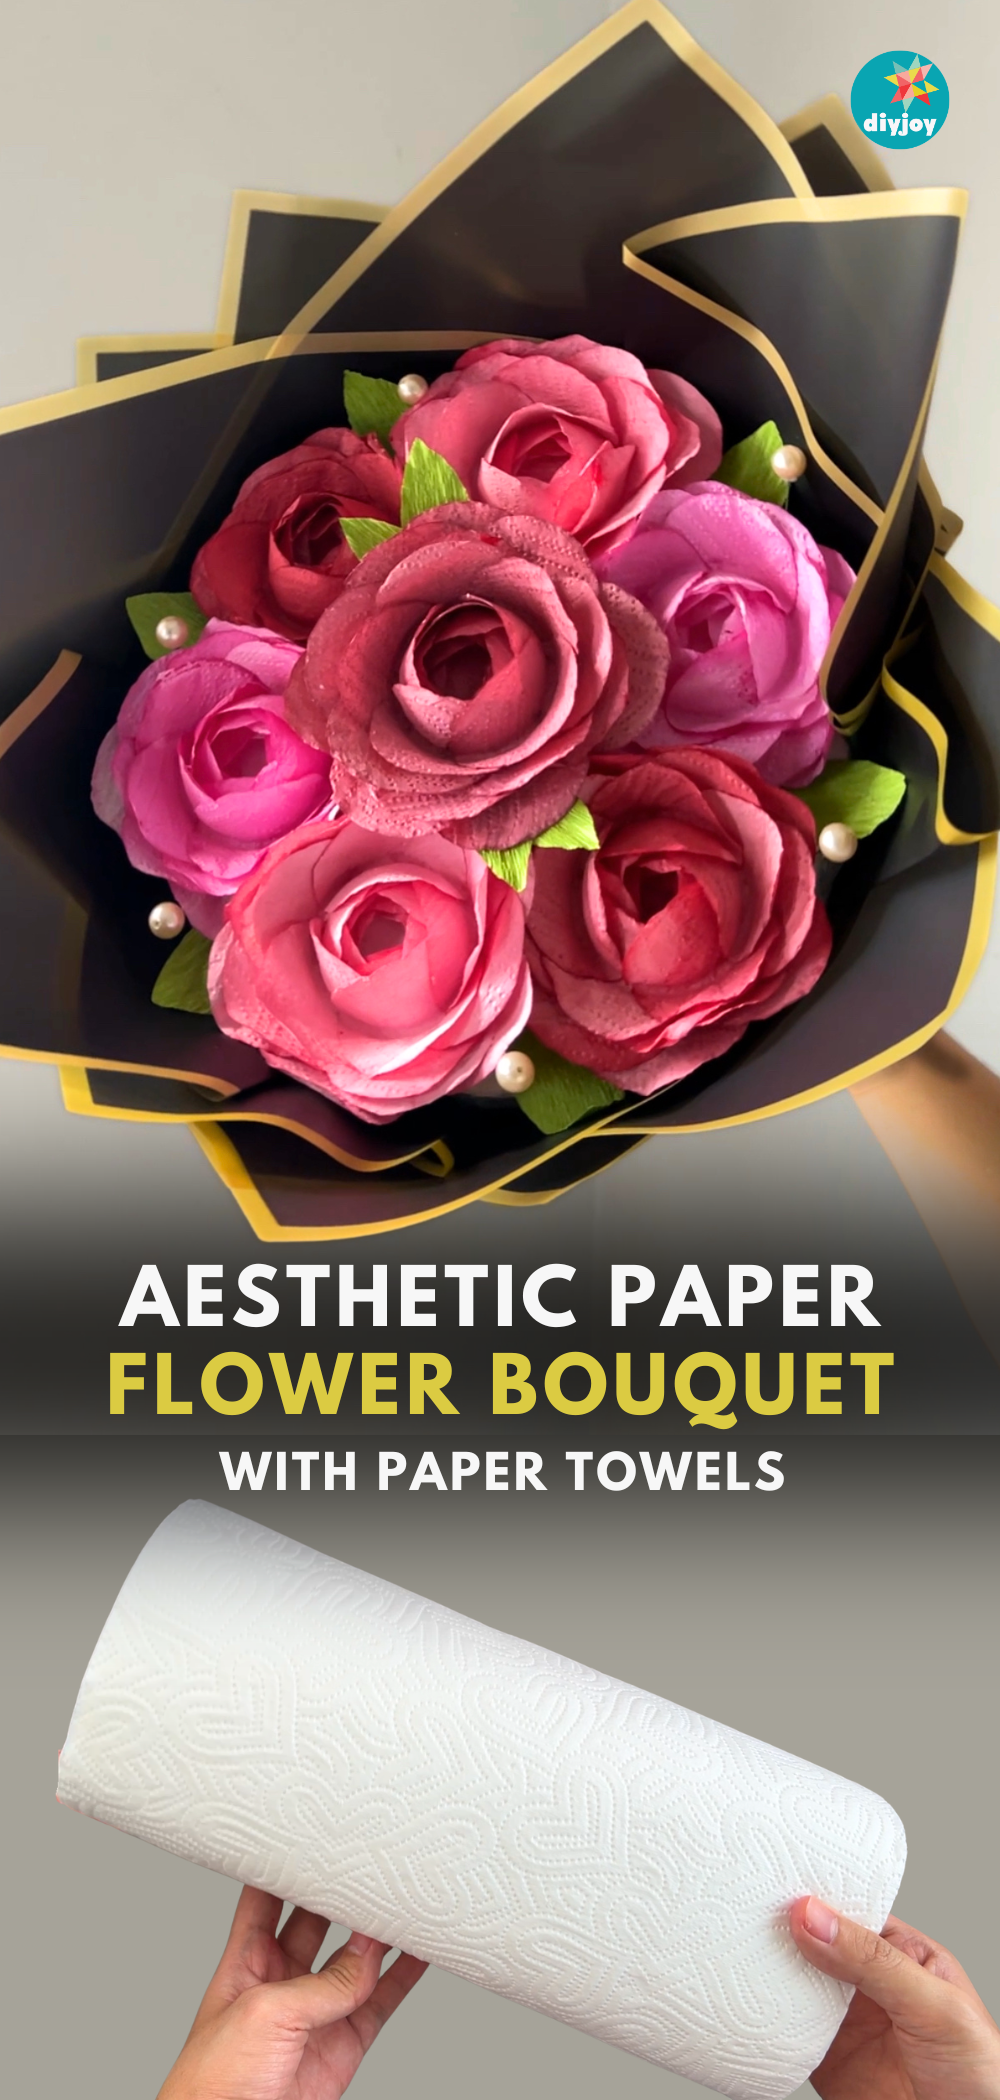
A full bouquet of deep pink roses wrapped in black and gold florist paper, and every flower in it started as a paper towel. Circles are cut from the towels, dipped into paint, and left to dry stiff and colored right through. Each dried circle is then wrapped around a drinking glass to shape the rose, the same way a salami rose is rolled. There are no stems. The finished roses are glued straight onto a foam base and wrapped, which is what keeps a whole bouquet down to a couple of hours.
Get the full tutorial at DIY Joy.
8. Paper Cocktails Umbrella
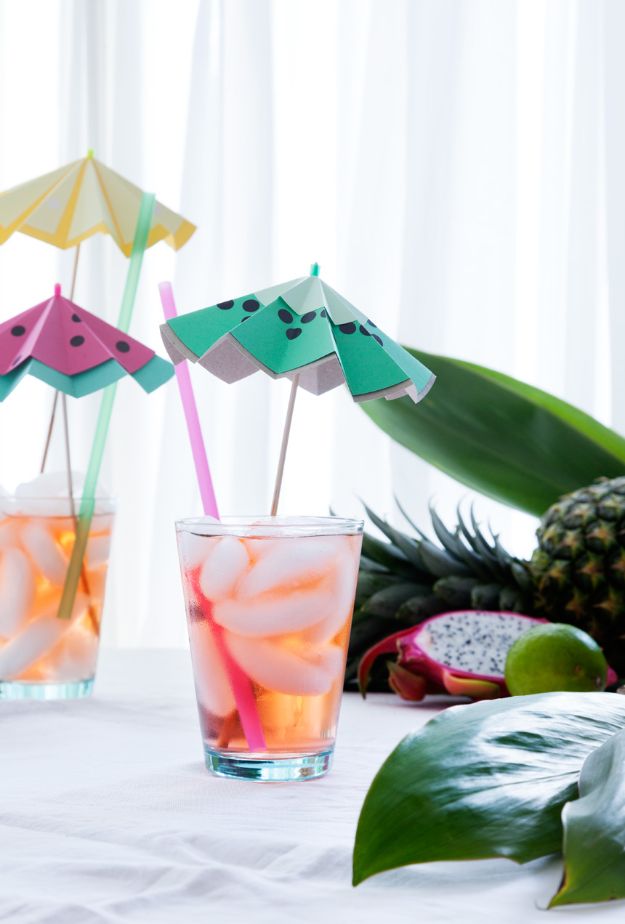
Tiny paper parasols for drinks, folded as watermelon, lemon, orange and kiwi slices, which beat the party store version because the fruit matches whatever is in the glass. Each one starts as a circle of around sixteen centimeters, folded in half through the middle eight times. Thin paper folds far more cleanly here than card. The folded circle is pushed in and out alternately to make the canopy, then mounted on a wooden skewer with a small cotton ball and a fuse bead. Adhesive dots hold better than liquid glue on such small folds.
Get the full tutorial at Wlkmndys.
9. Easy Paper Flowers With Cupcake Liners
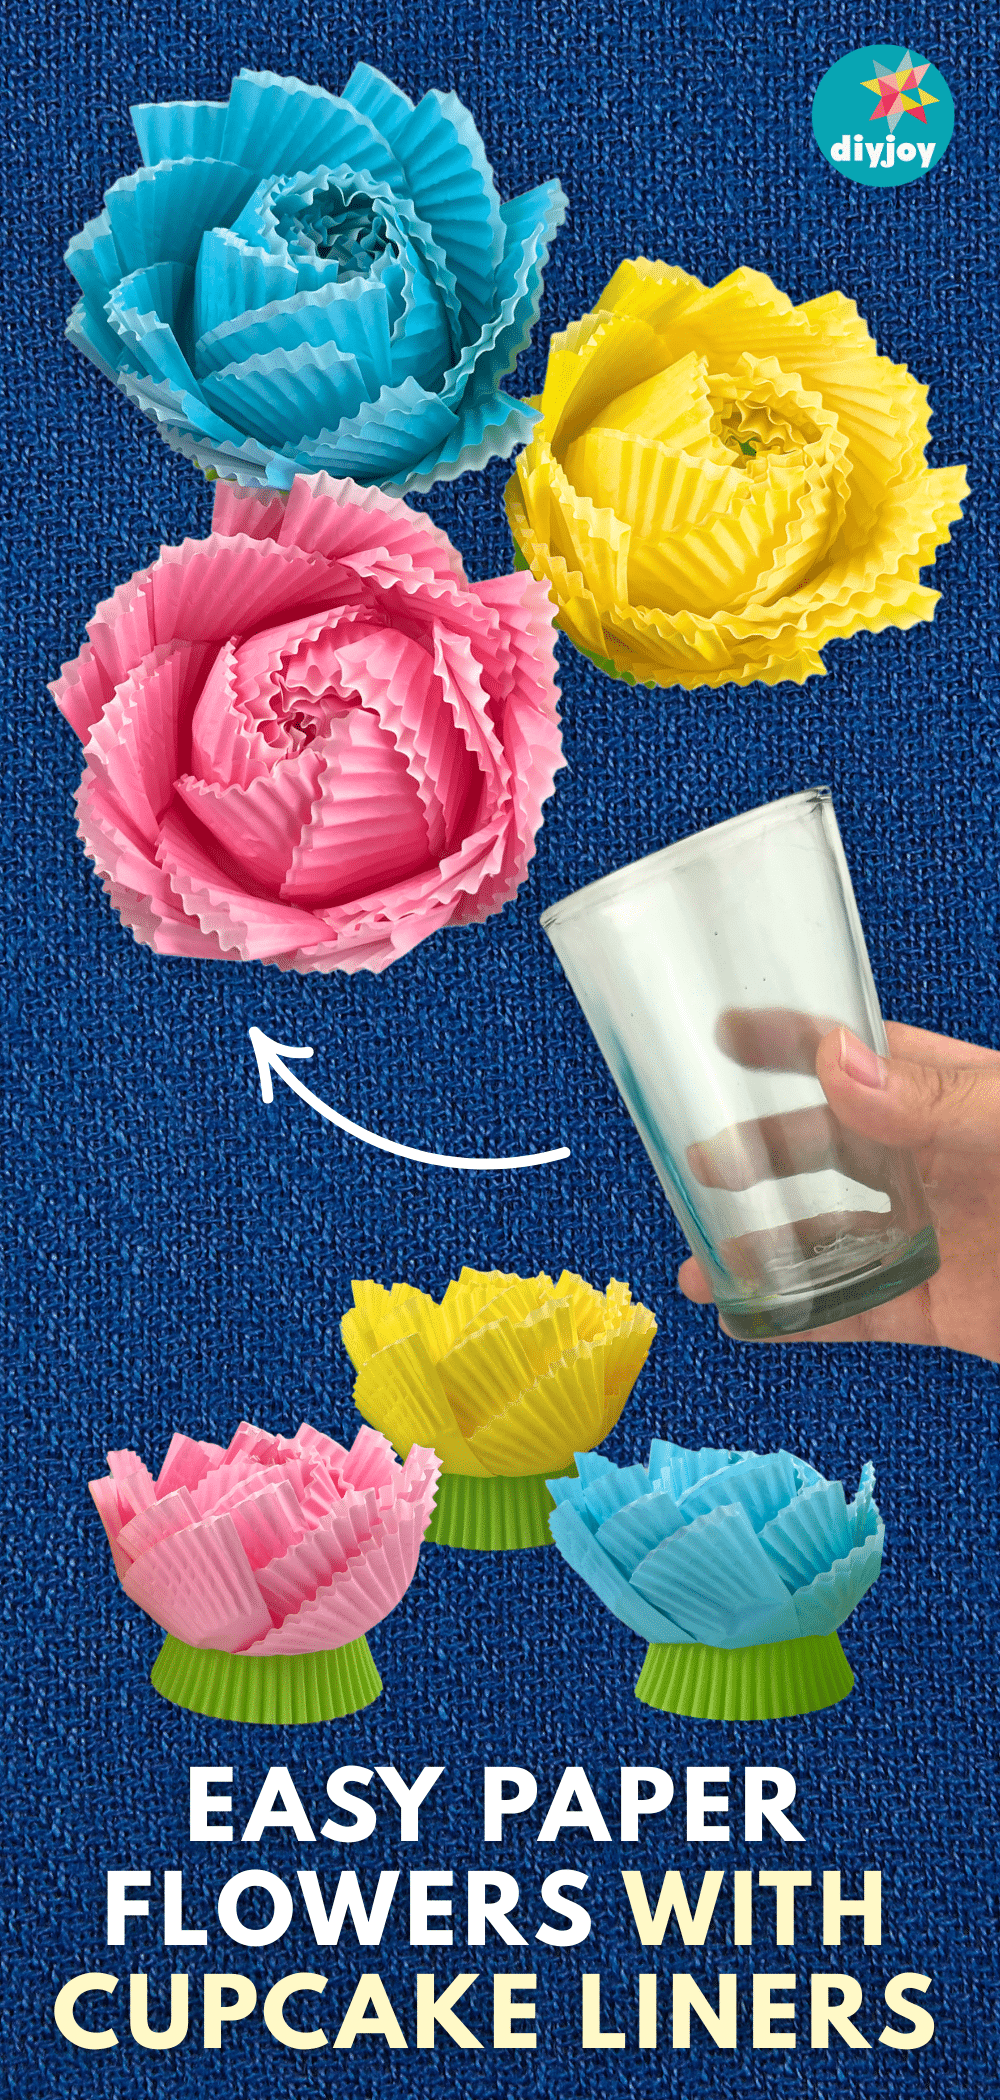
Full ruffled blooms in turquoise, yellow and pink, each one built from a stack of ordinary cupcake liners. The liners arrive pleated and round, which is half the work of a paper flower already done, so there is no cutting and no template. A drinking glass shapes the layers as they are stacked. Cupcake liners come in every color in any supermarket and cost almost nothing, which makes this the one to hand a child, or to make fifty of for a wedding without thinking about the budget at all.
Get the full tutorial at DIY Joy.
10. Paper Mini Top Hats

Miniature top hats printed from a template and glued into shape, in five pastel harlequin prints with contrasting paper bows. Everything is printer, scissors and a glue stick. Print onto slightly heavier matt card if they need to last past one afternoon, though plain printer paper works. The base is the fiddly part: fold and glue the sheet back to back so the pattern shows on both faces, cut the circle, snip the inner tabs, then press each tab up inside the cylinder and hold it for a few seconds. A bobby pin fixes one to a head.
Get the full tutorial at Happythought.
11. Ombre Paper Mobile

A nursery mobile of punched paper circles sewn into hanging strands, fading from navy through pale blue and white into orange. Four colors of cardstock are cut into circles in three sizes, roughly twenty of each, then laid out on the floor and shuffled until the fade looks right before anything is sewn. Each column runs through a sewing machine on a plain straight stitch, which is what spaces the circles evenly. Thread the top circle of each strand onto a painted embroidery hoop, and stagger the lengths so some hang lower than others.
Get the full tutorial at Kami Watson.
12. How to Make a Paper Lily
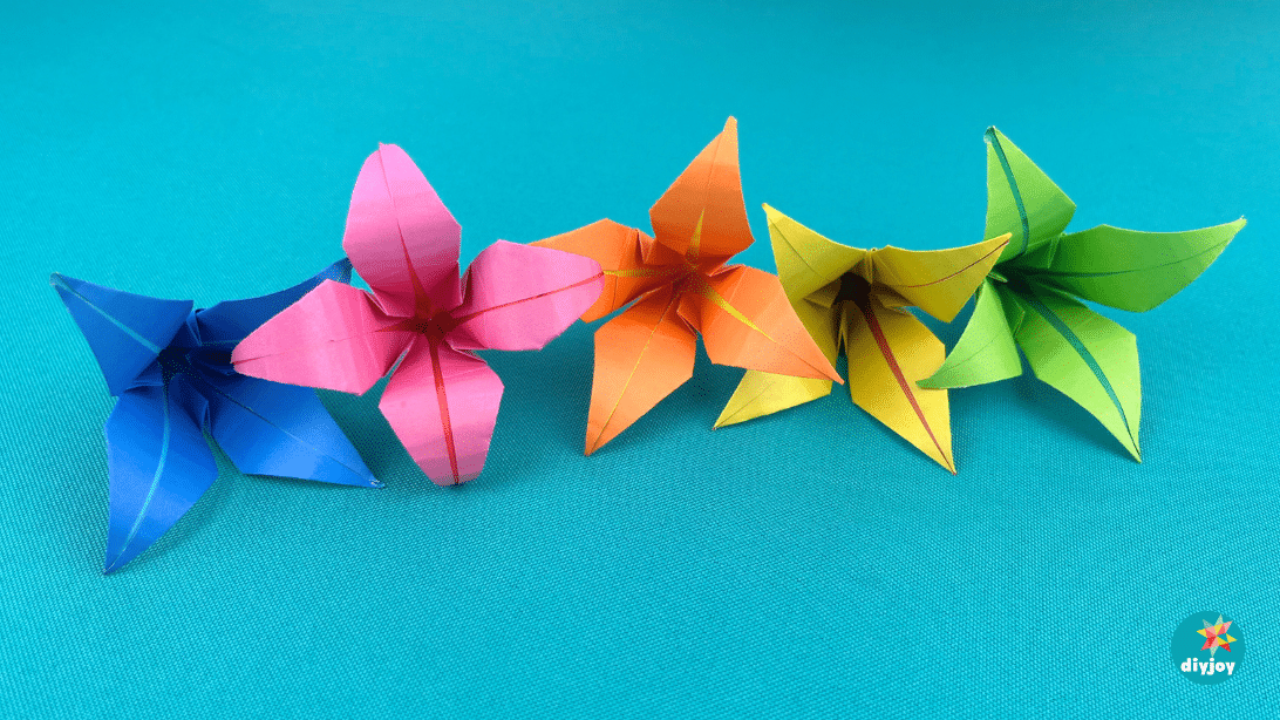
Folded paper lilies in blue, pink, orange, yellow and green, and the whole supply list is one square of paper and a wooden skewer. The folds are ordinary origami folds repeated on all four sides: crease the square in half both ways and diagonally both ways, collapse it along those creases, fold the sides to the center line, then open and flatten each fold in turn. The skewer comes in at the very end to curl the petal tips outward, which is the single move that turns a folded shape into a recognizable lily.
Get the full tutorial at DIY Joy.
13. DIY Flower Monogram

A letter shape covered edge to edge in crepe paper flowers, roses, ranunculus, anemones and small buds in pink, cream, red and gold, with paper leaves tucked into the gaps. The material choice is the whole tutorial: cardstock flowers were tried first and abandoned for heavyweight 180 gram crepe, because crepe stretches and holds a curve the way cardstock never will. It is honest about the cost in time, too. Paper flowers are easy but laborious, and the more realistic you want them, the longer every single bloom takes.
Get the full tutorial at Avanti Morocha.
14. Quilling Paper Dragonfly
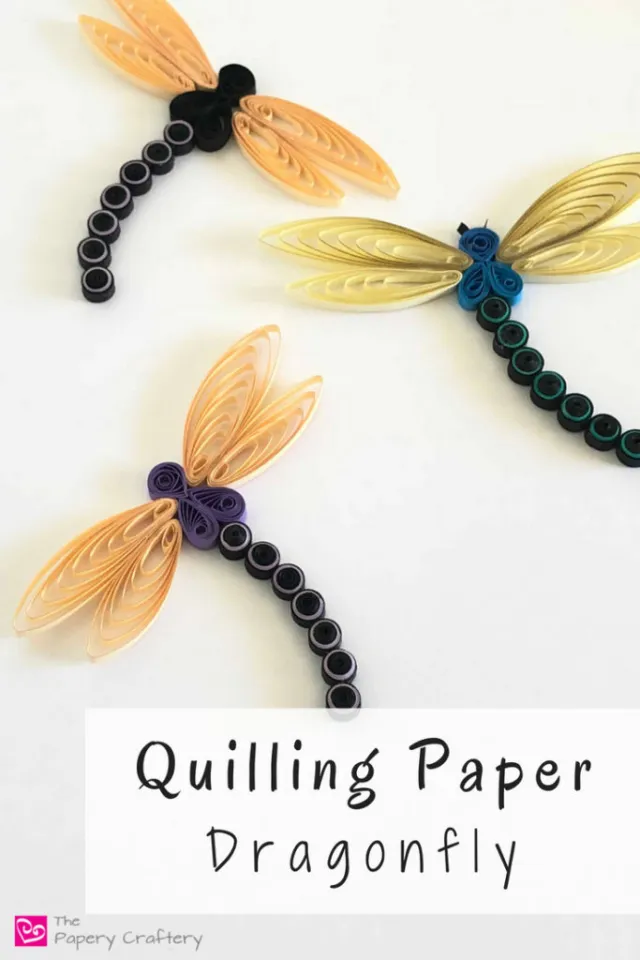
Two dragonflies built from coiled paper strips, a segmented body of tight black coils each ringed with a band of color, and long teardrop wings in rose gold metallic. The tail is seven coils, each rolled from five inches of black, three inches of a bright color and two inches of black again, wrapped in that order so the color shows as a stripe. The body and head are teardrops rolled from eight inch strips. One tip is worth stealing: use clear glue with dark paper, because white glue leaves visible specks.
Get the full tutorial at The Papery Craftery.
15. How to Make Paper Flowers With Post-It Notes
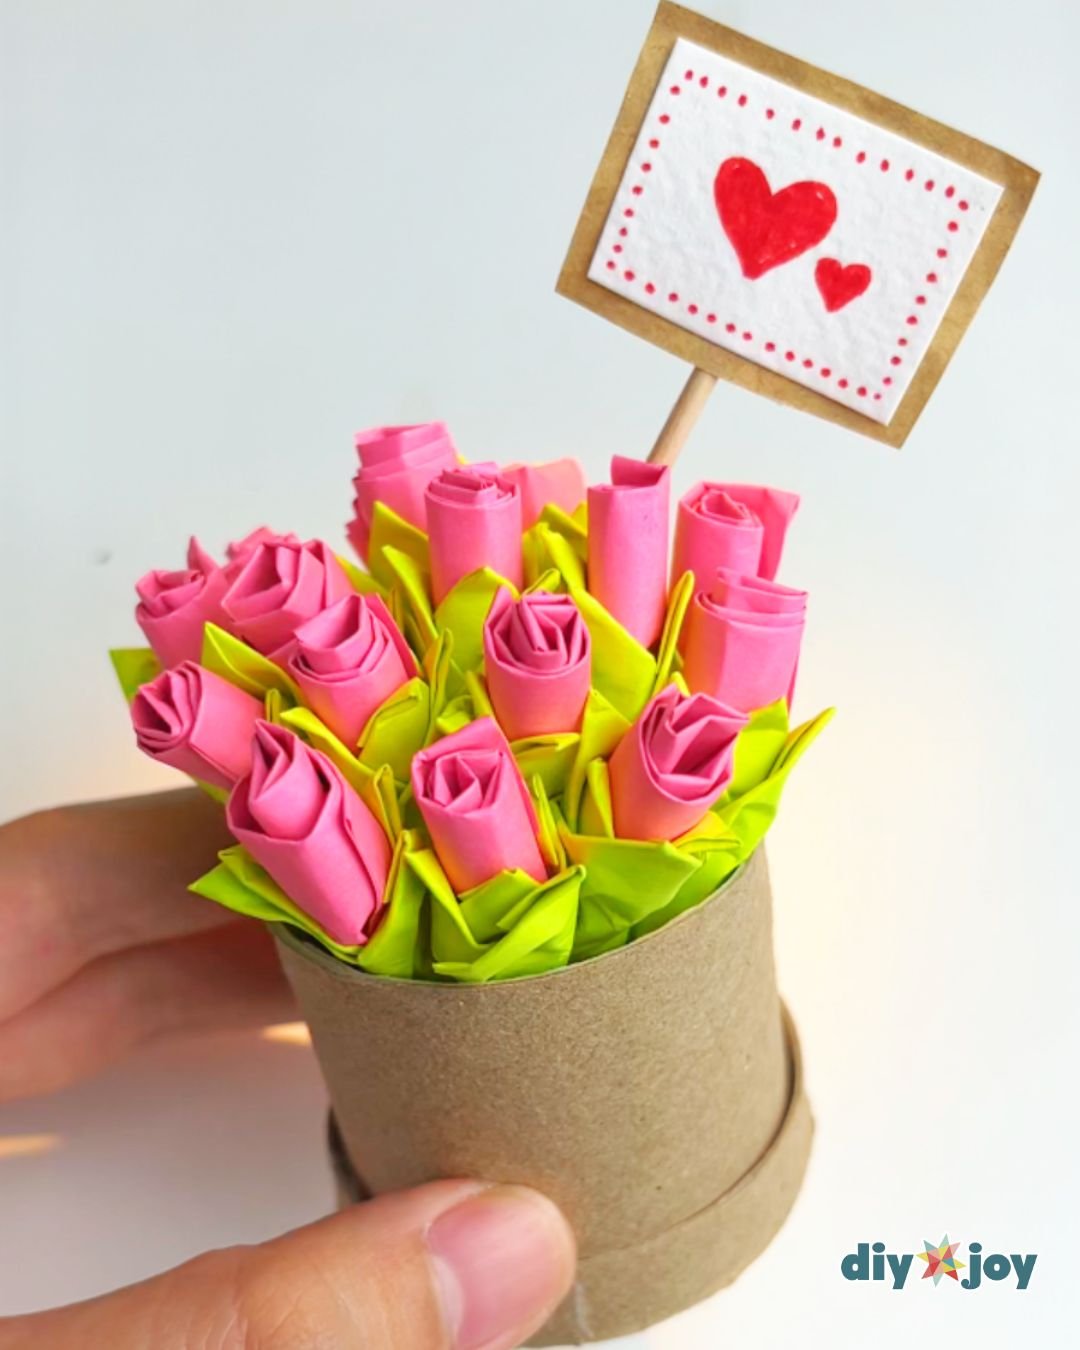
A little bouquet of pink roses standing in a trimmed down cardboard tube, made entirely from a pad of sticky notes. Cut a note into a spiral or a fringed strip, roll it tightly from one end, and the adhesive edge holds the rose closed without glue. Green notes fringe into leaves that wrap round the base. Each flower takes about two minutes and a whole bouquet under an hour, with no punches, no templates and nothing to buy, which makes it the craft to reach for at a desk on a bad afternoon.
Get the full tutorial at DIY Joy.
16. 6 Pocket Treats & Tea Bag Holder

A folded paper holder with six pockets, each sized for a chocolate square or a tea bag, tied shut with twine and a tag. Three squares of six by six inch patterned paper are folded so each one makes two pockets, then stacked and bound. The pockets end up about three inches wide, and bringing the sides in less gives wider ones from the same sheet. Keep folding and adding sections for more pockets. The same holder works as a pocket photo album for the wallet sized school photographs children trade.
Get the full tutorial at LovenStamps.
17. DIY Marigold Paper Flower Garland
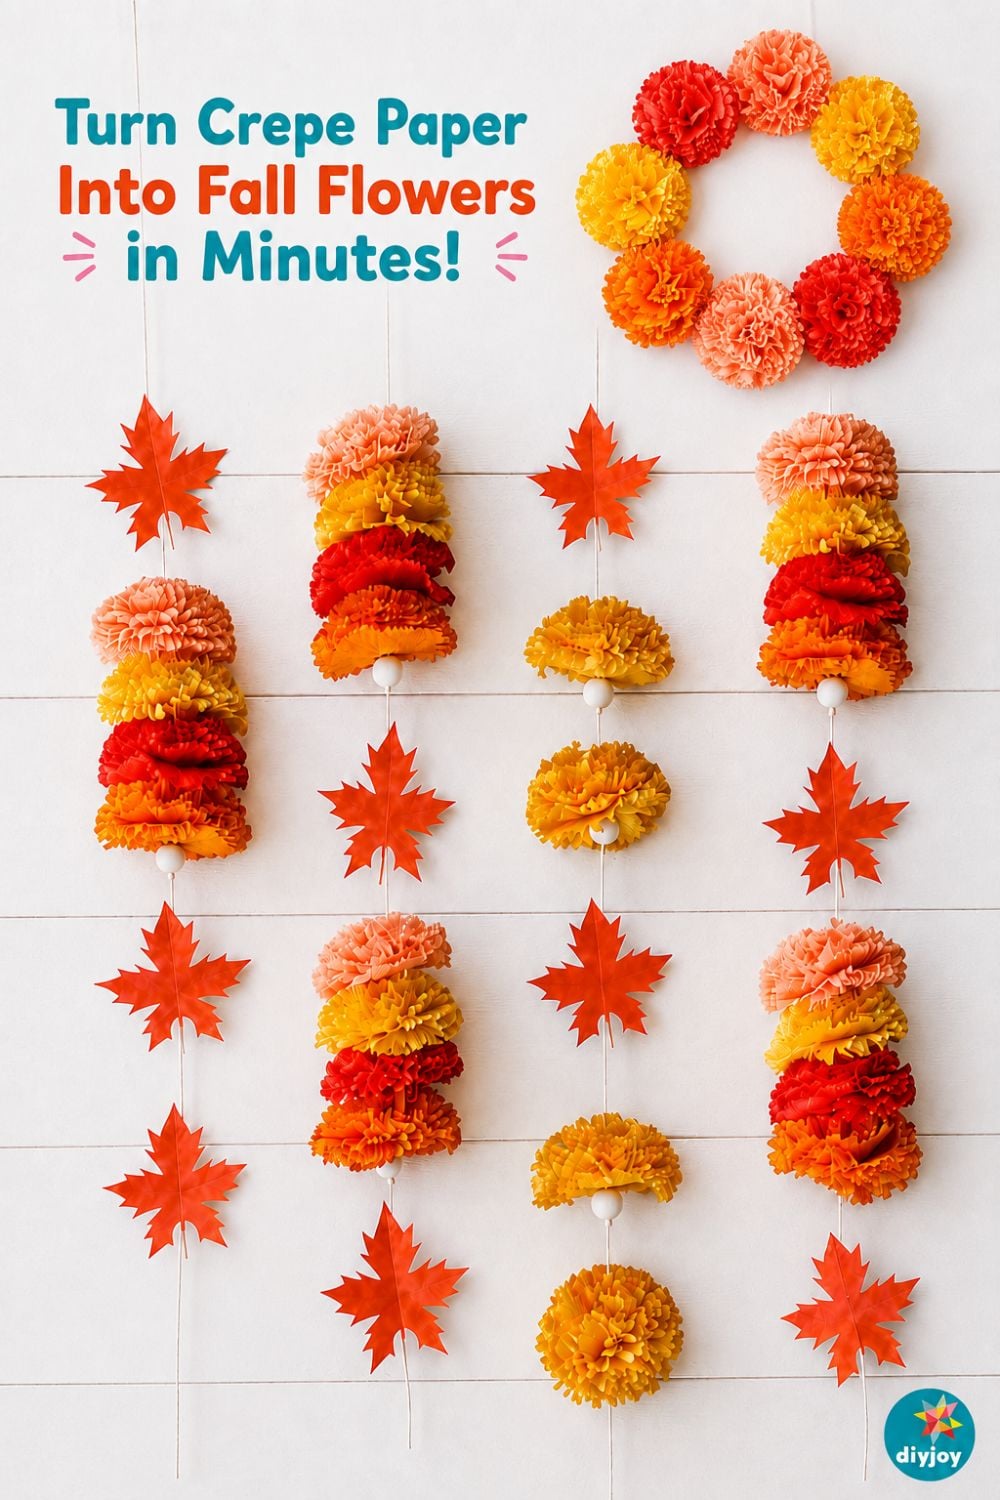
Fat fringed marigolds in red, orange and gold, strung into a garland with cut paper maple leaves between them. Each flower is six two and a quarter inch circles of Italian crepe paper stacked, stapled through the middle, fringed around the edge and then scrunched up one layer at a time toward the center. Multi blade scissors cut all that fringe in a fraction of the time and are worth the few dollars if more than one flower is planned. Threaded onto string, they hang down a wall, a banister or a doorway.
Get the full tutorial at DIY Joy.
18. DIY Paper Candy Package Tutorial
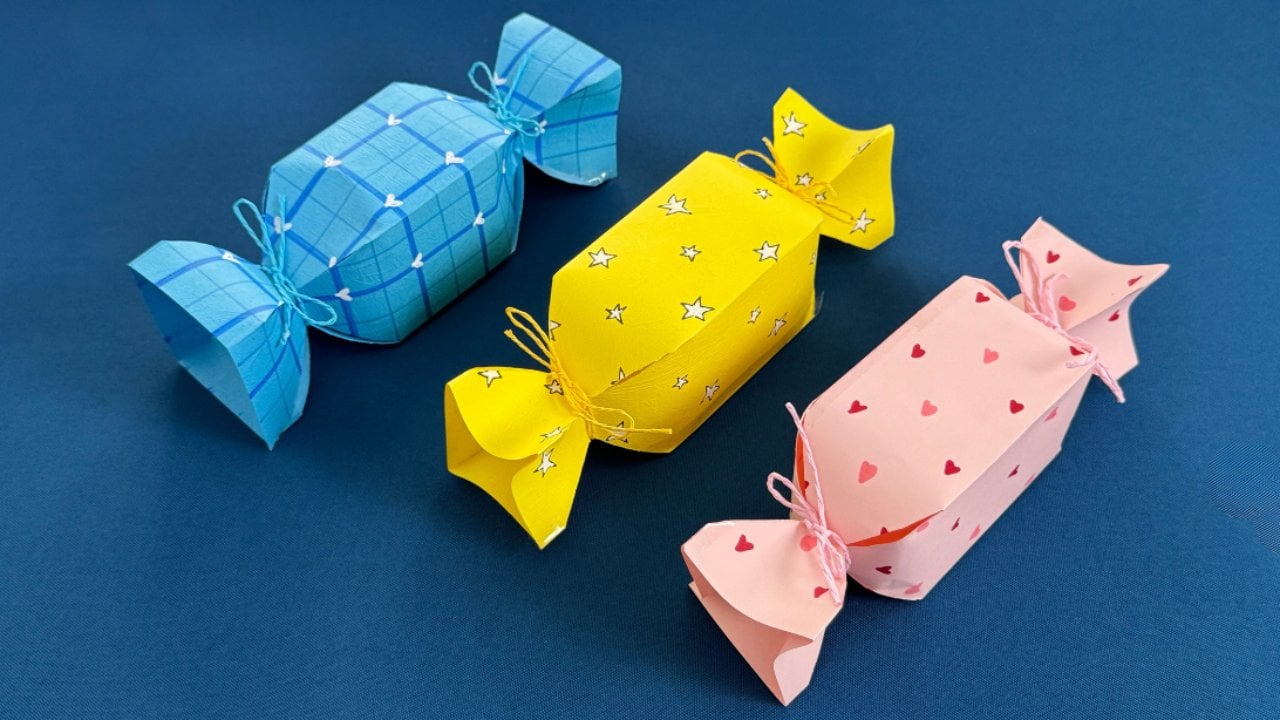
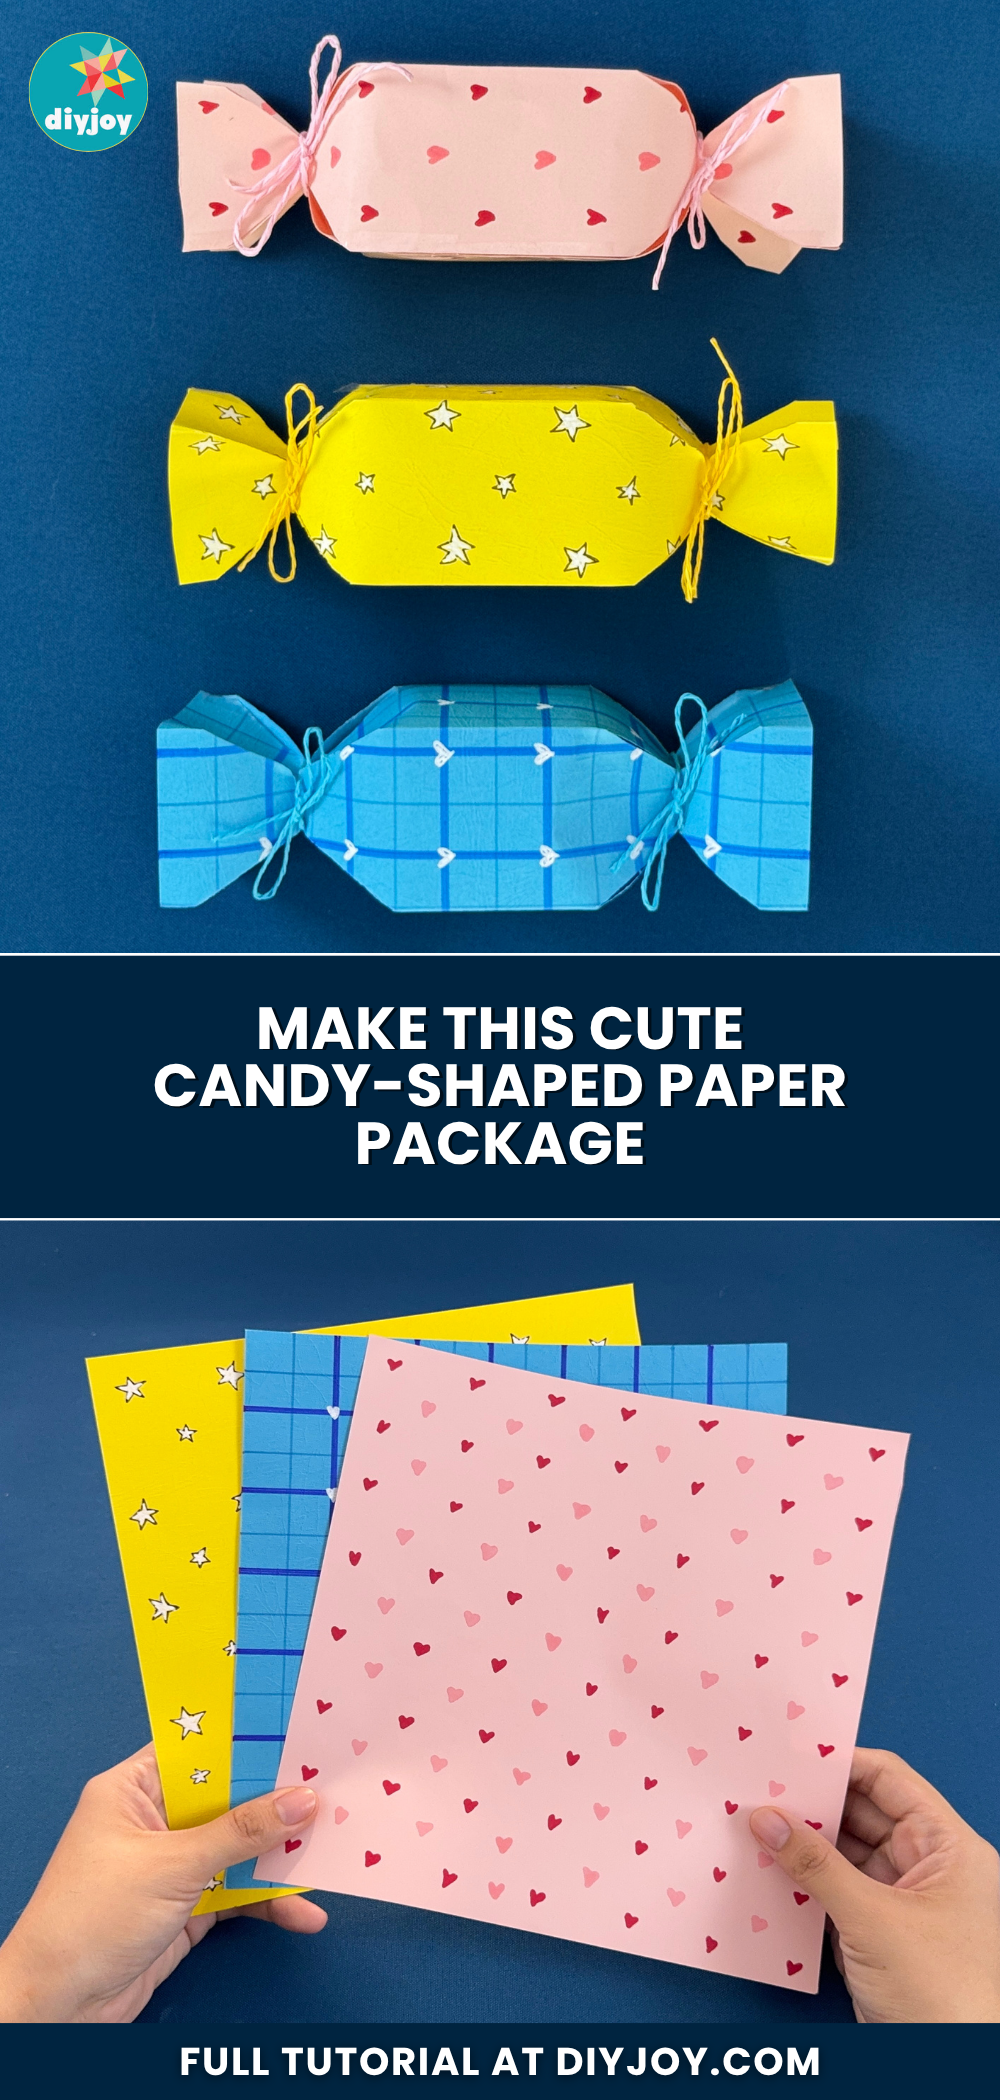
Little gift packages folded into the shape of a wrapped sweet, twisted and tied at both ends, in blue, yellow and pink patterned paper. They hold candy, small jewelry, party favors and anything else too small to justify a box. Almost any paper works, scrapbook, patterned, construction, wrapping or plain, and a blank sheet can be drawn on with markers first so the packaging is personal. There are no complicated folds and no special tools, which is what makes this the one to reach for when a gift needs wrapping in the next five minutes.
Get the full tutorial at DIY Joy.
19. Origami Pull Out Drawers

A folded chest of drawers in lilac and pink, made from four square sheets and no glue except a dab on the handles. The outer boxes and the inner drawers are the same masu box fold at two sizes, and the sizing is the part to get right: the inner sheets must be one centimeter smaller square than the outer ones or the drawers jam or rattle. Two of each builds the unit shown, finishing around five by five by ten centimeters. Stack several, or turn the whole thing on its side for a horizontal cabinet.
Get the full tutorial at Paper Kawaii.
20. Paper Pumpkin Centerpiece

Two folded paper pumpkins, one in kraft brown and one in teal, with curled paper stems and cut paper leaves, sitting on gray cloth as a fall centerpiece. A free printable template does the shaping. Fold decorative paper into several layers, tape the template on top and cut through every layer at once, which is how twenty identical pumpkin pieces take one pass rather than twenty. Fold each piece in half, stack them, hold the stack with binder clips and run glue along the folded edges, spread thin with a scrap of paper. Let it dry, fan the whole thing open into a sphere, then twist a strip of crepe paper into a stem.
Get the full tutorial at Minted Julep.
21. DIY Origami Vase
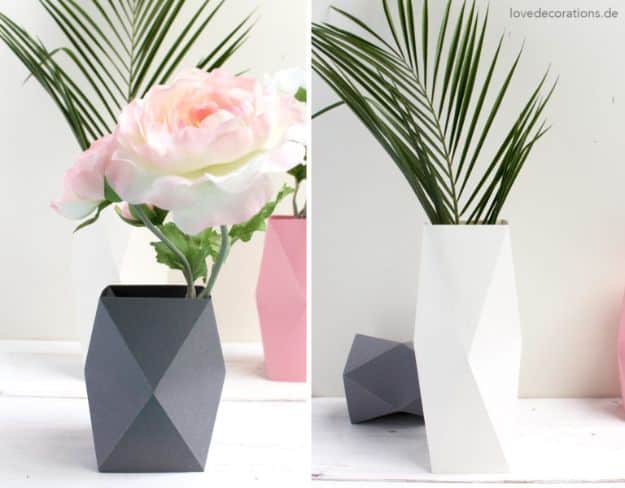
A faceted origami vase folded from one sheet, shown in charcoal, white and dusty pink with real stems and palm leaves in it. The page is honest that this is the easy one of the series: the previous vase was destroyed by accident and this replacement was folded in about five minutes. Anyone can manage it. One practical note the photographs do not mention is that a paper vase is a sleeve, not a container, so it goes over a jar or a glass if anything inside it is going to need water.
Get the full tutorial at Love Decorations.
22. 5-Minute Mini Notebook DIY
A pocket sized notebook folded and bound from leftover paper in about five minutes, small enough for a bag or a pencil case and still perfectly usable for lists and notes. Anyone who crafts with paper has a stack of offcuts too pretty to throw out, and this is what finally spends them: scrapbook scraps, patterned paper, cardstock ends and stray colored sheets. Mix papers and every notebook in the pile comes out different. It makes a good small gift, a party favor, or the thing to hand a child who is bored.
Get the full tutorial at DIY Joy.
23. DIY Utensil Holders

Folded paper envelopes that hold a napkin, a fork, a spoon and a straw in one piece, so an outdoor party table stops losing cutlery to the wind. One 12 by 12 sheet of scrapbook paper cuts in half and makes two of them. Lay a napkin in the middle of the half sheet, fold both sides in over it, fold the top corners down, turn it over, fold the bottom corners into triangles and fold the whole bottom edge up. Washi tape holds the fold, and a second strip across the front is purely decorative.
Get the full tutorial at The DIY Dreamer.
24. 3D Letter Art
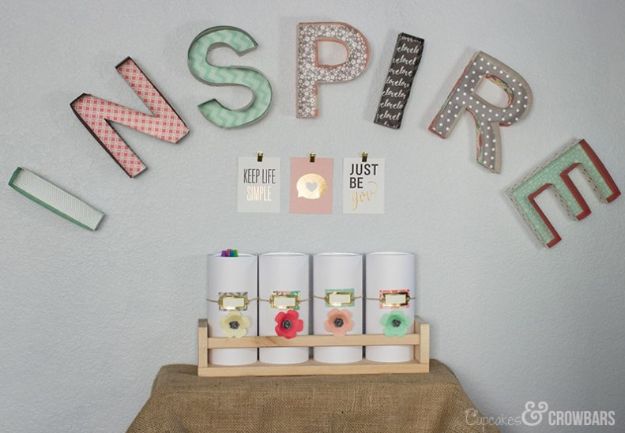
The word INSPIRE across a wall in 3D letters, each one covered in a different patterned paper, hung above a rack of white storage jars with paper flowers and label tags. The letters are cut from a template on a cutting machine and assembled into a shallow box shape, which is what gives the shadow. The useful tip is about pattern matching: the paper pack used here prints a coordinating pattern along the bottom edge of every sheet, so mixing prints that actually work together needs no eye for it at all.
Get the full tutorial at Dee of Cupcakes and Crowbars, guest posting at Tatertots and Jello.
25. DIY Paper Ranunculus For Beginners
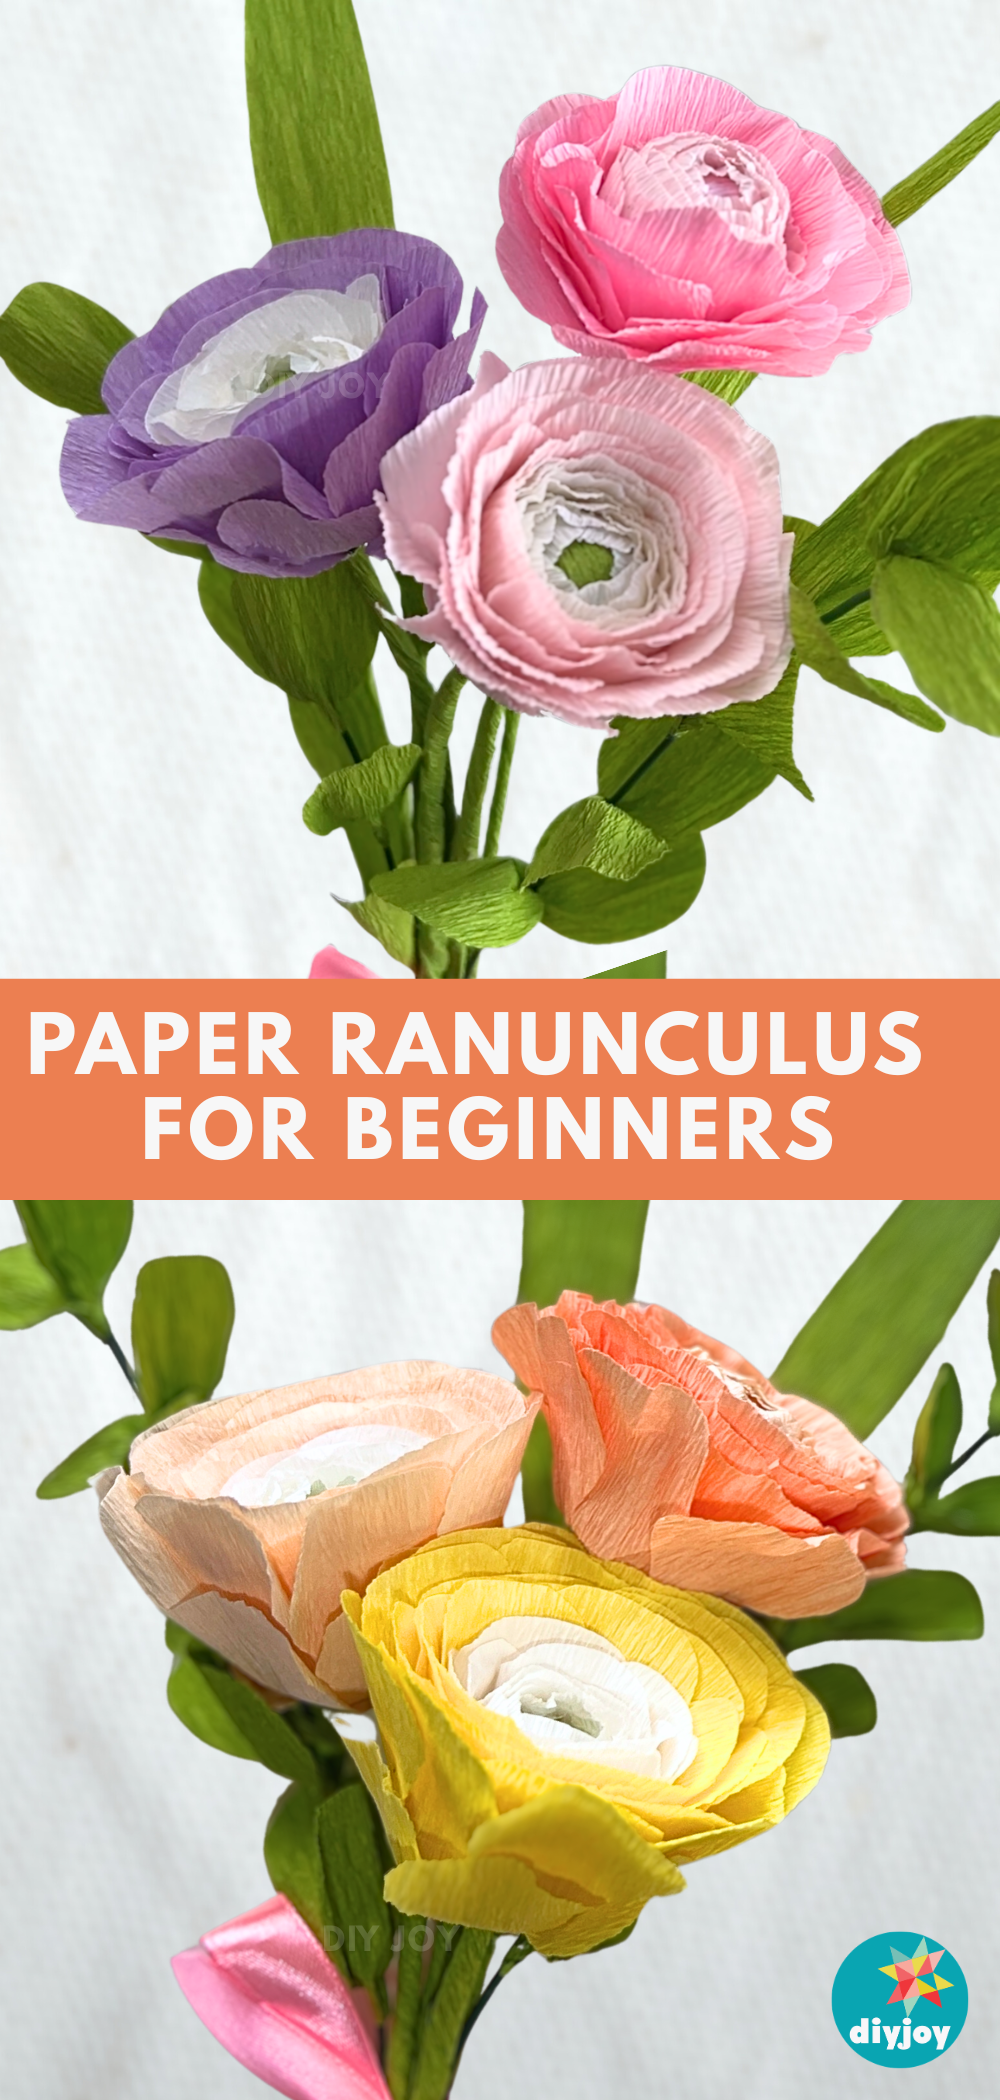
Crepe paper ranunculus in pink, lilac and cream on green wire stems, the flower with so many petals it looks like it should be difficult. It is not difficult, it is just long. Ranunculus are known for a high petal count, so expect to cut and glue a great many petals for one bloom, and expect the result to be worth it. Crepe paper, floral wire, a glue gun and a ball of foil for the center is the whole list. They gather into a bridal bouquet or a centerpiece.
Get the full tutorial at DIY Joy.
26. DIY Paper Star Ornament From Book Pages
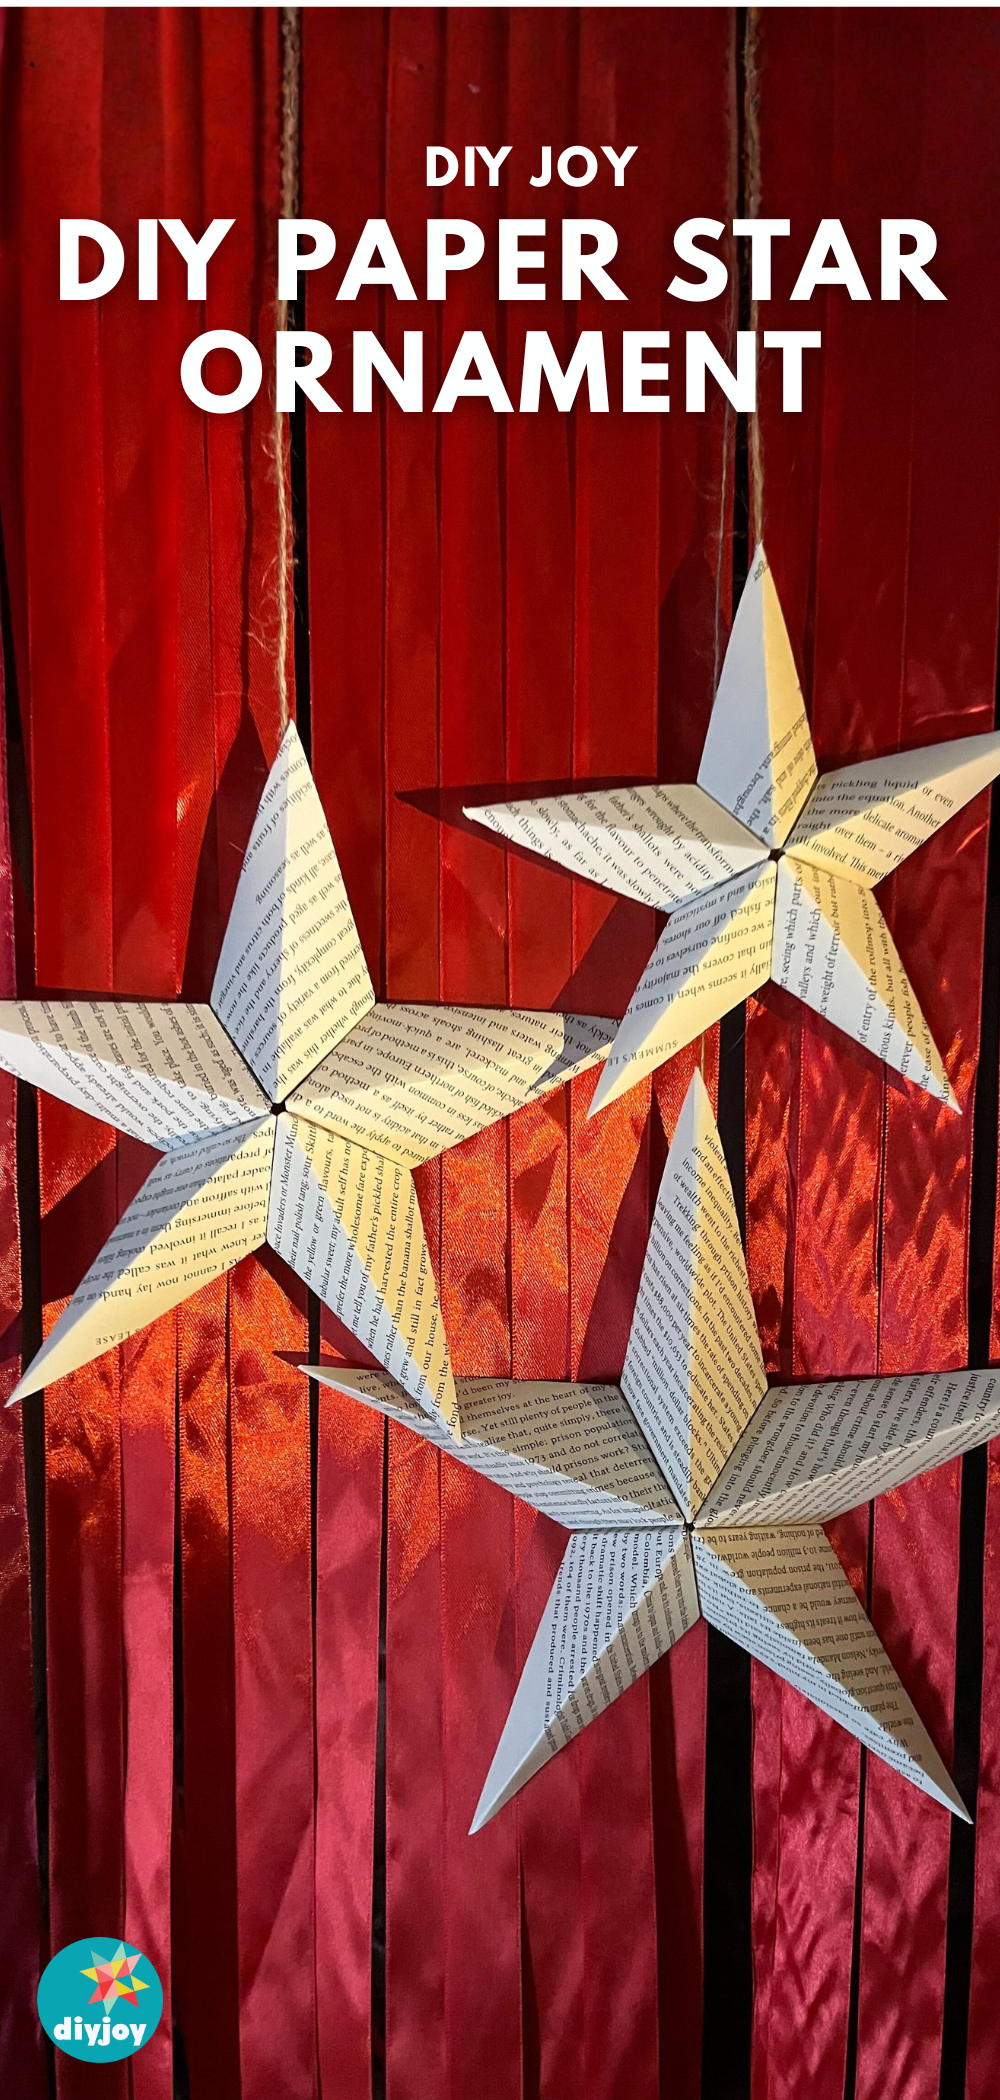
Three dimensional five pointed stars folded from the pages of old books, hung on twine as ornaments or pinned up as wall decor. The supply list is book pages, a glue stick, a glue gun, scissors and twine, which means the only thing to buy is nothing at all if there is a box of unwanted paperbacks in the house. Printed pages give the finished star a texture that plain paper cannot, and stained or foxed pages look better here than clean ones, which is the opposite of usual.
Get the full tutorial at DIY Joy.
27. Paper Chandelier

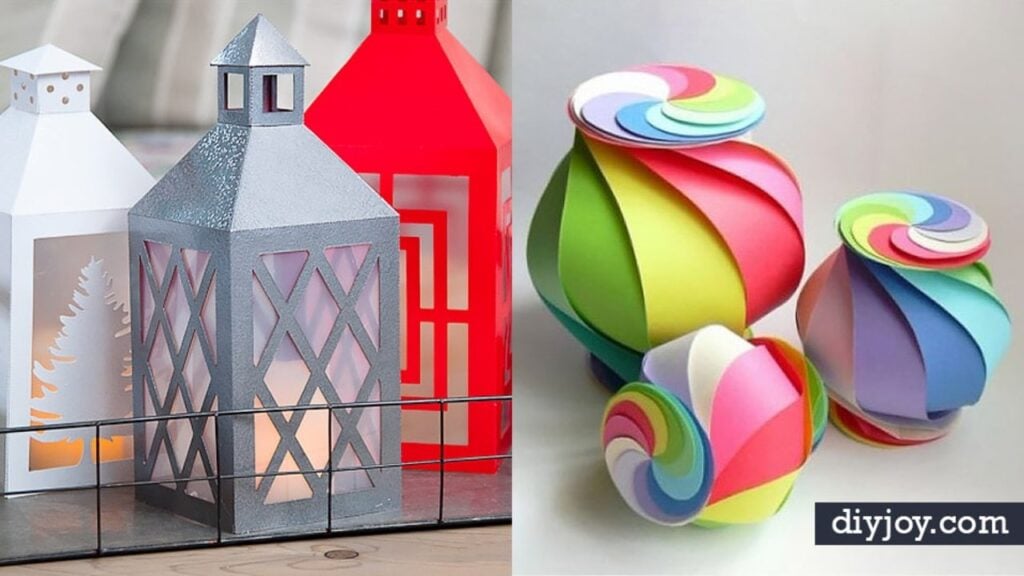
A lime green paper chandelier hung as party decor, assembled from four to six identical cut shapes. Each one is cut from 12 by 12 cardstock, scored straight down the center, then folded in half and glued wrong sides together one at a time until the whole thing opens out in the round. Two things decide how it looks: a sharp blade, because a dull one tears the fine scrollwork, and rhinestones glued on before assembly while the pieces are still flat. Hang it on invisible thread and it appears to float.
Get the full tutorial at Fleece Fun.
28. Make a Pinwheel

Paper pinwheels in pink, yellow and blue on wooden skewers, and these actually spin rather than just looking like they might. Six inch squares, a pencil X corner to corner, holes poked with a thumbtack at the marked points, then the corners folded in and pinned. The bead is the whole secret: a small round bead threaded between the paper and the skewer holds the pinwheel off the stick so it turns freely. Thinner paper spins faster. Needle nose pliers bend the pin end over so nothing sharp is left sticking out.
Get the full tutorial at Debbie Chapman at One Little Project.
29. Easy Origami Flapping Bat
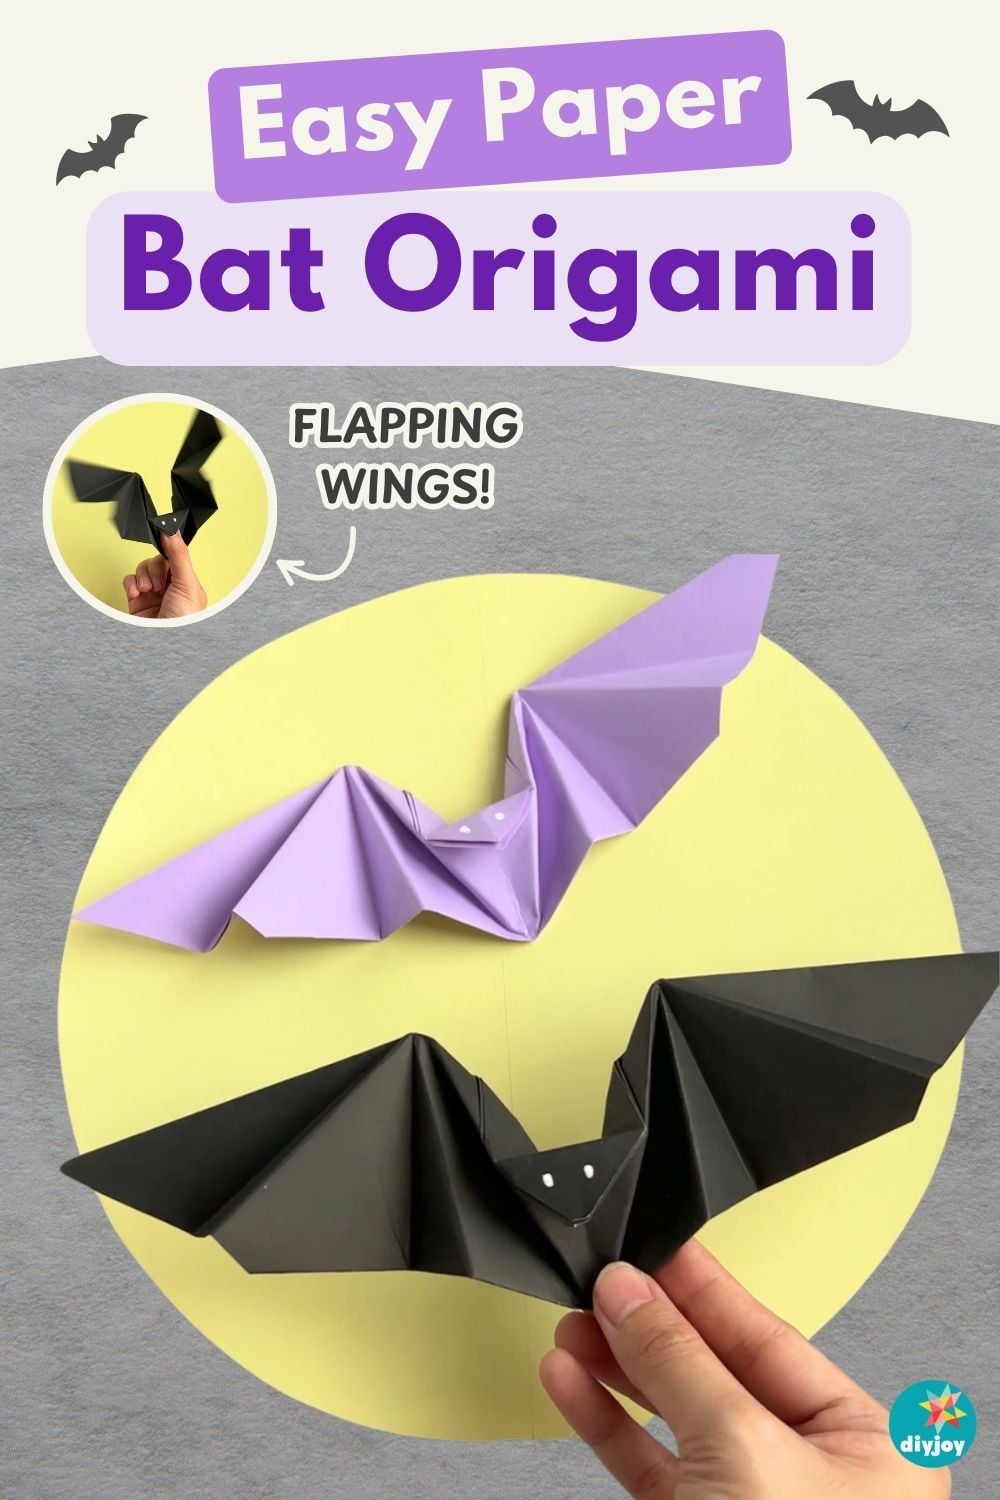
An origami bat whose wings genuinely flap when the body is squeezed, folded from one square of colored paper with no glue and no scissors anywhere in the process. It looks complicated and is not, which is the usual story with origami. A single 8.3 inch square is the whole requirement, with a bone folder and a paper cutter as optional extras for crisper creases. Children pick it up fast and will out-fold an adult by the third one. A swarm of black ones up a wall is free Halloween decor.
Get the full tutorial at DIY Joy.
30. DIY Woodland Animals Origami Bookmarks

Corner bookmarks that slide over the top corner of a page, folded into a fox, a badger, a bear, a raccoon, a bunny and three more, from seven free printable templates. Each one is a single sheet: print the design, cut out the square and the separate ears, and a few folds later the animal sits on the corner of the page. It is the classic origami corner bookmark with faces printed on, which is what makes it work for a child who cannot yet draw a convincing fox.
Get the full tutorial at It's Always Autumn.
31. Folded Paper Bracelets
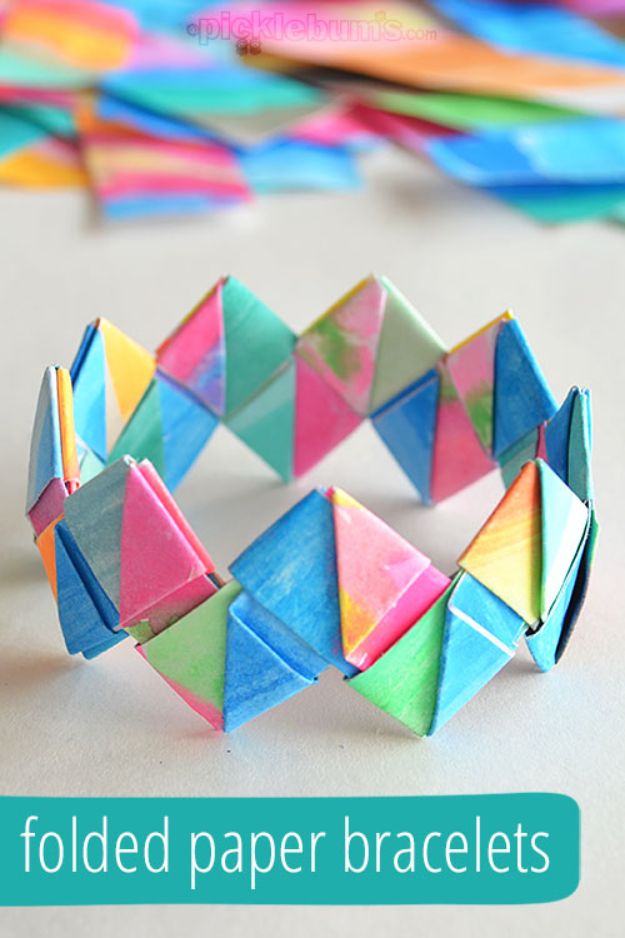
Zigzag bracelets folded and linked from strips of painted paper, which is what finally puts the pile of children’s watercolor paintings to use. Cut sixteen to twenty two strips at twelve centimeters by three, or any size at the same one to four ratio. Eighteen strips fits over a ten year old’s hand. Each strip folds into the same basic shape, then they interlock, and the linking is genuinely fiddly for the first few. Make the loop on each strip slightly loose when children are folding, since tight ones are almost impossible to thread.
Get the full tutorial at Picklebums.
32. Paper Bag Star Ornament
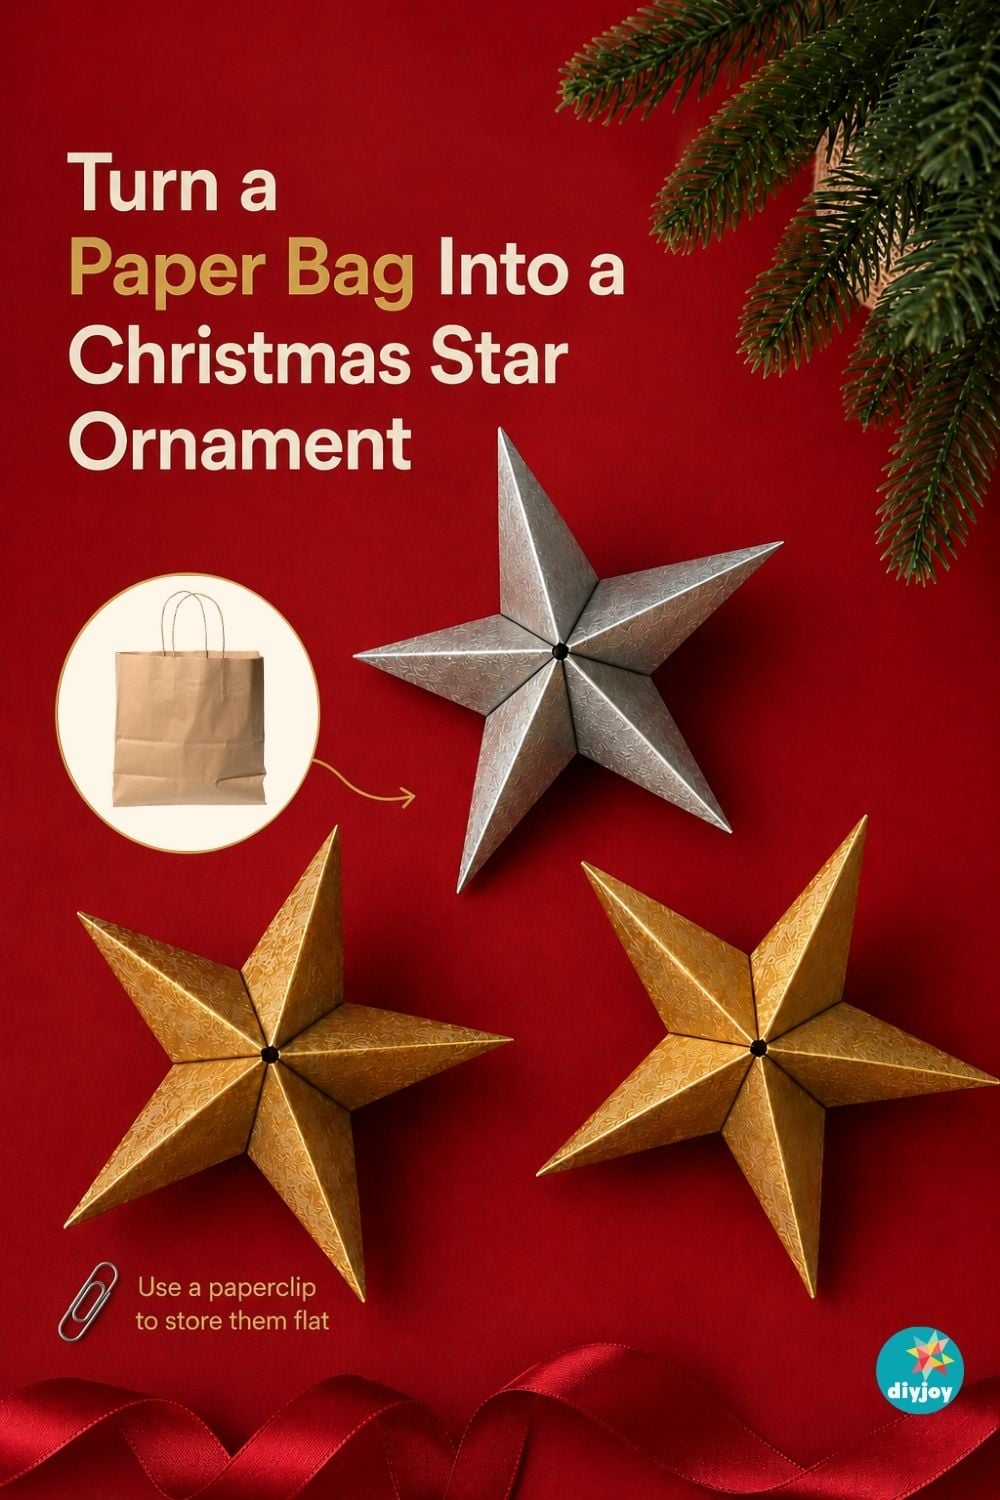
Five pointed 3D stars in gold and silver that look like hammered metal and are actually a grocery bag. The paper bag is painted with metallic acrylic, flicked on with a toothbrush so the surface gets its hammered texture, then cut into five squares, folded into diamonds and hot glued into a star. One warning on the page is worth heeding before shopping: skip bargain metallic paint. It carries less pigment and more filler, so four coats later the finish still looks like a painted paper bag rather than metal.
Get the full tutorial at DIY Joy.