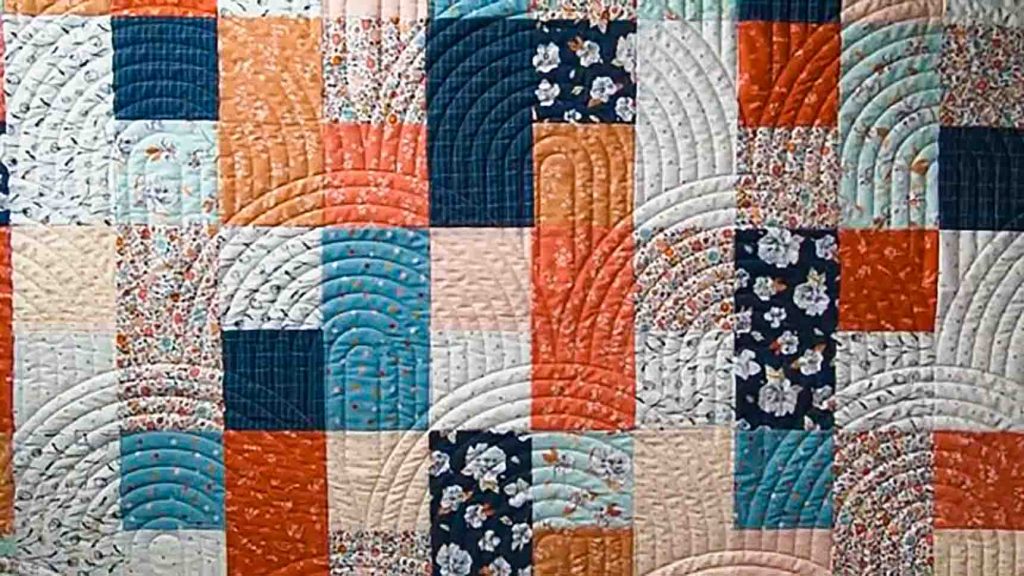
I was in need of a quick quilt for Mother’s Day, so I looked up some tutorials on Youtube I could make. While browsing, I came across this lazy day’s layer cake pattern from Moonkin Stitchery. It looked so easy, so I immediately tried it. I was to finish this in less than a day, just in time for Mother’s Day. Now, this will be my go-to pattern whenever I need a quick quilt for gifting. Watch the video tutorial below to learn how to make this.
Materials:
For a throw size quilt (54″ x 63″):
- 42 print layer cake (10″ squares)
- 1/2 yard binding
- 3 3/4 yards backing
- 62″ x 71″ batting
- (click here for the free pattern)
Directions:
Step 1
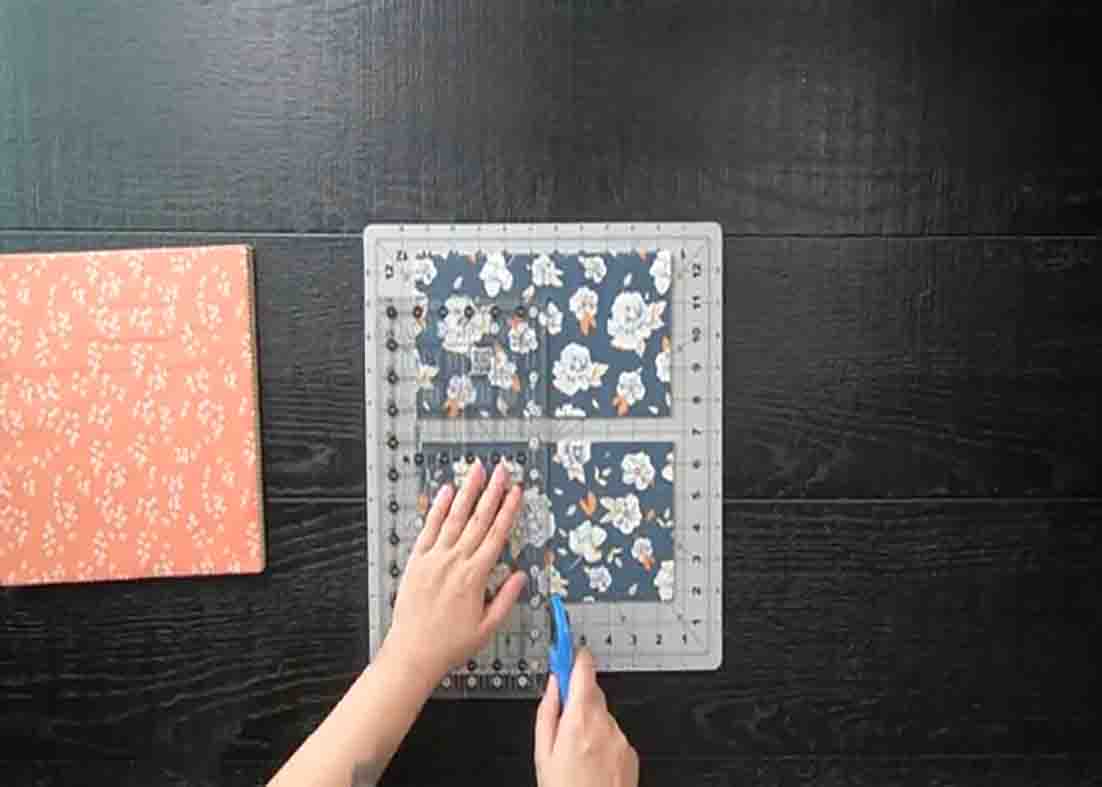
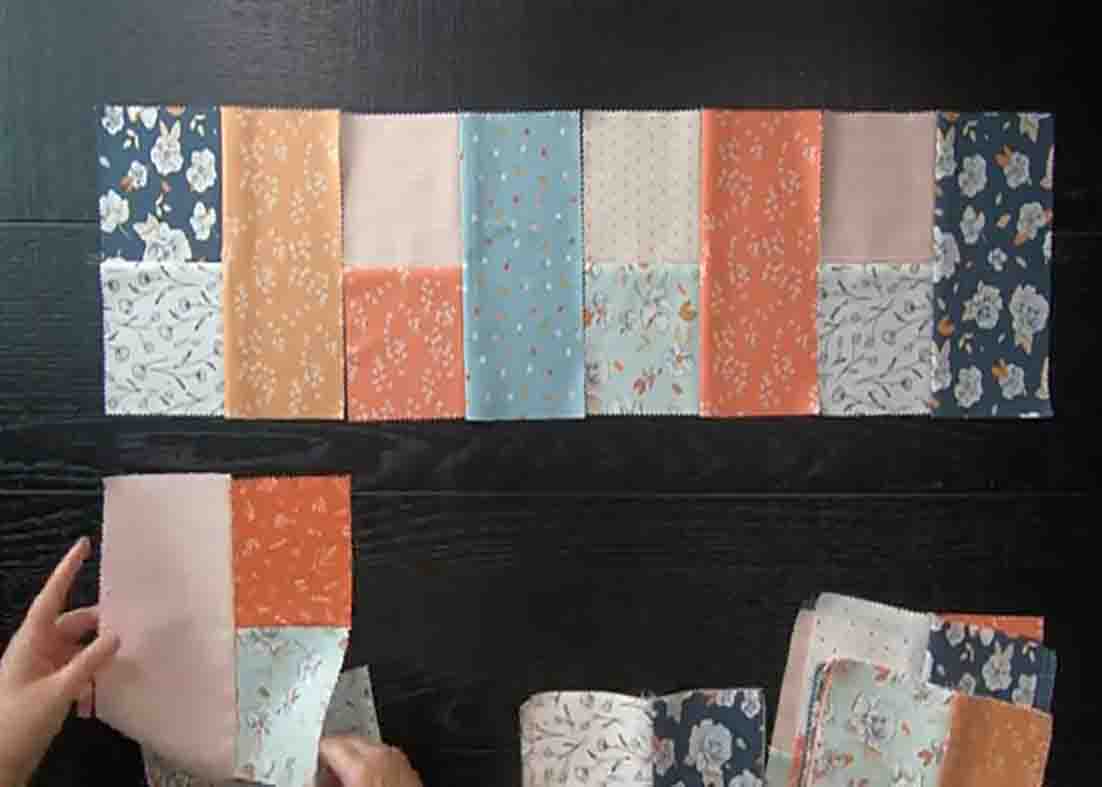
Cut all of your layer cakes into two 5″ x 10″ rectangles. With one of those 5″ x 10″ rectangles, sub-cut them into two 5″ squares. Repeat the same step for the rest of the layer cake. Once you have everything cut, mix them up, and sew the two 5″ squares together first. After this, sew to that unit you just created a 5″ x 10″ rectangle. Trim the block down to 9 1/2″ square afterward. Repeat this step to create the needed blocks for your quilt size.
[social_warfare]
Step 2
Once you have enough blocks, it’s now time to lay the quilt top. For the odd rows, the 5″ squares will be on the left side, and for the even rows, the 5″ squares will be on the right side. After this, sew your blocks together to create rows, then sew those rows together to complete the quilt top.
Lazy Day’s Layer Cake Pattern Tutorial


