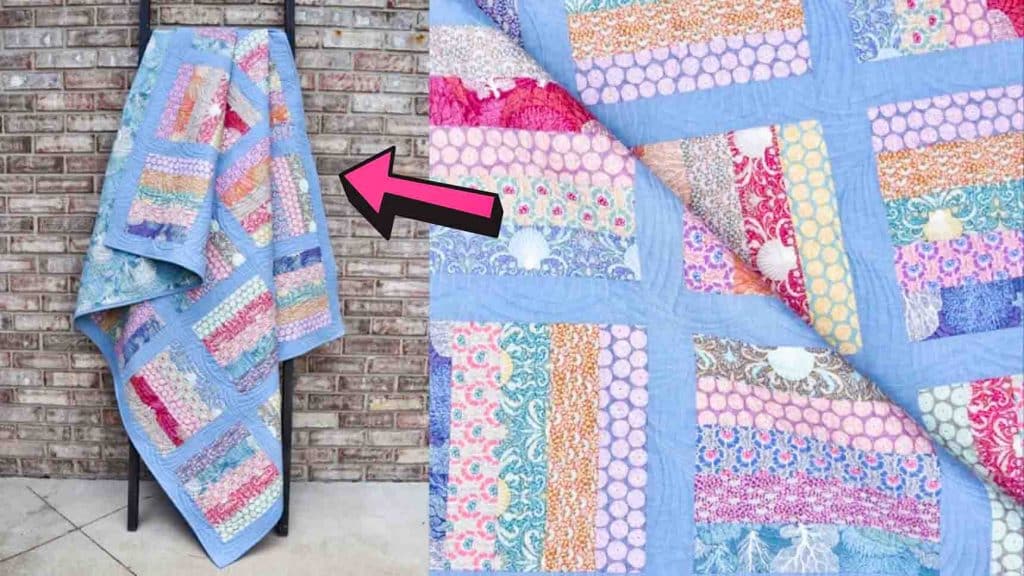
Whether a beginner or a seasoned quilter, you’ll definitely want to try this jelly-filled quilt from Material Girl Quilts on Youtube. It’s a quilt project you can do if you want a fast finish or need something handmade to give as a present. You can definitely practice your quilting skills through this project. Watch the video tutorial below to learn how to make this.
Materials:
1 jelly roll (or 40 – 2 & 1/2″ x WOF strips)
2 & 1/2 yards of sashing/border fabric
4 yards of backing fabric
1/2 yard binding fabric
Directions:
Step 1
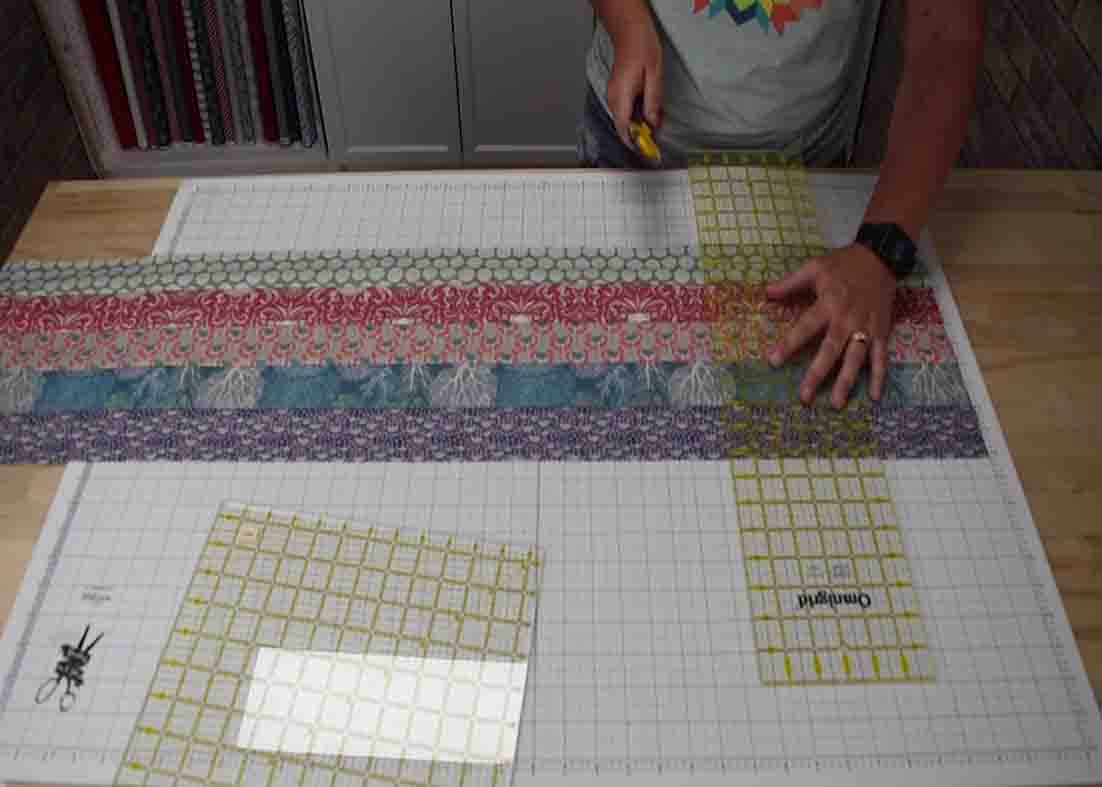
First, separate the 40 strips from your jelly roll into eight sets of five strips each. Next, sew those strips together, then cut them into 10 & 1/2″ squares. You can use your square ruler but if you don’t have a ruler that’s at least 10 & 1/2″ square, you can use the lines on your cutting mat. To do that, line your strip set up and make sure it’s straight along one of the lines on your cutting mat. Also, make sure that the selvage is beyond the zero line of your cutting mat on the left, then cut off the excess selvage.
[social_warfare]
Step 2
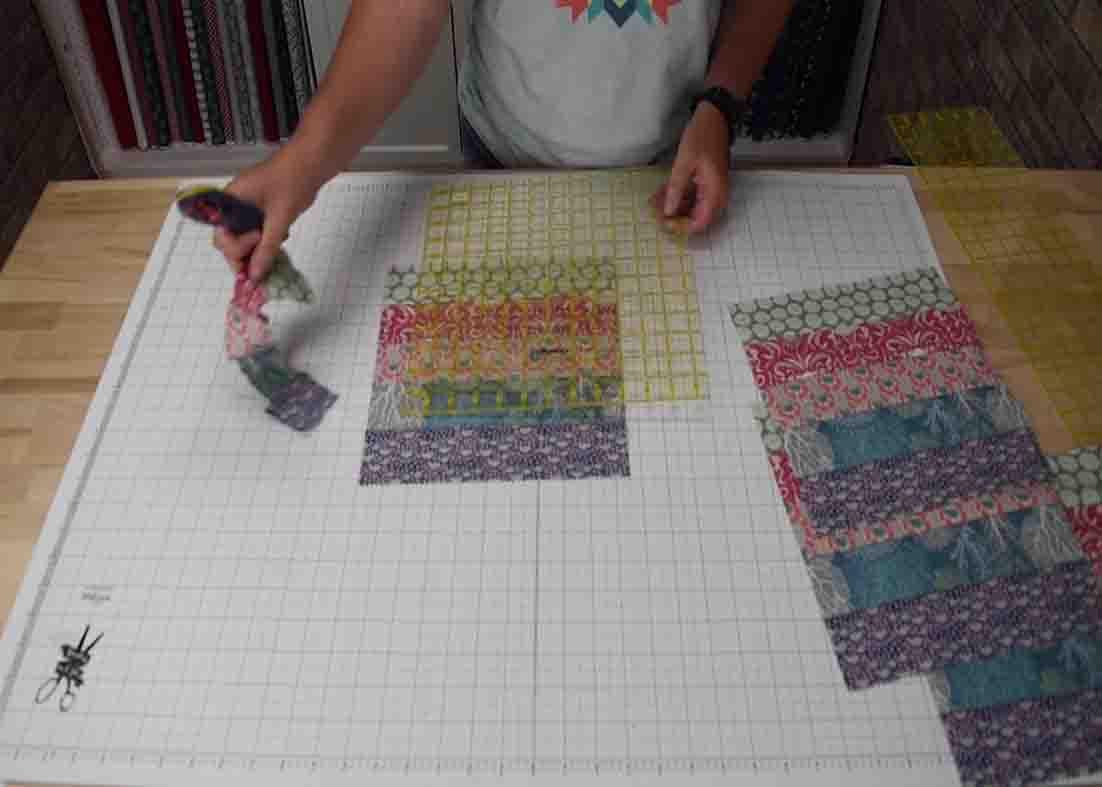
After this, you will just move over to the 10 & 1/2″ mark on your cutting mark and cut there. You now have your first 10 & 1/2″ square. Now, if you’re going to use your square ruler, line it up at the 10 & 1/2″ mark on the left side, then cut. You can cut three more blocks from this strip set, so from each strip set, you’ll cut a total of 4 pcs. 10 & 1/2″ blocks. You will then lay out your blocks in 6 rows with 5 blocks per row and you will alternate the direction of the strips within your block. Between each block in the rows, you will also add your sashing strips (24 pcs. 2 & 1/2″ x 10 & 1/2″). Sew your rows together, then in between each row, you will add the sashing rows that will be pieced to measure 2 & 1/2″ x 58 & 1/2″. Finish off your quilt with the remaining 2 & 1/2″ strips that you’ll use to piece your borders and the finished quilt will measure 62″ x 74″.
Jelly-Filled Quilt For Beginners Tutorial


