
Do you have food jars at home that need lids? Make them instead of buying from the store. Here’s a jar fabric cover DIY tutorial by Estadistica Datos del Mundo on Youtube to help you. These keep the insects away and decorate the jars too! Watch the video below for full instructions.
Materials:
- jar
- 2 printed fabrics
- thermo-adhesive interfacing
- measuring tape
- elastic tape
- wavy tape
[social_warfare buttons=”facebook,pinterest,twitter,whatsapp”]
Instructions:
Step 1:
Measure half of the jar, from one side to the other. The jar used measures 9.45 inches. Cut a 9.45 inches circle on a piece of paper. Next, measure the mouth of the jar and cut a circle on a piece of paper with that measurement as the diameter. It measured 3.5 inches in diameter.
Step 2:
Cut two squares on each of the cotton fabrics. It should measure the diameter of the bigger circle plus 0.8 inches for the allowance. For this project, she used 10.25-inch squares. Then from one of the printed fabrics and thermo-adhesive interfacing, cut smaller squares measuring 0.8 inches bigger than the smaller circle which gives 4.3 inches.
Step 3:
Place the bigger squares on top of each other, right sides together, and trace the bigger circle in the middle. Secure the fabrics with pins and sew along the line. Trim leaving 0.12 inches. Mark the center and make a small cut of 1-1.2 inches. Cut only on one piece of fabric. Flip it right side out and iron.
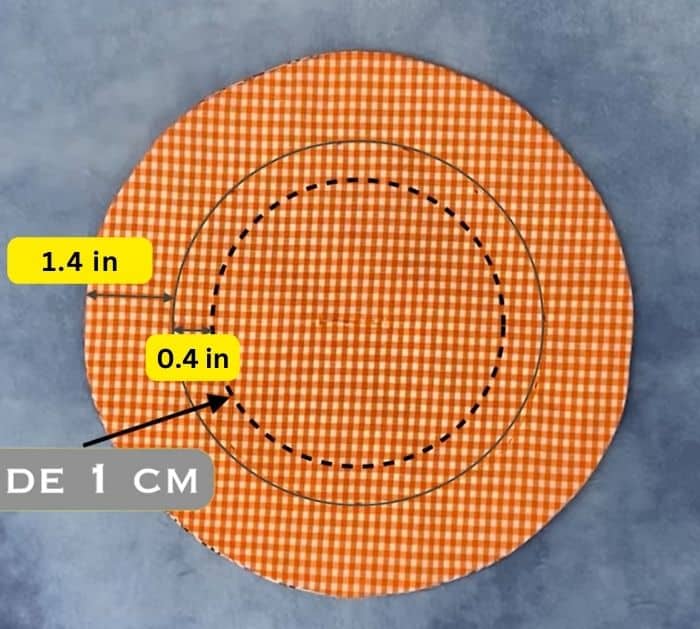
Step 4:
Measure 1.4 inches around the circle and mark. Sew on the circle. From that circle, sew another with 0.4 inches seam allowance inward.
Step 5:
Trace the little circle on the 4.3″ square.
Step 6:
Fold the end of the wavy tape and secure it with 2 to 3 stitches. Baste it within the marked circle, then cut the circle. Place it on the thermo-adhesive right side down. Pass the stitching over the basting, then remove the basting thread. Trim the circle leaving 0.12 inches allowance. Make a slit in the center of the interfacing and flip it.
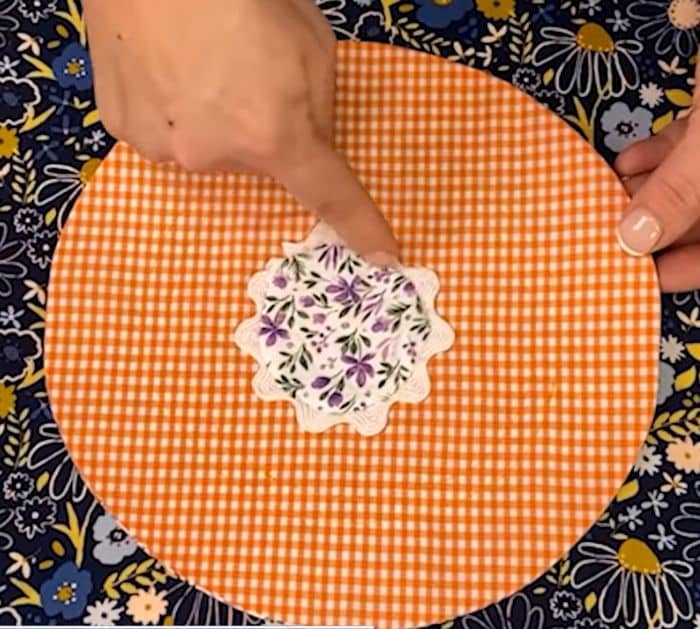
Step 7:
Mark the center of the two circles. Place the smaller circle on the center of the bigger circle and iron. Pass a backstitch on the edge of the circle.
Step 8:
Make a small cut on the 0.4-inch tunnel at the back. Insert the elastic band around, then check the tension. Once it fits perfectly into the jar, sew the ends of the elastic together. Sew the hole with 2 to 3 stitches.
Jar Fabric Cover DIY Tutorial


