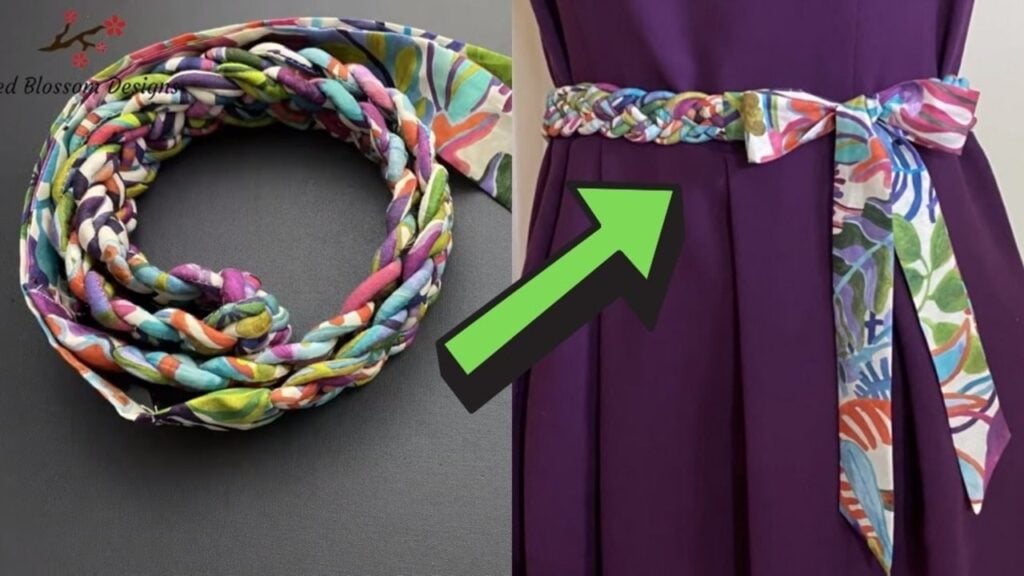
Want to make new and fashionable accessories for your outfits? How about this beautiful fabric row plaited bow tie by Red Blossom Designs? You can use them to match your dress, skirt, or long top to complete your whole look. It’s an excellent way to repurpose old fabrics from your previous sewing projects. Even beginners can do this lovely belt tutorial as it is very easy to follow. Watch the video below for the full instructions.
Materials:
- strip of paper
- fabric
- scissors
- tape
- yarn
- elastic bands
- paper clip
[social_warfare buttons=”Facebook,Pinterest,Twitter,WhatsApp”]
Instructions:
Step 1:
Get a strip of paper, wrap it around your waistline and cut it exactly with the measurements of your waist. Then fold it into four equal lengths and add paper with the same length of the fold. Attach it to the ned using tape.
Step 2:
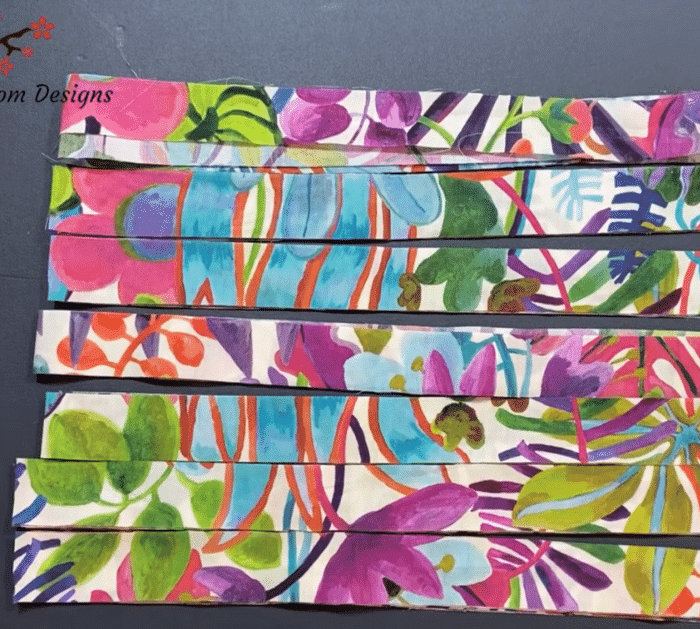
Cut a piece of fabric with the same length of the paper with a width of 1 inch. Make 8 pieces of this strip.
Step 3:
Get two strips. Fold and press them in half lengthwise using an iron. Then sew with a 0.2-inch allowance. Cut one end diagonally and use a needle and thread to pull the right side out.
Step 4:
Get a six-strand yarn and insert it inside the strip using a needle and thread. Once done, cut off the excess on both sides. Do the same for all of the remaining strips.
Step 5:
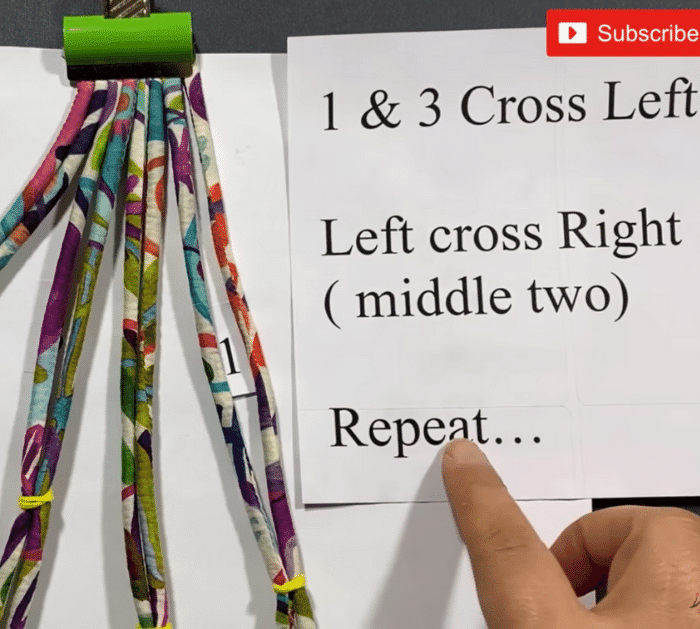
Using the elastic bands, tie two pieces of the strip together, then clip the ends to a paper or folder. Keep the elastic bands low and open them up so each one is separated. The first strip is the one on the right, followed by the second, third and fourth. Get strips 1 and 3 and cross them on the left. Then cross the middle two. Repeat the process until the end of the strip. Once done, use an elastic band to hold each end in place.
Step 6:
Remove the extra paper from the paper strip, measure 6 inches from one end and cut it. Then place the paper strip on the middle of the belt and mark the ends. Using a needle and thread, secure the strips by sewing them together. Once done, cut the excess off and remove the paper strip.
Step 7:
Cut two pieces of cloth measuring 3.15 by 3.94 inches. Fold in half and sew the left and right edges. Cut the corners and flip them over. Place the rectangular pieces at the ends of each strip and sew.
Step 8:
Get two strips measuring 3.15 by 15.7 inches. Fold and press in half. Cut a diagonal on the end of the two strips. Sew the edges with a 0.2-inch allowance. Then pull the right side out and press with an iron. Sew the two strips at the ends of the belt and you are done.
How to Make a Sash Belt


